Binding off with the 3-needle bind off method is a way to bind off and connect two sets of live stitches, each on their own knitting needle. It is often used to close the shoulder seams from sweaters that are knitted bottom-up. It can for example also be used to close a cowl in the round, that has been started with a provisional cast on and knit flat.When connecting the pieces of your work with the right sides against each other, then the seam will be on the inside of your work. When placing wrong sides together, then the seam on the outside. This can be very nice as a design element because this method of binding off / closing the seam yields a very neat seam.
The 3-needle bind off step by step
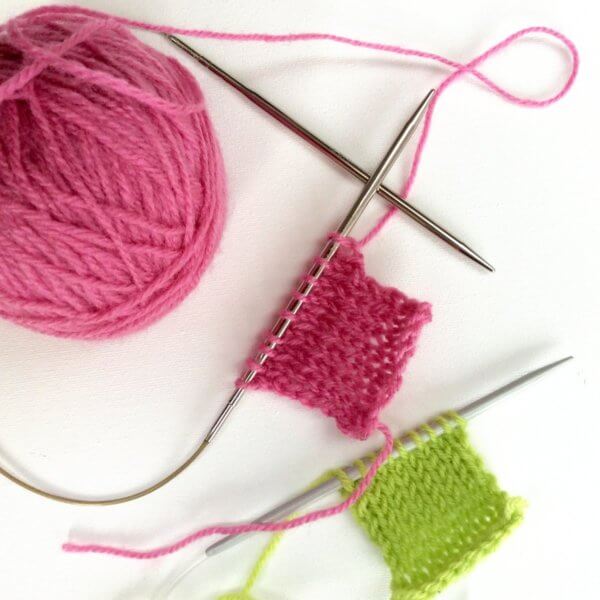
1. To bind off this way, you will need two sets of stitches, each in their own knitting needle, and a third knitting needle to work with. Please note that both sets should contain the same number of stitches. Otherwise, you will have a problem with remaining stitches that cannot be cast off, because the other needle is already “empty.”
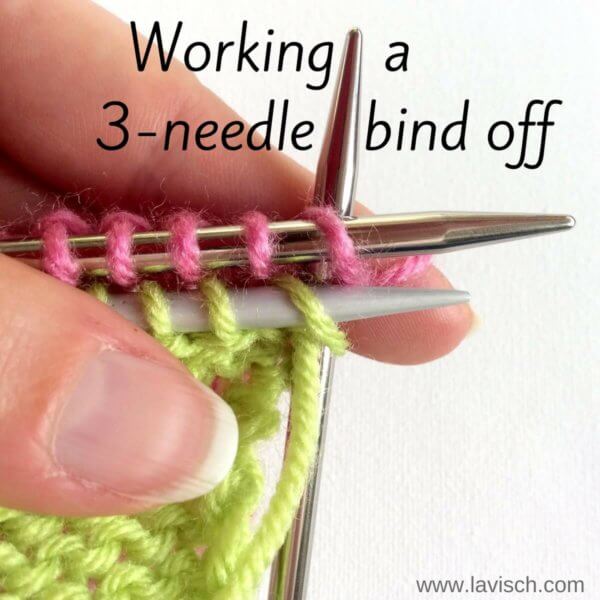
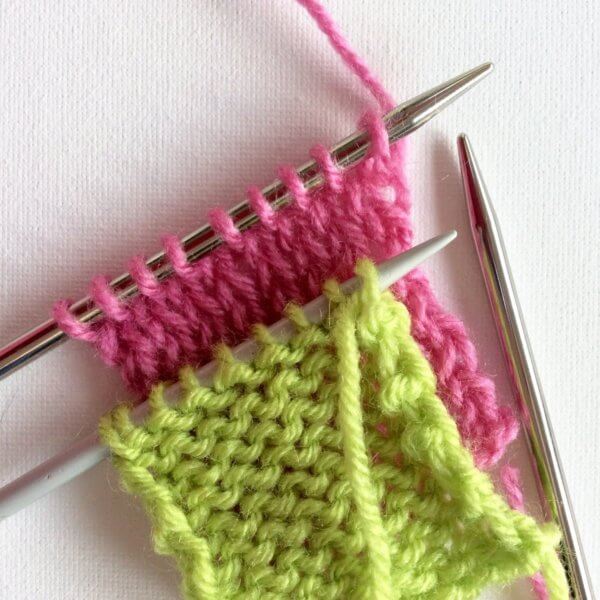
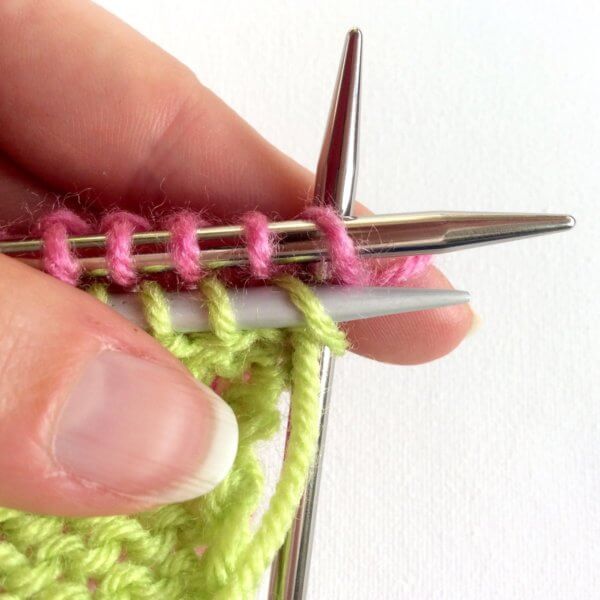
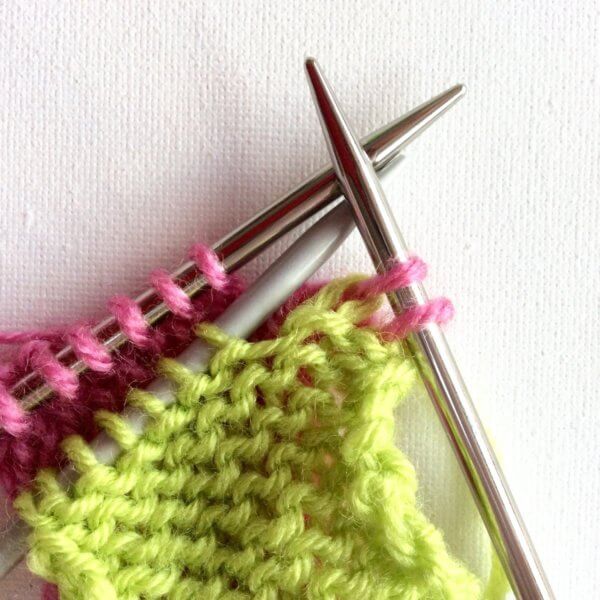
2. Hold in one hand both needles with stitches. In this example I have placed the right sides together, to get the seam on the wrong side of the work.
3. Insert the third knitting needle into the first stitch on the front needle as if to knit as usual, then immediately after that do the same with the first stitch on the needle at the back.
4. Wrap yarn around the needle as usual …
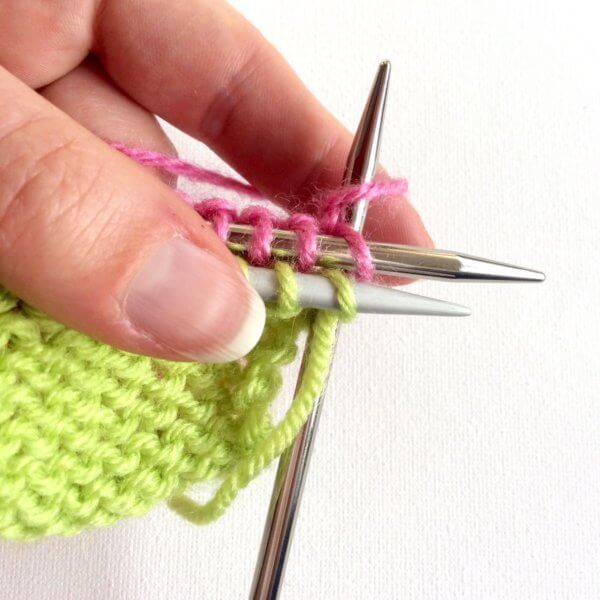
5. … and pull it through both stitches.
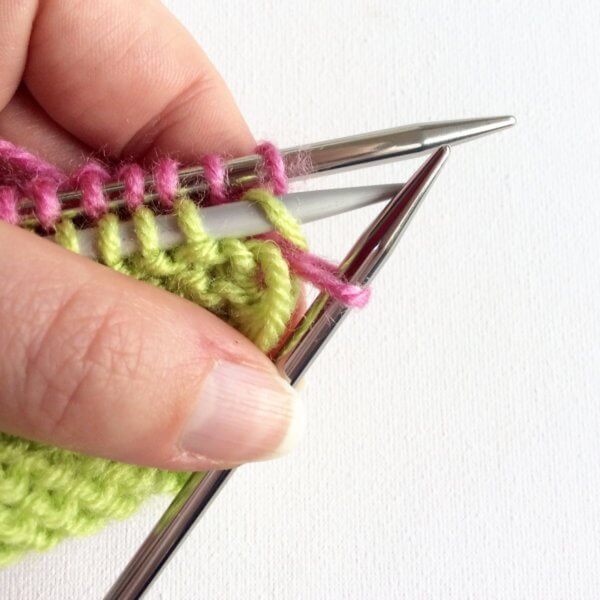
6. Next slip both first stitches from the 2 left-hand needles to complete the stitch.
7. Repeat steps 3 to 6, you now have two stitches on your right-hand needle.
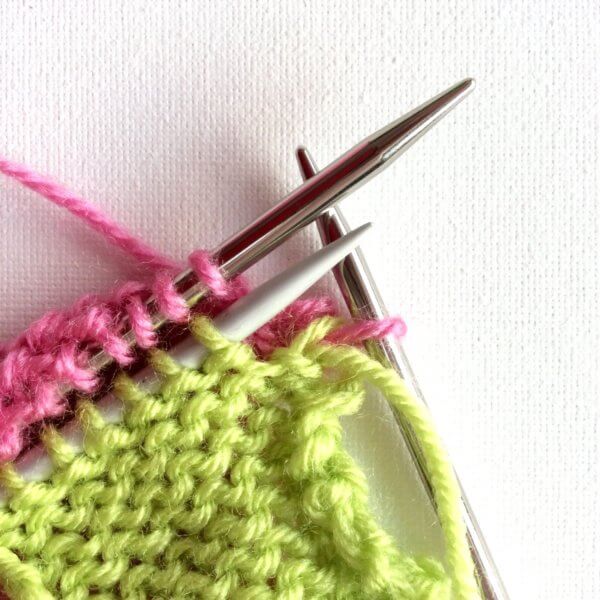
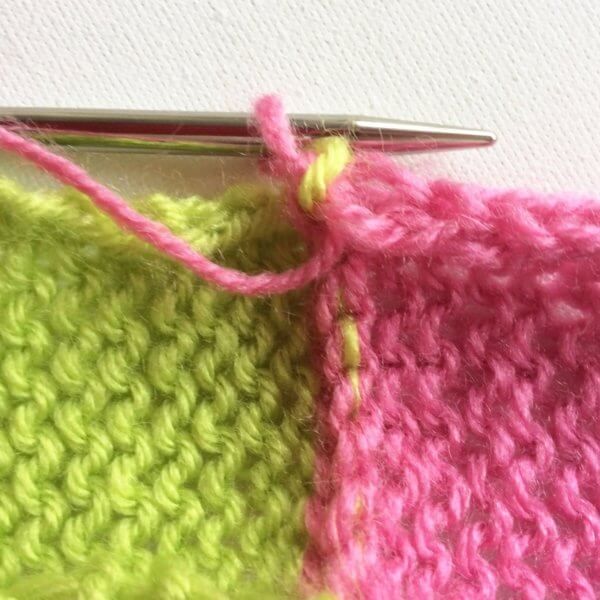
8. Slip the first stitch on your right-hand needle over the second stitch to bind off one stitch.

9. Repeat steps 3 to 8 until all stitches have been worked. You can now break your yarn and pull it through the last live stitch on your right-hand needle to finish.
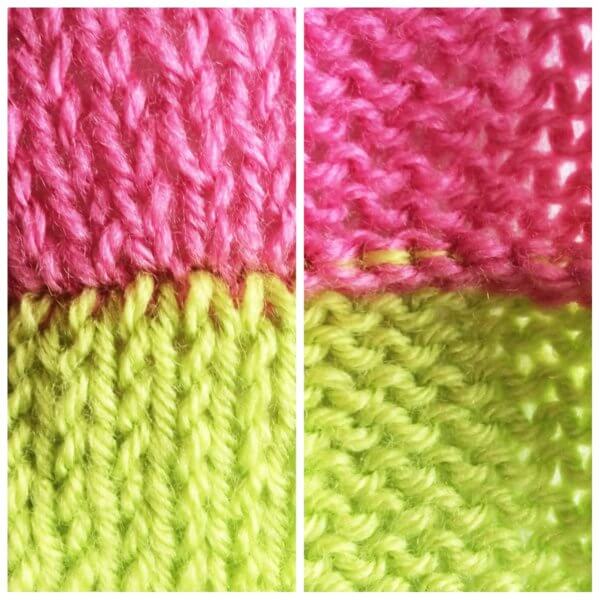
The result will be as pictured below. On the left, you see how the seam is on the right side of the work looks and on the left how it looks on the wrong side.