
In an earlier blog post, I’ve already shown how to apply an edging to your project. In this post, I will focus on how to turn your border around the corner.
The special feature of knitting on borders is that such a border is knit perpendicular to the body of the project. The stitches of the border are connected to those of the main body by knitting or purling them together. This is not only very decorative, but also a highly elastic finish of a project. Much more elastic than with a regular cast off!
Last time I have shown you the basics of how an applied border is worked. In this post, I want to show you how to apply such an edging around a corner.
To “turn the corner” you need a slightly different approach than with the rest of the border. And what, exactly, depends on how wide your knitted-on edging is. You can probably imagine that going around the corner is similar to driving a car in a race: the inner corner of the race track gives a shorter distance to cover than the outer corner.
If you don’t take this difference into account somehow, the fabric will pull at the corner and deform in a way that really can’t be fixed by blocking your project. The wider the edging, the more important it is, therefore, to plan in advance on how to approach the corners in your work.
When you knit on an edging, you work 2 border rows for each stitch of the body of the project. This makes the solution is actually quite obvious: Make sure to knit more than two rows for each body stitch to give the fabric more slack! This is in that respect, very much like knitting a variant of short rows.
For a relatively narrow edging of about 5 to 9 stitches wide, it is usually sufficient to add 2 additional times of knitting back and forth at the corner point. For wider edges, more rows are, of course, needed. In this example, the edging varies between 10 and 15 stitches wide. Therefore I will be adding a total of 3 additional times knitting back and forth at the corner.
The border pattern used in this example is the “traditional scalloped lace” border. It can found on page 81 of the book “The magic of Shetland Lace Knitting”, written by Elizabeth Lovick.
Knitting around the corner step by step
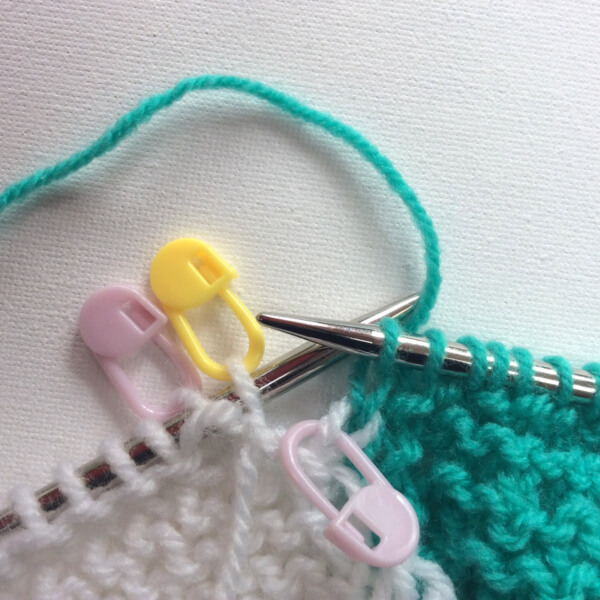
1. Mark the 3 stitches at the corner of the body of your work. Knit the edging as shown in the previous blog up to the first marked stitch.
2. Now work according to the description given in the pattern for the next row that is knit from the outside of the edging going inwards, up to 1 st before the end of the row. Knit the last stitch of the row together with the first next stitch of the body as usual.
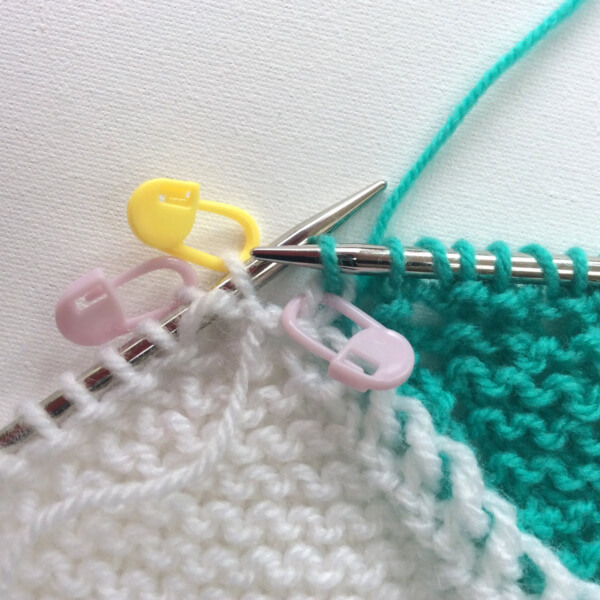
3. Turn the work and slip the stitch just worked purl-wise with the yarn in front of the right-hand needle. Then move the yarn to the back of the work and work the next row of the border pattern as usual.
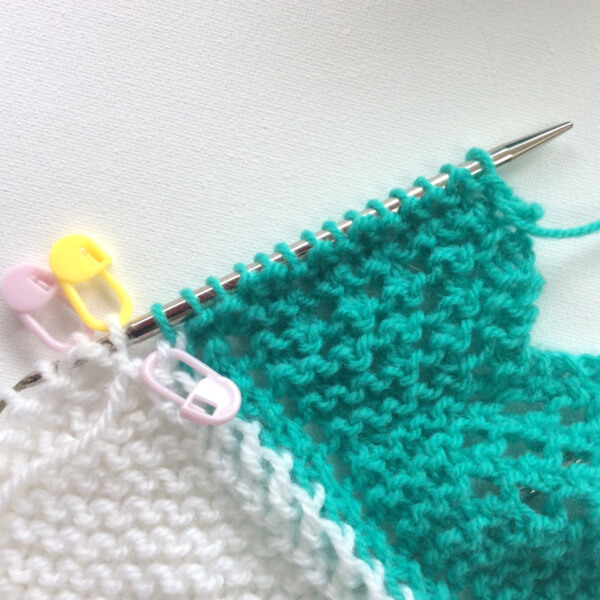
4. Now work next row according to the description given in the border pattern, until 1 stitch before the end of the border stitches. Now do not knit this next stitch together with the first body stitch, just knit it instead.

5. Turn work. Slip the stitch just worked purl-wise with the yarn in front of the right-hand needle. Then move the yarn to the back of the work and knit the return row as usual. You now have knit 4 rows and have only used 1 stitch of the body of your project.
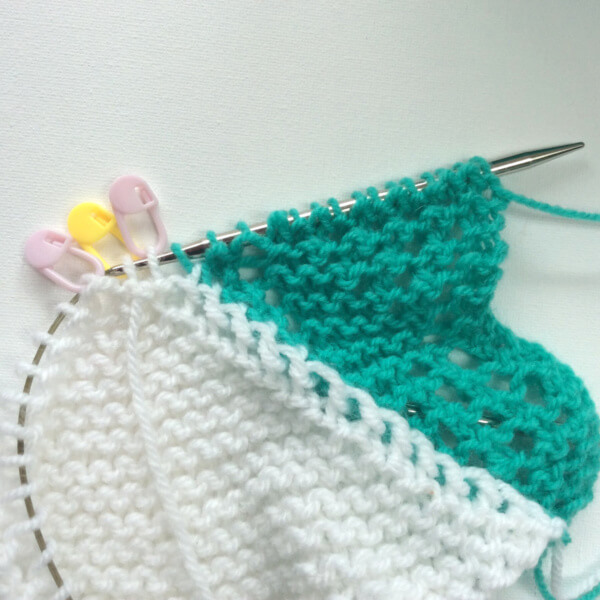
6. Repeat steps 2 through 5 twice, one time for each marked corner stitch. Doing so, you knit a total of 12 edging rows, using only 3 stitches from the body of your work. This looks something like this:
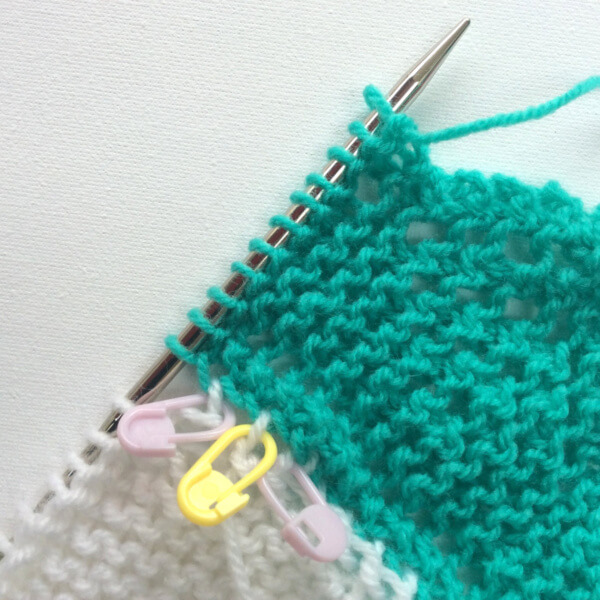
You can also see, that for each corner stitch there are 2 garter stitch ridges instead of 1.
7. After turning around the corner, continue to knit on your edging in the usual way with2 rows from the edging for each stitch of the body of the work.
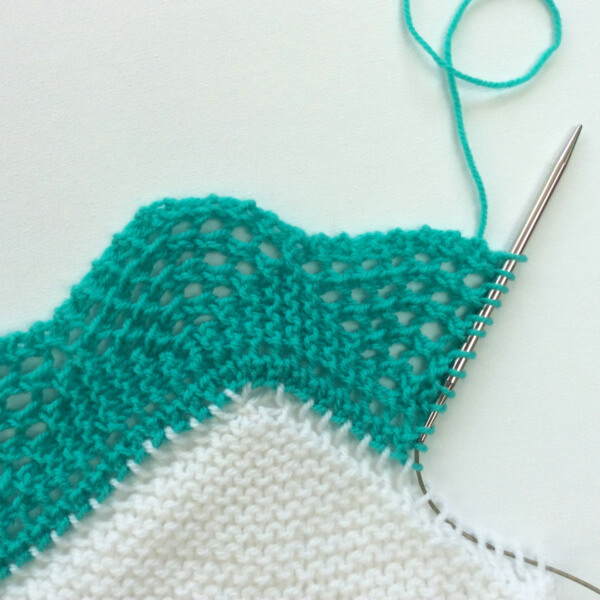
And that is really all there is to it!


