In many patterns, it is common to first knit the body of the piece followed by a lace border that is knit perpendicular to the edge of the body. Such a knitted-on border is sometimes also called an applied border. You can see this for example in the traditional Shetland shawls, but also in patterns for knitted blankets. It is also a lovely way to give the hem or cuffs of a sweater a beautiful finish.
The beauty of the knitted-on border is that it is not only very decorative but also very elastic. With a regular cast-of, the bound of edge is the limiting factor in how far you can block out your work. And as you know, lace is at its best when the patterning is opened up. When knitting on a border you won’t have a problem with a tight-ish cast-of, because there is, in fact, no cast-of!
The starting point of such a knitted edge is that the stitches of the border are knitted perpendicular to the work. The stitches of the border are connected to those of the main body by knitting or purling them together. If you knit (or purl) through the back loop, you get a more solid connection. Depending on the type of project, for example, a lacy scarf vs. a sweater, you can choose the one you prefer.
In this post, I’ll show you how to knit on an edge to your work.
E-course on working an applied border
Of course, there is much more to learn and tell about working an applied border. More than I can put in this post! For that reason, I want to create a simple online course teaching the basics on applied borders for approx. € 25. If you’d be interested in such a course, enter your info below and I’ll notify you when it launches!
The form you have selected does not exist.
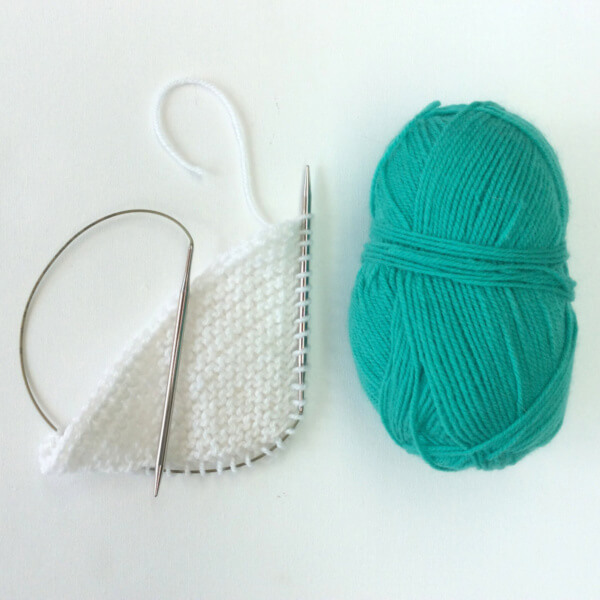
In the example in this post, I knitted a swatch in white. On this, I will knit a border in a contrasting color. If you want to make the border the same color as the main part of your project, you can, of course, continue to use the same yarn instead of attaching new yarn.
The border pattern used in this example is the “traditional scalloped lace” border that can found on page 81 of the book “The magic of Shetland Lace Knitting”. It’s written by Elizabeth Lovick.
Working a knitted-on border step by step
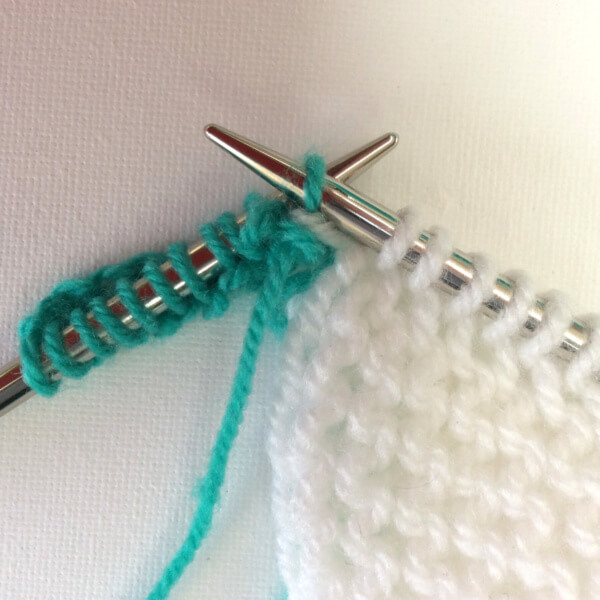
1. Start by casting on the number of stitches you need for your border, on the same needle that holds the body stitches of your project. I used the knitted-on cast-on.
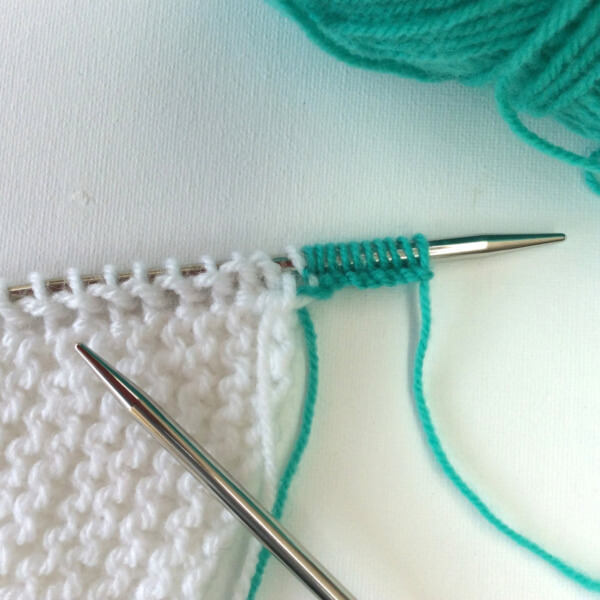
2. Now work according to the description given in the border pattern for the first row that you knit from the outside of the piece inwards, until 1 st before the end of the border stitches. Then knit the last border stitch together with the first body stitch.
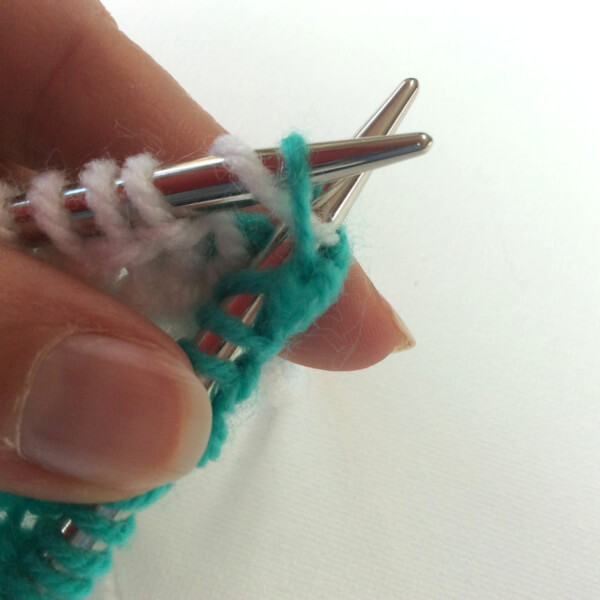

3. Turn the work. Next, slip the stitch just worked purl-wise with the yarn in front of the right-hand needle. We do this to make sure that the connection is as flat as possible. Then move the yarn to the back of the work and work the next row of the border pattern. This row is knit outwards from the body.
4. Repeat steps 2 and 3 until all stitches are worked. For every body stitch, you basically knit two rows of the border.
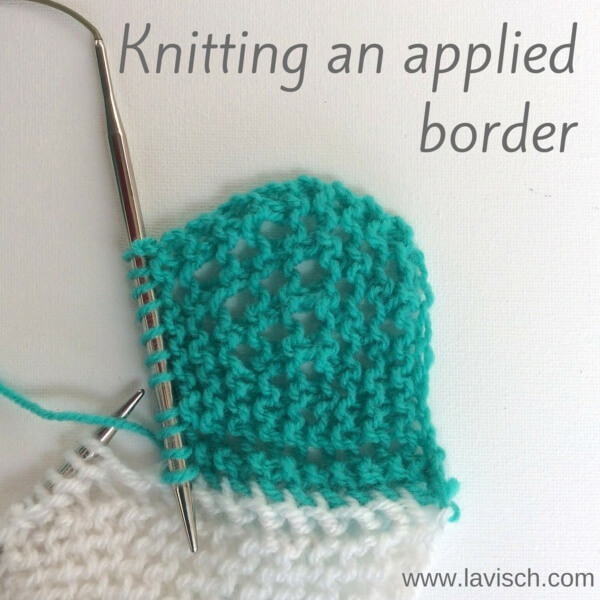
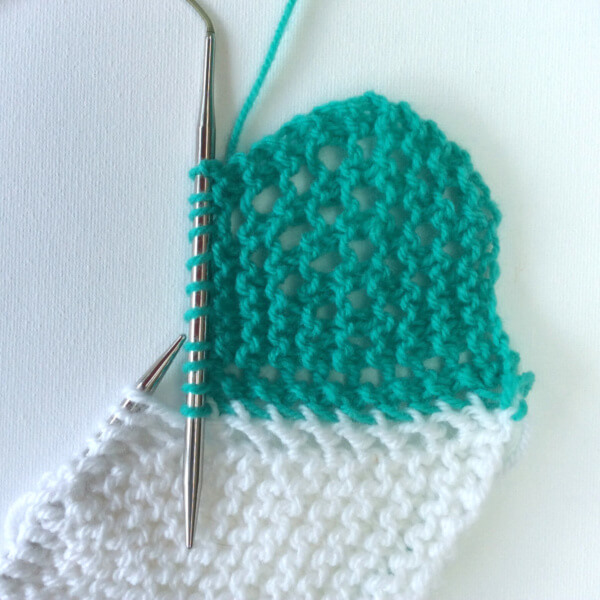
On the right side of the work it will look something like this:
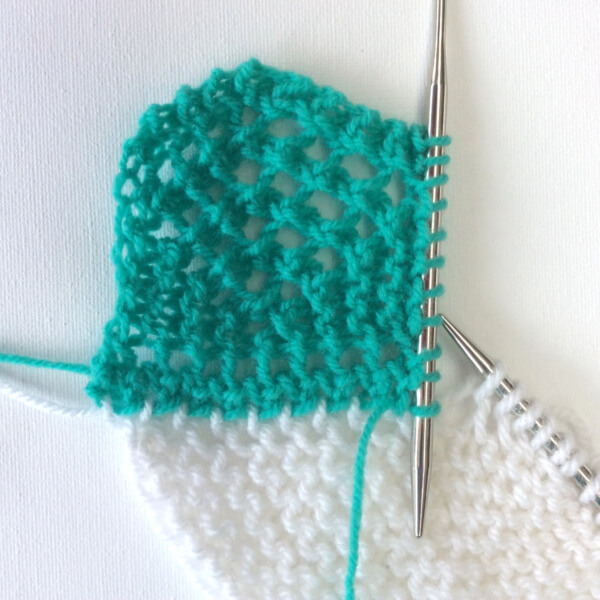
And this is the result on the wrong side of the work:
In part 2 of “Working a knitted-on border” I show you how to turn the border around a corner.


