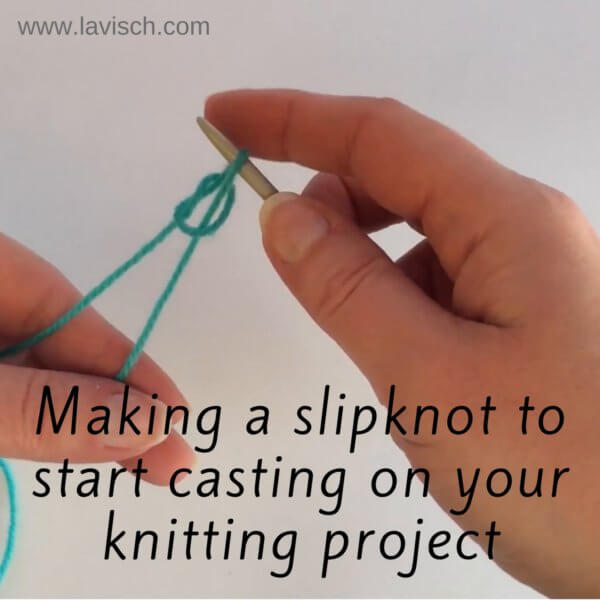
I know, it seems so basic: making a slipknot to start casting on your knitting project. But that’s only because once you know how to do it, it’s easy! And yes, I know it’s possible to start casting on without a slipknot, and that it’s sometimes to be preferred because it doesn’t give that extra knot on your cast-on edge. But that’s not the point here.
Most of the times I still start my knitting projects with a slipknot, even though I know how to do it without. I guess I just like that sturdy start of my cast-on edge! In this post, I’m going to show you how to do make a slipknot around a knitting needle yourself.
Making a slipknot step-by-step
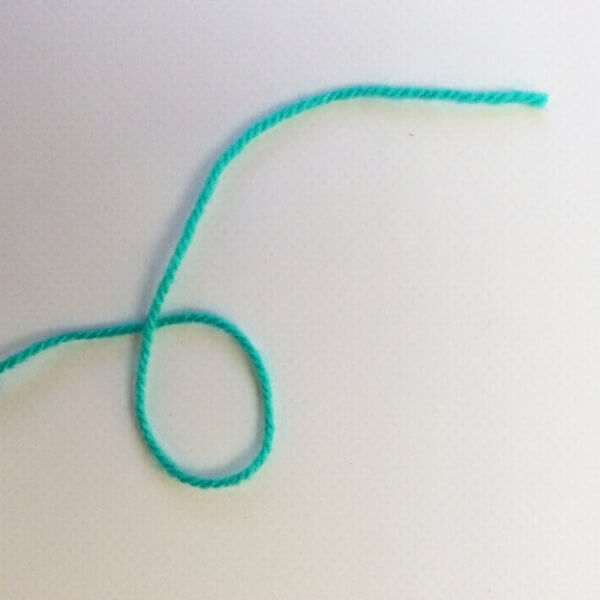
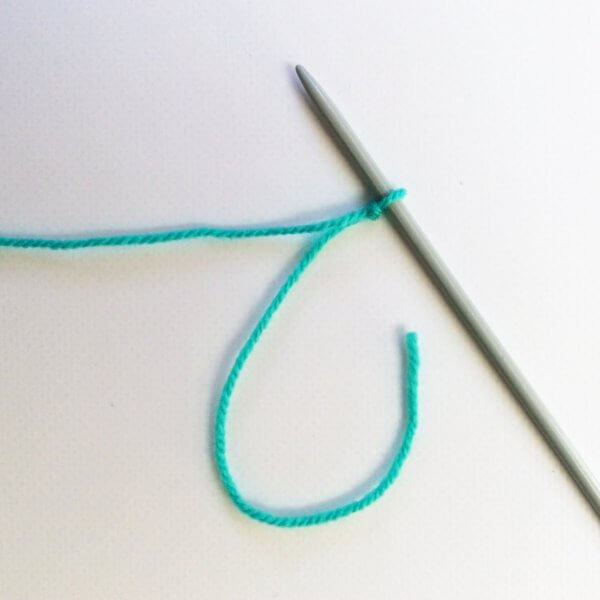
1. Loop the yarn as shown in the picture below.
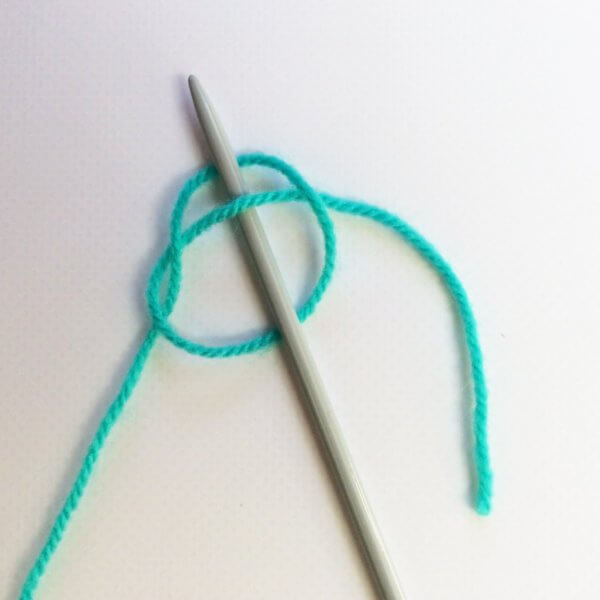
2. Next, arrange the yarn tail in such a way, that you can pull it through the first loop, like this:

3. Insert your knitting needle as shown, underneath the arranged bit of yarn tail.
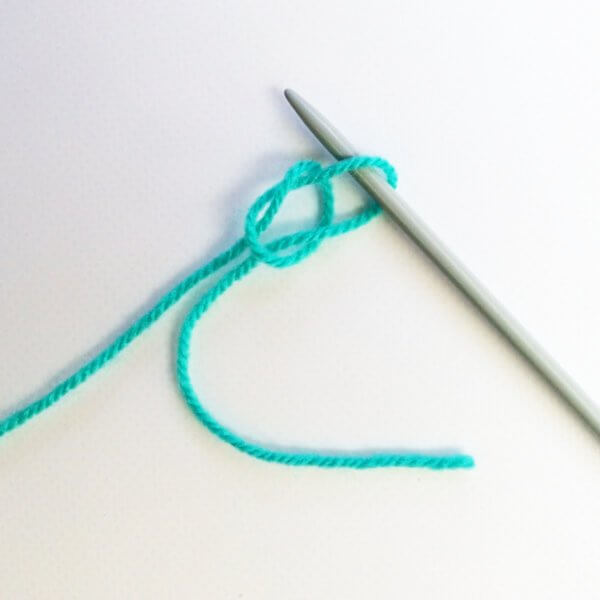
4. Now hold both the yarn tail and the yarn going back to the ball of yarn and pull them both to tighten the slipknot around the needle.
5. And there you have it: a lovely slipknot around your needle! You’re now ready to start casting on the remaining stitches needed for your project. You can for example use the knitted-on cast-on for this.
Of course, it can be hard to visualize the motions needed to realize the above. For that very reason, I’ve also made a short video in which I show you how I make slipknots around my knitting needle. It doesn’t contain a spoken commentary, it’s really only to show you the motions!


