cord

knitting i-cord

Knitting i-cord - a tutorial by La Visch Designs - www.lavisch.com

You’re probably familiar with those cute French knitting dolls. With the doll I had as a child, I probably made dozens and dozens meters of cord. At that time the making of just the cord itself was enough, nowadays I really only use cord when needed in addition to another project. Think of straps or closures for wrap cardigans.

Nowadays I don’t use French knitting dolls anymore for my cord needs: I make cord with just my knitting needles. This type of cord is also know as “I-cord”, with the “I” standing for “idiot” because it is indeed idiotically easy to knit.

Most tutorials for i-cord indicate that double pointed needles or circular needles are needed. This is because after the setting up the stitches and the working the first row, the work is not turned. Instead the stitches are pushed to the other side (point) of the needle. However, this approach does not work if you want to attach the cord to an existing piece of knitting.

That’s why I’ll show you in this post how to knit an i-cord without the pushing around of stitches. With this method, you can also just use regular straight needles if you wish. I don’t, but that is just because I like knitting with circs better.

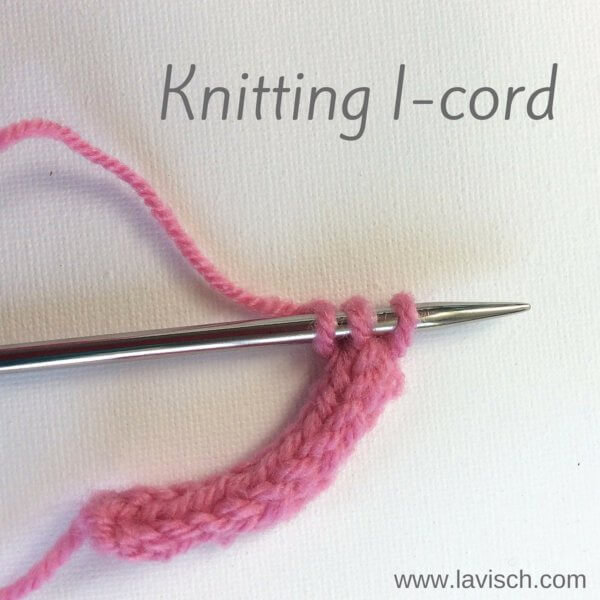
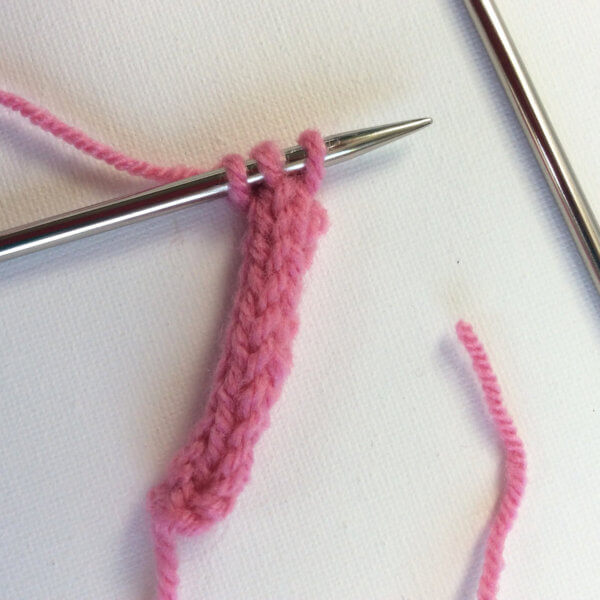
I-cord is usually knit over 3 to 5 stitches. In this example I’m going to make i-cord on 3 stitches. In short instruction would be as follows:

I-cord: Cast on 3 sts. *k 3, sl 3 sts just worked back on the LH needle, pull yarn tight across back of sts; rep from * to desired length.

Knitting i-cord step by step

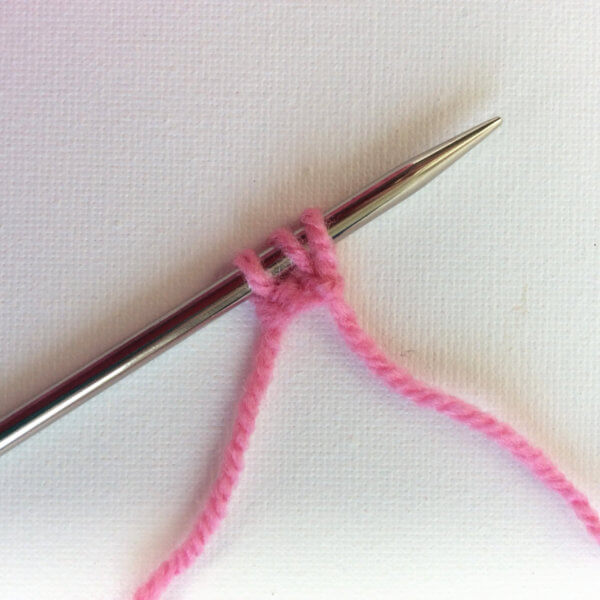
1. Cast on 3 stitches, in this example I used the knitting-on method.

Knitting i-cord - a tutorial by La Visch Designs - www.lavisch.com

2. Knit 1 row.

Knitting i-cord - a tutorial by La Visch Designs - www.lavisch.com

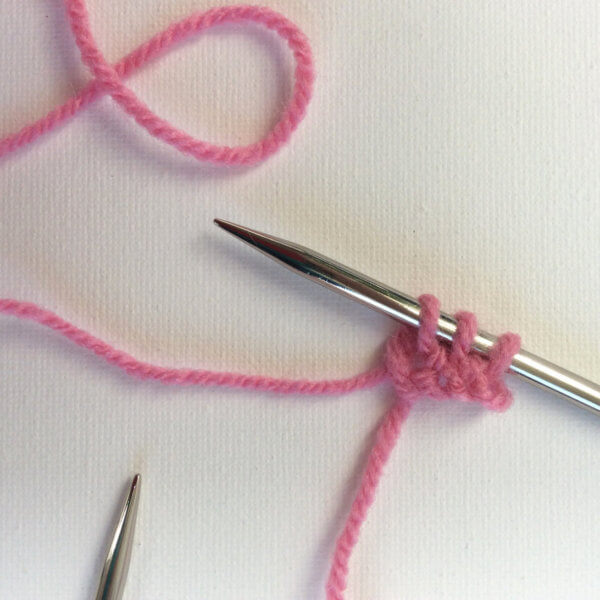
3. Slip the three newly knitted stitches back to the left hand needle one by one.

Knitting i-cord - a tutorial by La Visch Designs - www.lavisch.com

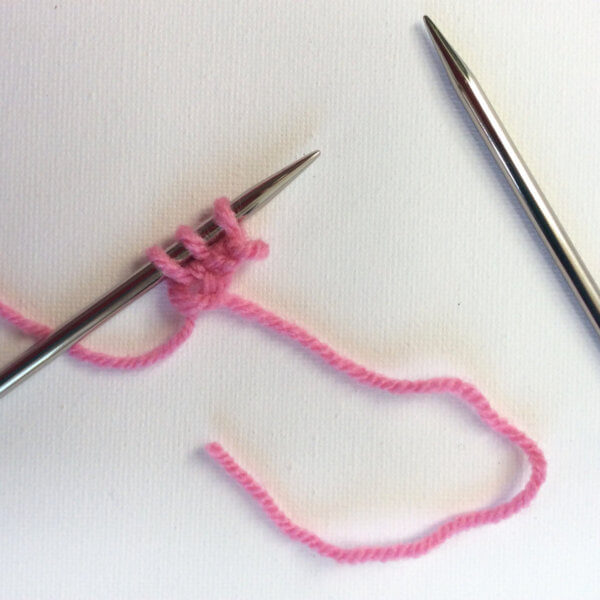
4. Pull the yarn tight and make sure it is behind the work.

Knitting i-cord - a tutorial by La Visch Designs - www.lavisch.com

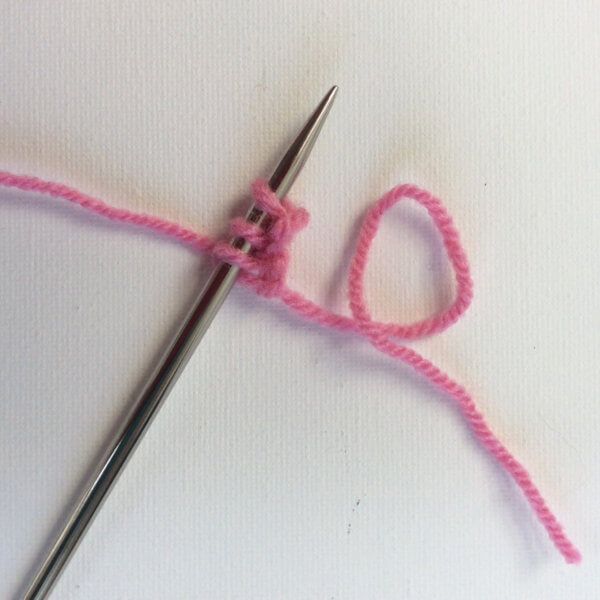
5. Repeat steps 2 to 4 until the cord has the desired length. In the picture below, I repeated these steps about 10 times.

Knitting i-cord - a tutorial by La Visch Designs - www.lavisch.com

Knitting i-cord is indeed, not too difficult, right?

knitting i-cord Read More »

tutorial: crochet lobster stitch cord

Lobster stitch cord tutorial by La Visch Designs

Being it for handles of bags, bracelets, necklaces or other things, crochet cord often comes in handy. Personally, though, I don’t really like making a cord by doing single crochet stitches in a chain because it always so finicky to do. A good and attractive alternative is making a lobster stitch cord.

This type of cord is a tad thicker than a cord made from a chain and single crochet, and therefore also somewhat firmer. Really a good attribute when making bag handles! Of course, if you make lobster stitch cord of a thinnish yarn, the resulting cord will also be finer and thinner than when made from worsted or heavier weight yarn. And best of all: besides being rather decorative, a lobster stitch cord is started with only 2 stitches! You can determine how long to make it as you go.

In this post, I’ll show you how to crochet lobster stitch cord. These instructions are written in American English crochet terminology.

Lobster stitch cord step by step

For this example, I’m using Zeeman Super Soft yarn and a crochet hook size 4 mm (US G/6).

Lobster stitch cord tutorial by La Visch Designs

1. Start by chaining 2 stitches, followed by 1 single crochet in the second chain from the hook.

Lobster stitch cord tutorial by La Visch Designs

The result will look like the picture below. You can see that the stitch you have just created is pointing down on the side of the hook. This is indicated by the arrow on the right.

Lobster stitch cord tutorial by La Visch Designs

2. In this step, you turn the work towards you, as indicated by the left arrow pictured above. The stitch just made is now facing you, make sure the thread of yarn stays behind the work. In the picture below, the arrow indicates the very same stitch after rotating the work.

Lobster stitch cord tutorial by La Visch Designs

3. Insert your hook in the stitch and make a single crochet by pulling up a loop, wrap the yarn around your hook and pulling it through the two loops on the hook.

Lobster stitch cord tutorial by La Visch Designs

4. After the stitch you just made, you see two loops on the underside of your work (see arrow). These are indicated by the two white lines. Now turn your work towards you, similar as in step 2. Next insert the hook into the two indicated loops and make a single crochet by pulling up a loop, wrap the yarn around your hook and pulling it through the two loops on the hook.

Repeat step 4 until your cord has the desired length.
And that is all there is to it!

Lobster stitch cord tutorial by La Visch Designs

tutorial: crochet lobster stitch cord Read More »