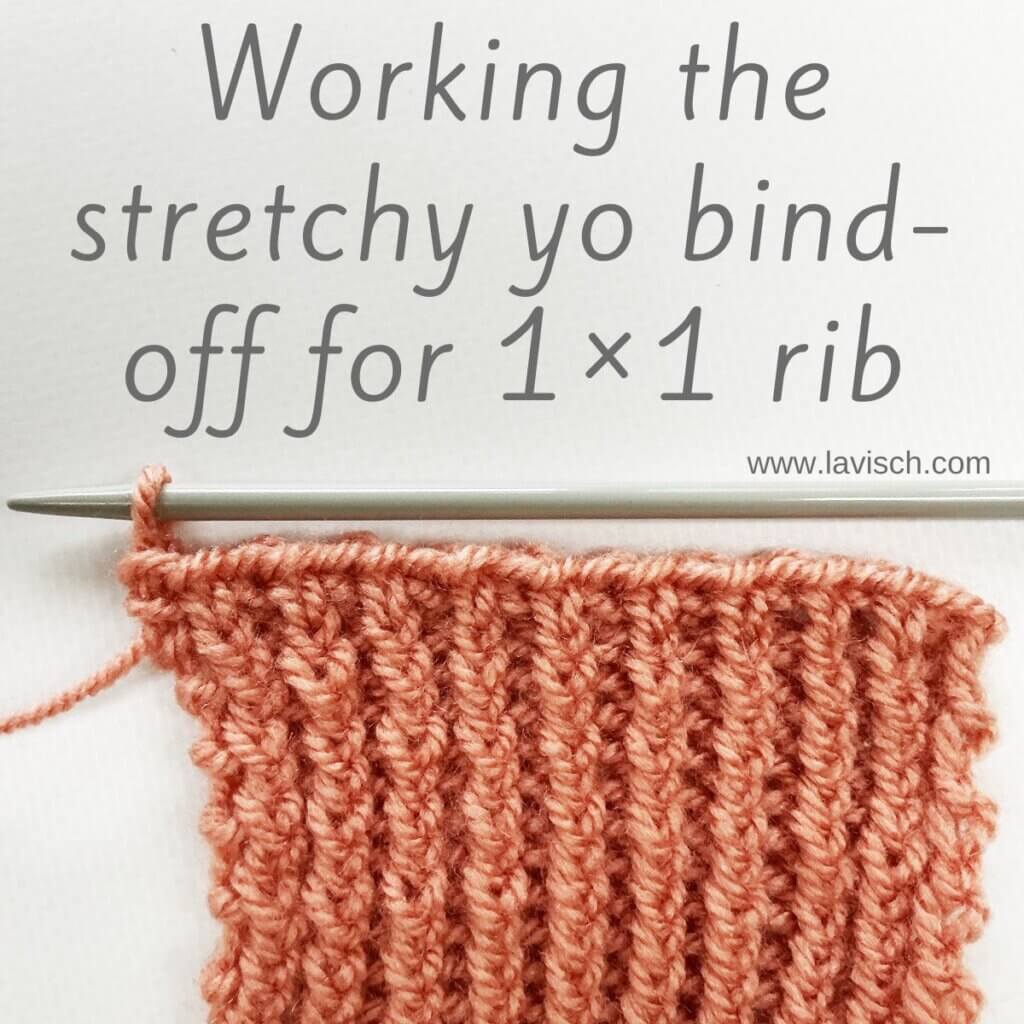
This bind-off is very similar to regular “binding of in pattern”, take a look at the tutorial for 1×1 rib that shows you the principal of it. The main difference with the stretchy yo bind-off, is that it adds a yarn over for every purl stitch of the ribbing. As such, it’s less stretchy than a bind-off that includes a yo after every stitch, but much more stretchy than a regular ribbing bind-off that doesn’t include one. I really like to use this one for ribbing on sleeve cuffs, the hems of sweaters etc. It really doesn’t matter if your piece is in regular 1×1 rib, are a twisted one using (k tbl, p1). It doesn’t flare out as much as, for example, the Russian bind-off does.
Let’s get started!
Materials used


Yarn: Paintbox Yarns Simply DK, a good value, good quality 100% acrylic yarn, here in the color Vintage Pink
Knitting needles: This is a pair of straights that I picked up at the second-hand store when I started knitting, brand unknown.
The stretchy yo bind-off for 1×1 rib step by step
In patterns, you may see the following instruction for this bind-off:
K1, *yo, p1, then grab the 2nd and 3rd sts, and pass them both over the st just purled, k1, insert tip of the left-hand needle into second stitch on the right-hand needle, pass this stitch over the stitch just knit*; rep *–* to end, yo, p1, then grab the 2nd and 3rd sts, and pass them both over the st just purled.
Below, I’ll show you step by step how this looks like in knitting!
- To start, take the piece of knitting you want to bind-off.
In this case, I’m using a swatch in [k1 tbl, p1] rib.
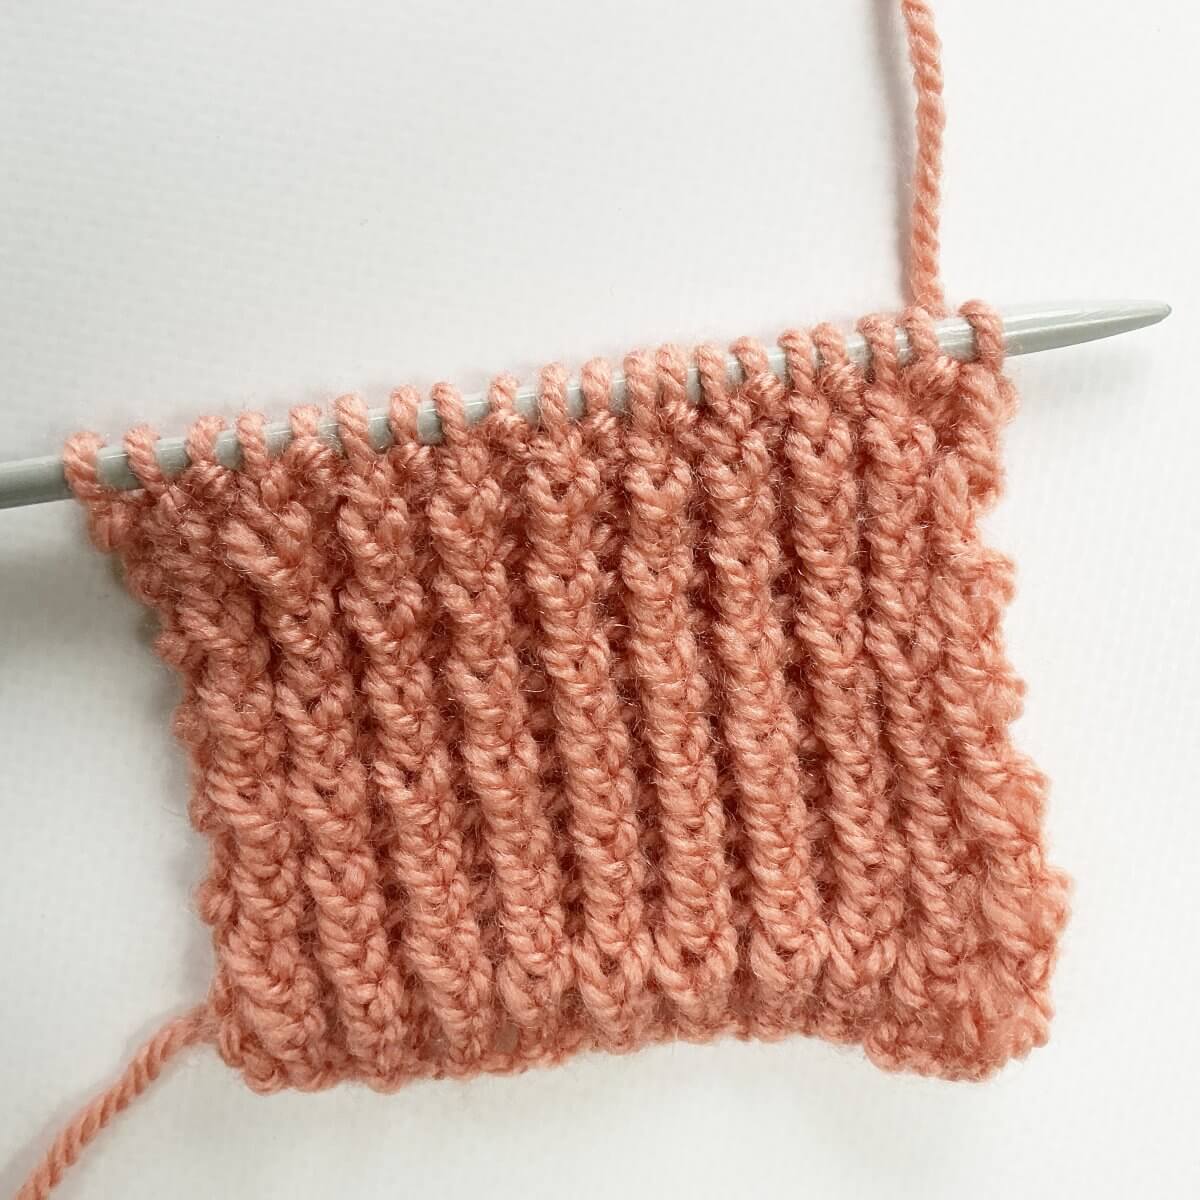
- Knit the first stitch on the left-hand needle.
- Next, work a yarn over by wrapping the yarn around the needle.
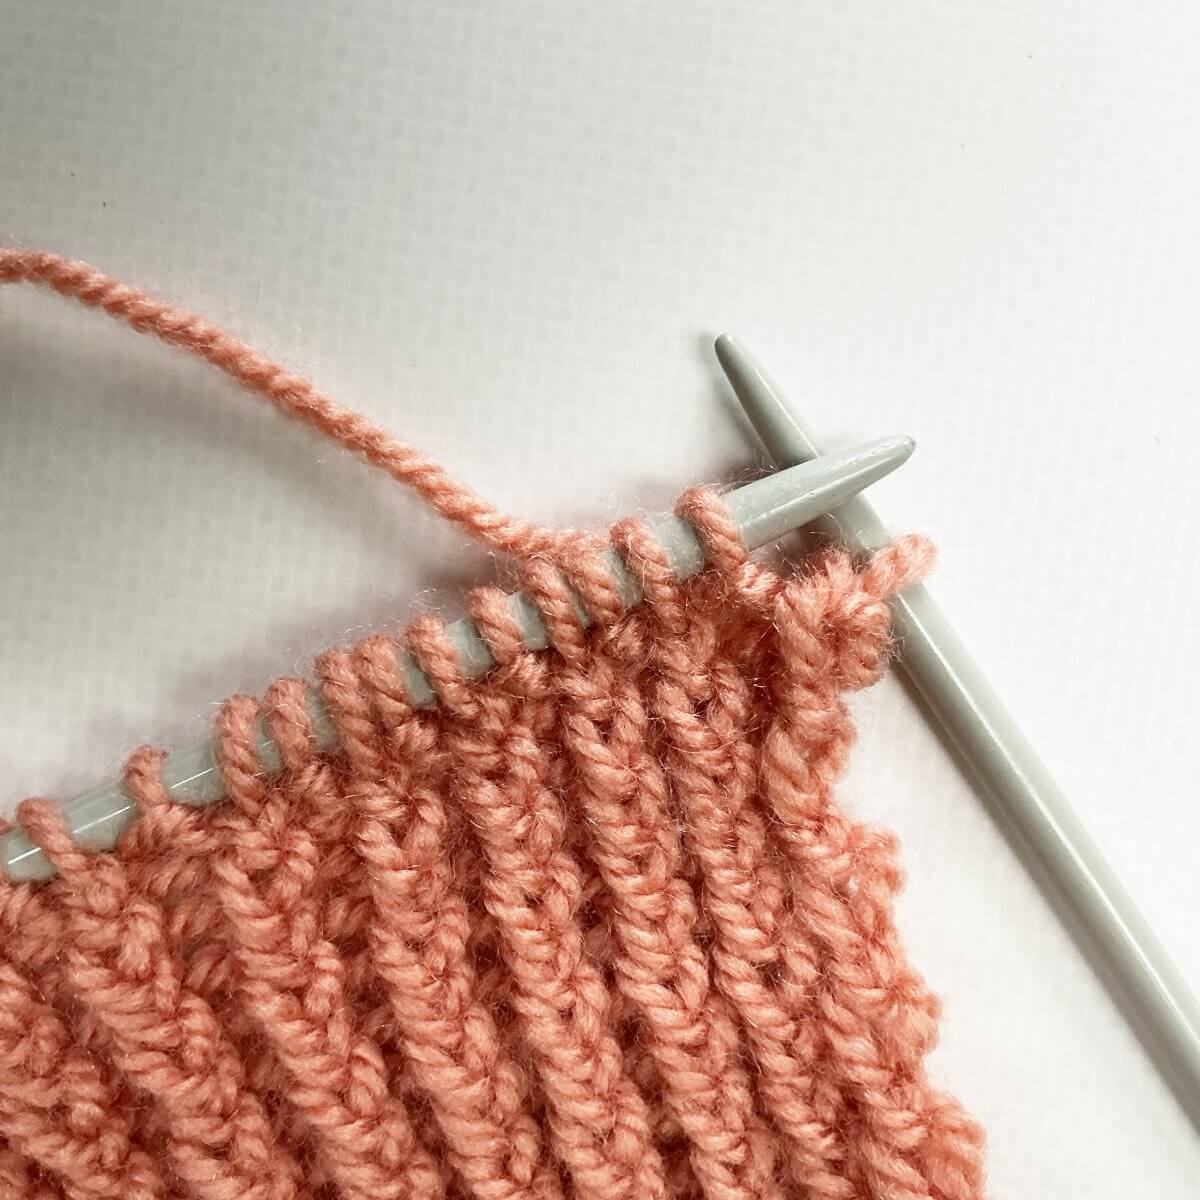
- Next is working a purl stitch.
Depending on your knitting style, it may help to secure the yo of the previous step with your right index finger while you work the purl stitch.
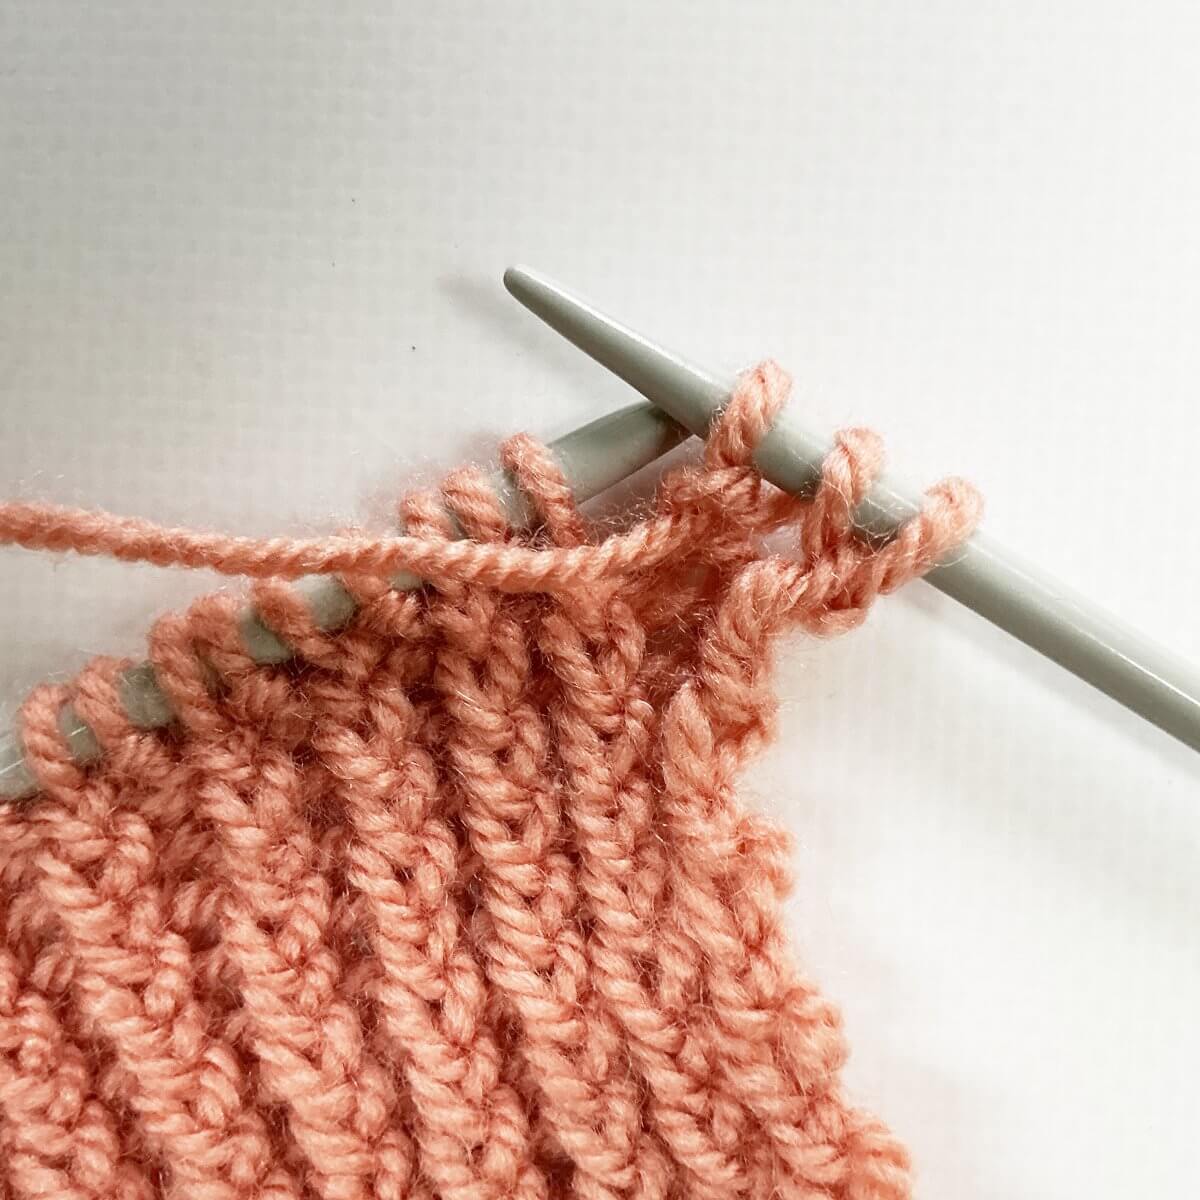
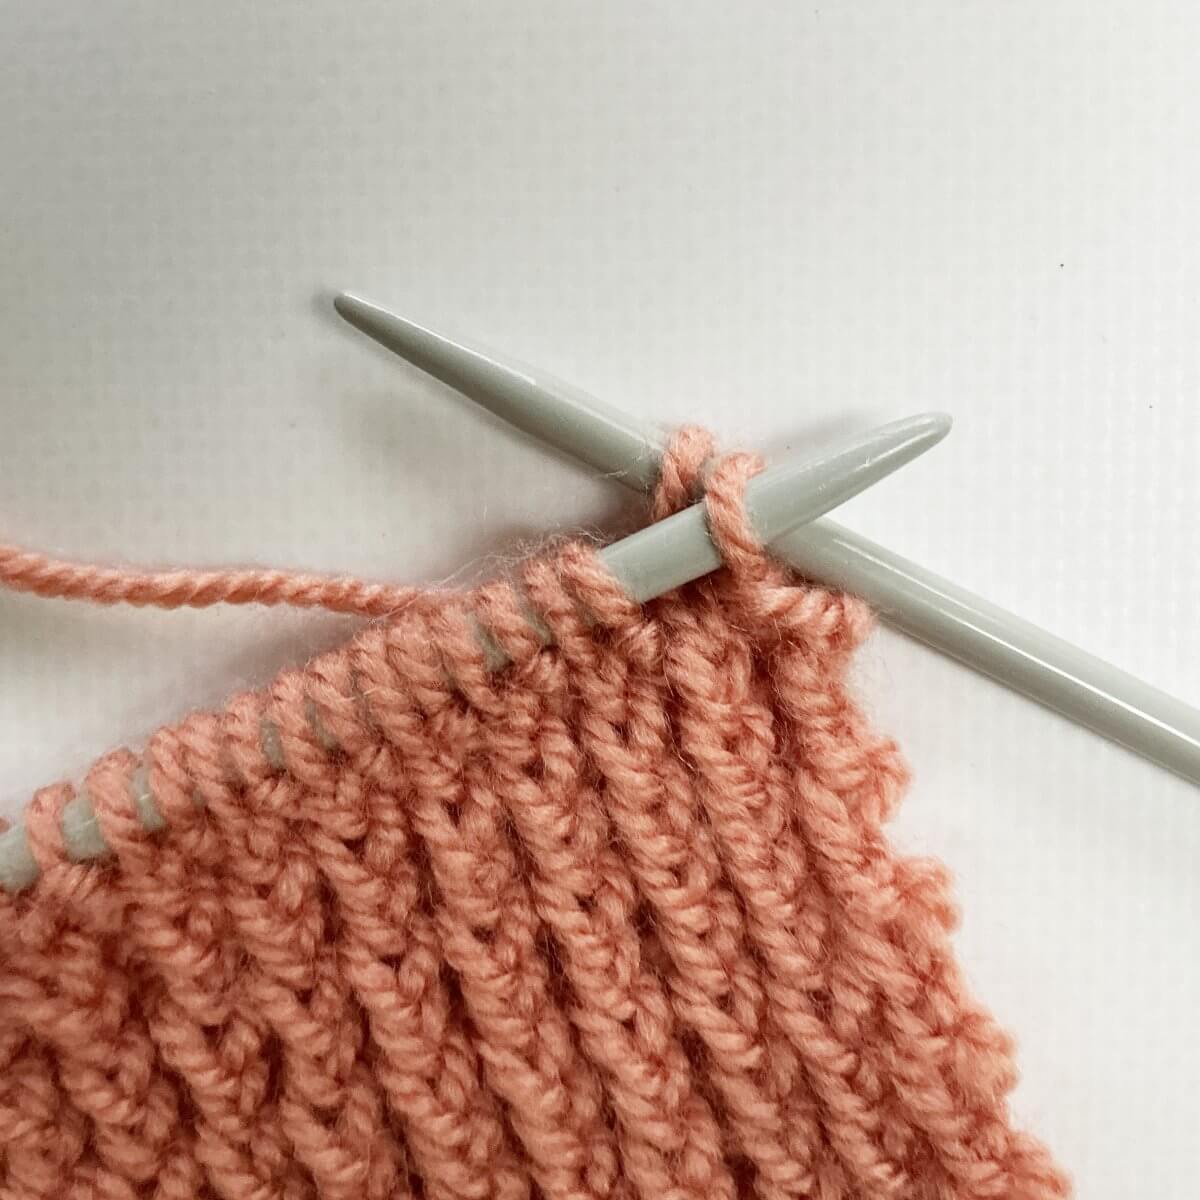
- Insert the tip of the left-hand needle into the second and third stitches on the right-hand needle….
- … and pass them over the purl stitch.
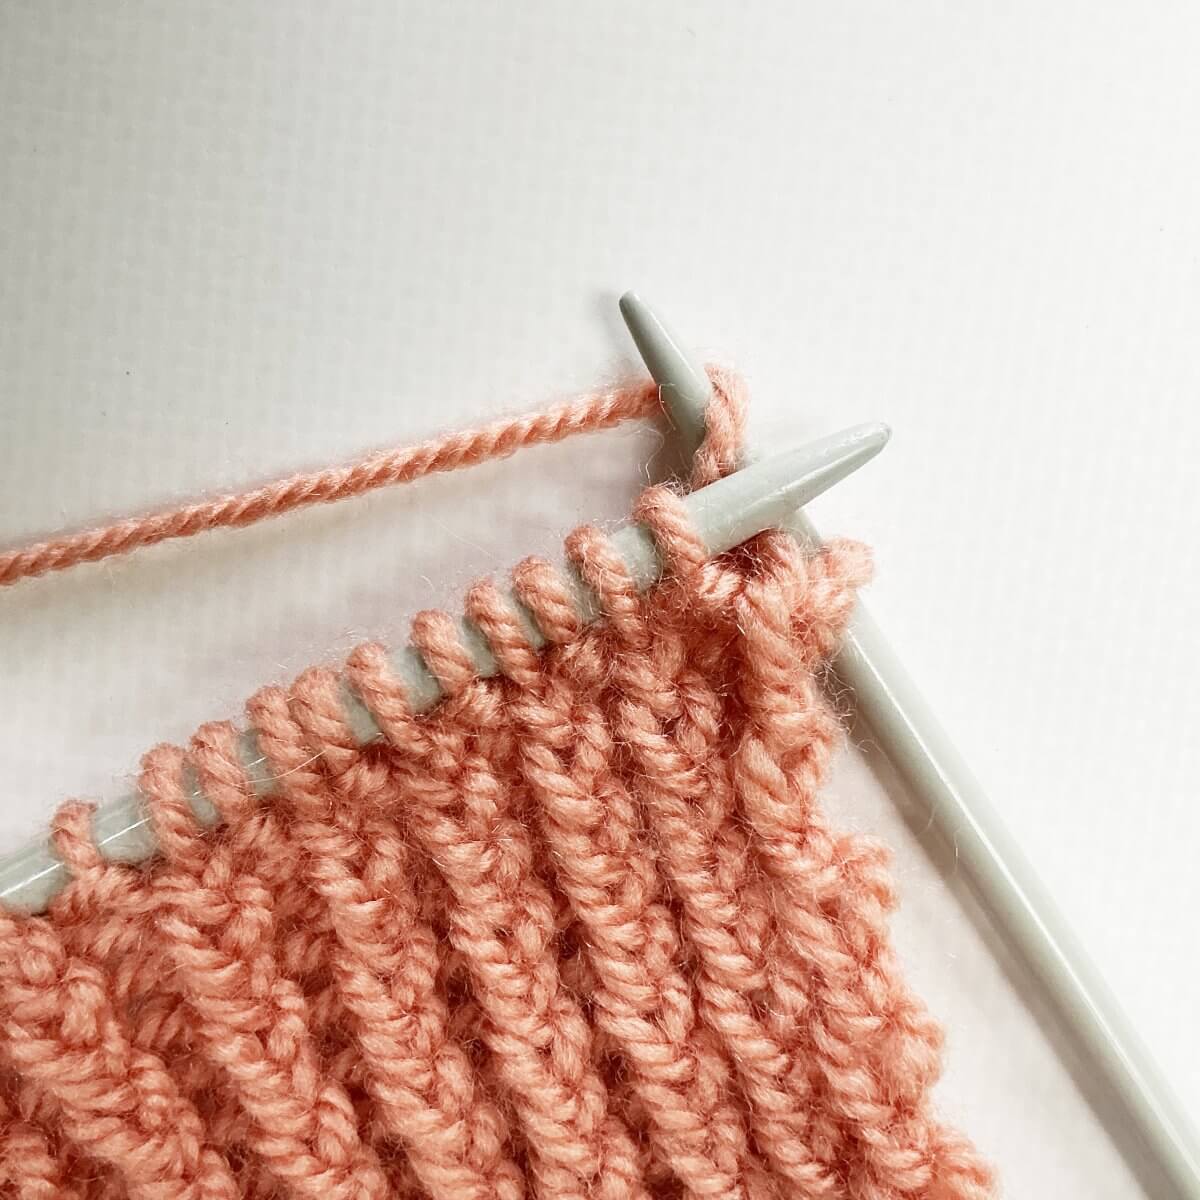
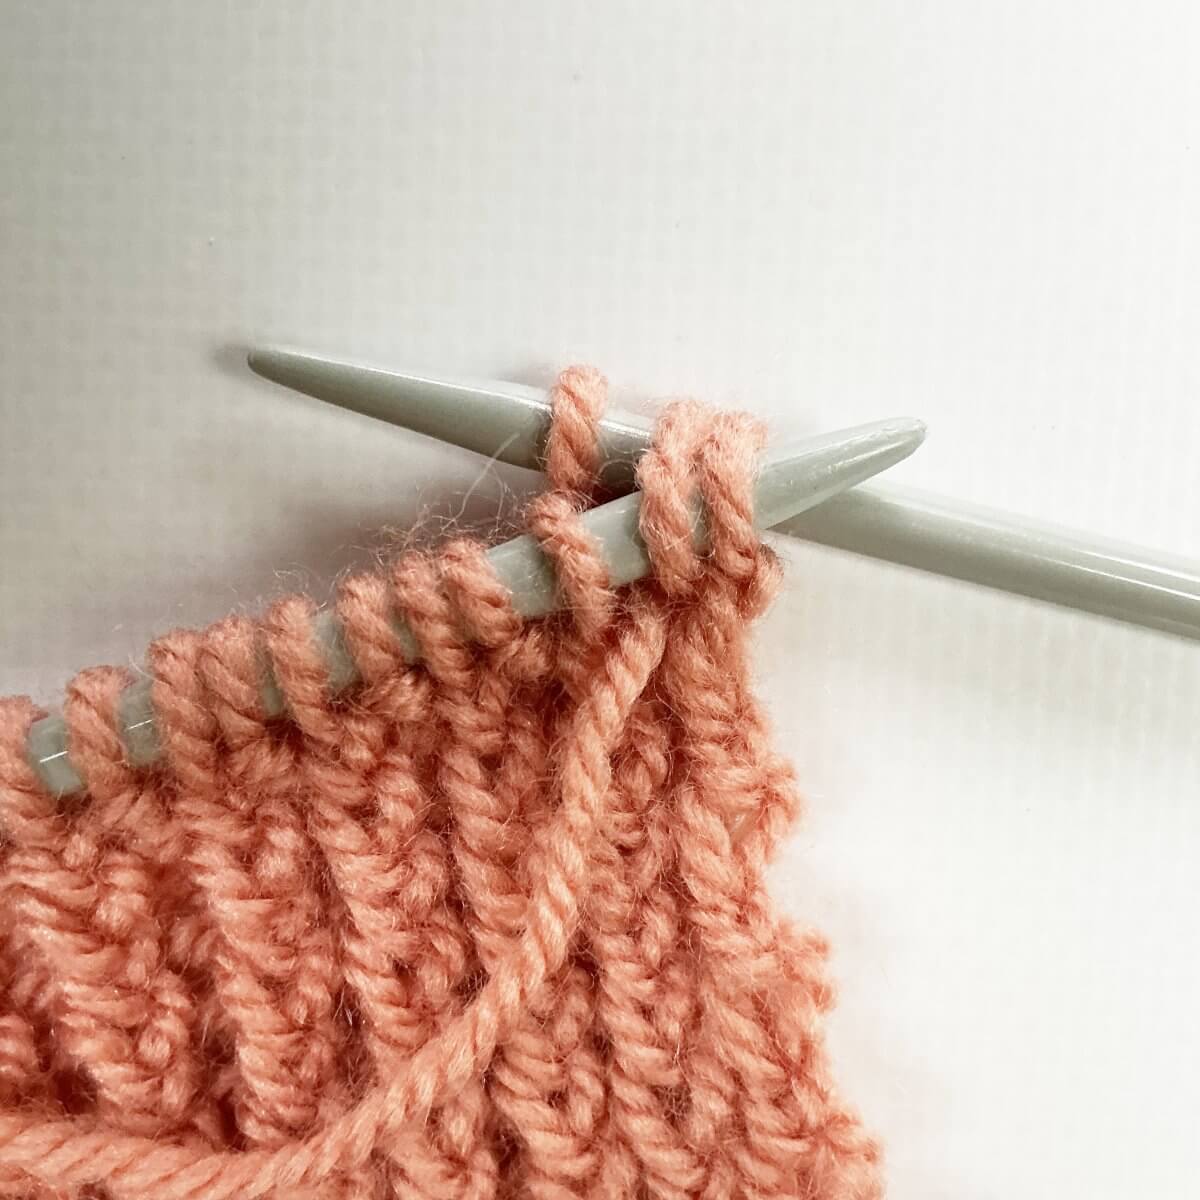
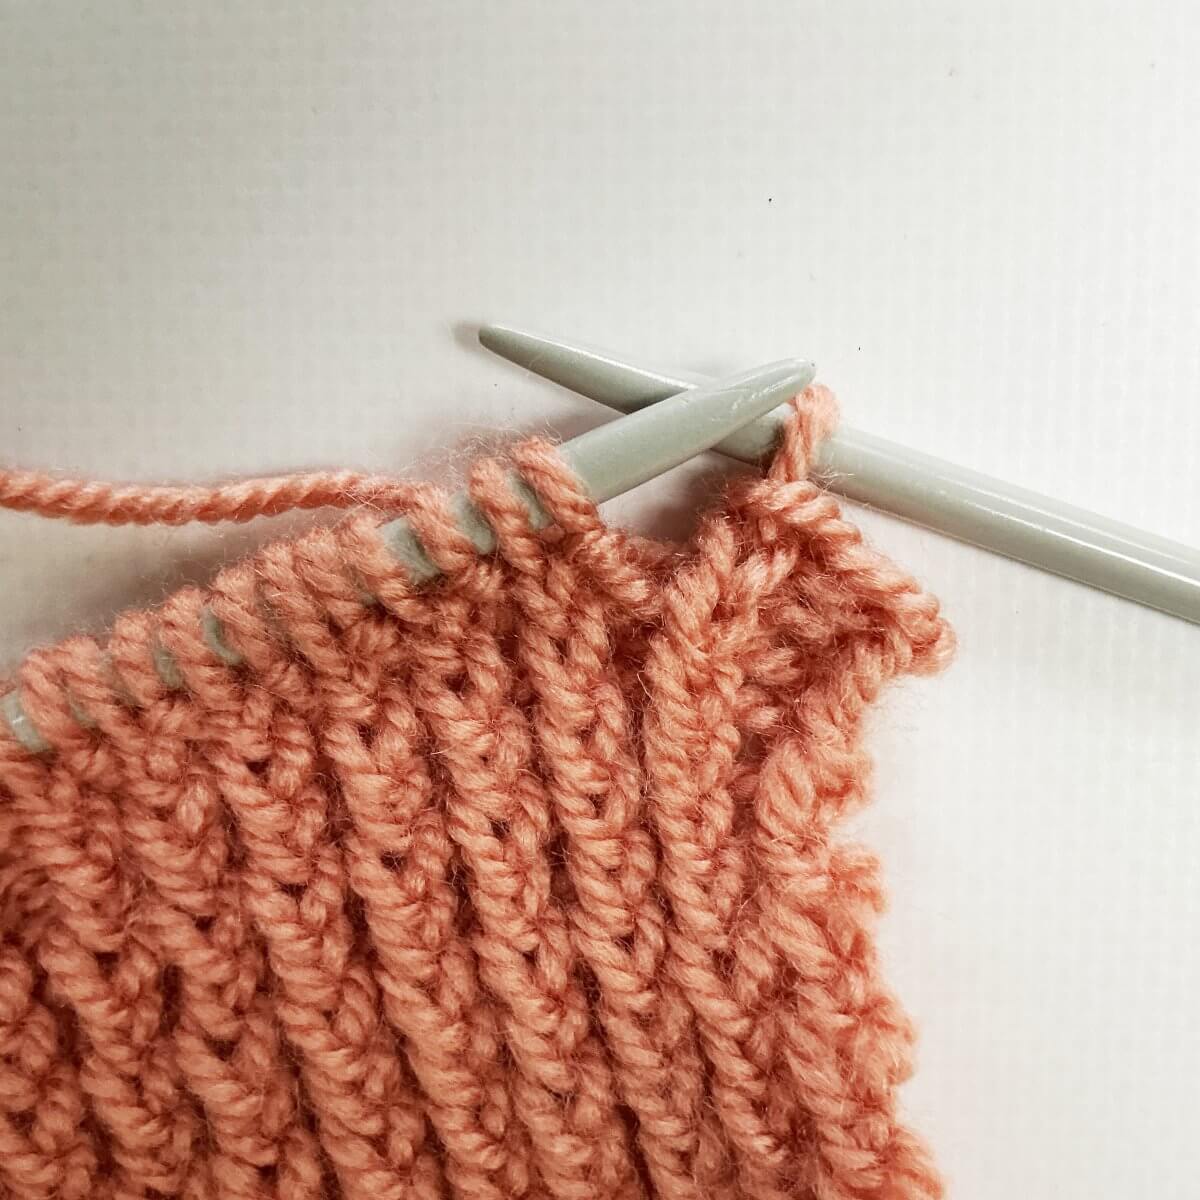
- Knit the first stitch on the left-hand needle.
- Insert the tip of the left-hand needle into the second stitch on the right-hand needle….
- …. then pass it over the stitch just knit.
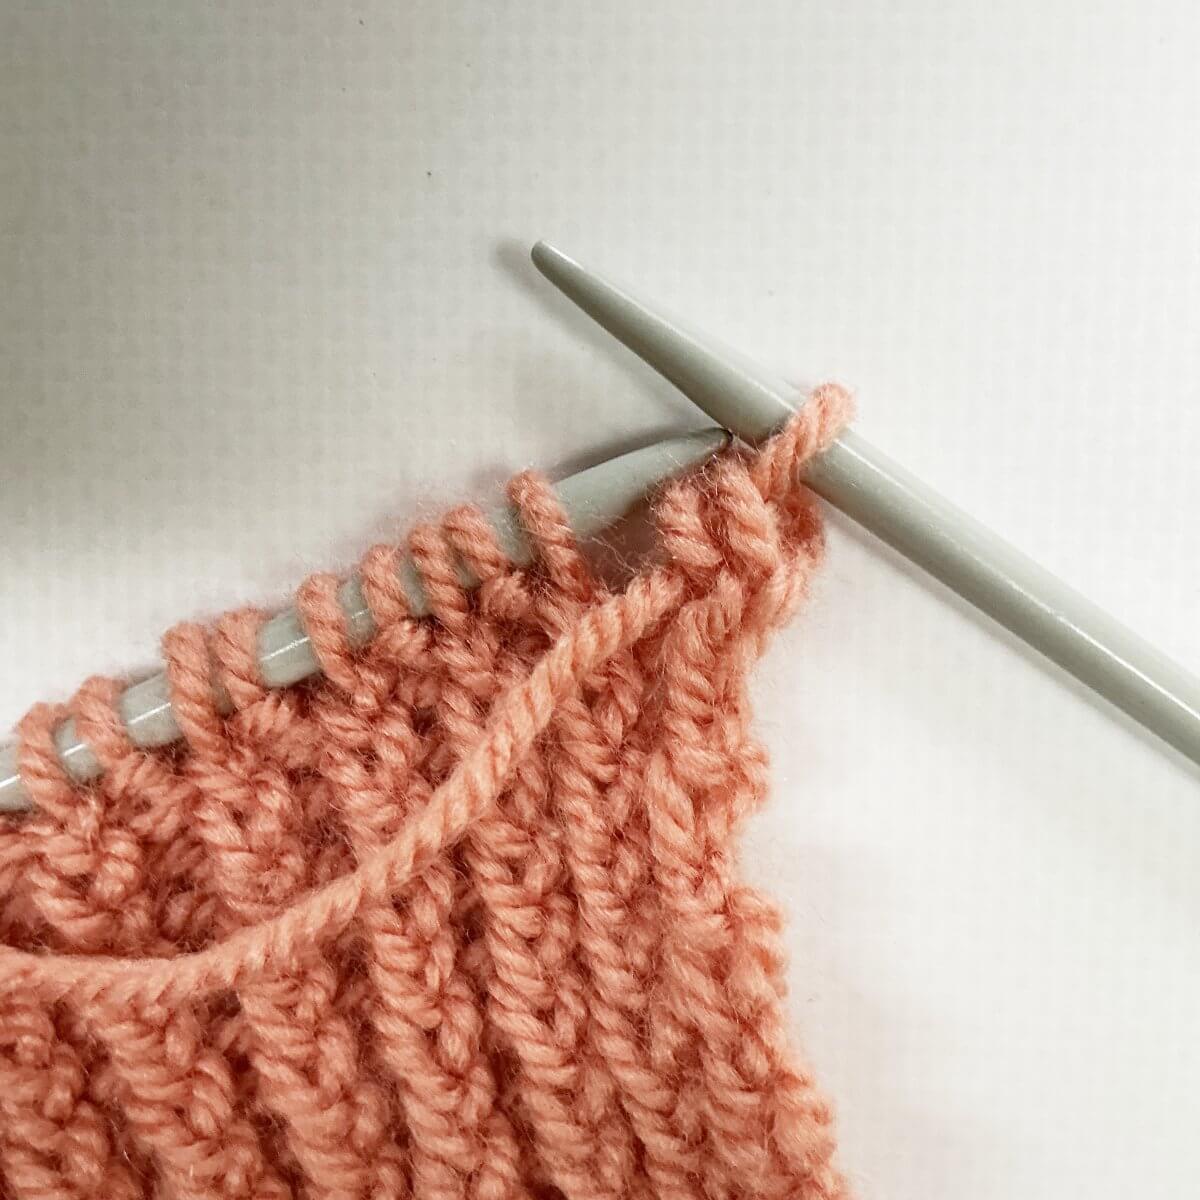
- Continue working steps 3-8, ending with a repeat of steps 3-6 for the last purl stitch in the rib (assuming you started with an even number of stitches!).
To bind-off the last stitch you end up with, just break your yarn, and pull it through.
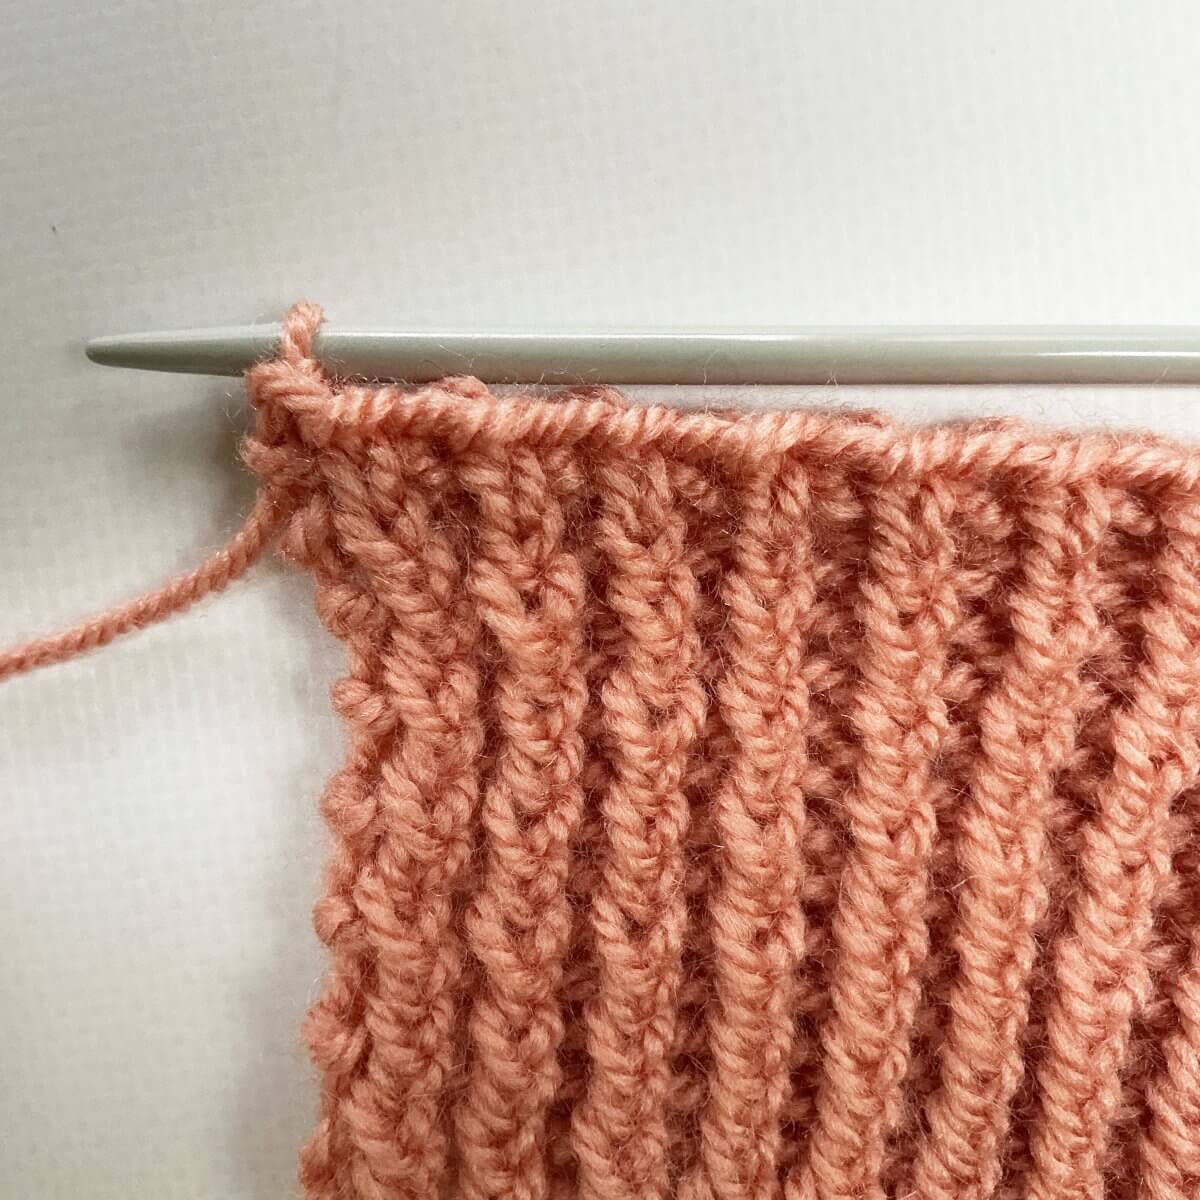
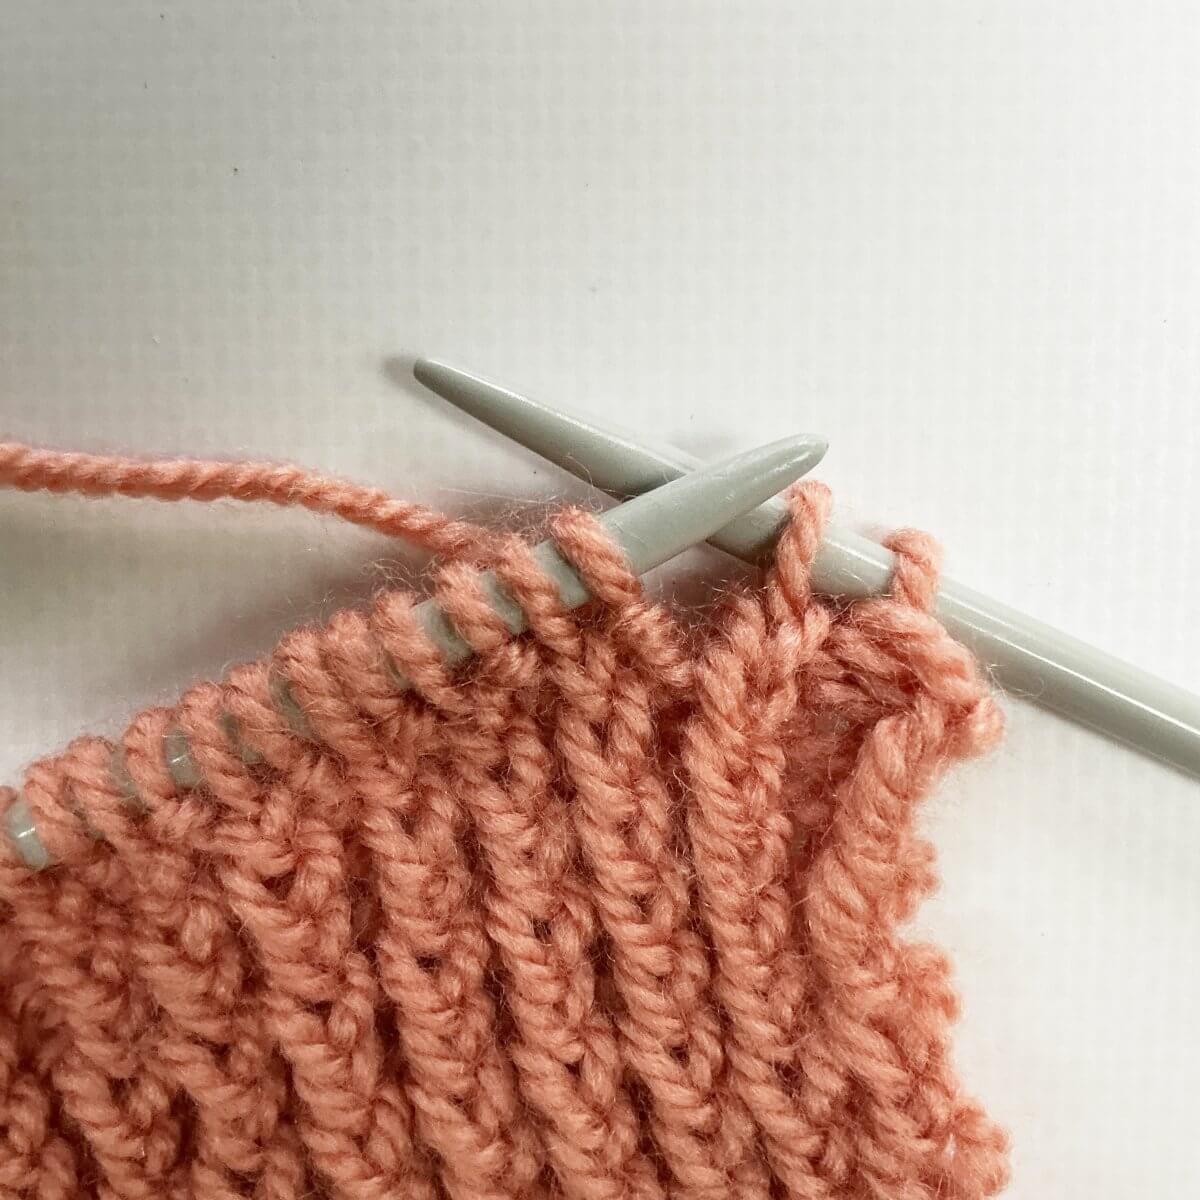
The result
Do you see how lovely this bind-off follows the shape of the ribbing?

Thanks to my Patreon supporters for bringing you this freebie! Creating quality patterns and tutorials is a lot of work and resource-intensive. However, I find it important to give you free content like this tutorial. Thanks to the generous support of my Patreon supporters, I can make it happen. Thank you, patrons! Click here to join, or click here to read more about La Visch Designs on Patreon.


