Many top-down shawl patterns start with a garter tab cast-on because it creates a lovely seamless start of any shawl. Most people will be familiar with this cast-on for traditional top-down triangle shawls. A tutorial on working such a garter tab cast-on can be found here. But what to do when starting a top-down crescent type shawl?
This type of shawl usually has a different increase rate when compared with traditional triangles. With the latter, the stitch count is increased by 4 on all right-side rows. With a top-down crescent though, increases are worked on both right side and wrong side rows: the stitch count is increased by 4 stitches on right-side rows and by 2 on wrong-side rows. When the wrong-side row increases are yarn overs, you get a rather decorative eyelet edge to your shawl. This makes it, however, harder to make your garter tab blend in invisibly. And this is where this tutorial on knitting garter tab CO for top-down crescents comes in!
As with all garter tabs, they can be a bit fiddly to work, especially when working with very skinny yarn. However, don’t let that deter you from knitting patterns that use this cast on: with the below step-by-step instructions and tips you are sure to master this technique.
In this example I used the following garter tab instructions, to get a 7 stitch start including 2 edge stitches on each side:
CO 2 sts and knit 6 rows. Turn work 90 degrees clockwise, yo, then pick up 1 st from the second (middle) garter stitch ridge along the long edge and twist this st 360 degrees counterclockwise, then purl it, yo. Pick up and knit 2 sts along the cast on edge. (7 sts).
Materials
Besides yarn and knitting needles I’m also using 3 removable stitch markers, one preferably in a different color or size.

The garter tab CO for top-down crescents step by step
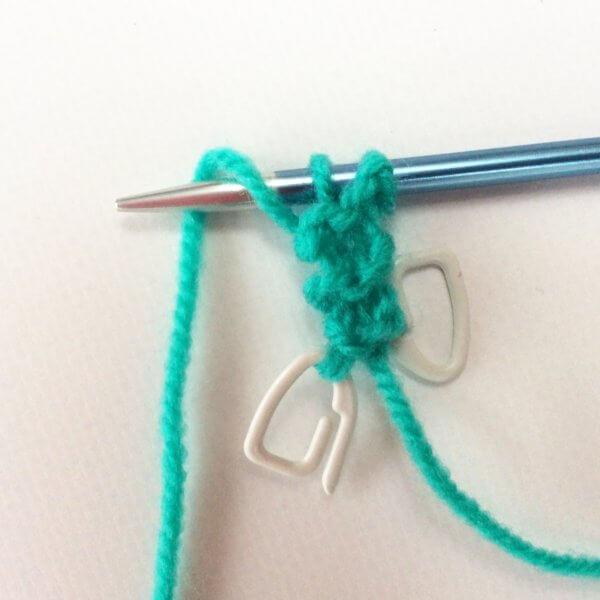
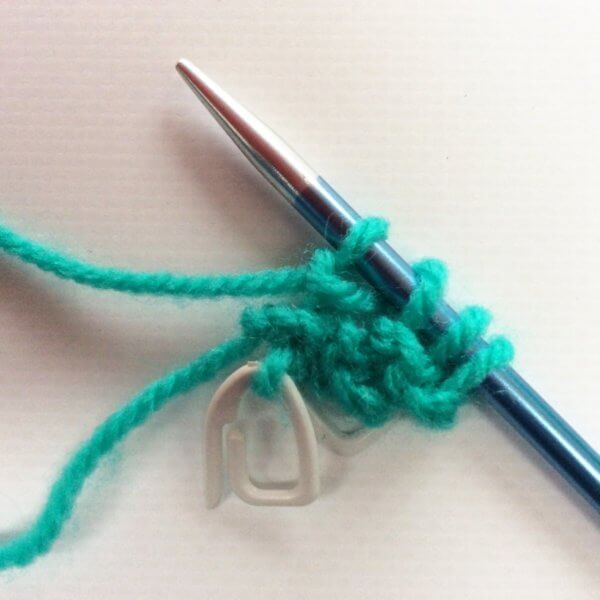
1. Cast-on two stitches using your preferred cast-on method. In this example, I’m using the knitted on cast-on. Place markers in each of every cast-on stitch, this will make it easier to pick them up later on. I attached them to the back legs of the stitches to keep the markers out of the way.
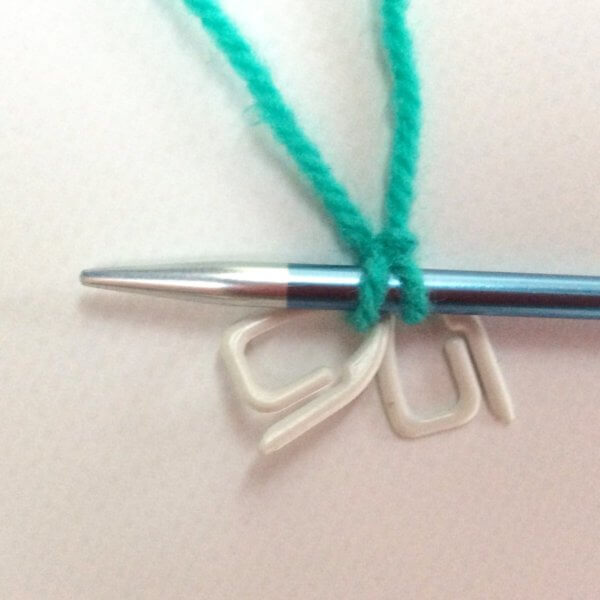
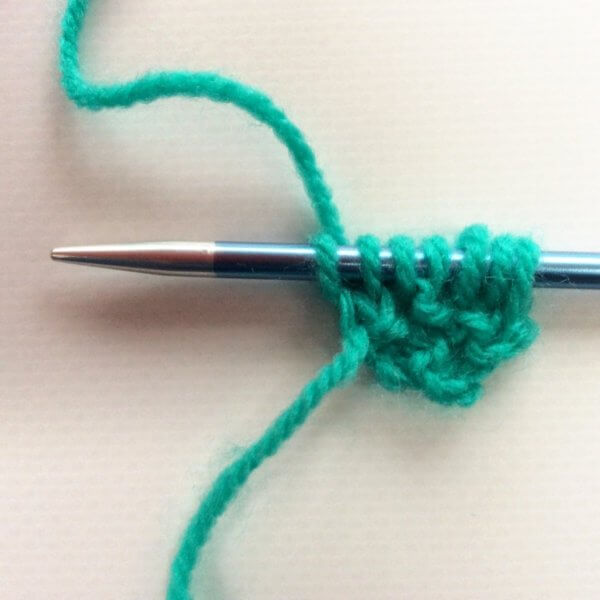
2. Work 6 rows in garter stitch (knit every row). This will give you 3 ridges.
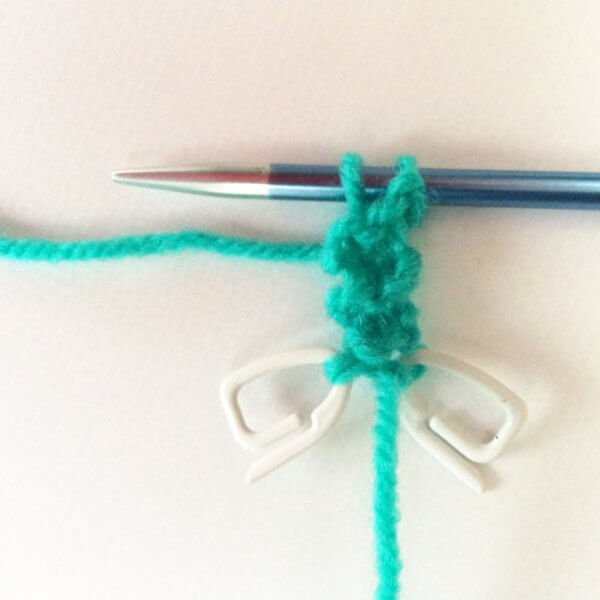
3. Then turn your work – still on the right-hand needle – 90 degrees clockwise and yo.
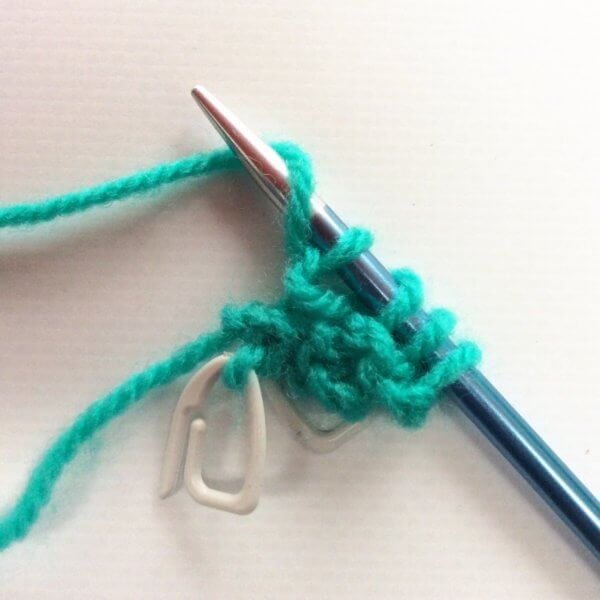
4. Next, insert the remaining stitch marker in the purl bump from the middle of the 3 garter ridges along the edge.
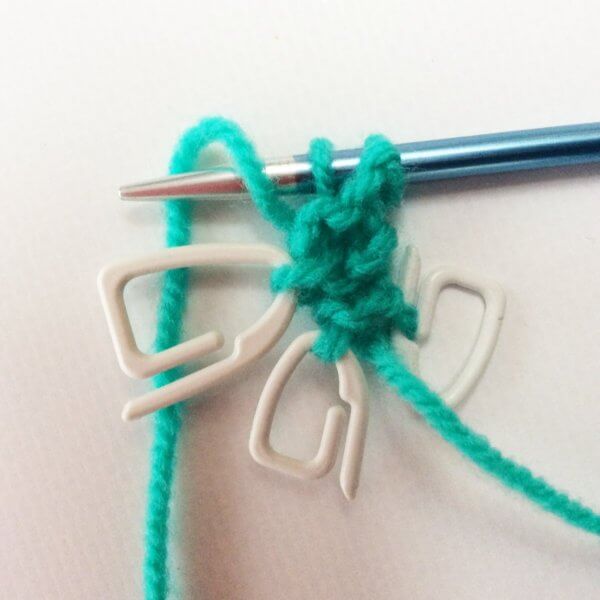
5. Use the stitch marker to twist the stitch it is inserted in 360 degrees counterclockwise (2 twists).
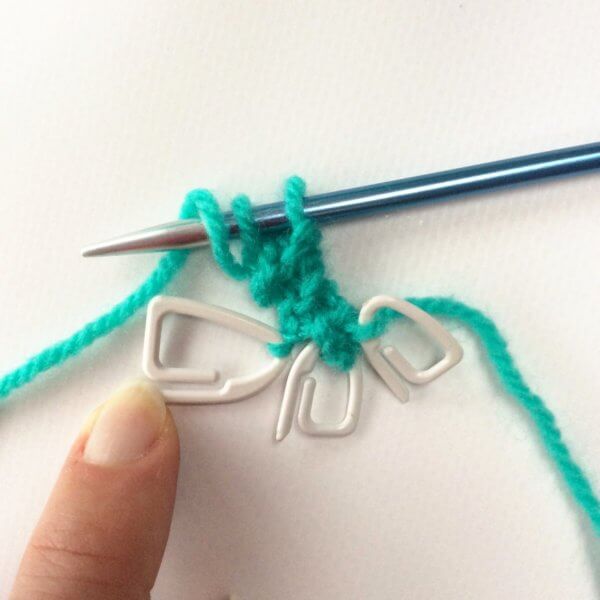
6. Next, insert the left-hand needle in the twisted stitch ….
7. …. and purl this stitch. The reason I’m purling this stitch here is that it makes sure that after casting on I can continue straight away with a right side row for stockinette. If you want reverse stockinette or garter stitch, this stitch should be knit instead of purled. It looks like this after this step:
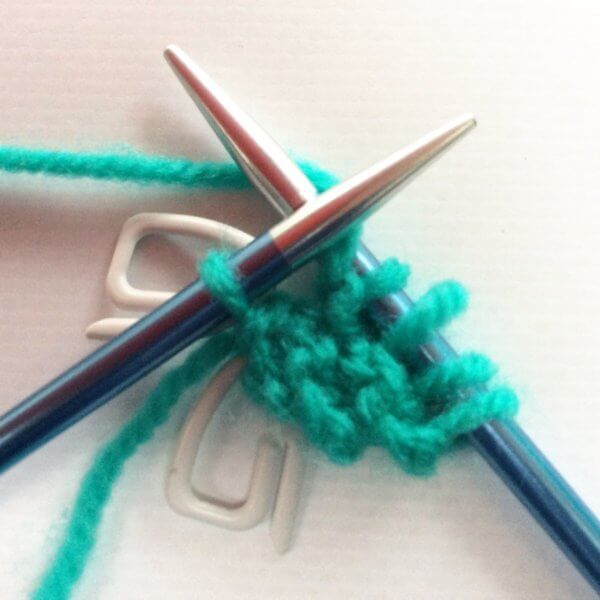
8. Next, yo again.
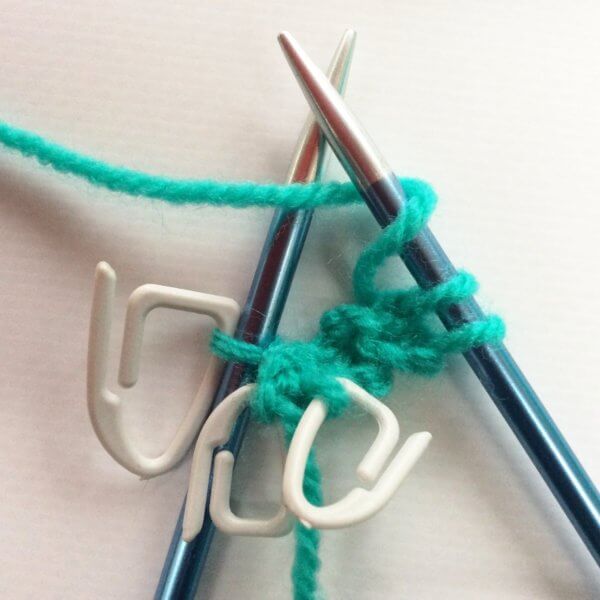
9. Turn your work 90 degrees clockwise again and pick up and knit the first marked stitch along the cast-on edge. These stitches can be a tad hard to see, but because we marked them in step 1 this really isn’t an issue.
10. Now pick up and knit the second marked stitch along the cast-on edge.
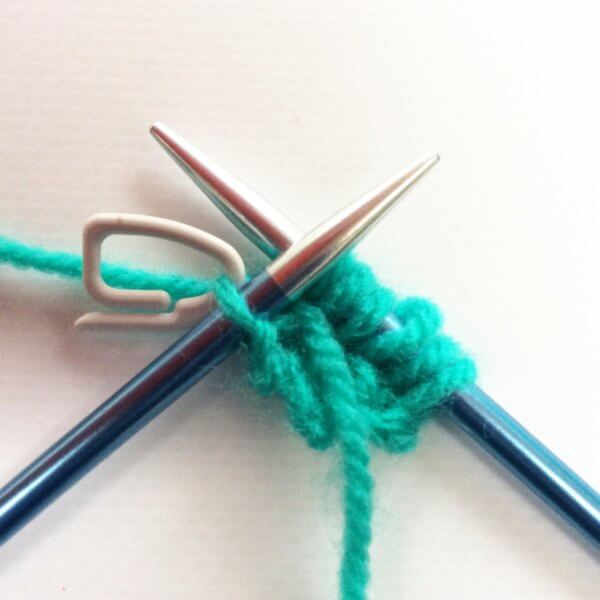
11. There you have it: a garter tab CO for top-down crescents! There are now 7 stitches: 2 stitches on either end which will become the garter edge stitches, and 3 stitches in the middle which will become the body of your shawl. You are now ready to start the rest of your pattern!
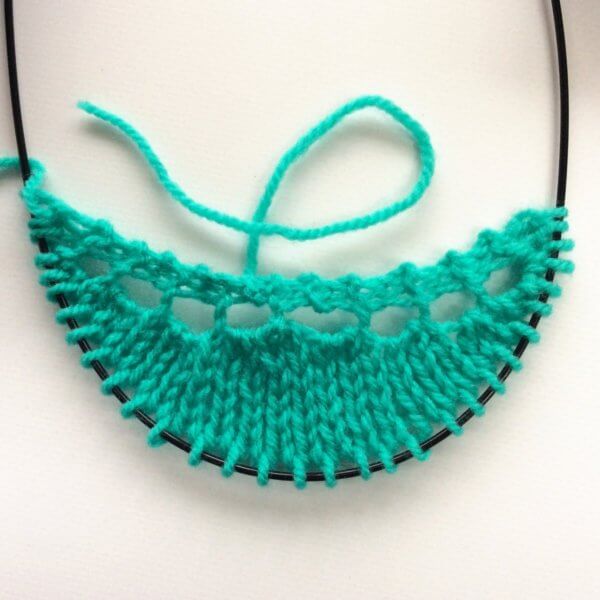
In the little swatch shown below, I’ve knitted some more rows in the following format:
Row 1 (RS): K2, (k1, yo, k1) in next st, k to 3 sts before end, (k1, yo, k1) in next st, k2.
Row 2 (WS): K2, yo, p to 2 sts before end, yo, k2.
Do you see how well this garter tab cast-on blends in? I can’t see where the cast-on ends and the rest of the shawl begins! And that’s how I like it.