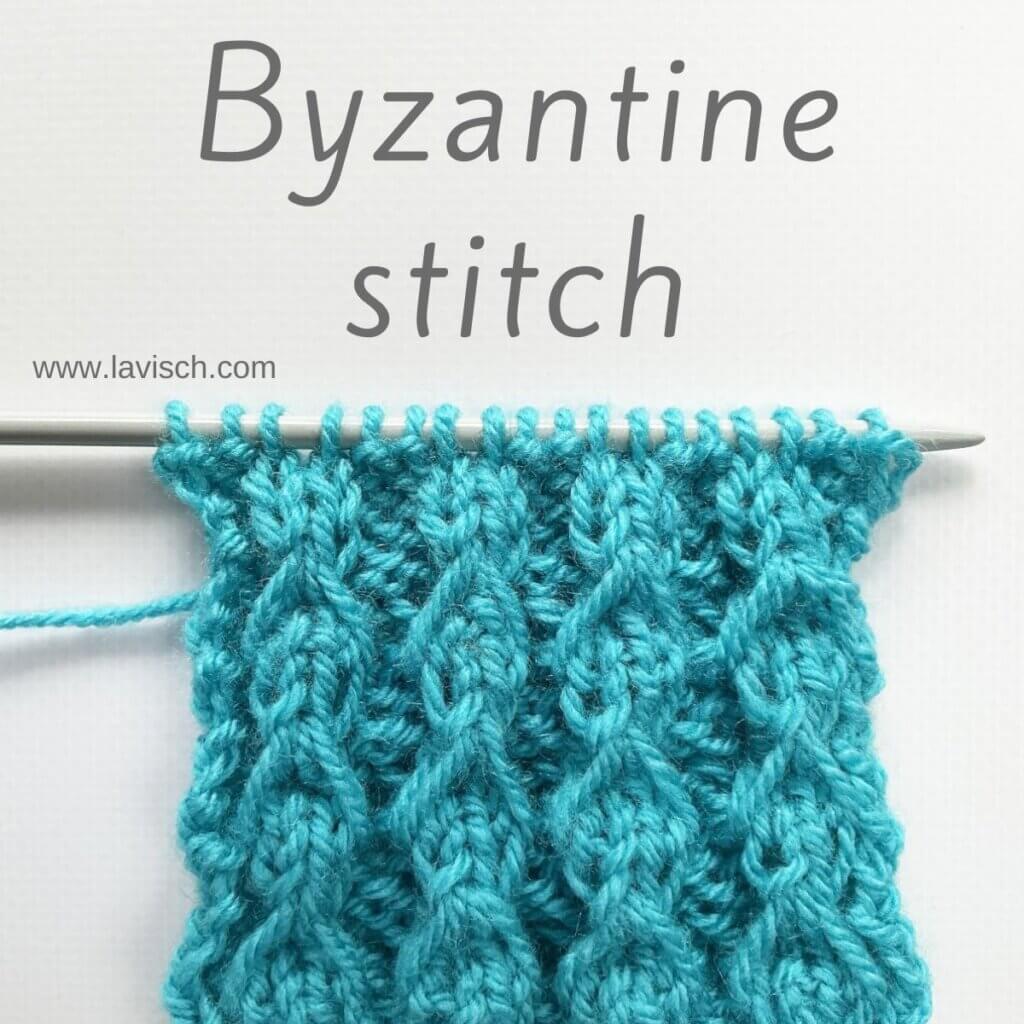
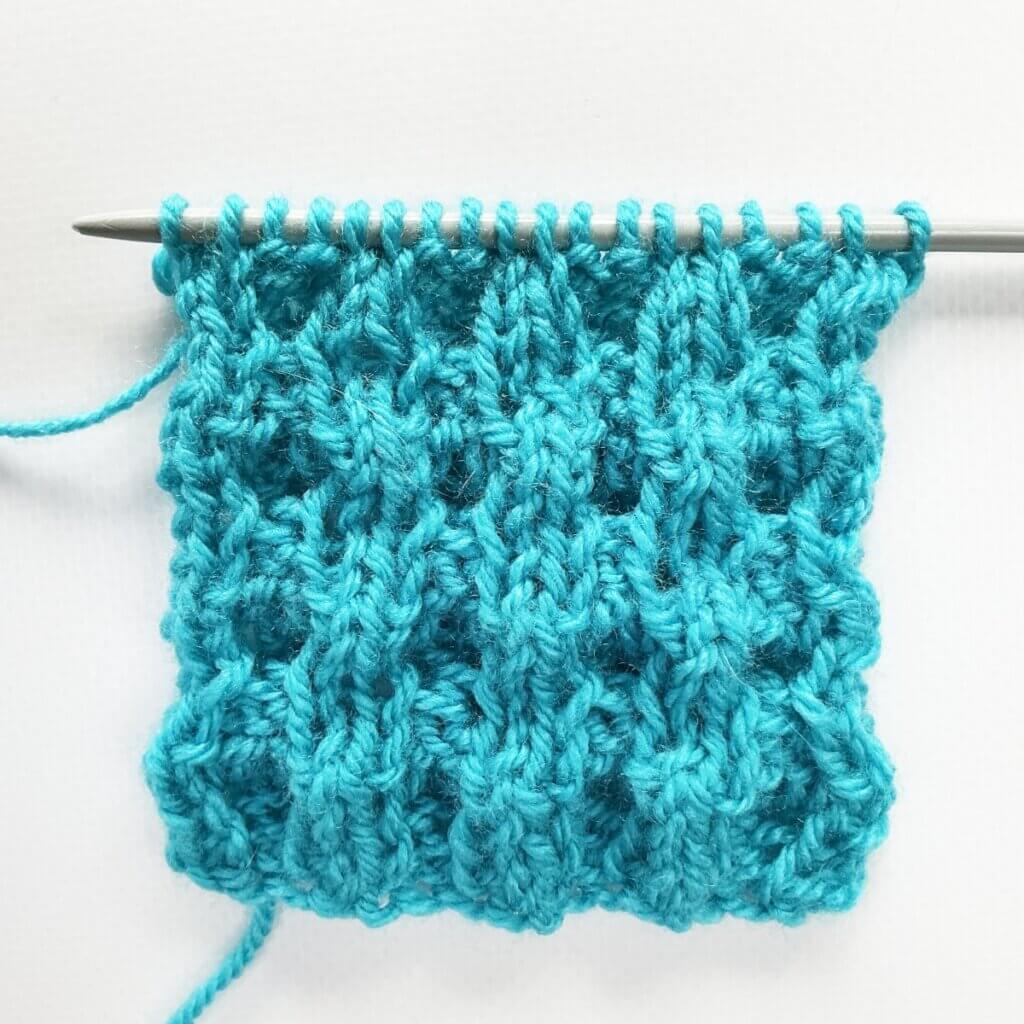
The Byzantine stitch pattern is a textured knitting pattern against a background of reverse stockinette stitch. Basically, it’s a variation op 2×2 rib stitch. It may look complicated to work, but it’s really not that hard. You create the effect by pulling up loops between stitches around the column of knit stitches, a couple of rows below the one that you’re working. Next, these loops are slipped one row. Finally, they’re anchored and decreased away by working the k4tog bf decrease. It’s a versatile stitch pattern that can be used in any place you’d used regular ribbing. However, because it’s so pretty, it’s lovely as all-over patterning for blankets, for example.
This stitch pattern is worked as a multiple of 4 stitches + 2, and in a six-row repeat. Please note that in this swatch, I’ve not used any edge stitches.
Materials used


Yarn: Paintbox Yarns Simply DK, a good value, good quality 100% acrylic yarn, here in the color Marine Blue.
Needles: This is a pair of straights that I picked up at the second-hand store when I started knitting, brand unknown.
Stitches used
- k – knit
- k4tog bf – knit 4 stitches together through the back loop, then knit the same 4 stitches together through the front loop.
- p – purl
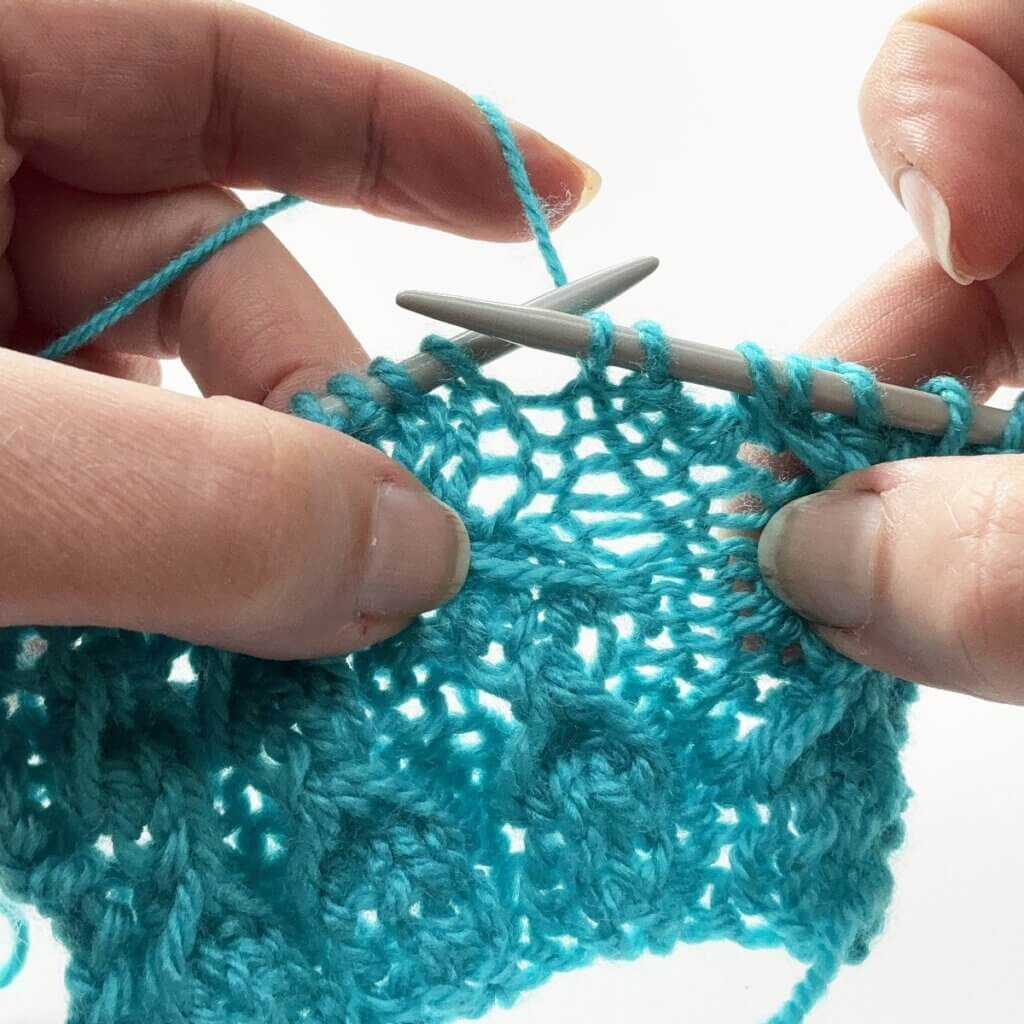
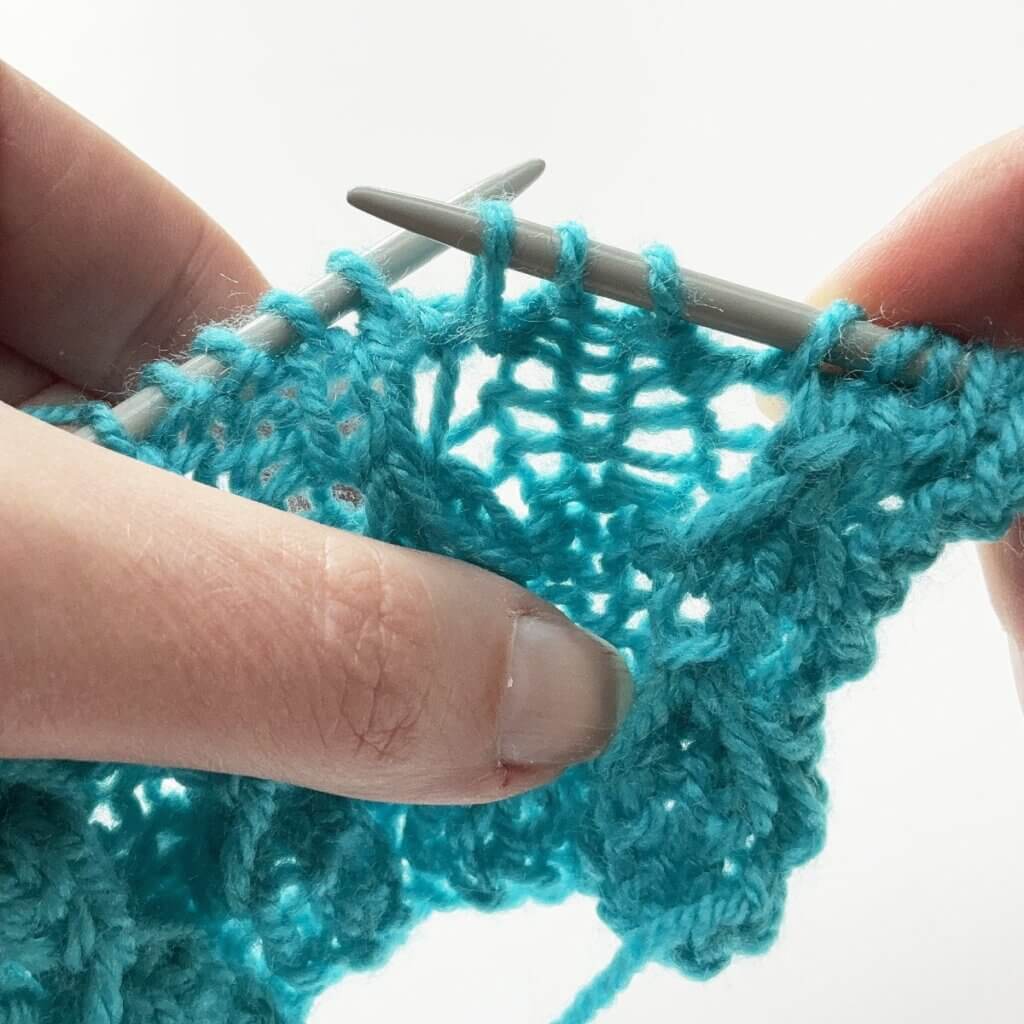
- pulling up a loop – in this stitch pattern this means that you insert your knitting needle underneath the bar between the last and next stitch, 3 rows down. Next, wrap the yarn around the needle, and pull it through. Take a look at the photographs below to see how this looks.
- sl – slip 1 stitch purl-wise with the yarn in front
- st(s) – stitch(es)
Byzantine stitch instructions
Set-up row 1 (RS): P2, *k2, p2*; rep *-* to end.
Set-up row 2 (WS): K2, *p2, k2*; rep *-* to end.
Set-up rows 3-6: Rep set-up rows 1 and 2 twice.
Row 1 (RS): P2, *pull up a loop underneath the bar between the last and next stitch, 3 rows down, k2, pull up another loop underneath the bar between the last and next stitch, 3 rows down, p2*; rep *-* to end.
Row 2 (WS): K2, *move the working yarn to the front of the work and sl1, p2, sl1, k2*; rep *-* to end.
Row 3: P2, *k4tog bf, p2*; rep *-* to end.
Row 4: K2, *p2, k2*; rep *-* to end.
Row 5: P2, *k2, p2*; rep *-* to end.
Row 6: K2, *p2, k2*; rep *-* to end.
Repeat rows 1-6 for pattern until desired length.
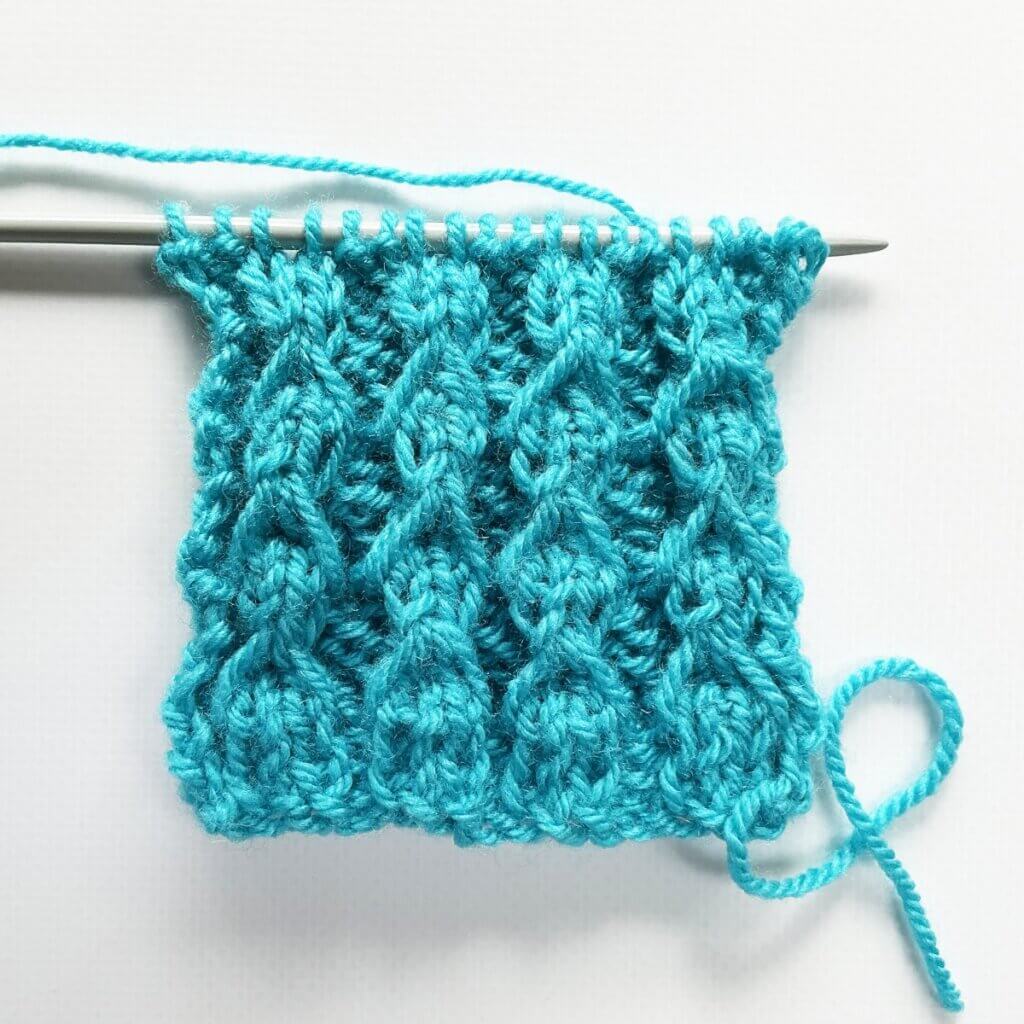
Below, you can see how this stitch pattern looks: First as seen from the right side, and then from the wrong side of the fabric.

Thanks to my Patreon supporters for bringing you this freebie! Creating quality patterns and tutorials is a lot of work and resource-intensive. However, I find it important to give you free content like this tutorial. Thanks to the generous support of my Patreon supporters, I can make it happen. Thank you, patrons! Click here to join, or click here to read more about La Visch Designs on Patreon.


