It seems there are 2 distinct camps when it concerns the Kitchener stitch: either you love it or you hate it. Personally, I don’t really understand the hubbub around this technique, it’s a very useful one in certain situations. One just has to know how to do it. And that’s where this tutorial comes in!
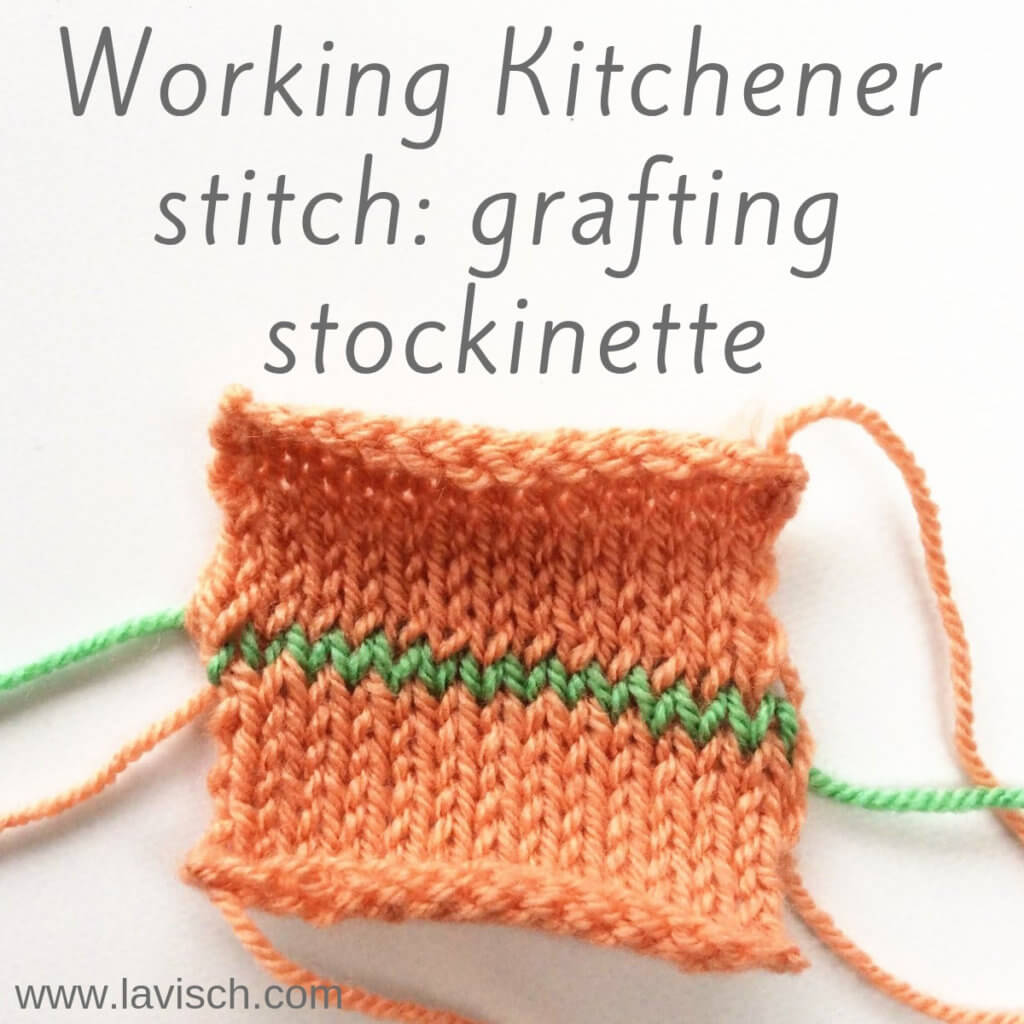
But first: what is Kitchener stitch? It’s a method of grafting two sets of live stitches together in an invisible way. It’s often used to seamlessly close the toes of top-down socks, for example. The “seam”, so to speak, is really a new row of stitches that you create using a yarn needle. To do so, the needle is passed through the live stitches of the pieces of knitting to be joined, in a similar manner similar as the direction in which a knitting needle is inserted within a stitch. This can be purlwise or knitwise.
Materials used


Yarn: Paintbox Yarns Simply DK, a good value, good quality 100% acrylic yarn, here in the colors 155 Vintage Pink for the swatches and 125 Spearmint Green for the Kitchener stitch.
Darning needle: Hiya Hiya Darn It Yarn Needle, or any other tapestry needle, threaded with yarn.
Working Kitchener stitch to graft stockinette step by step
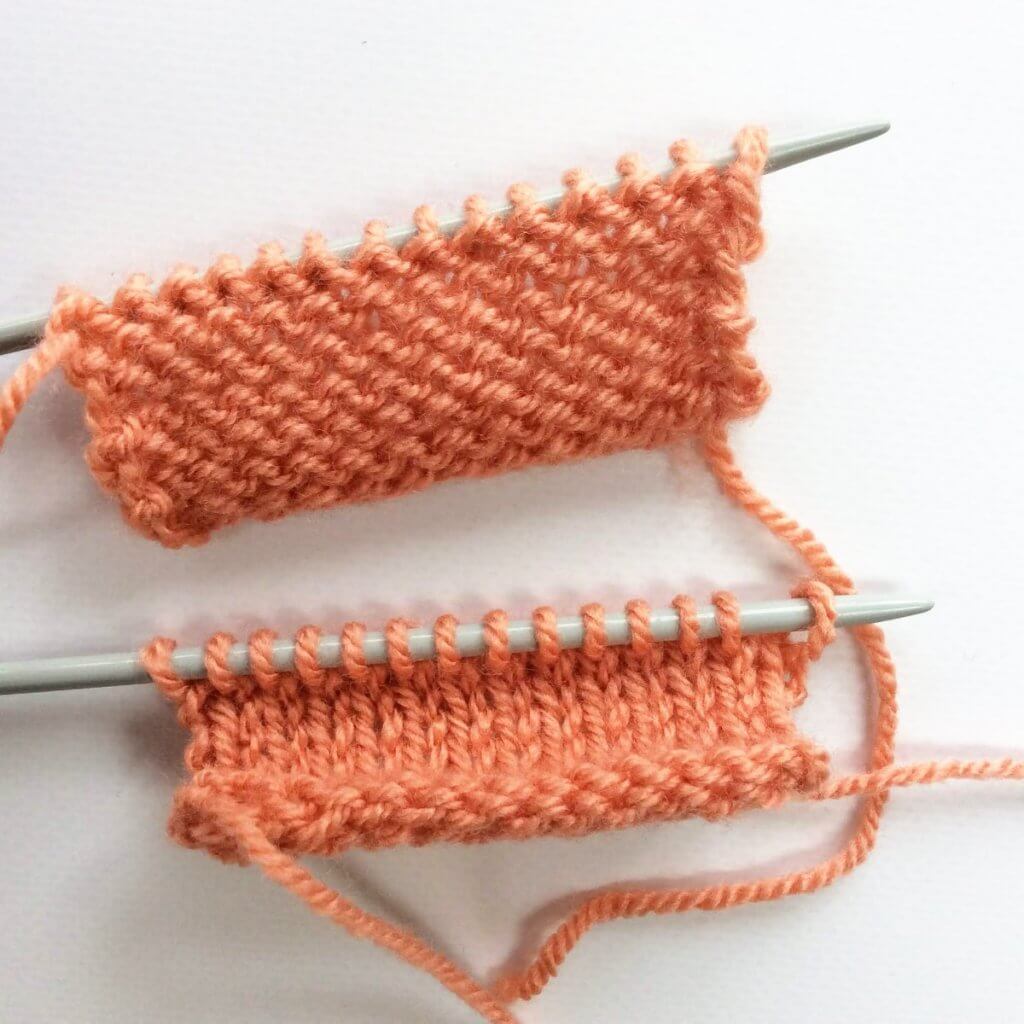
Before we start, we have to make sure that the two pieces of stockinette fabric that we will be grafting together, each have the same number of stitches.
Set-up
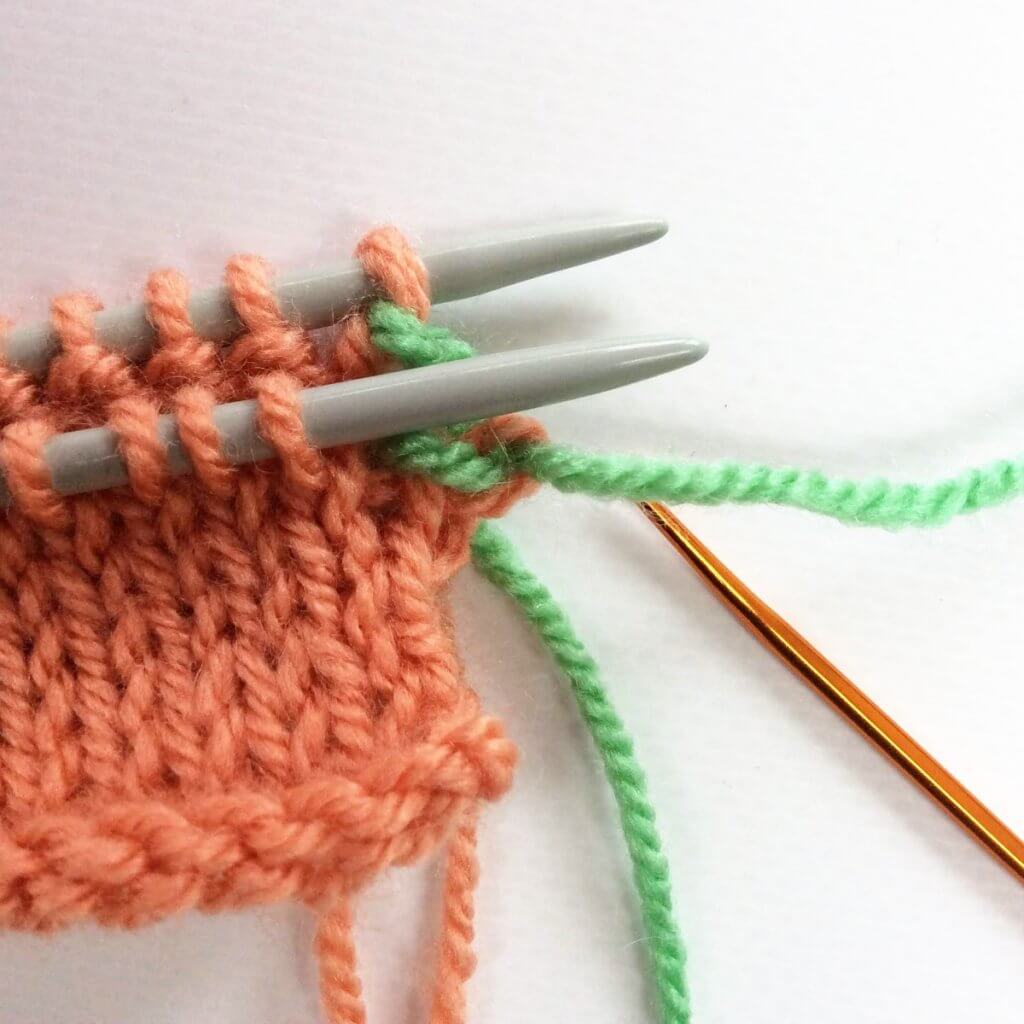
1. To start, we hold the two needles containing the live stitches parallel to each other, with the wrong sides of the fabric facing inside and the right sides facing outside.
2. Take your darning needle and pass it purl-wise through the first stitch on the front needle. Pull the yarn through, while leaving the stitch on the needle.
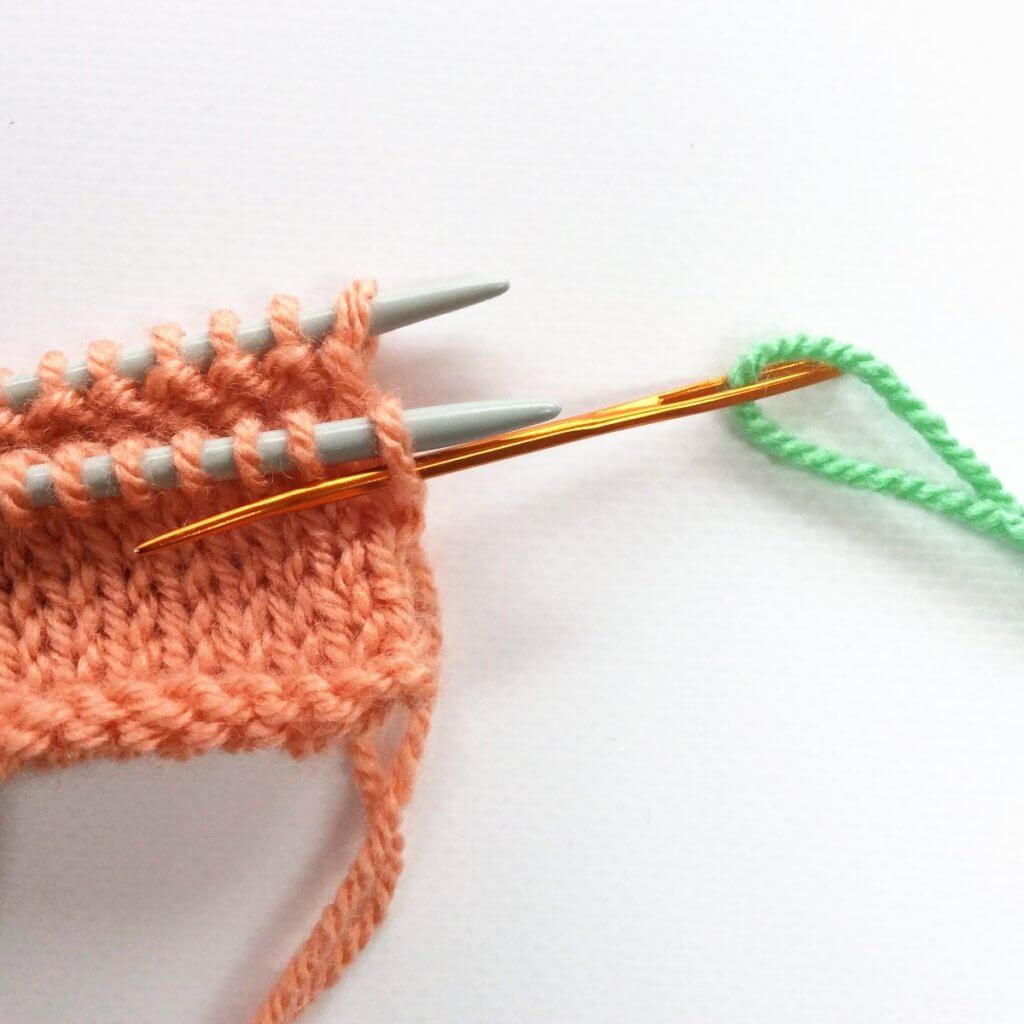
3. Next, thread the darning needle knit-wise through the first stitch on the back needle. Again, pull the yarn through, while leaving the stitch on the needle.
Repeat
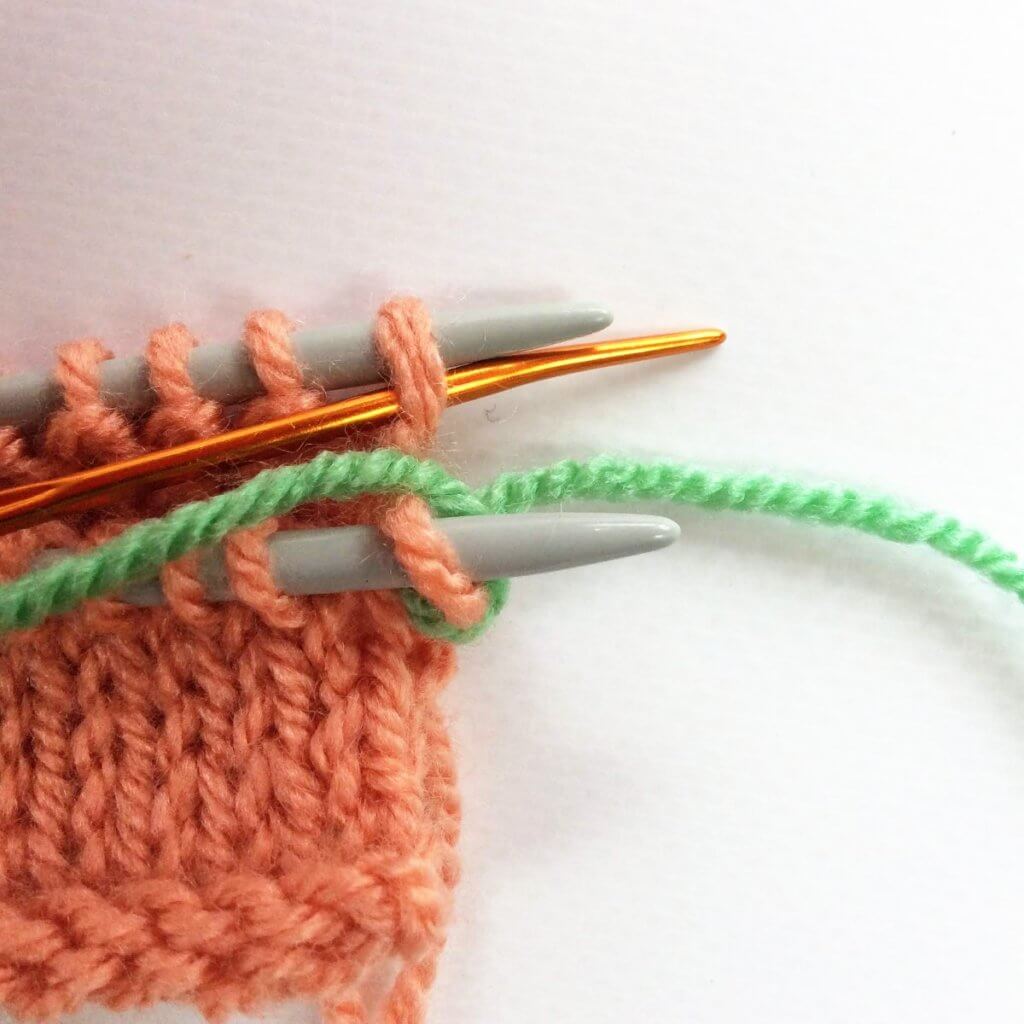
1. Front needle: Pass the darning needle knit-wise through the first stitch of the front needle. Pull the yarn through and slip the stitch off the needle. The below picture shows how it looks after the stitch has been dropped.
2. Front needle: Next, thread the darning needle purl-wise through the second stitch on the front needle. Leave the stitch on the needle and pull the yarn through.

3. Back needle: Pass the darning needle purl-wise through the first stitch of the back needle. Pull the yarn through and slip the stitch off the needle. Again, the picture shows how it looks after the stitch has been dropped off.
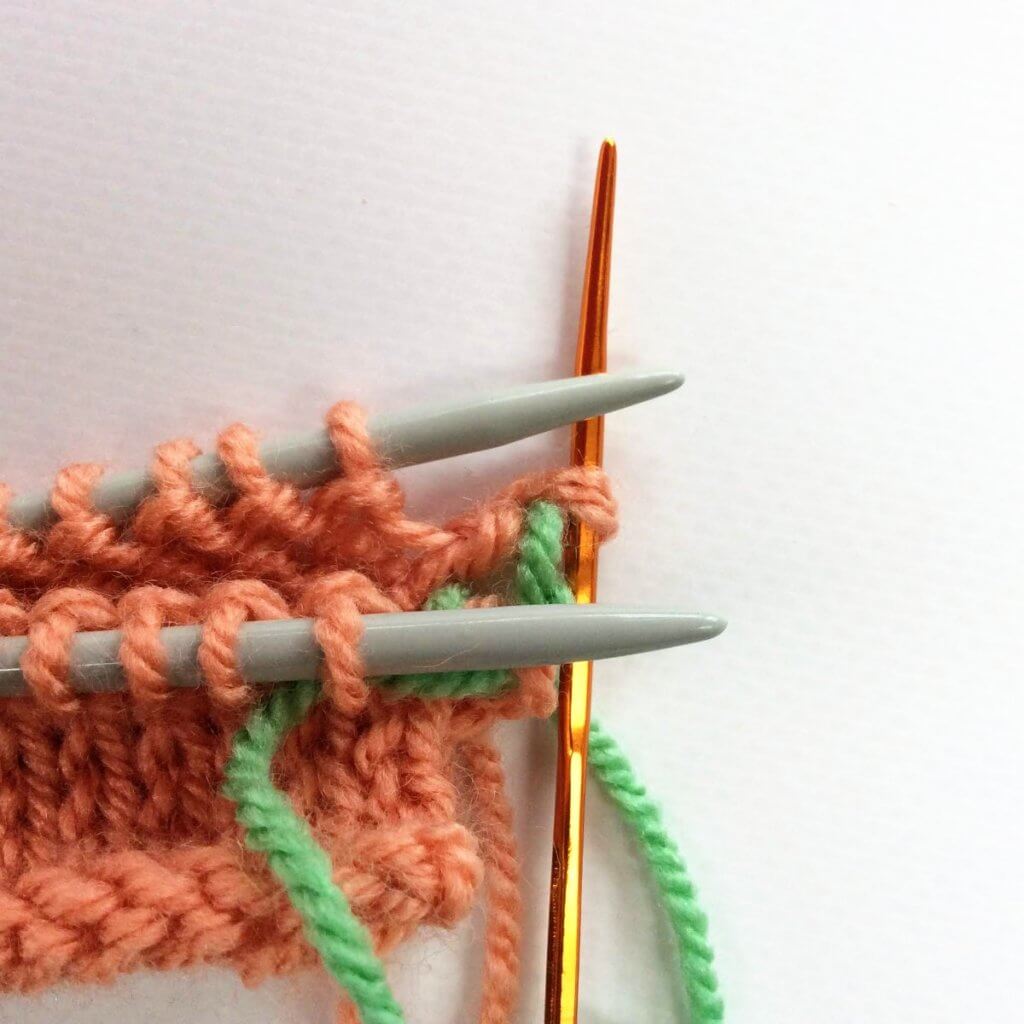
4. Back needle: Next, thread the darning needle knit-wise through the second stitch on the back needle. Leave the stitch on the needle and pull the yarn through. Gently adjust the tension of the newly made stitches to match the fabric of the pieces you’re grafting together. Be careful not to pull your yarn too tightly!
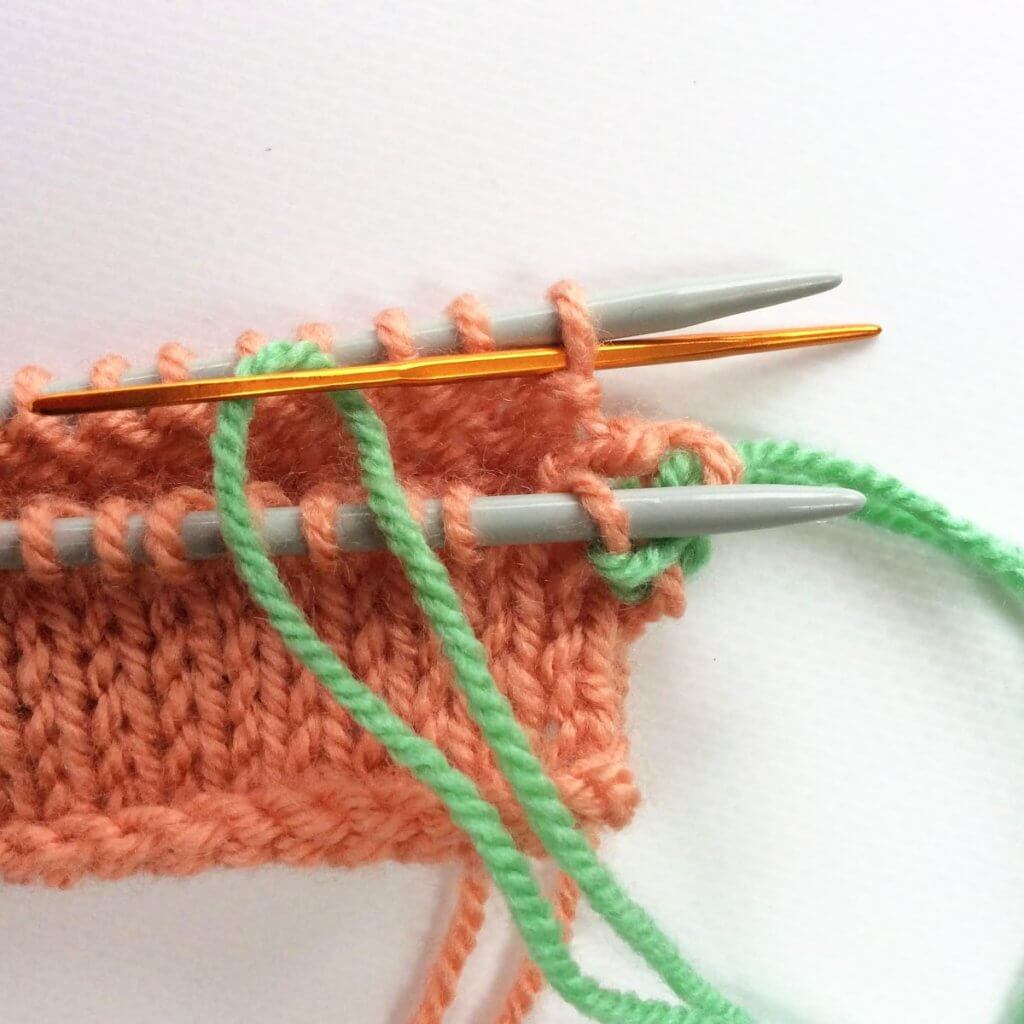
Repeat steps 1 to 4 until only 1 stitch remains on each knitting needle. This is how it then looks:
Finishing
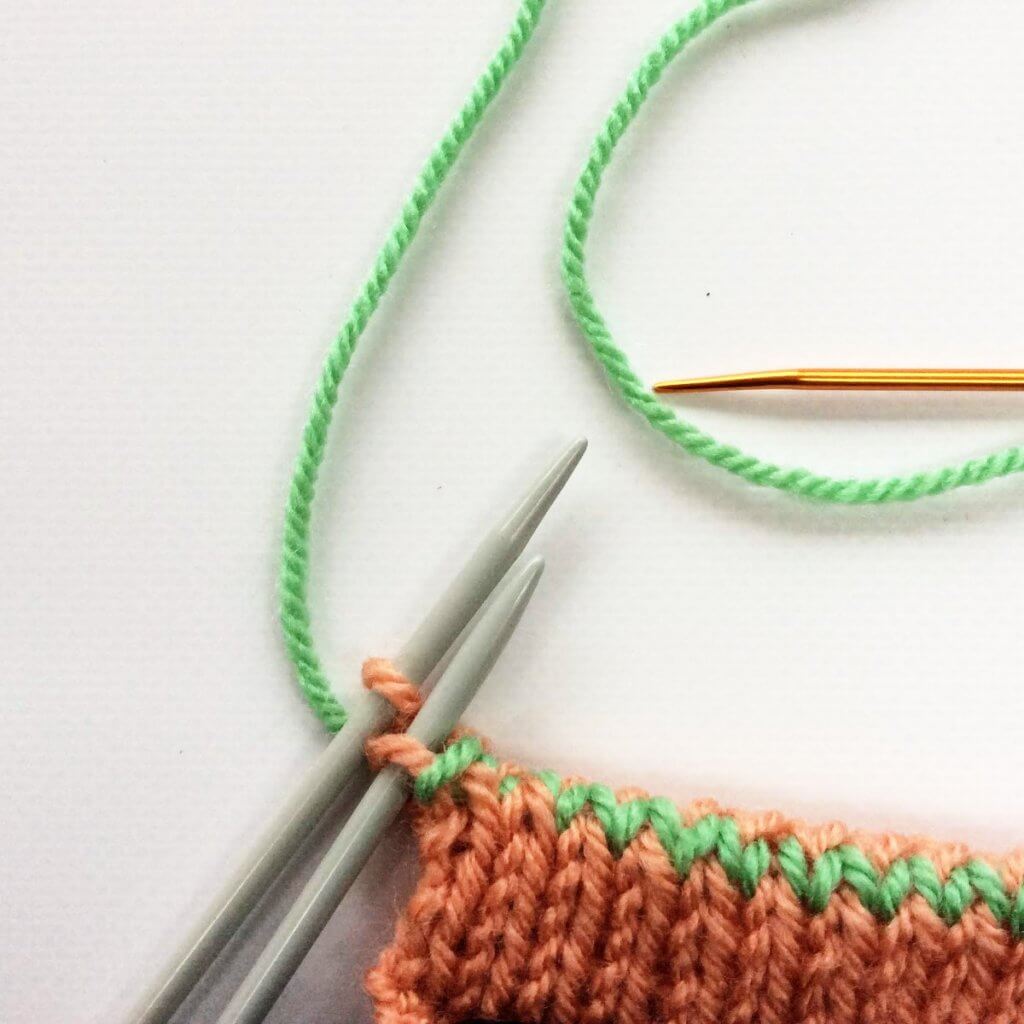
1. Now insert the darning needle knit-wise into the first stitch on the front needle and pull the yarn through, dropping the stitch from the needle.
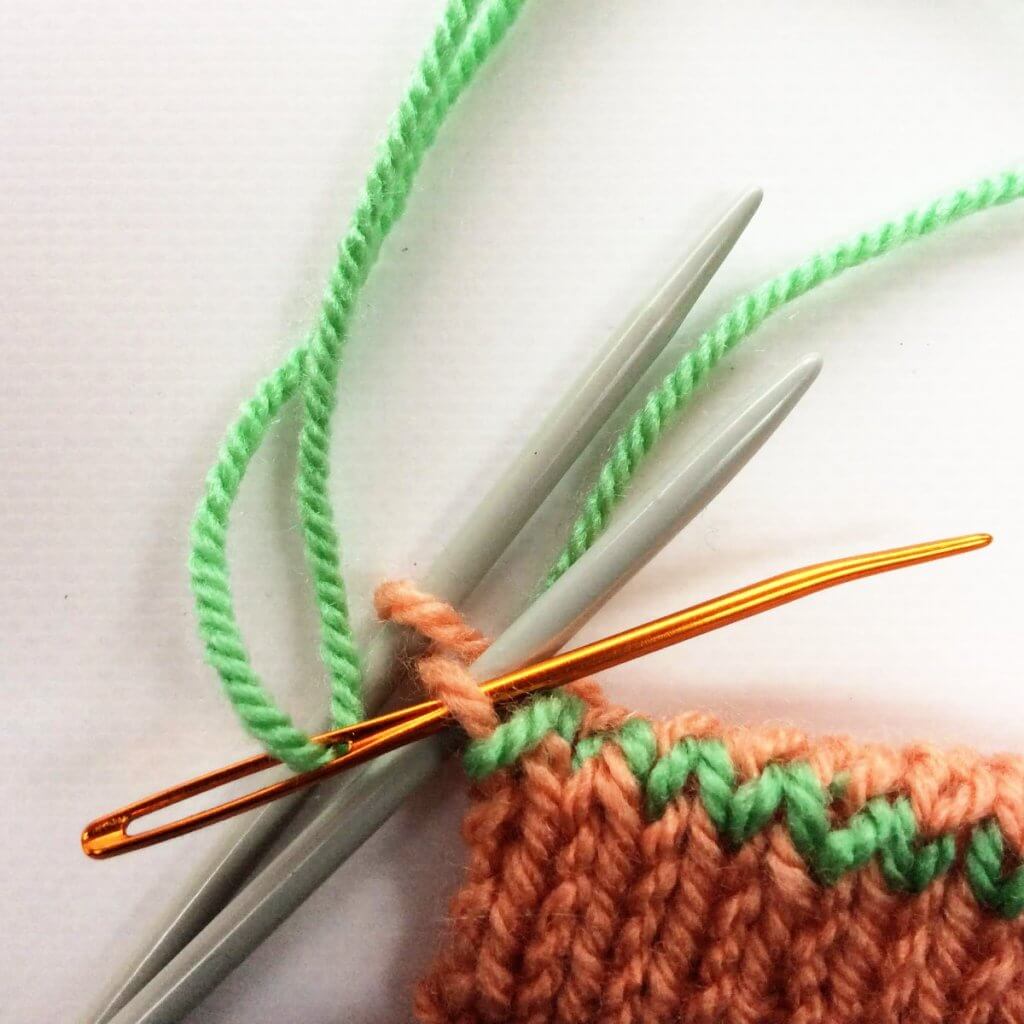
2. To finish, insert the darning needle purl-wise into the first stitch on the back needle. Pull the yarn through and drop the stitch from the needle.
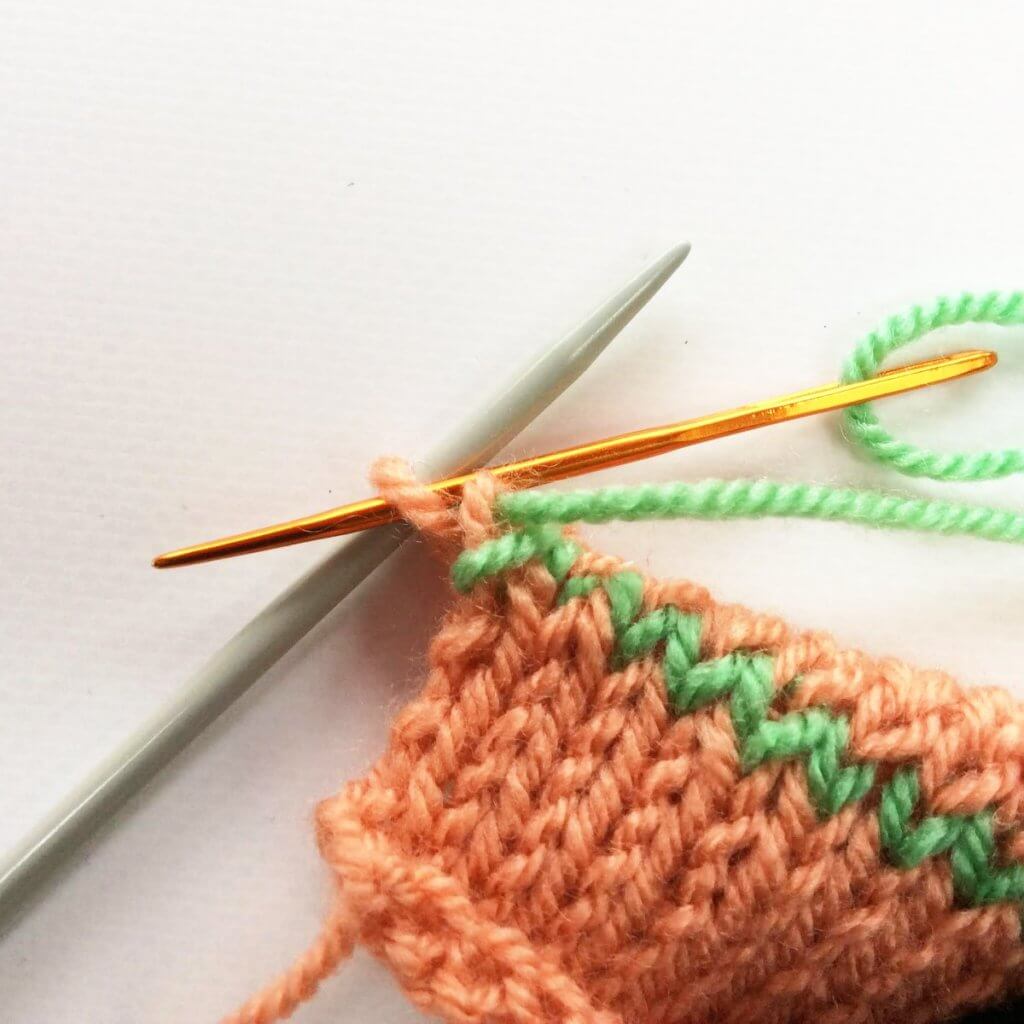
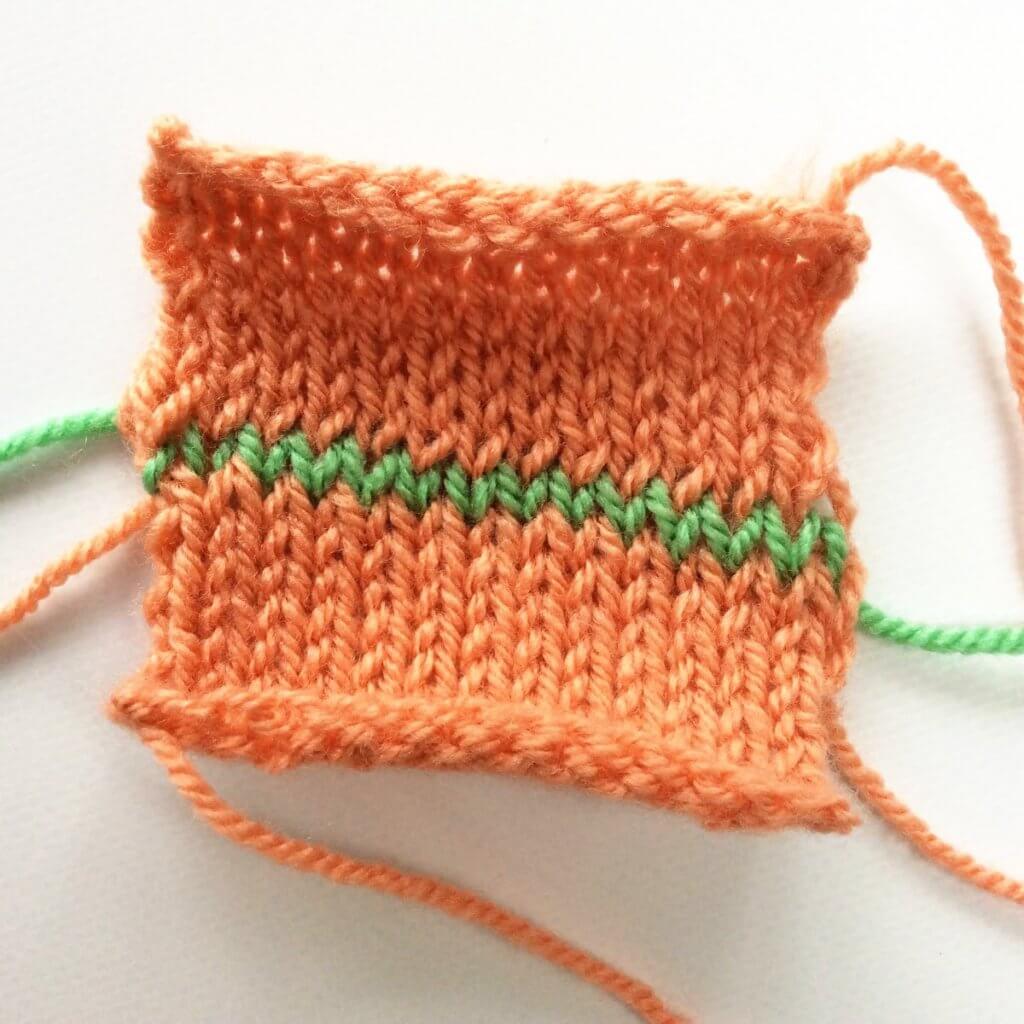
And that’s it! Pretty seamless, isn’t it? The only reason it can be seen as clearly as it is in this example is that I used a contrasting yarn.
Points of attention
If the tension of the new connecting row of stitches is not right yet, you can use the tip of your darning needle to further adjust. Just start at the right edge of the work, where grafting began, and gently pull the various stitches to adjust the tension until it matches the tension of the joined pieces. Also, when moving from front to back needle and vice versa, make sure to pass the working yarn and darning needle underneath the knitting needles, not above them.
Many people use a little rhyme to help remember the various steps that are to be repeated. It goes like this:
Front: Knit off –(knit
Front: Purl on – (purl next stitch on
Back: Purl off – (purl first stitch on back needle, drop
Back: Knit on – (knit next stitch on back needle, leave stitch on)

Thanks to my Patreon supporters for bringing you this freebie! Creating quality patterns and tutorials is a lot of work and resource-intensive. However, I find it important to give you free content like this tutorial. Thanks to the generous support of my Patreon supporters, I can make it happen. Thank you, patrons! Click here to join, or click here to read more about La Visch Designs on Patreon.
 syndrome")


