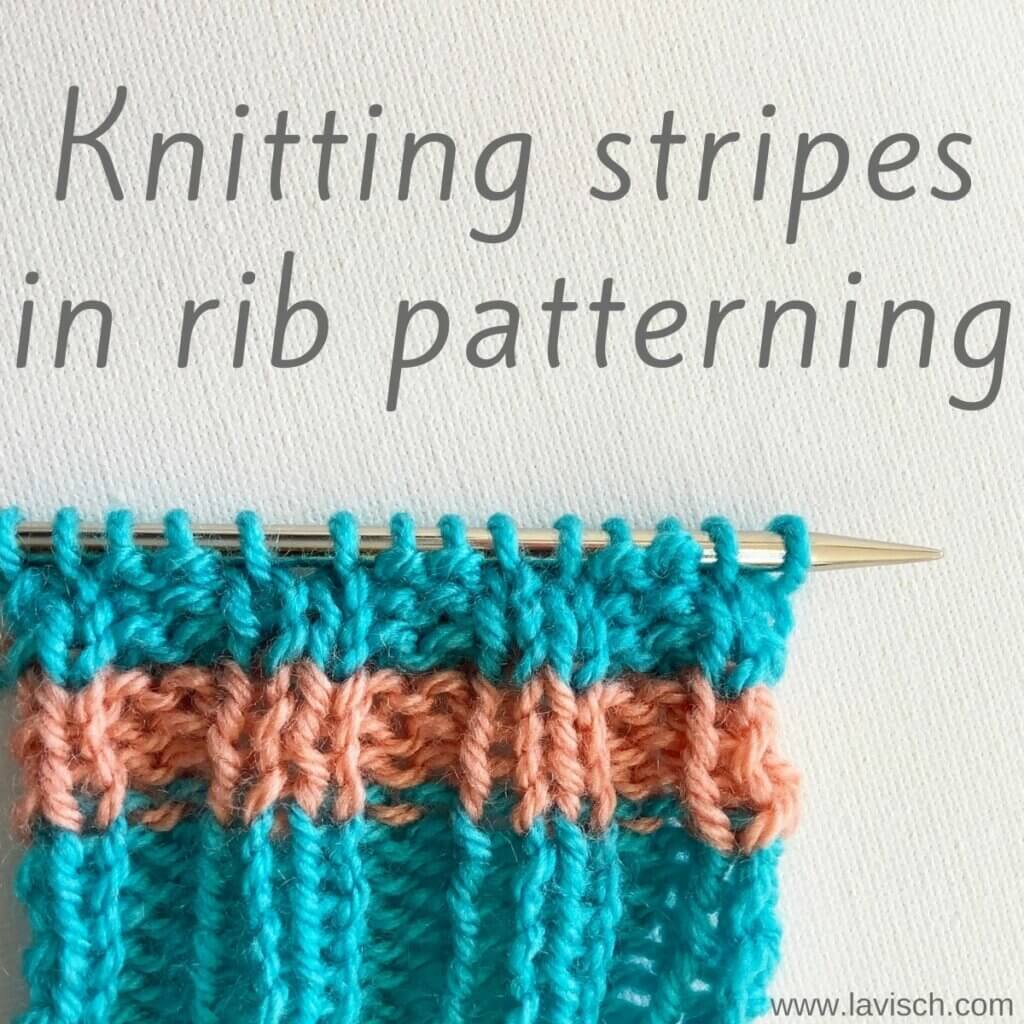
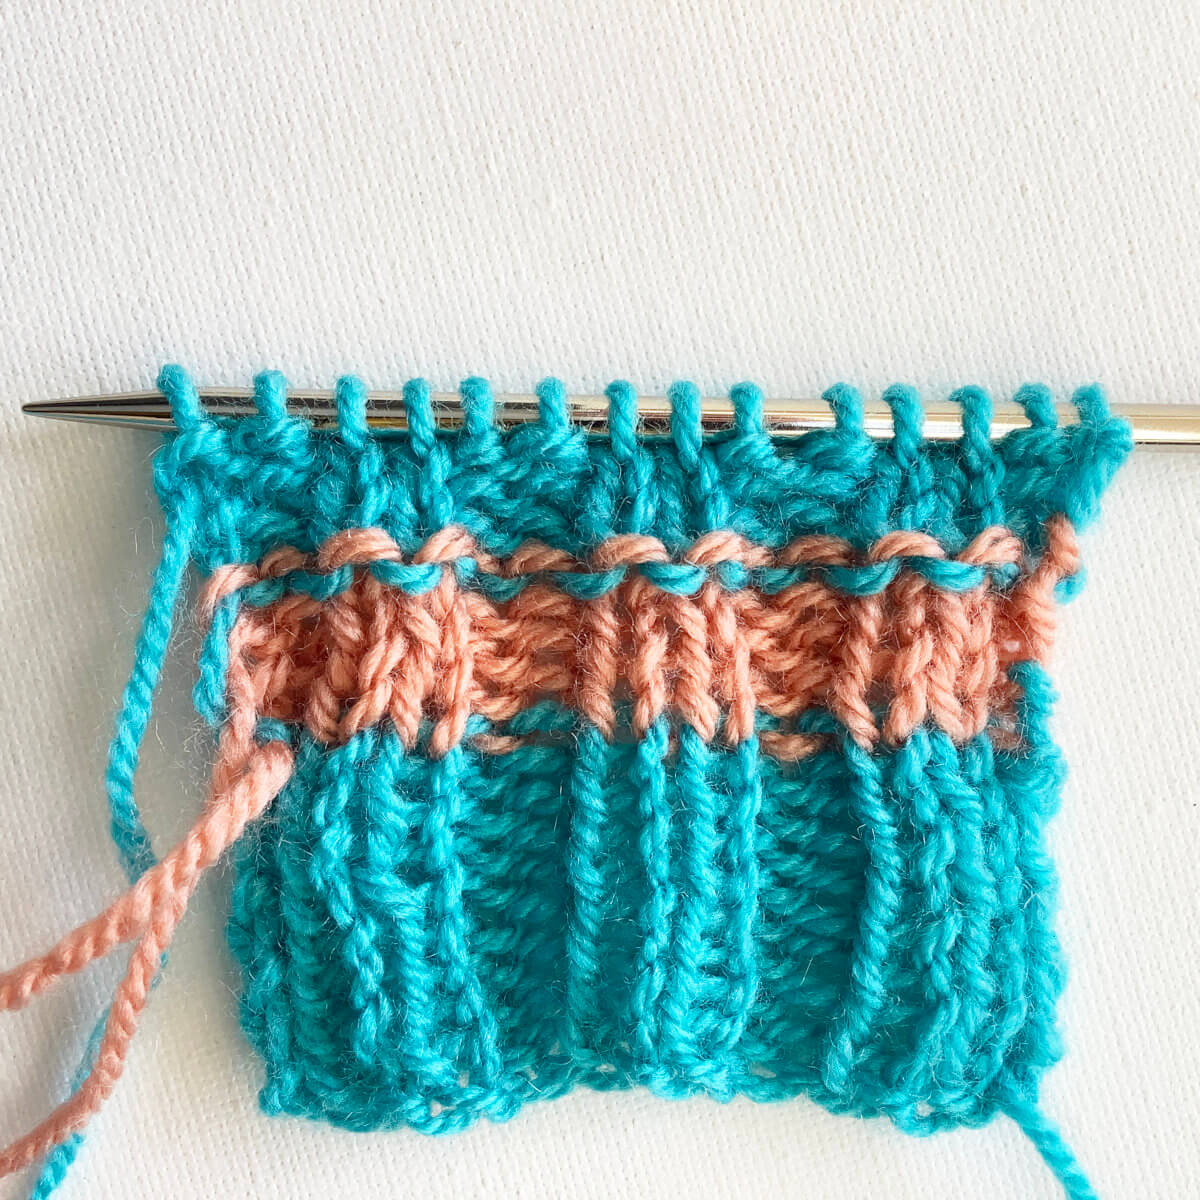
Adding stripes is an easy way to make a project more interesting, without having to work complex patterning. But what if you’re changing colors when already working in some sort of knit-purl patterning, like the 2×2 rib pictured above? When changing the colors, you will see purl bumps in the old color showing through. Personally, I don’t like how it looks, it makes the color change look less sharp than it could. Fortunately, there is an easy solution!
Materials used

Yarn: Paintbox Yarns Simply DK, a good value, good quality 100% acrylic yarn, here in the colors Marine Blue, and Vintage Pink.
Needles: A random circular needle in the 4 mm (US 6) size, with a cable length of 80 cm (32 inches).
Preventing purl bumps when knitting stripes in rib patterning
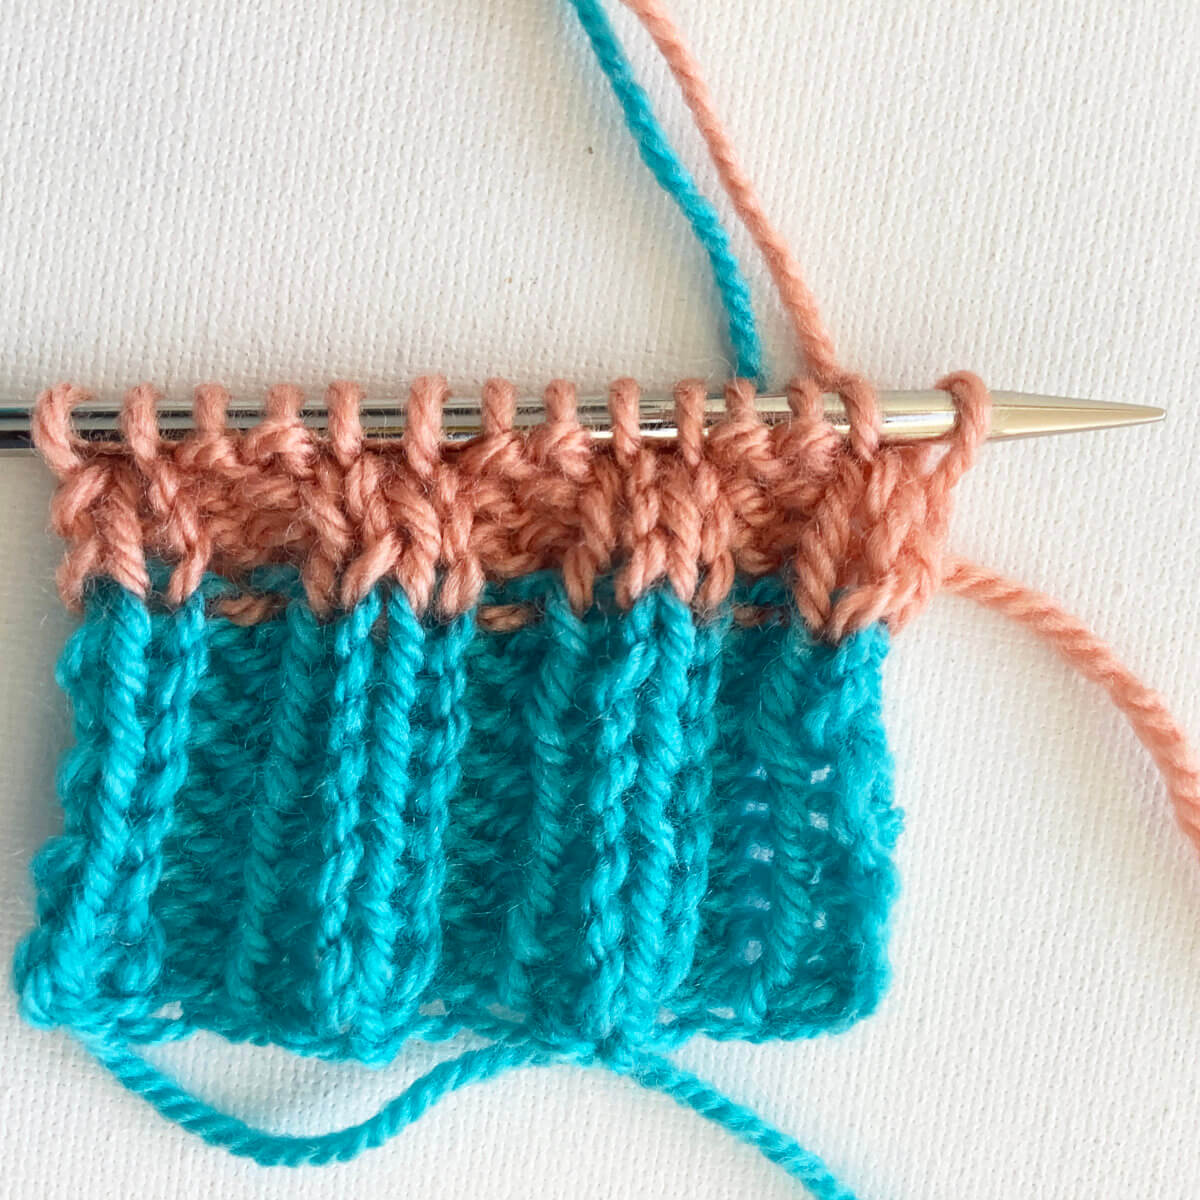
- In the picture below, you can clearly see the purl bumps of the Marine Blue yarn peeking through, above the Vintage Pink.
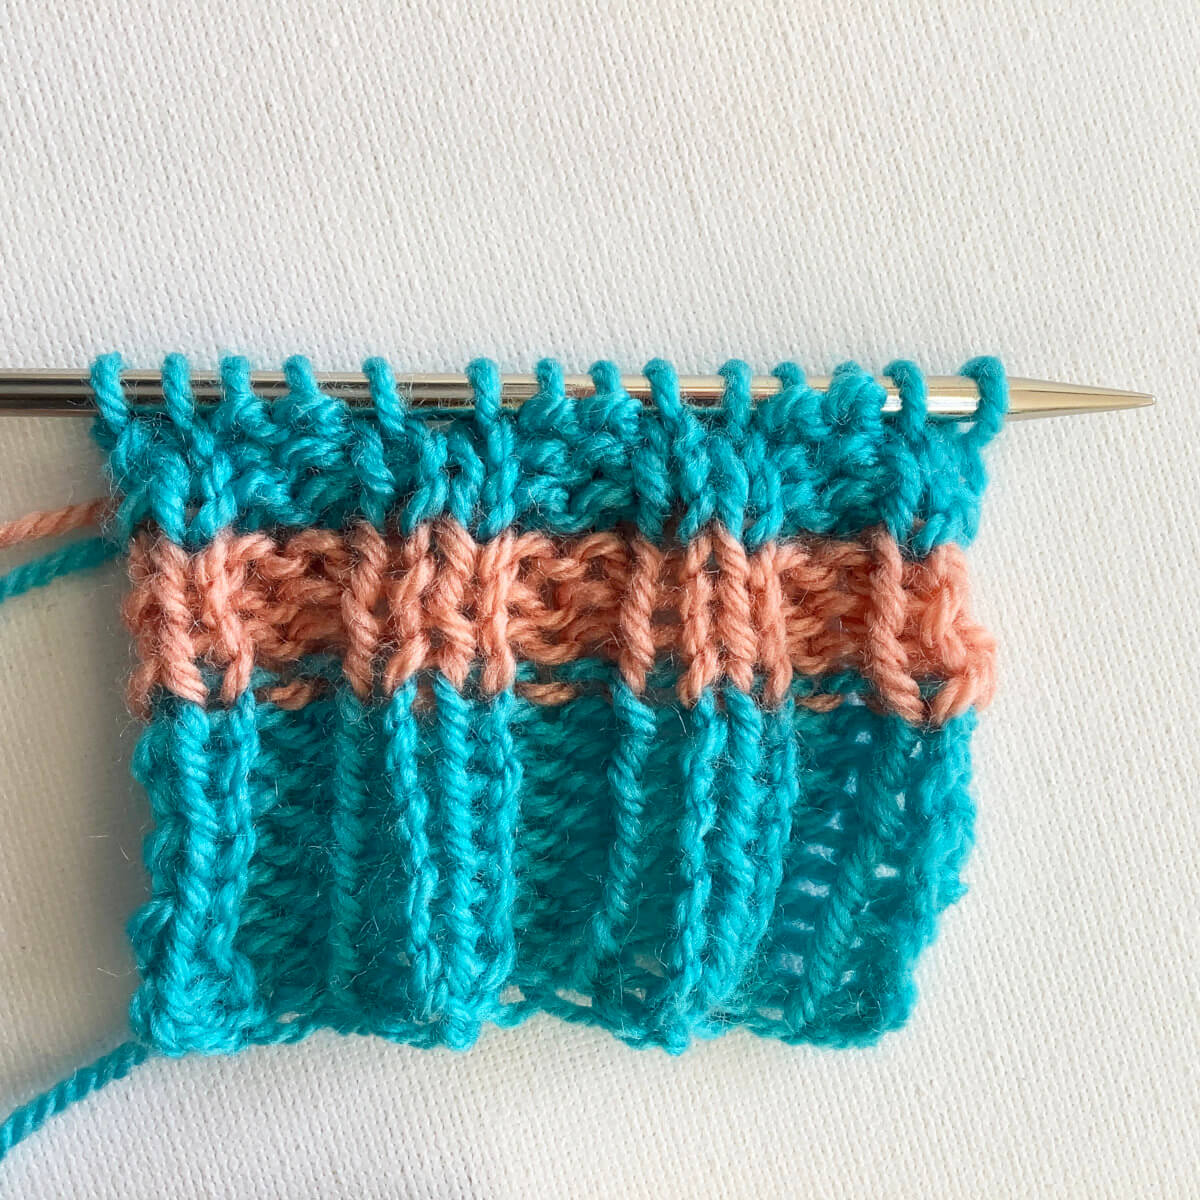
- To remove those pesky purl bumps, simply knit the entire first row or round in the new color!
For all rows or rounds following the color change, just resume the patterning as before. Do you see the difference in the picture below?
- To be complete, I’ll also show you the wrong side of this piece:

Thanks to my Patreon supporters for bringing you this freebie! Creating quality patterns and tutorials is a lot of work and resource-intensive. However, I find it important to give you free content like this tutorial. Thanks to the generous support of my Patreon supporters, I can make it happen. Thank you, patrons! Click here to join, or click here to read more about La Visch Designs on Patreon.


