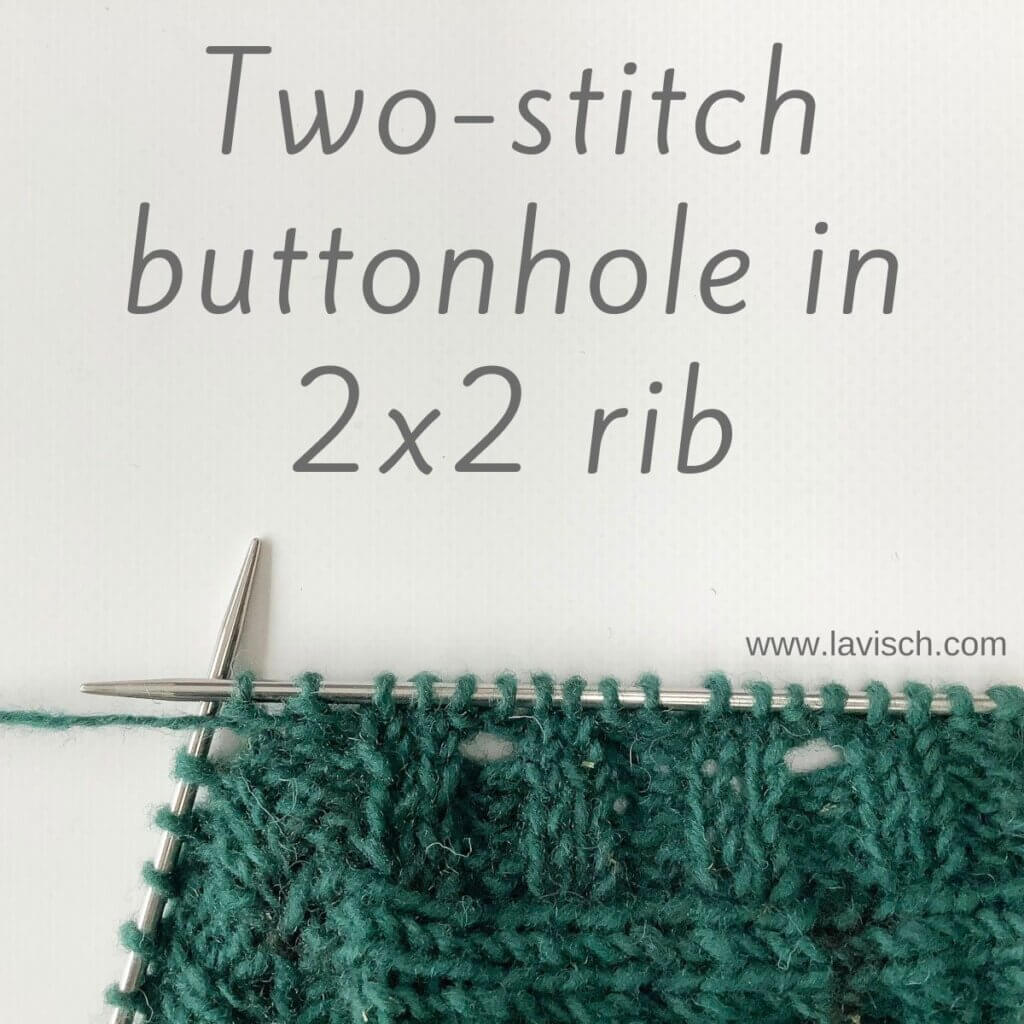
Knitting neat buttonholes can be a challenge, especially if you need the bigger sized ones. They often tend to sag or stretch at the edges. Fortunately, I recently came across this lovely technique to make a two-stitch buttonhole, right in the purl portion of (k2, p2) rib patterning. This method may seem a tad involved, but trust me, the result is really worth it!
In this tutorial, I’ll show you how to work buttonholes in an 8 st repeat, with a buttonhole over the 2 stitches in every other purl section of the rib patterning.
Materials used
Yarn: Beiroa, an aran weight yarn from Retrosaria Pomar; a 100% Portuguese wool yarn, manufactured in Portugal, exclusively from the wool of free grazing Bordaleira Serra da Estrela sheep.
Knitting needles: A pair of Addi circular needles in size 4.5 mm (US7).
Knitting two-stitch buttonholes in 2×2 rib, step by step
This technique is worked over various rows. In a pattern (like the one for the cardigan-in-progress used in this tutorial), you can expect instructions like these:
Buttonhole row 1 (RS): *K1, kfb, (p1, psso) twice, sl st back to left needle, k2tog, k1, p2; rep from *.
Buttonhole row 2 (WS): *K2, p2, you have then reached the first bound off st, m1bl, p2; rep from *.
Buttonhole row 3 (RS): *K2, m1rp, p1, k2, p2; rep from *.
Let’s get started!
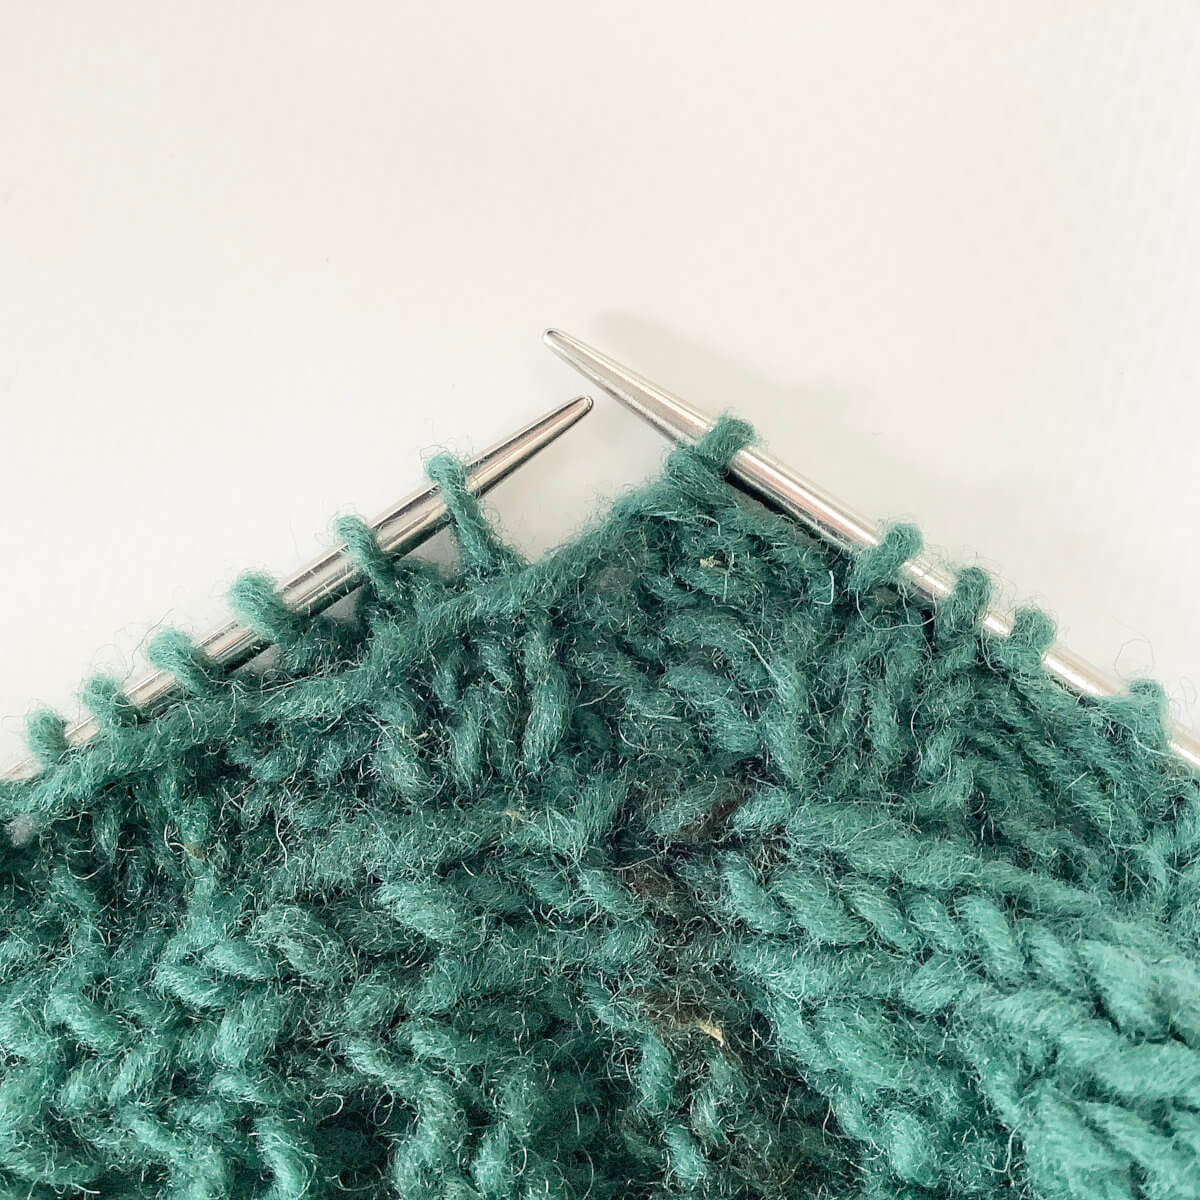
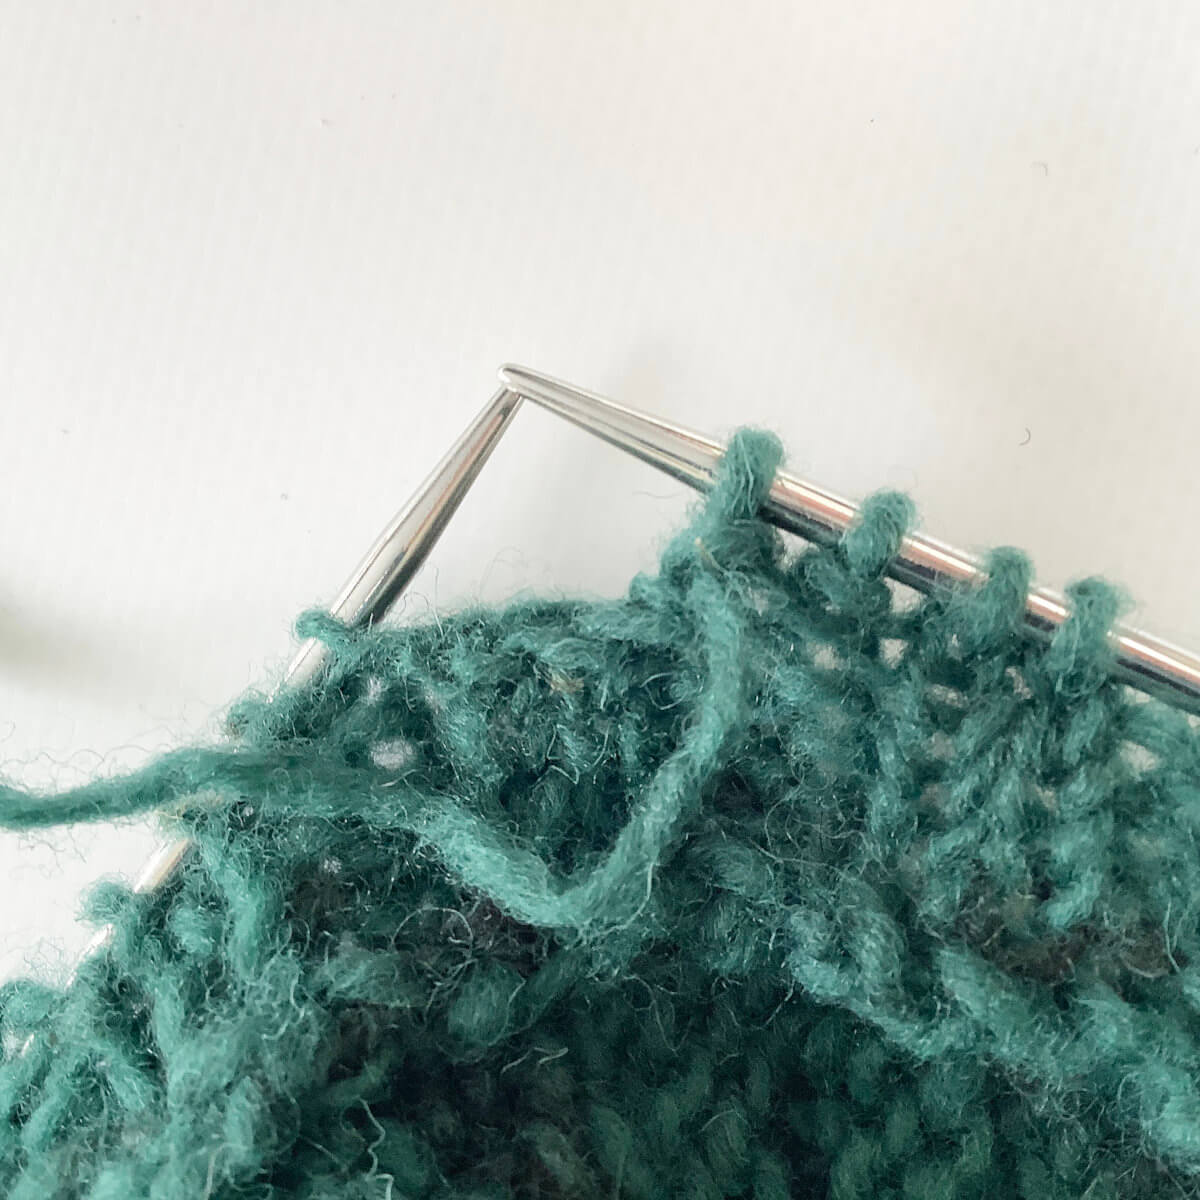
- First, work to the 2 knit stitches just before the purl stitches where you want to place your buttonhole.
- Knit 1 stitch.
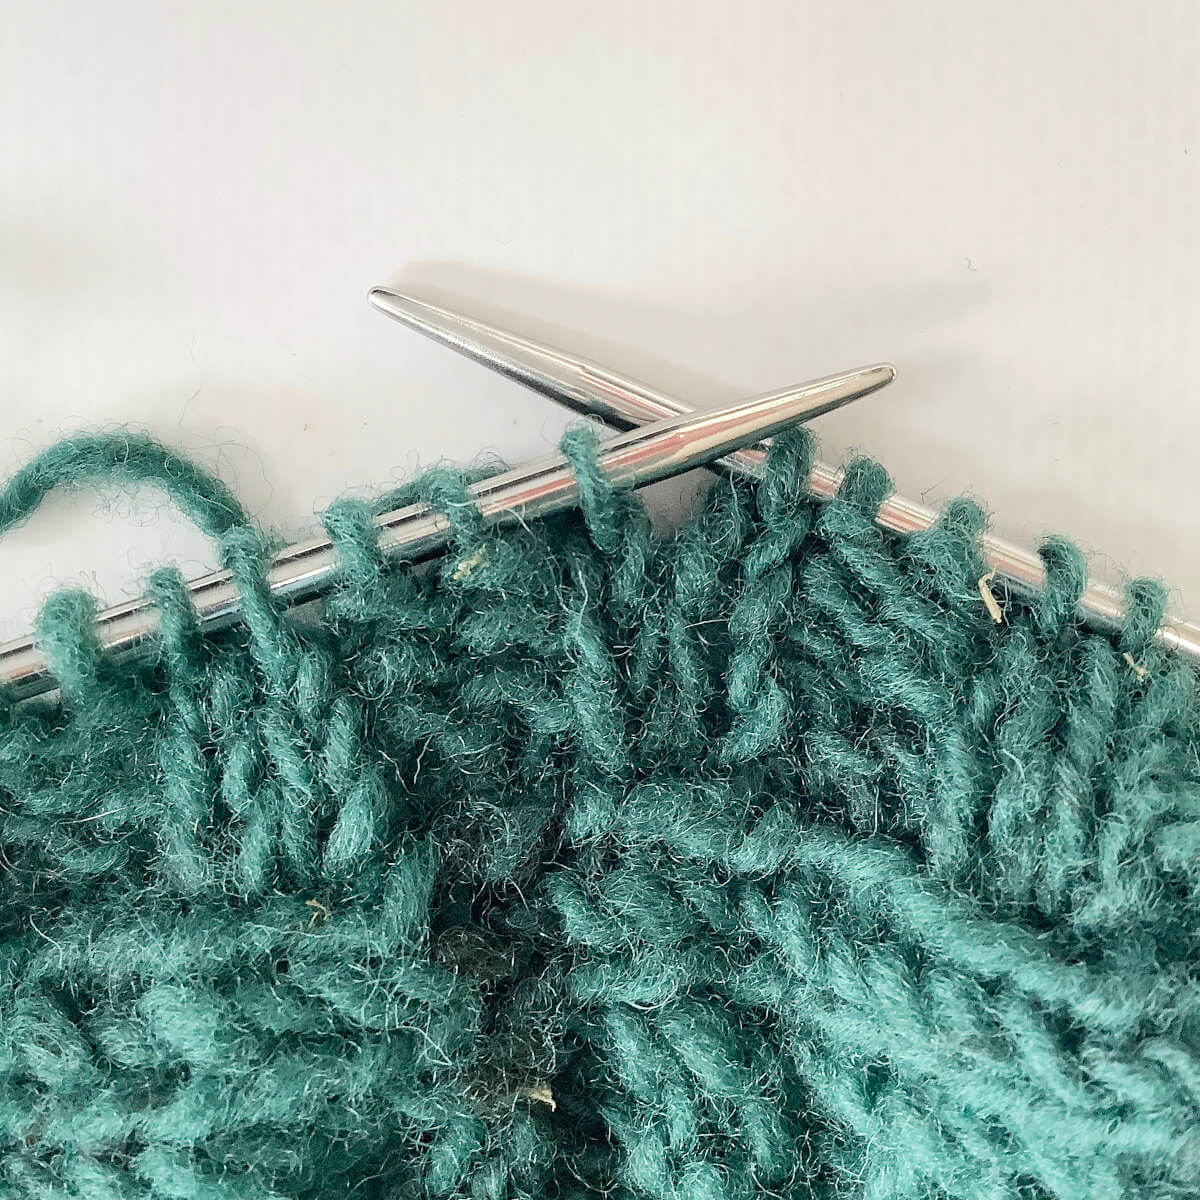
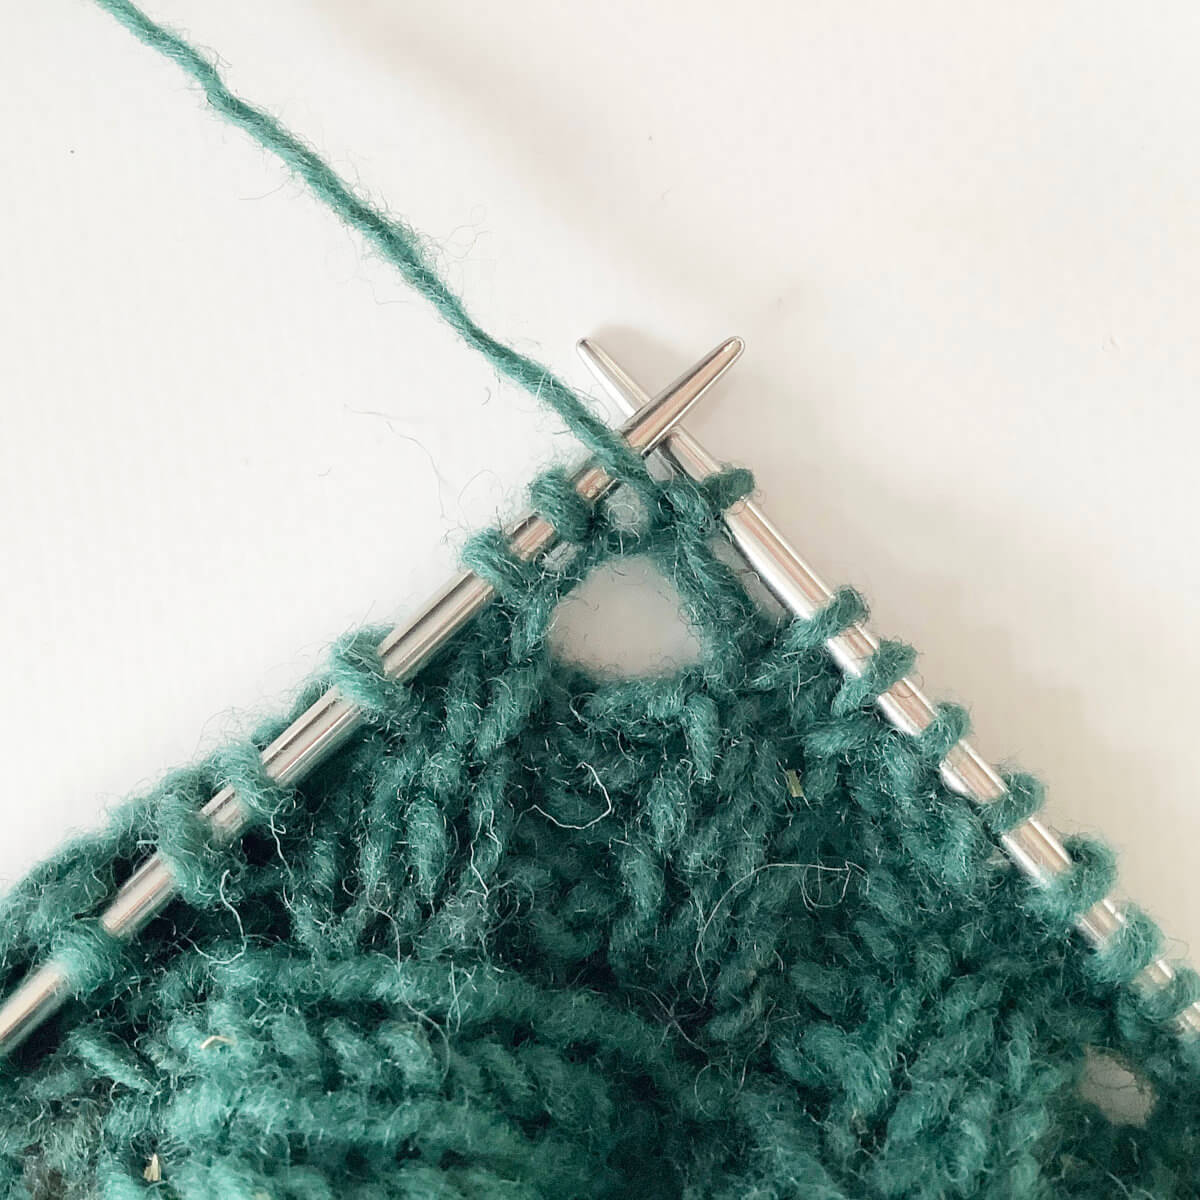
- In this step, work a kfb increase in the next stitch.

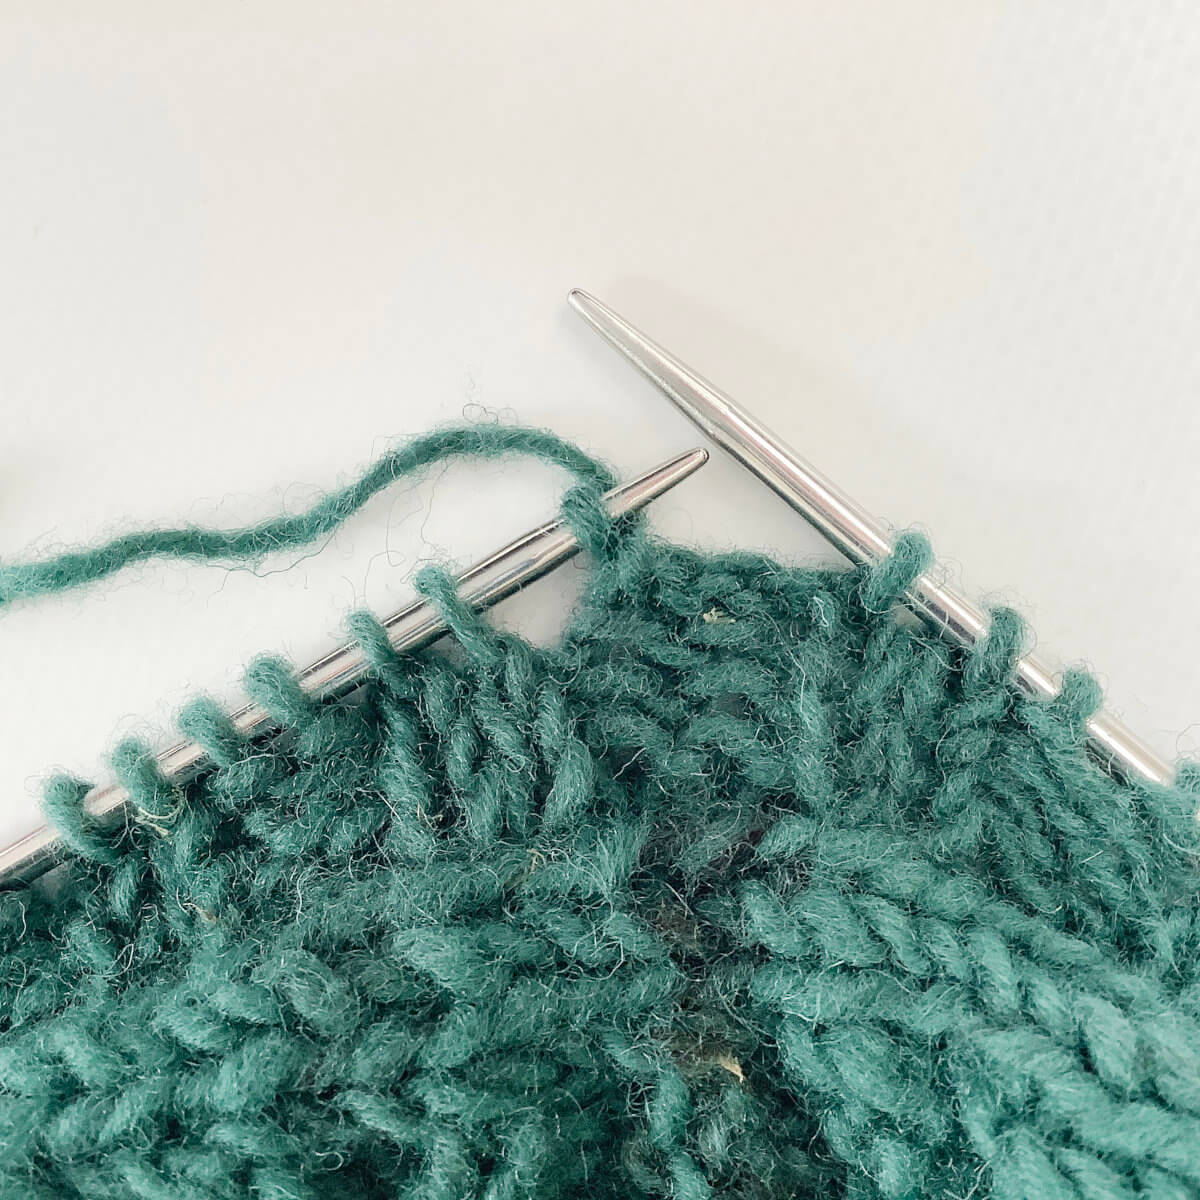
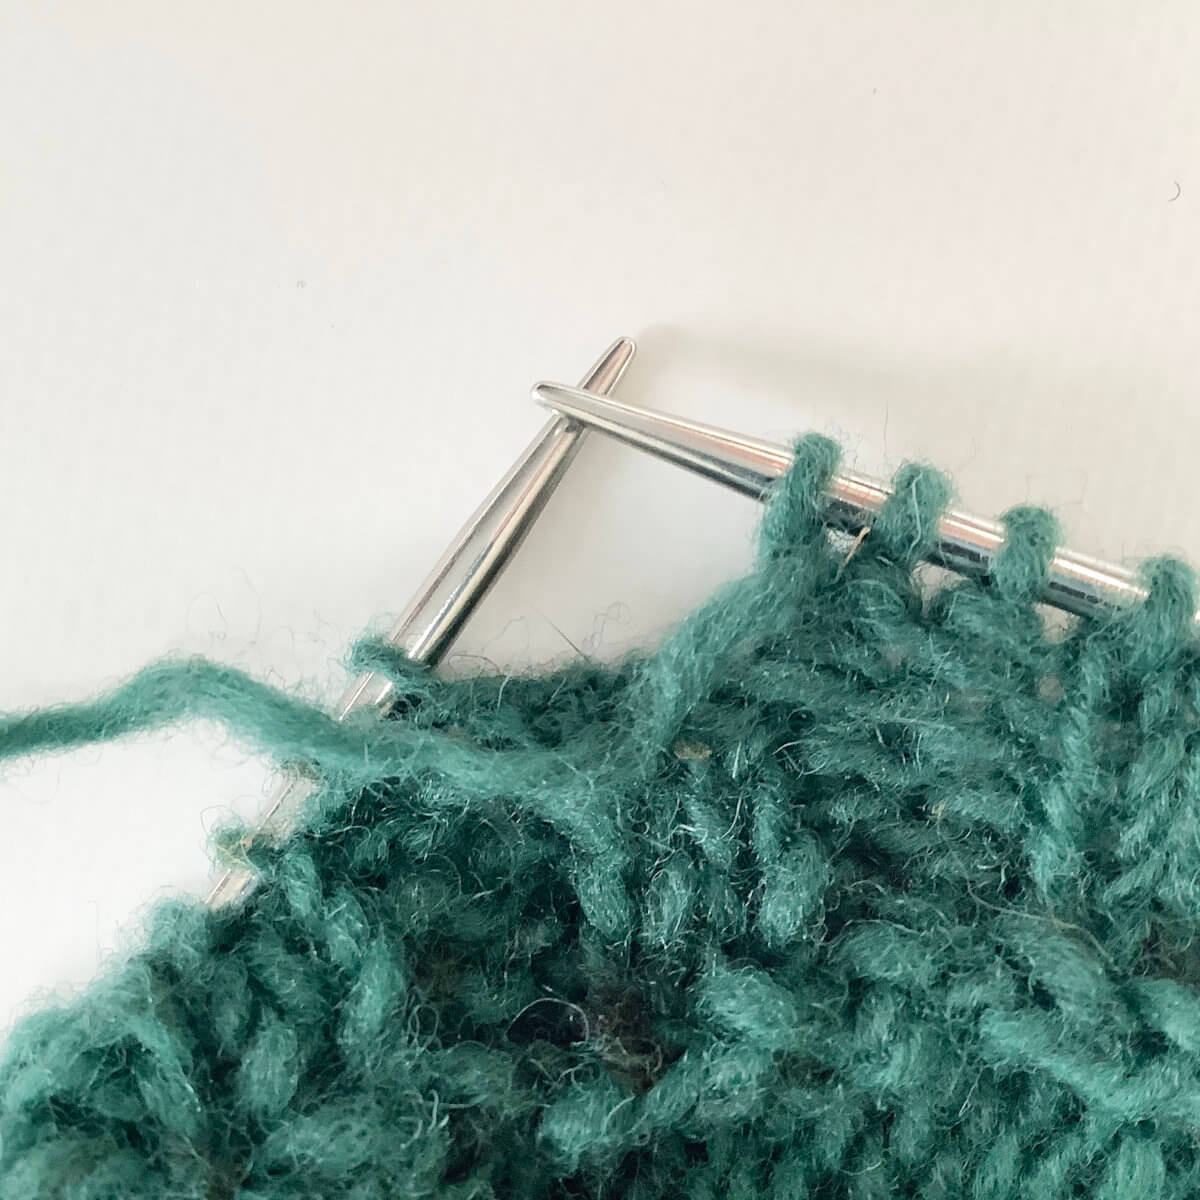
- Now purl the next stitch on the needle….
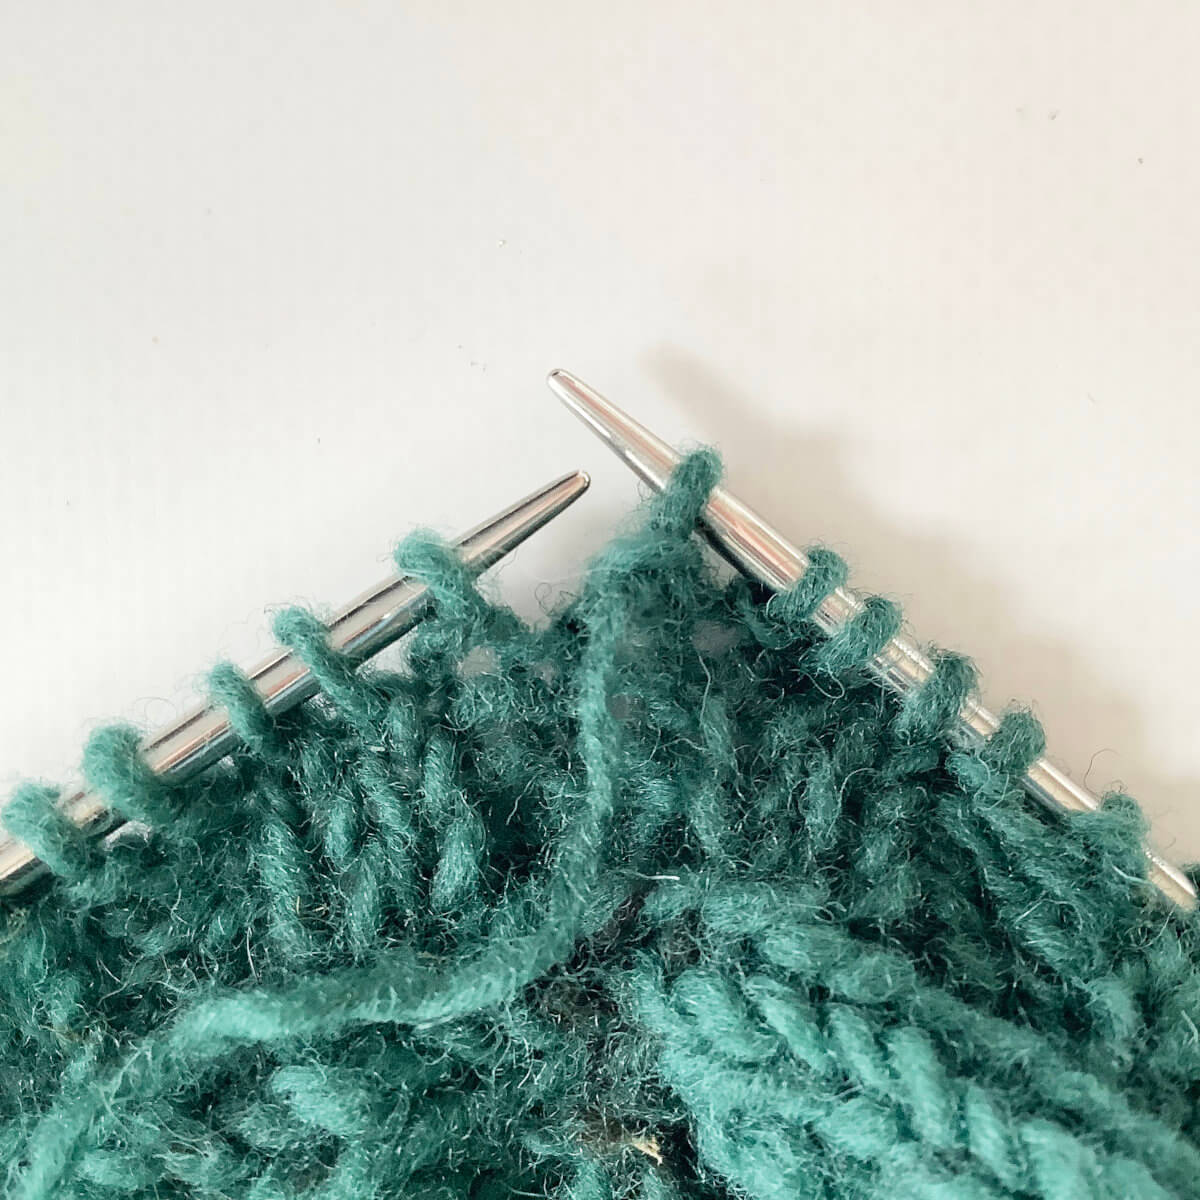
- … insert the tip of your left-hand needle into the second stitch on the right-hand needle ….
- … and pass it over the purl stitch.
- Repeat steps 4 to 6 once.
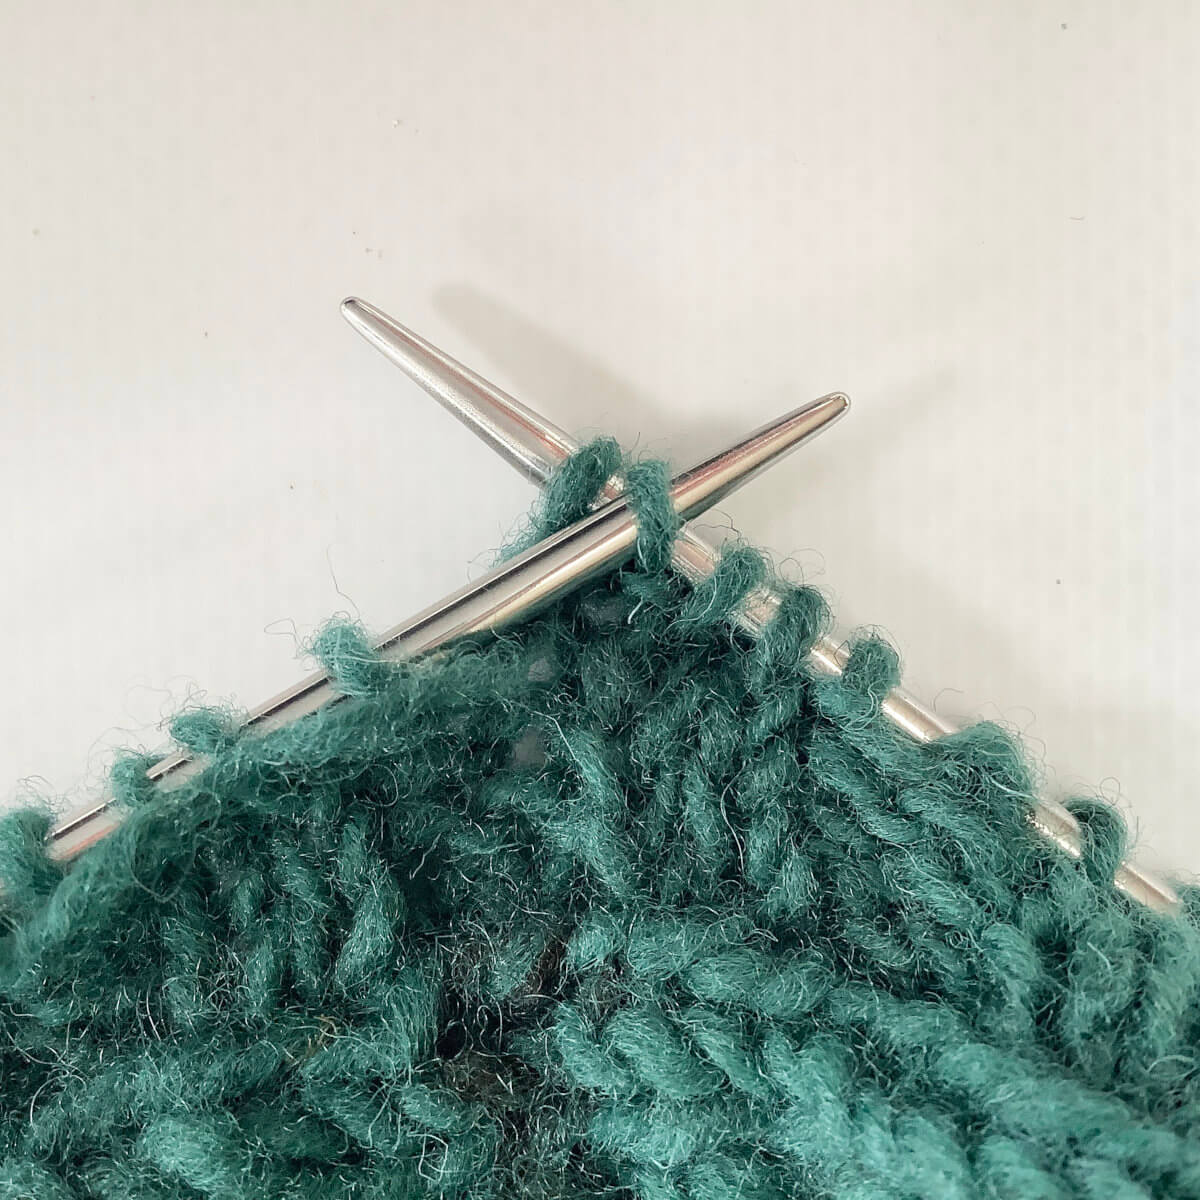
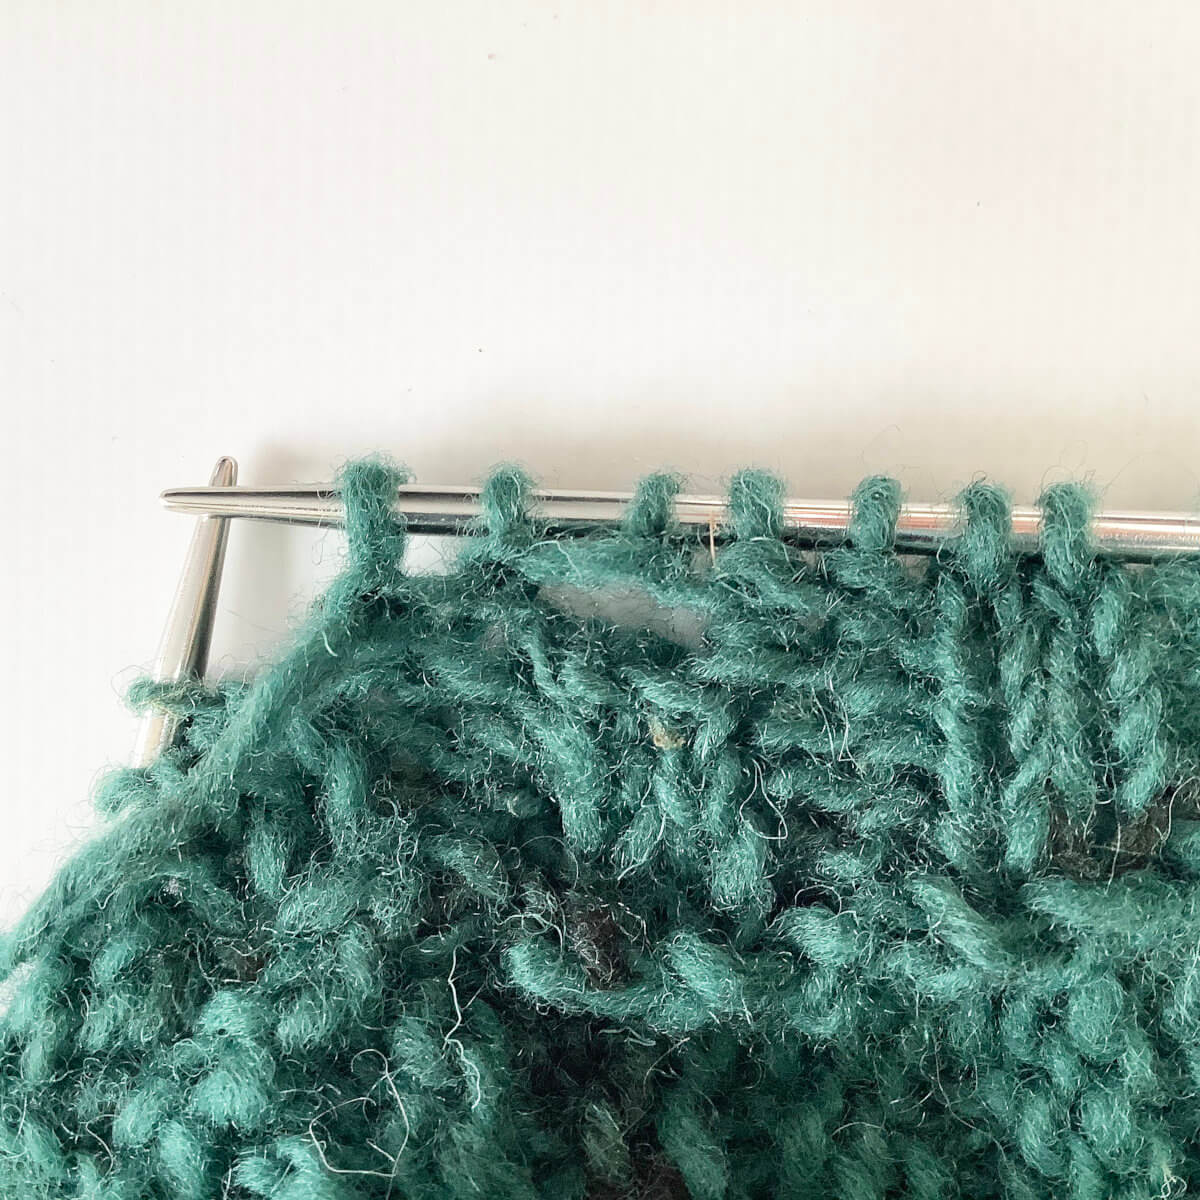
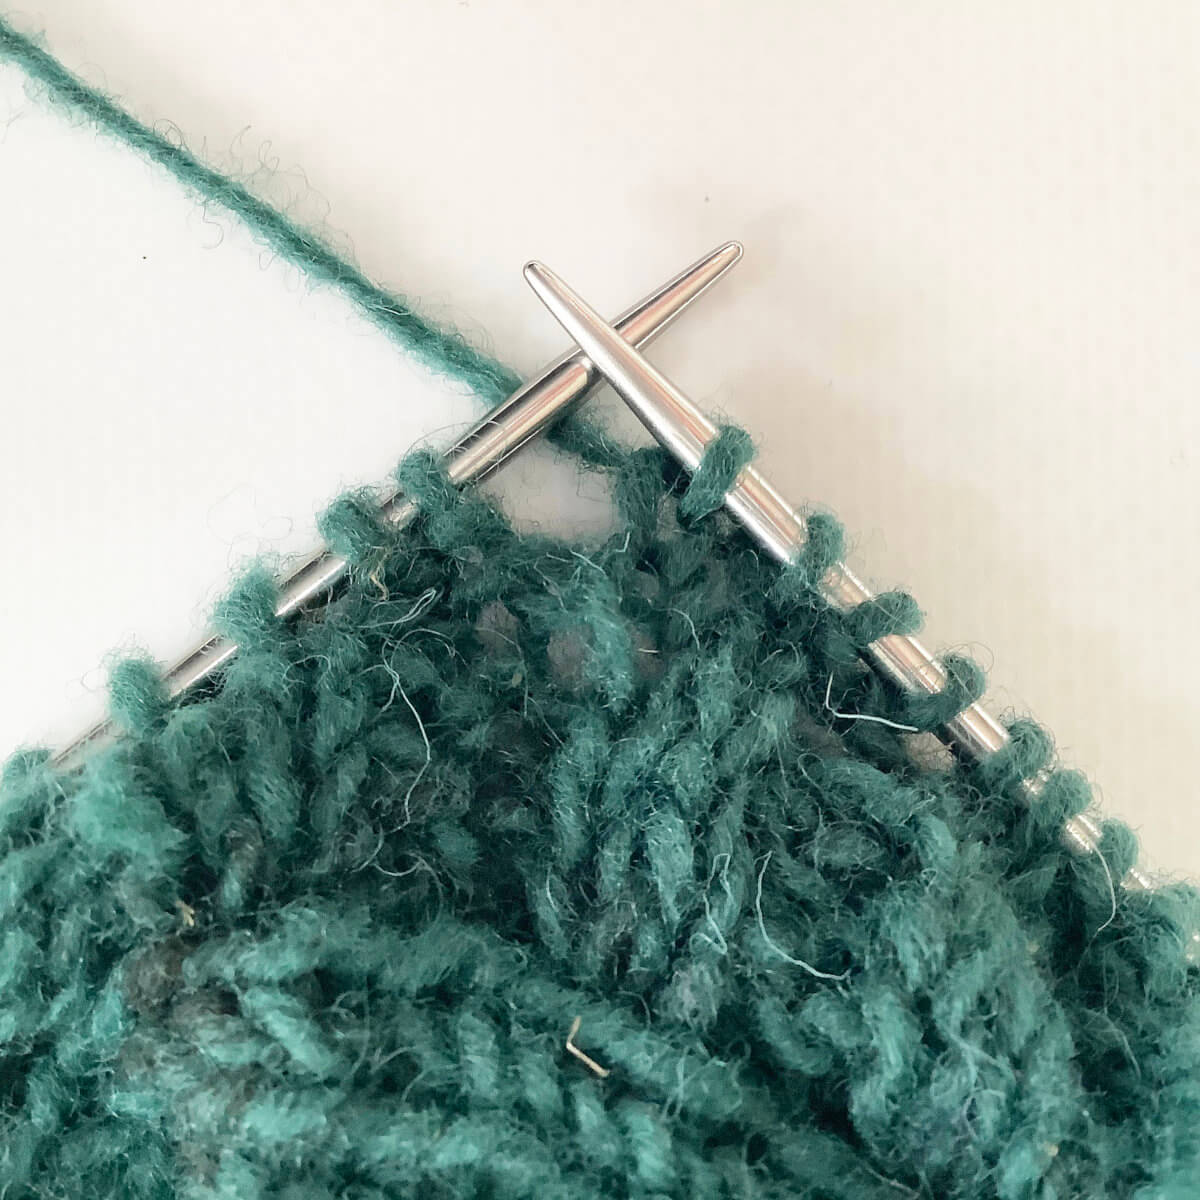
- Next, slide the first stitch that’s on the right-hand needle back to your left-hand needle.
- Next, knit the first 2 stitches on the left-hand needle together (k2tog), decrease the extra stitch away.
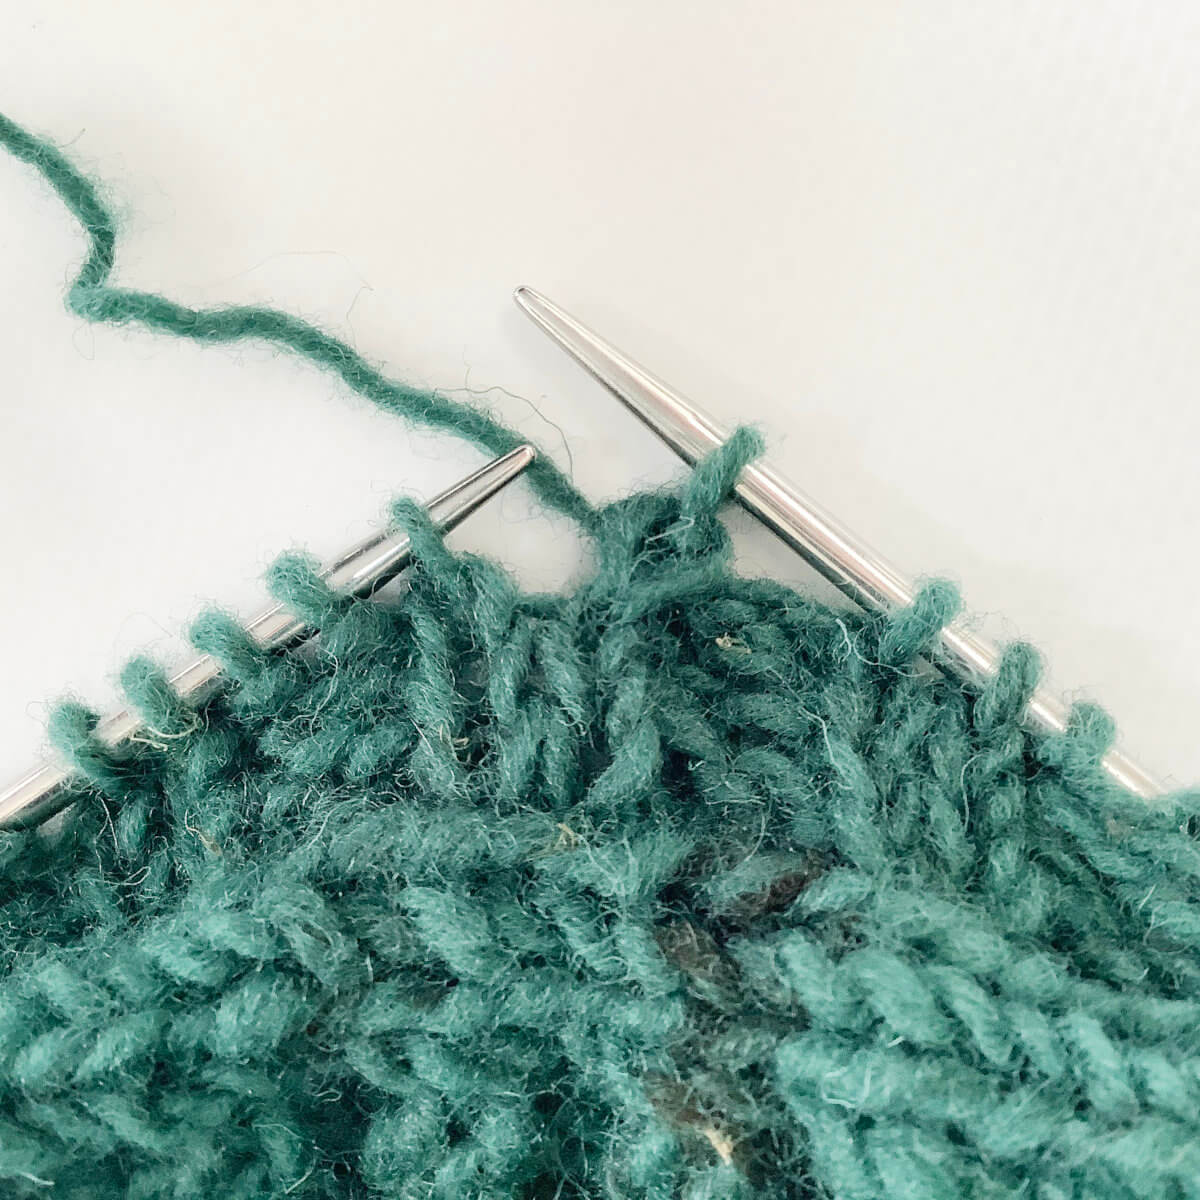
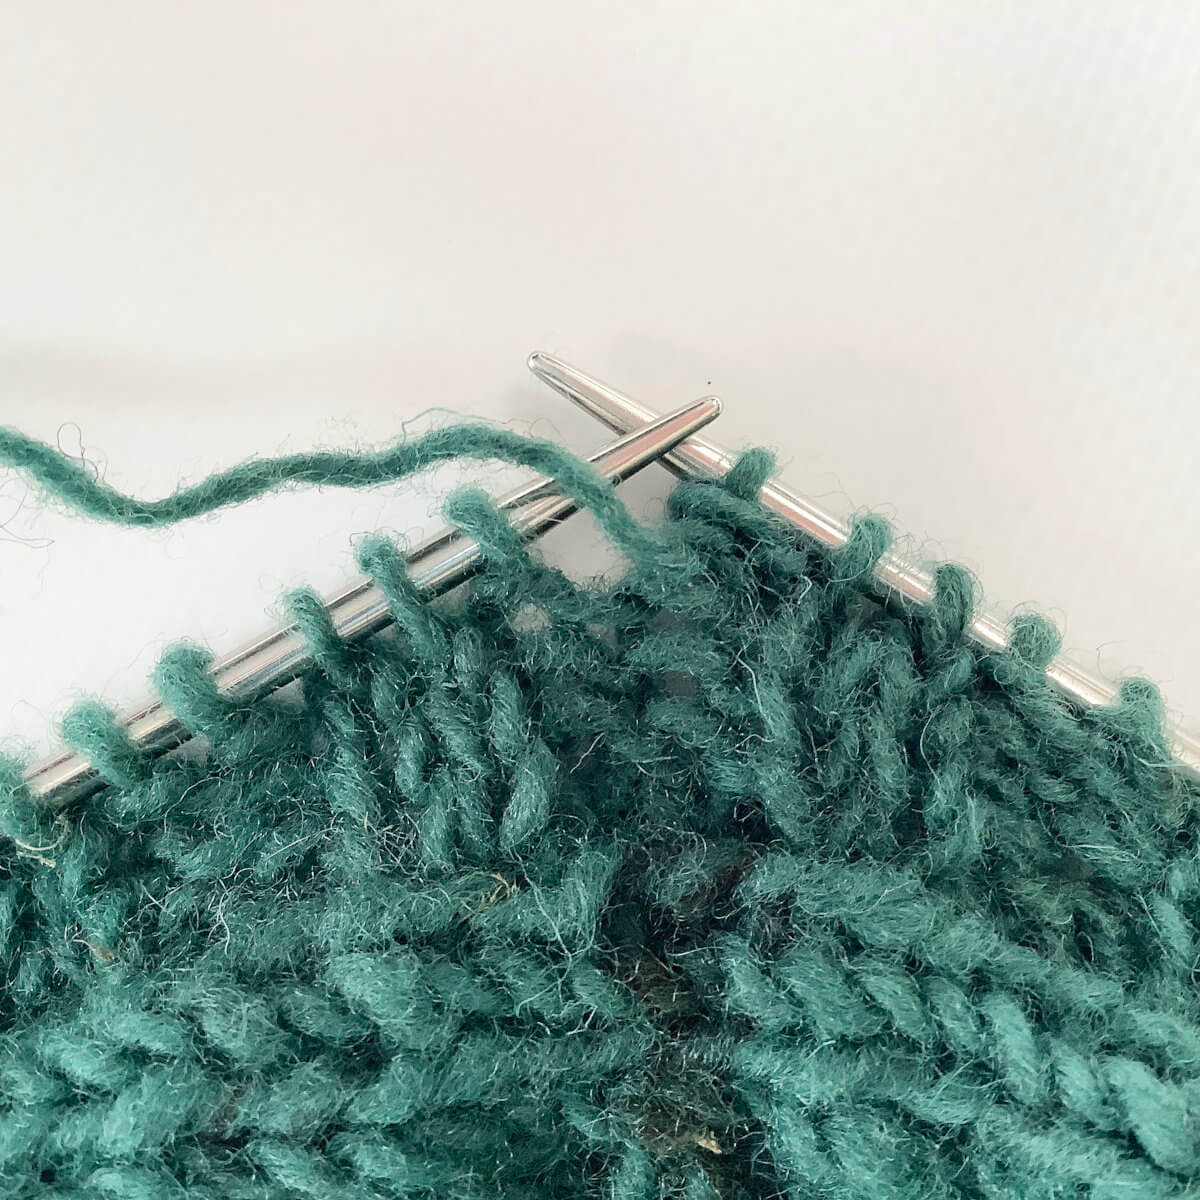
- To finish the last few stitches of the repeat, work k1, p2 over the 3 next stitches.
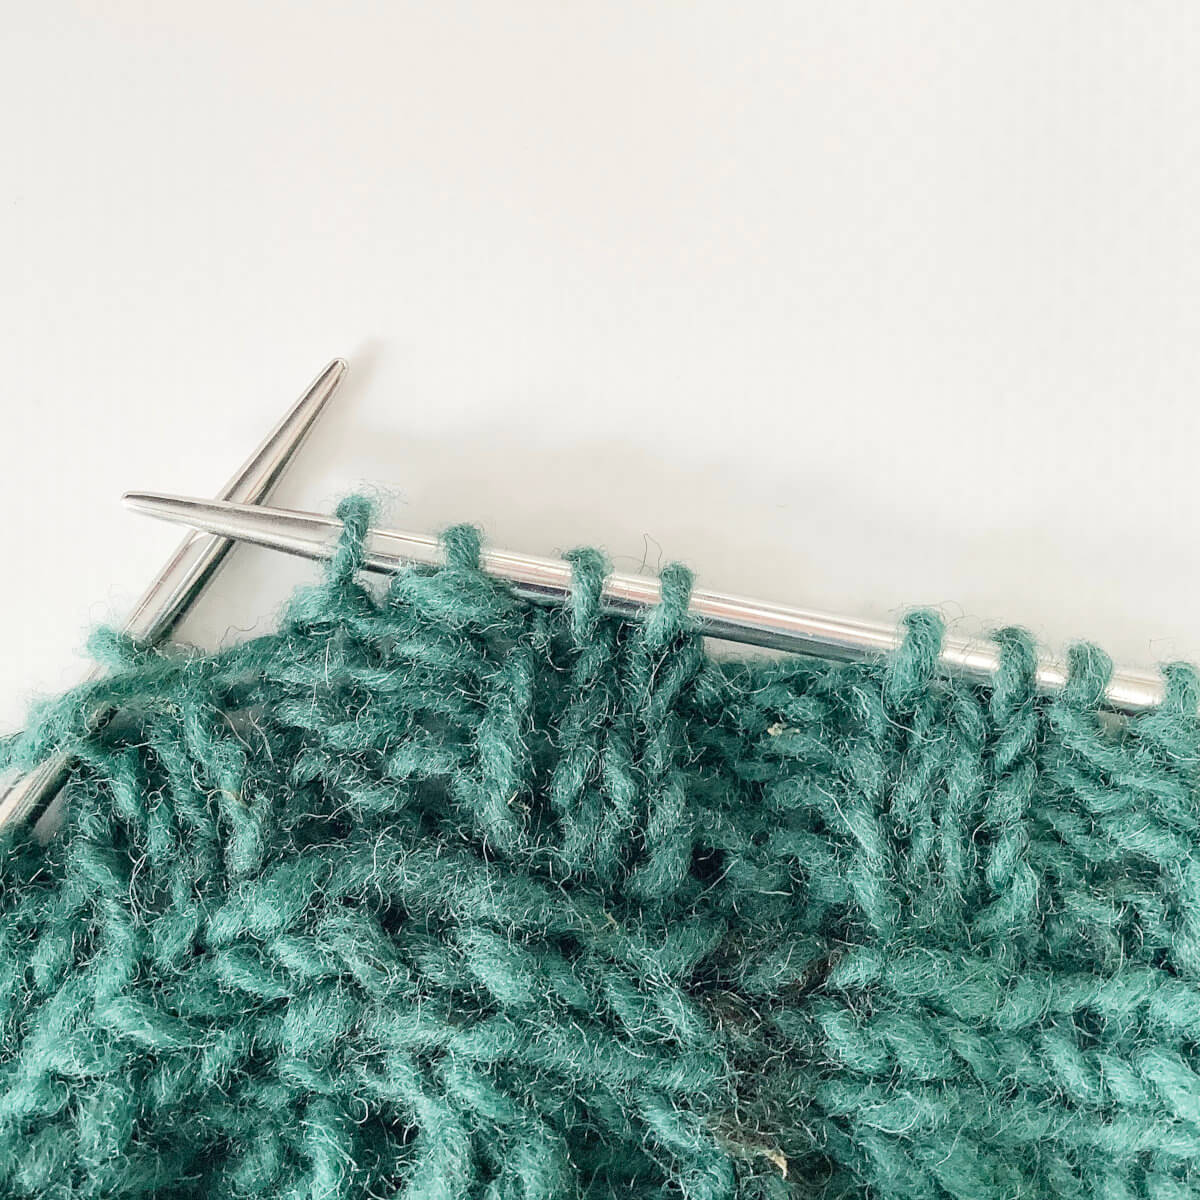
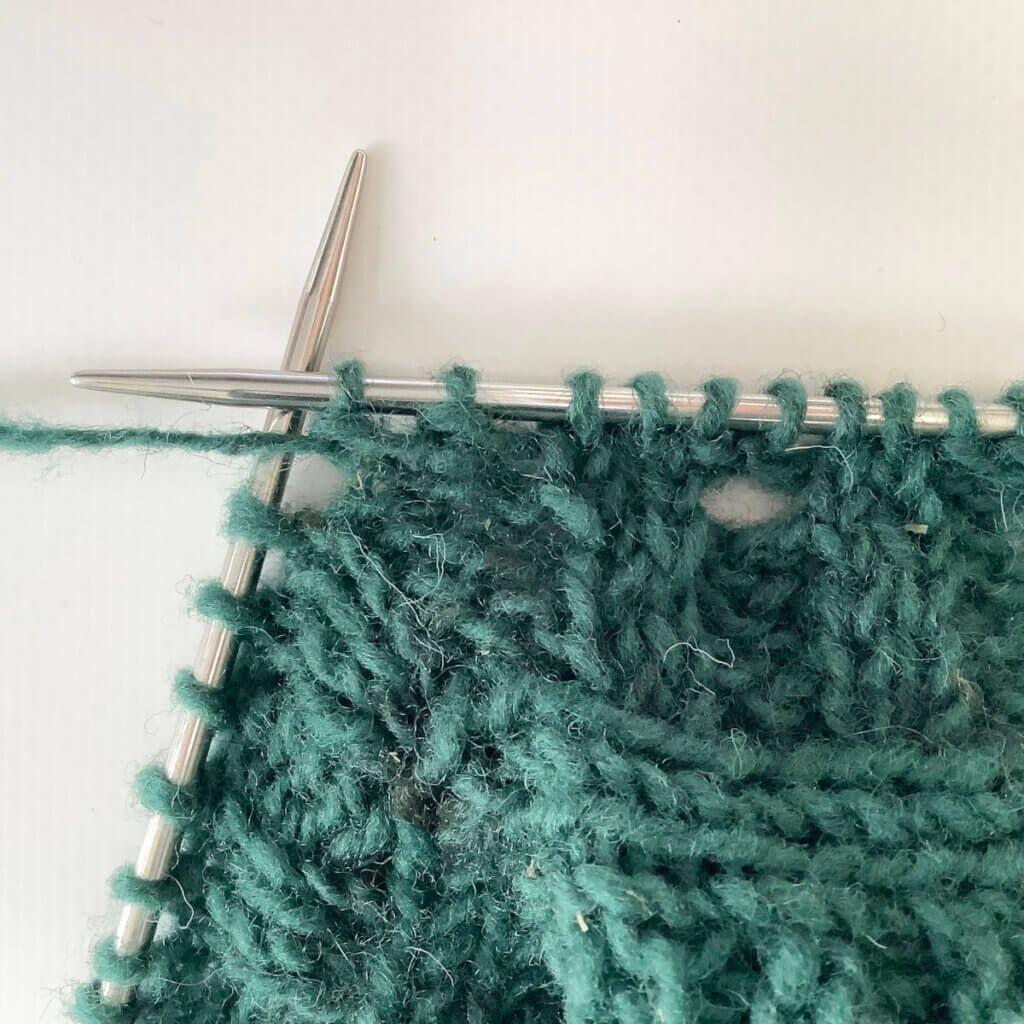
Now you can repeat these steps until you have the correct number of buttonholes, and then continue with the button band until you’ve reached the end of the row. It can be useful to use stitch markers around the buttonhole repeats, to make it easier to find your place on the next row.
- Buttonhole row 2: Work the button band on the WS until you’ve reached your marker. Then work k2, p2 over the next 4 stitches.
You have then reached the first bound off st.
- Now work a m1bl increase.
- Next, purl 2 stitches to finish the buttonhole repeat on the WS.
Again, continue and repeat as needed to the end of the row.
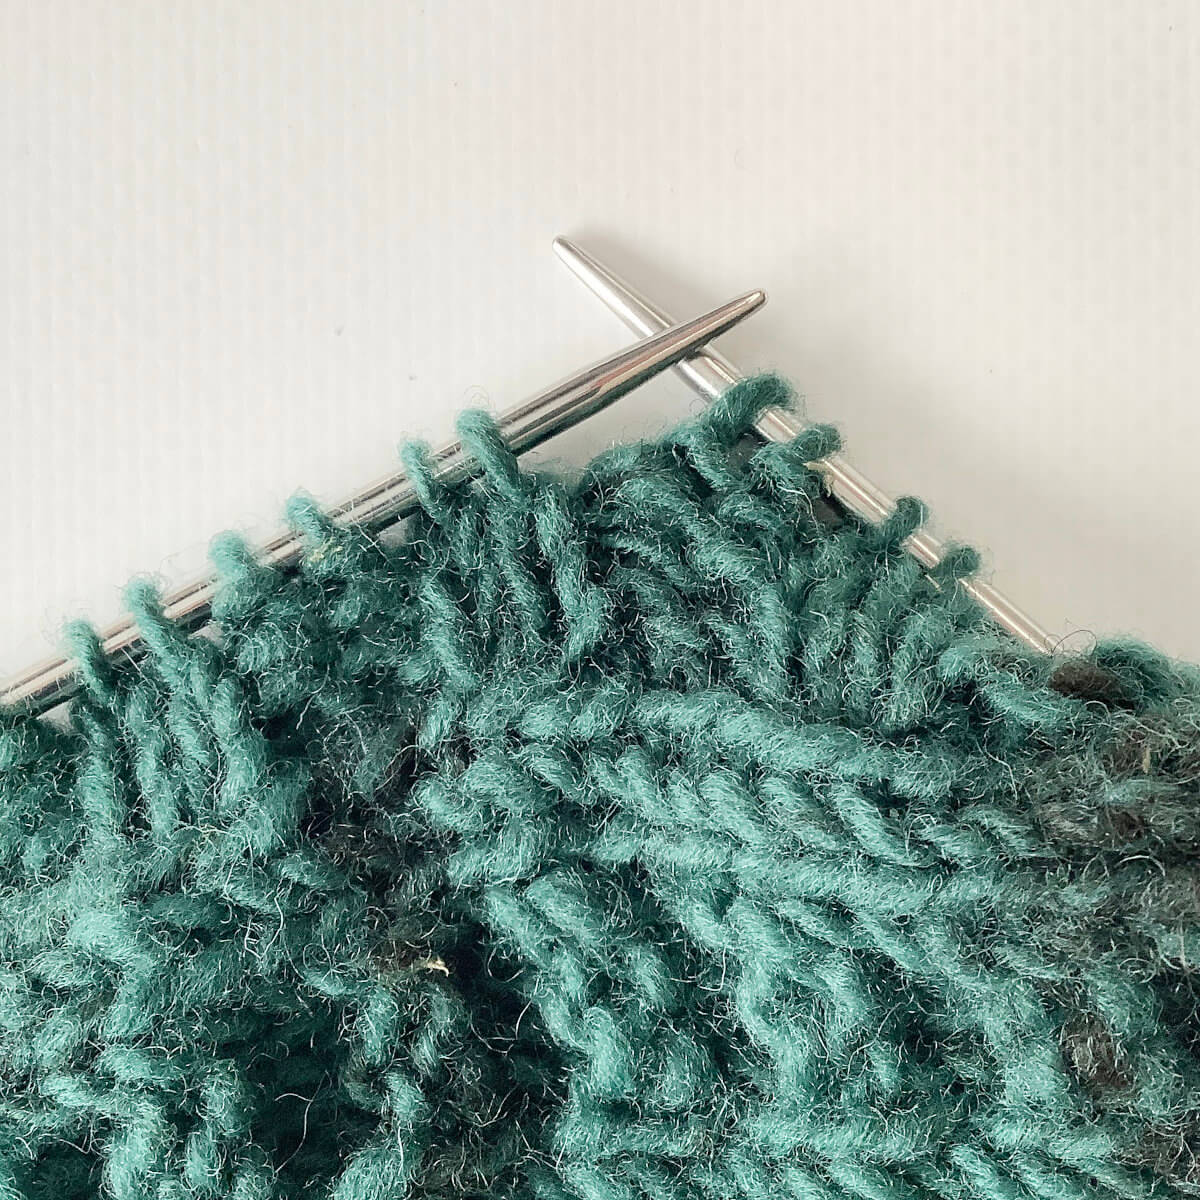
- Buttonhole row 3: Work to the start of the buttonhole repeat and work k2 over the first 2 stitches.
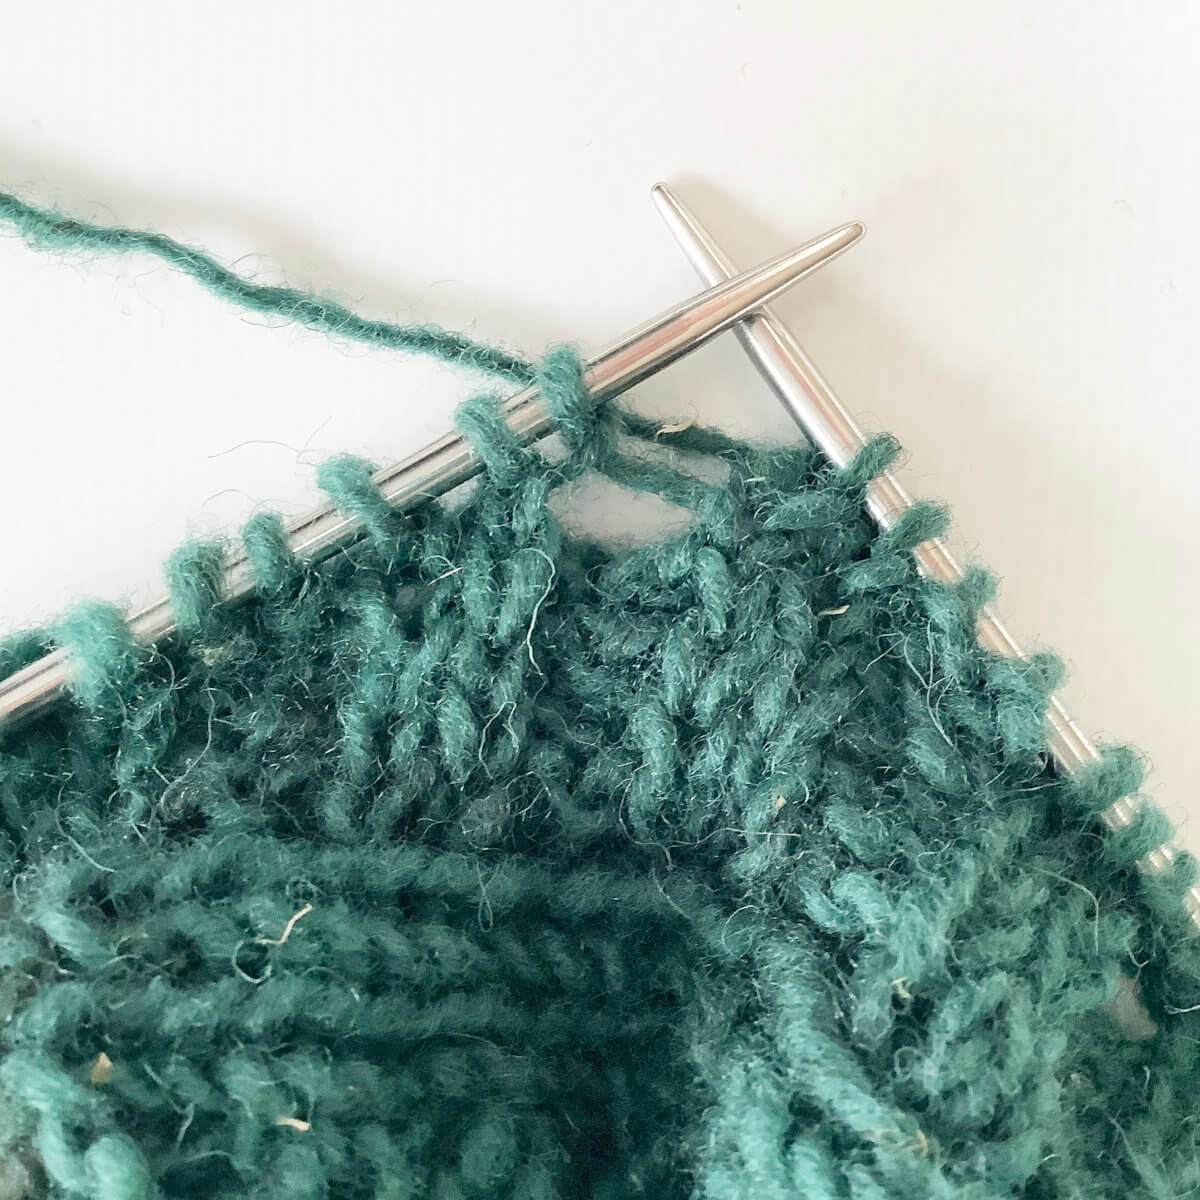
- As you can see in the result of the last step, we’ve now reached the newly cast-on stitch. To make sure the buttonhole edge is nice and tight, we’ve not cast on 2. But, of course, we do need two stitches in theta purl section. So, to remedy that, we’ll be using the extra slack in the loose thread of yarn to make that extra stitch. To do so, work a m1pr: a right leaning m1 stitch, worked purl-wise.
- To finish the buttonhole, work a p1 in next stitch, followed by k2.
The result
Below, you can see the result of working this two-stitch buttonhole. Really neat, right?!

Thanks to my Patreon supporters for bringing you this freebie! Creating quality patterns and tutorials is a lot of work and resource-intensive. However, I find it important to give you free content like this tutorial. Thanks to the generous support of my Patreon supporters, I can make it happen. Thank you, patrons! Click here to join, or click here to read more about La Visch Designs on Patreon.
")


