As you know, there are many options to work increases in knitting. Take for example the various m1 increases. A disadvantage of the regular m1 increase is, however, that it’s worked into the horizontal strand between two stitches in the row below. This causes the knitting to become tighter when they’re stacked over multiples rows. Especially when working in stripes or garter stitch, this can cause the lines to become distorted.
And that is where the m1bl increase comes in. The m1bl increase is also known as “Make 1 with Backward Loop” or the “Backward loop increase”. And when worked correctly it’s almost invisible! This is due to the fact that it doesn’t use yarn from the row below, but is given its own amount to be formed. Also, the m1bl increase can be used to either increase mid-row or cast-on stitches at the end of the row. The m1bl is basically the same as the thumb method of casting on, also known as the “single cast-on”, “e-wrap cast-on” or the “backward loop cast-on”.
Directional increase
The m1bl increase is a directional increase. This means there is both a left-leaning and a right-leaning version, which mirror each other when used together. This can be very useful in projects where paired increased are needed and it may be visually pleasing to be symmetrical. Think for example of both sides of a top-down triangle shawls spine, or bust shaping in a garment.
Sometimes there is no indication of a direction given in the pattern, usually denoted by plain “m1bl”. If that is the case, you can choose which version you like best, or easiest to make. Often I don’t bother using both versions of the m1bl increase. I mean, it’s so invisible on its own!
In my patterns you can find the following description for the m1bl increase:
Make 1 with a backward loop (m1bl): With your thumb, make a backward loop with the working yarn over the right-hand needle and pull to tighten.
Below you can find how this increase is worked.
Knitting the left-leaning m1bl increase step by step
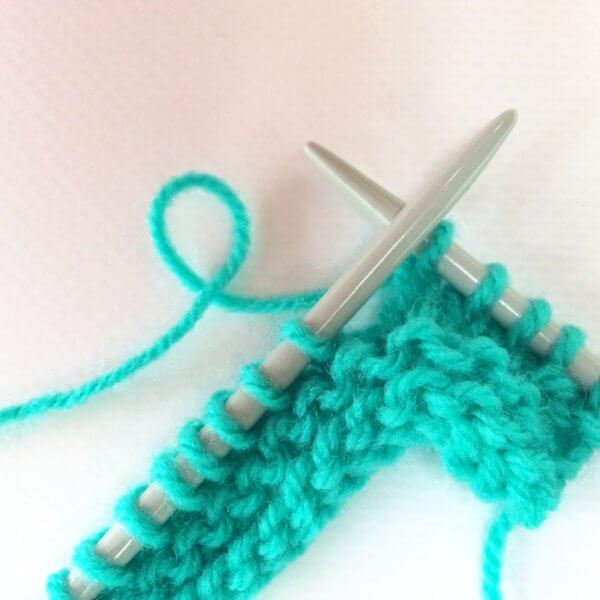
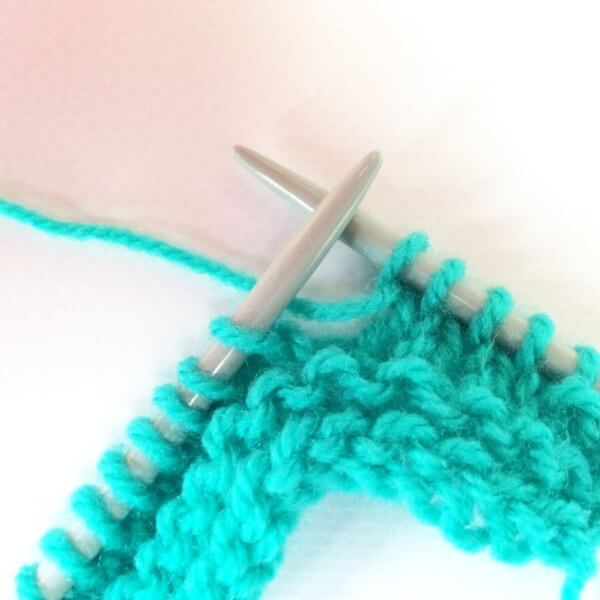
1. Take your working yarn and loop it as shown in the picture below, with the yarn going to the project in front.
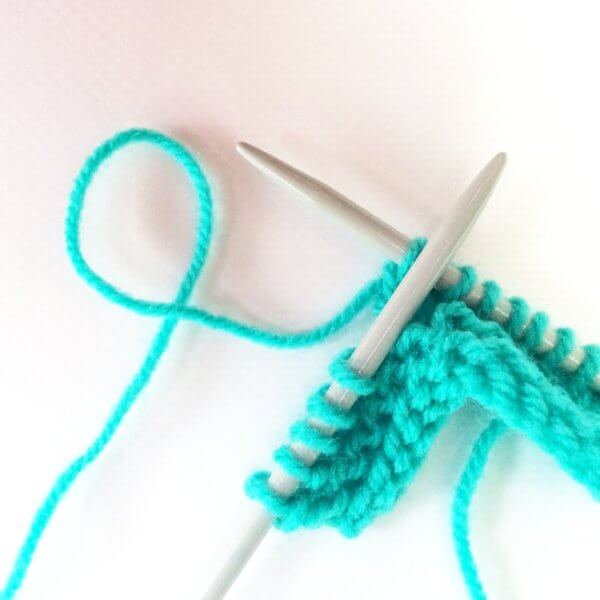
2. Next, insert the tip of the right needle from back to front through the loop.
3. Pull the yarn snugly around the needle.
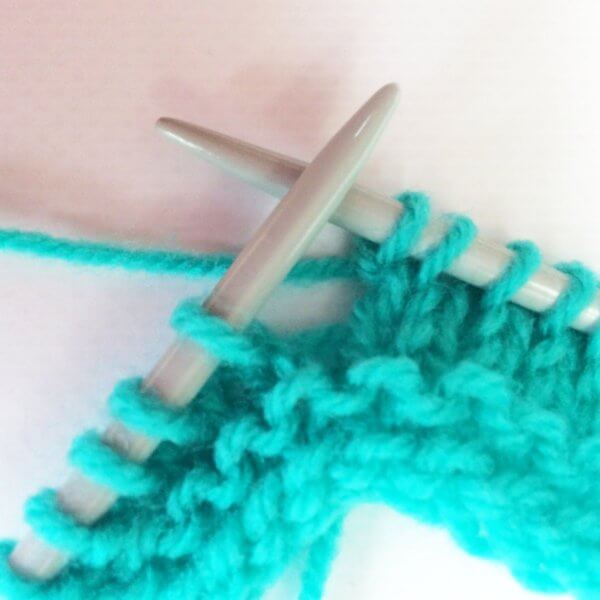
4. On next row when you come to the loop added, purl (as shown here for stockinette) or knit (for garter stitch) as usual.
Knitting the right-leaning m1bl increase step by step
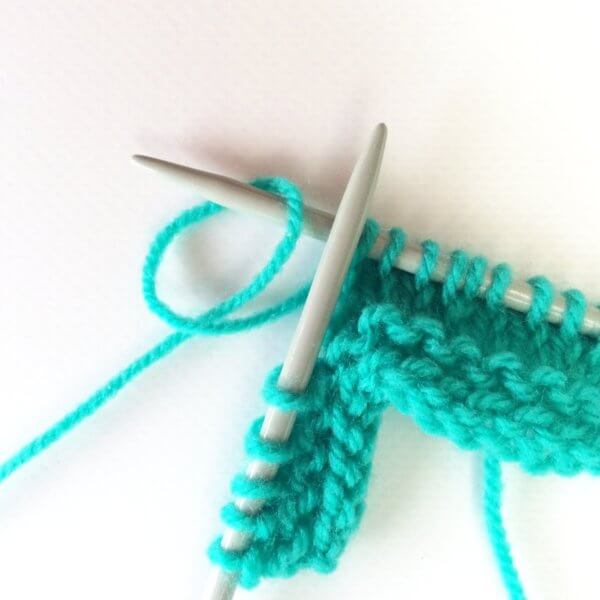
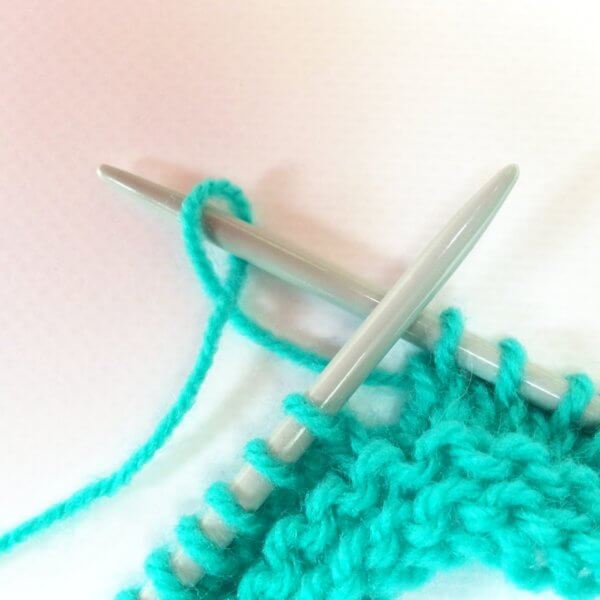
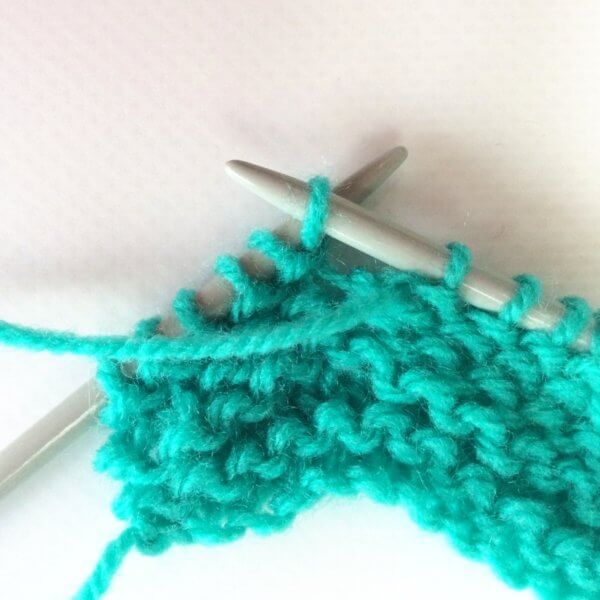
1. Take your working yarn and loop it as shown in the picture below, with the yarn going to the project in the back.
2. Next, insert the tip of the right needle from front to back through the loop.
3. Pull the yarn snugly around the needle.
4. On next row when you come to the loop added, purl (as shown here for stockinette) or knit (for garter stitch) as usual.
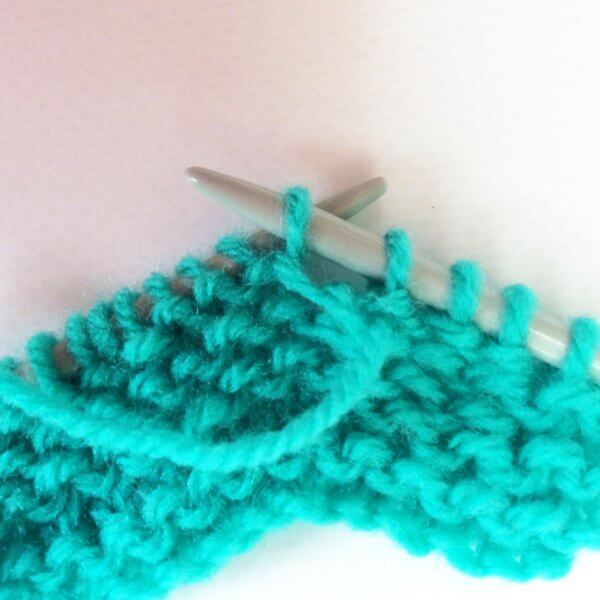
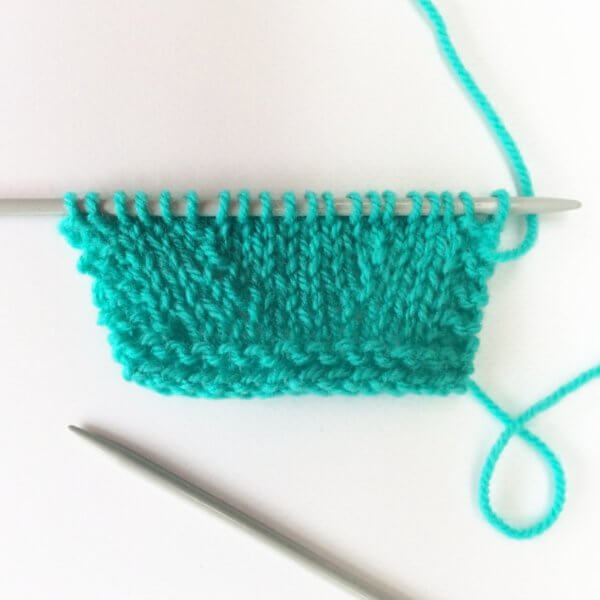
The results
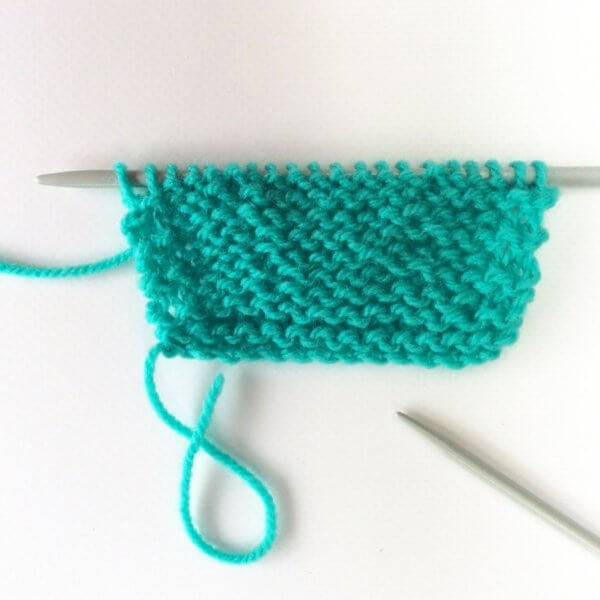
And this is how knitting both right- and left-leaning versions of the m1bl increase are worked! The result in stockinette is shown below, with the right-leaning version on the right of the swatch and the left-leaning one on the left. In this small swatch, there are three increase rows worked every other row, at a distance of 3 stitches from the garter stitch edge.
As you can see in the below picture, the increases are fairly invisible in reverse stockinette. The same holds true in garter stitch!