Whenever you’re knitting a top-down sweater, there comes a point where you’re going to pick up the held stitches to work the sleeves. There will, however, be a difference between working those sleeves for a raglan or a circular yoke garment vs a set-in sleeve garment where the sleeve cap is worked top down with short rows. In the case of a raglan or circular yoke, stitches are often cast-on at the underarm. In the corners, where those stitches meet the live stitches being held for the sleeves, there is a risk of holes in the resulting garment. Instructions often say to close those up with the yarn tail. But, in my opinion, it’s better to avoid them than to fix them! That’s the reason that in my garment patterns, detailed instructions are included for this.
In this tutorial, I’ll show you how to avoid holes at the underarm with a circular yoke top-down sweater I currently have on the needles. It’s the Knitwords Sweater (Ravelry link!) by Cori Eichelberger.
Materials used
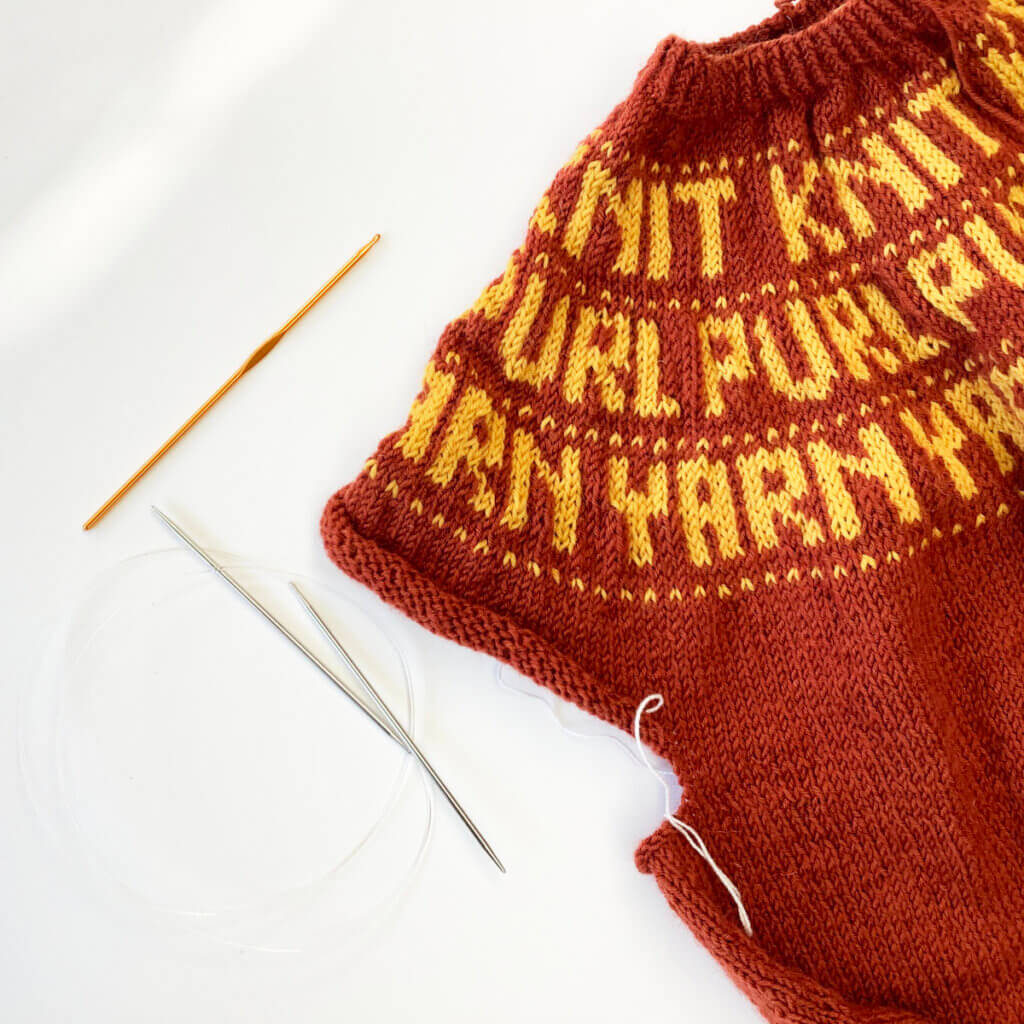
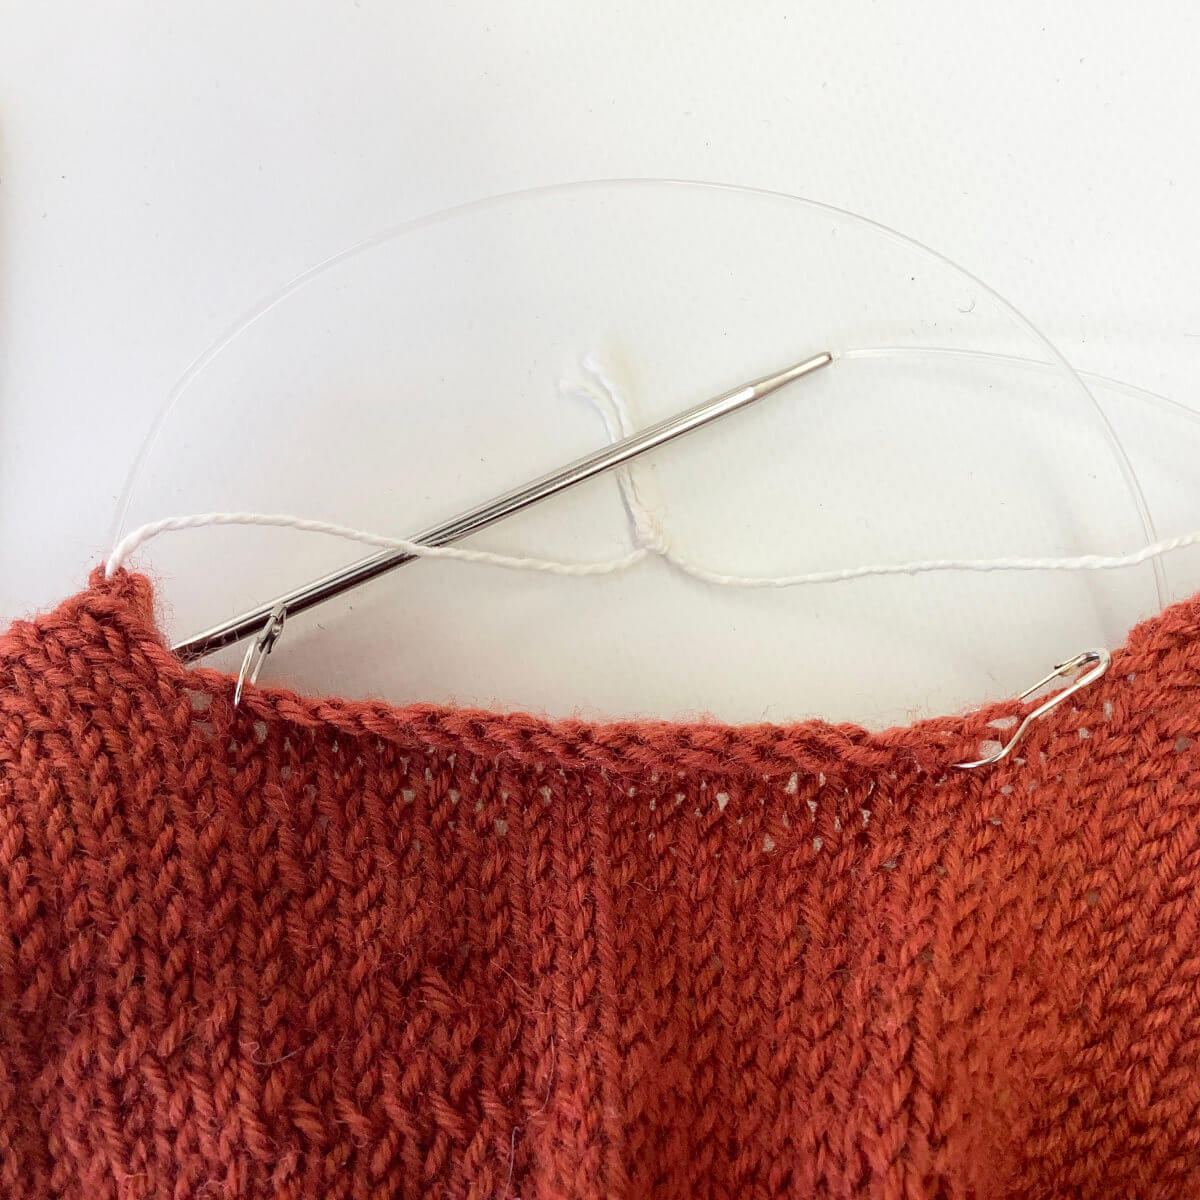
Garment WIP: Knitwords sweater work-in-progress, with the sleeves stitches held on waste yarn. You’ll also need yarn to work the sleeve. Here I’m using a DK weight sock wool.
Other materials: A circular knitting needle in the size needed for the garment gauge, bulb pins or removable stitch markers, and a crochet hook in a similar size as the knitting needles. The crochet hook is optional, but I find it makes picking up stitches a lot easier. Therefor, I certainly recommend using one.
Let’s get started!
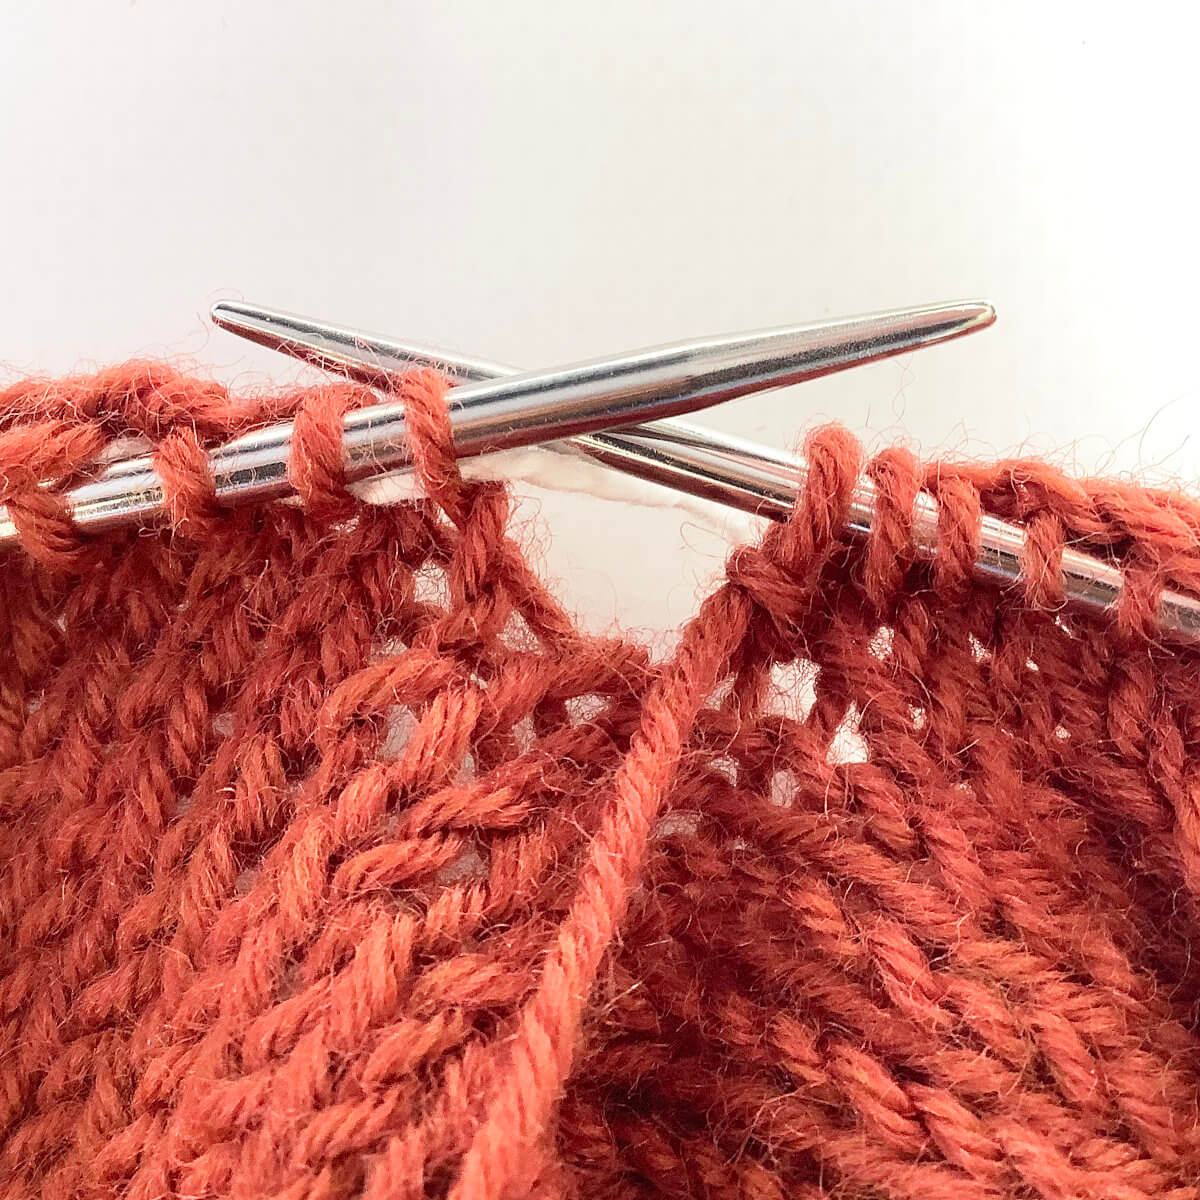
- To start, put the live stitches on the knitting needle.
I’m using a circular needle, but you could, of course, also use DPN’s. I often leave the waste yarn in for a bit, it can be removed once the sleeve has a bit of length and there is no risk of dropping stitches anymore.
- In this picture, all stitches are replaced on the needle.
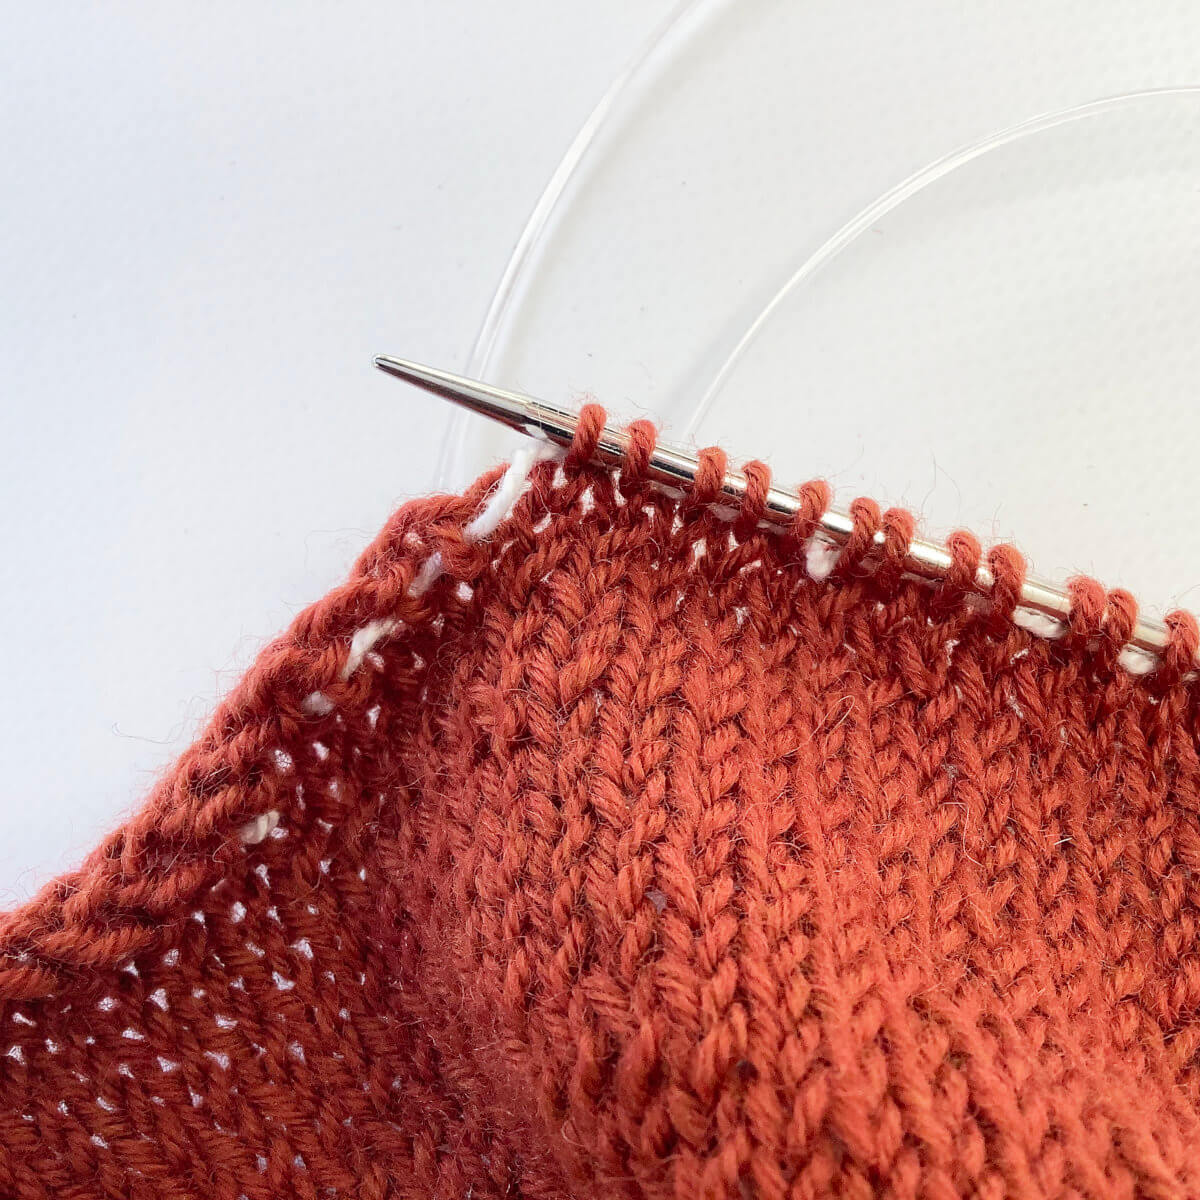
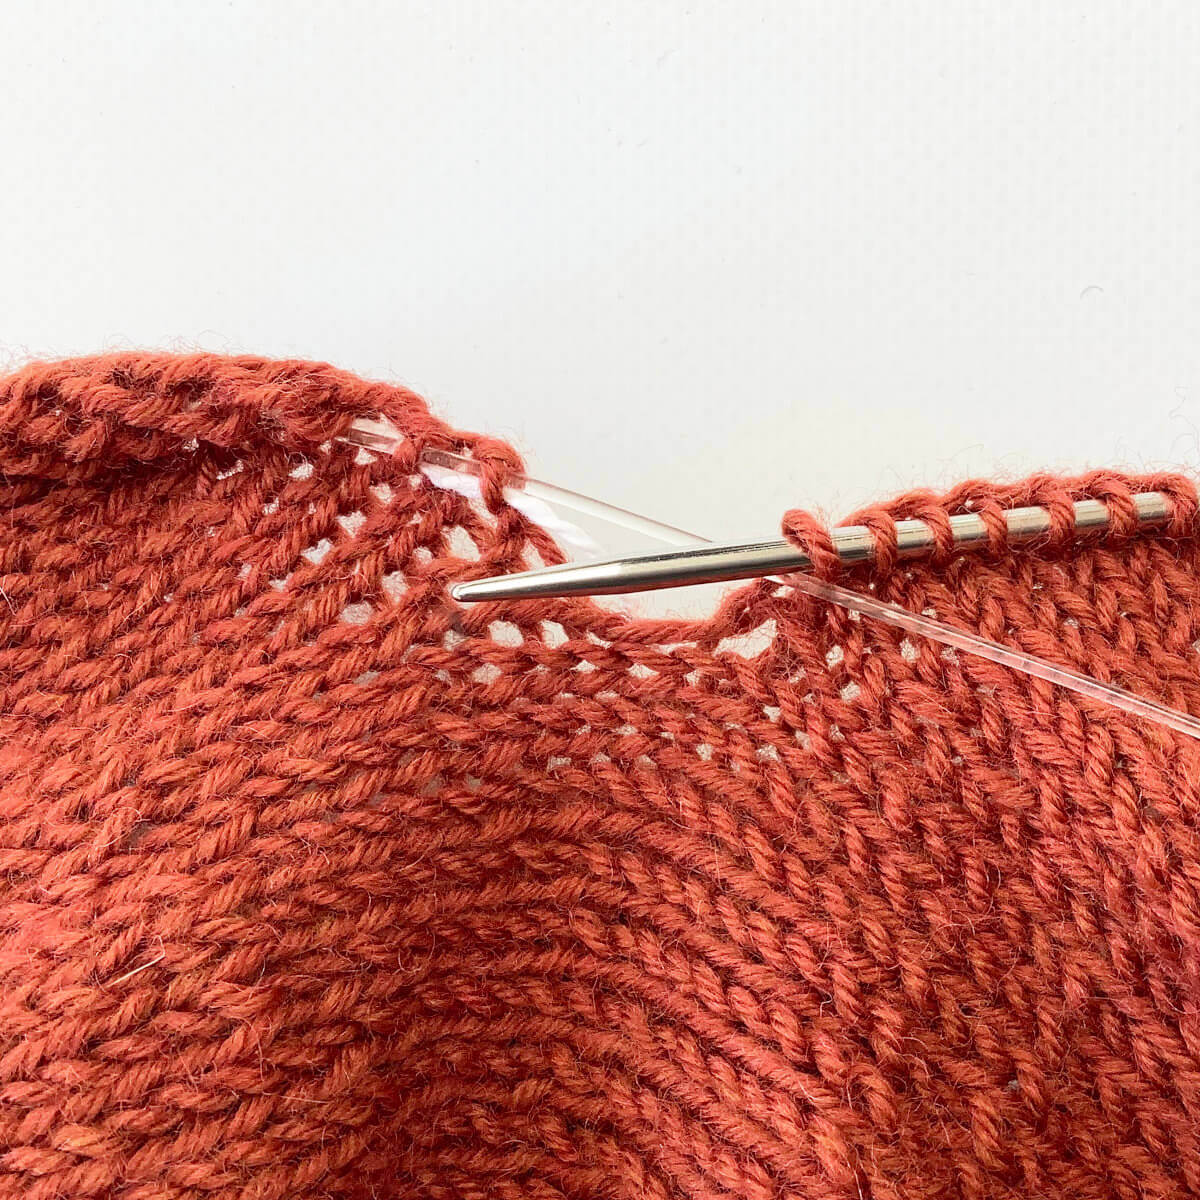
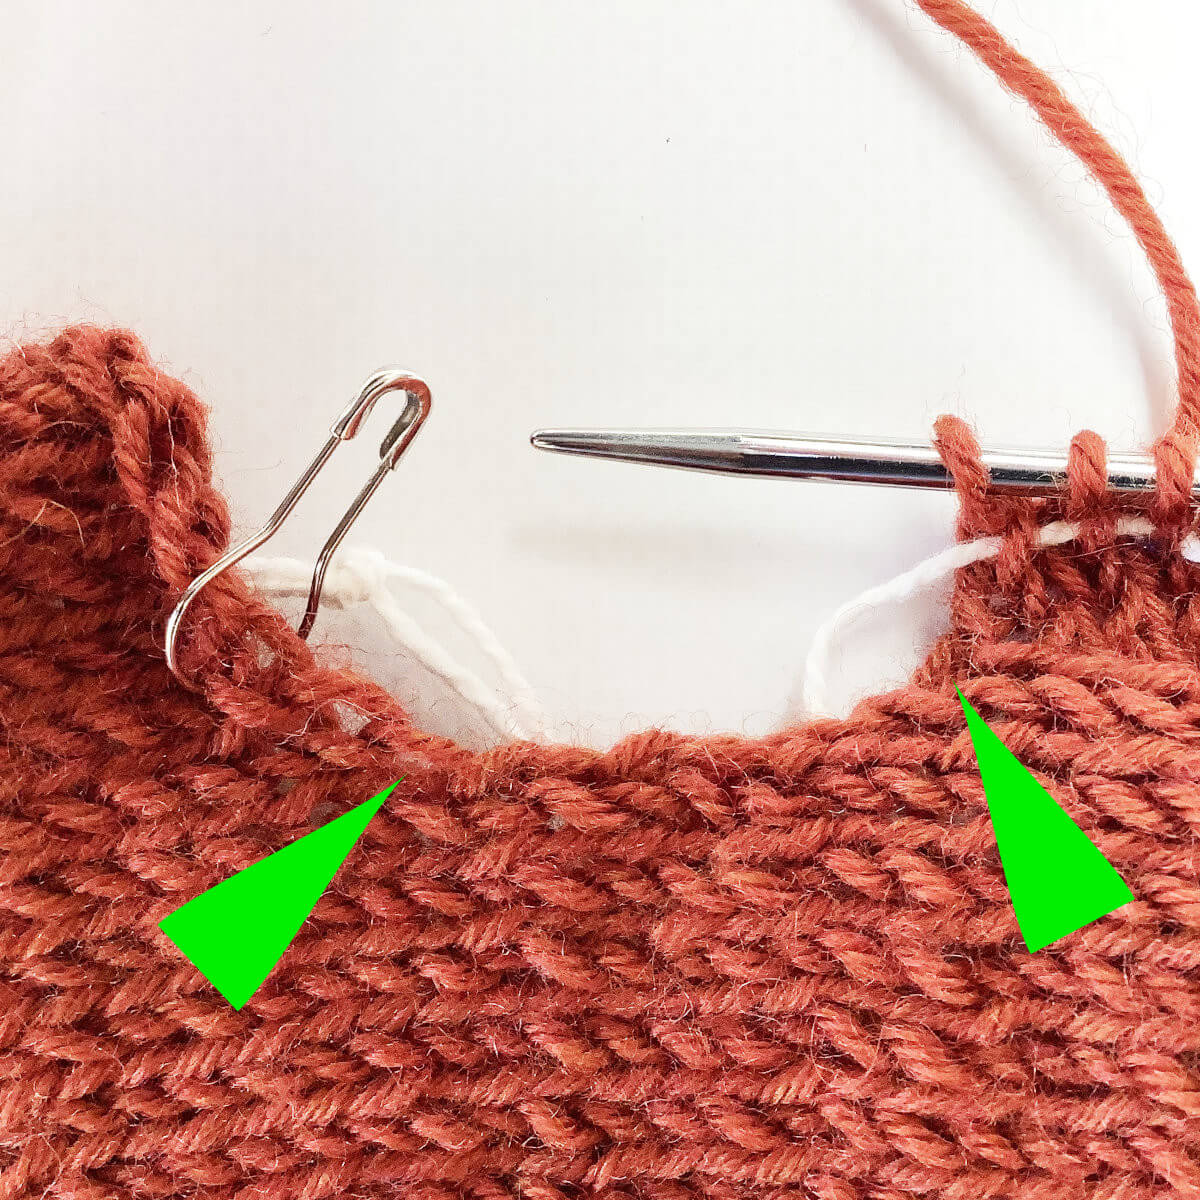
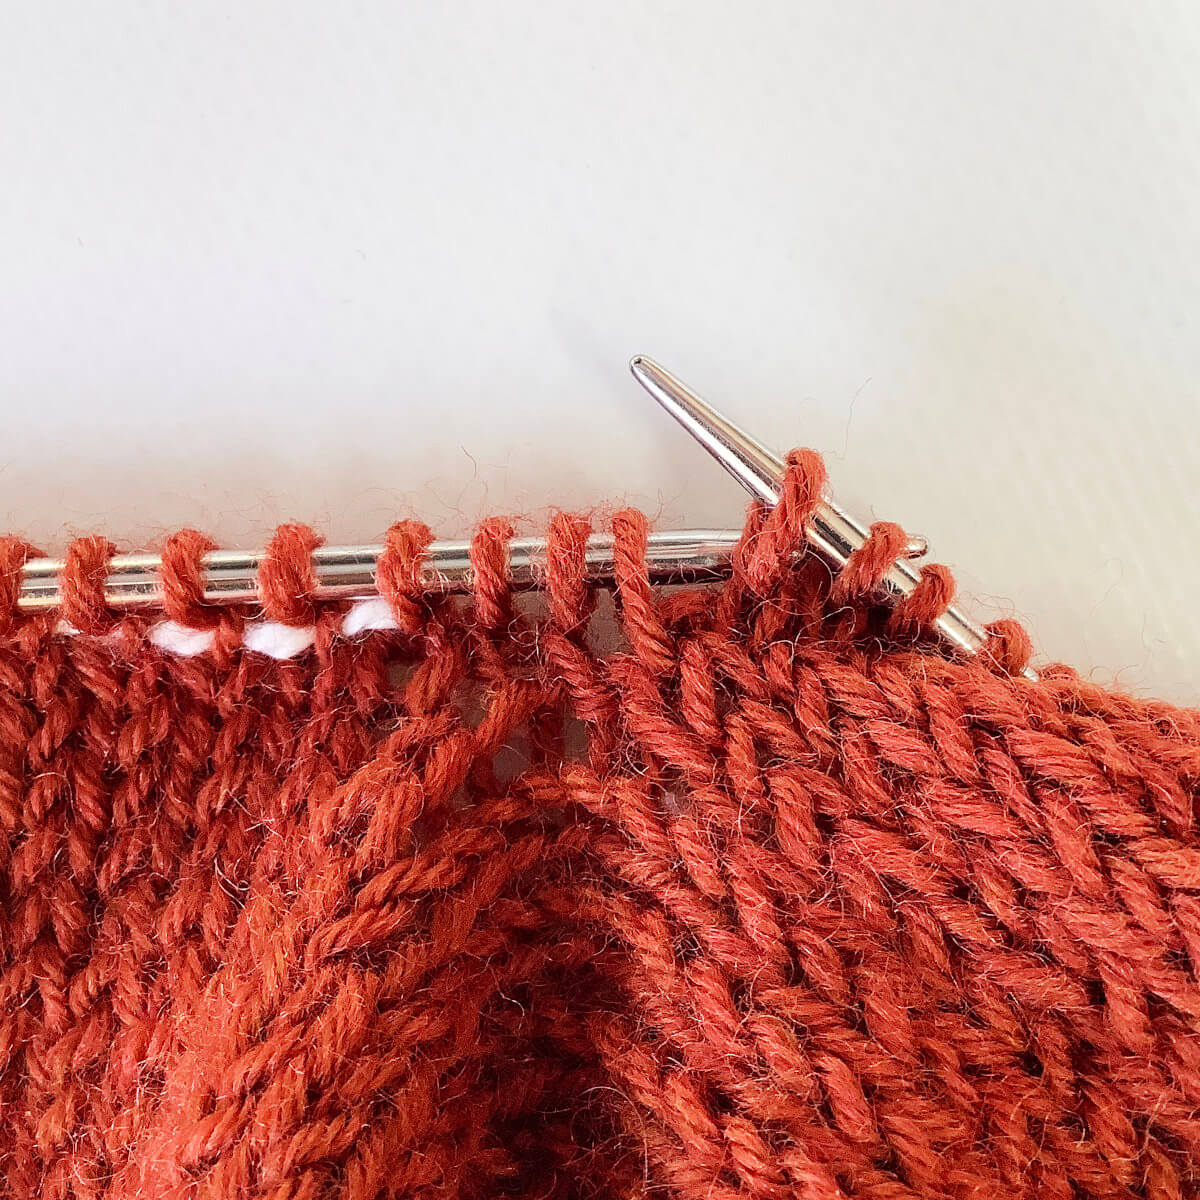
- Here, you can see the stitches that were cast-on for the underarm. I have marked the first and the last stitch, because this will make it easier to know where to start and stop picking up those stitches.
- Next, find the middle of those stitches (if you want the end-of-round to be in the middle). Insert the crochet hook in the middle of the “V” formed by the stitch….
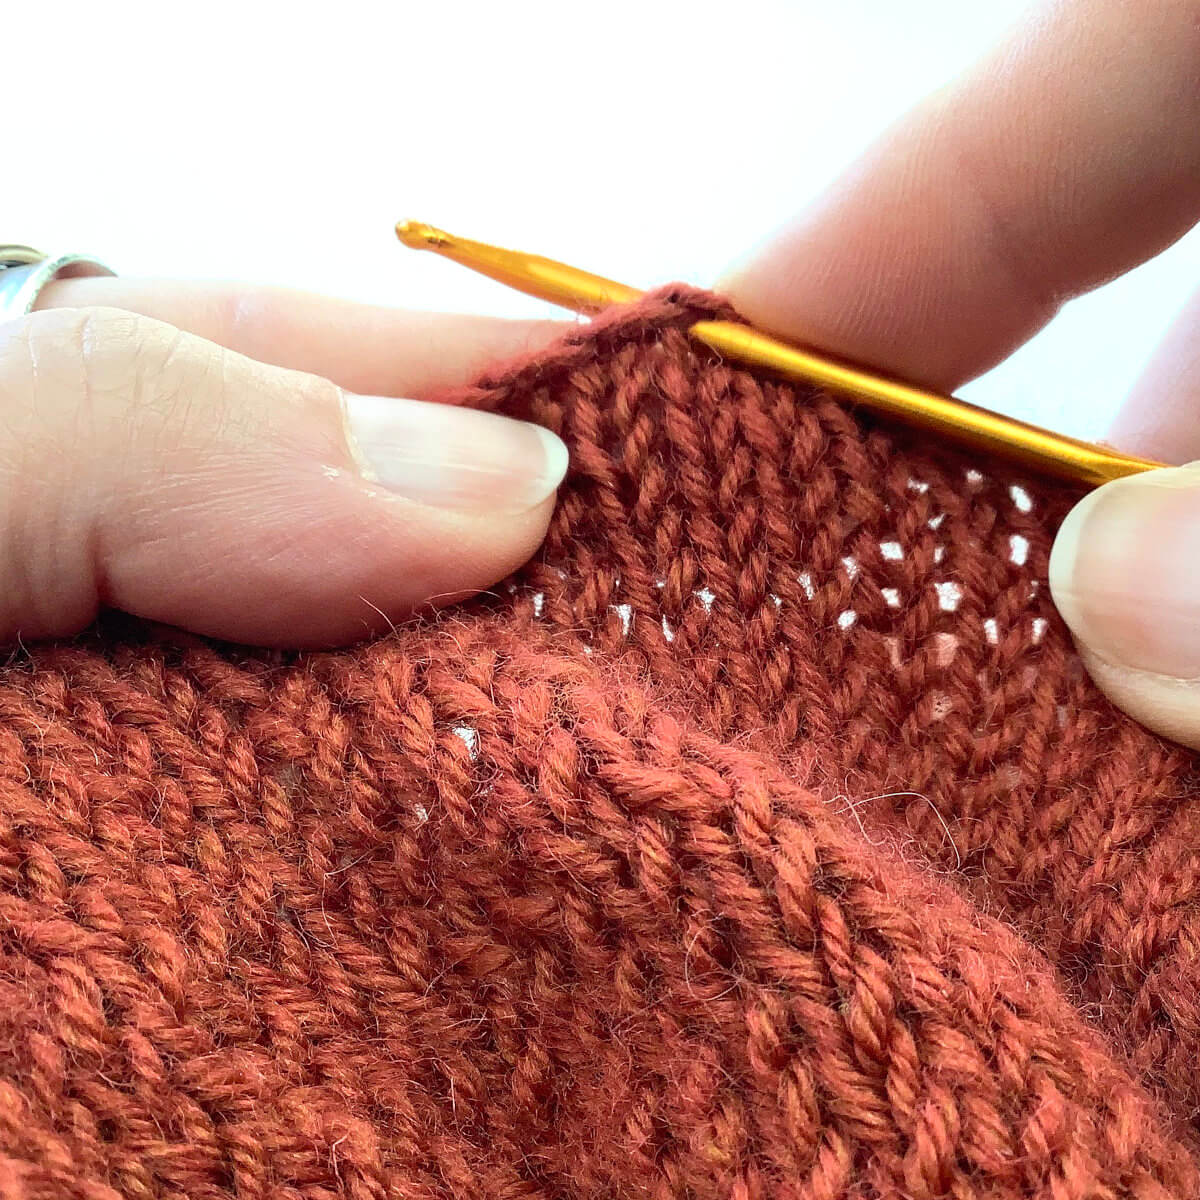
- … wrap the yarn around the hook and pull it through.
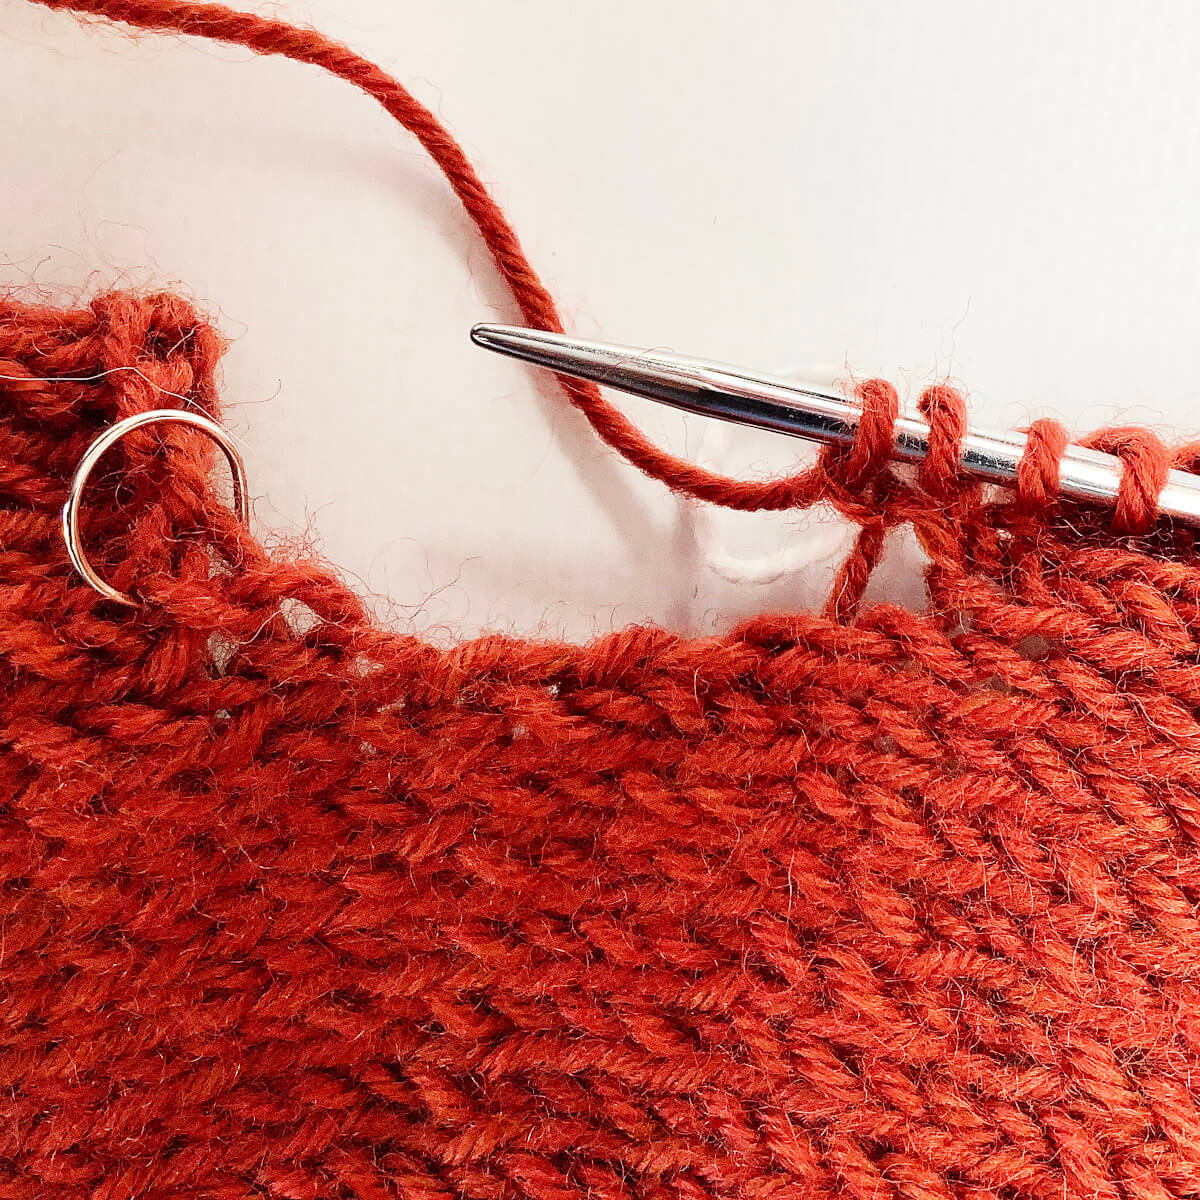
- Repeat steps 4 and 5 until you’ve worked the marked stitch.
In this example, I’ve left the picked up and knit stitches on the crochet hook to be placed on the knitting needle once they were all worked. You can, of course, also do that after every stitch worked.
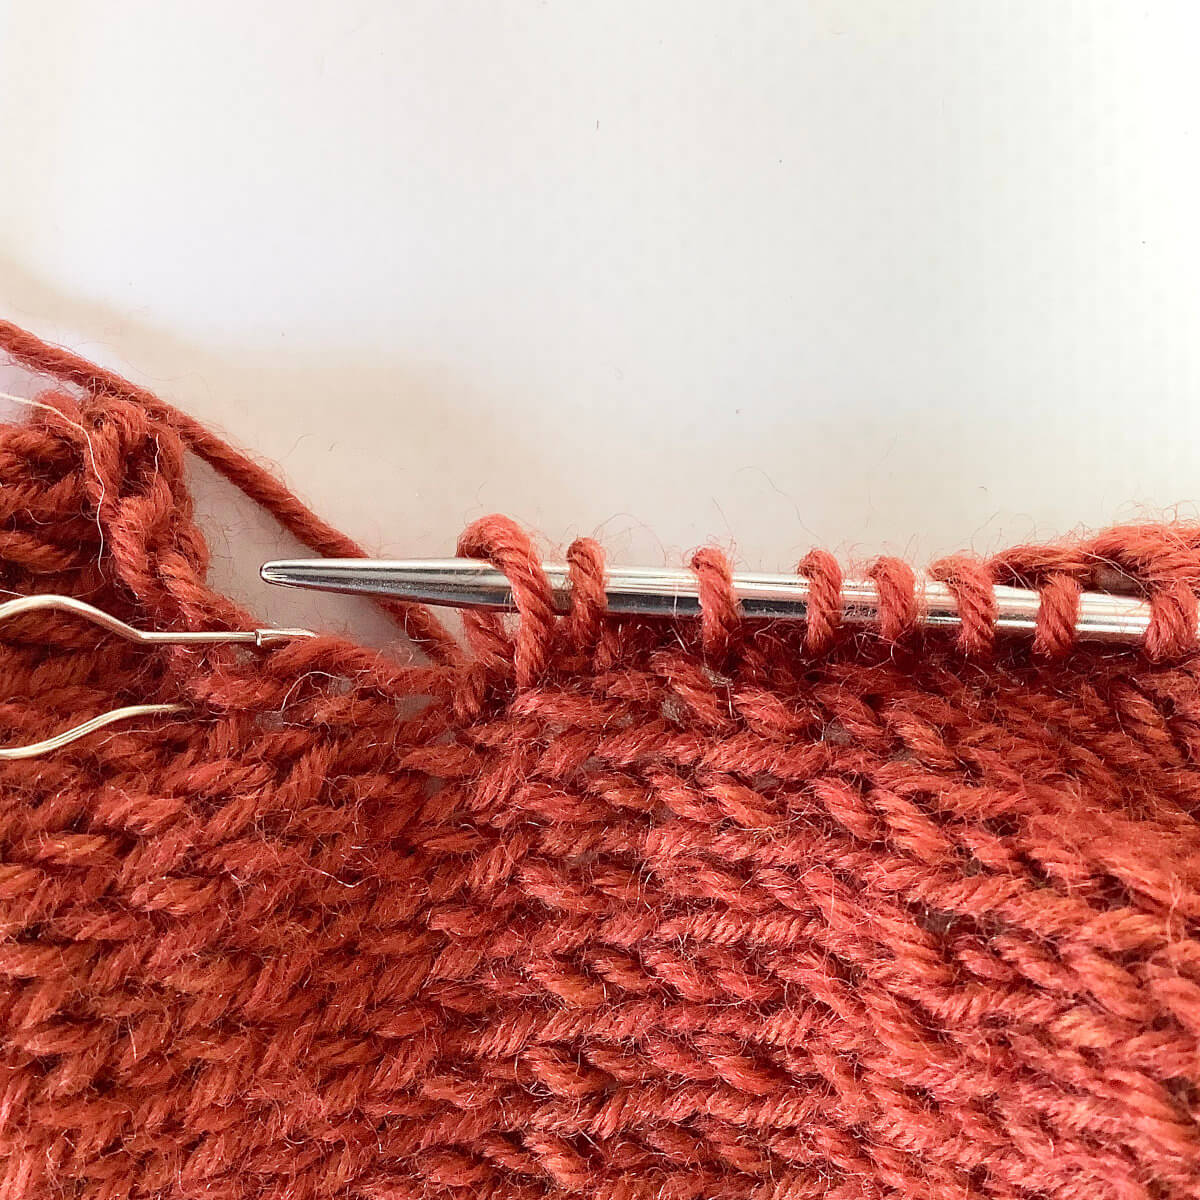
- Here, I’ve placed the stitches on the right-hand part of the circular knitting needle.
Now we’re getting to the actual “avoiding holes” part!
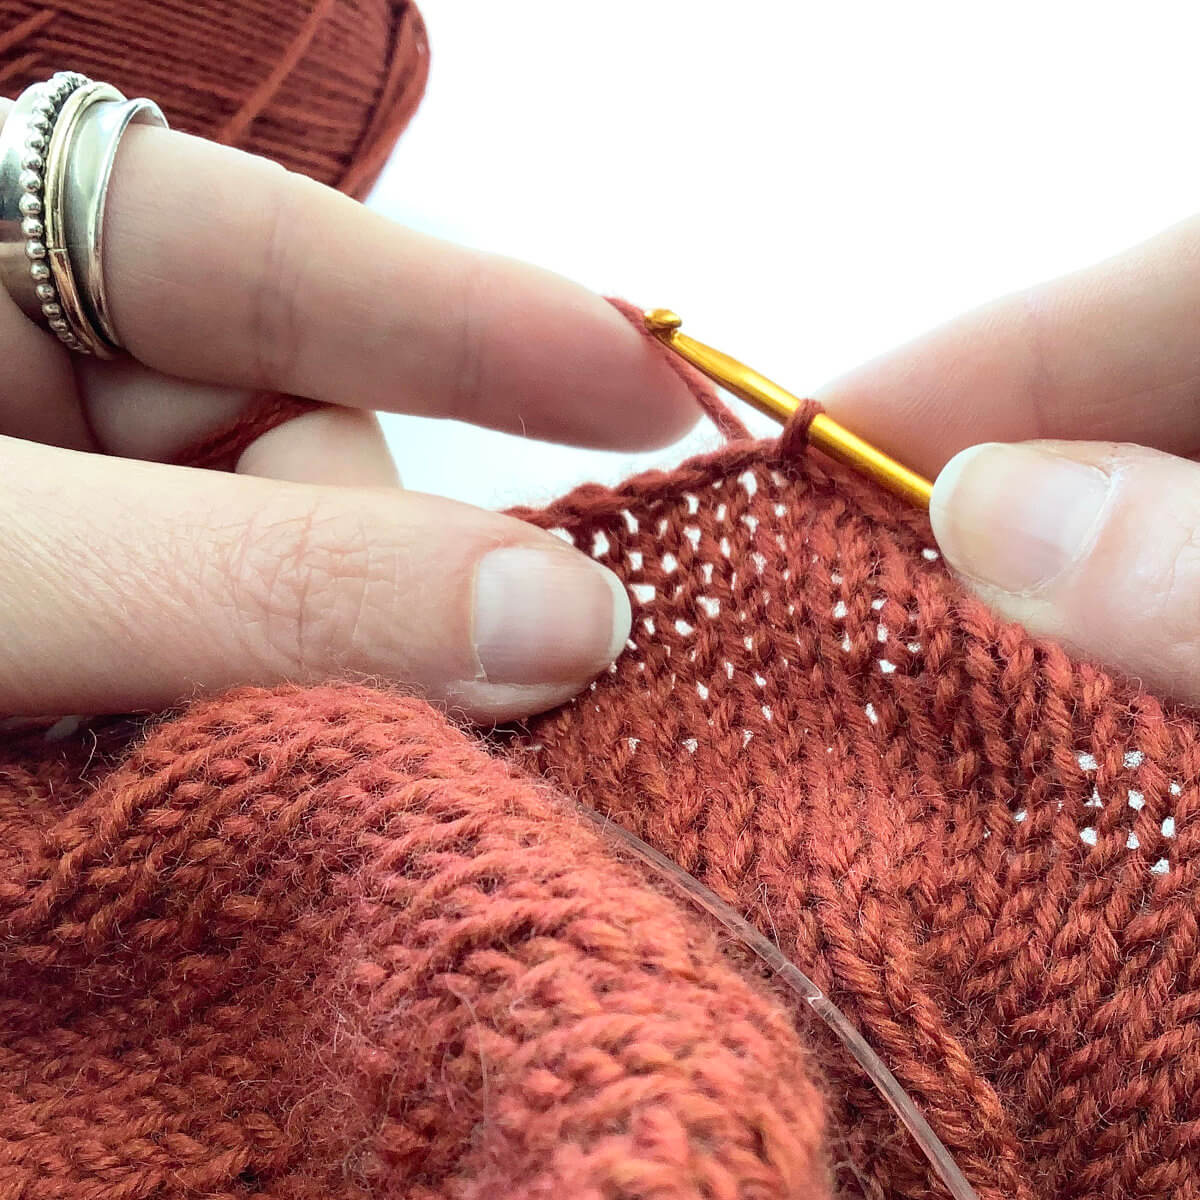
- Do you see the 2 strands of yarn indicated by the triangles? This is where we have to pick up extra stitches to avoid those holes!
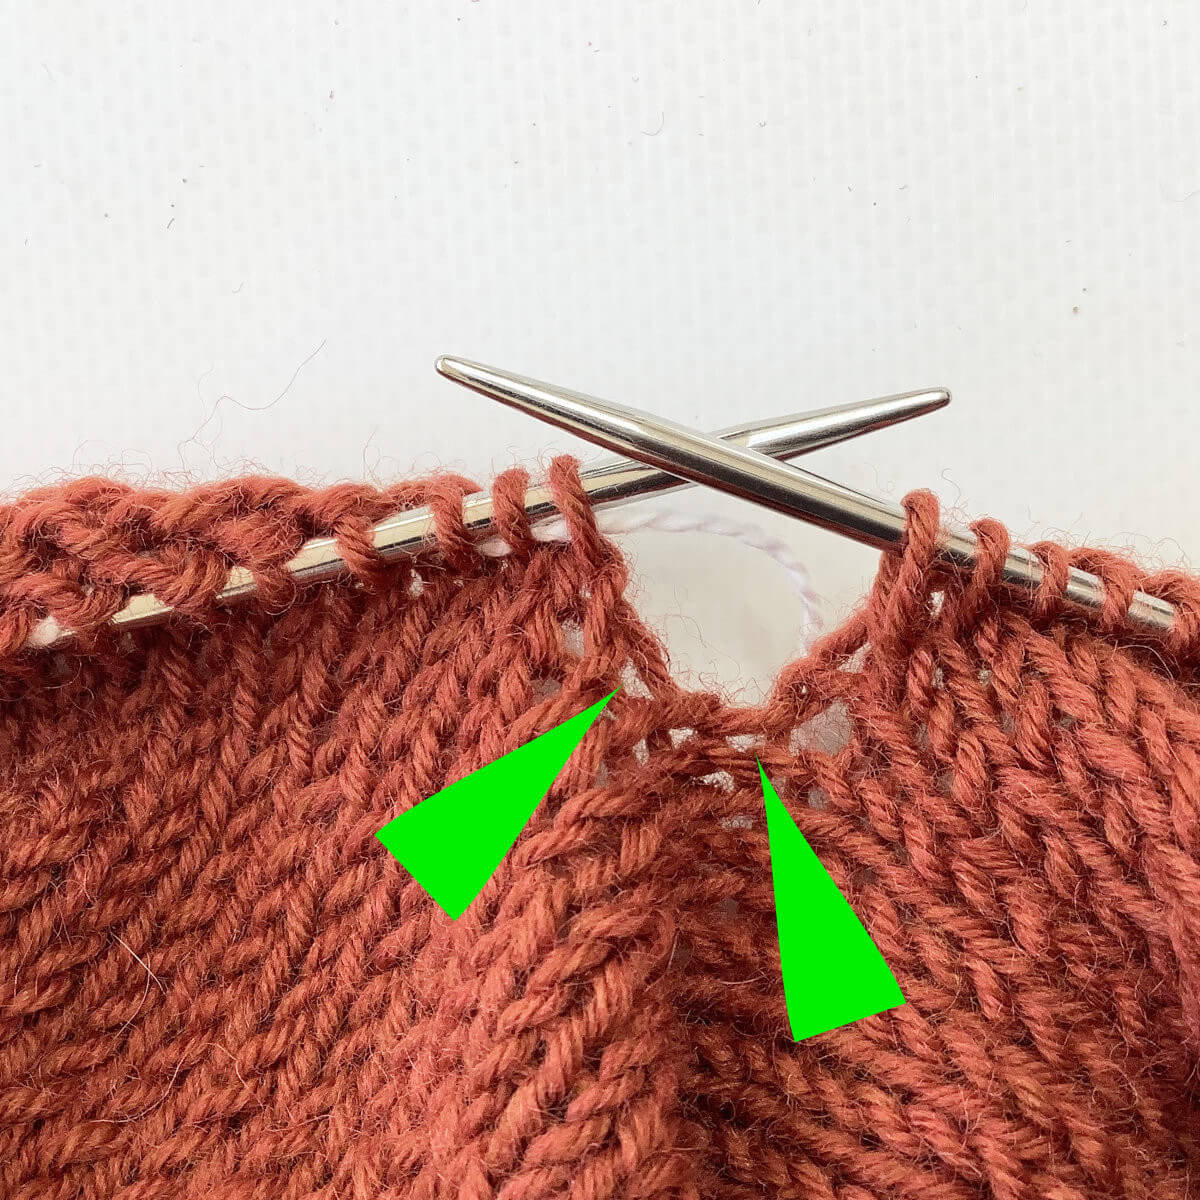
- When picking up these stitches, you want to twist the strand, to close up the hole. To do so, insert your crochet hook as pictured…
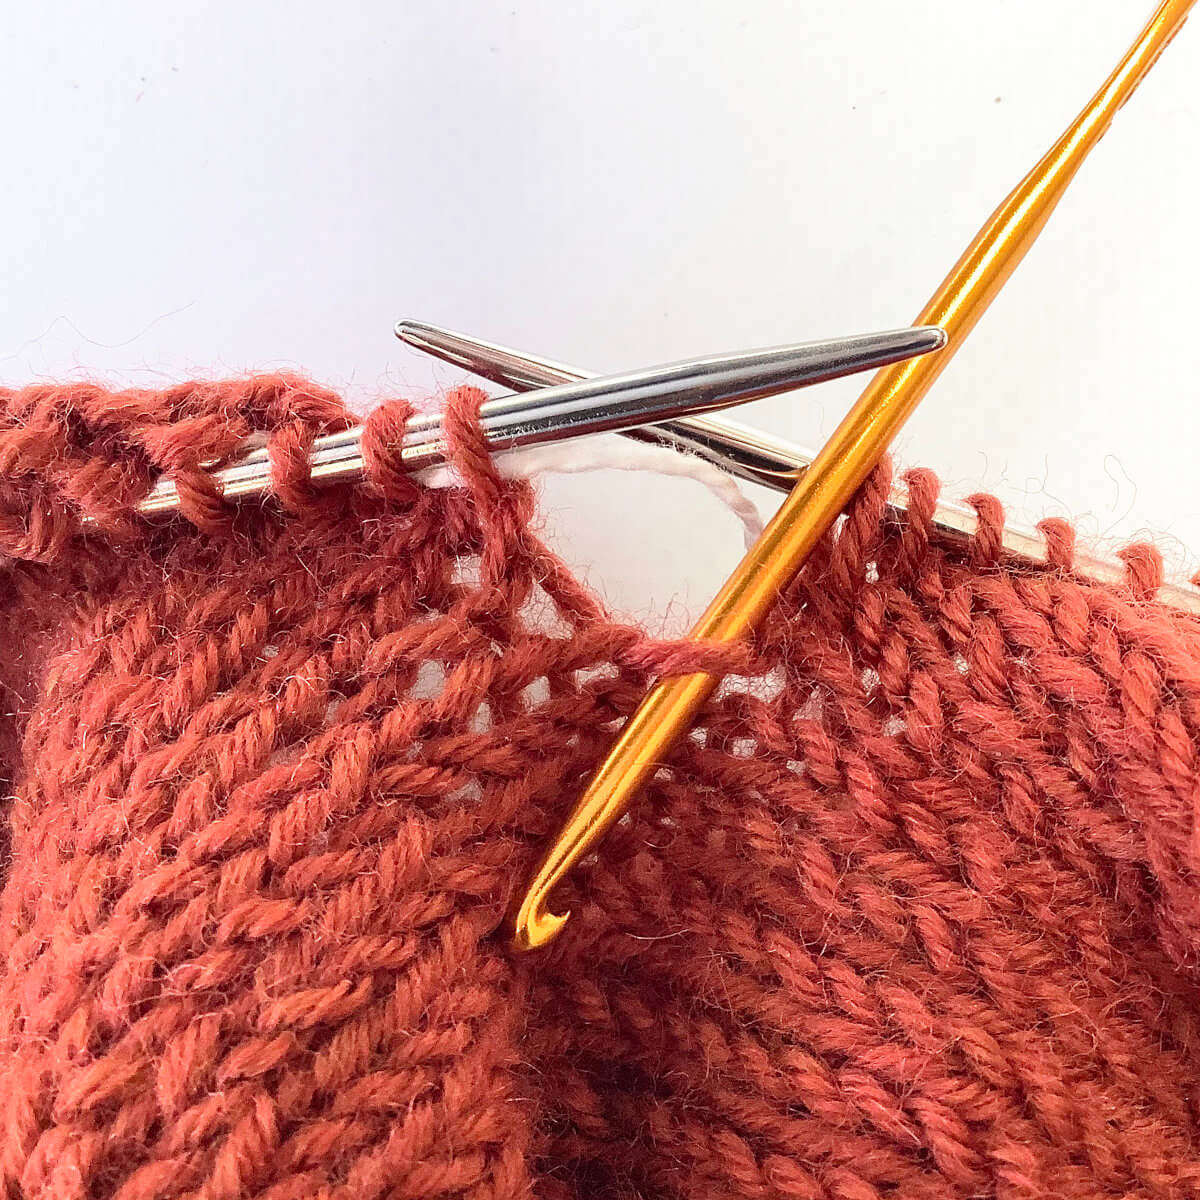
- … twist the hook around, then wrap the yarn around the hook and pull it through.
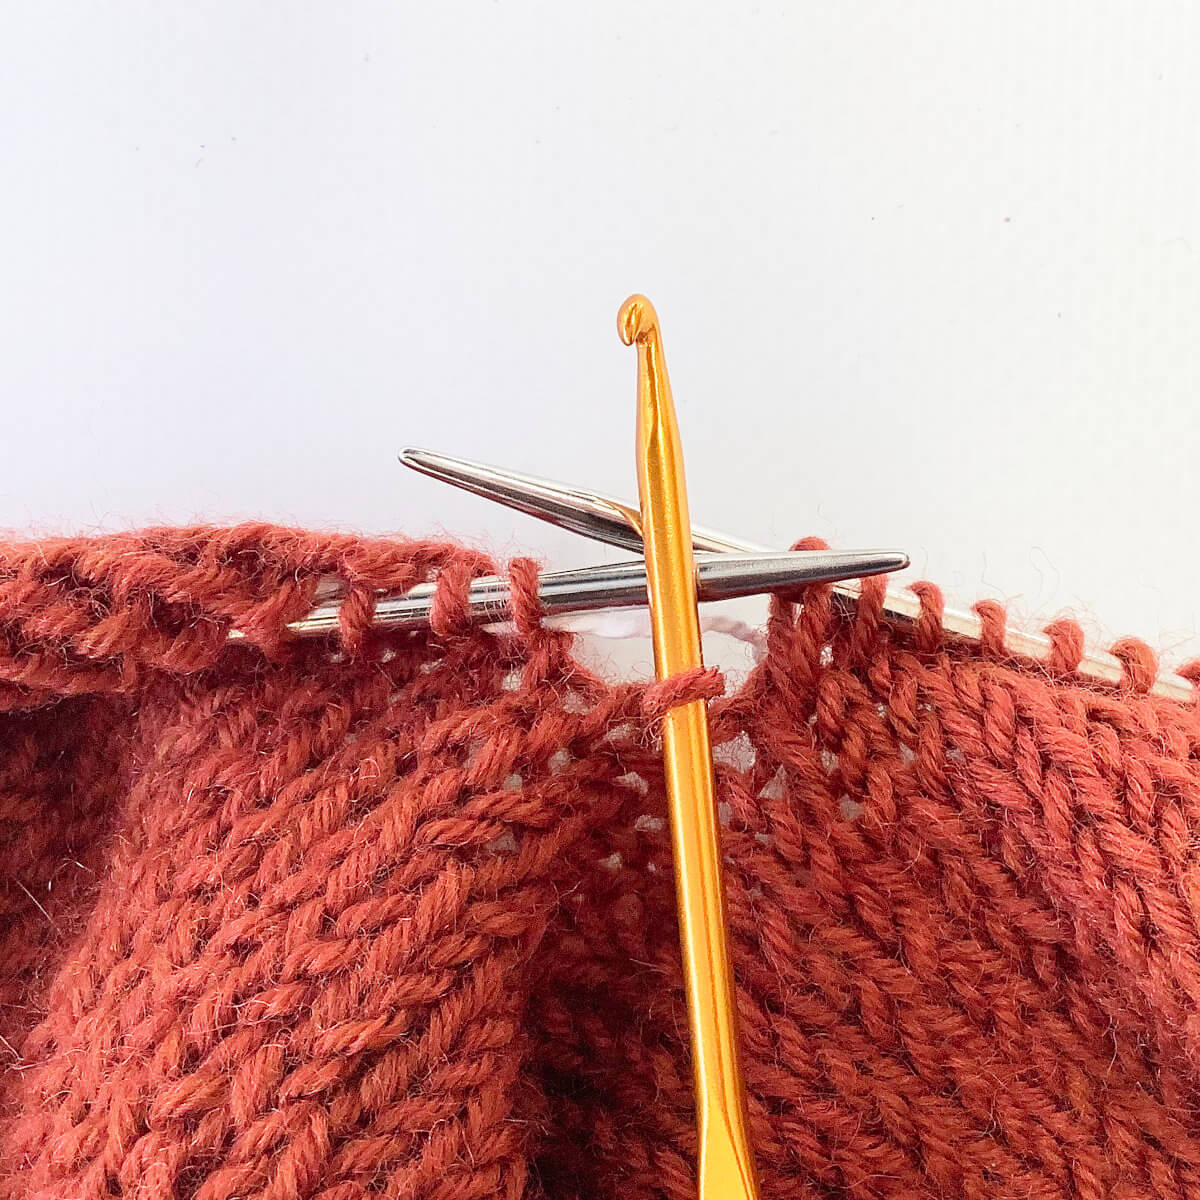
- This is how it looks after the stitch has been placed on the needle.
- Repeat steps 9-11 for the second strand.

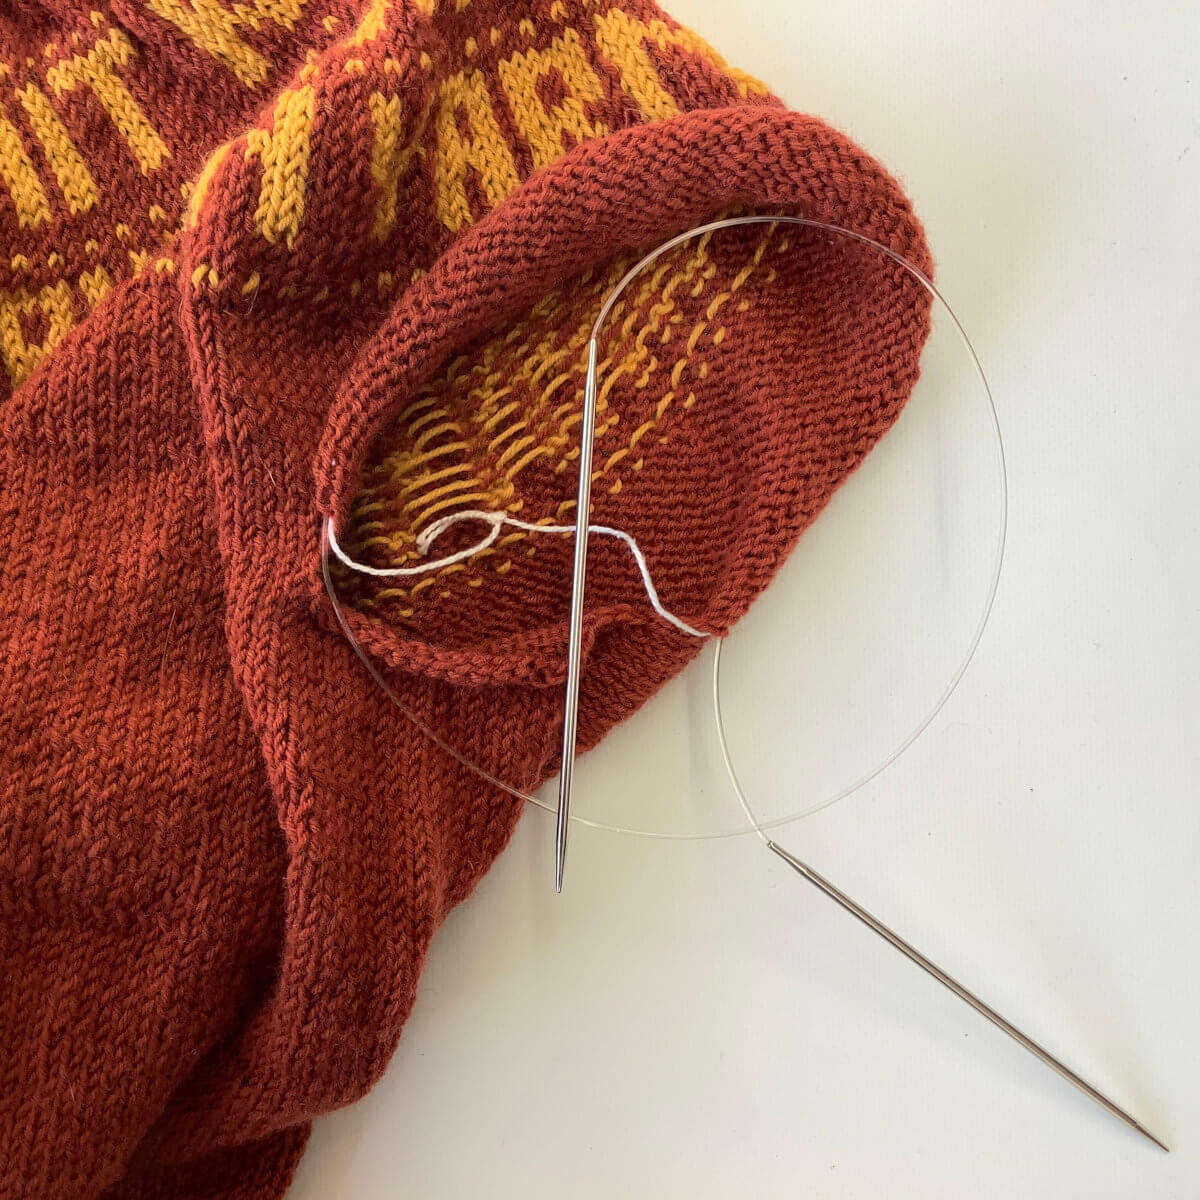
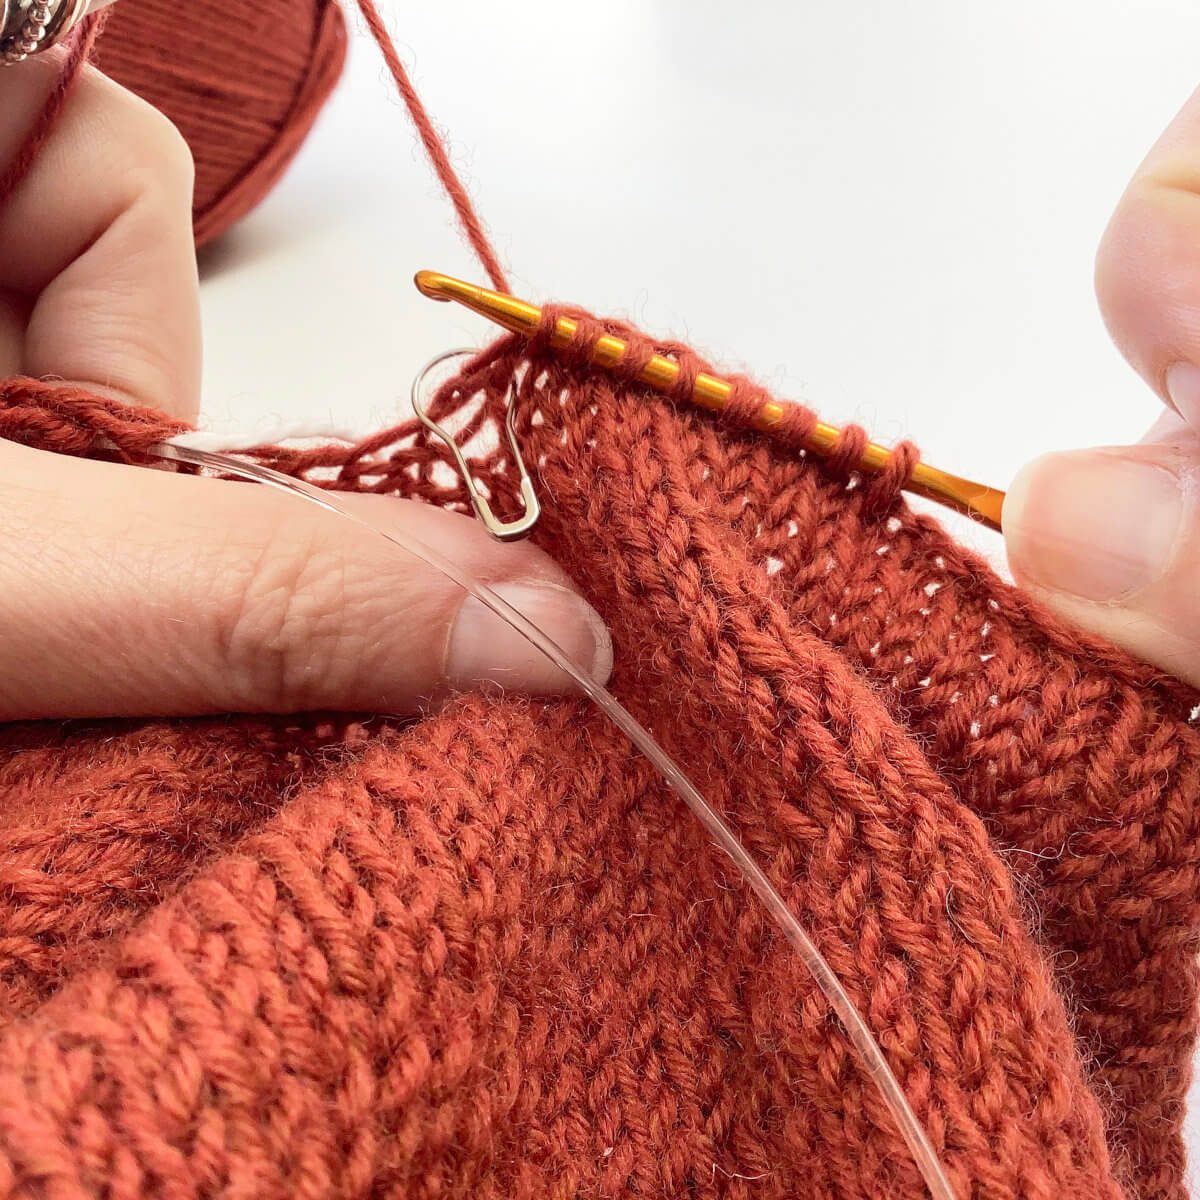
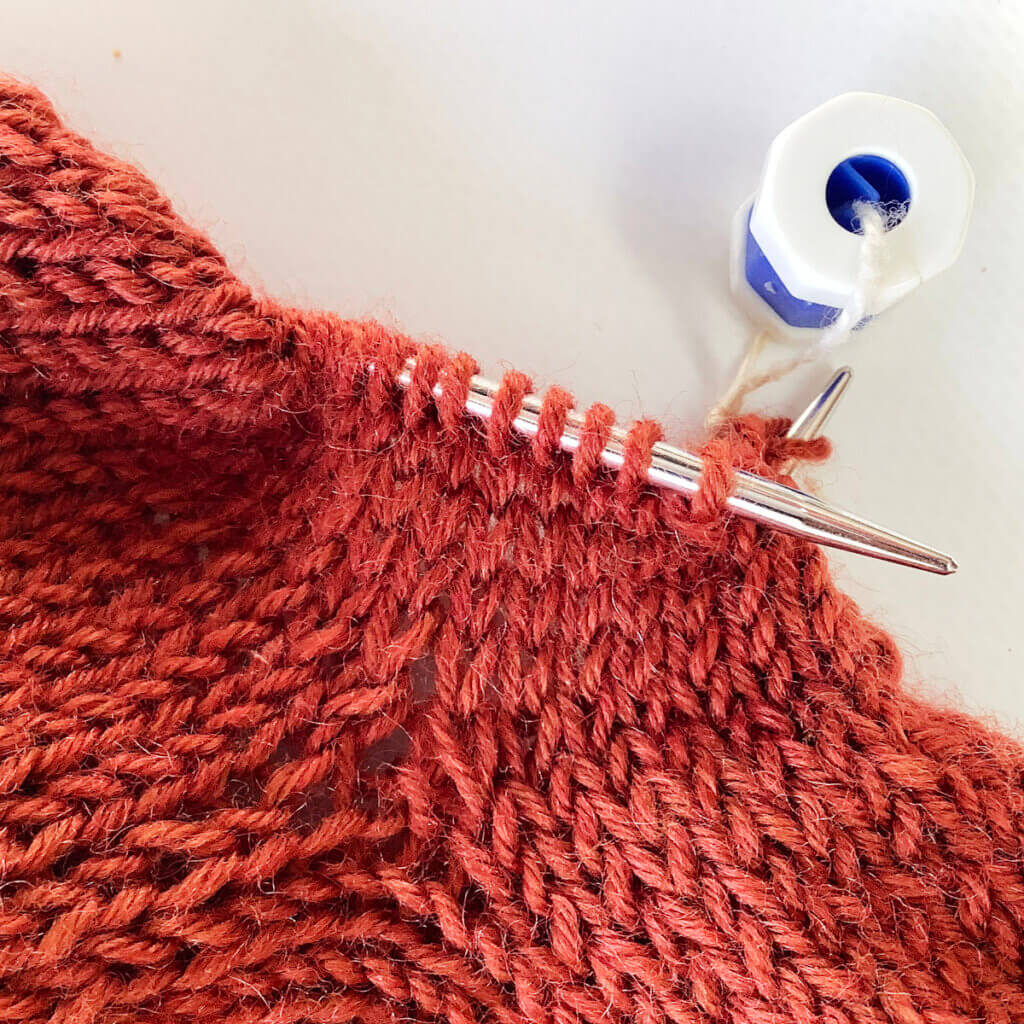
- Next, work over the live stitches until you’ve worked the last one.
In my case, this looks like this, because I’ve raised the back neck according to the method described here. As a consequence, the 2 strands of yarn to be picked up to avoid the holes, are more apart than on the other side of the armhole. When not raising the back neck according to this method, it would like similar to the other “corner”.
- Here, I’ve repeated steps 9-11 on the first strand.
- Next, I’ve picked up and knit stitches on the vertical section. And finally, I’ve repeated steps 9-11 on the last strand.
- But we’re not ready yet! We’ve picked up an extra 4 stitches total for the corners. It may mean that you have some welcome extra ease in the upper arm. In that case, just follow the pattern for a larger size that has the same approx. number of sleeve stitches. Otherwise, we’ll need to decrease those extra stitches in the following round.
To do so, work to 1 stitch before the first picked-up-and-knit stitch in the corner.
- Next, work 2 decreases over the 4 following stitches.
Here, I first worked a skp, followed by a k2tog. Repeat this step at the other corner.
The result of avoiding holes at the underarm with top-down sweaters
This is how I go about avoiding holes at the underarm with top-down sweaters. The picture below shows how it looks after a few more rounds have been worked. Pretty neat, right?!

Thanks to my Patreon supporters for bringing you this freebie! Creating quality patterns and tutorials is a lot of work and resource-intensive. However, I find it important to give you free content like this tutorial. Thanks to the generous support of my Patreon supporters, I can make it happen. Thank you, patrons! Click here to join, or click here to read more about La Visch Designs on Patreon.


