There are many ways to join two pieces of knitted fabric together, all with their own advantages and disadvantages. In this post, I’ll be talking about working the mattress stitch. This technique is particularly suited for joining pieces in stockinette stitch on the vertical edge of the work. It will also work splendidly with other stitch patterns, as long as there is a column of knit stitches right at the edge that you want to join with another piece. Examples of where I used mattress stitch, include closing up sleeves that were worked flat, and connecting the front and back pieces of sweaters.
Personally, I find mattress stitch more time-consuming than, for example, working a crochet join. However, it has a very important benefit: it’s virtually invisible on the right side of the fabric, although it does create a ridge on the wrong side of the work. Also, it’s very satisfying to see the fabric closing up when pulling the thread!
Materials used


Yarn: Paintbox Yarns Simply DK, a good value, good quality 100% acrylic yarn, here in the color 142 Tea Rose.
Darning needle: Hiya Hiya Darn It Yarn Needle, or any other tapestry needle, threaded with yarn.
Working mattress stitch step by step
Before we can start, we have to measure out a length of the working yarn. For this, a length of approx. twice the length of the edge that you want to bind-off is advised. If long enough, you could also use the yarn tail left over from casting on or binding off. This will give less ends to weave in later on.
When you have measured out the length of yarn, break it, and thread it onto the darning needle.
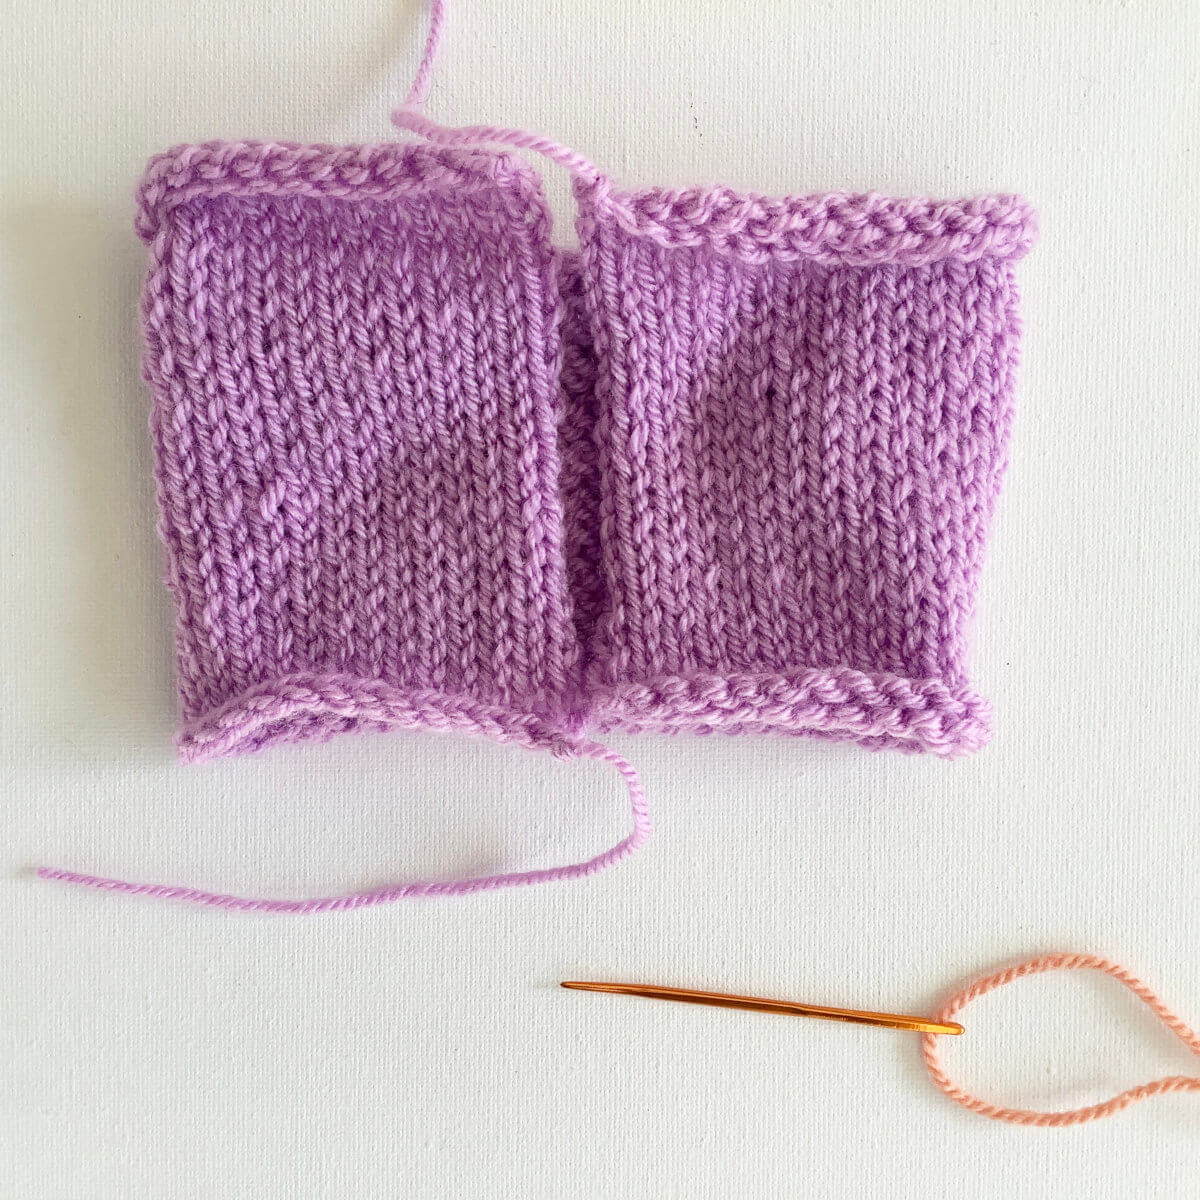
- First, make sure you have your work in front of you, with the right side facing.
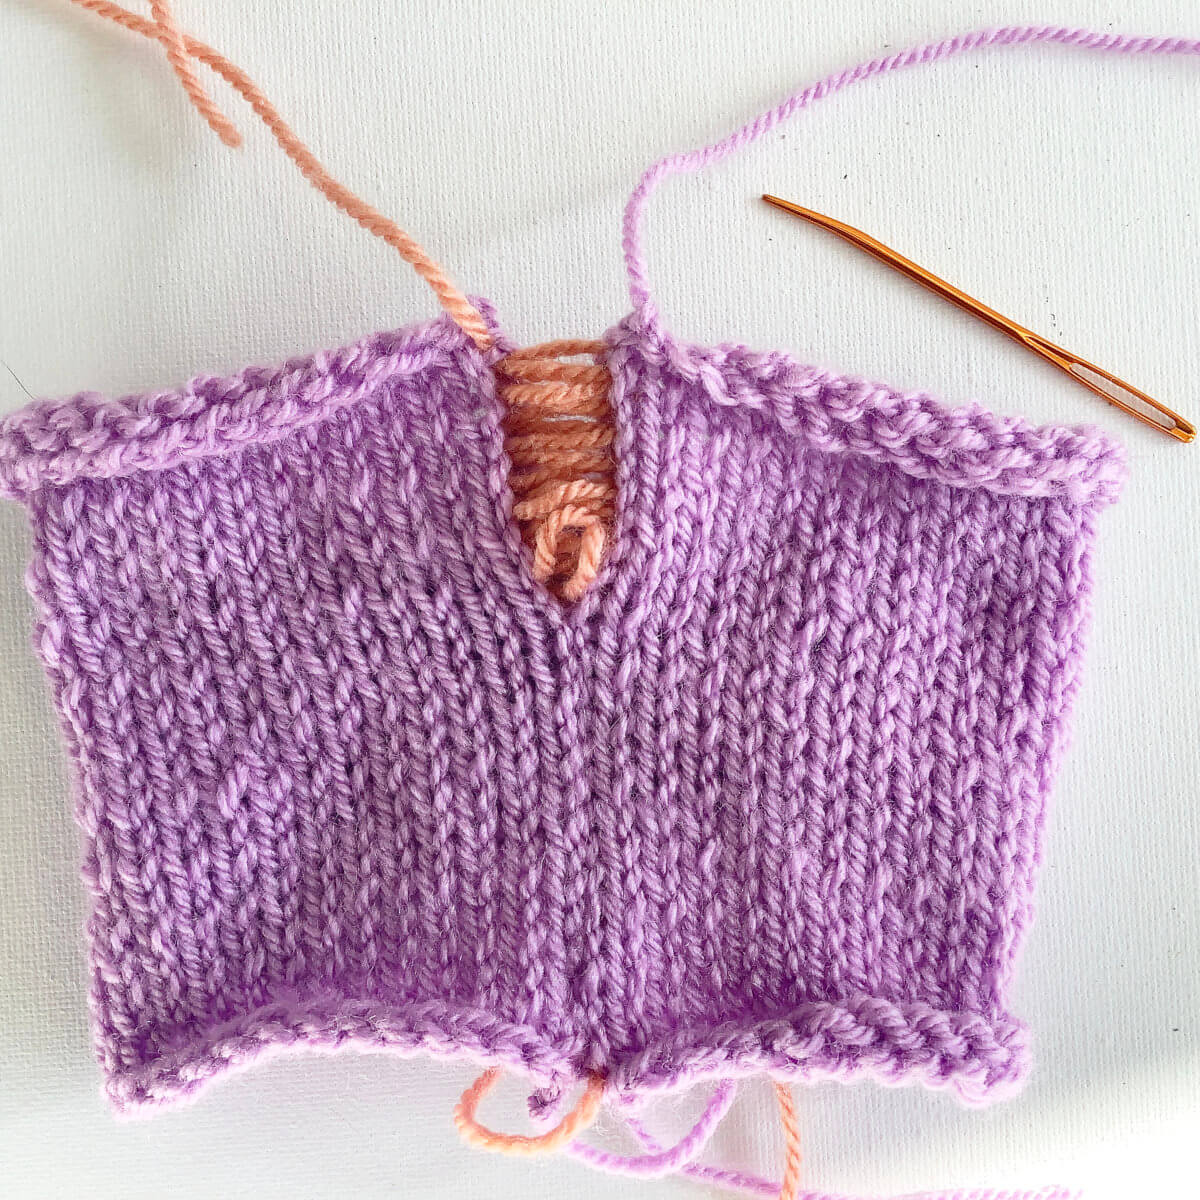
In the picture below, you can see that I did not block my swatch before making the pictures for this tutorial. When using this technique on a project, though, blocking could make it easier to see the stitches you want to seam into.
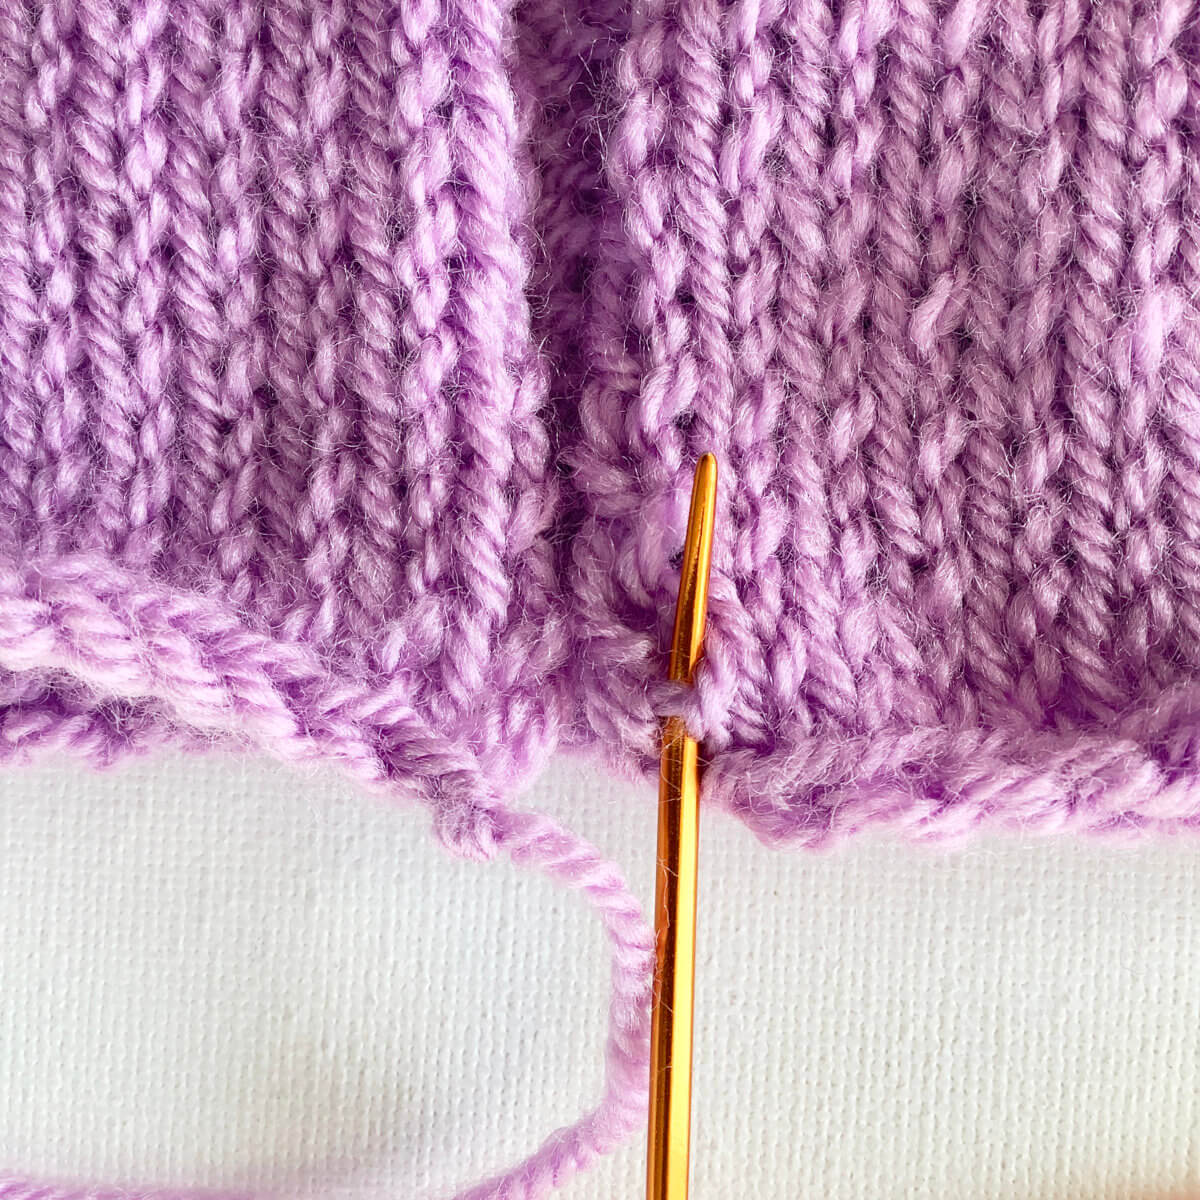
- To start, insert the darning needle directly to the right of the first column of stitches, from bottom to top, underneath the thread that runs between the two columns of stitches.
You can also start with the left piece of fabric. In that case, insert the needle underneath the thread to the left of the column of knit stitches at the edge of the piece. Don’t forget to leave a long enough yarn tail to weave in later on, if you’re not using a yarn tail for seaming.
- Next, insert the darning needle directly to the left of the first column of stitches on the other piece of fabric. Again, from bottom to top, underneath the thread that runs between the two columns of stitches.
Pull the yarn through.
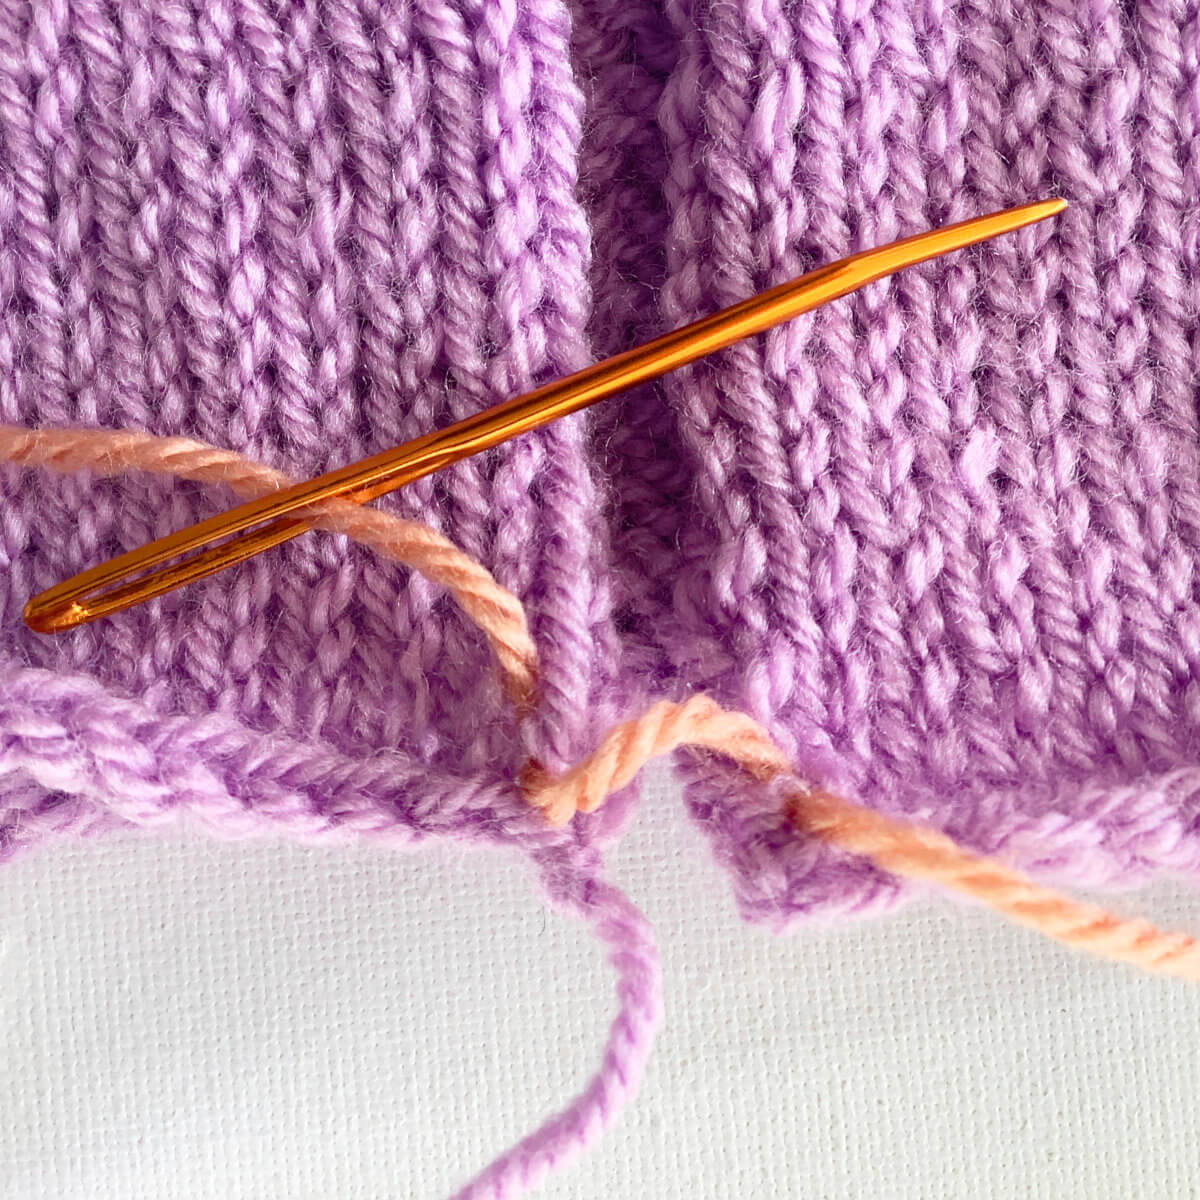
- Repeat steps 2 and 3 until you’ve reached the end of the edges to join.
Make sure to pull the yarn to close up the seam every few cm or inches. Take care not to make it too tight, though, or the seam will be less invisible than it could be.
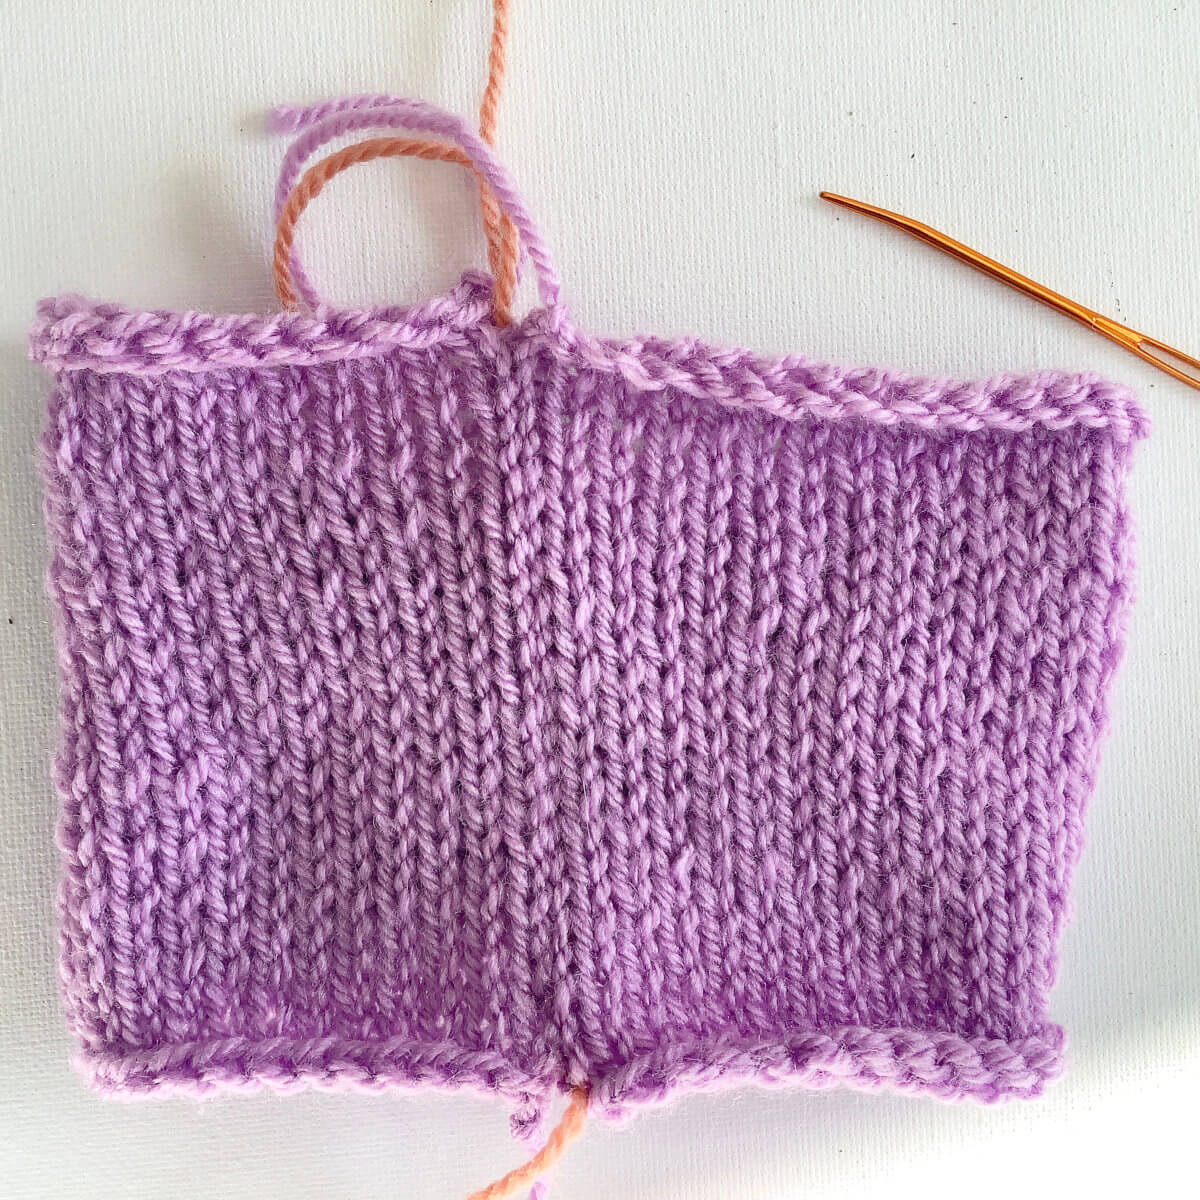
- Below, you can see the result of seaming with mattress stitch on the right side of the fabric. Pretty good, right?!
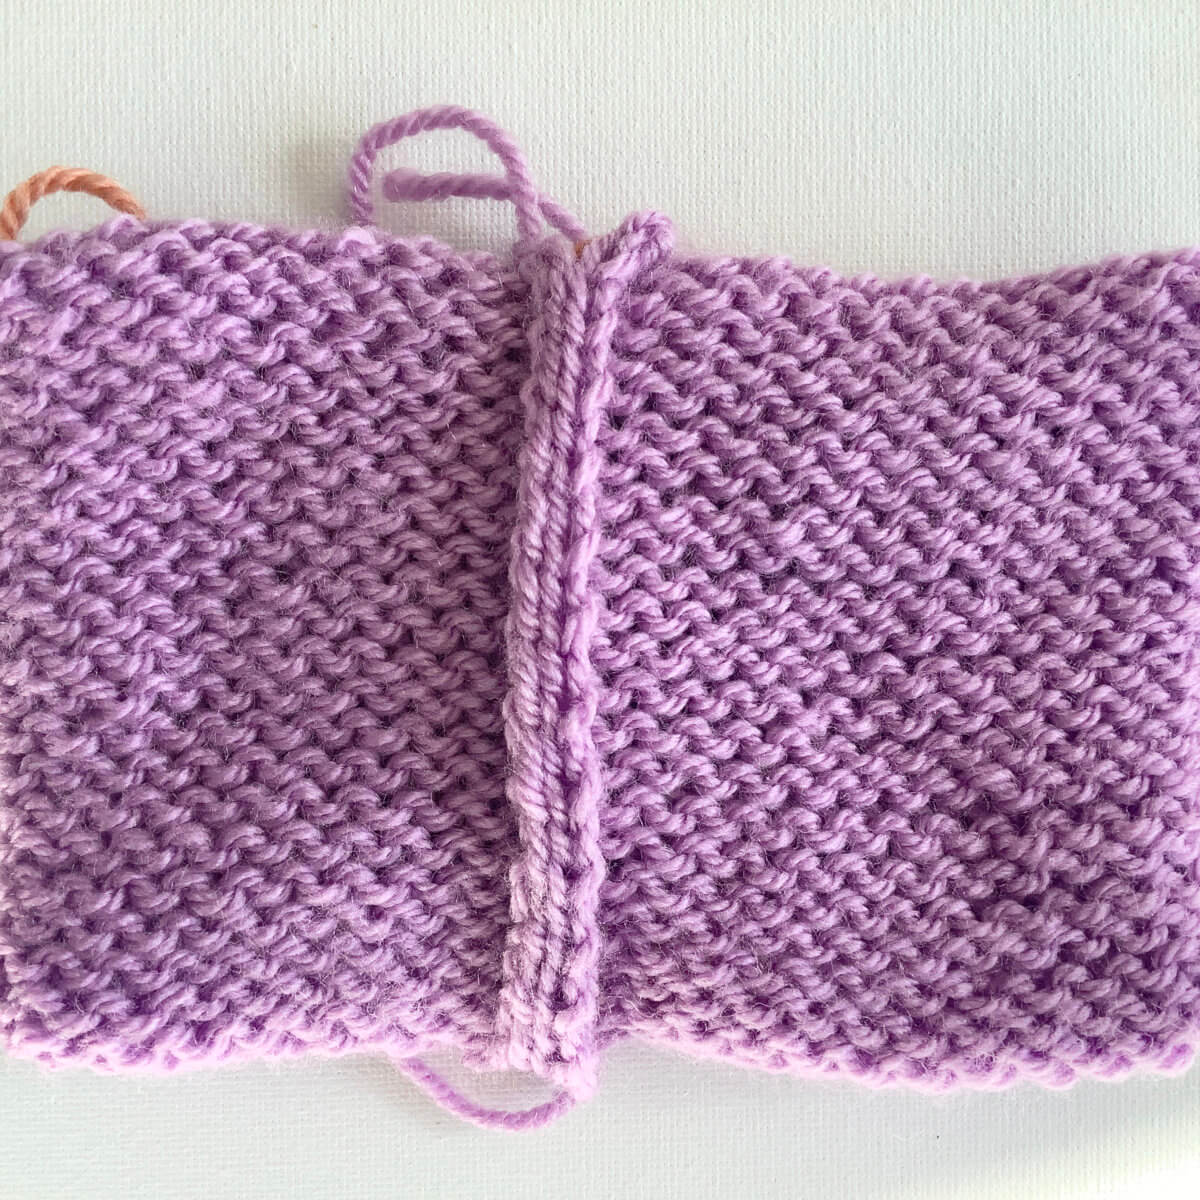
- And for completeness’s sake, here also the view from the wrong side of the fabric.

Thanks to my Patreon supporters for bringing you this freebie! Creating quality patterns and tutorials is a lot of work and resource-intensive. However, I find it important to give you free content like this tutorial. Thanks to the generous support of my Patreon supporters, I can make it happen. Thank you, patrons! Click here to join, or click here to read more about La Visch Designs on Patreon.


