inspiration

Time for a knit-a-long!

Cinematic knit-a-long image

It’s time for a knit-a-long! And I’ve got just the pattern for it: Cinematic! Join the KAL on Facebook in the La Visch World of Fiber Crafts group.

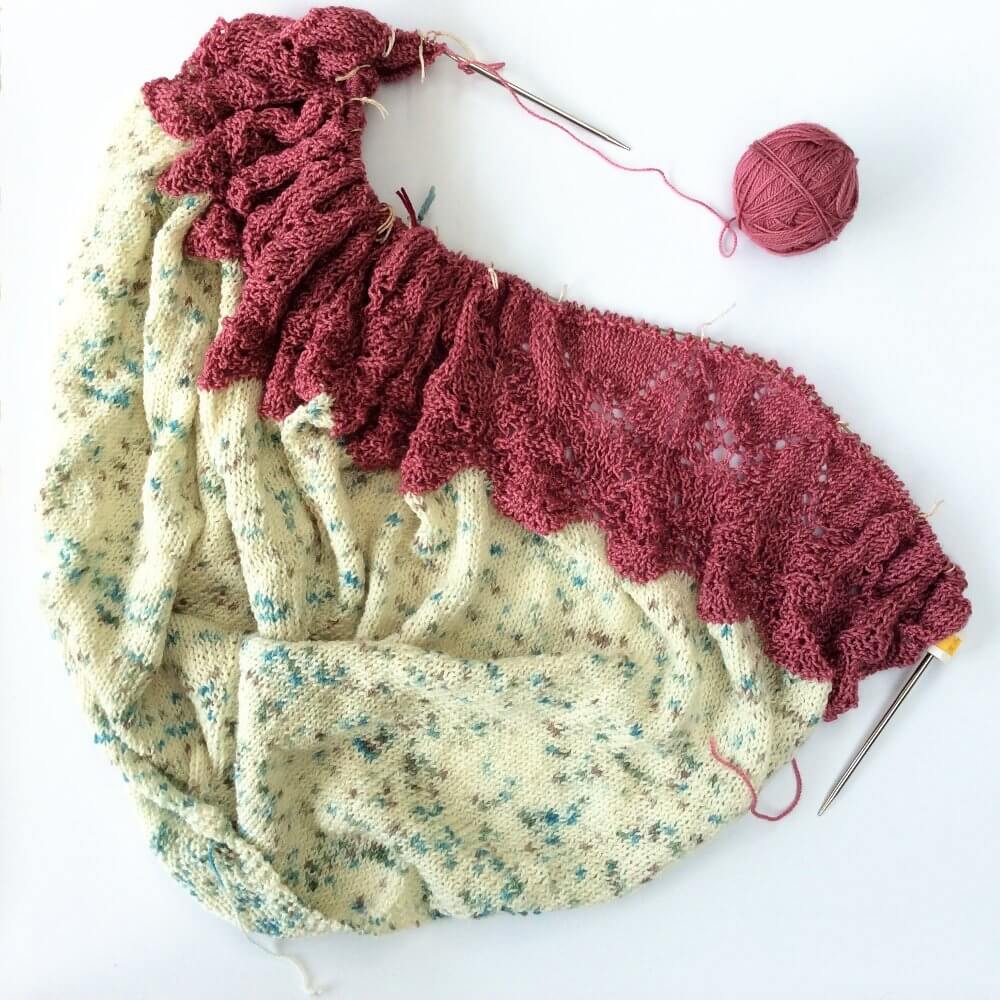
Cinematic is a simple but stylish triangular shawl knit sideways in garter stitch. With its generous size, it’s perfect to wear as an elegant scarf. Eyelet rows and stripes in a contrast color, combined with a gradient yarn, make for a highly customizable accessory. Wear it with a shirt and jeans for a casual look or with that little black dress for a more dramatic look.

The KAL will start this Friday, August the 30th and will run for a month until and including September the 30th 2019. The pattern can be found on Ravelry and, of course, on the La Visch Designs website. Every person posting a picture of the FO before or on September 30th will receive a 25% discount code for a La Visch Designs pattern of choice 😃

Want to share your progress social media? Go ahead, I love to see what folks do with my designs! Make sure to tag your posts with #cinematickal, #lavischdesigns and #cinematicshawl so I can find your post.

So, get your yarn and pattern today, I’m looking forward to seeing you over in the KAL group for the Cinematic knit-a-long!

Time for a knit-a-long! Read More »

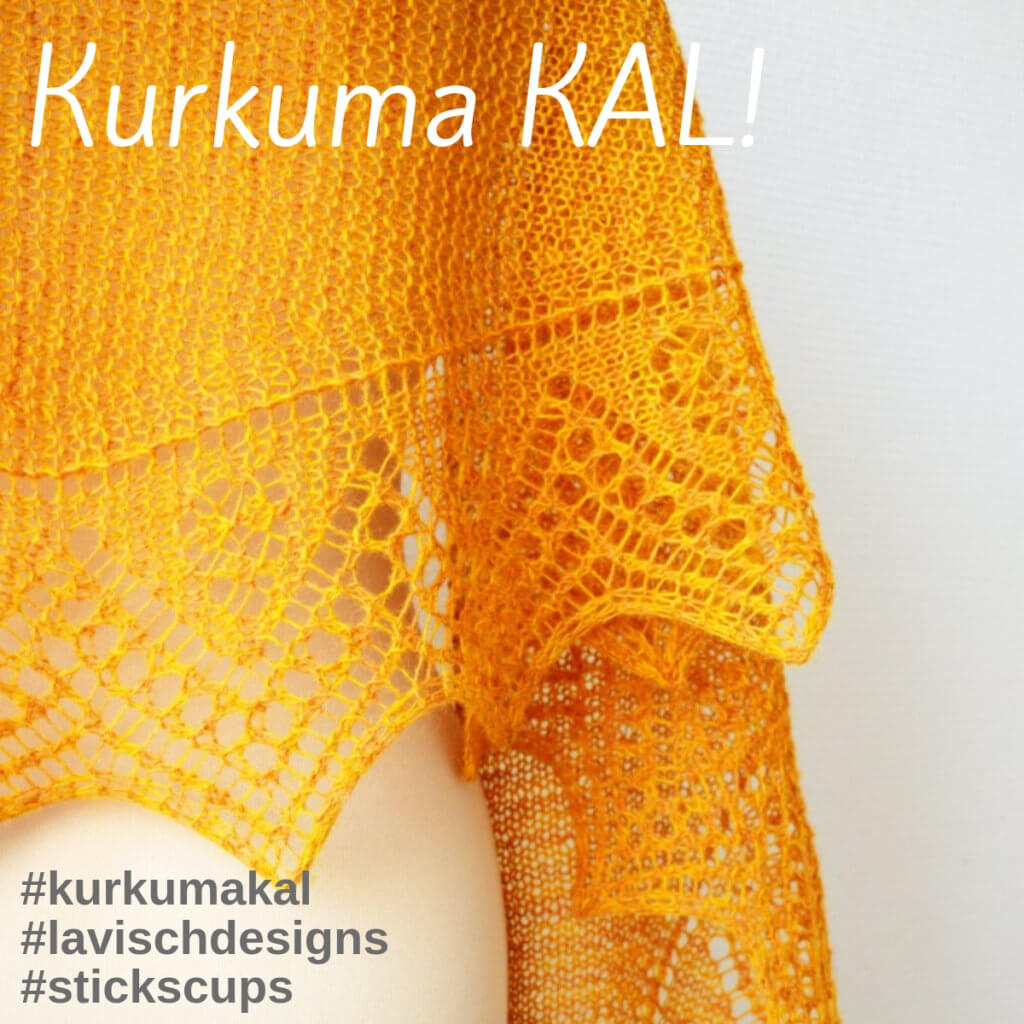
kurkuma KAL!

Kurkuma KAL!

My LYS Sticks & Cups and I are organizing a Knit-A-Long for my latest shawl design Kurkuma. It’s very spicy and so much fun, so join the Kurkuma KAL!

We cast on Thursday 11 April during the Cast-On Party at the Sticks & Cups store in Utrecht. Also, I’ll be there with a bunch of my designs, so if you want to take a closer look at some of my shawls and try them on, this is your chance! Can’t make it to the party? No worries! Get your kit before the 11th and post a picture using the #kurkumakal #stickscups and #lavischdesigns hashtags!

The pattern is available through this website, but if you can also get it at the shop in a kit. Visit Sticks & Cups on Instagram or Facebook to see some of the yarn combinations Lili has prepared.

Prizes!

Of course, there will also be prizes! The prize drawing is on May 18th during the Beltane Yarn Festival at the Sticks & Cups store in Utrecht. There will be 2 prize drawings, both to be held on May 18th:

Logo Sticks & Cups
  1. The first drawing is for all who join by getting a kit at Sticks & Cups: You get a number when you buy your kit at the shop with which you are entered in the prize drawing. Prizes consist of yarn and your pick of a La Visch Designs pattern of choice.
  2. The second drawing is for all who love to join the KAL but don’t have the option to visit Sticks & Cups for a kit. On May the 18th I will select my 3 favorite pictures tagged with #kurkumakal & #lavischdesigns. Each of the 3 winners may select a La Visch Designs pattern of choice that will be gifted to you. Both (pictures of) WIP’s and FO’s count, so share pretty pictures on Instagram and Facebook as often as you like! During the KAL I will repost some of the pictures that catch my eye.

Make sure to follow La Visch Designs on Instagram or Facebook for all the latest news about the Knit-A-Long. Also, visit the Kurkuma KAL event on Facebook for more info on the KAL.

Recap

  • The KAL runs from 11 April to 18 May 2019.
  • Get your Kurkuma kit at Sticks & Cups or just the pattern here.
  • The prize drawing is on 18 May.
  • Post lots of pictures using the hashtags #kurkumakal #lavischdesigns and #stickscups.

So go get your pattern and yarn and be ready to cast on with us on Thursday. I’m looking forward to seeing your WIP’s and FO’s!

kurkuma KAL! Read More »
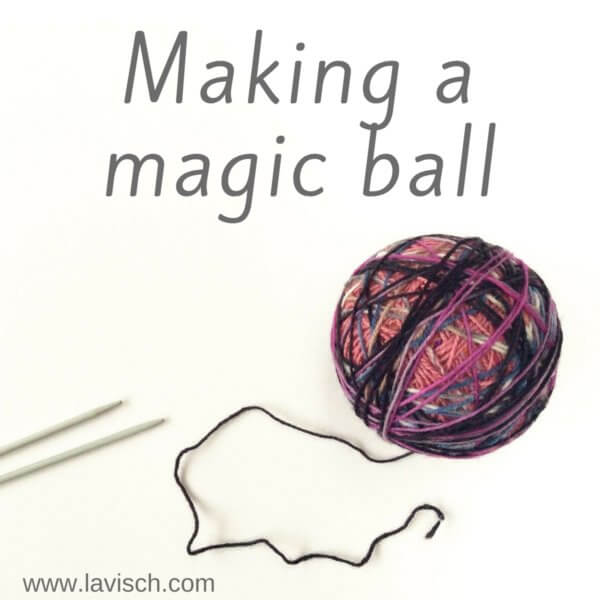
tutorial: making a magic ball

Making a magic ball - by La Visch Designs

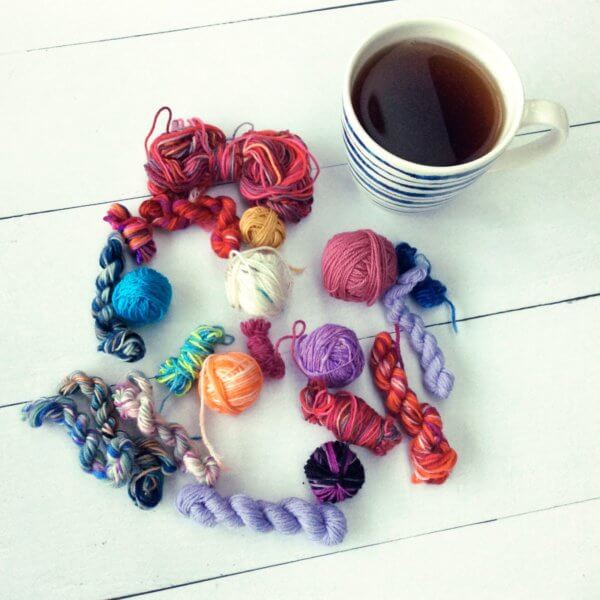
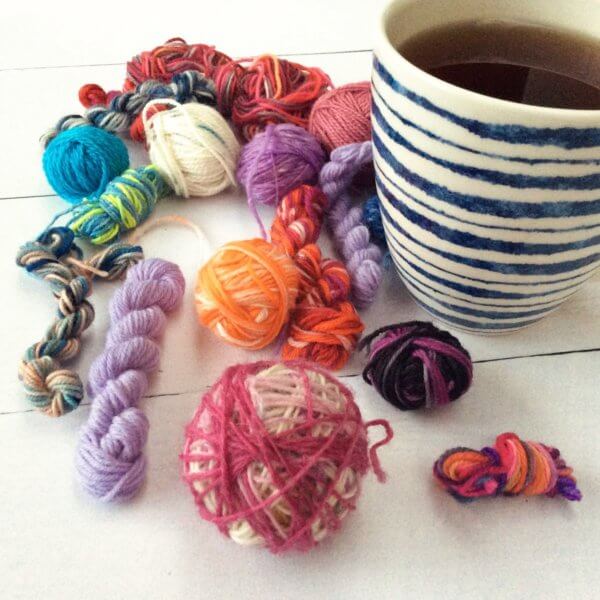
If you’re a bit like me, you’ll have loads of odds and ends of the various projects. They are of course quite ornamental when displayed in nice glass jars or vases. But how many jars of ornamental balls of yarn does one need? I mostly work in fingering weight yarn which means I’ve got a lot of ends that would combine well, ranging from a mere 2 g up to quarter skeins. Of course, the latter could be used in small projects like Fish for Amiga, but again, how many small softies does one need?

So, I thought, why not make a magic ball?!

What is a magic ball?

You may wonder what a magic ball exactly is. Well, I’ll tell you! It is a ball of yarn that is made by attaching pieces of yarn of similar weight to each other. Thus making a bigger ball out of all of the smaller yarn remains. This way a scrappy project like a blanket, cowl, scarf or shawl is made easier because there are no ends left to weave in. That’s already taken care of by combining the yarns in the magic ball!

I myself am also very much looking forward to working with my magic ball. All those memories of projects past attached to the yarns within… Below you can find what I did to make my magic ball.

How to make a magic ball step by step

1. To start, collect your bits and bobs of yarn. Make sure they’re all in the similar weight range and ideally, also of similar materials. Combining an all acrylic yarn with otherwise wool yarns will have an impact on the resulting piece if it requires blocking. And do also consider differences in drape and washing care.

In my case, they’re all fingering weight yarns with a high content of wool. Some have up to 25% of nylon, others contain a bit of silk. In general behavior, all these yarns are however quite similar.

Making a magic ball - by La Visch Designs

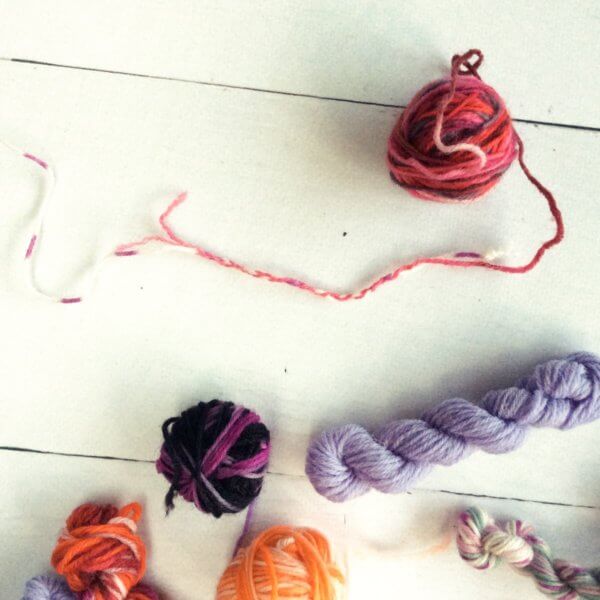
2. To connect the pieces of yarn with each other, there are of course various options among which the Russian join and the braided join. In this case, because the yarns all have multiple plies, I’m using the braided join. The Russian join requires a bit more attention and tools to work, but would have been my choice for connecting single ply yarns with each other.

Making a magic ball - by La Visch Designs

3. Do leave the yarn tails on! Cutting them off prematurely can contribute to the join coming undone. Just leave them be and cut any yarn ends after you’ve knitted up your magic ball and blocked the finished piece. In the below picture you can see a bit how I’m faring midway in making my magic ball.

Making a magic ball - by La Visch Designs

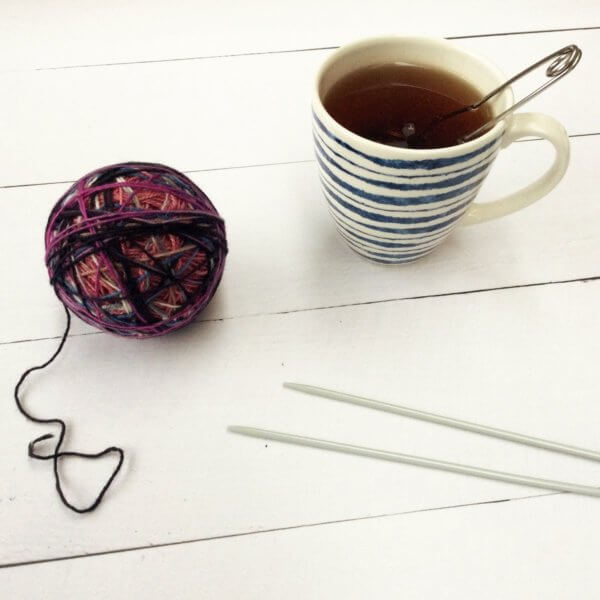
4. And here it is all done! Almost 100 g of yarn where there were only useless bits before. Now to think of a nice new design to use it in…

Making a magic ball - by La Visch Designs

tutorial: making a magic ball Read More »
dyeing cotton with onion skins

Dyeing cotton with onion skins - a tutorial by La Visch Designs

After I finished dyeing the skeins of wool in my recent onion skin wool dyeing experiment, quite a potent dye baths were left over. A shame, of course, to let it go to waste. I decided that dyeing cotton with onion skins was in order! Fortunately, I have some, that has been lingering in my stash for years.

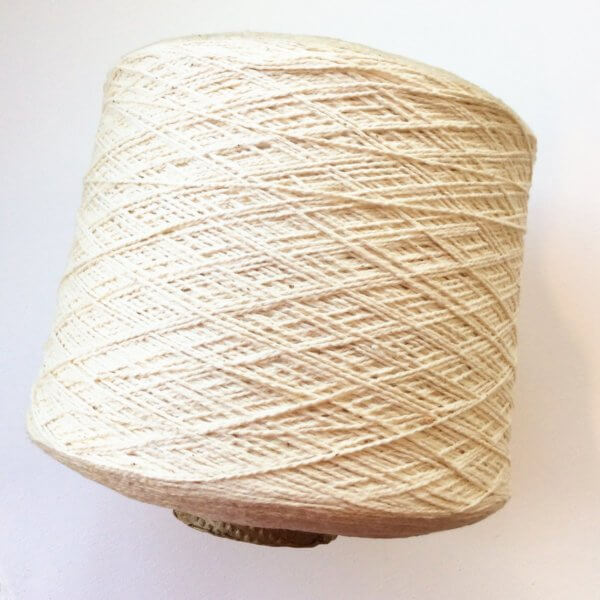
This cotton yarn is an unbleached coned yarn, that I originally bought for dishcloths and such. It turned out a tad too thin for that though, so it has been lingering in the stash ever since. I perfect candidate for some dye experimentation!

Dyeing cotton with onion skins - a tutorial by La Visch Designs

Materials

In this experiment, I did not have to prepare the dye baths themselves because I used the leftover ones from my wool dyeing experiment. Also, I decided not to mordant the cotton yarn, despite the fact that I read that plant or cellulose fibers are more challenging to dye than protein based fibers like wool or silk. I also read, that there was no need to mordant cotton with onion skin dye. So I decided to take the plunge and go ahead without!

I used the following materials:

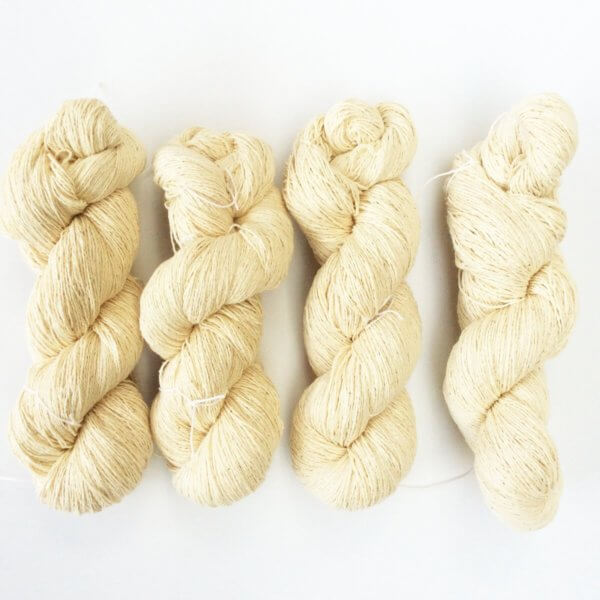
  • Cotton yarn, 4 skeins of 100 g each
  • Detergent (without enzymes)
  • Yellow onion skin dye bath (second dye bath)
  • Red onion skin dye bath (second dye bath)
  • Rubber gloves, stainless steel spoons
  • Water
  • A way to heat the pots, I just used my stove

a. Washing the cotton

1. First as explained in this post I skeined up the yarn.

Dyeing cotton with onion skins - a tutorial by La Visch Designs

2. Next, I washed the cotton yarn to remove any lanolin, spin oil or other debris still present on on it. You can’t see it in this picture, but my washing water turned yellow! A very needed wash it appeared…

Dyeing cotton with onion skins - a tutorial by La Visch Designs

b. Dyeing cotton with onion skins

1. In the case your yarn has dried before getting to this step, you have to soak it first in  water again. In wet yarn dye distributes itself much more uniformly. About half an hour of soaking is usually enough. If the yarn is still slightly wet, you can skip to step 2.

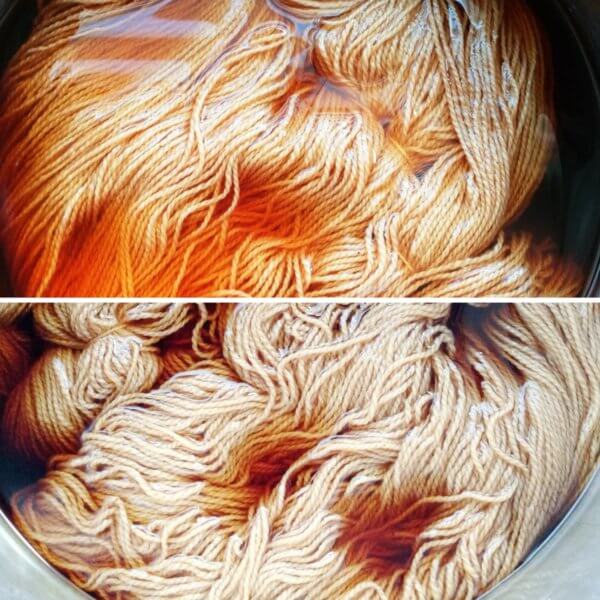
2. In each of the dye baths, I have put 2 skeins of cotton and made sure to completely submerge all yarn. The picture below shows the yellow onion bath on top and the red onion skin one on the bottom half.

Dyeing cotton with onion skins - a tutorial by La Visch Designs

3. I let the cotton simmer for about an hour in the dye bath. Next, I let it cool down in the dye bath overnight. The picture below shows how the cotton looked next morning.

Dyeing cotton with onion skins - a tutorial by La Visch Designs

4. Rinse the yarn off with lukewarm water, add a dash of vinegar kitchen to fix the color. Rinse as long as necessary until the water runs clear. Remember to put on rubber gloves, if you do not want to stain your hands! Then you can squeeze the water out of the dyed yarn and hang to dry.

And this is how my cotton looks like after it has completely dried up:

Dyeing cotton with onion skins - a tutorial by La Visch Designs

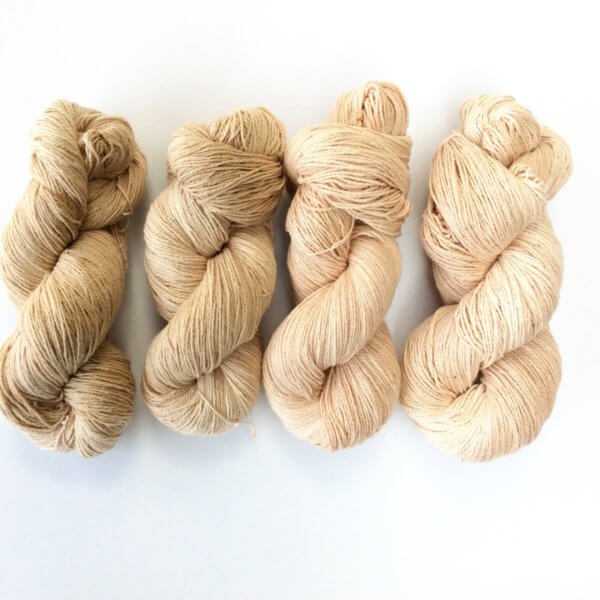
On the left 2 skeins of red onion skins on un mordanted cotton, and on the right yellow onion skins on again 2 skeins of un mordanted cotton. The red onion dyed yarn is now some sort of brownish cream. The yellow onion dyed yarn turned a pinkish cream. All in all, not a very dramatic difference.

I must admit being a tad disappointed with the result of my dyeing cotton with onion skins experiment. These colors give me unpleasant associations with old underwear, the type of color that, makes me look like I just crawled from underneath a rock. Was it because I used a second dye bath? An unbleached yarn? Or perhaps because I didn’t mordant the cotton beforehand?

I really don’t know. One thing is sure though: there will be a next experiment sometime in the future overdyeing this cotton!

dyeing cotton with onion skins Read More »
fixing a mistake in lace knitting

Fixing a mistake in lace knitting - a tutorial by La Visch Designs

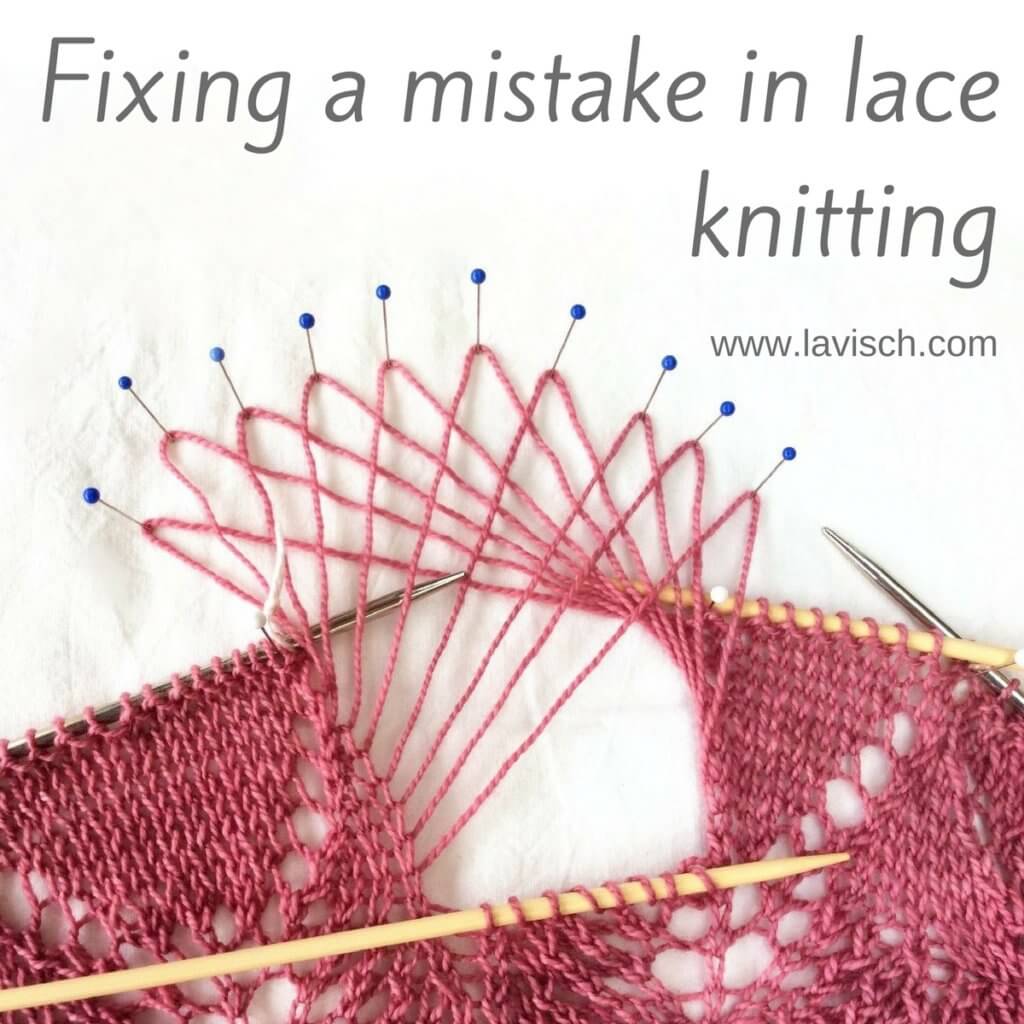
This post is all about my recent confrontation with fixing a mistake in lace knitting. As you may have seen if you’re following me on Instagram or Facebook, I’ve been happily knitting along on my latest design using Nurturing Fibres Super Twist Sock in “Odette” and “humbug”. I got mine from Wol zo Eerlijk, a lovely store with lots of environmentally friendly and fair trade yarns. Anyway, there I was, in the home stretch, with only 10 more rows of edging to go before the bind off. It was then that I saw it: a mistake in my lace, 9 rows down!

When I found the mistake in the pink border of my Pink Monarda shawl pictured, I had about 320 stitches per row. So no, I was not going to rip out all that work! Instead, I dropped down only 8 stitches to the place where I made the mistake. After that was correcting the error, followed by knitting everything back up to the row I was on.

In this post, I’ll show you exactly what I did!

Helpful materials

To start, it is pretty handy to have some tools available to make fixing the mistake easier. I used the following:

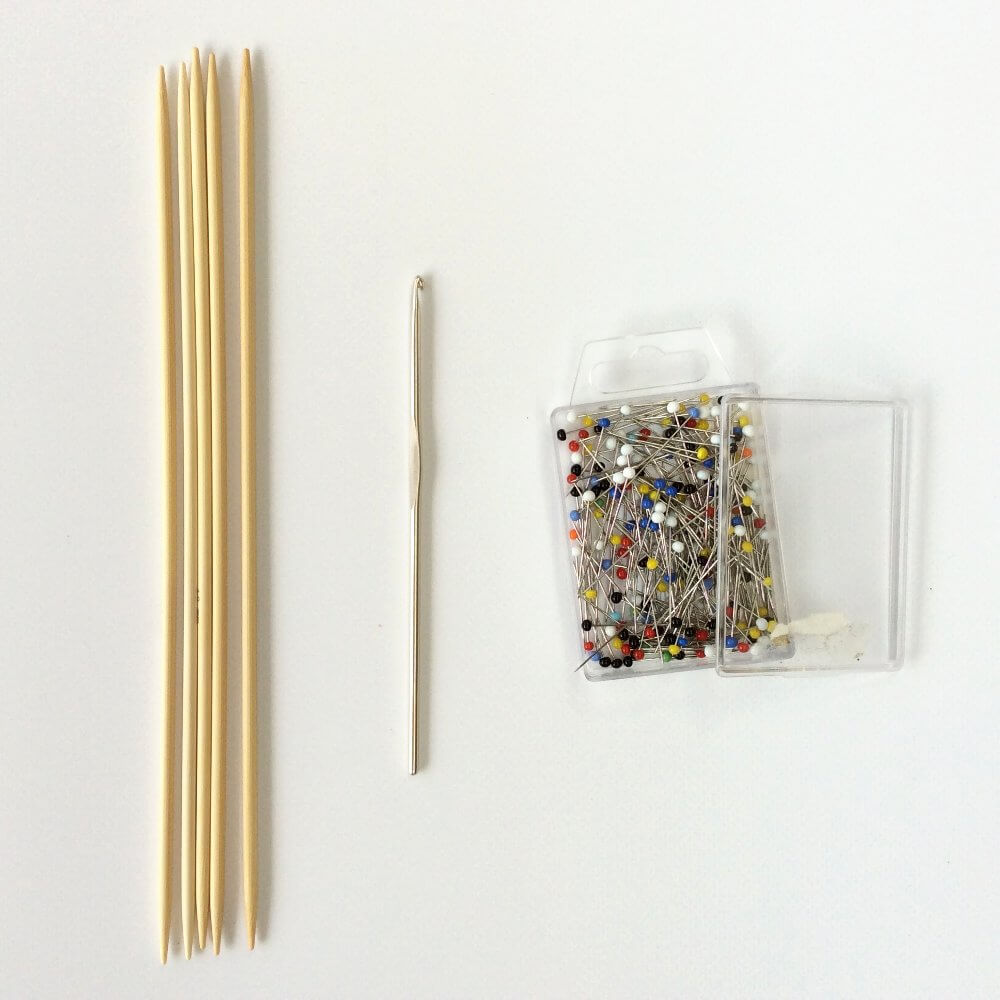
  • A set of DPN’s (double pointed needles) in the same size as the needles used in your project, or smaller.
  • A crochet hook.
  • Some pins.
  • A pillow.
Fixing a mistake in lace knitting with La Visch Designs

The pillow and pins were used to make sure that your work stays exactly where you need it to be. Also, it helps to see the mistake better when pinned out, instead of all scrunched up like lace tends to be before blocking.

On to the fixing!

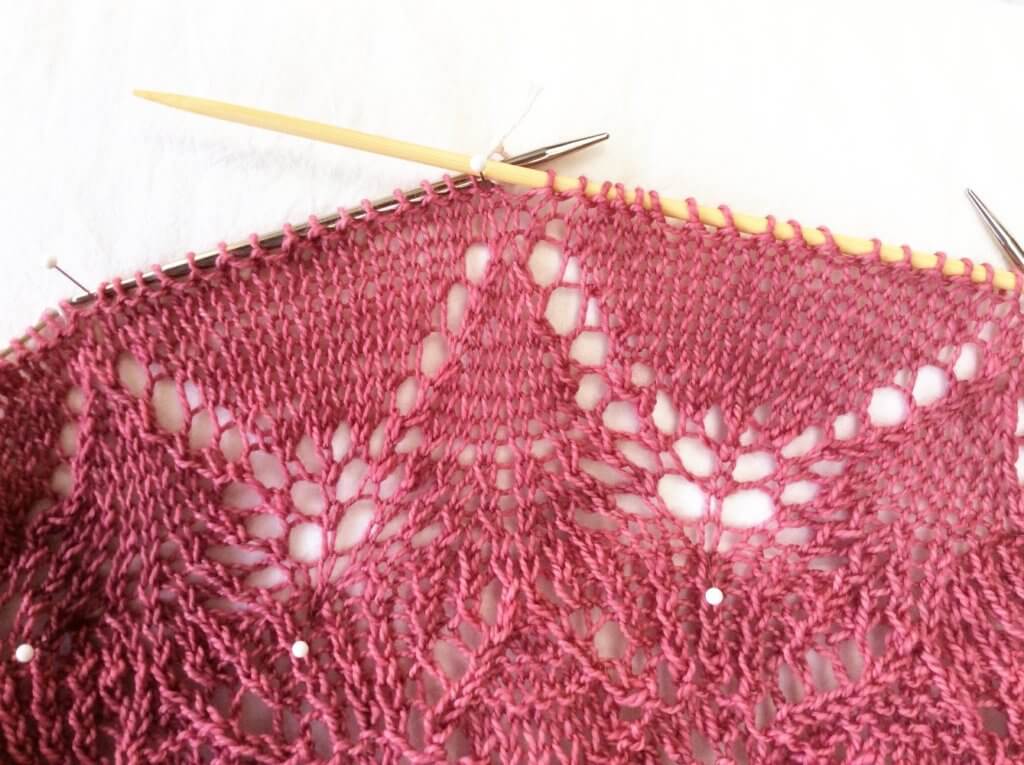
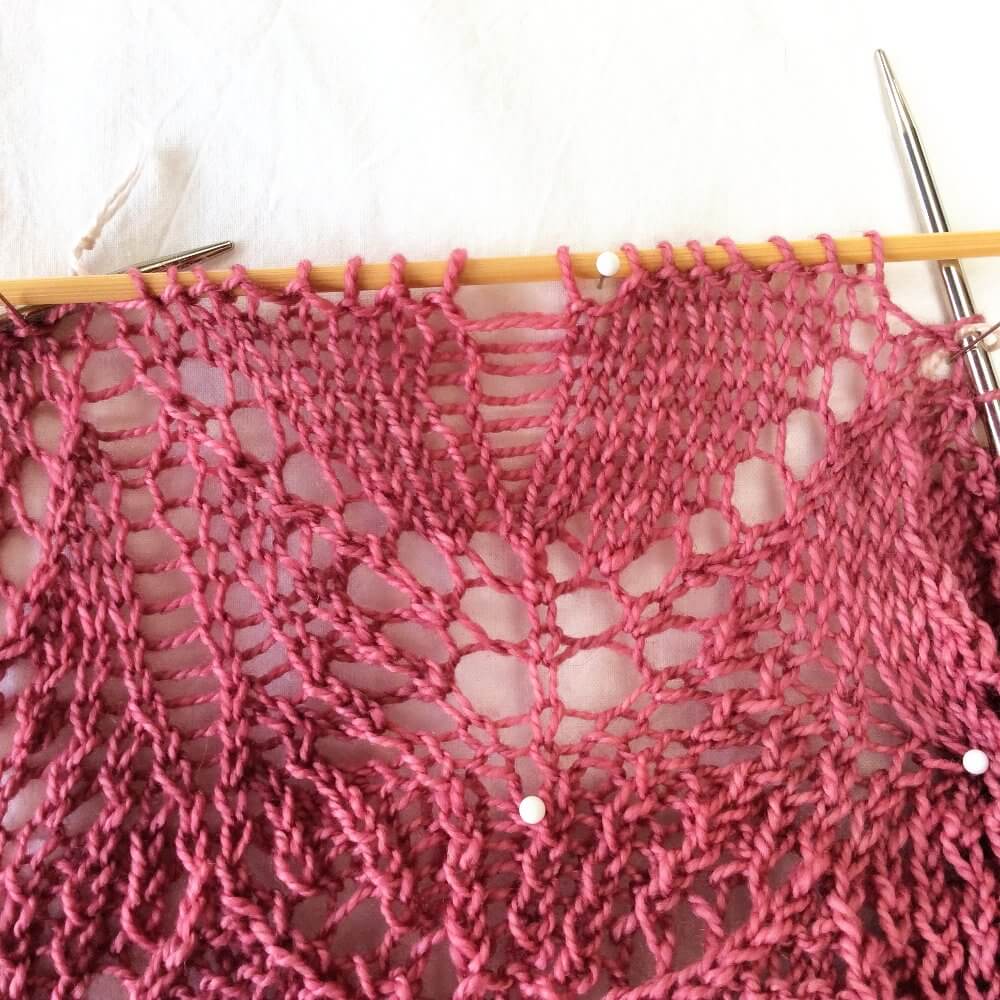
1. To start, I pinned out my knitting on the pillow. I did this in such a way that I could clearly see a repeat of the lace pattern that was knitted correctly, as well as the one with the mistake in it. I slipped some of the stitches on one of the DPN’s to help fixate the whole better on the pillow. Can you see in the picture below where the mistake is?

Fixing a mistake in lace knitting with La Visch Designs

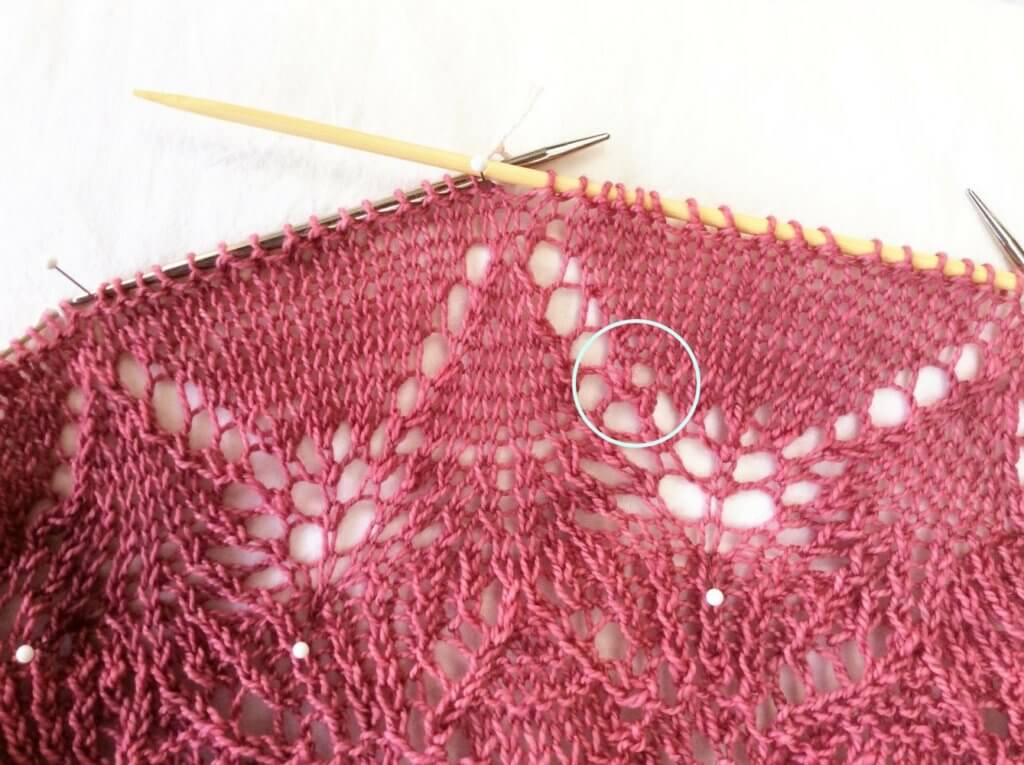
2. The mistake is in the left half of the repeat, near the 4th yarn over, counted from the needle. Can you see it? In the picture below, I have indicated it with the circle.

Fixing a mistake in lace knitting with La Visch Designs

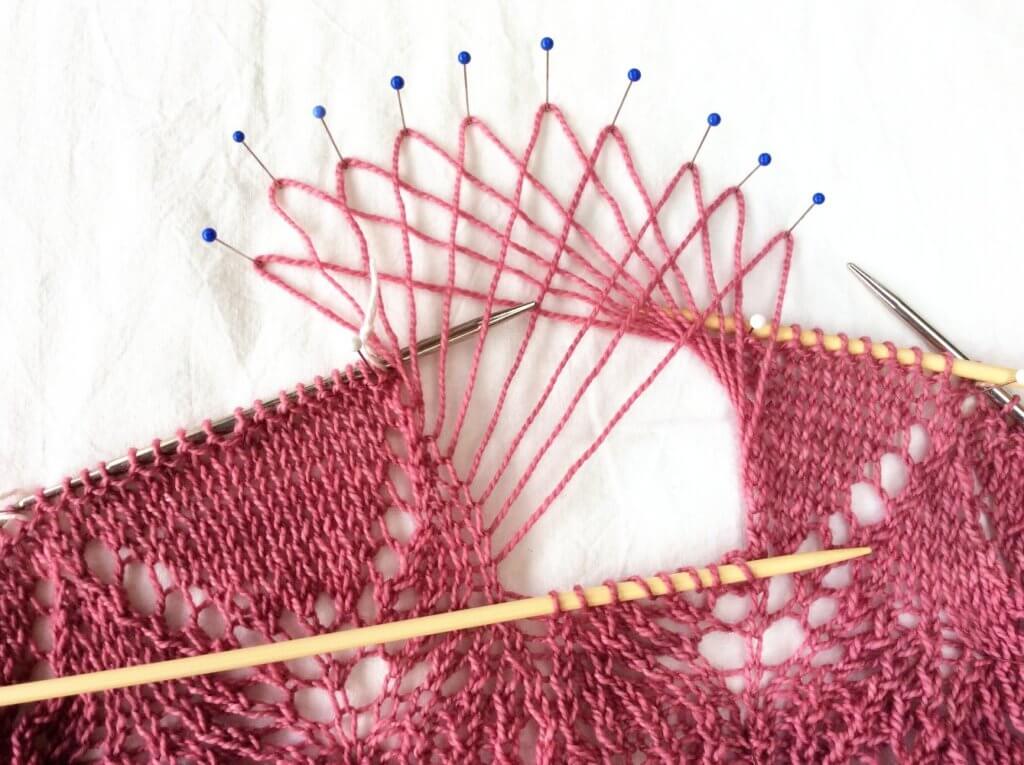
3. In this particular case, it wasn’t necessary to drop down the whole repeat. Instead, I only dropped the 8 stitches on the left half of the repeat. I dropped down until I reached the purl row exactly below the row with the mistake in it.

When approaching the row below the mistake, I stopped ripping back and started to carefully tink (tink = knit backward!) further back, catching the released stitches with another DPN. It is especially important to do it like this when working with very slippery yarn. If you don’t take care, the knitting may run deeper down than desired, thus increasing the amount of fixing to do.

The yarn from every row dropped, I pinned to the pillow, going from left to right. This made sure nothing got tangled, and I could easily count the number of dropped down rows. This, in turn, made it easier to see where to pick up the chart when knitting it back up.

Fixing a mistake in lace knitting with La Visch Designs

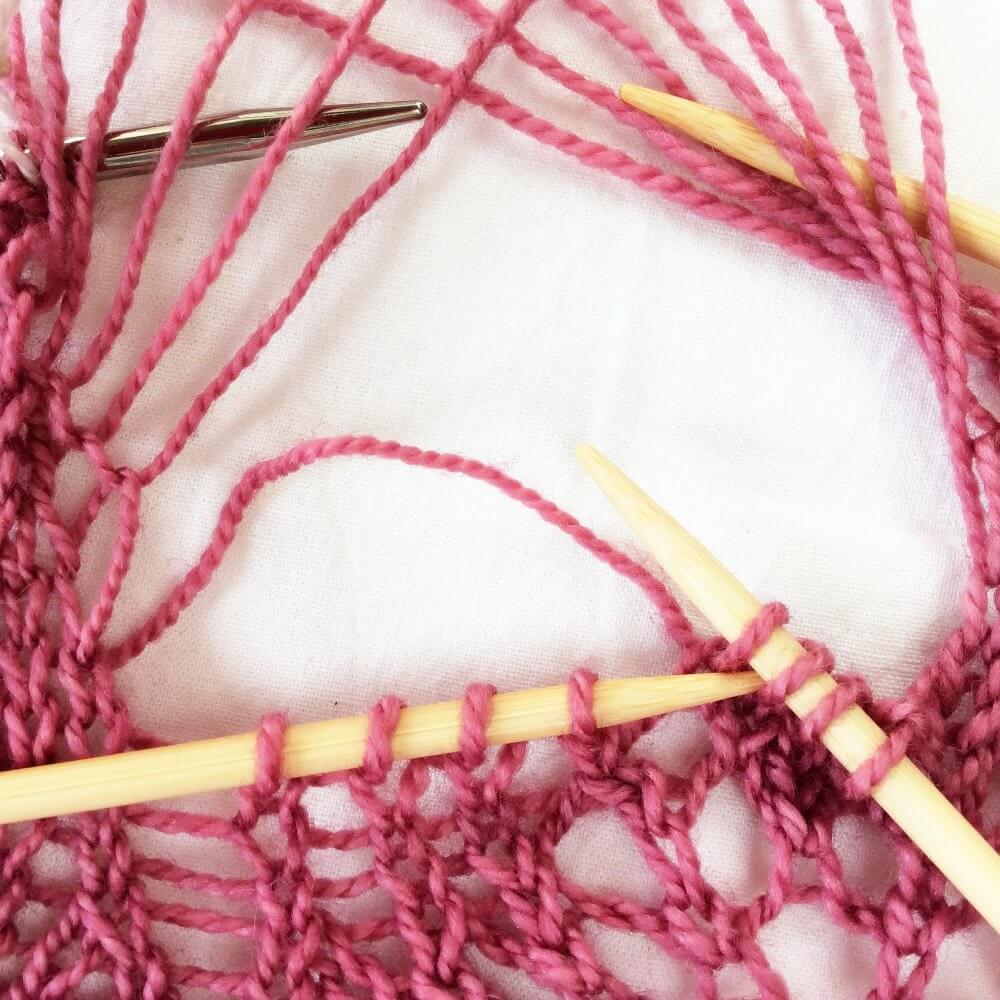
4. Then it was a matter of knitting back in pattern. As you can see, you use the free loop of yarn, just as you would use the thread running to the ball of yarn. If you find it challenging to catch the thread correctly to pull it through a stitch, you can always use the crochet hook to assist with this.

Fixing a mistake in lace knitting with La Visch Designs

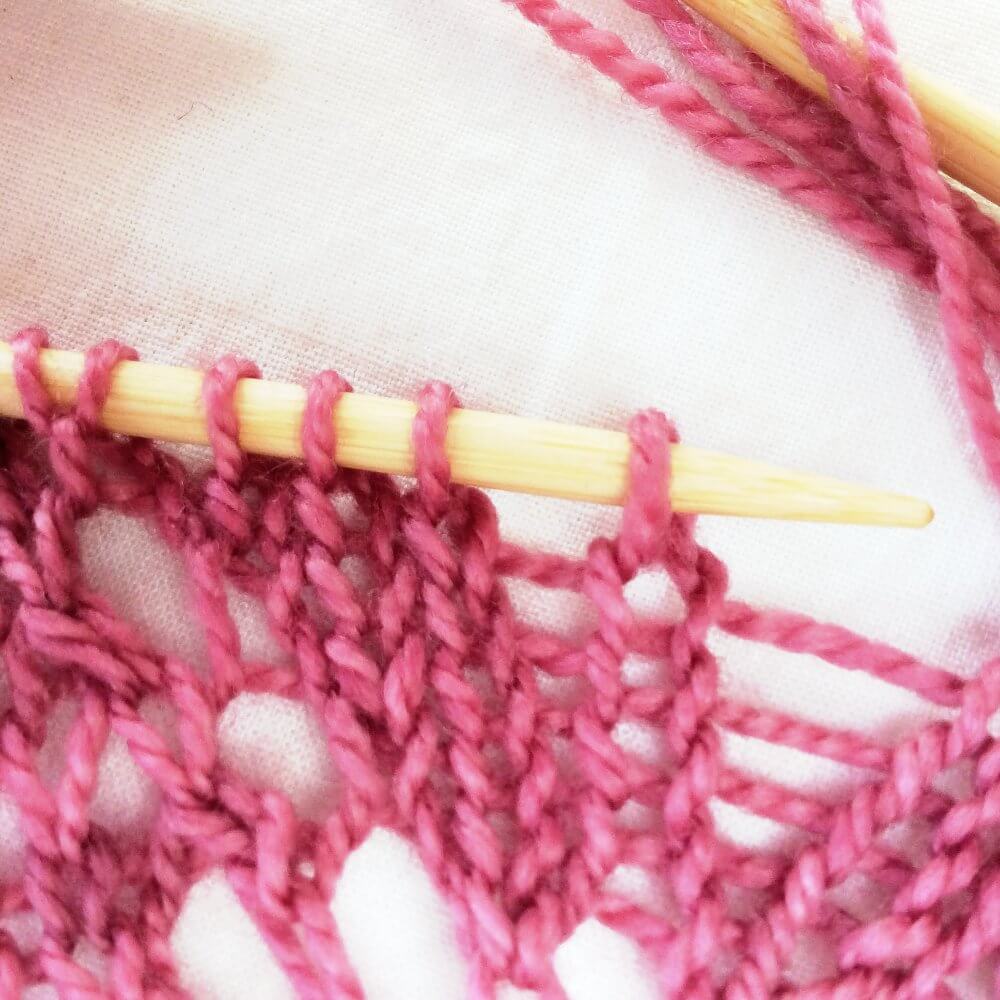
5. Because of the way I manipulated the yarn through the stitches, some of the stitches got mounted twisted. In the picture below, you can see that the left leg of the stitch is in front of the needle, instead of at the back. This really is no problem, but it is something to pay attention to. To correct this, I knitted these twisted stitches through the back loop.

Fixing a mistake in lace knitting with La Visch Designs

6. And here you see the result: all fixed! The loose stitches you can see next to the re-knitted stitches are because of the tension on those threads when manipulating the dropped down stitches. This should, however, correct itself during blocking. If it’s still a tad visible, you can redistribute the excess yarn a bit over the various stitches.

Fixing a mistake in lace knitting with La Visch Designs

7. And this is how to go about fixing a mistake in lace knitting. Now on to knitting those final rows of this shawl…

Fixing a mistake in lace knitting with La Visch Designs

fixing a mistake in lace knitting Read More »
dyeing with natural dyes: part 4 – dyeing!

Dyeing yarn with natural dyes - a tutorial by La Visch Designs

This post is part 4 in a series in which I tell you all about what is involved in dyeing wool with natural dyes. In the previous steps, we have already washed our wool, mordanted the yarn and prepared our dye bath. Now it is finally time to dye!

The steps to go through are as follows:

a. Washing the wool
b. Mordanting
c. Preparing the dye
d. Dyeing your wool

As with mordanting, you can dye either warm or cold. The end result may differ between the two methods, it is a matter of experimentation to see what you like best. The advantage of hot dyeing is, of course, that it is relatively fast. After about an hour in the hot dye bath you’ve already got result. However, it also uses much more energy. That’s why I’m using the cold dyeing method in this example.

d. Dyeing yarn!

1. In the case your mordanted yarn is dry, you have to soak it first in water again. In wet wool dye distributes itself much more uniformly. About half an hour of soaking is usually enough. If the wool is still slightly wet, you can skip to step 2. If you intent to have a more random coverage, than by all means do not pre-soak your yarn of course! Freedom in variations is one of the nice things about dyeing yarn yourself.

Dyeing yarn with natural dyes - a tutorial by La Visch Designs

2. Put the mordanted wool in the pot or pots with the dye bath. Fill if necessary with a little water to completely cover the wool. Stir gently if necessary to get the wool well into the dye bath.

Dyeing yarn with natural dyes - a tutorial by La Visch Designs

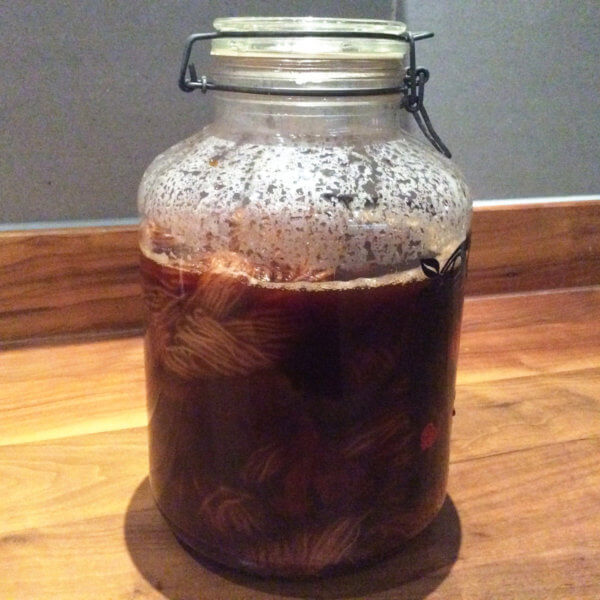
3. Let the wool soak about 24 hours (or longer if desired) in the dye bath. An hour more or less does not matter very much. You can dye your skeins of wool in varying tints of the same color, by removing them after different numbers of hours in the dye bath.

Dyeing yarn with natural dyes - a tutorial by La Visch Designs

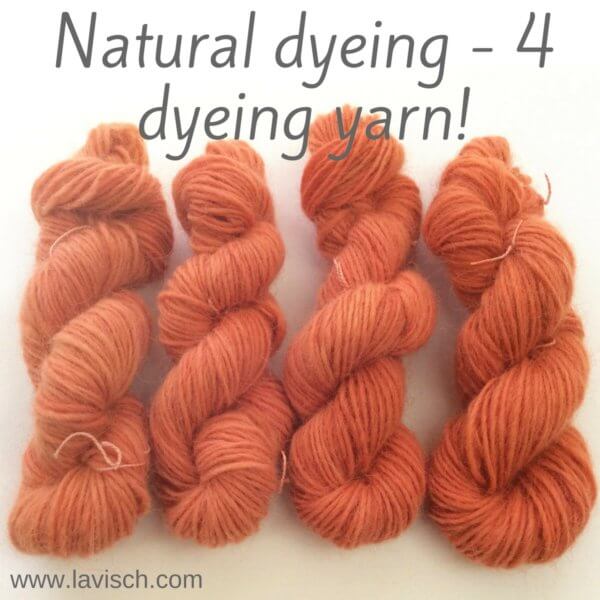
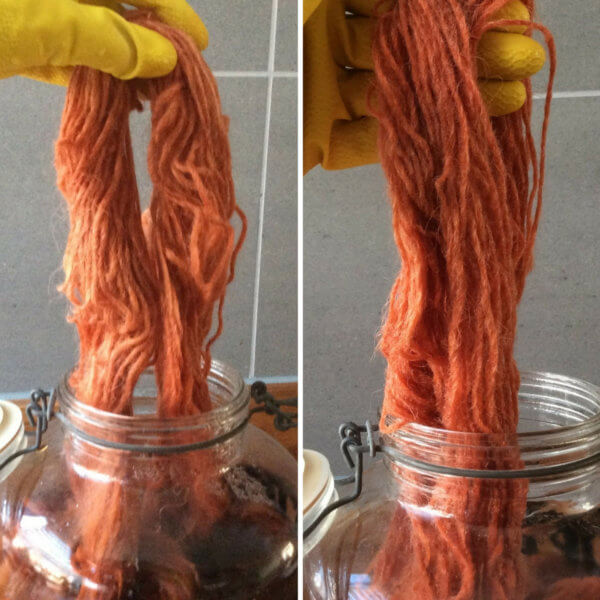
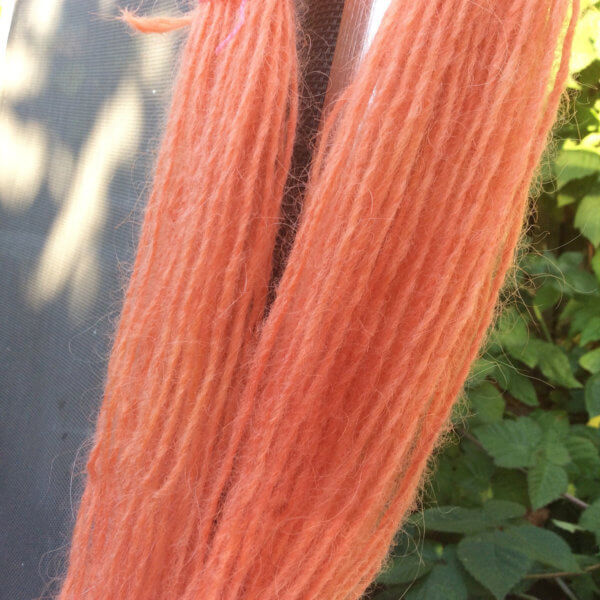
4. I have removed my skeins of wool after respectively 12, 16, 20 and 24 hours in the dye bath to see how the differences turn out. On the left is 12-hour in the dye bath, on the right is at the 24 hour mark.

Dyeing yarn with natural dyes - a tutorial by La Visch Designs

Rinse the wool off with lukewarm water, add a dash of vinegar kitchen to fix the color. Rinse as long as necessary until the water runs clear. Remember to put on rubber gloves, if you do not want to stain your hands!

5. Then you can squeeze the water out of the dyed wool and hang to dry.

Dyeing yarn with natural dyes - a tutorial by La Visch Designs

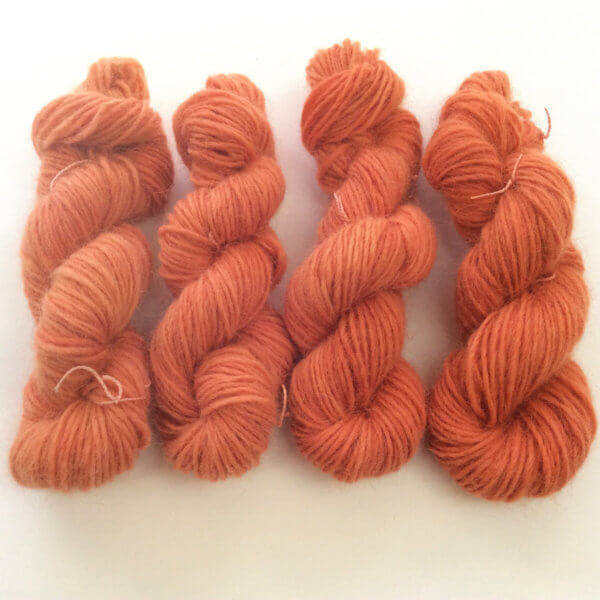
And this is how my wool looks like after it has completely dried up:

Dyeing yarn with natural dyes - a tutorial by La Visch Designs

As you can see there is a difference between 12 and 24 hours in the dye bath. However, four hours between the skeins is apparently too short to see a lot of difference between successive skeins. Learned something!

The second dye bath

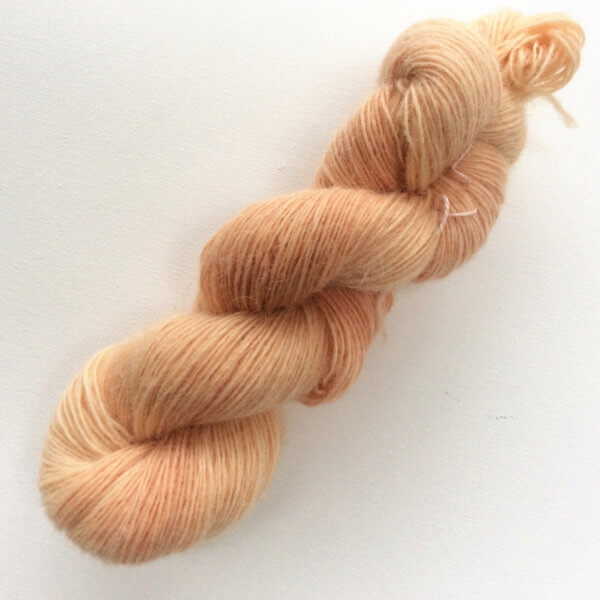
The above coral pink color I obtained by allowing my wool to soak in the first extract of the madder, the so-called first dye bath. To see if more pink shades were possible, I made a new dye bath containing the same madder by soaking them again for one day. In this dye batch I then soaked another mordanted skein of wool for 24 hours. And this lovely blush-colored yarn was the result:

Dyeing yarn with natural dyes - a tutorial by La Visch Designs

Lots of fun to dye with plant-based dyes! I will definitely do this more often and am already saving up onion skins for my next natural dye project!

dyeing with natural dyes: part 4 – dyeing! Read More »
dyeing with natural dyes: part 3 – the dye bath

Dyeing with natural dyes - preparing the dye bath, a tutorial by La Visch Designs

This post is part 3 in a series about dyeing wool with natural dyes. This part is all about the various steps in preparing the dye bath.

The steps to go through are as follows:
a. Washing the wool
b. Mordanting
c. Preparing the dye
d. Dyeing your wool

Today we are going to make the dye bath! In this experiment I’m going to dye with madder. Below I want to tell you some more about this first.

Madder

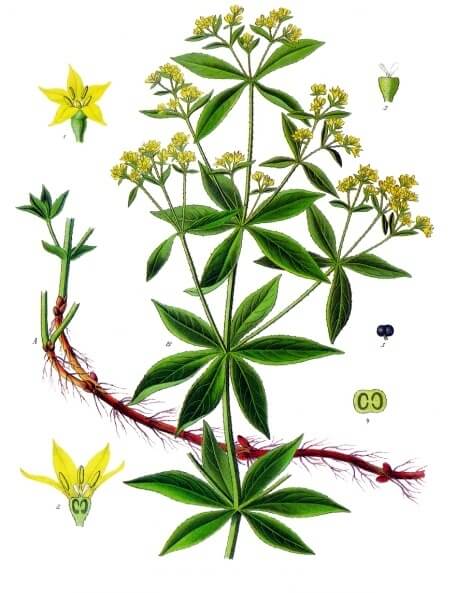
Dyeing with natural dyes - preparing the dye bath, a tutorial by La Visch DesignsMadder (Rubia tinctorum) has been used as a dye for many thousands of years. The reason? It is one of the most light-resistant red dyes of natural origin. It was and is used for the coloring of textiles and leather. In the fifteenth century, the Netherlands was the main producer of the madder. Particularly in Zeeland there were many fields of madder plants in the 19th century. At least until synthetic dyes became available.

The plant is about 60-90 cm high and has small yellow flowers. Below ground are the rhizomes, which can go as deep as  50-100 cm. The roots are the part that is of interest for dyeing. Madder is harvested about three years after planting, because only then the roots are big enough. After drying, the roots are ground to small pieces or powder.

c. Making the dye bath

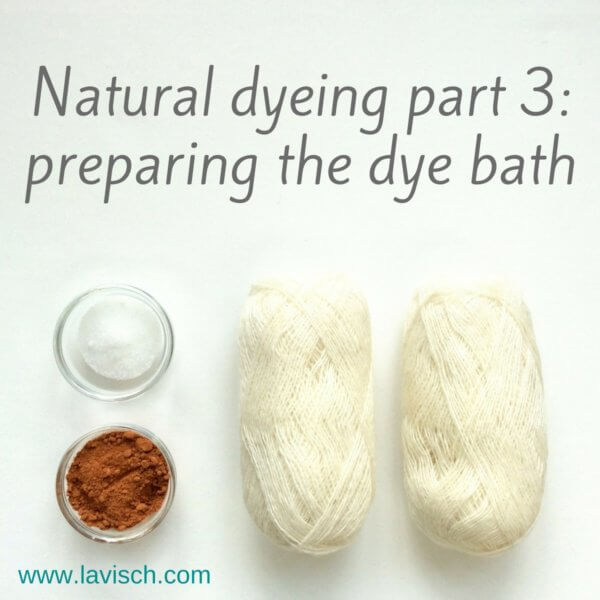
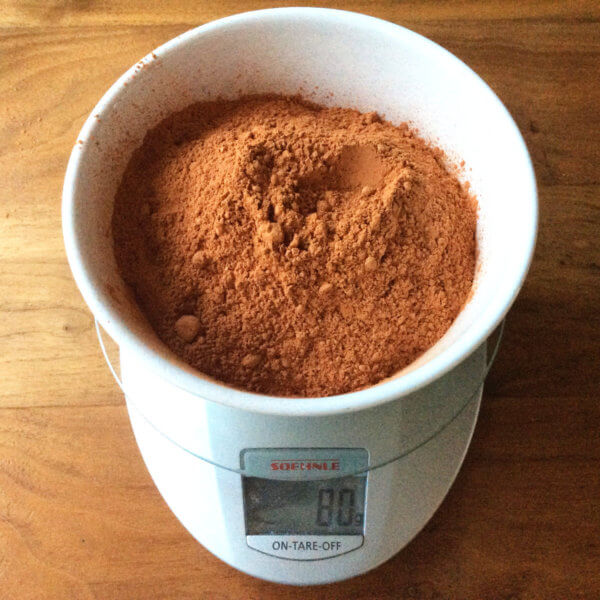
In order to dye  with madder root, you need about 25-50 g of powder per 100 g of wool. The precise amount depends upon the desired strength of the dye bath. For my wool (weighing in at 200 g dry weight) I will use a total of 80 g of madder powder. Here are the steps I followed:

1. Weigh your dye stuff, powdered madder root in my case.

Dyeing with natural dyes - preparing the dye bath, a tutorial by La Visch Designs

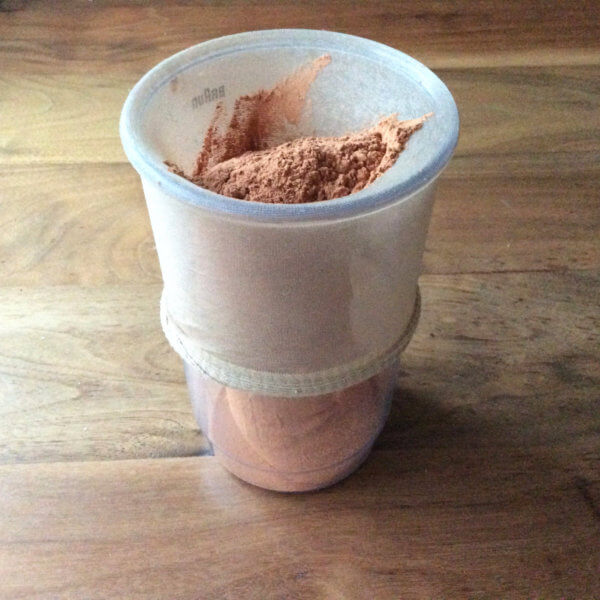
2. Put your dye stuff in an old bit of pantyhose or make a “tea bag” from it by other means. You want the dye stuff  in it to have adequate space to absorb moisture and to release its dye to the water. The dye stuff “tea bag” makes it easier later on to remove it out of your dye bath. It also has the great benefit of not having to remove any pieces or powder out of your wool.

Dyeing with natural dyes - preparing the dye bath, a tutorial by La Visch Designs

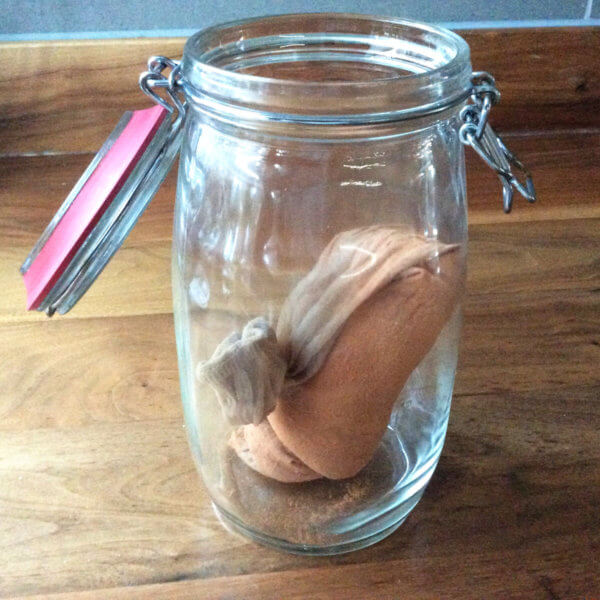
3. Put the dye bag in a glass jar and cover with boiling water. I understand that madder provides a brighter shade of red when using “hard” water. Do you have soft water? Then add some chalk in the form of calcium carbonate to your dye bath.

Dyeing with natural dyes - preparing the dye bath, a tutorial by La Visch Designs

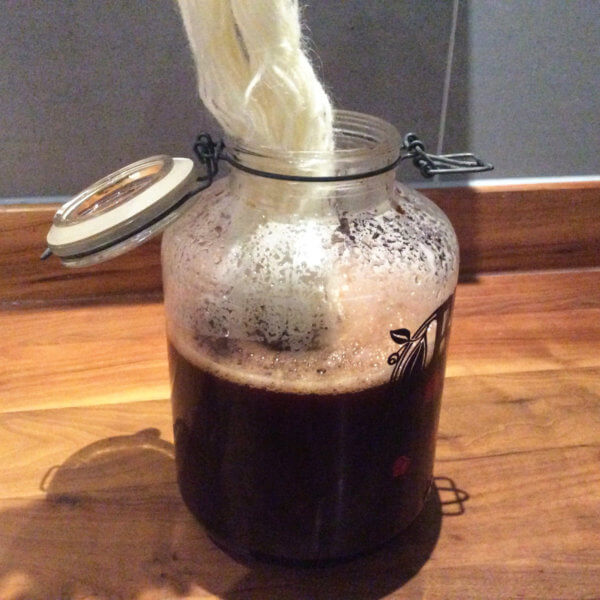
4. Allow the dye bath to soak overnight. This is how mine looks after one night of patience:

Dyeing with natural dyes - preparing the dye bath, a tutorial by La Visch Designs

Now it’s finally time to dye! More on this in my next post.

dyeing with natural dyes: part 3 – the dye bath Read More »

dyeing with natural dyes: part 2 – mordanting

Dyeing with natural dyes - mordanting, a tutorial by La Visch Designs

This post about mordanting your fiber is part 2 in a series in which I tell you all about what is involved in dyeing wool with natural dyes. I guide you through the various steps and take you along with a natural dye experiment.

The steps to go through are as follows:

a. Washing the wool
b. Mordanting
c. Preparing the dye
d. Dyeing your wool

Today we are going to mordant the wool we washed in the previous step.

b. Mordanting

Mordanting of the wool is usually required with natural dyeing to ensure that the wool fibers are all opened up so that the dye can penetrate into the fiber. Without mordanting the dye adheres less well and the resulting color is less bright and colorfast.
There are several possible mordants: alum (potassium aluminum sulfate), chrome (potassium dichromate), copper sulfate, iron (ferrous sulfate), and tin (stannous chloride).

Each mordant has a different effect on the outcome of the dyeing process. Iron for example will “sadden” or darken colors, bringing out the green shades. Because alum is, when compared to the others, much less polluting and releases no harmful vapors during processing, I use it in this step-by-step guide.

1. The amount of mordanting agent to use depends on the quantity of wool that you want to dye. Typically, alum is used between 8% and 20% of the weight of the wool (dry weight!). I start at 15% and have 200 g of wool, therefore I use 30 g alum. (I know that the photograph shows 31 g, have corrected the weight after making the picture!)

Dyeing with natural dyes - mordanting, a tutorial by La Visch Designs

Tartaric acid (“cream of tartar”) is sometimes used as an additive when mordanting with alum. As I understand it, it can brighten the colors. Use at approx. 7% of the weight of fiber together with 8% alum. In this example, I however do not use it.

2. Dissolve the alum (and, possibly, tartaric acid) in a glass jar or stainless steel pan of boiling water. Use enough water to fully submerge your amount of wool.

Dyeing with natural dyes - mordanting, a tutorial by La Visch Designs

3. Add the wet wool to the pot. This may be immediately after washing. If your wool has dried between washing and mordanting, let it soak in water for about half an hour first. Adding dry wool to a mordanting or dye bath may cause streaks in your fiber.

Dyeing with natural dyes - mordanting, a tutorial by La Visch Designs

Many instructions for dyeing wool indicate to keep it all warm at the simmering point for more than an hour. That may indeed be the case, but you can also get good results if you let it cool completely and then allow to stand overnight. This cold mordanting takes more time, but much less energy and therefore has my preference.

4. After mordanting, the wool must be rinsed.

mordanting_4

5. Next you can directly proceed to dyeing the wool, or (if the timing is not quite right) hang your wool to dry. Once mordanted and dried, simply store the wool until you are ready to dye.

Dyeing with natural dyes - mordanting, a tutorial by La Visch Designs

Now it is time to proceed to the next step: preparing your dye bath. More on this in my next post!

dyeing with natural dyes: part 2 – mordanting Read More »
dyeing with natural dyes: part 1 – washing the wool

Dyeing with natural dyes part 1: washing the wool - a tutorial by La Visch Designs

Dyeing wool with food coloring like Easter egg dyes is of course a lot of fun and very easy to do. Lately, however, the possibilities of natural dyes intrigue me. Think of onion skins, indigo, madder, annatto and logwood.

In order to get good results with natural dyes, more steps are required, than with food coloring. In this series of posts I will guide you through the various steps and take you along with a natural dye experiment. Before I proceed I must tell you that I am by no means an expert in this area. I’m only sharing what I have learned in my own experiments!

The steps to go through are as follows:

  1. Washing the wool
  2. Mordanting
  3. Preparing the dye bath
  4. Dyeing your wool

Today we are going to discuss the preparations with respect to washing the wool. Of course, it is also useful to know what materials are needed!

Materials

Collecting the required materials is obviously an important step. However, this step I haven’t included in the above overview, because what will be required depends very much on the choices made with respect to your natural dyes of choice.

Things you will however (almost) always need are:

  • Protein (animal-based) fibers, such as wool or silk or cellulose (plant-based) fibers, such as cotton, linen, or hemp. Man-made fibers like acrylics can’t be dyed this way!
  • Pieces of waste yarn to tie up your yarn into skeins.
  • Detergent (without enzymes).
  • The natural dyes or dye material.
  • A mordant like alum. This is used to help the dye adhere to the fiber and helps in achieving bright colours.
  • For warm dyeing: A stainless steel or enamelled pan which will not be used for cooking anymore.
  • For cold dyeing: Glass jars in the number or volume big enough for the amount of wool that you want to dye.
  • Old nylons or other material to make a “tea bag” for your dye material.
  • Rubber gloves, stainless steel spoons.

a. Washing the wool

If you buy wool yarn, you may be inclined to dye without washing it. There is however a chance that there is a reasonable amount of lanolin, spin oil or other debris still present on the yarn. This makes it difficult for the dye to penetrate well into the fiber. This in turn results in your wool having less vivid colors and being a less colorfast.
For best results, wash first is the motto.

Dyeing with natural dyes part 1: washing the wool - a tutorial by La Visch Designs

1. In this experiment I used Lettlopi, it is sold in the lovely put-up shown. However, when washing like this, the yarn will tangle beyond hope. Therefore it is wise to rewind first into skeins. I use my niddy noddy, but the yarn can of course also, for example, be wound around the back of a chair.

Dyeing with natural dyes part 1: washing the wool - a tutorial by La Visch Designs

And yes, I know that my niddy noddy isn’t used “correctly” in this picture. I prefer using it this way because I like the length of the skein it gives. Fortunately, there is no such thing as wool-police!

2. To ensure that the skeined yarn does not tangle, tie it together with some waste yarn in several places. Do not tie it too tight, this may prevent the dye from fully penetrating the wool in those spots. I do this as follows four places:

Dyeing with natural dyes part 1: washing the wool - a tutorial by La Visch Designs

The entire skein then looks like this:

Dyeing with natural dyes part 1: washing the wool - a tutorial by La Visch Designs

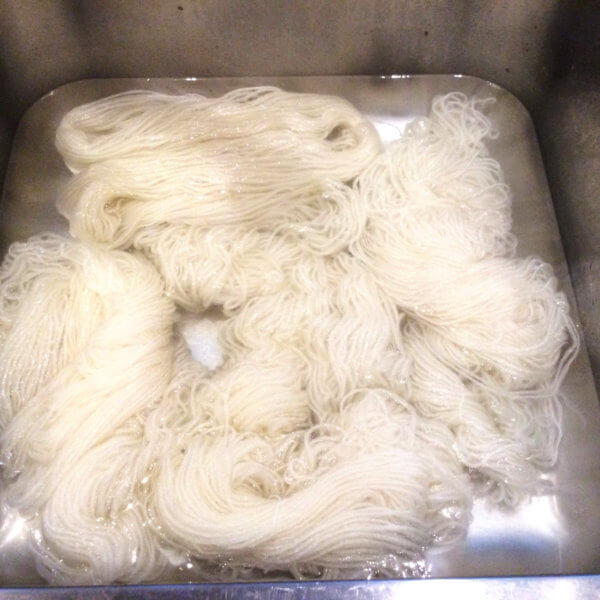
3. Now we go on to the washing! Use water of at least 60 C or 140 F for best results. I use water as hot as it comes out of the tap. If this is not very hot in your case, add a splash of boiling water from the kettle or stove. Add a dash of detergent and then the wool. Use detergent without enzymes, since these would damage the wool. Strongly agitating the wet could felt it, but gentle stirring should not be a problem.

Allow the wool to stand for about 15 to 20 minutes, but don’t let it cool down completely. Any lanolin dissolved in the water could then precipitate again on the wool.

Dyeing with natural dyes part 1: washing the wool - a tutorial by La Visch Designs

4. Now it’s time to rinse the wool with warm water. Do not rinse with cold water, a big difference in temperature from hot to cold can felt your wool!

Dyeing with natural dyes part 1: washing the wool - a tutorial by La Visch Designs

After rinsing it is time to proceed to the next step: mordanting the wool. More on this in my next post!

Dyeing with natural dyes part 1: washing the wool - a tutorial by La Visch Designs

dyeing with natural dyes: part 1 – washing the wool Read More »
tutorial: knitting the i-cord bind-off

Knitting the i-cord bind-off - a tutorial by La Visch Designs - www.lavisch.com

In a previous post I’ve already shown you how to cast-on your knitting project with an i-cord cast-on. And of course it would be nice to be able to bind-off with a matching i-cord bind-off finishing. Fortunately, we can!

The i-cord bind-off is usually knit over 3 to 5 stitches. In this example I’m going to show the version made over 3 stitches. In short, instructions would look something like this:

I-cord bind off: Cast-on 3 sts, *k2, k2tog tbl, sl 3 sts just worked back to LH needle, pull yarn tight across back of sts; rep from * until 3 sts remain.
Next: K2tog tbl, k1, sl 2 sts to LH needle, k2tog tbl and fasten off.

The i-cord bind-off step by step

You can start casting off as soon as the last row of your work has been knit, and after your work has been turned when working flat back and forth.

1. With the right side facing, cast-on 3 stitches. I used the knitted-on method.

Knitting the i-cord bind-off - a tutorial by La Visch Designs - www.lavisch.com

2. Knit 2 stitches.

Knitting the i-cord bind-off - a tutorial by La Visch Designs - www.lavisch.com

3. Knit 2 stitches together through the back loop.

Knitting the i-cord bind-off - a tutorial by La Visch Designs - www.lavisch.com

4. Move the 3 stitches on the right needle back to the left hand needle one by one.

Knitting the i-cord bind-off - a tutorial by La Visch Designs - www.lavisch.com

5. Pull the yarn tight and make sure that it is behind your work.

Knitting the i-cord bind-off - a tutorial by La Visch Designs - www.lavisch.com

6. Repeat steps 2 to 5 until 3 stitches to bind-off remain.

Knitting the i-cord bind-off - a tutorial by La Visch Designs - www.lavisch.com

7. Knit 2 stitches together through the back loop.

Knitting the i-cord bind-off - a tutorial by La Visch Designs - www.lavisch.com

8. Knit 1 stitch.

Knitting the i-cord bind-off - a tutorial by La Visch Designs - www.lavisch.com

9. Move the 2 stitches on the right needle back to the left hand needle one by one.

Knitting the i-cord bind-off - a tutorial by La Visch Designs - www.lavisch.com

10 Knit 2 remaining stitches together through the back loop and fasten off.

Knitting the i-cord bind-off - a tutorial by La Visch Designs - www.lavisch.com
The “ear” where the yarn was fastened off, can be reduced by using a tapestry needle to pull it into the i-cord tube. Front and back of the work then look as follows:

Knitting the i-cord bind-off - a tutorial by La Visch Designs - www.lavisch.com

Knitting the i-cord bind-off - a tutorial by La Visch Designs - www.lavisch.com

Tip 1

It can be very nice to knit the i-cord bind-off in a contrasting color to the rest of your project. It may however happen, that the main color shines through in the i-cord BO. To avoid that, I would recommend to first knit a row in the contrast color, before starting the i-cord bind-off.

Tip 2

An i-cord bind-off edge on a piece worked in stockinette stitch is very pretty. As you know however, stockinette tends to curl…. A lot. An i-cord bind-off is usually not sufficient to prevent curling. For this you will have to look at other methods, such as garter stitch or rib. So if you purely want the effect of a stockinette stitch edge to your work, you better have a look at a folded hem.

tutorial: knitting the i-cord bind-off Read More »