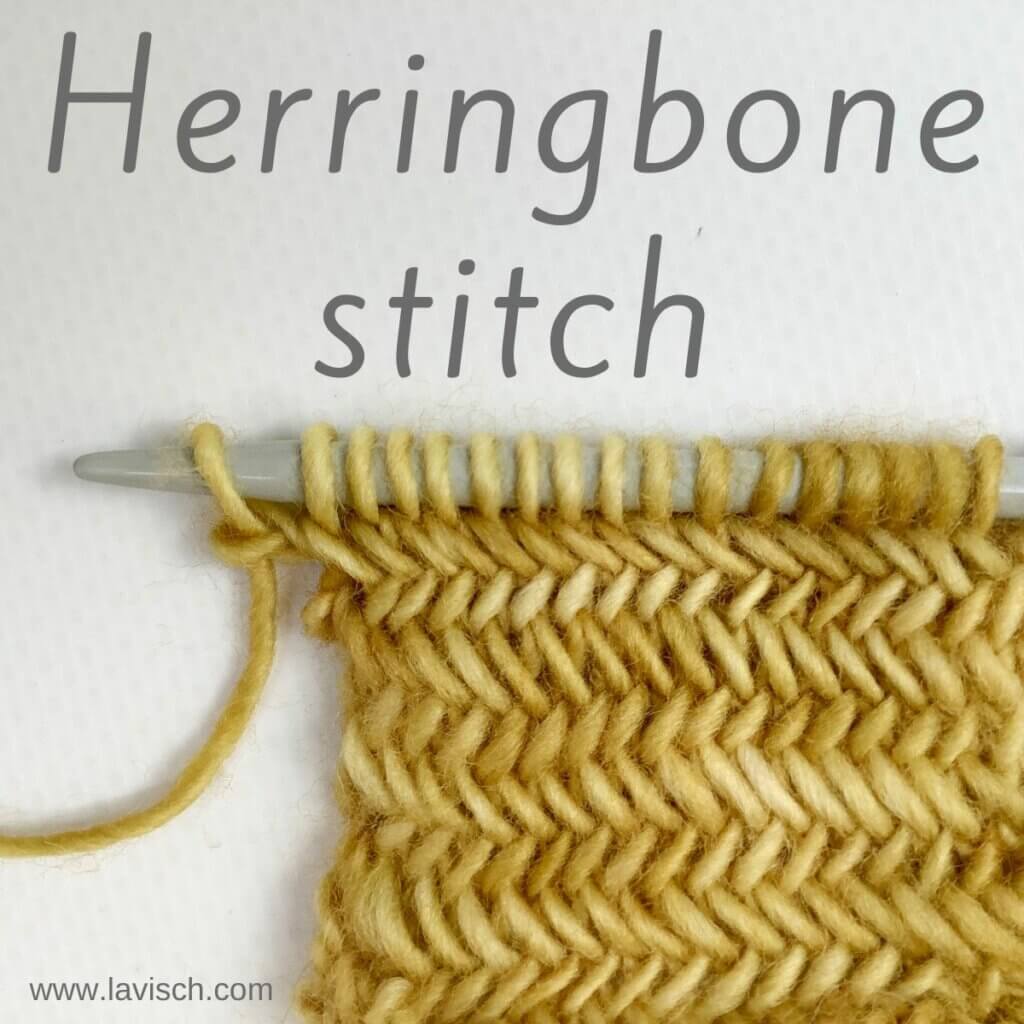
Herringbone stitch is a stitch pattern that creates a woven looking fabric. It creates a very thick and dense fabric, for that reason it’s often used for home decor projects, or items like scarfs and cowls. Because it is so dense, it’s strongly advised to use a much larger size of needles than you may usually use for that particular yarn. In this tutorial, I will be using a fingering weight yarn with size 4 mm (US 6) needles. But I can already tell you that going up another size wouldn’t have been a mistake. Of course, it all depends on your preference.
There are various ways to work herringbone stitch. As far as I know, they all boil down to a left leaning decrease on the right side of the fabric, of which only 1 loop is slipped off. This is followed by a decrease worked on the wrong side, that shows as a right leaning decrease on the right side of the fabric. Of this, again, only 1 loop is slipped off every time the decrease is worked. There are many left leaning and right leaning decreases, so that absolutely explains a lot of the variations in working the herringbone stitch. In this example, I will be using k2tog tbl as my left-leaning decrease, and p2tog as my right-leaning decrease.
Materials used
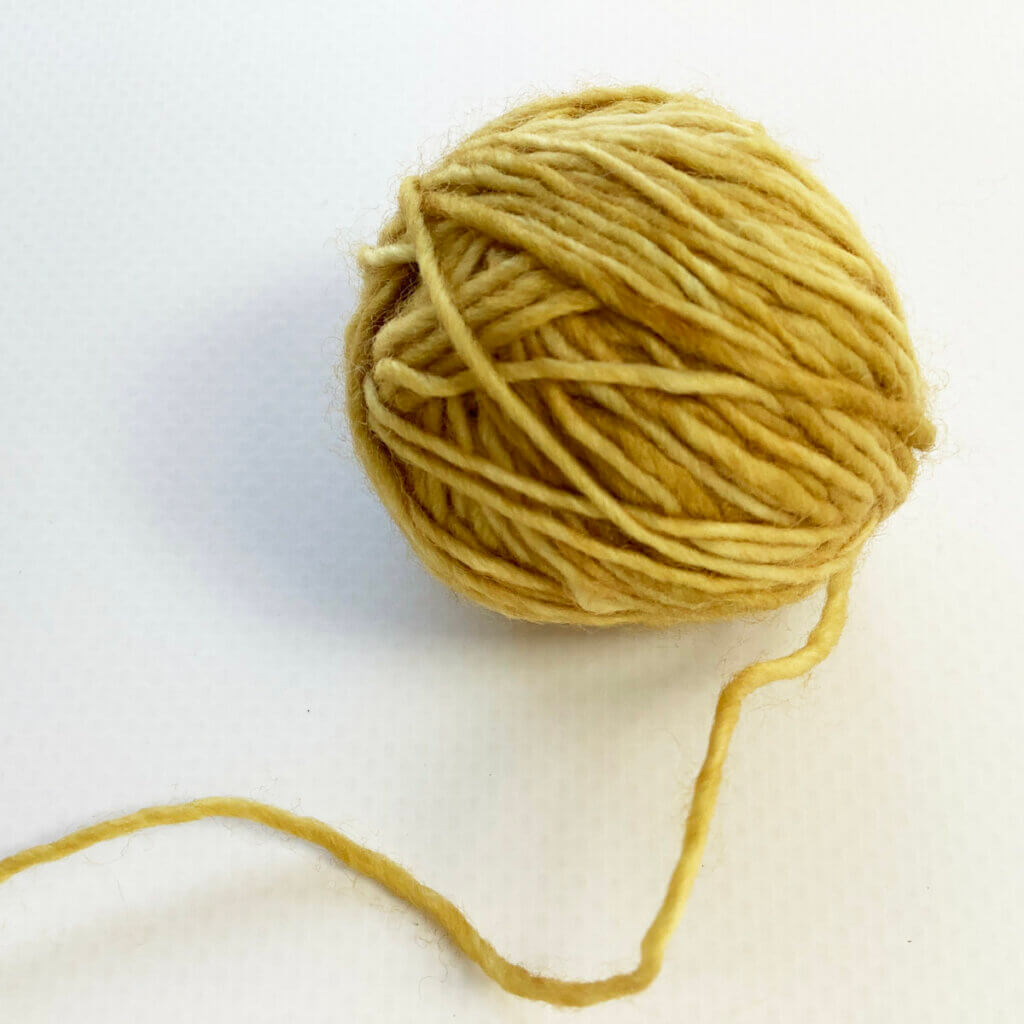

Yarn: Leftovers from my Sunglow Forest shawl, it’s Fleece Artist Merino Slim (100% Merino wool; 400 m (437 yds) / 115 g) in “Minegold”
Knitting needles: This is a pair of straights that I picked up at the second-hand store when I started knitting, brand unknown.
Stitches used
- k – knit
- k2tog tbl – knit 2 stitches together through the back loop
- p – purl
- p2tog – purl 2 stitches together
- RS / WS – right side / wrong side
Working herringbone stitch step by step
For this particular stitch pattern, there is no specific multiple needed for the patterning to work out. So, cast on any number of stitches.
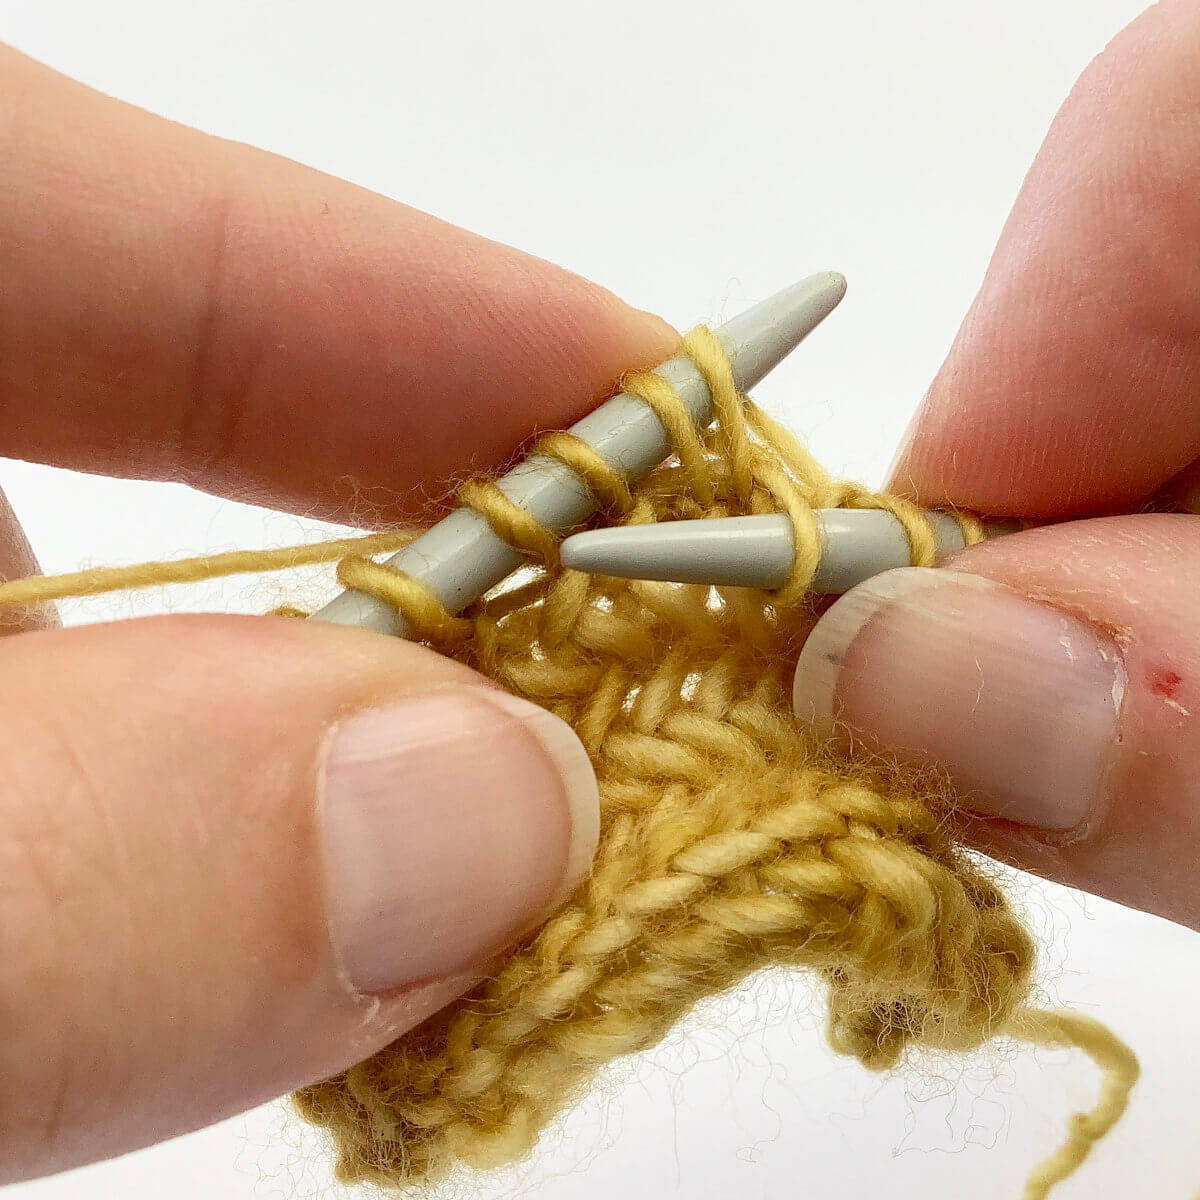
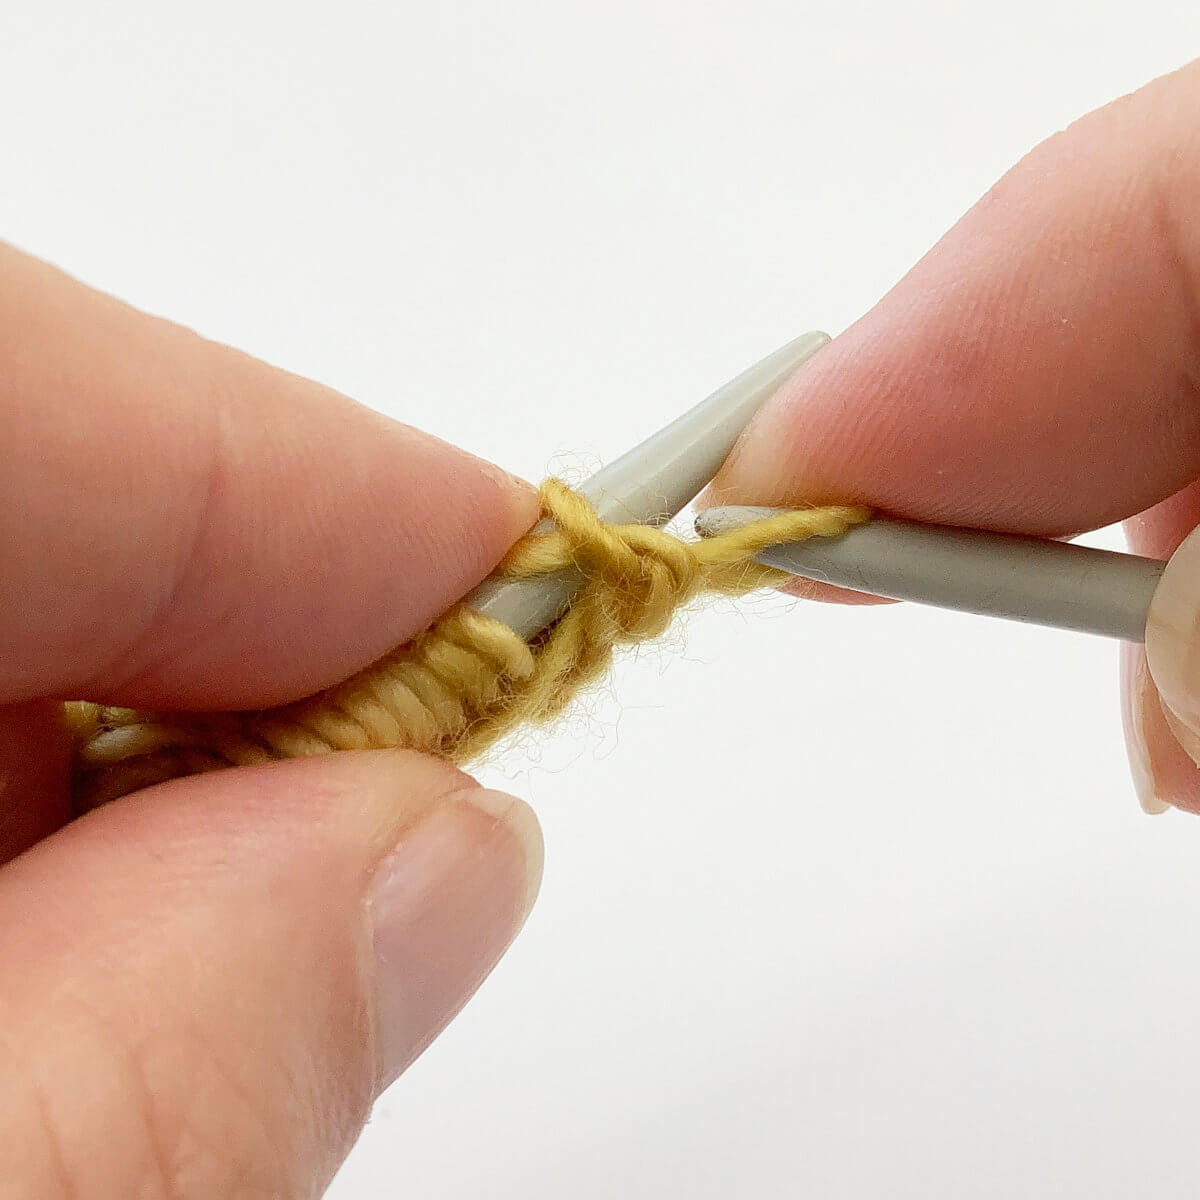
- To start, insert the needle through the back loop of the first 2 stitches on the left-handle needle.
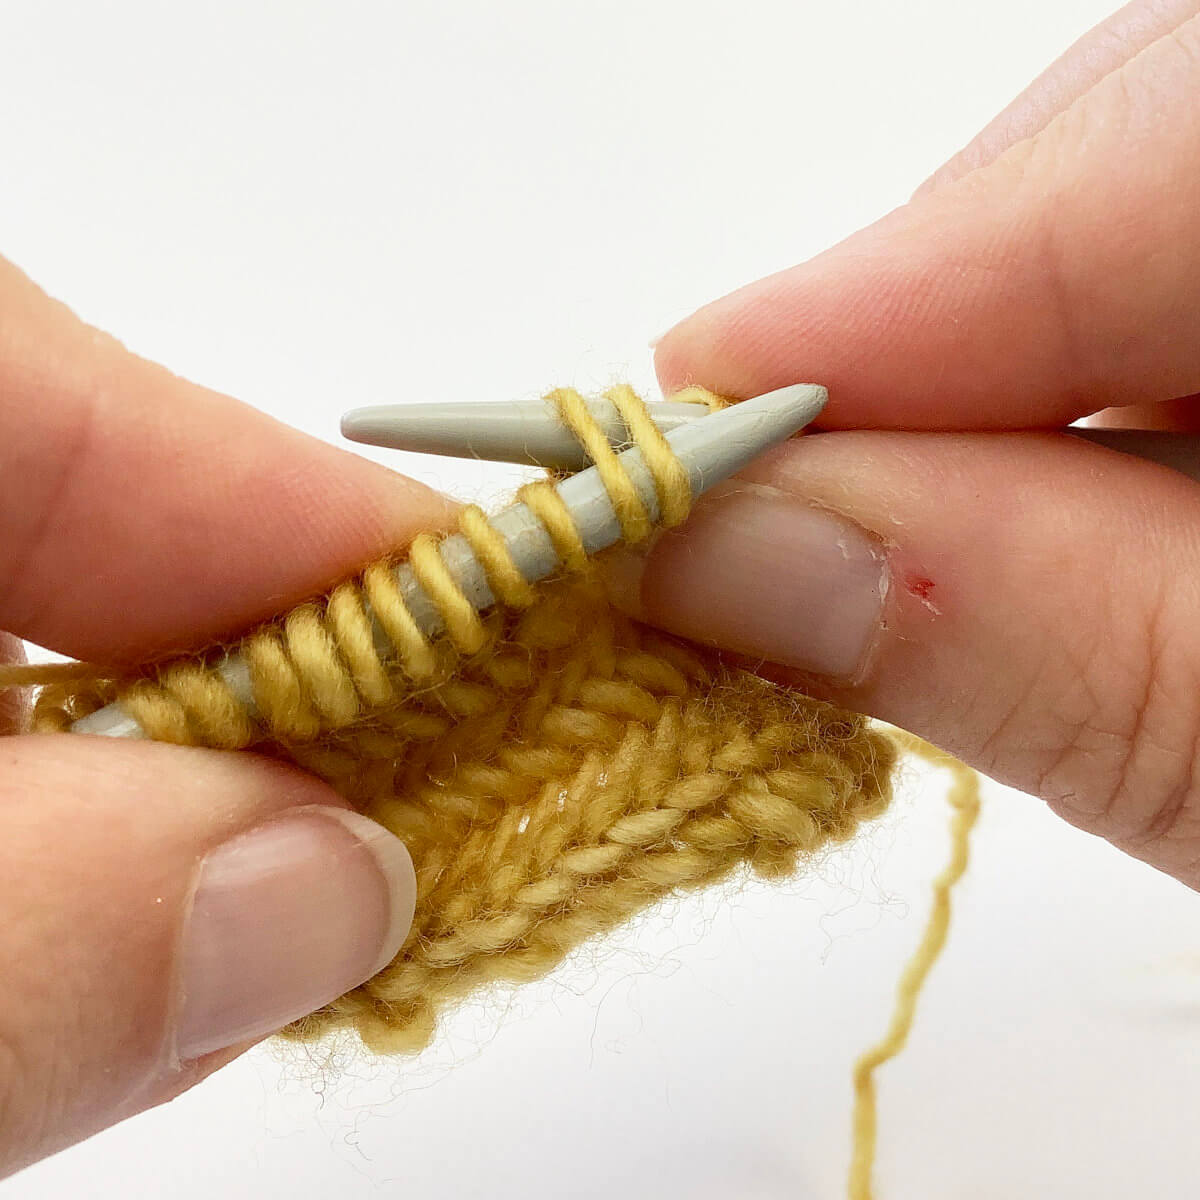
- Wrap the yarn around the needle…
- … and pull it through both loops.
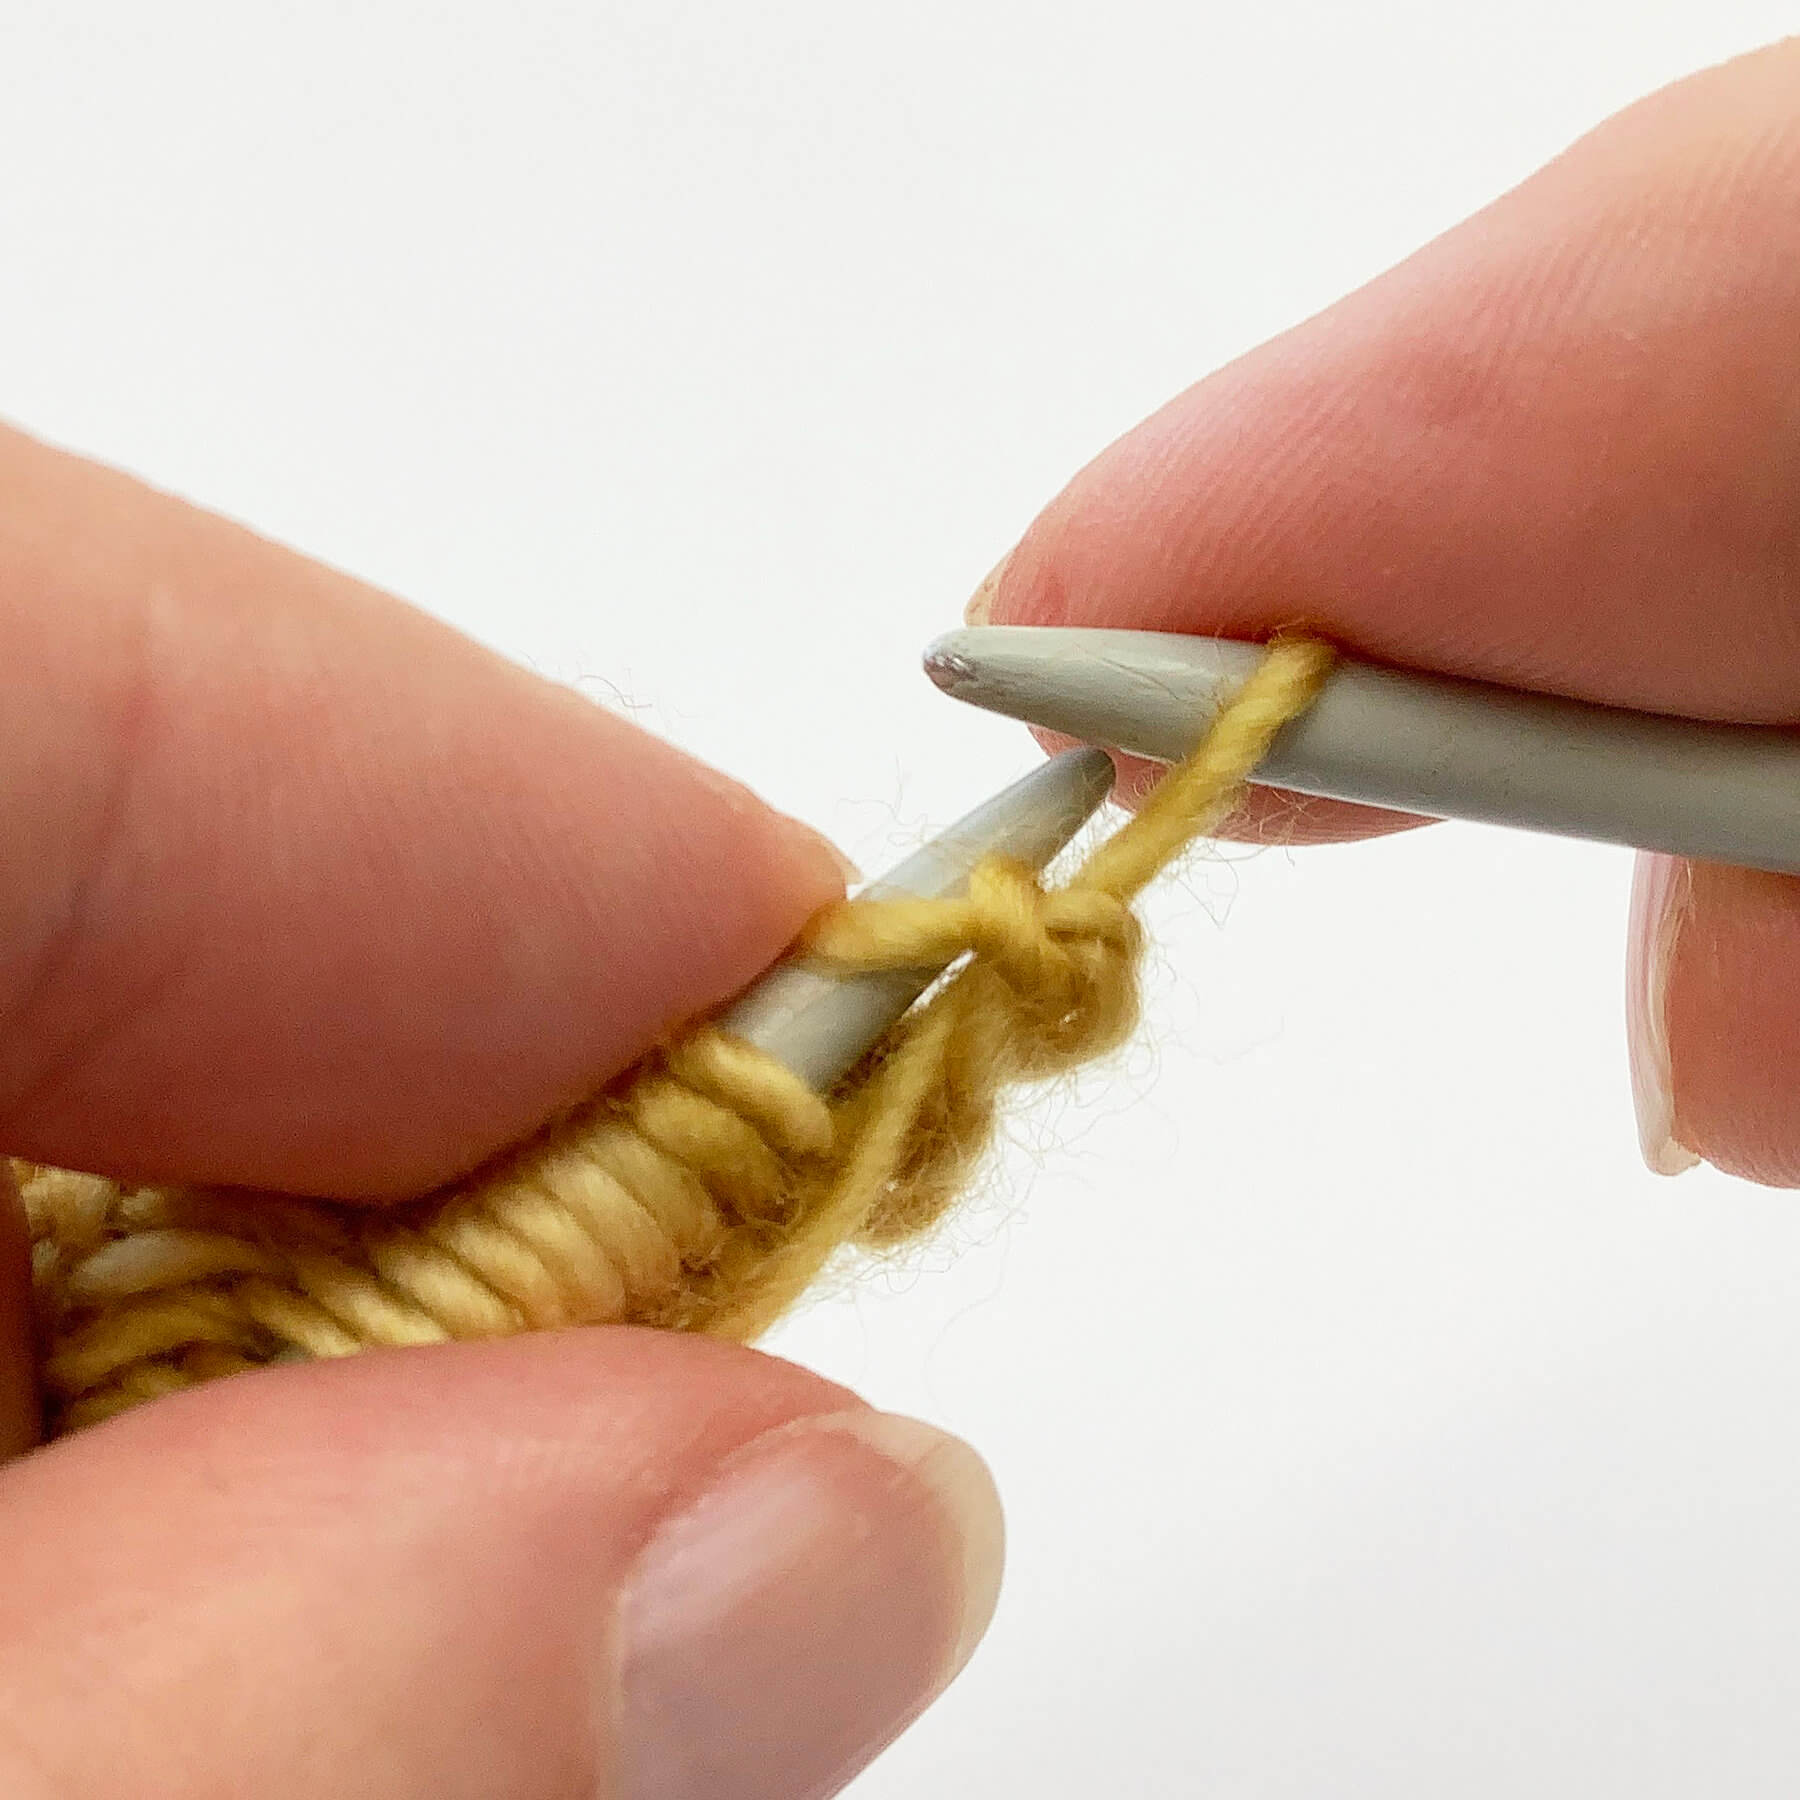
Don’t let the loops drop off the needle yet! See that I use my finger to hold the second loop from the tip fixed against the needle?
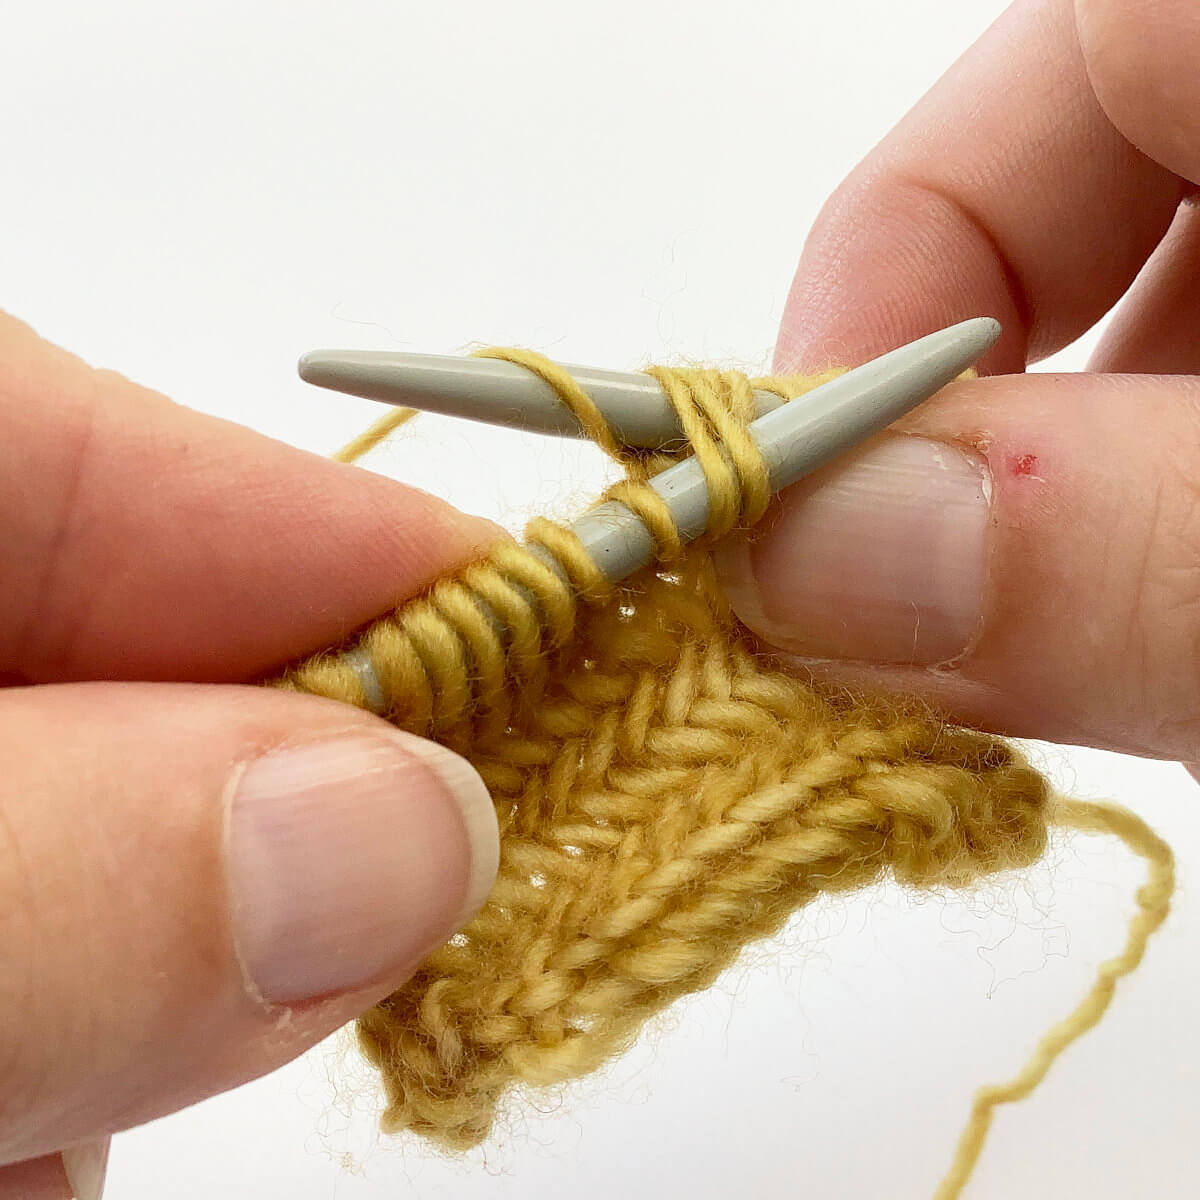
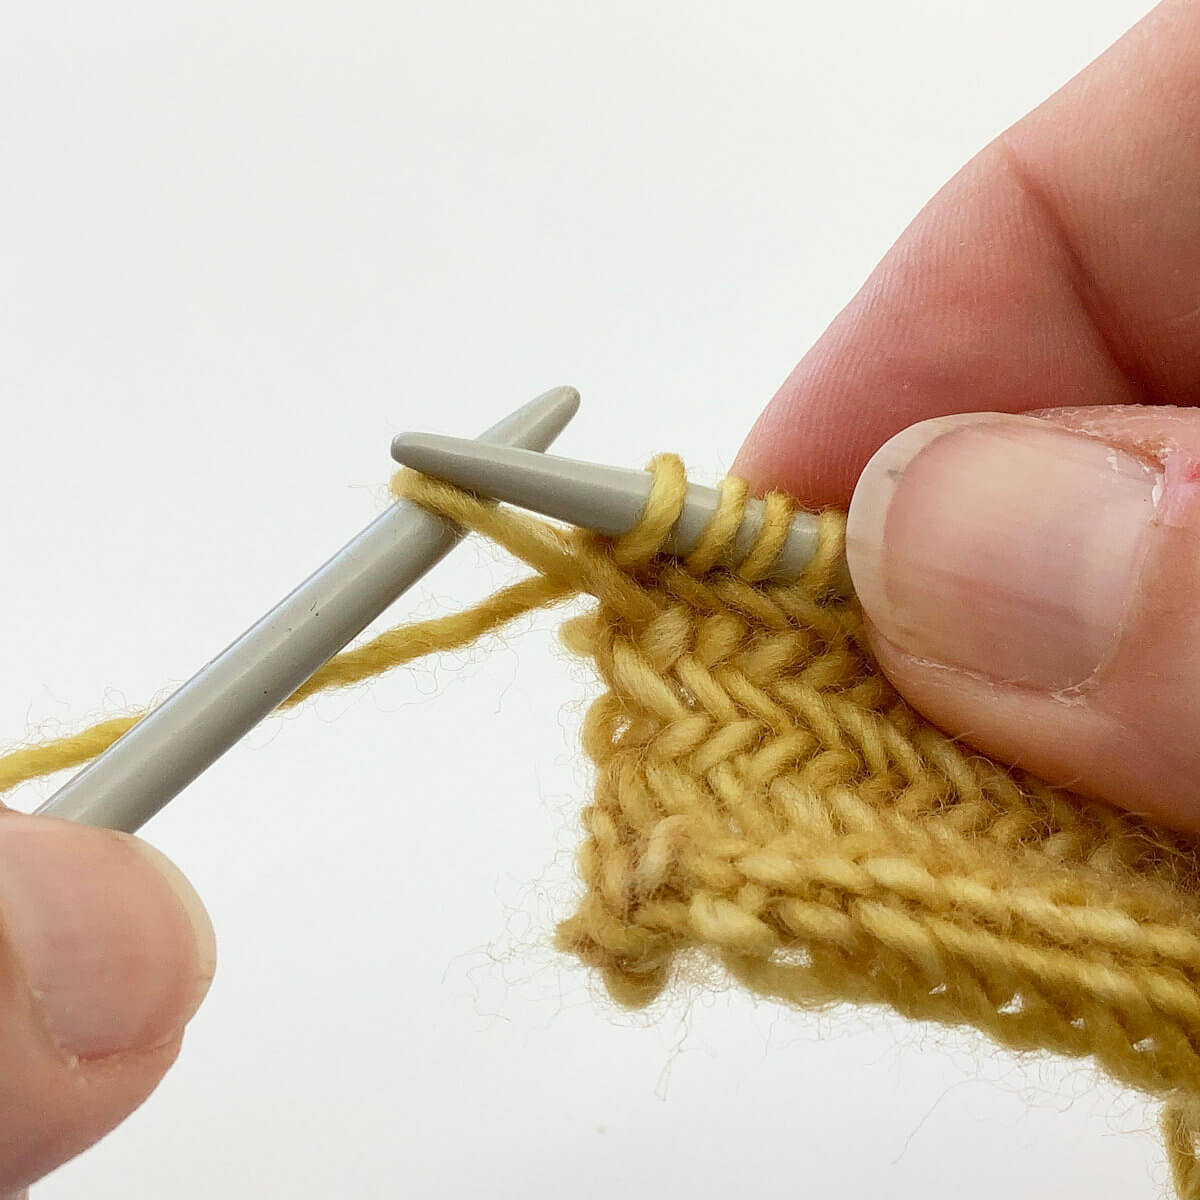
- Drop the loop, and only the loop closest to the needle tip, off the needle.
Repeat steps 1 to 4 until there is 1 stitch left in the row.

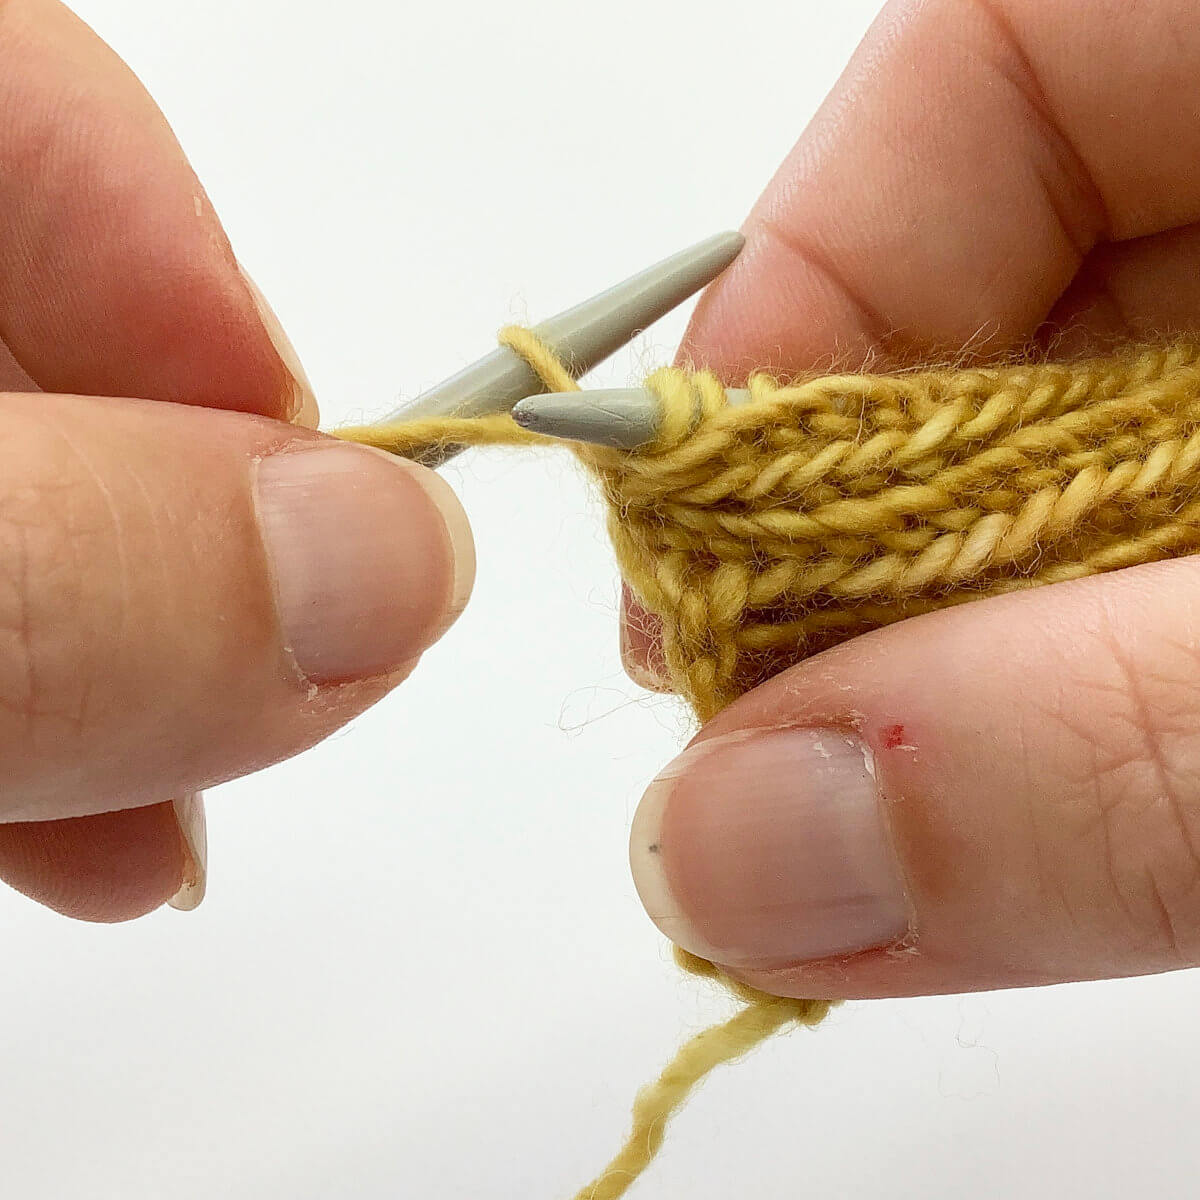
- Knit this last stitch.
Next, we can turn the work to start the WS instructions.
- Now insert the needle purl wise through the first two stitches on the left-hand needle.
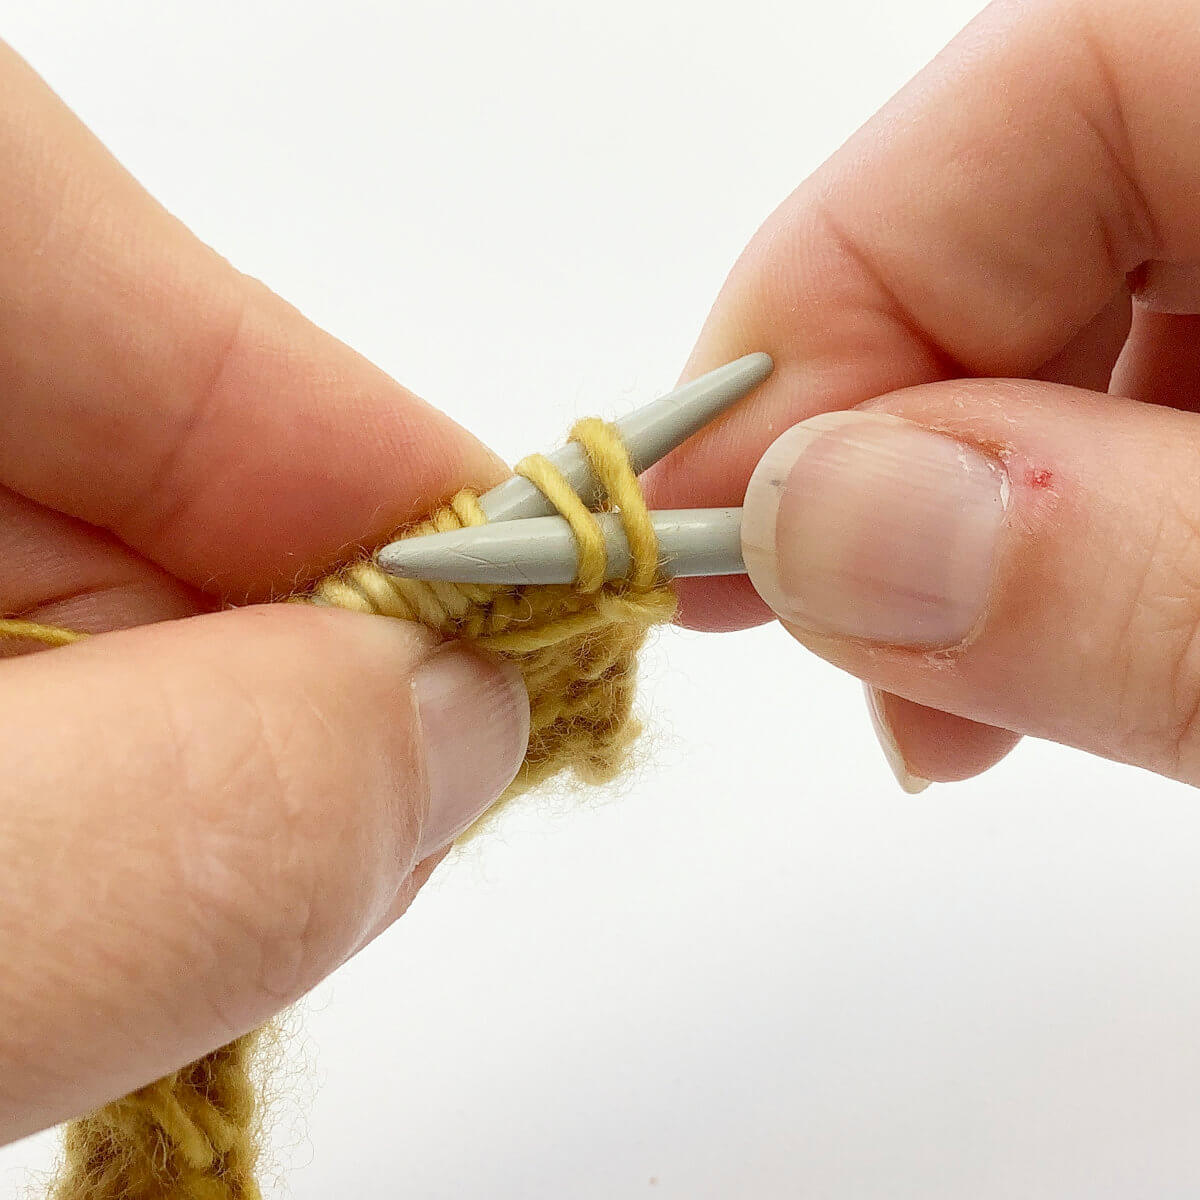
- Wrap the working yarn around the right-hand needle….
- … pull the yarn through the 2 stitches.
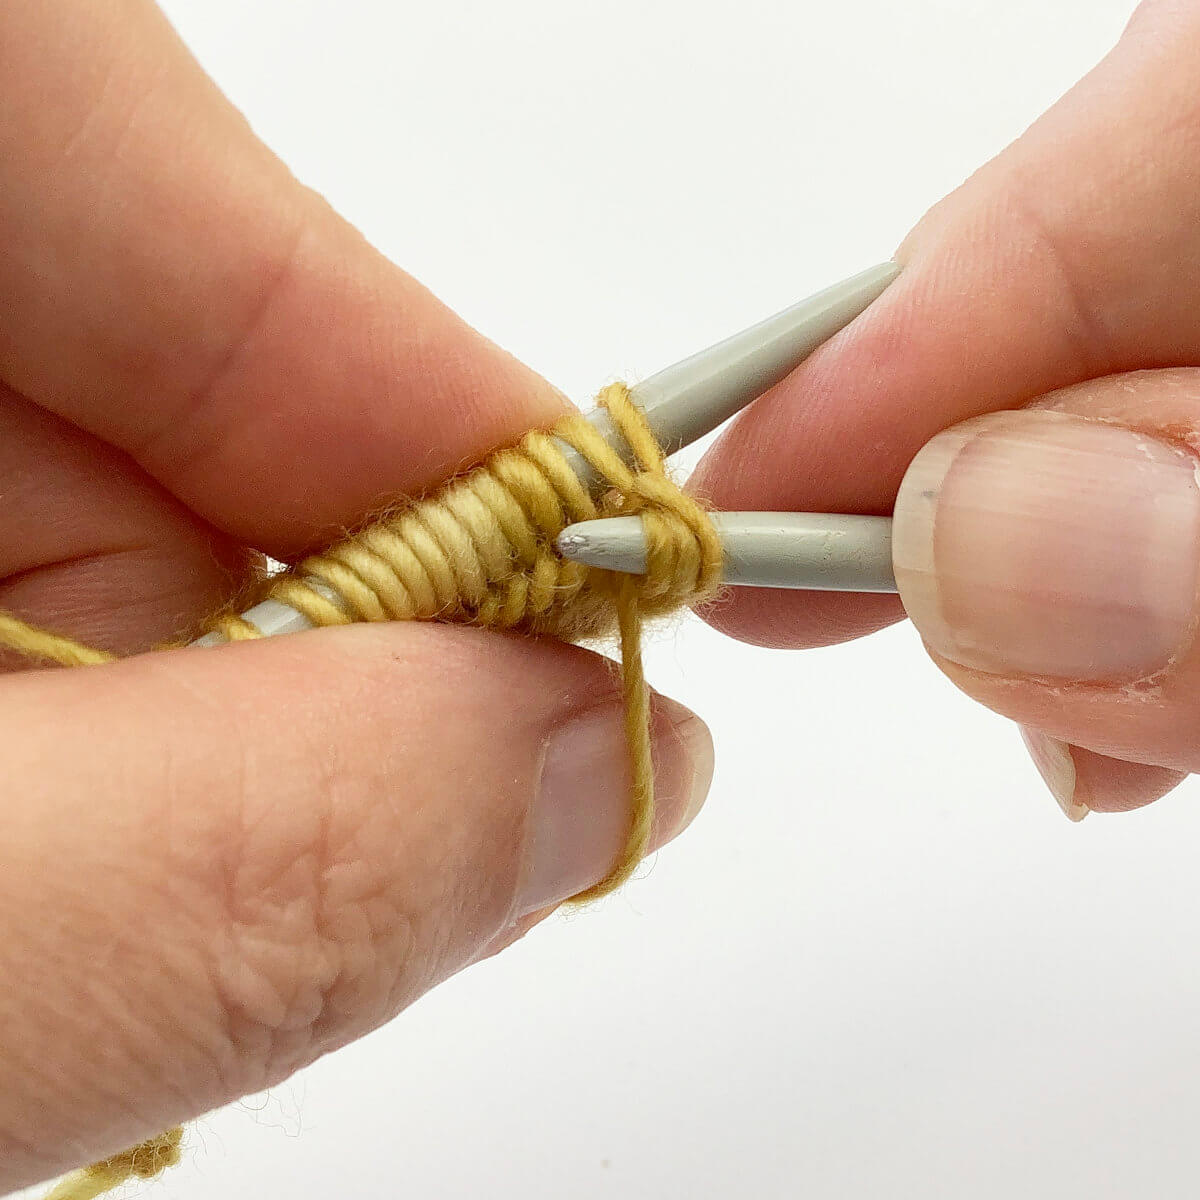
Again, I use my finger to hold the second loop from the tip fixed against the needle.
- This is how it looks after I’ve dropped the loop closest to the needle tip, off the needle.
Repeat steps 6 to 9, until there is 1 stitch left in the row.
- Purl this last stitch.
Repeat steps 1-10 for the stitch pattern.
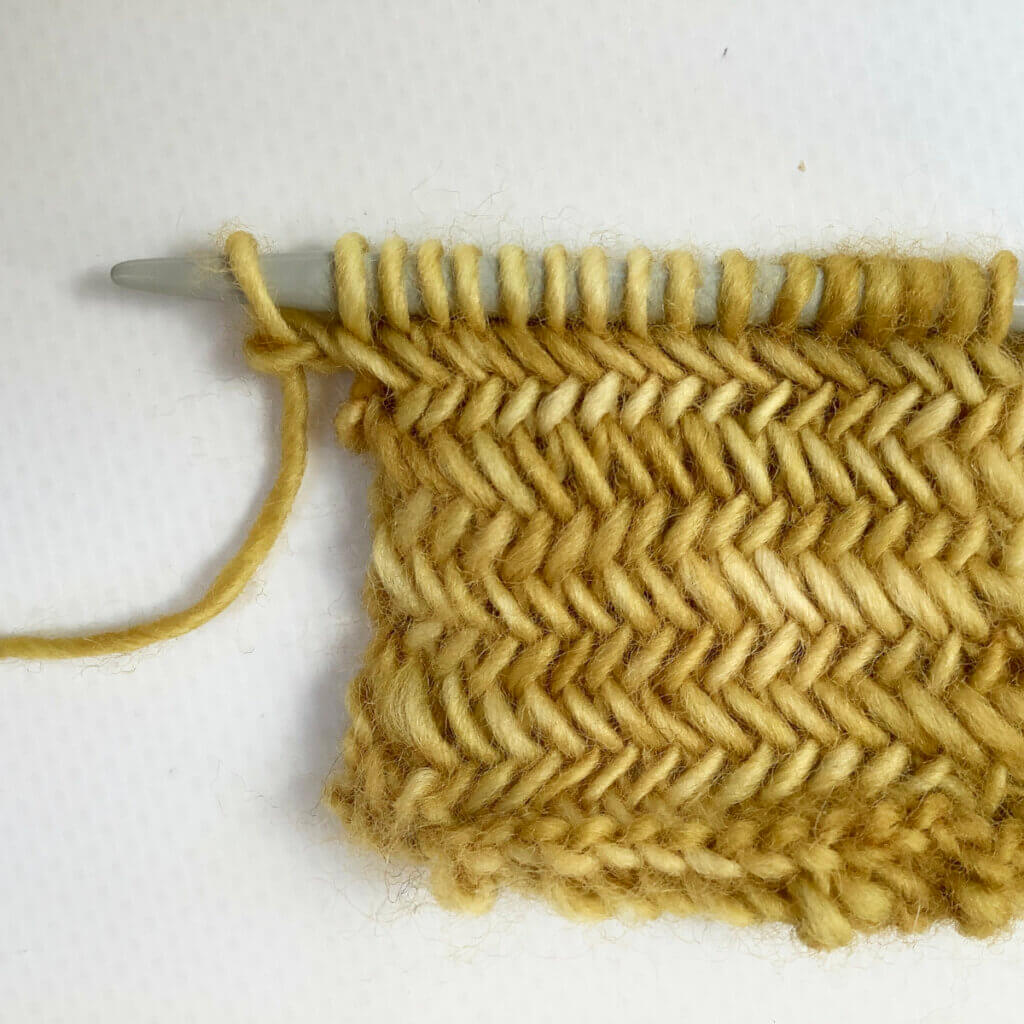
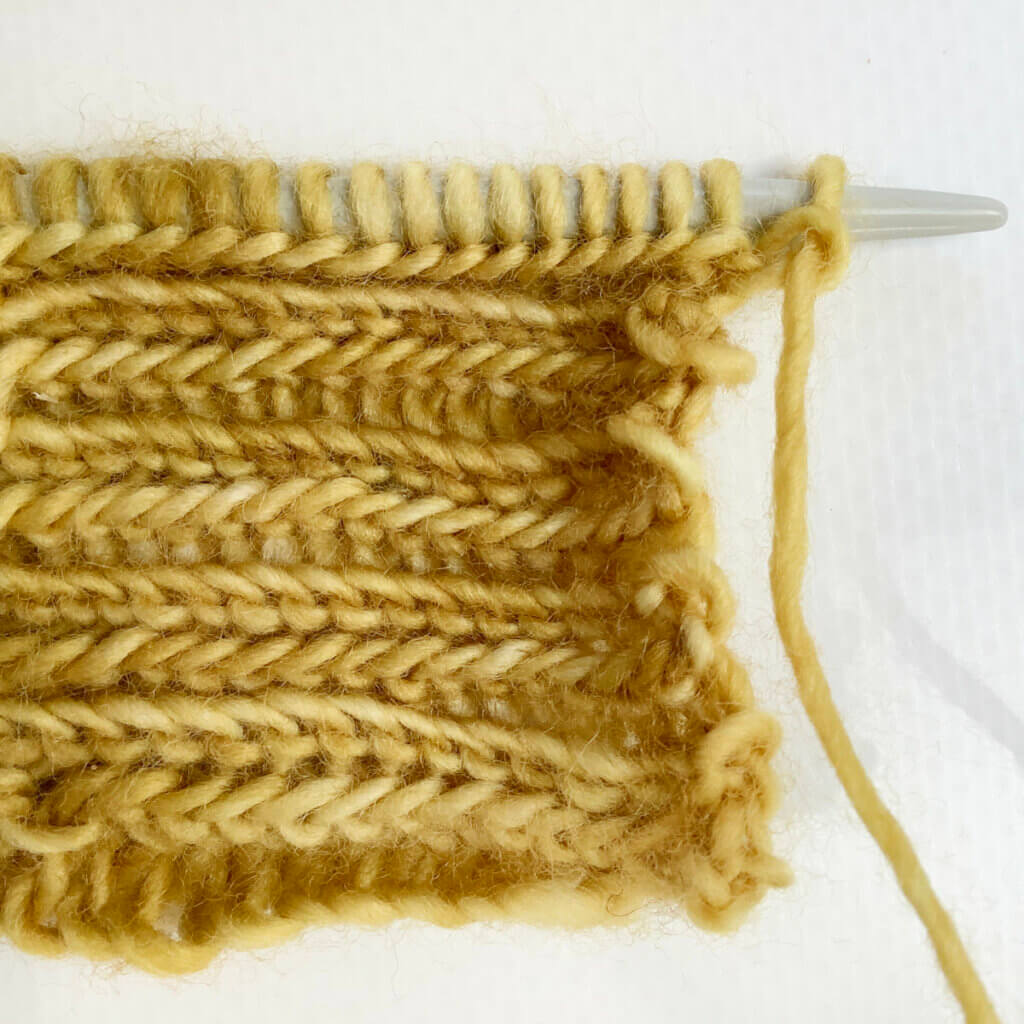
The result
Viewed from the right side of the fabric:
Viewed from the wrong side of the fabric:

Thanks to my Patreon supporters for bringing you this freebie! Creating quality patterns and tutorials is a lot of work and resource-intensive. However, I find it important to give you free content like this tutorial. Thanks to the generous support of my Patreon supporters, I can make it happen. Thank you, patrons! Click here to join, or click here to read more about La Visch Designs on Patreon.
")


