The Turkish cast-on is a way to invisibly cast-on for projects to be worked in the round. Think, for example, of toe-up socks. This cast-on can be used for a wide range of projects and not just for socks. It can be used for anything that requires knitting in the round and a neat, seamless start. In other words, for anything you’d use Judy’s Magic Cast-On for, this cast-on is a good alternative. And, to be honest, I find this one to be much easier and less fiddly to work!
Materials used


Yarn: Paintbox Yarns Simply DK, a good value, good quality 100% acrylic yarn, in the color 128 Lime Green.
Needles: KnitPro Zing Fixed Circular Needles. In this tutorial, I used the 4 mm (US 6) size with a cable length of 80 cm (32 inches).
Working the Turkish cast-on step by step
In this example, I’m casting on 20 stitches, as one would do for toe-up socks.
- To start, we make a slipknot, and place it on the needle.
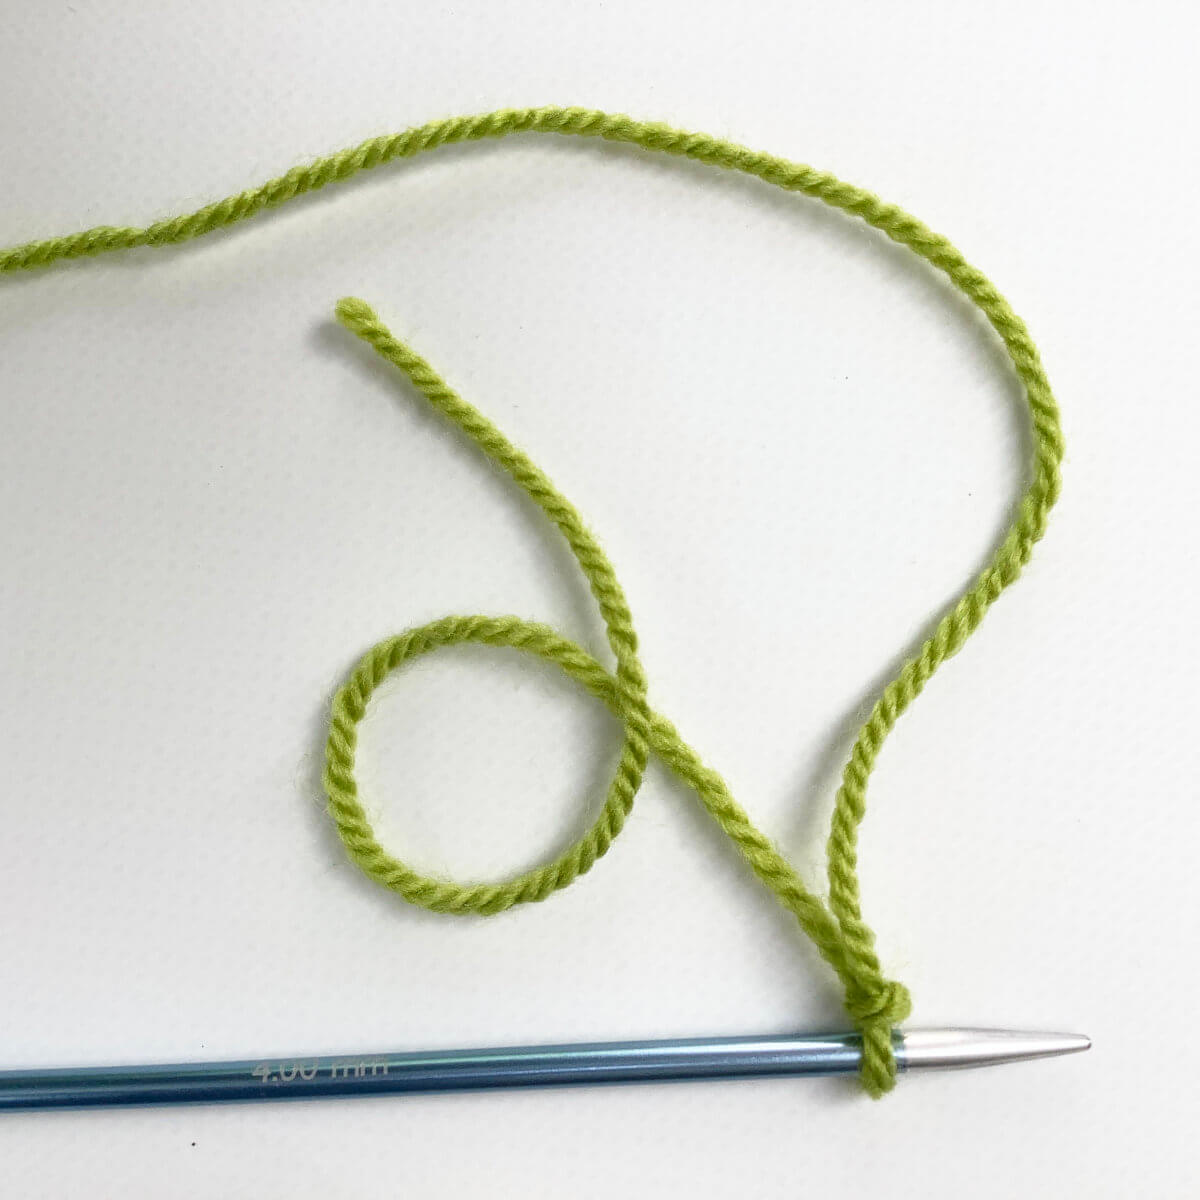
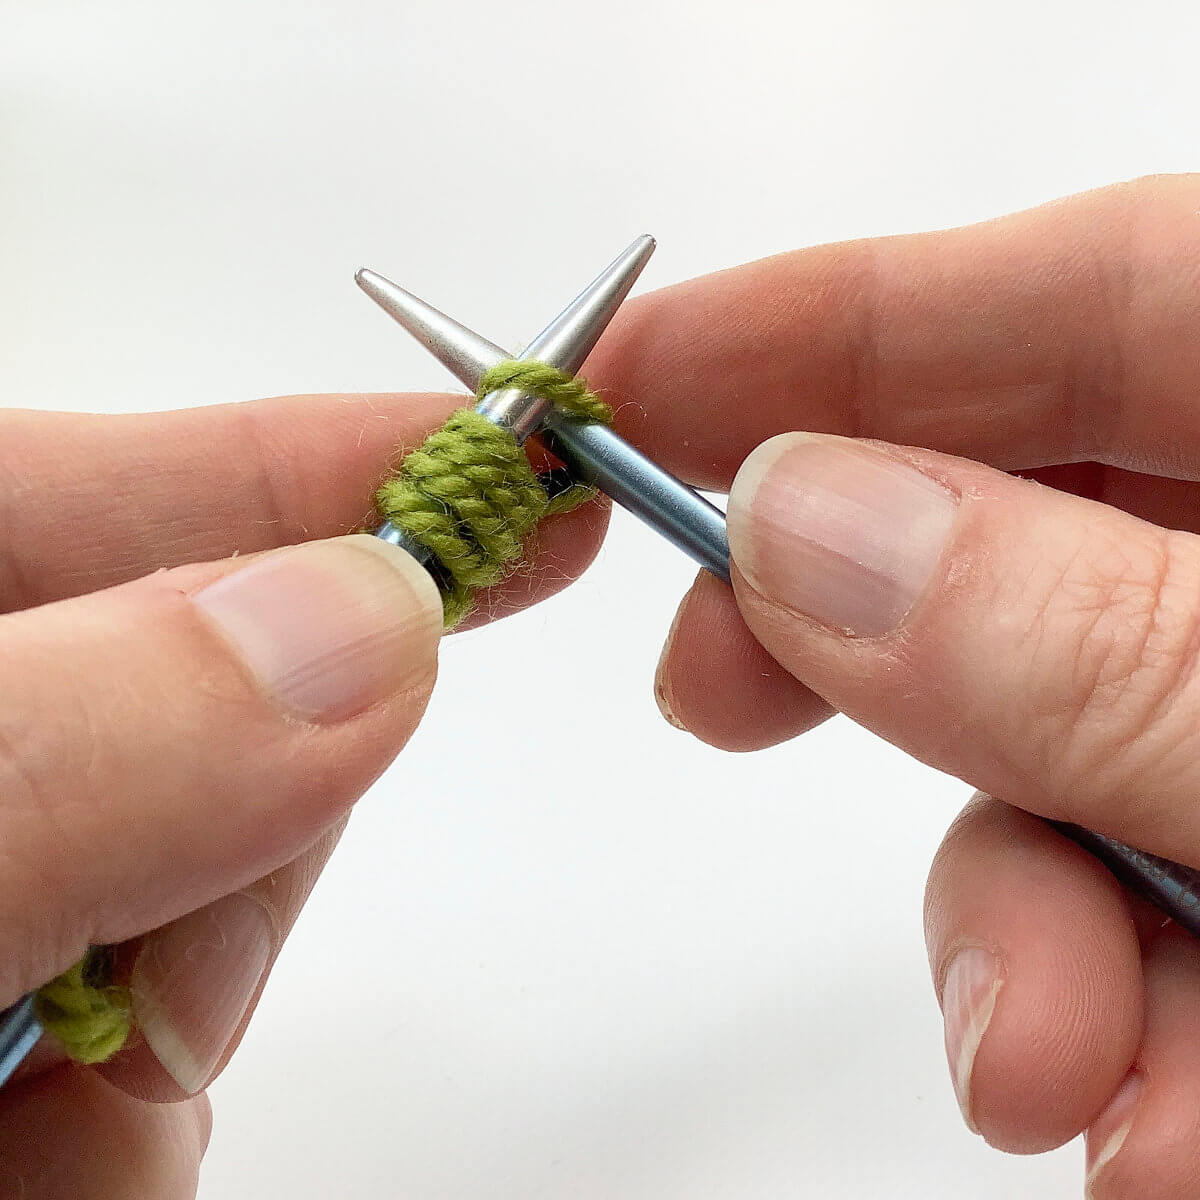
- Next, arrange both needle tips as shown in the picture below.
Place both needle tips parallel to each other, with the slipknot-holding needle below the other one, and the working yarn behind and above the top needle.

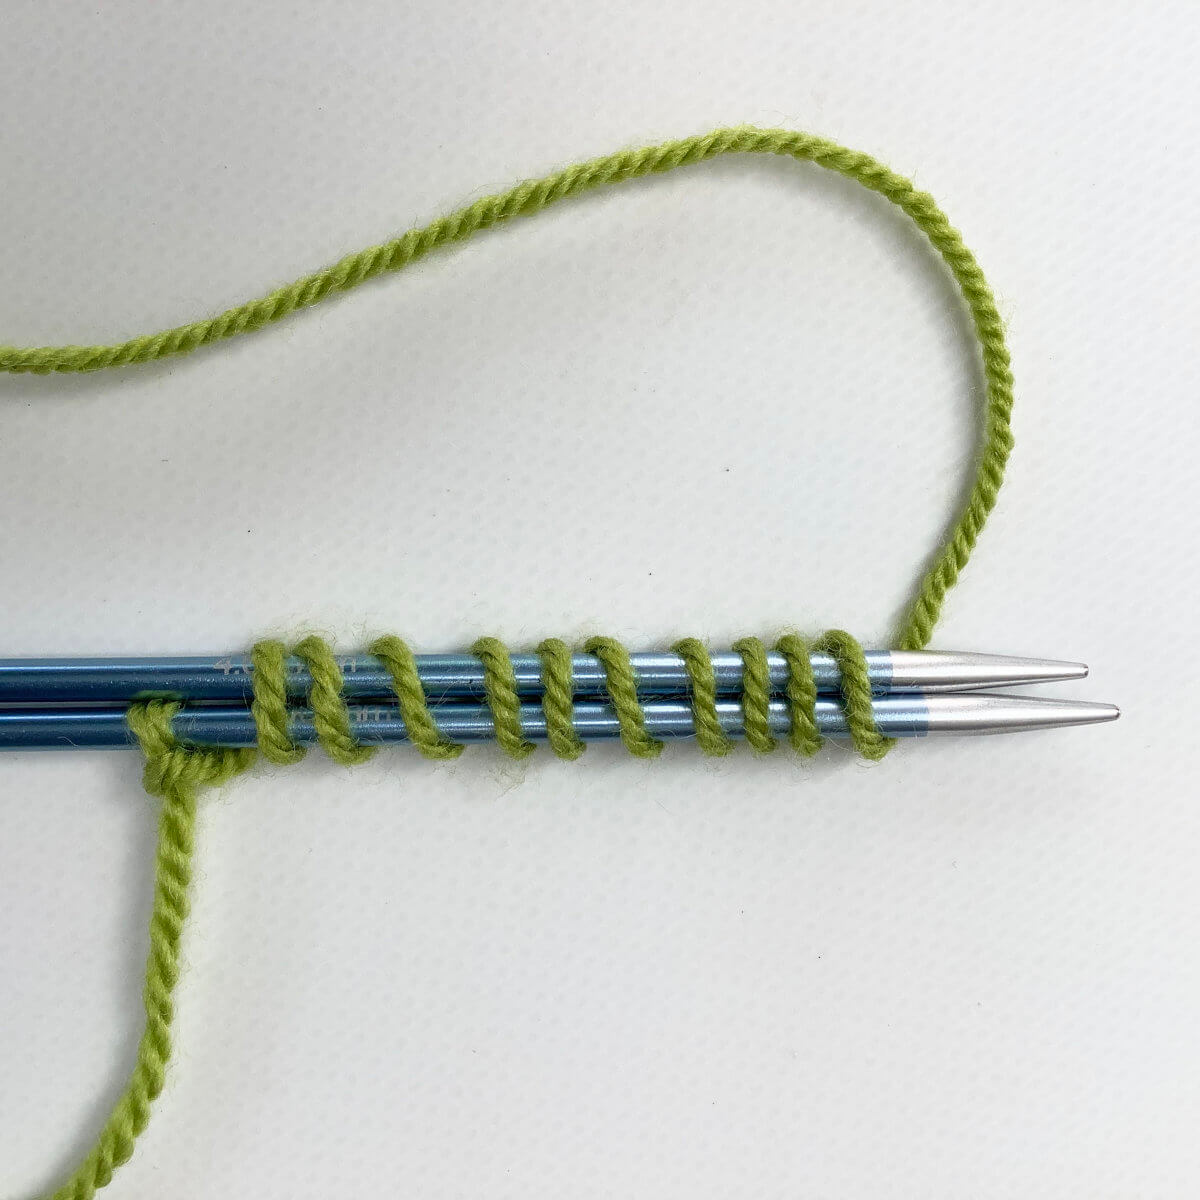
- Now wrap the working yarn around both needles. Make as many wraps as half the total stitches you want to cast-on.
In this example, I want 20 stitches total, so I wrap the yarn 10 times around the needles.
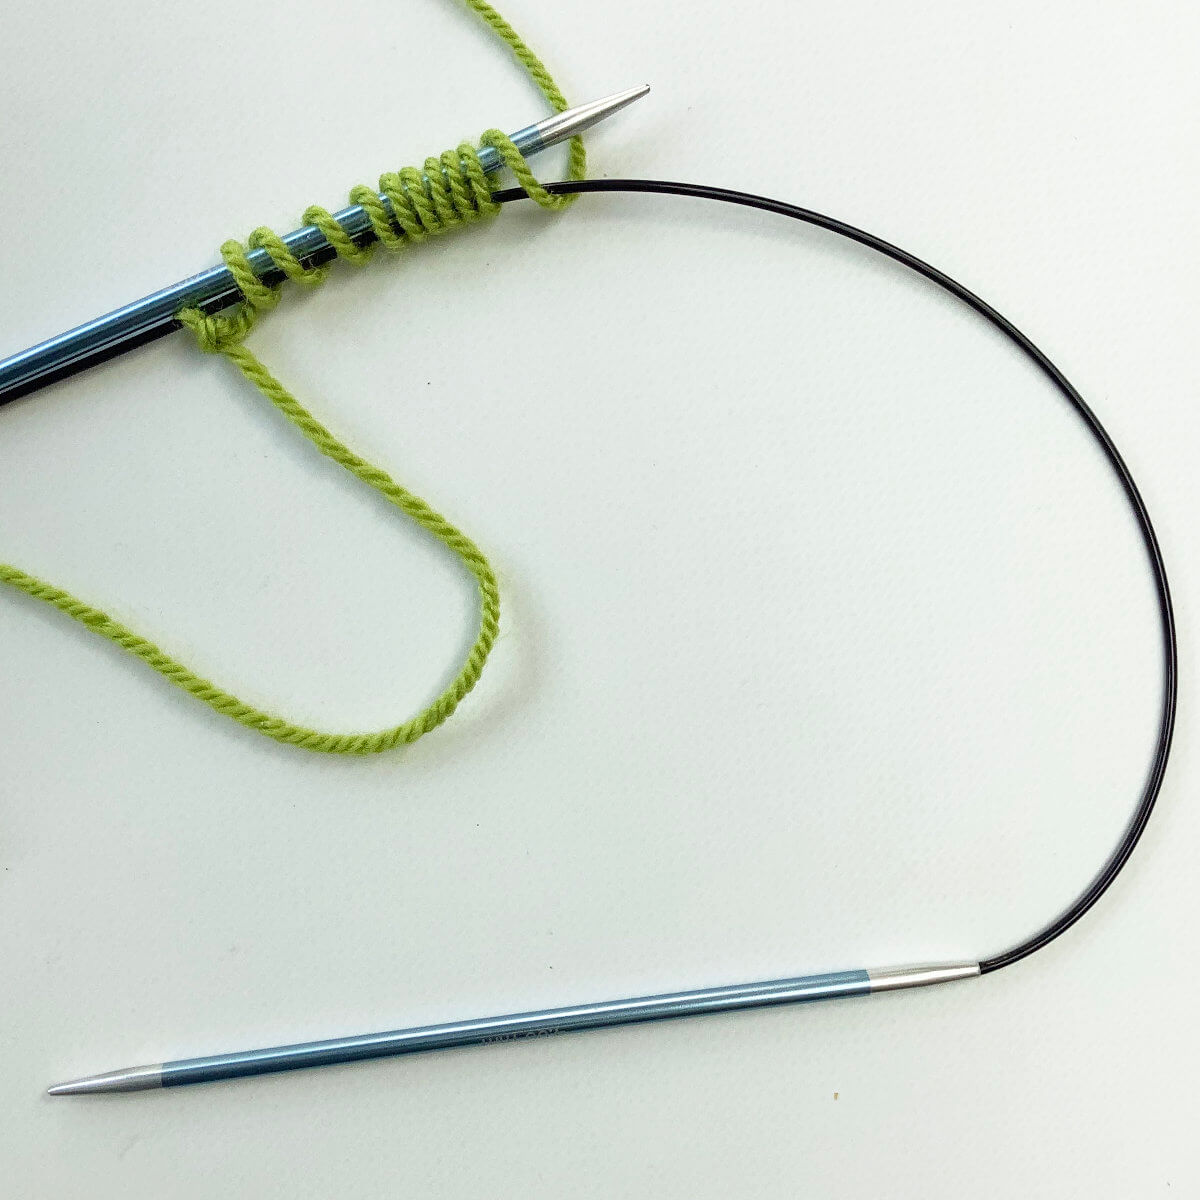
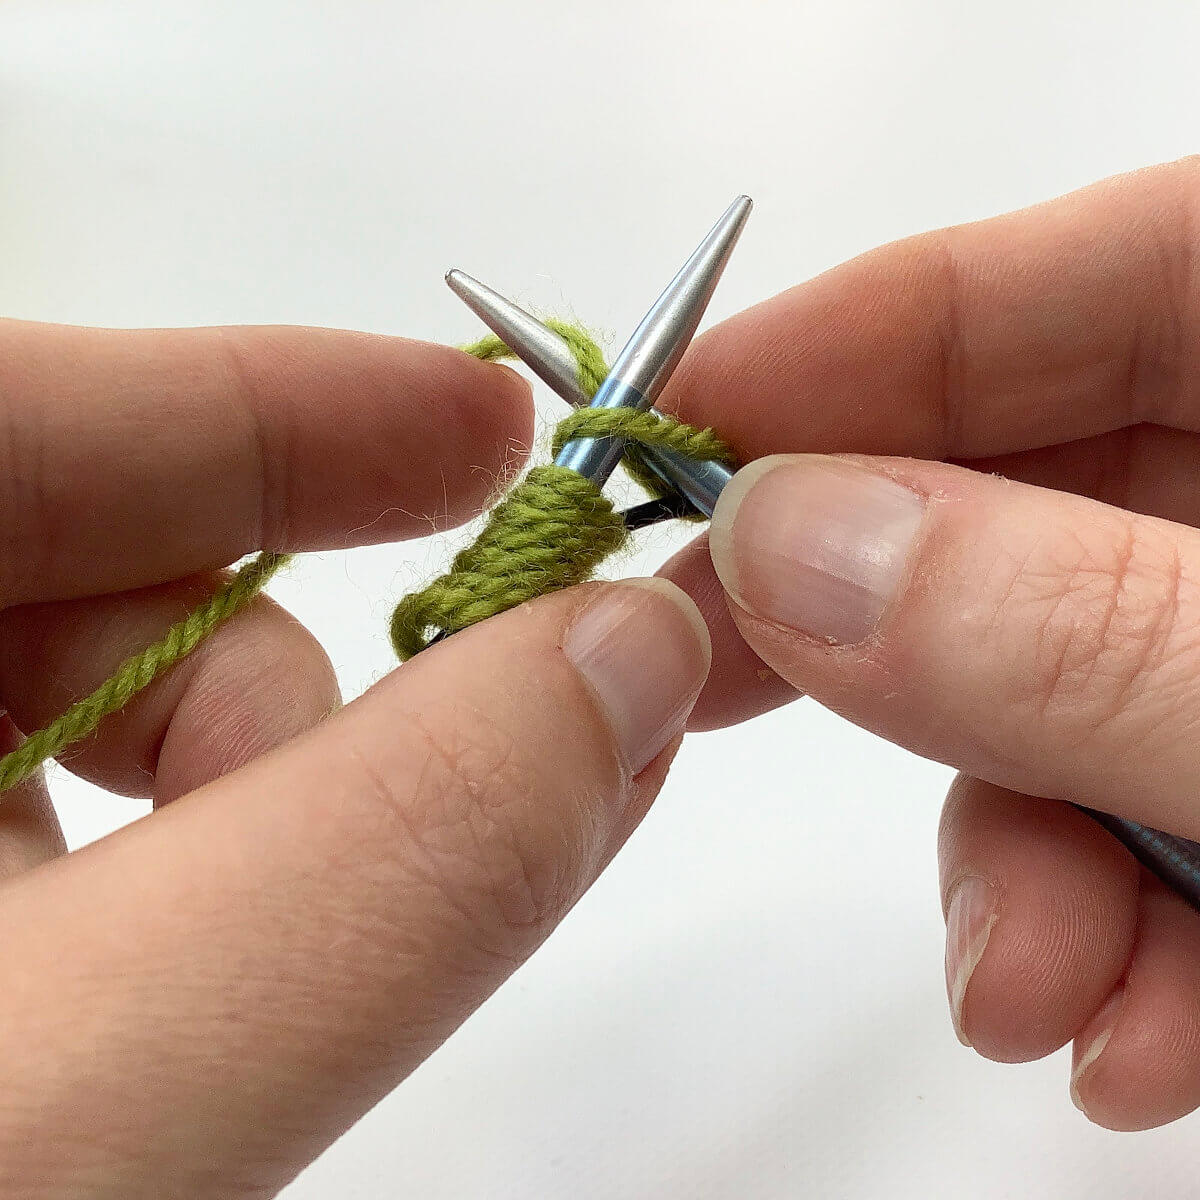
- Next, pull out the bottom needle (the one with the slipknot).
It helps to keep the wrapped yarn in place by holding it close to the needle with your left hand.
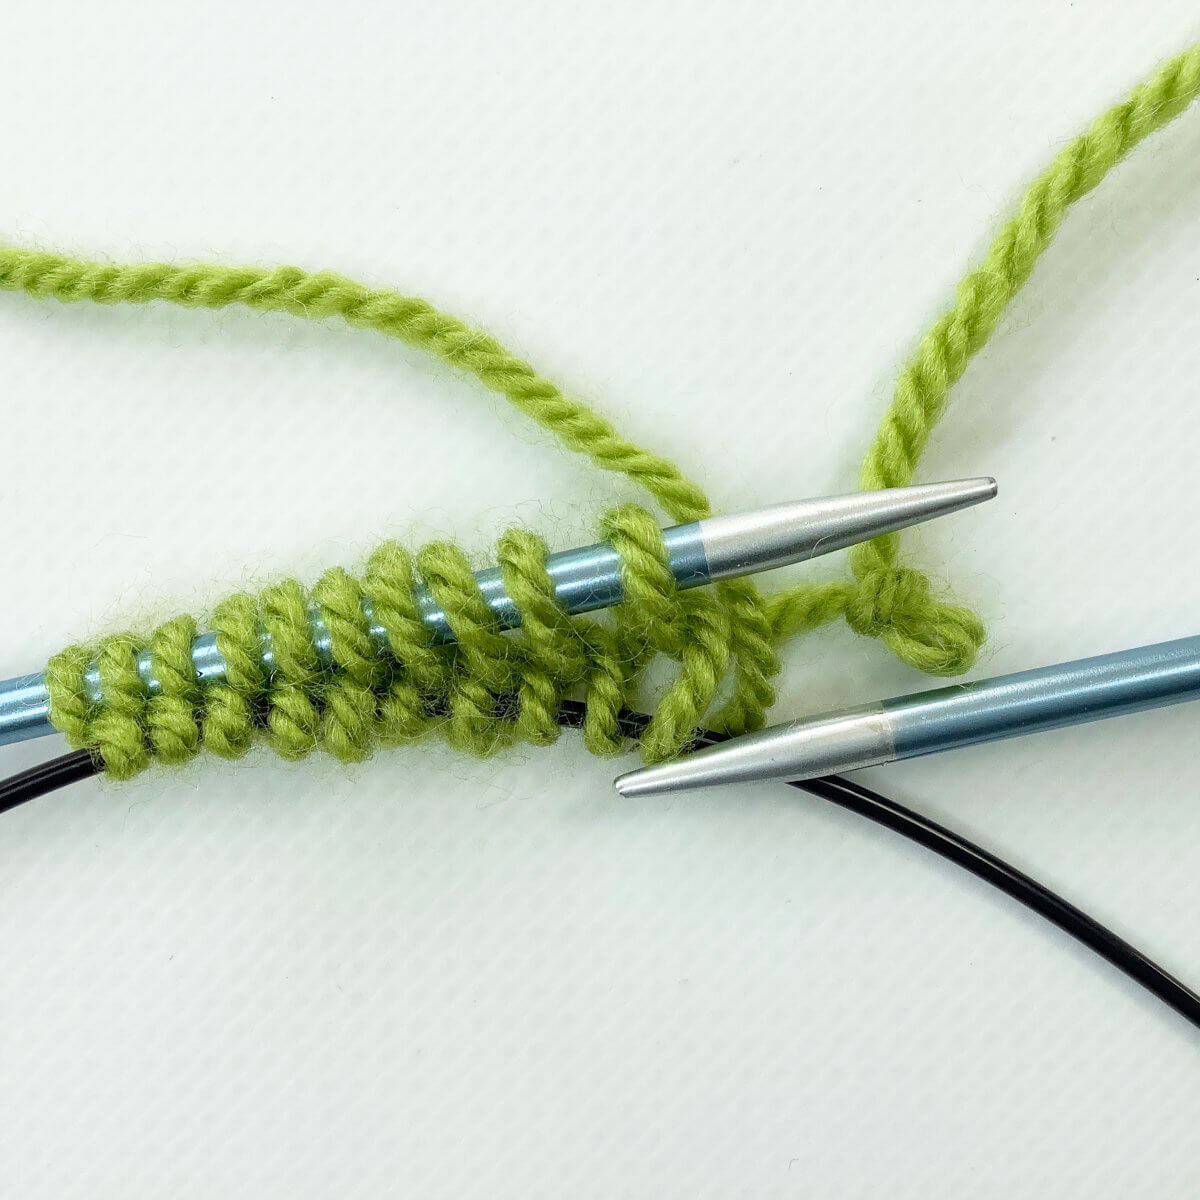
- Now use the pulled-out needle tip as your working (right-hand) needle to knit into the first stitch on the main (left-hand) needle.
To do so, first insert the needle knit-wise into the stitch…
- …, and wrap the yarn around the needle.
- To finish the knit stitch, pull the yarn through en let the loop fall off the left-hand needle.
This is how it then looks:

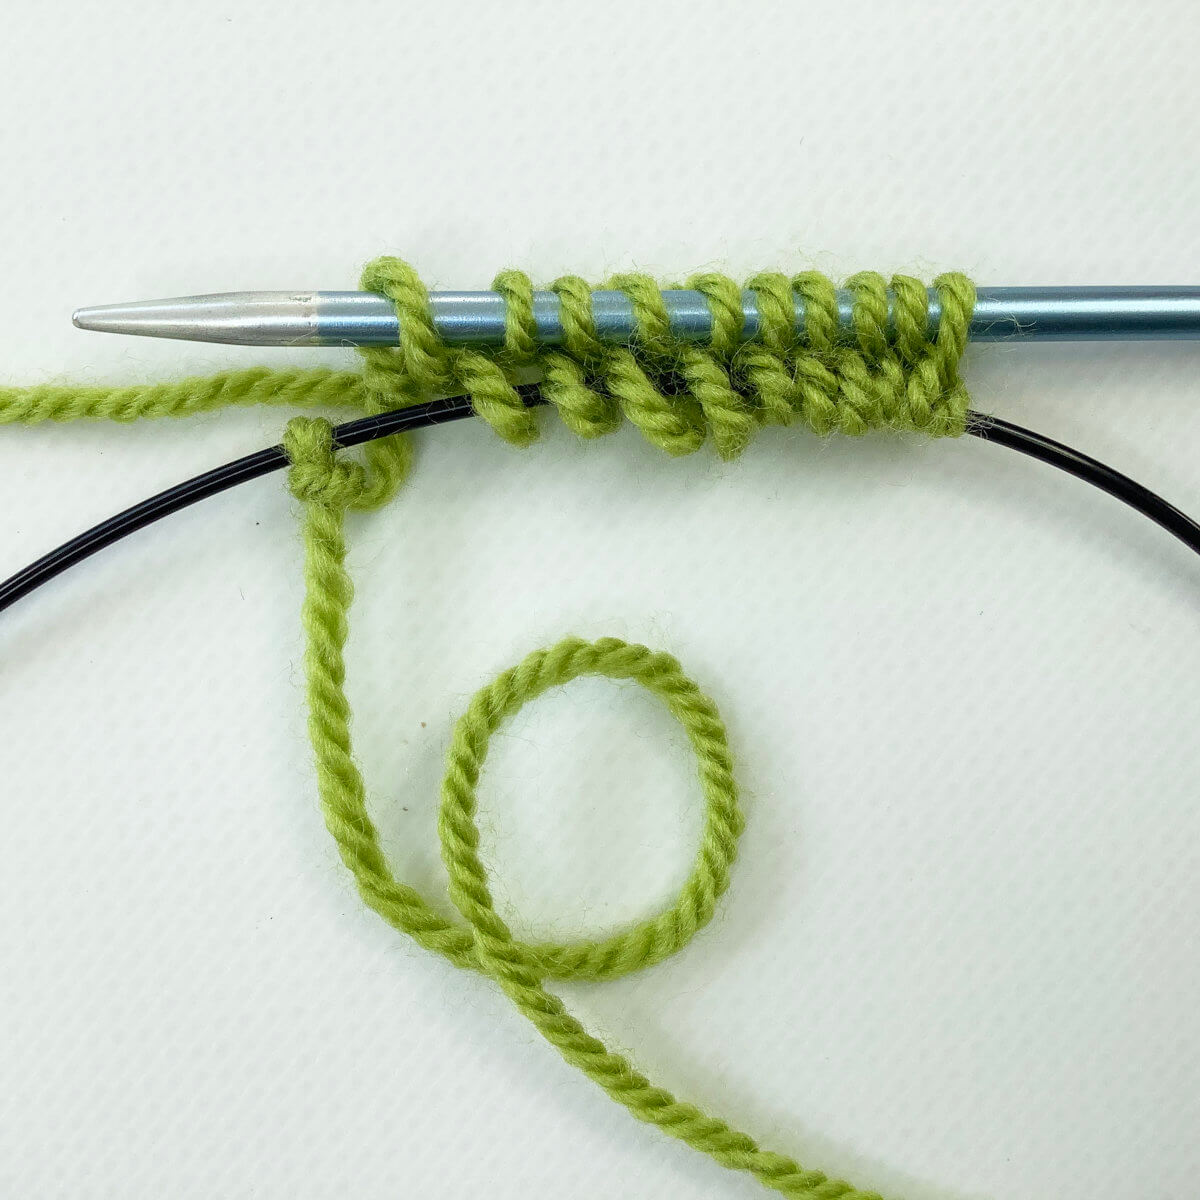
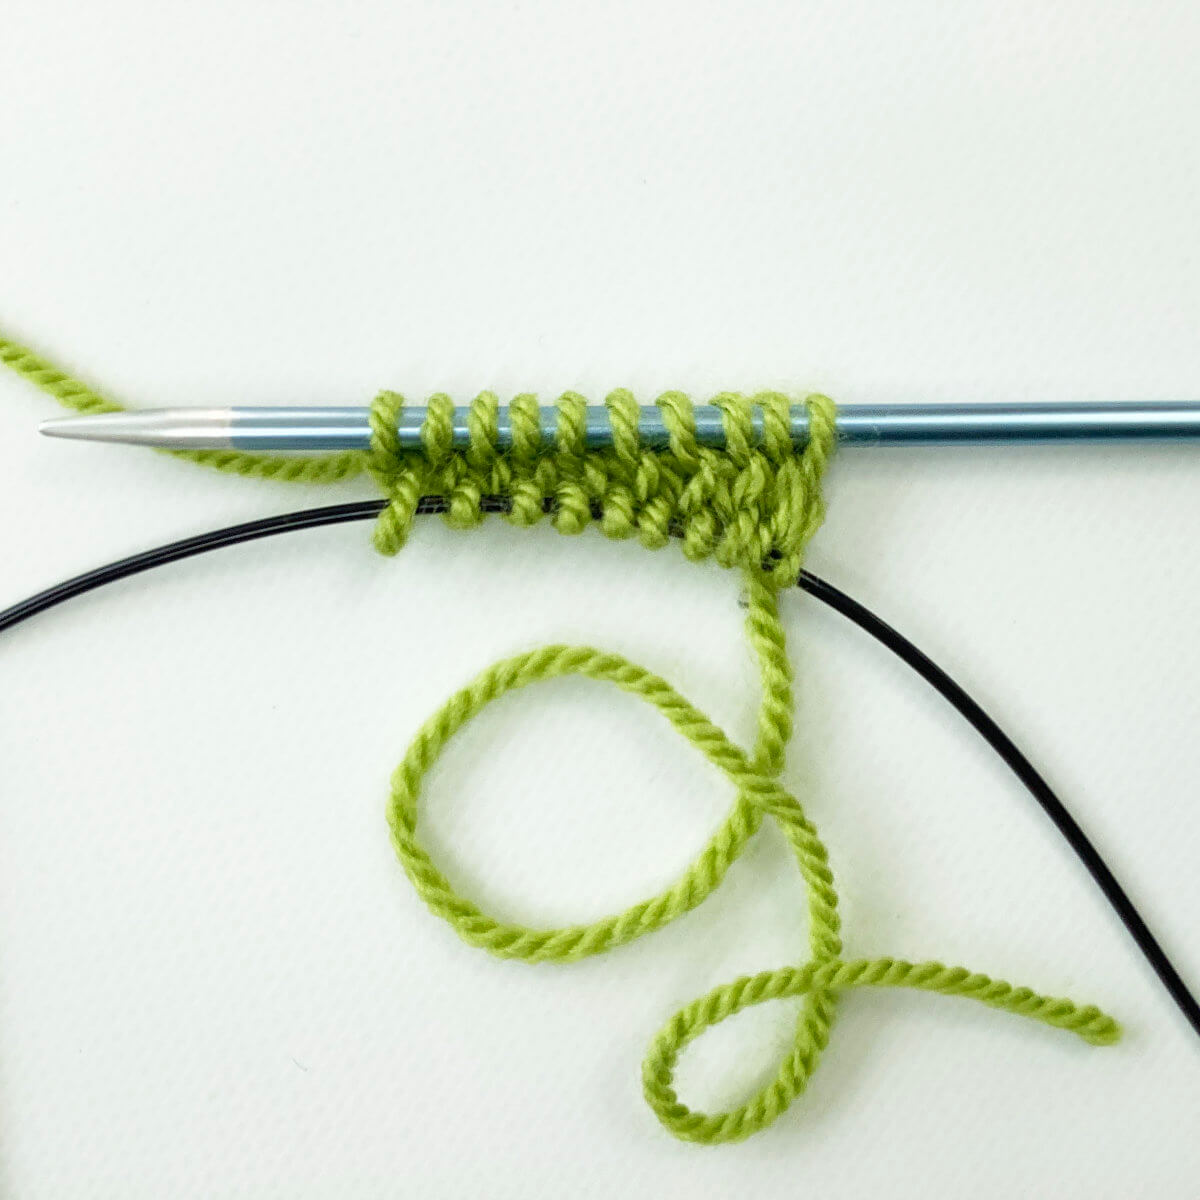
- Repeat steps 5-7 until there are no more loops on the needle.
This is how it looks:
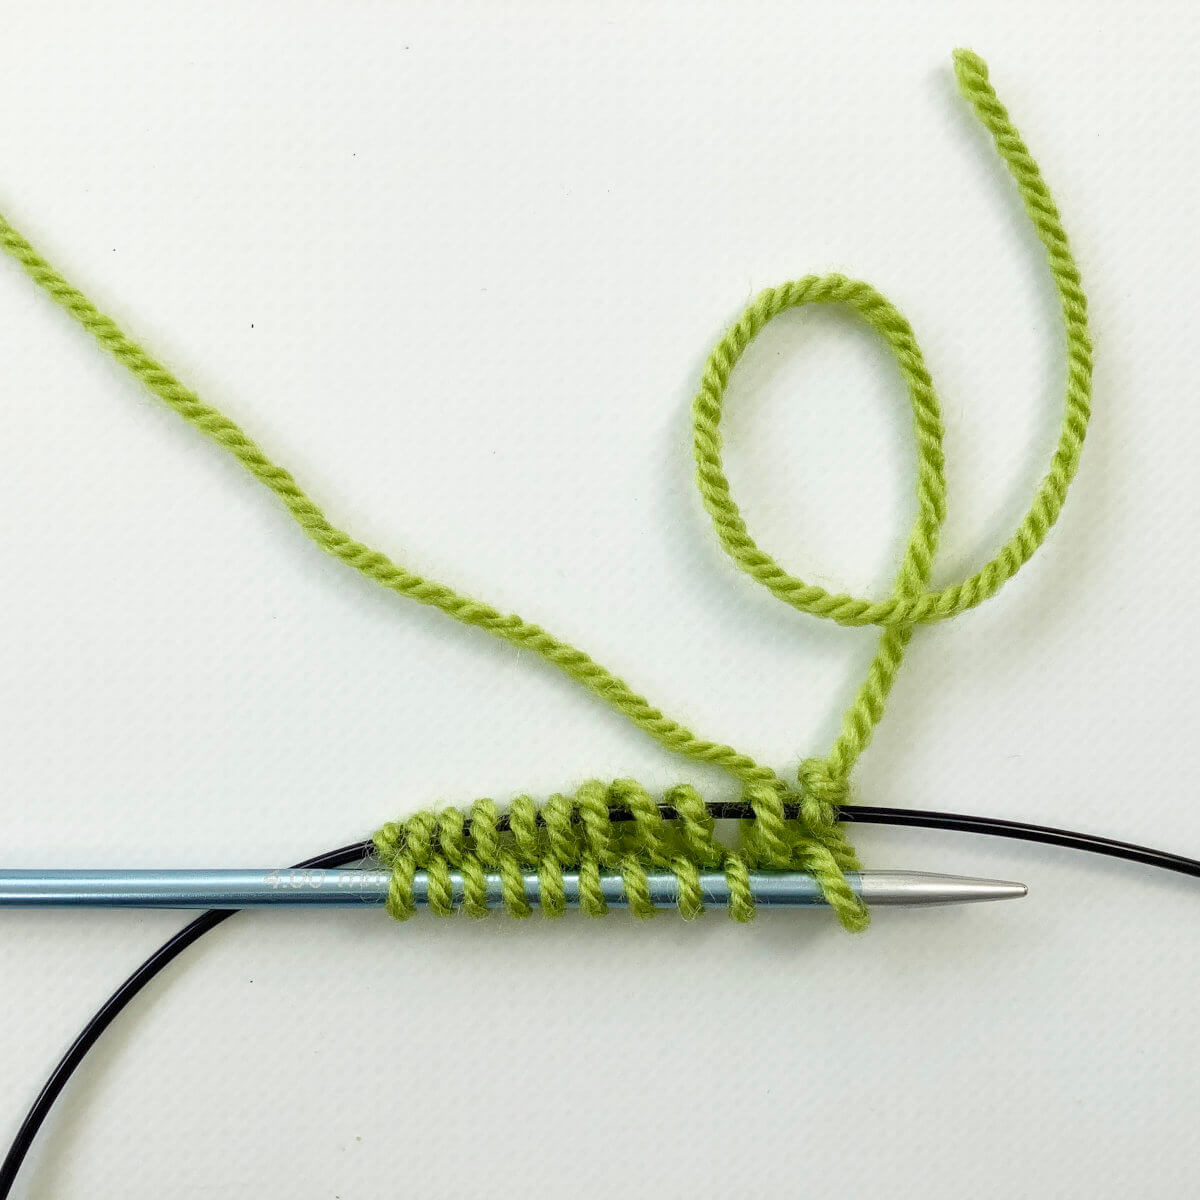
- To work the other 10 stitches that are on the cable, we have to rearrange the circular needle.
First, orient the work in such in a way that the row of stitches with the slipknot is on top, as shown below. Now push the needle in, so they no longer rest on the cable, but on the needle tip instead. For the other row of stitches, pull the needle tip out, so the stitches rest on the cable.
- In this step, I’ve slipped the slipknot off the needle, because I don’t need it as a stitch.
Just gently pull the yarn tail to pull the slipknot loose. Next, knit all the stitches on the needle as described in steps 5 to 7.
- This is the cast-on result, ready for further knitting in the round (using magic loop) as described in your pattern!

Thanks to my Patreon supporters for bringing you this freebie! Creating quality patterns and tutorials is a lot of work and resource-intensive. However, I find it important to give you free content like this tutorial. Thanks to the generous support of my Patreon supporters, I can make it happen. Thank you, patrons! Click here to join, or click here to read more about La Visch Designs on Patreon.


