In some cases, loose strands of yarn in front of the work are used to make details in patterning. Take, for example, my Kitties all around hat. In this hat pattern, I use these loose strands to create the whiskers of the little cats. At some point, you need to catch these loose strands behind another stitch. This way, you make sure they’re fixed in the correct point in the patterning. This is where the knit 1 under loose strands (k1 uls) stitch comes in! Read on to see how it’s done.
Materials used


Yarn: Paintbox Yarns Simply DK, a good value, good quality 100% acrylic yarn. The yarn shown here is in the colors 155 Vintage Pink and 125 Spearmint Green.
Knitting needles: This is a pair of straights that I picked up at the second-hand store when I started knitting, brand unknown.
Working a k1 uls stitch step by step
In patterns, you may encounter the following description of this stitch:
Knit 1 under loose strands (k1 uls): Insert right-hand needle under the loose strands to slip the next stitch purlwise, pulling it out from under the loose strands before replacing it on the left-hand needle, trapping the strands behind the stitch, next knit it.
Alternatively, the stitch may be described like this:
Knit 1 under loose strands (k1 uls): Insert right-hand needle under the loose strands then into the stitch, wrap the yarn around the needle and pull it through underneath the loose strands, trapping them behind the stitch. Slide the stitch off the left-hand needle to complete the k1 uls.
Both methods amount to exactly the same, but have a slightly different way to achieve the end result. In this tutorial, I’ll show the second version.
- Make sure you have your piece with knitting with loose strands to work, as instructed in your pattern.
In this swatch I have 2 strands, achieved by slipping 3 stitches purlwise, with the yarn held in front of the work.
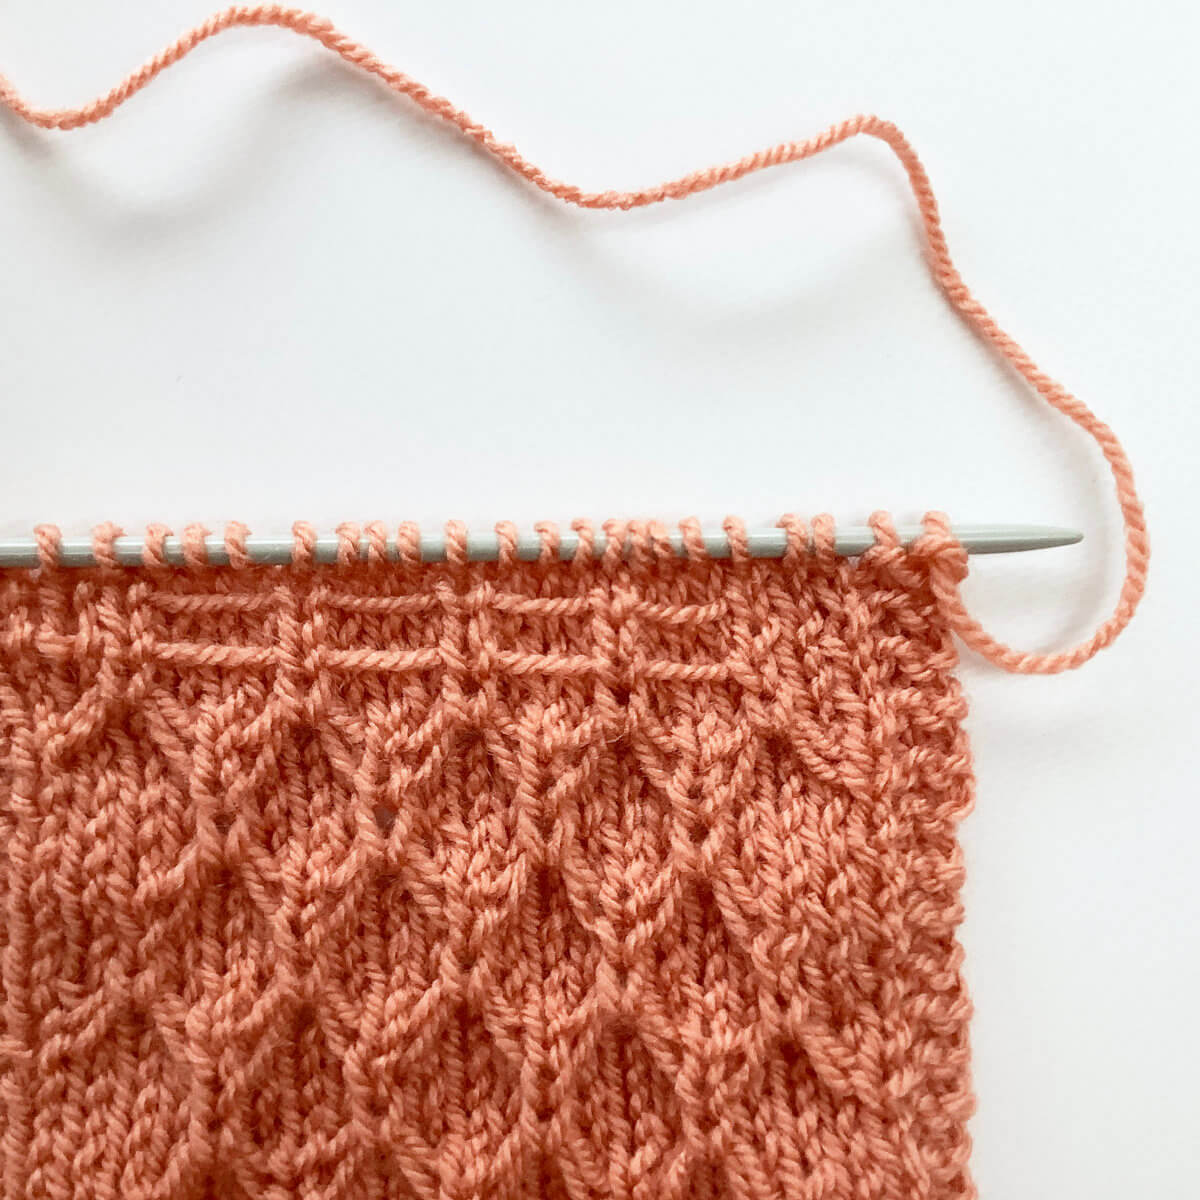
- First, work your way across the row until you’ve reached the point where you want to make the k1 uls stitch
In this case, I’m making it in the middle stitch of the 3 slipped ones.

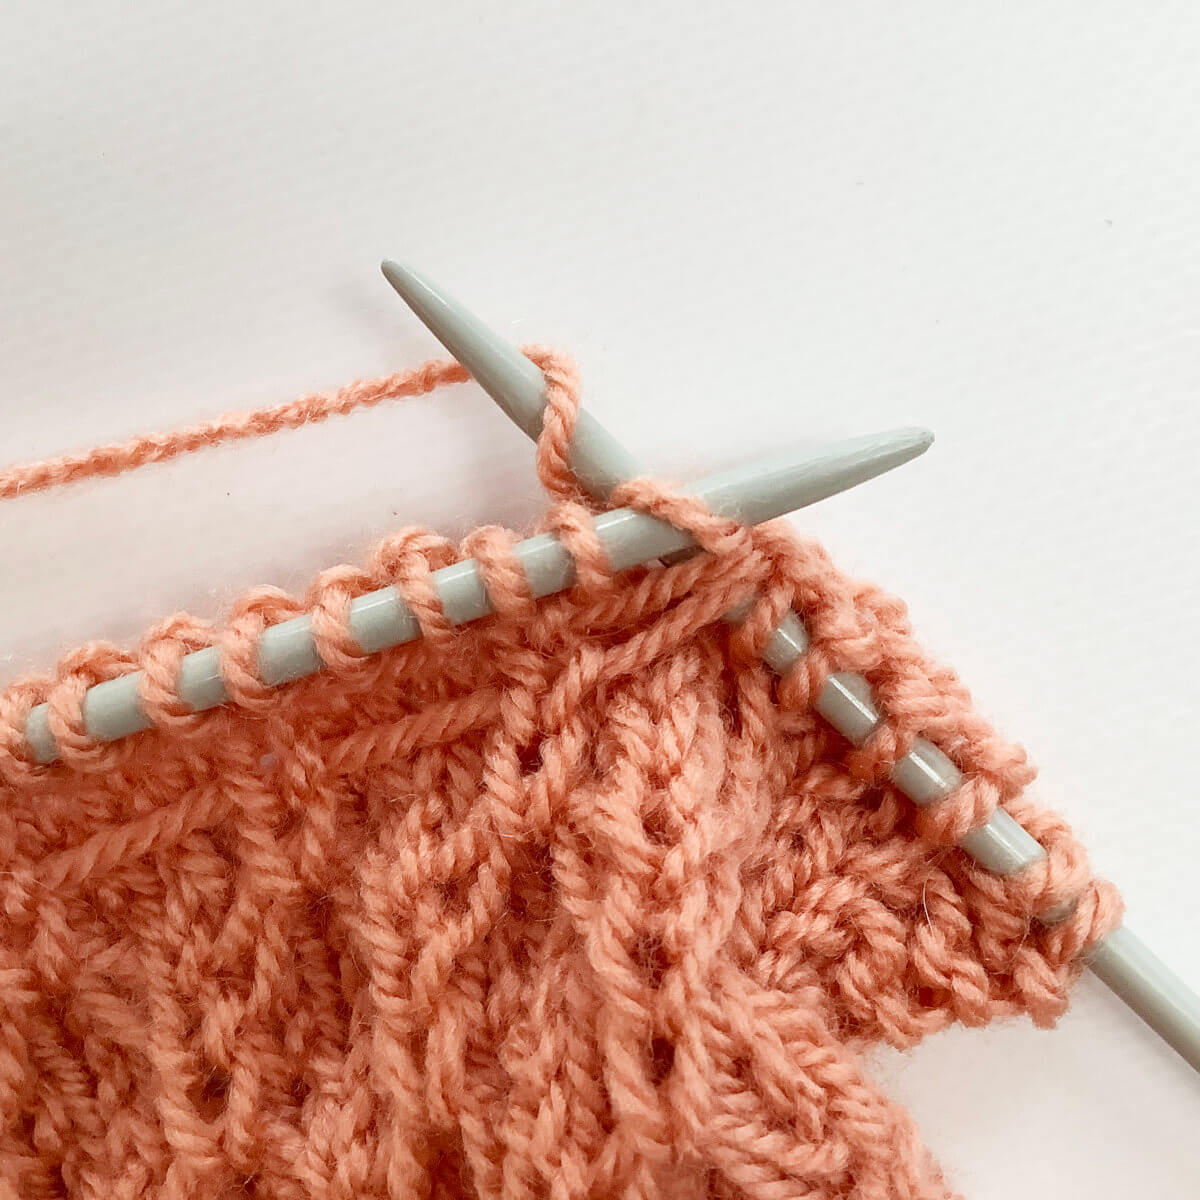
- Insert your right-hand needle underneath the loose strands to capture.
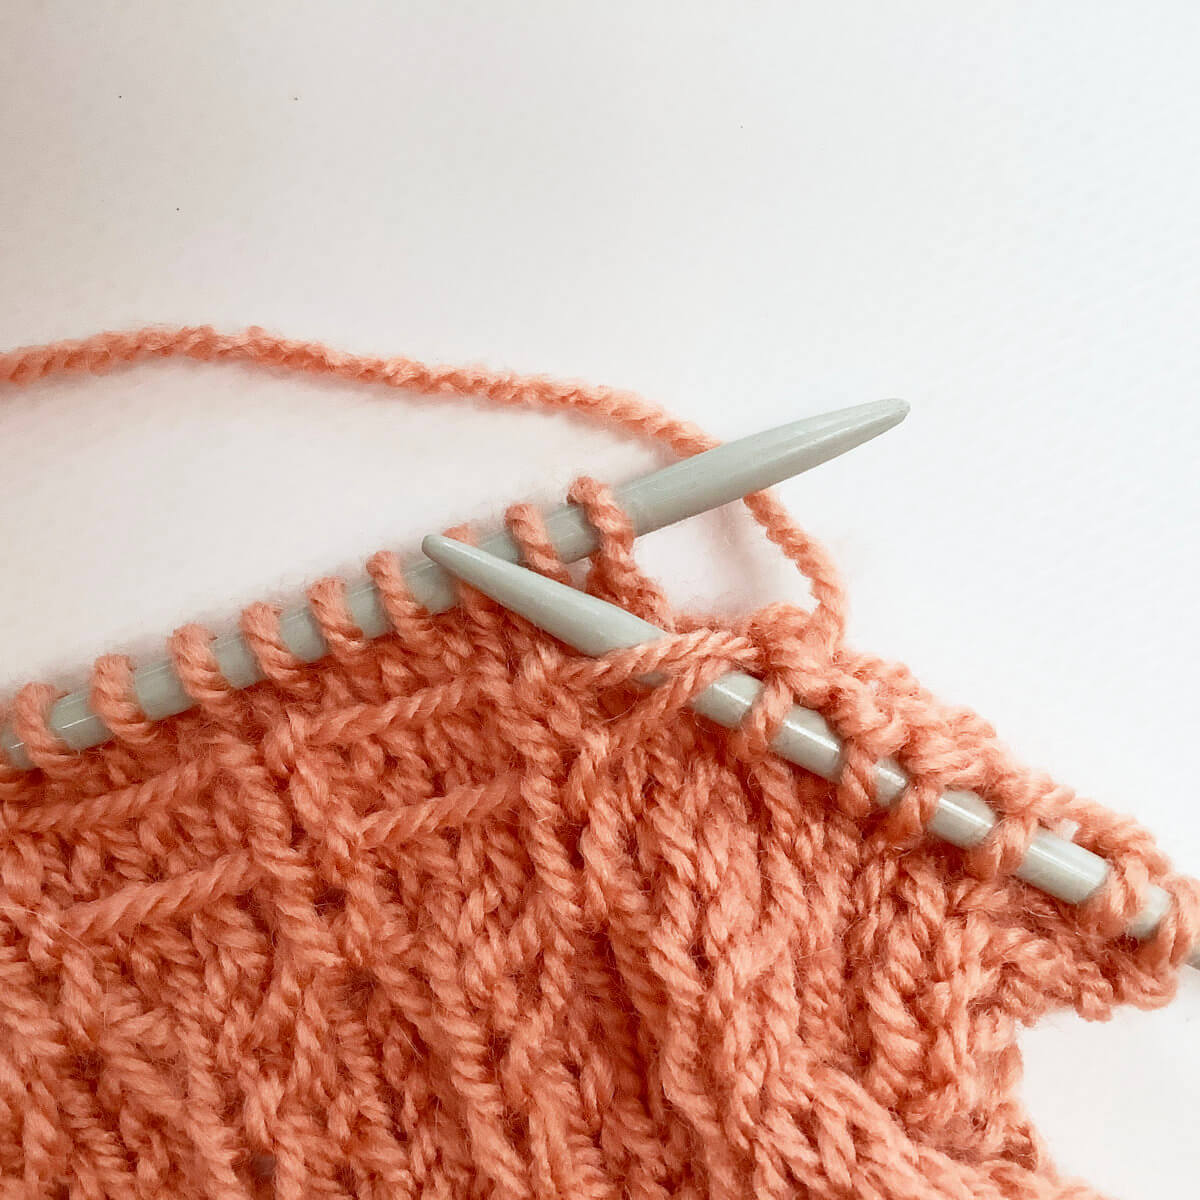
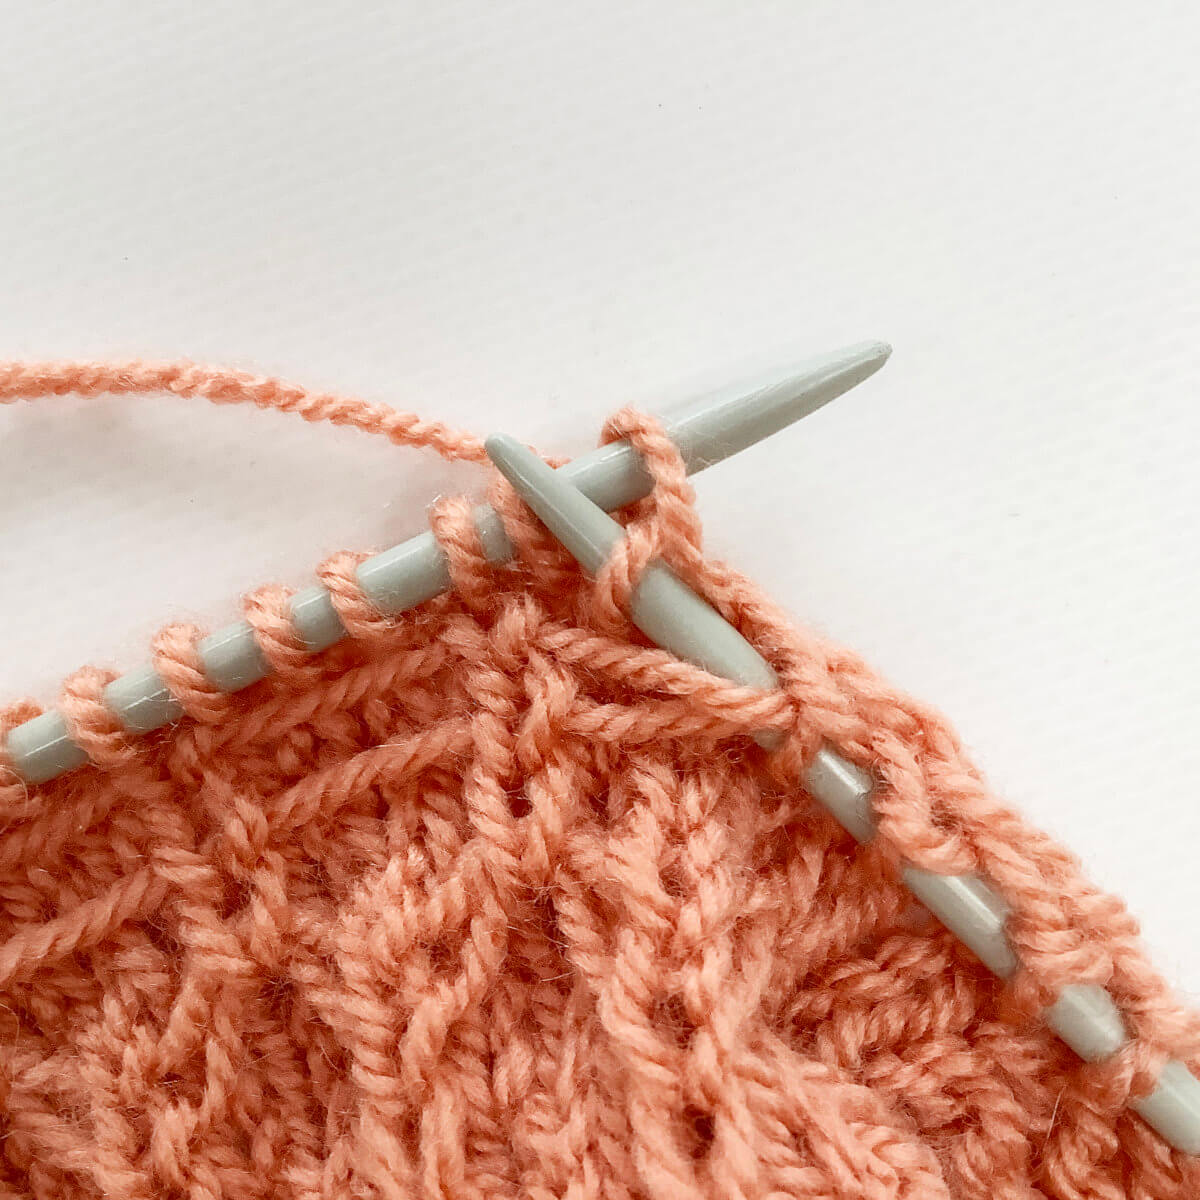
- Now, insert the right-hand needle knit wise in the stitch to knit.
Here I want to make a regular knit stitch, but if you’re instructed to work it through the back loop (k1 tbl), insert the needle in the back loop instead.
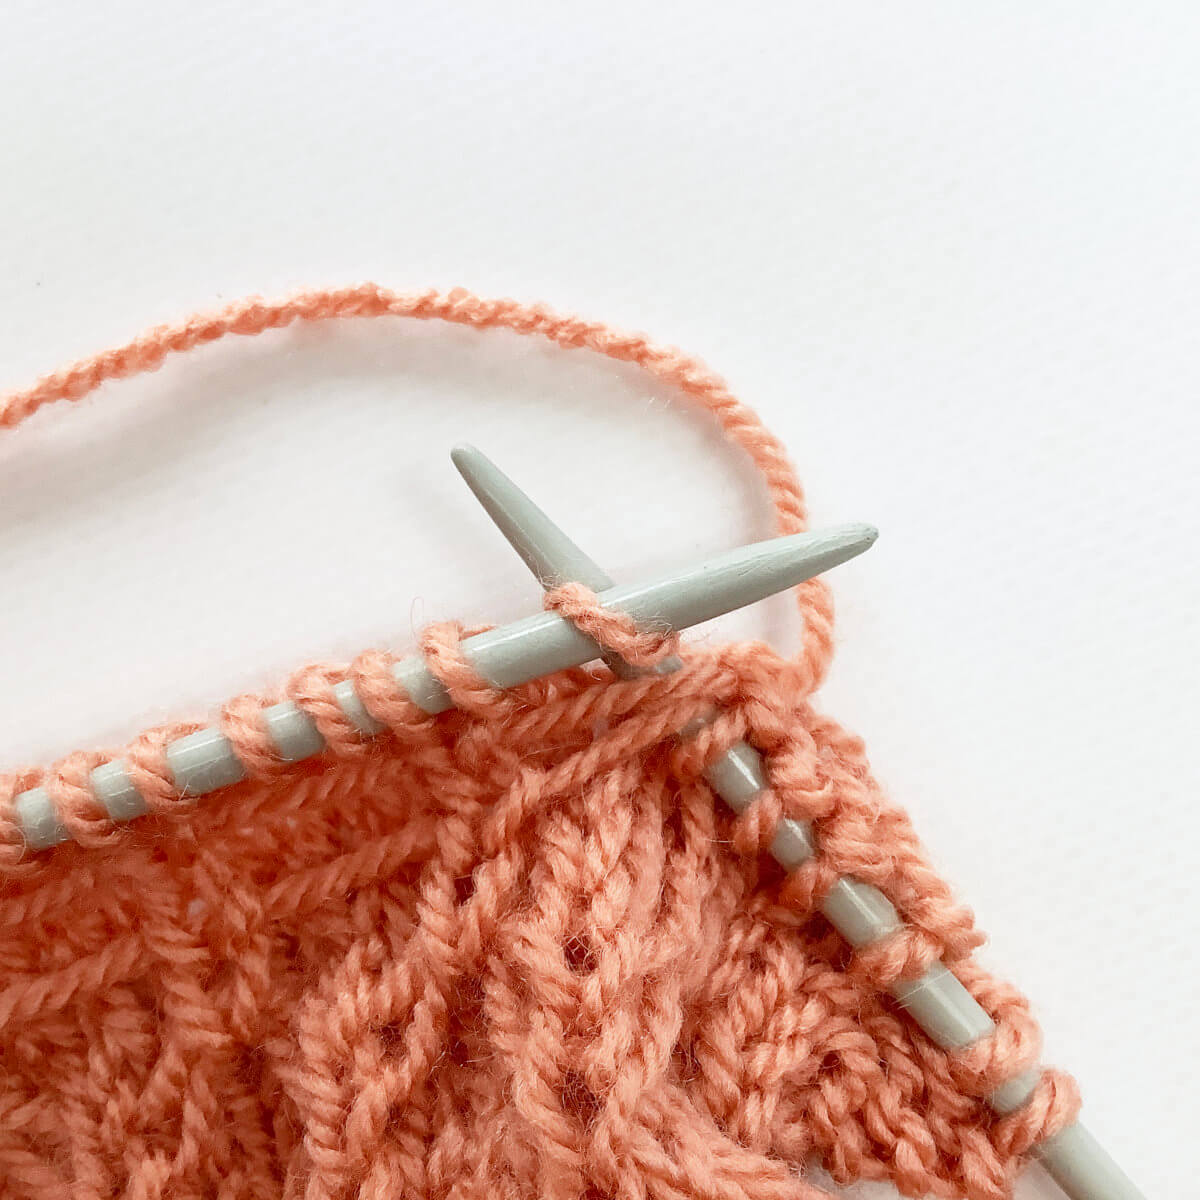
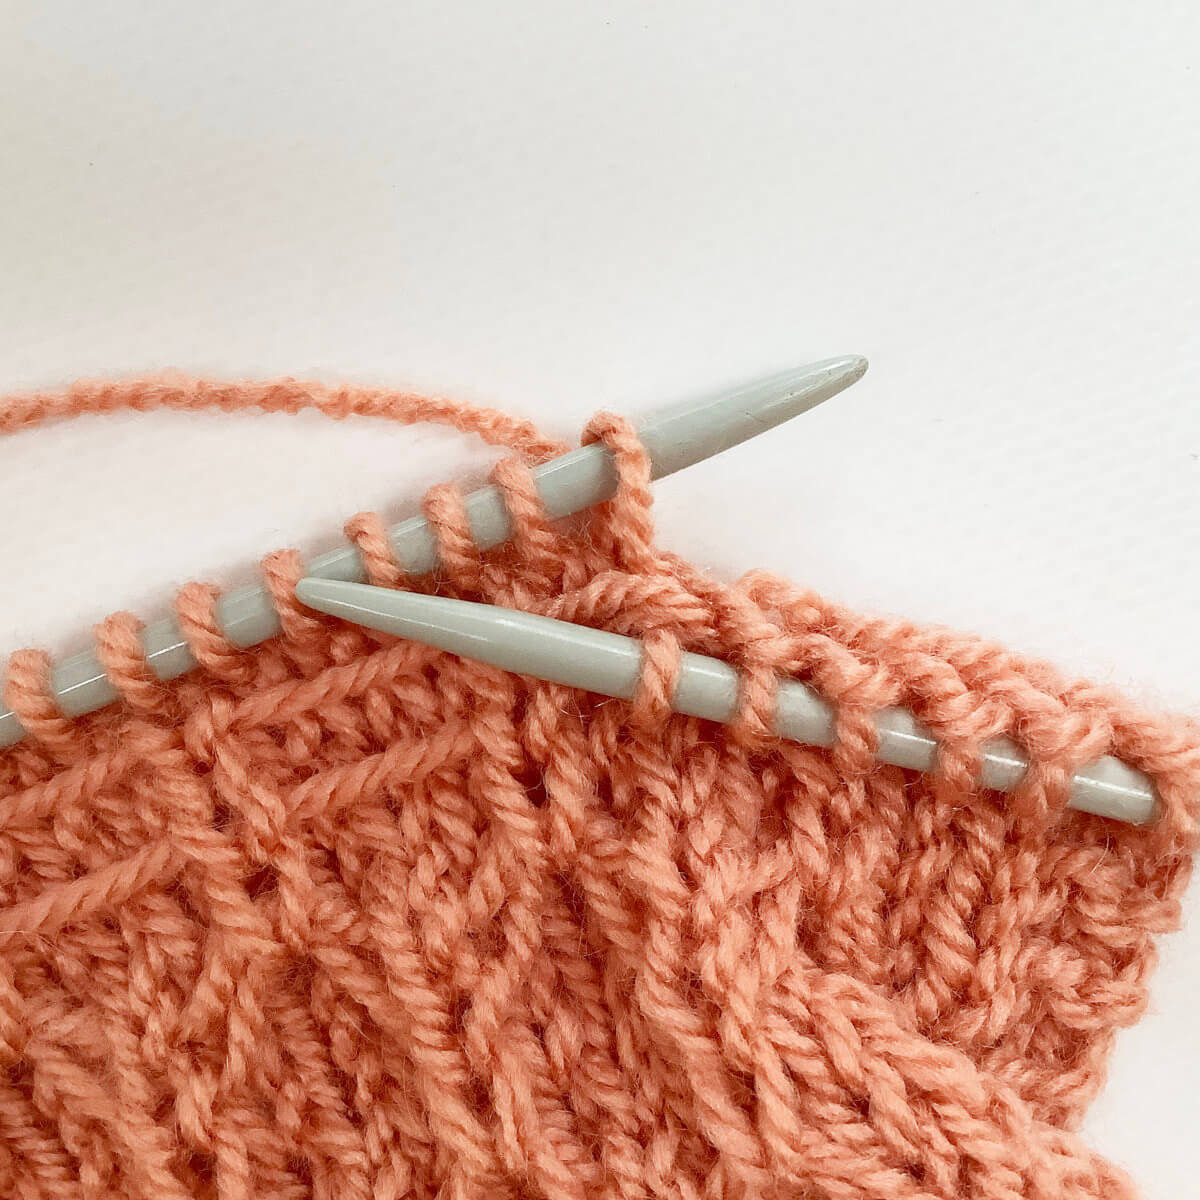
- To continue, wrap your working yarn around the needle…
- …. and pull it through the stitch.
- Next, also pull it from underneath the loose strands.
This is what captures the strands behind the newly made stitch.
- Finally, finish the stitch by slipping the loop off the left-hand needle.
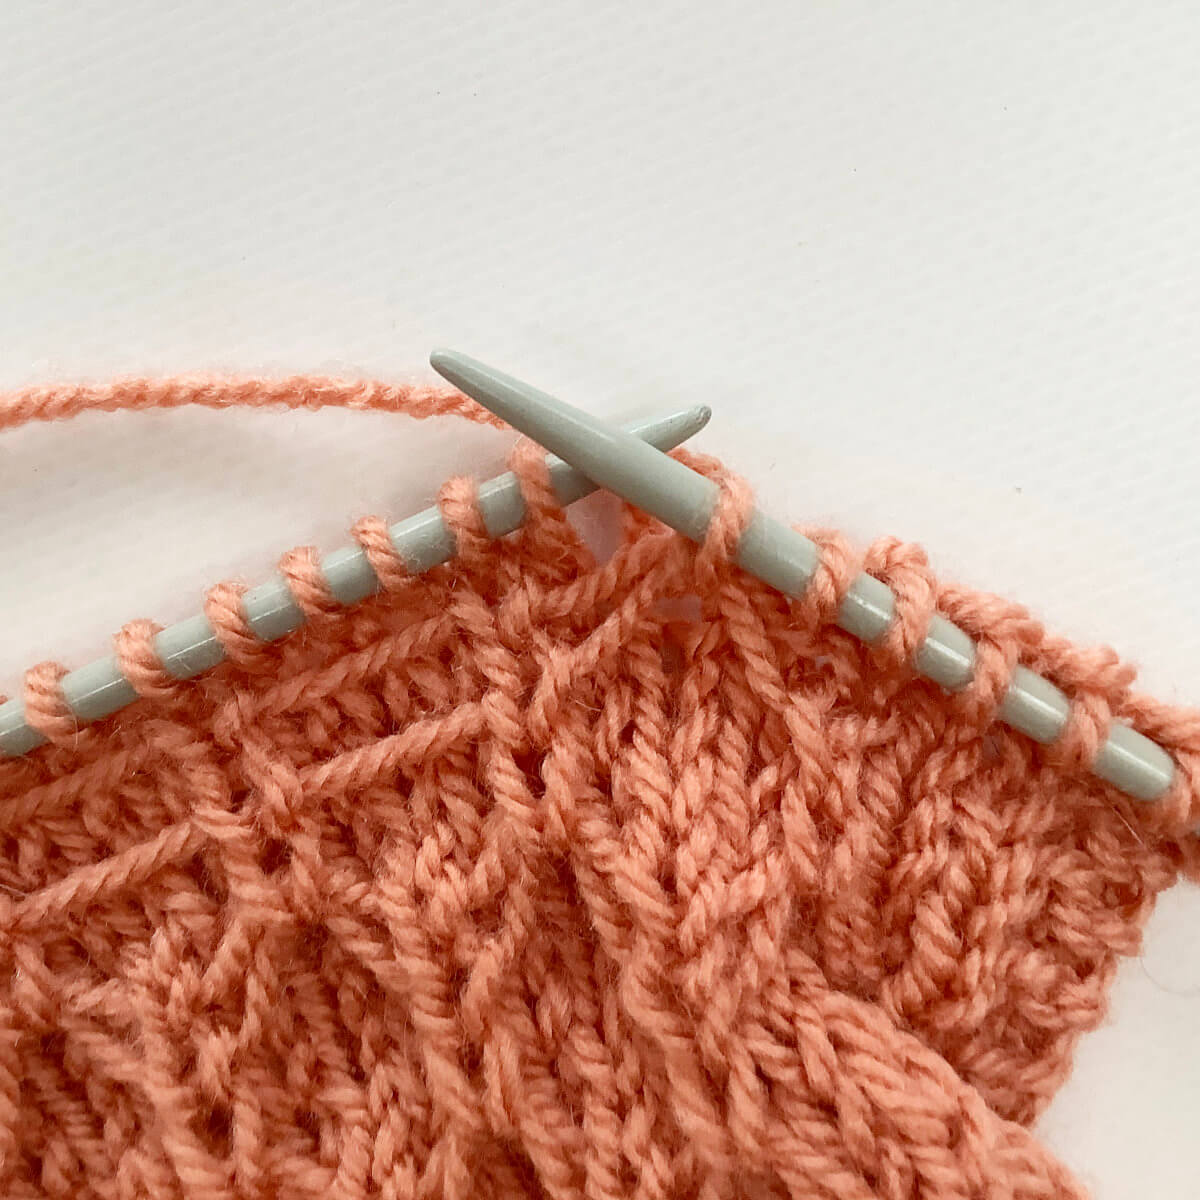
And that’s all there is to it!

Thanks to my Patreon supporters for bringing you this freebie! Creating quality patterns and tutorials is a lot of work and resource-intensive. However, I find it important to give you free content like this tutorial. Thanks to the generous support of my Patreon supporters, I can make it happen. Thank you, patrons! Click here to join, or click here to read more about La Visch Designs on Patreon.

 stitch")

