In this tutorial, I’m going to show you a very neat decrease: the bunny ears decrease. It’s a symmetrical way of decreasing 3 stitches to only 2! It’s called this way, because the result somewhat looks like 2 bunny ears “hugging” the resulting 2 stitches. Now, in this version of the decrease, the “ears” are pointing outwards. There is also a version in which the ears point inwards, that one is called the “bunny ears back” decrease. I’ll make a tutorial on that version of the decrease soon.
Materials used


Yarn: Paintbox Yarns Simply DK, a good value, good quality 100% acrylic yarn, here in the color Marine.
Needles: This is a pair of straights that I picked up at the second-hand store when I started knitting, brand unknown.
Working the bunny ears decrease step by step
In patterns, you may encounter the following description of this stitch:
Bunny ears decrease (bedec): Knit 2 stitches together but leave the second stitch on the left needle, next work skp over the next 2 stitches.
But how to actually do this? Read on!
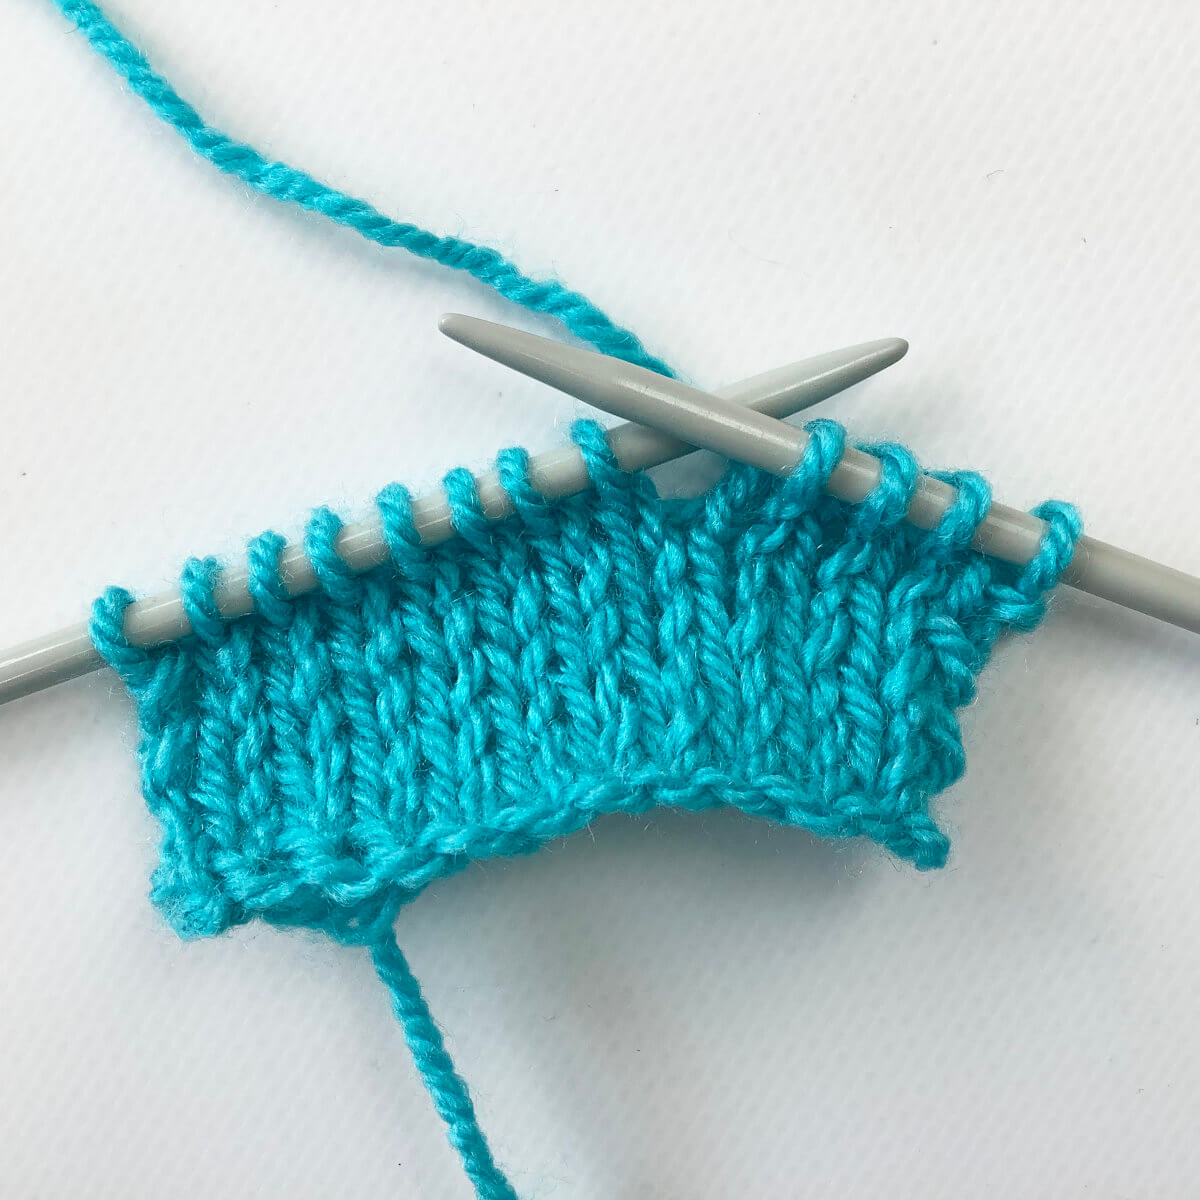
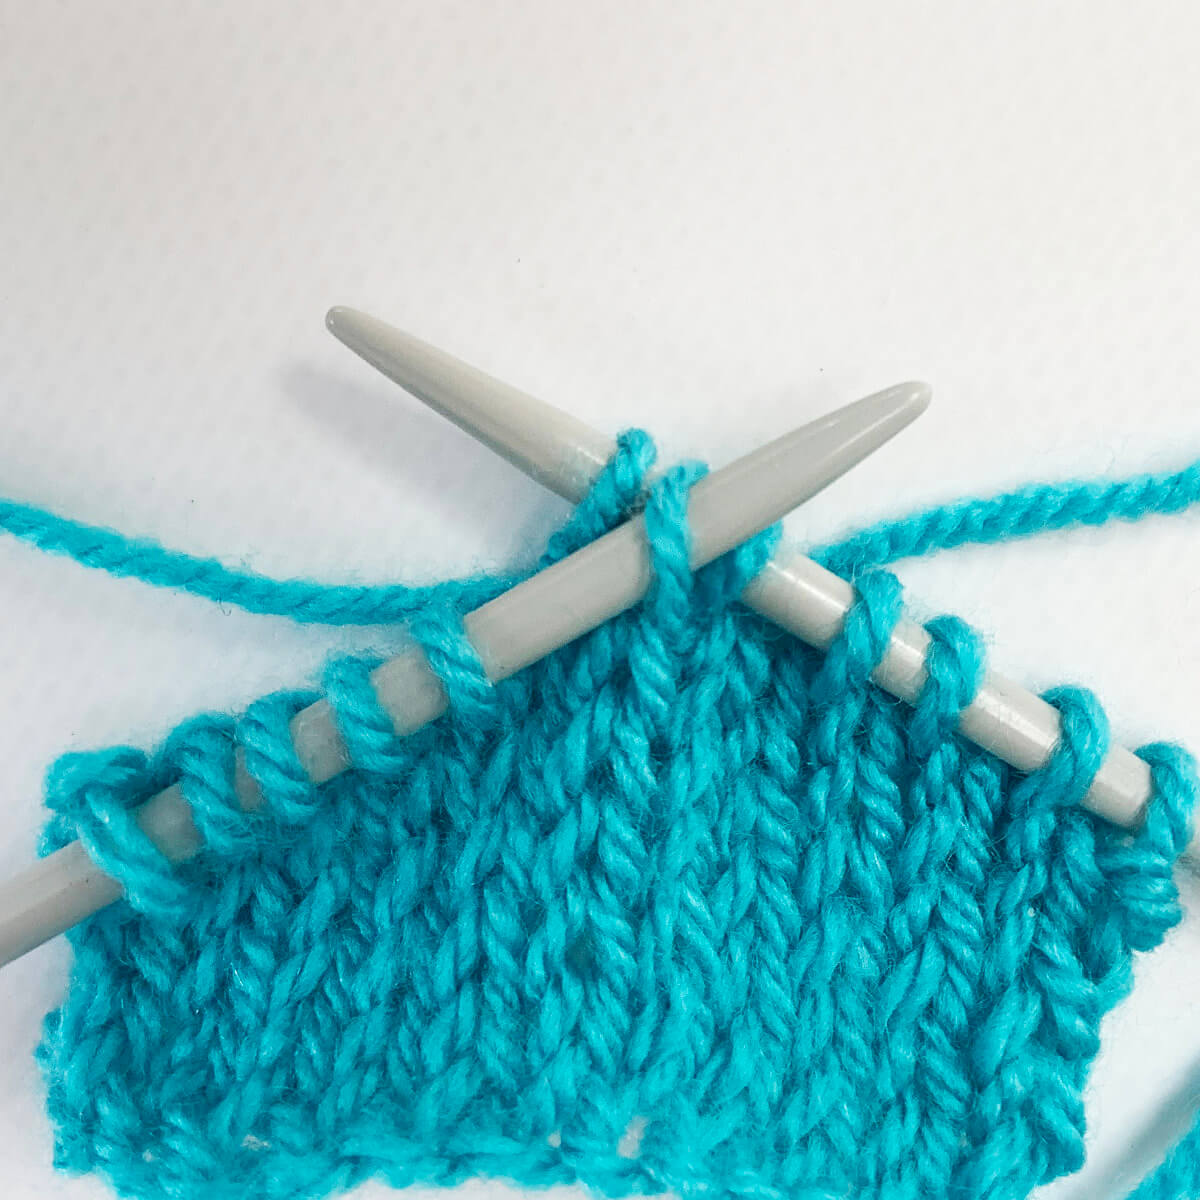
- First, work your way across the row until you’ve reached the point where you want to make the decrease.
See those 3 stitches on the left-hand needle? That’s where I’ll be making the bunny ears decrease.
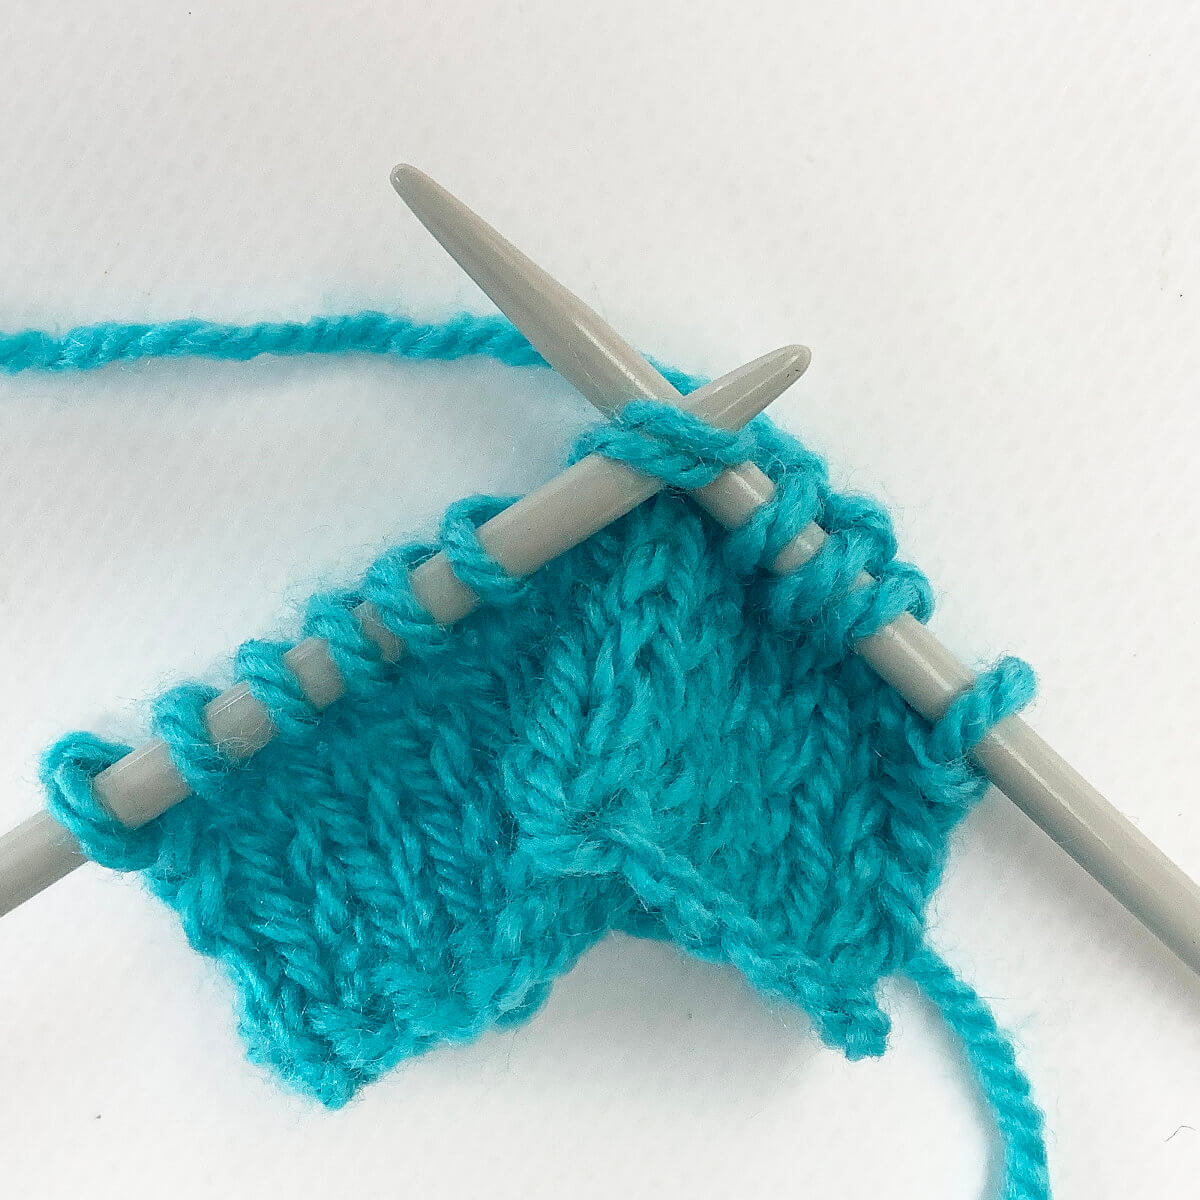
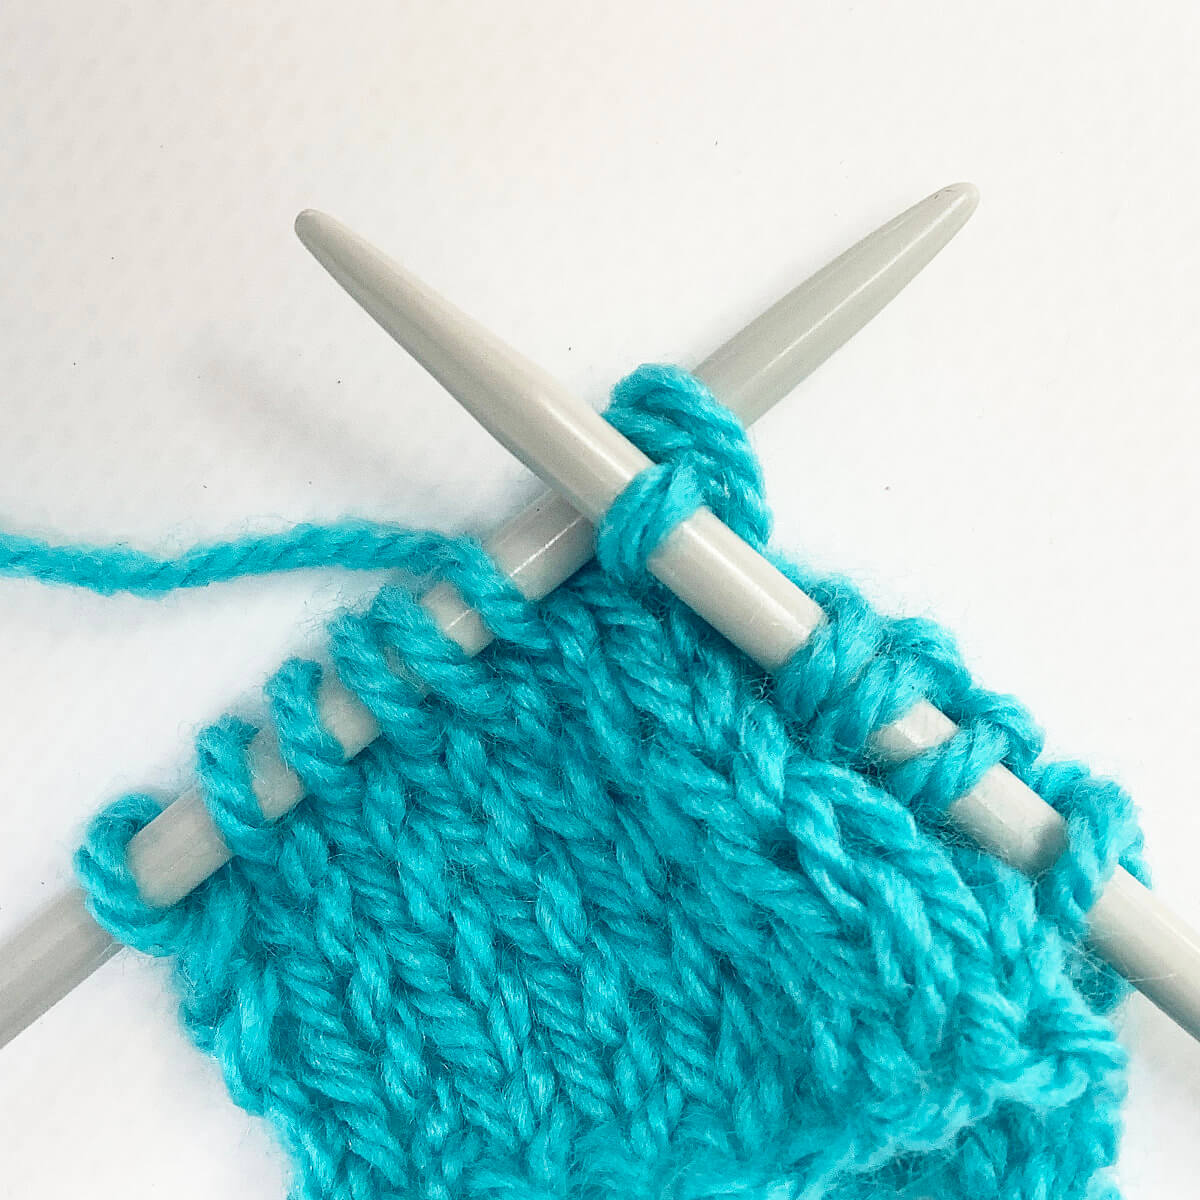
- Next, insert the tip of the right-hand needle into the first 2 stitches at the same time as if to knit.
Over these stitches, we’ll be doing the first steps of a k2tog.
- Wrap the yarn around the needle…
- … and pull the yarn through the 2 stitches.
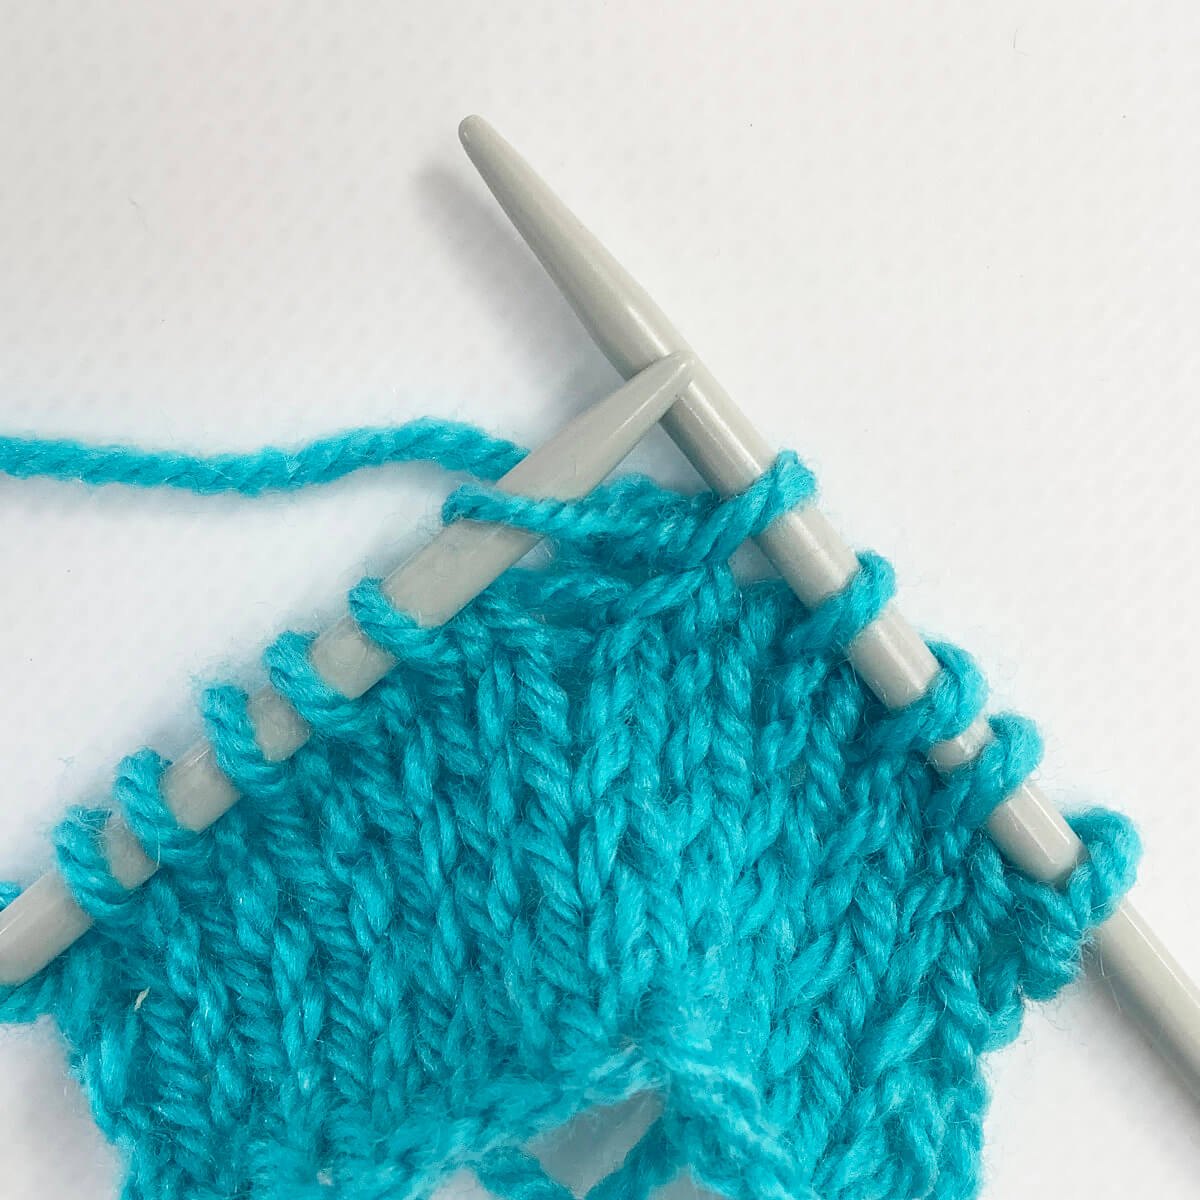
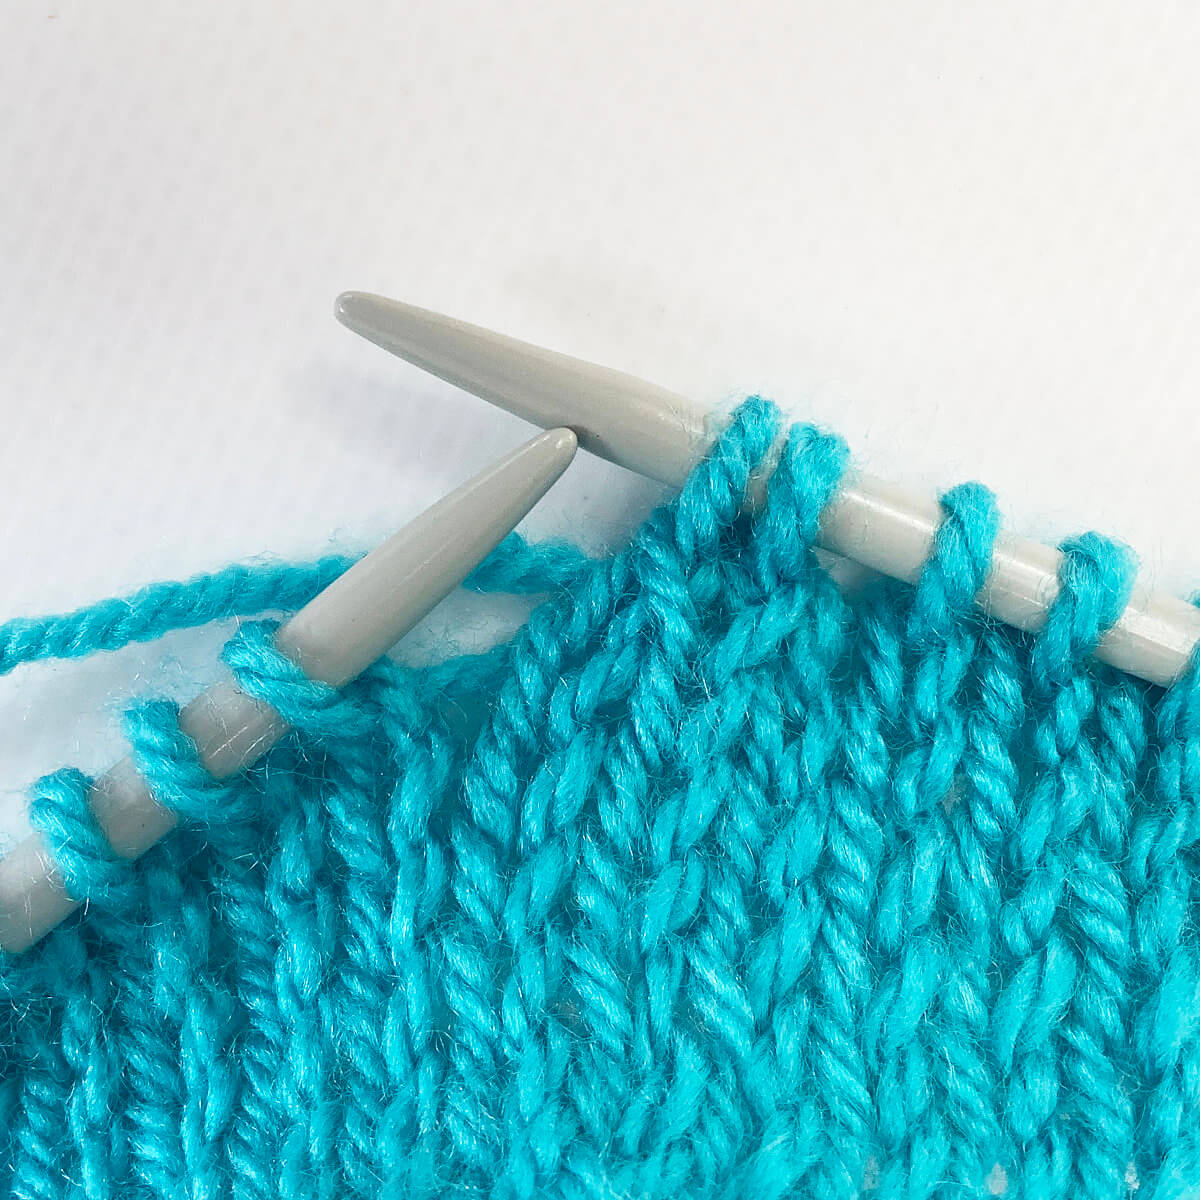
- Next, slide only 1 of the 2 original stitches of the left-hand needle.
With a regular k2tog, both stitches would be moved off the needle. So this is where it starts to go different.
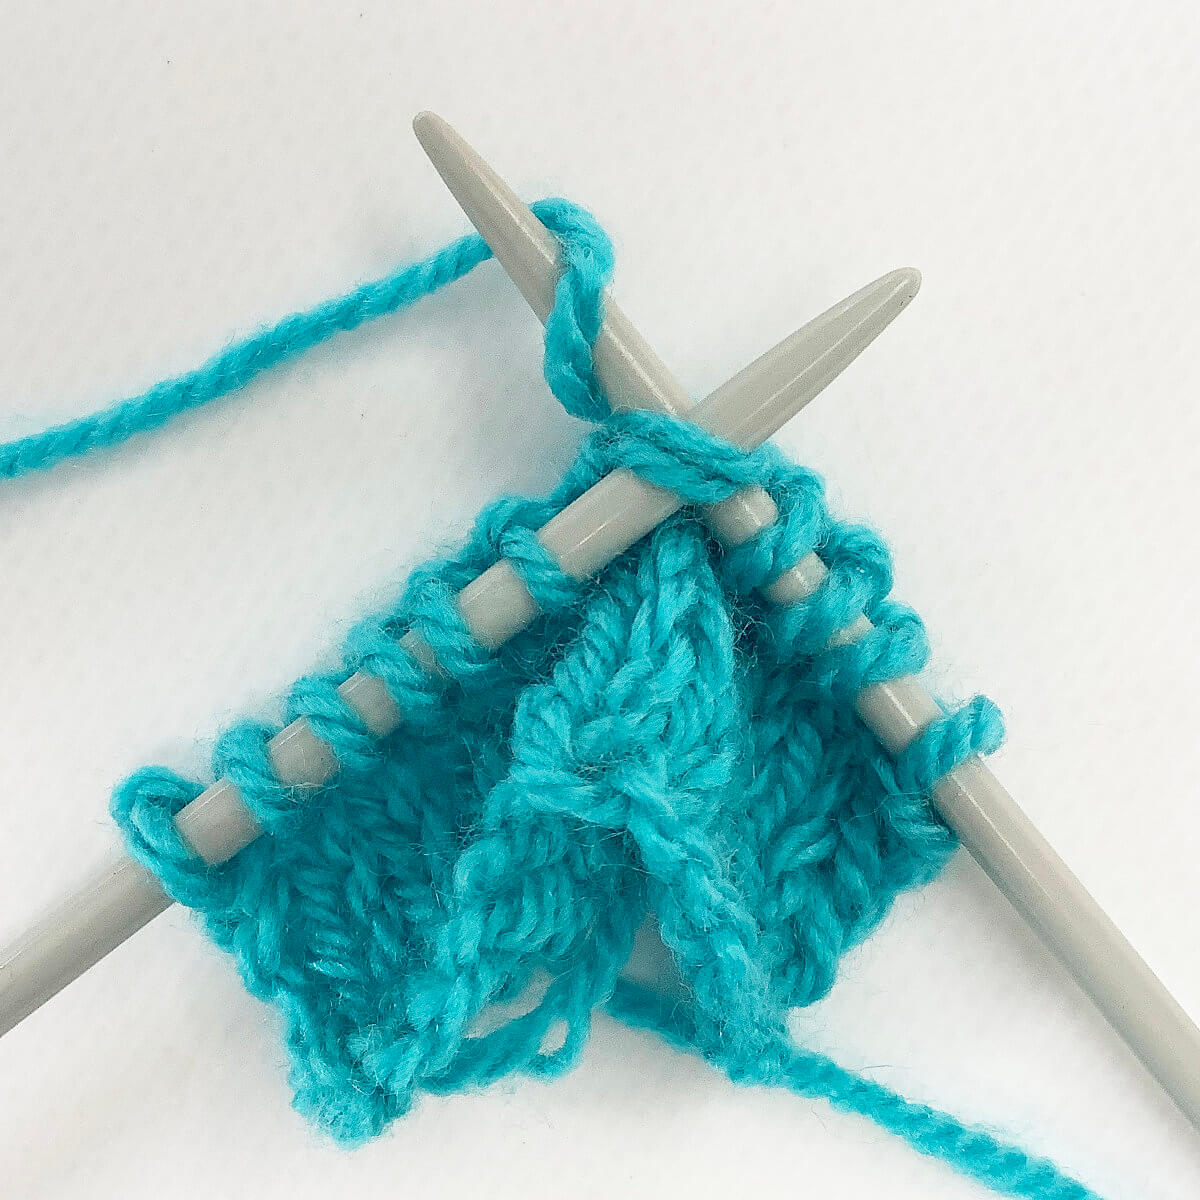
- Now we’re starting the left leaning decrease part of the stitch.
The main point here is to work this on the 2 remaining stitches on the left-hand needle: 1 stitch we haven’t handled yet, and 1 stitch that we didn’t move off the needle when working the k2tog right-leaning decrease. This part of the stitch can be worked as ssk, skp, or any other way you may prefer to work a left-leaning decrease. Since I personally prefer skp I’ll be showing this in the tutorial.
To start, insert the tip of the right-hand needle into the first stitch as if to knit, and slip it onto the right-hand needle without actually knitting it. This is how it now looks: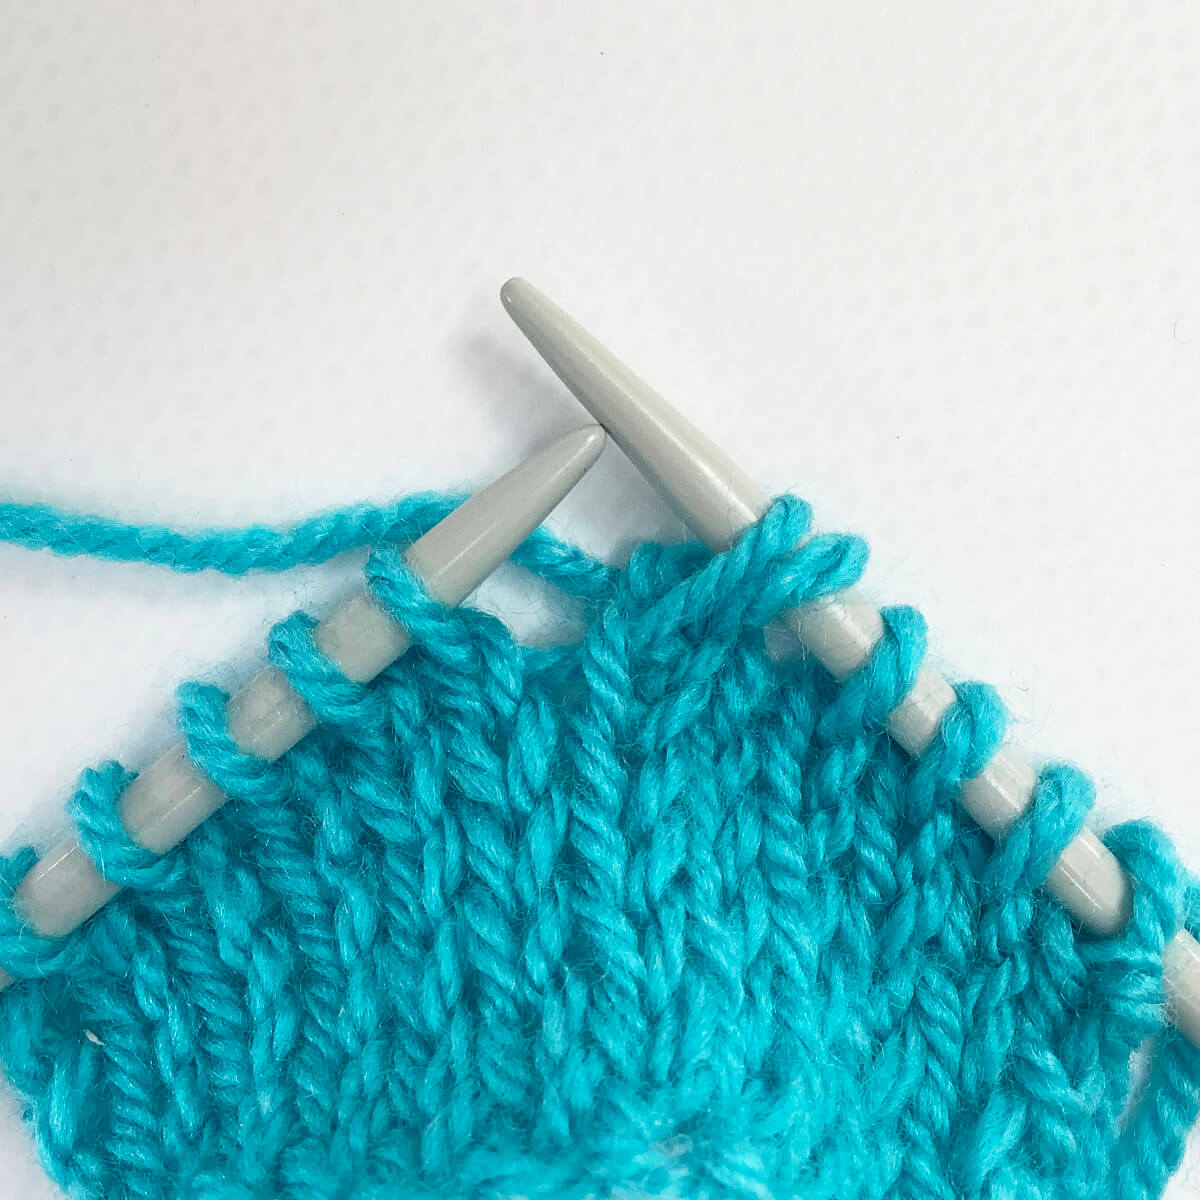
- Next, we knit the second stitch.
To do so, we start with inserting the right-hand needle into the first stitch on the other needle, wrap the yarn around the needle, pull it through the stitch you inserted the right-hand needle in, and slip the original stitch off the left-hand needle.
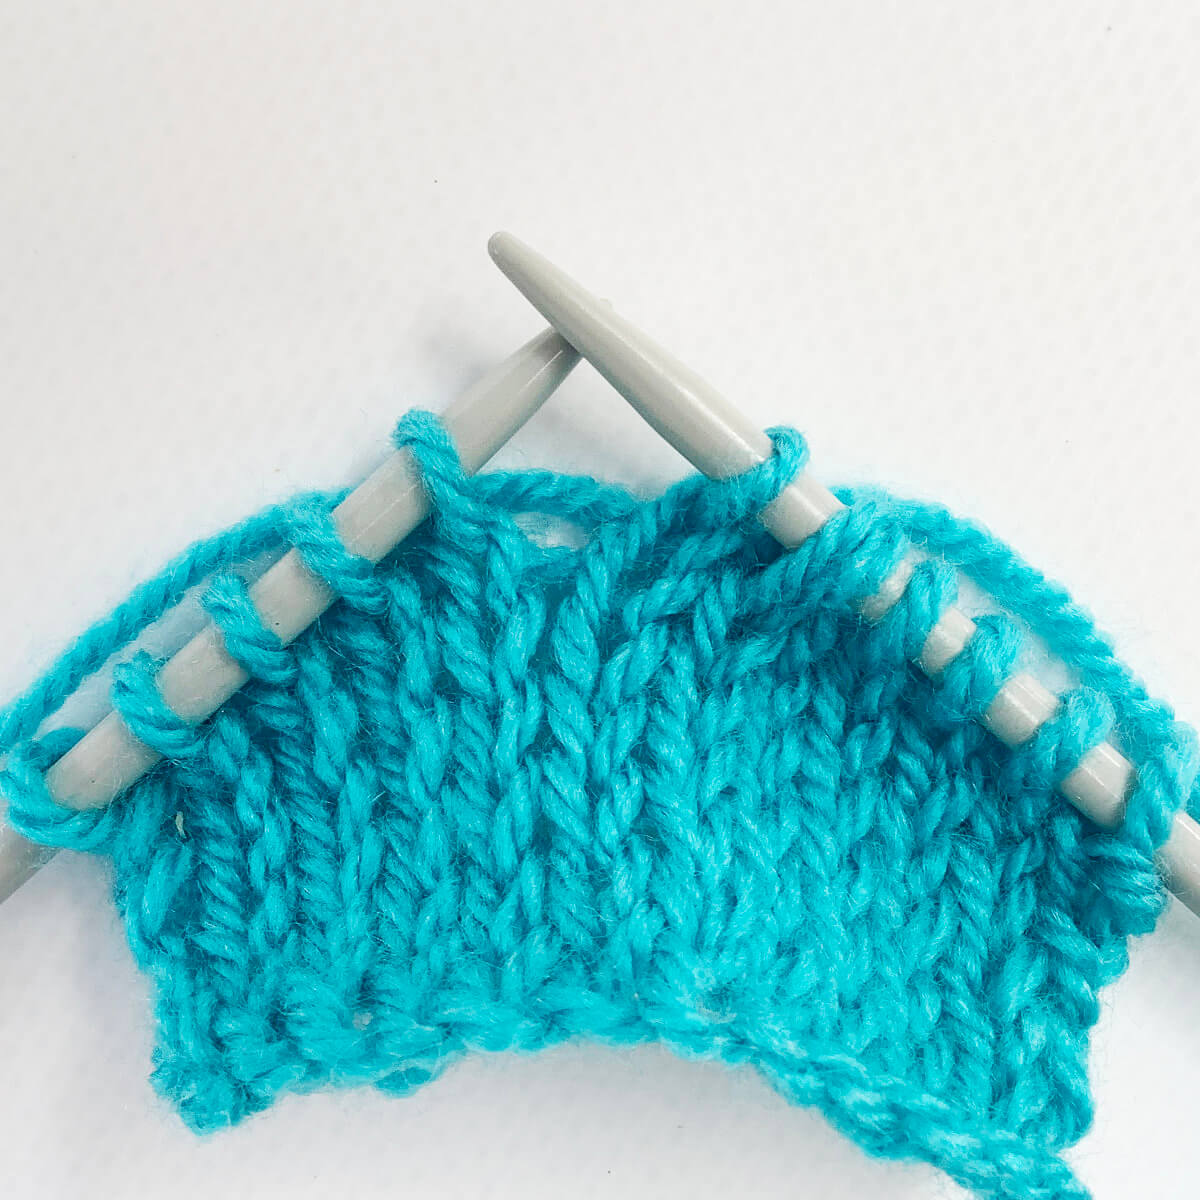
- Next, insert the left-hand needle into the second stitch counted from the tip of the right-hand needle…
- … and pull it over the first stitch from the tip of the right-hand needle to complete the decrease.
Do you see how this part of the decrease slants to the left? With this, the bunny ears decrease is finished.
And that’s all there is to it!

Thanks to my Patreon supporters for bringing you this freebie! Creating quality patterns and tutorials is a lot of work and resource-intensive. However, I find it important to give you free content like this tutorial. Thanks to the generous support of my Patreon supporters, I can make it happen. Thank you, patrons! Click here to join, or click here to read more about La Visch Designs on Patreon.


