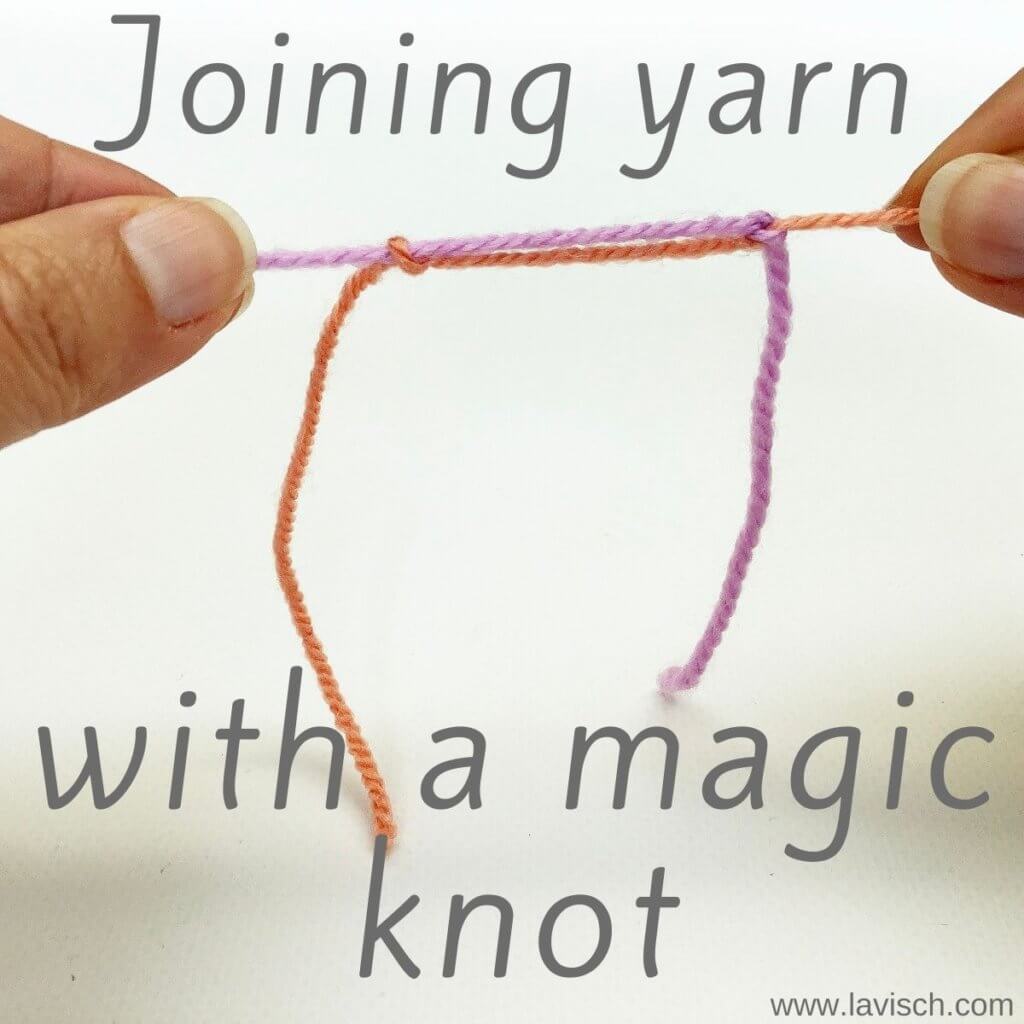
There are many ways to join a new ball of yarn to your project, the magic knot is one of them. Personally I prefer to work a felted, braided or Russian join instead, but that’s just because I don’t like knots in my work. If done correctly, the join should not fail and leave a neat, nearly invisible connection between the old and the new yarn.
This join is basically 2 knots pulled tight, with the yarn ends trimmed of. Due to this, it’s less suited for the more fragile yarns: These may break when pulled to tighten. Very bulky yarns may leave a too big knot that can’t easily be hidden between the stitches or at the back of the work. So, other than that the magic knot join really is a viable option to connect two pieces of yarn.
Materials used


Yarn: * Paintbox Yarns Simply DK, a good value, good quality 100% acrylic yarn, here in the colors Tea Rose and Vintage Pink.
Making a magic knot step by step
Time to get this join started!
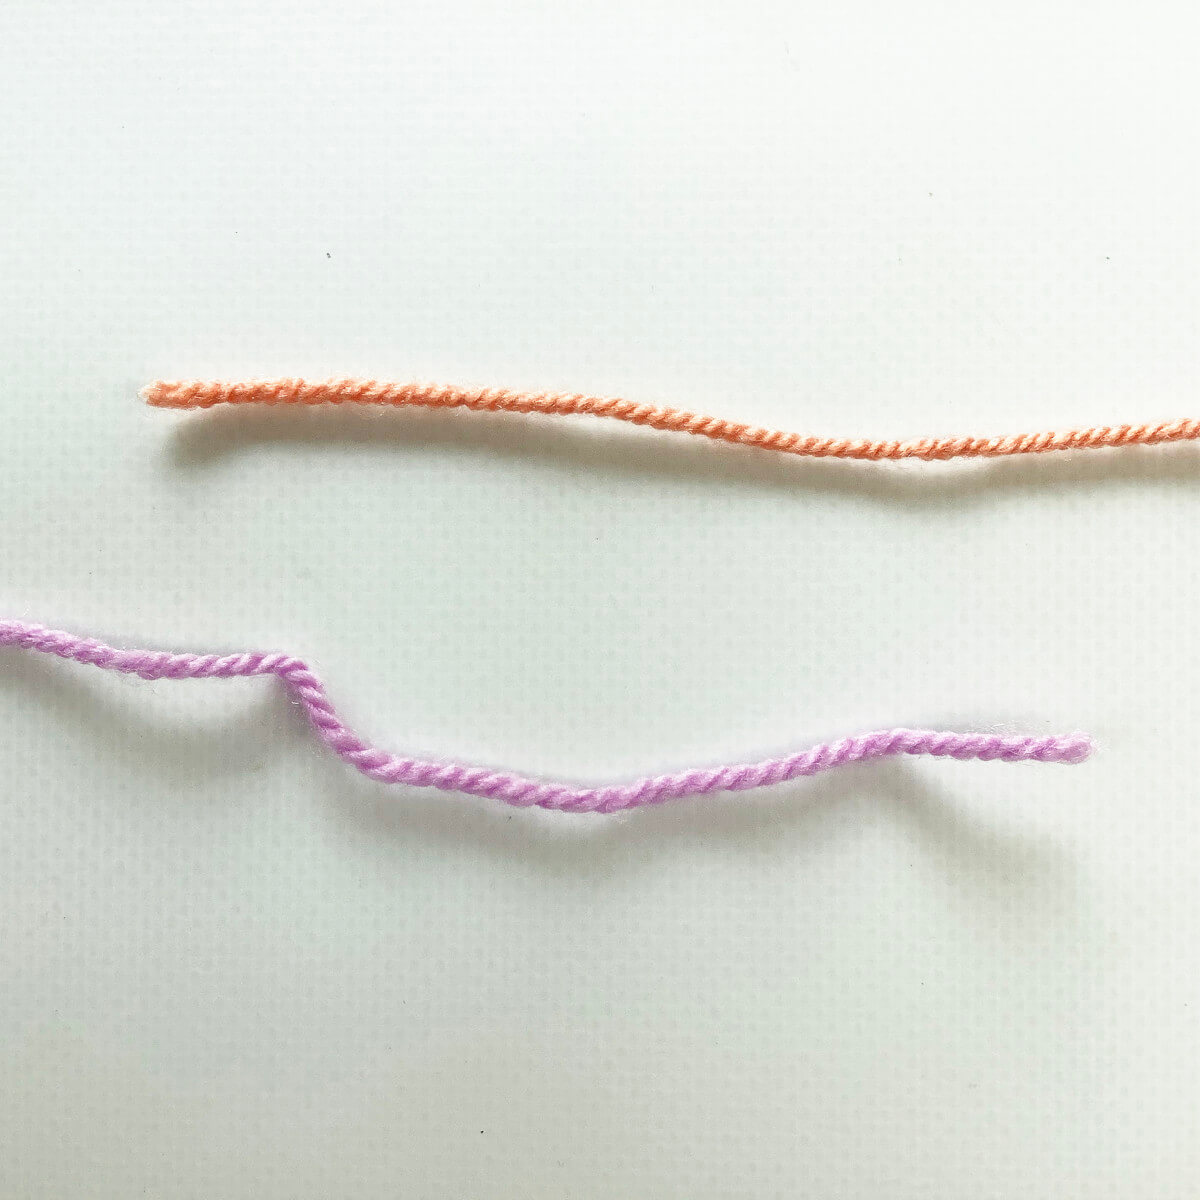
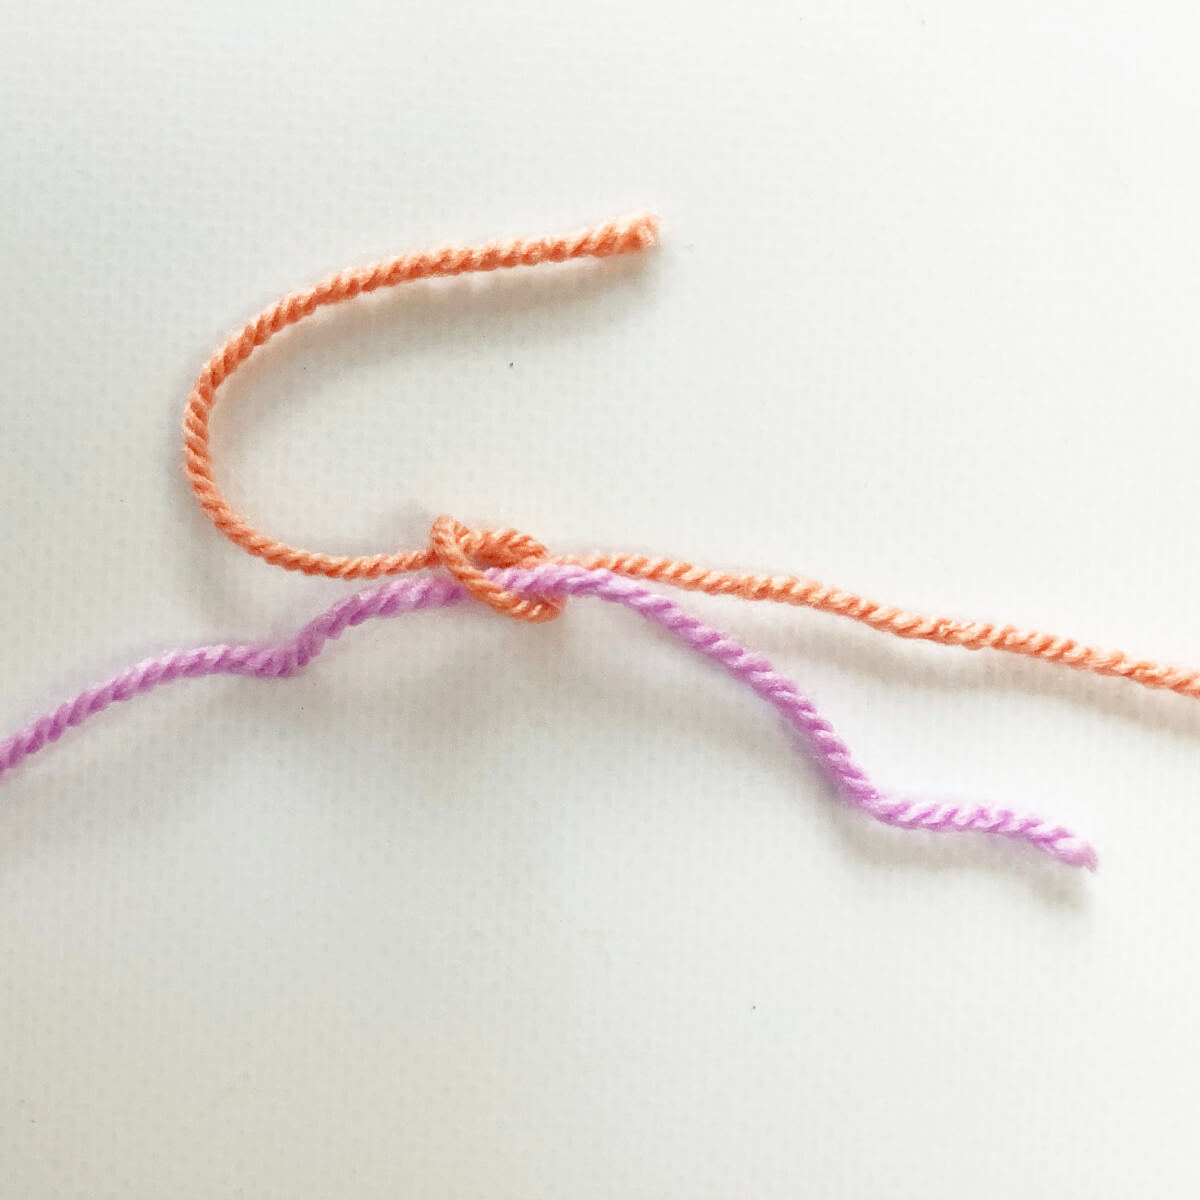
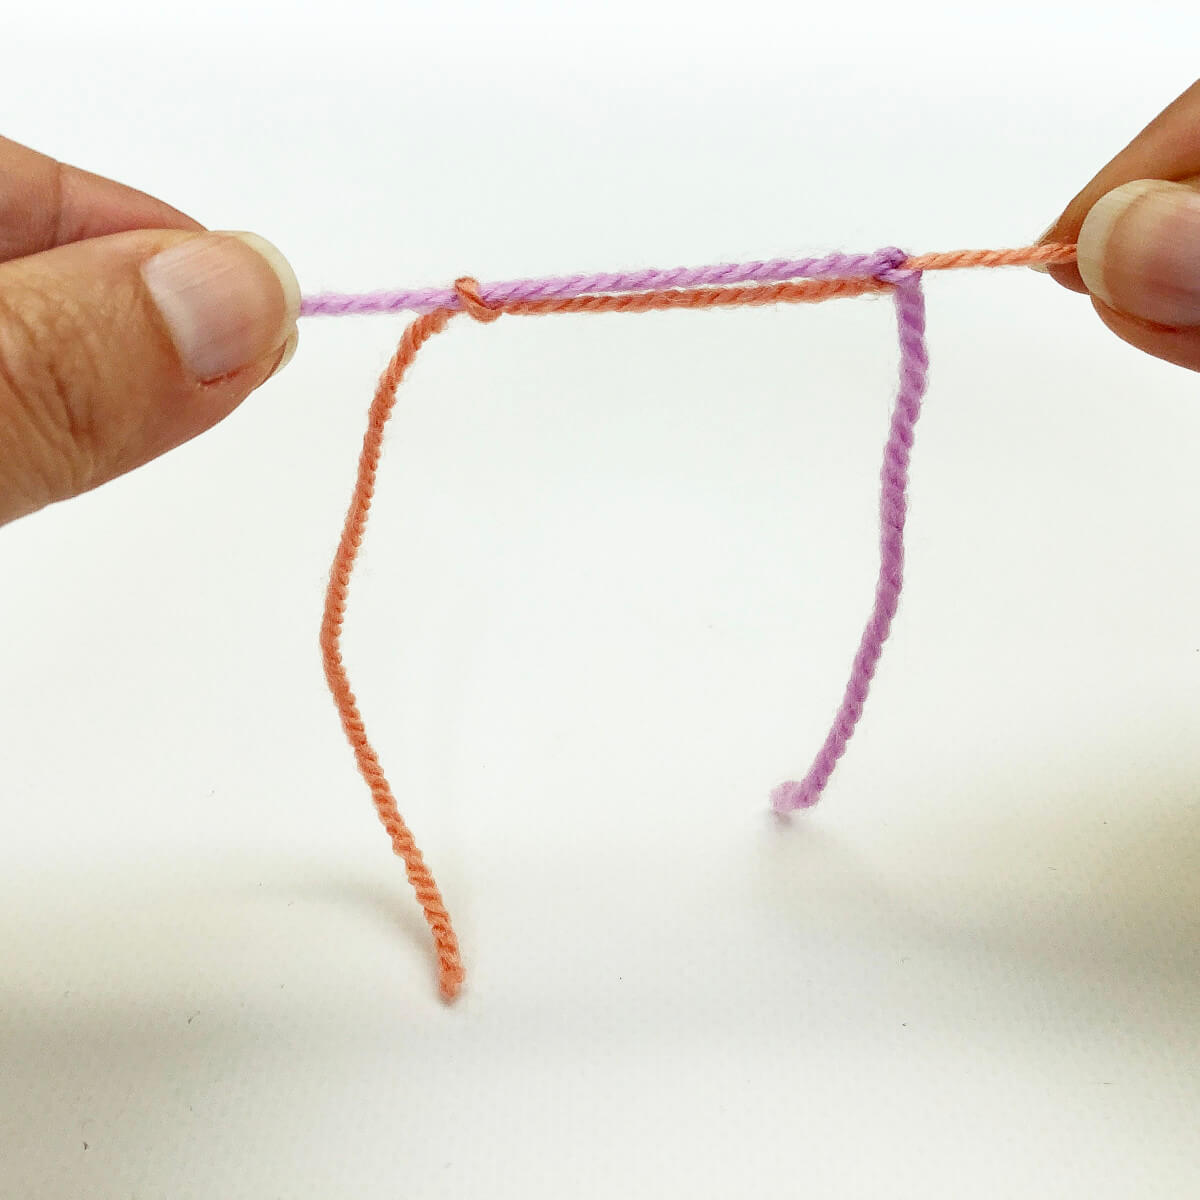
- Take your pieces of yarn
Align the yarn from your project and from the new ball of yarn as pictured below.
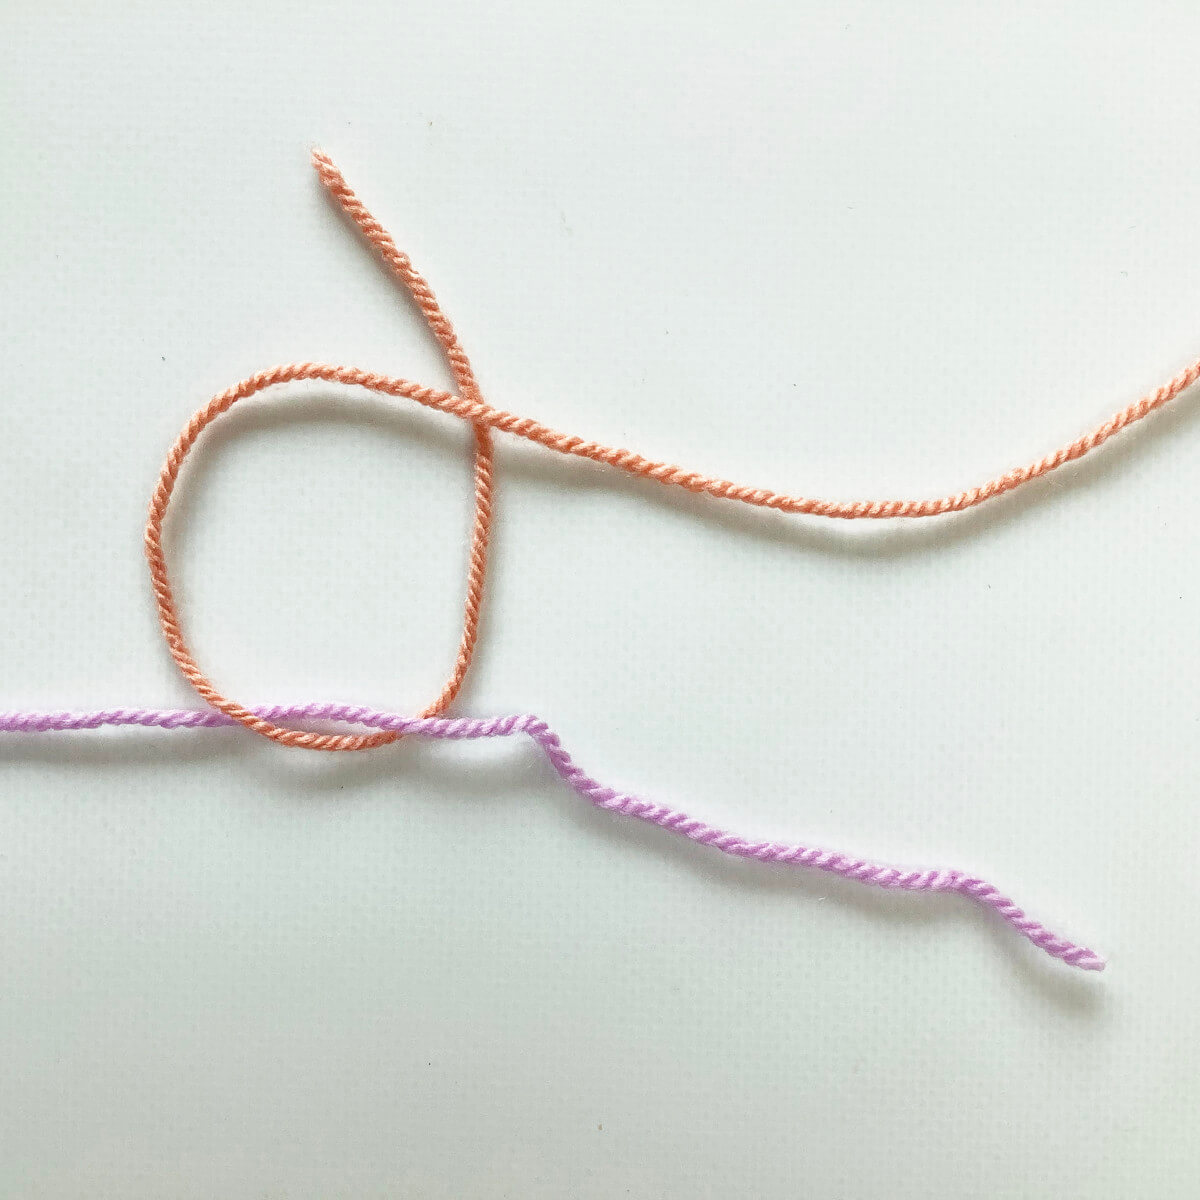
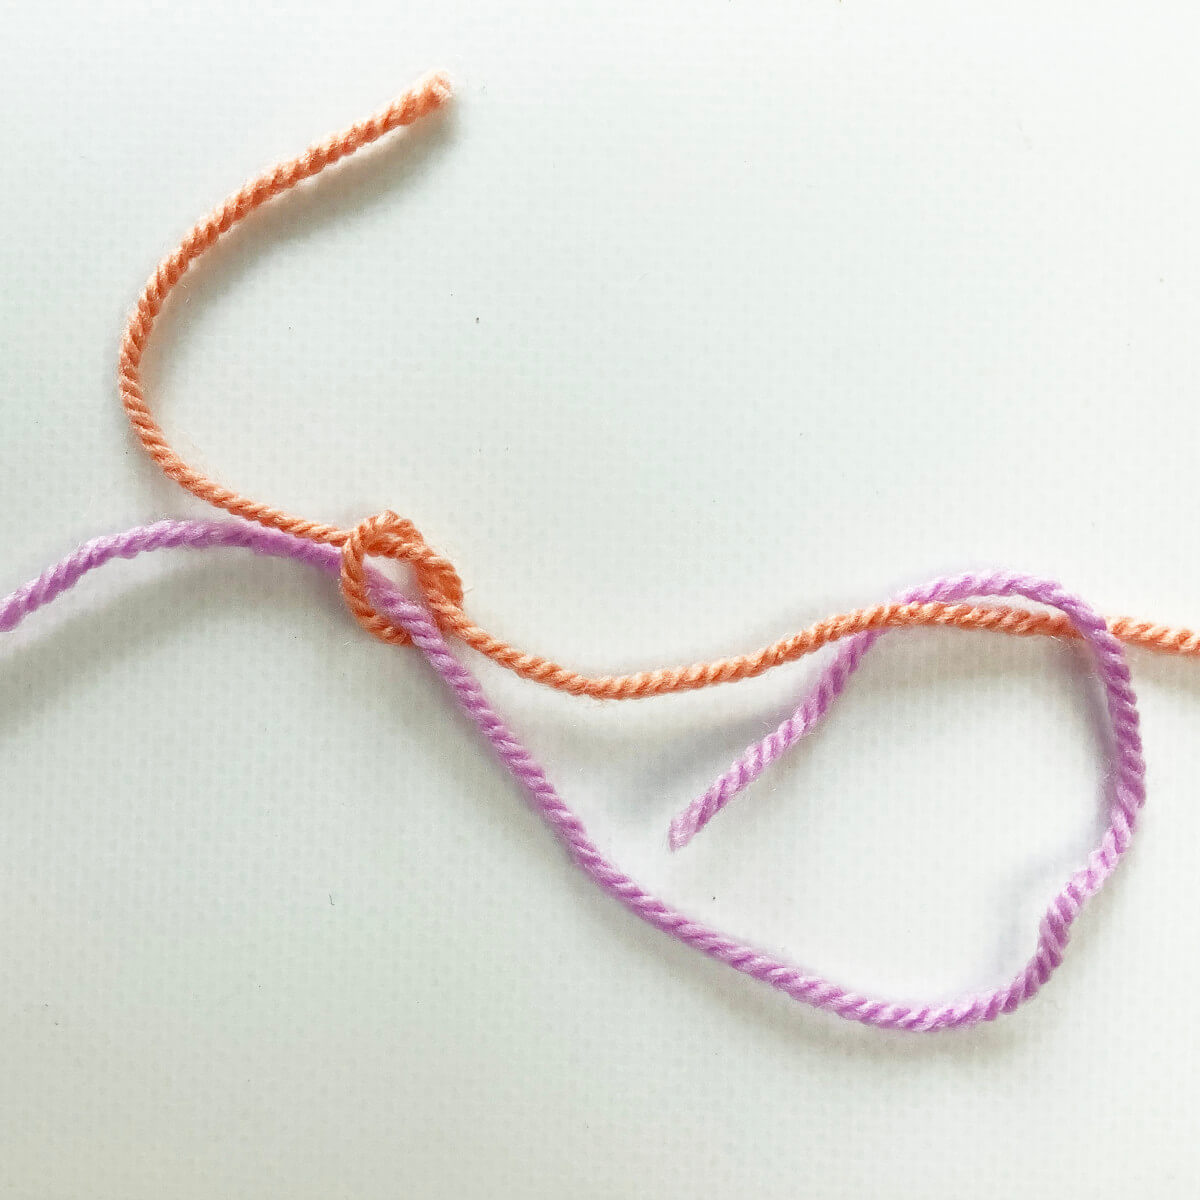
- Making the first knot, part a
In this step one of the yarn tails is turned over, then under the other yarn tail, followed by turning it under itslef to form a loop.
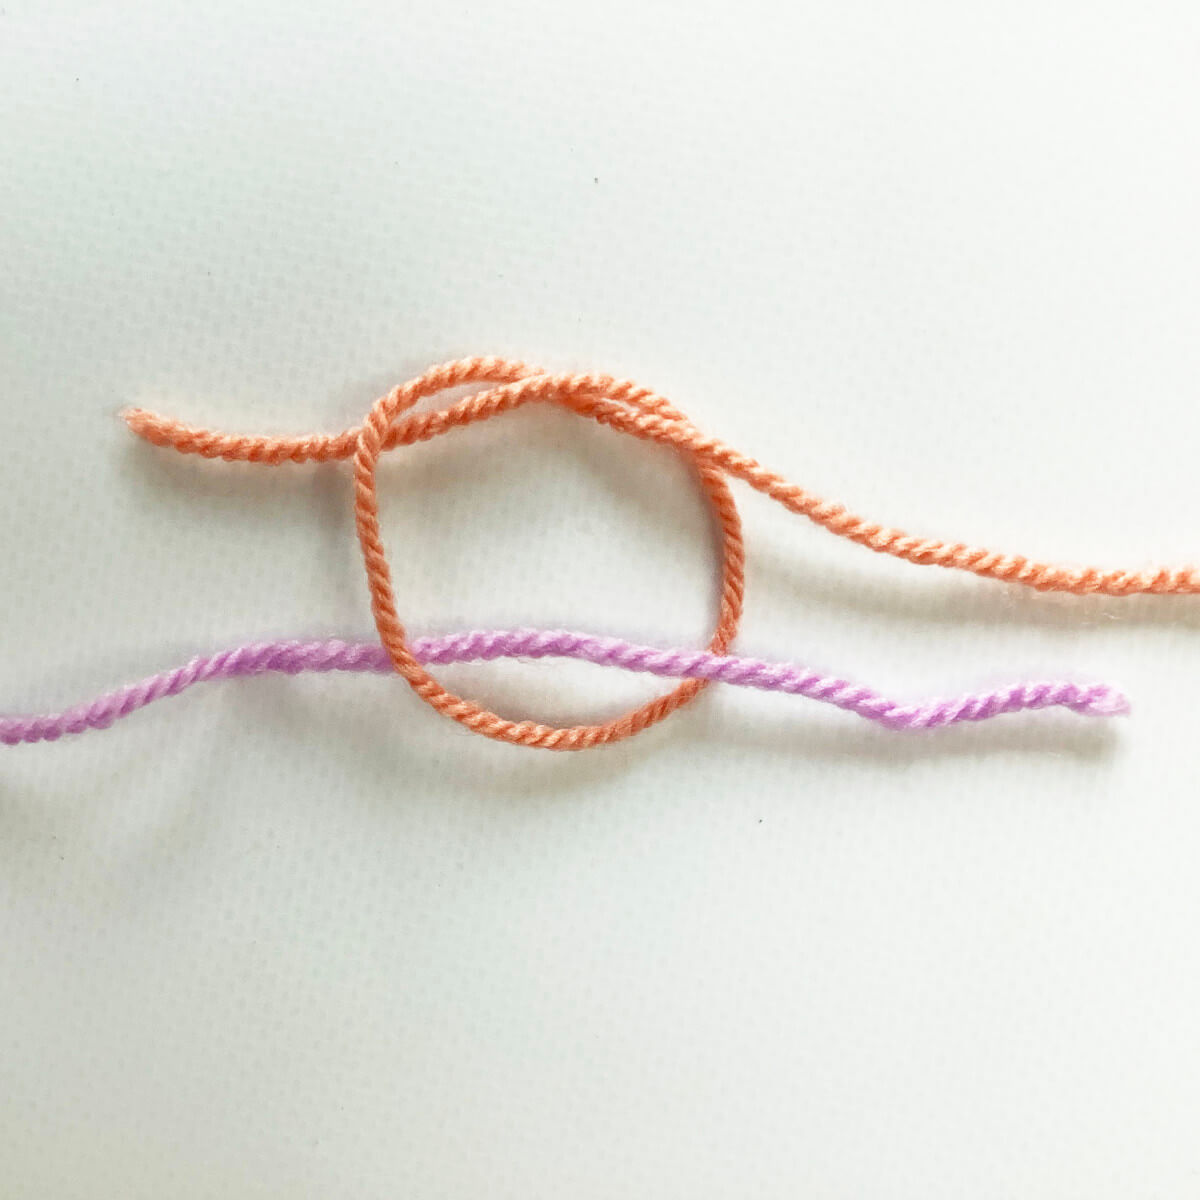
- Making the first knot, part b
Next, fold the yarn tail over itself, and then underneath again to form a knot.
- Tighten the knot a bit
This is how it looks after this:
- Making the second knot, part a
Now we take the other yarn tail and fold it over, then under the other strand of yarn.
- Making the second knot, part b
Next, fold the yarn tail over itself, and then underneath again to form a knot.
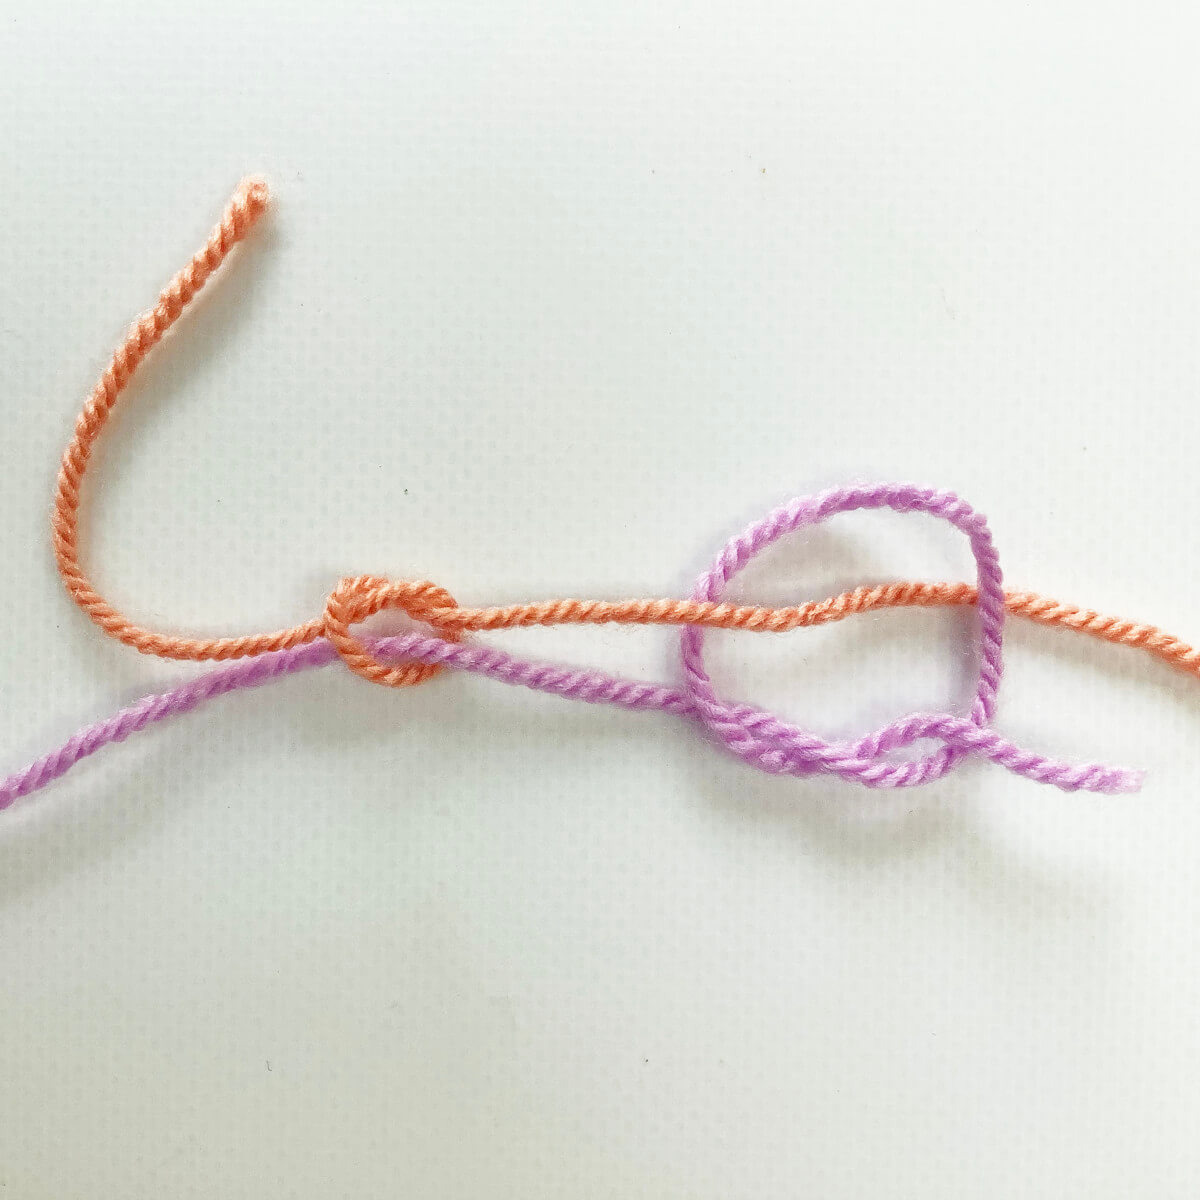
- This is how it looks after the second knot has also been tightened a bit:
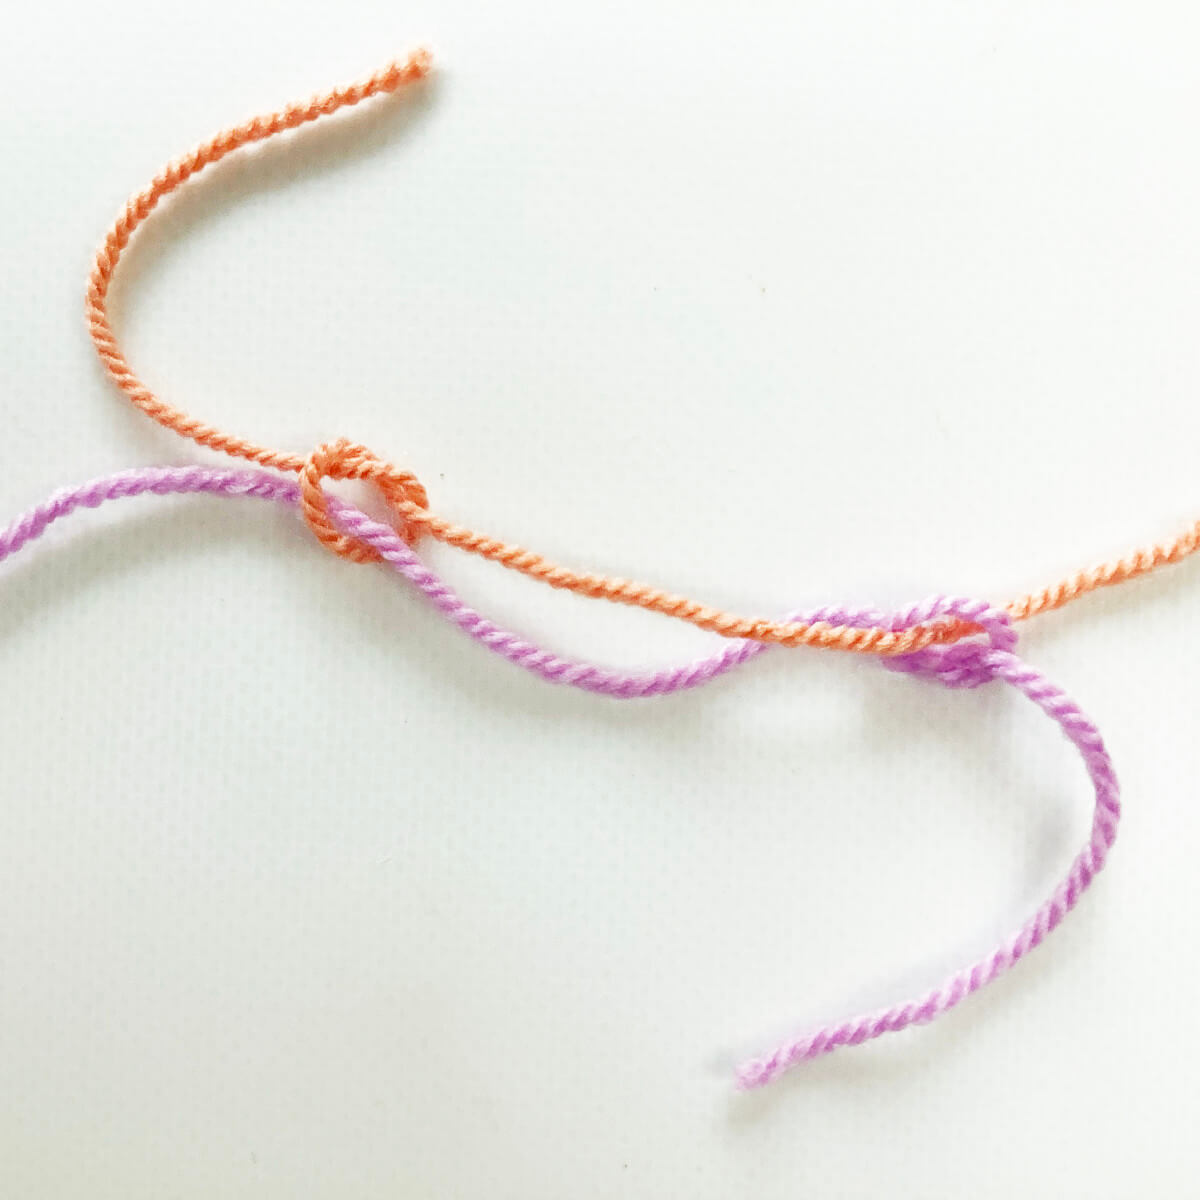
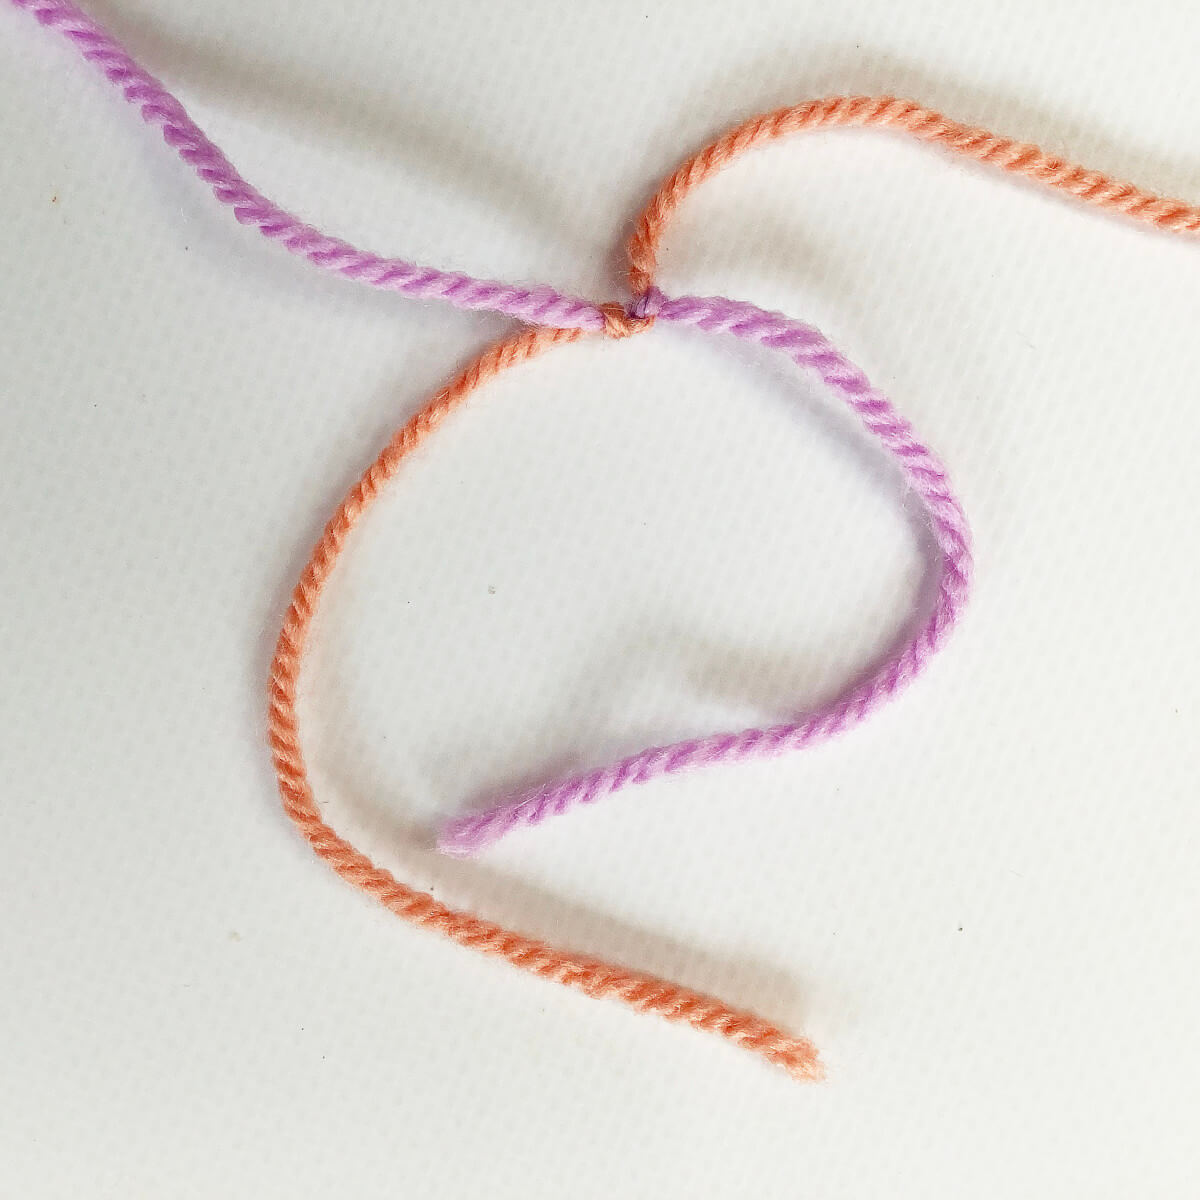
- The magic step!
First tighten both knots a bit more, and then comes the fun part. Take both pieces of yarn and pull to slide the knots close to each other.
- After pulling and tightening it should look something like this:
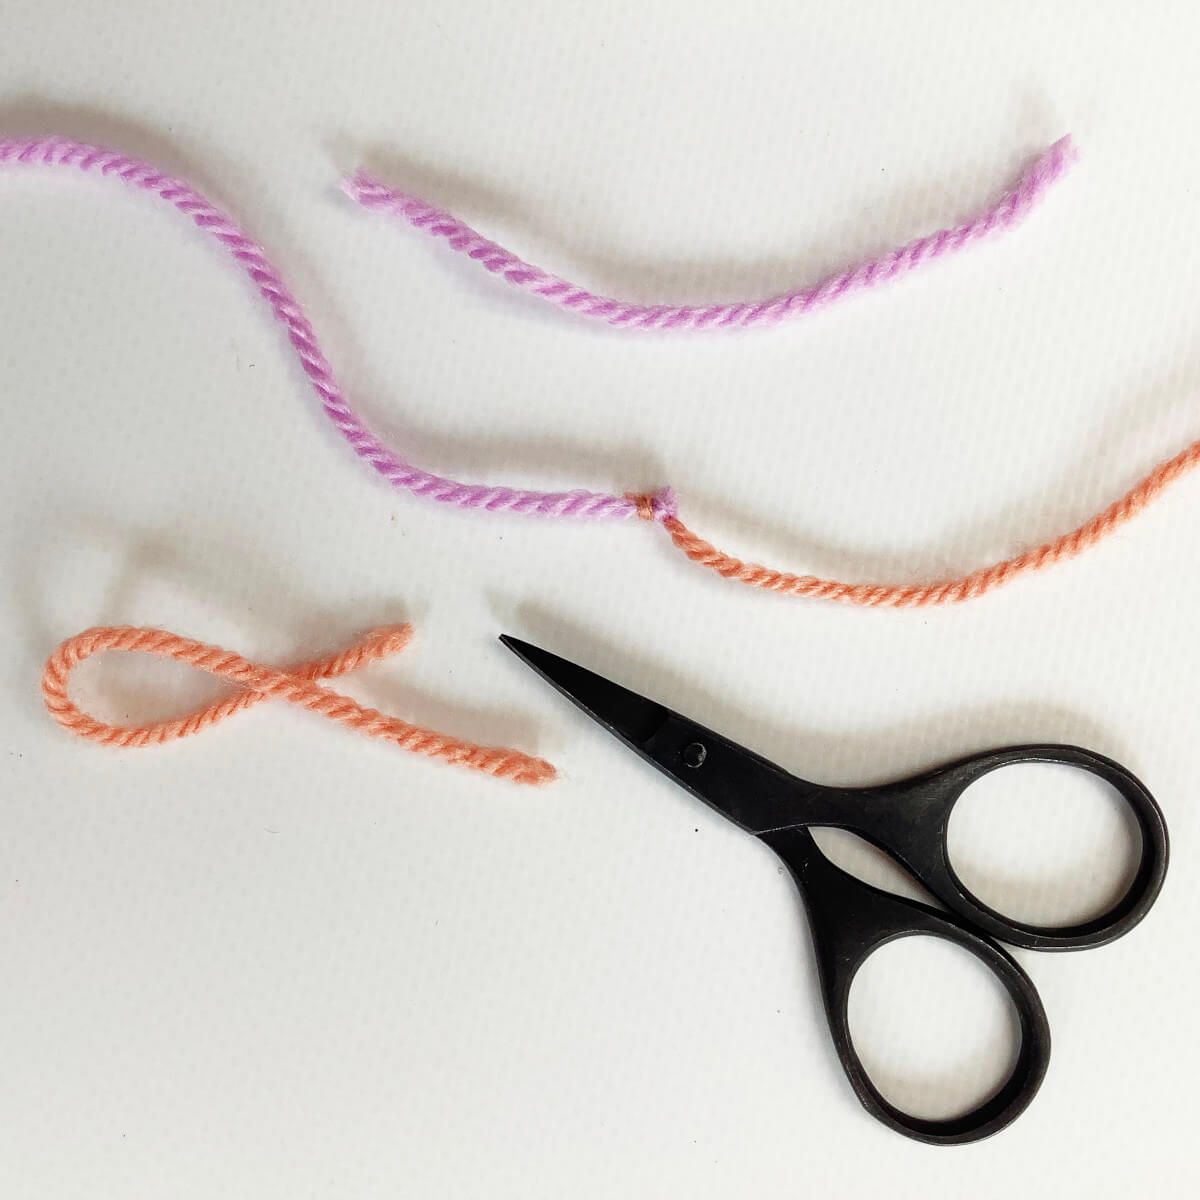
- Removing the yarn ends
On this step, after making sure the connection is tight and snug, we snip away the yarn ends as close as possible to the knot. Take care not to accidentally cut the wrong piece of yarn!
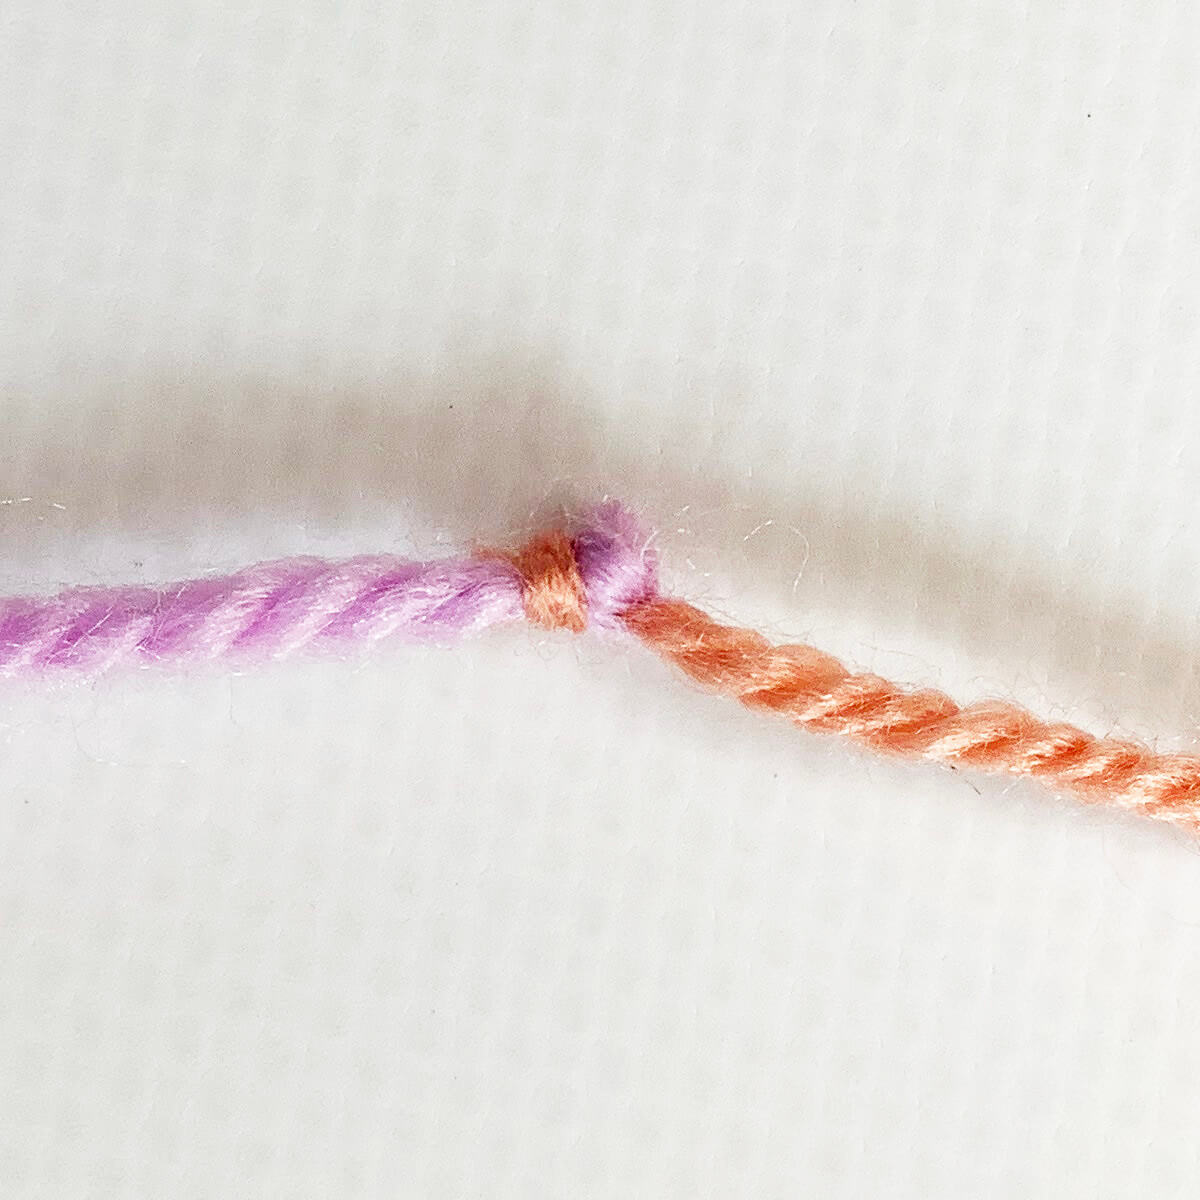
- The end result!

Thanks to my Patreon supporters for bringing you this freebie! Creating quality patterns and tutorials is a lot of work and resource-intensive. However, I find it important to give you free content like this tutorial. Thanks to the generous support of my Patreon supporters, I can make it happen. Thank you, patrons! Click here to join, or click here to read more about La Visch Designs on Patreon.


")