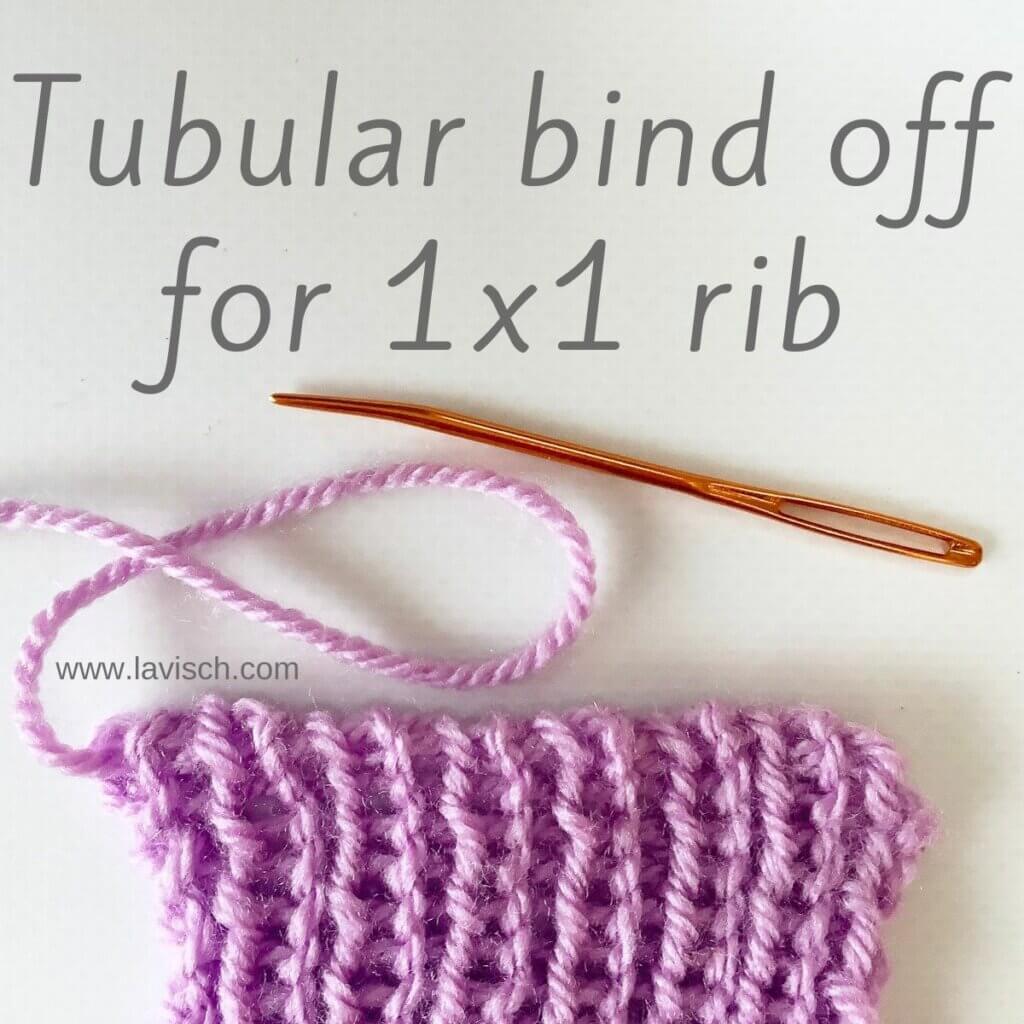
The tubular bind-off creates a rounded edge of your knitting project, as well as being very stretchy. This makes it a very good bind-off for edges that are prone to wear and tear. And, of course, where the stretch is useful. Think, for example, of bottom-up socks. That said, this bind-off is very time-consuming to work, very much worth it in my opinion, though!
Of course, there are many ways to work a tubular bind-off. This particular version is for working in k1, p1 rib patterning. It can be used both in the round and for knits worked flat, and is a perfect match for the tubular cast on I did a tutorial about recently.
Materials used


Yarn: Paintbox Yarns Simply DK, a good value, good quality 100% acrylic yarn, here in the color 142 Tea Rose.
Darning needle: Hiya Hiya Darn It Yarn Needle, or any other tapestry needle, threaded with yarn.
Working a tubular bind-off for 1×1 rib step by step
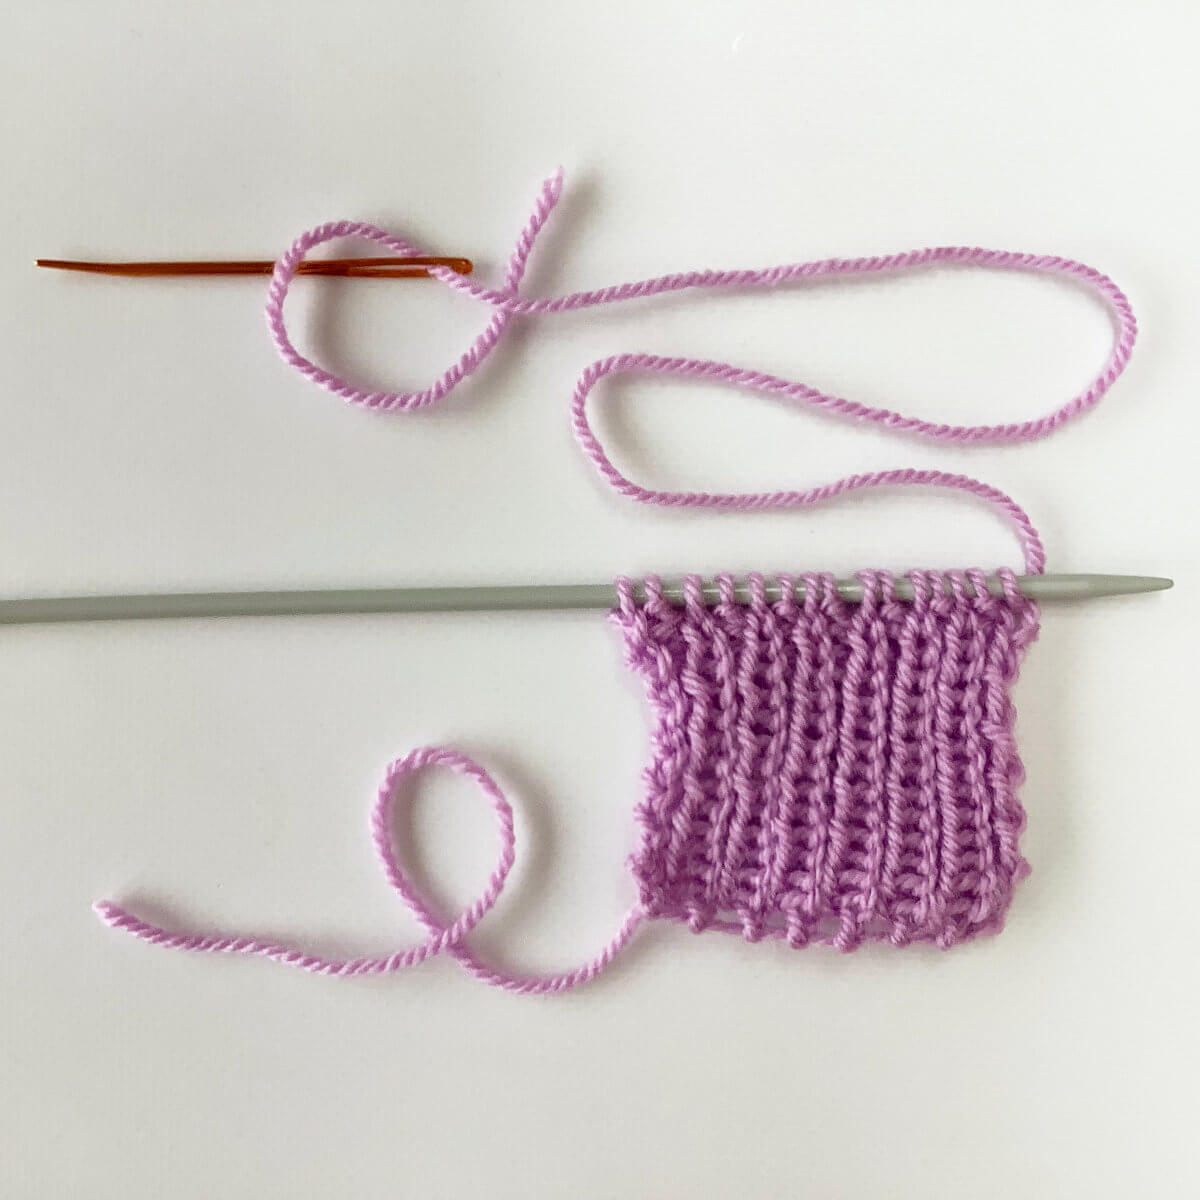
Before we can start, we have to measure out a length of the working yarn, before breaking it. For this, a length of approx. 3 to 4 times the length of the edge that you want to bind-off is advised. However, if you want to bind-off a long edge like the body of a sweater, this means that the length of yarn can get very unyielding and prone to tangling. So when using a feltable yarn, I highly recommend only measuring out about twice the length needed. When the yarn tail runs out, a new length can be added by first using the braided join, followed by felting the join between your hands. This would have saved me quite aggravation on a recent sweater project!
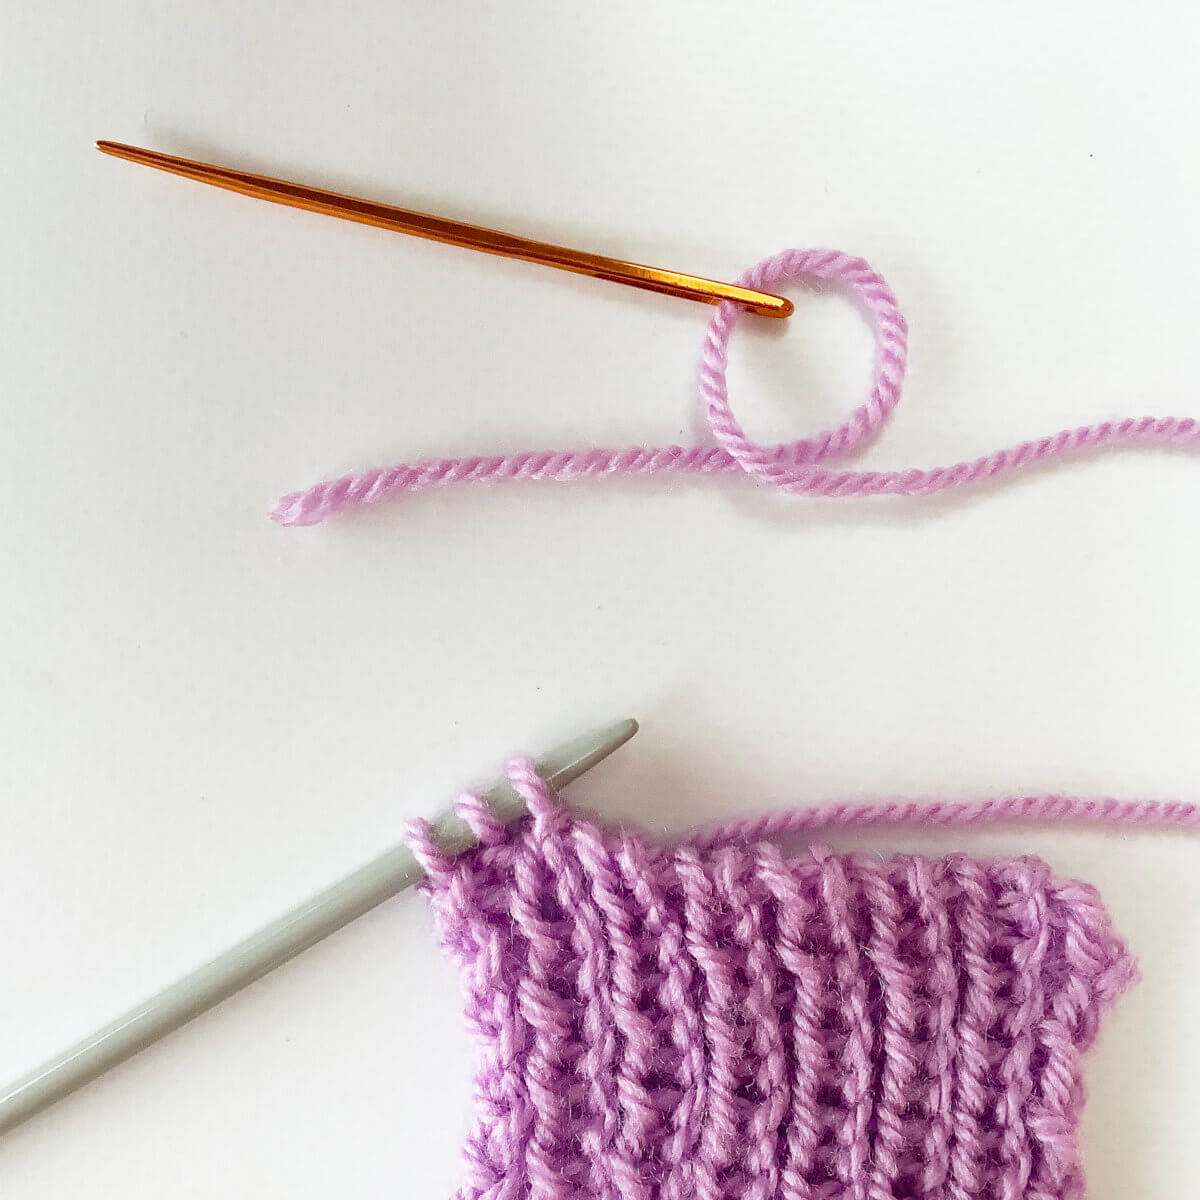
When you have measured out the length of yarn, break it, and thread it onto the darning needle.
- First, make sure you have your work in front of you on the left-hand needle, ready to work.
We’ll be working on binding the stitches off from right to left.
- To start, insert the darning needle purl-wise into the first stitch on the needle, and pull the yarn through.
This first stitch is a knit stitch.
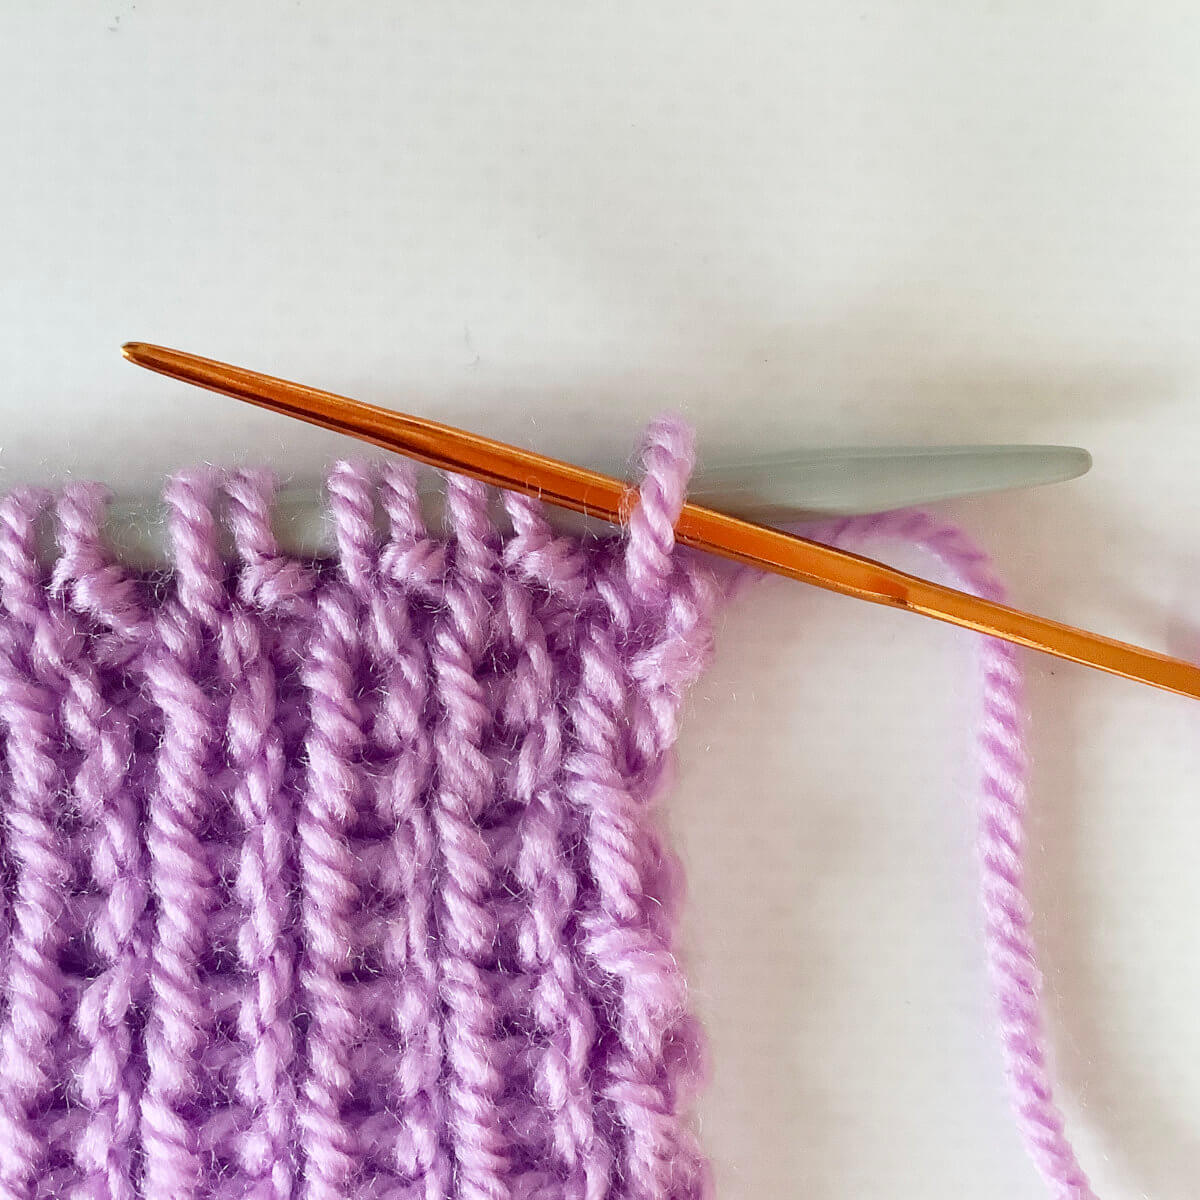
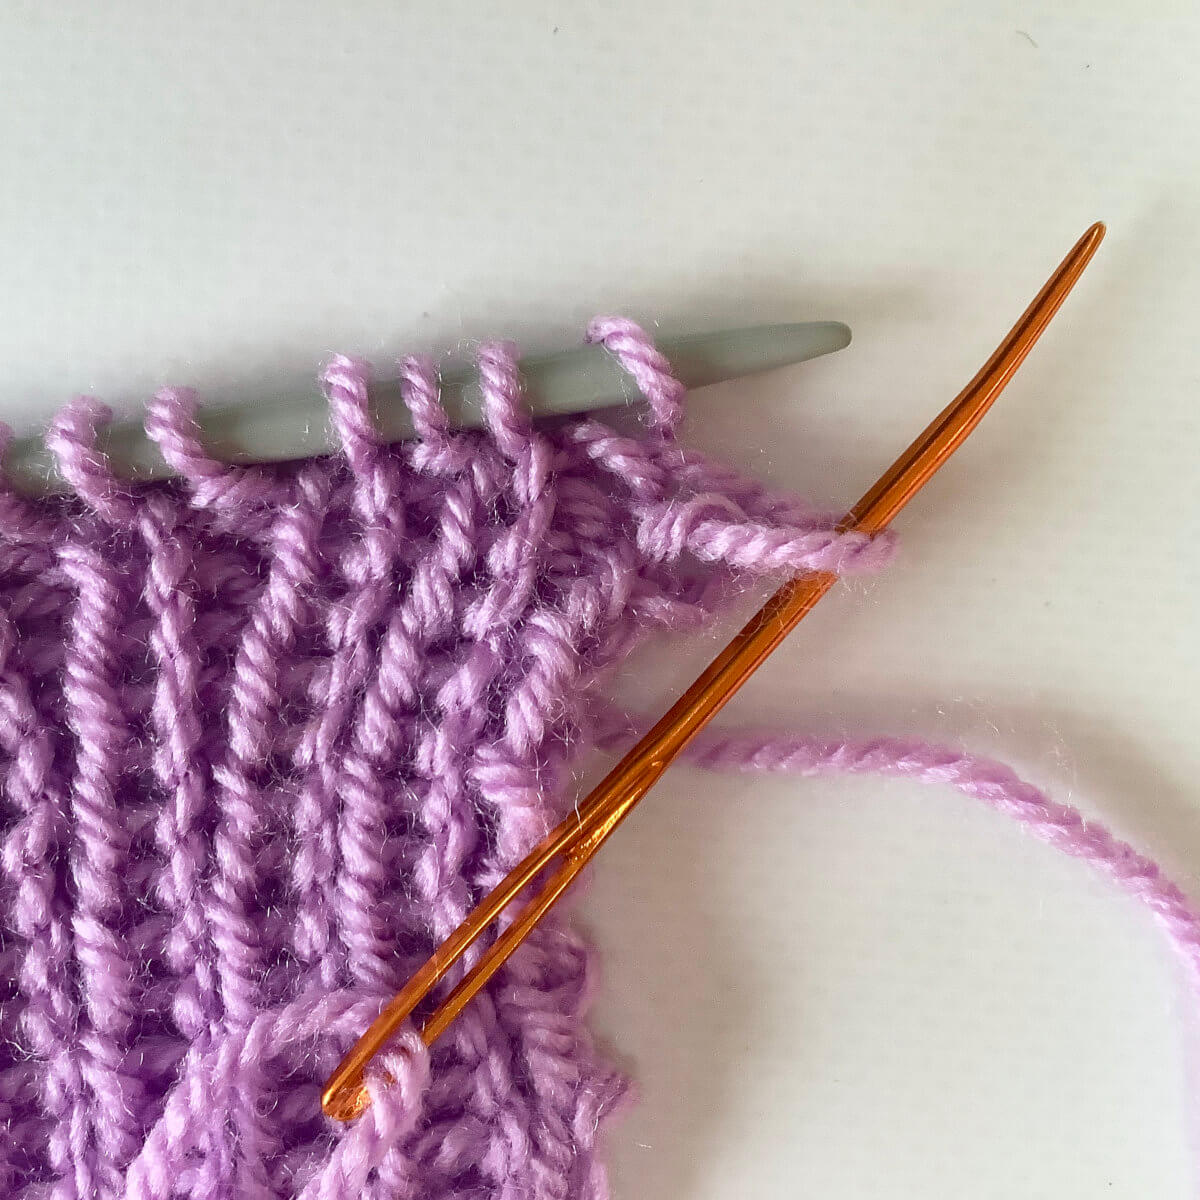
- Next, hold the darning needle behind the work, insert it between the first 2 stitches on the needle from back to front, then twist it around to insert it knit-wise into the second stitch (purl stitch) on the needle.
Pull the yarn through.
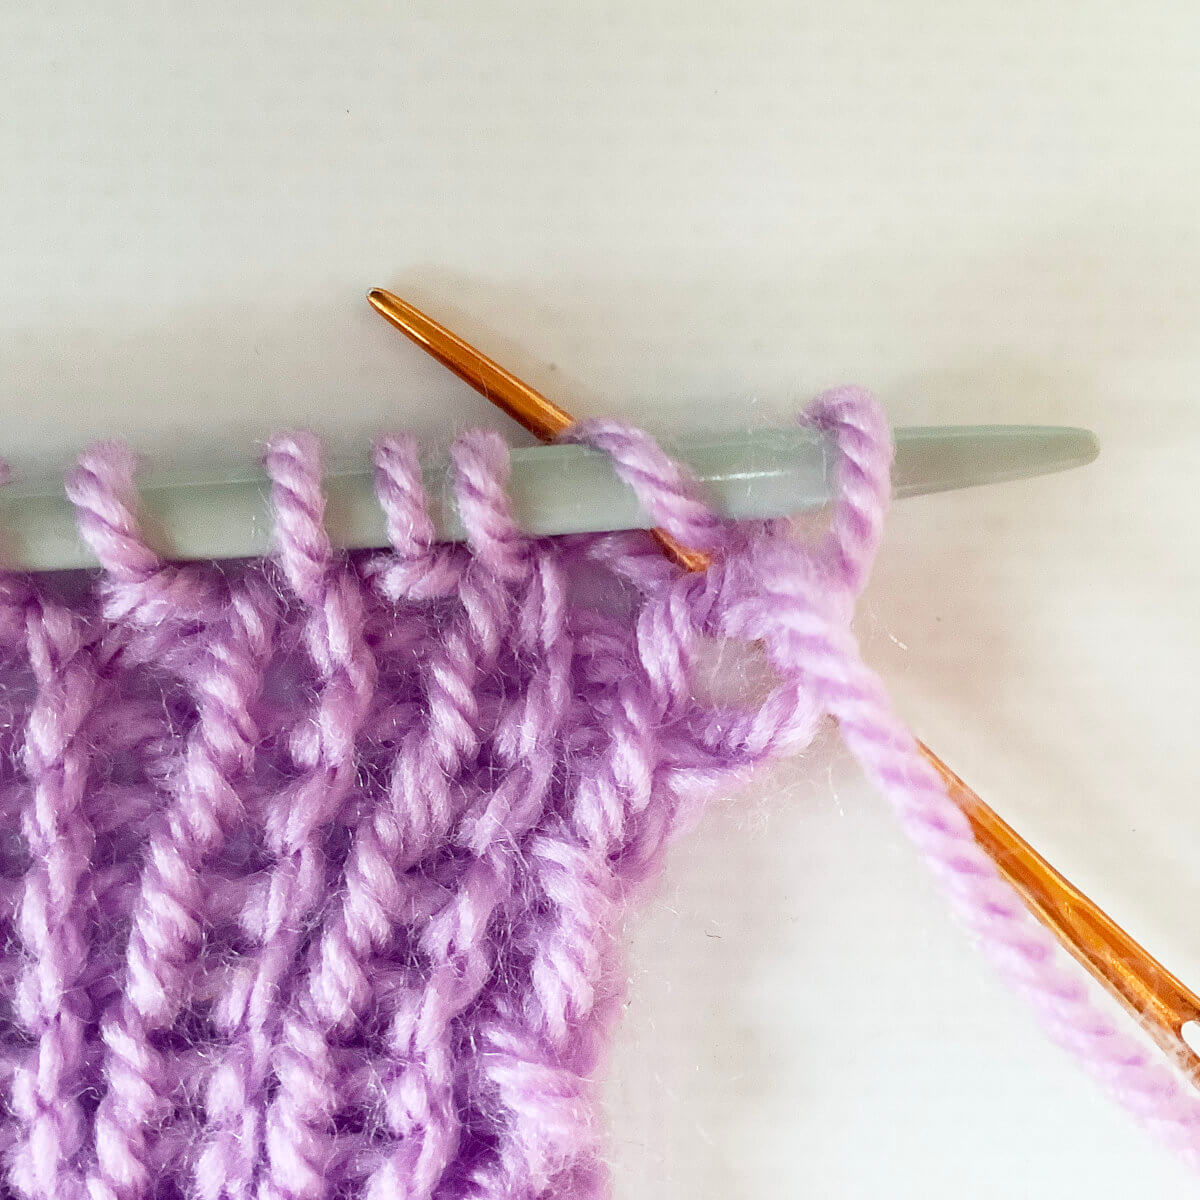
- Now move the darning needle back to the front of the work, insert it knit-wise in the first stitch on the needle (a knit stitch) and slip this stitch off the knitting needle.
Don’t pull the yarn through yet!
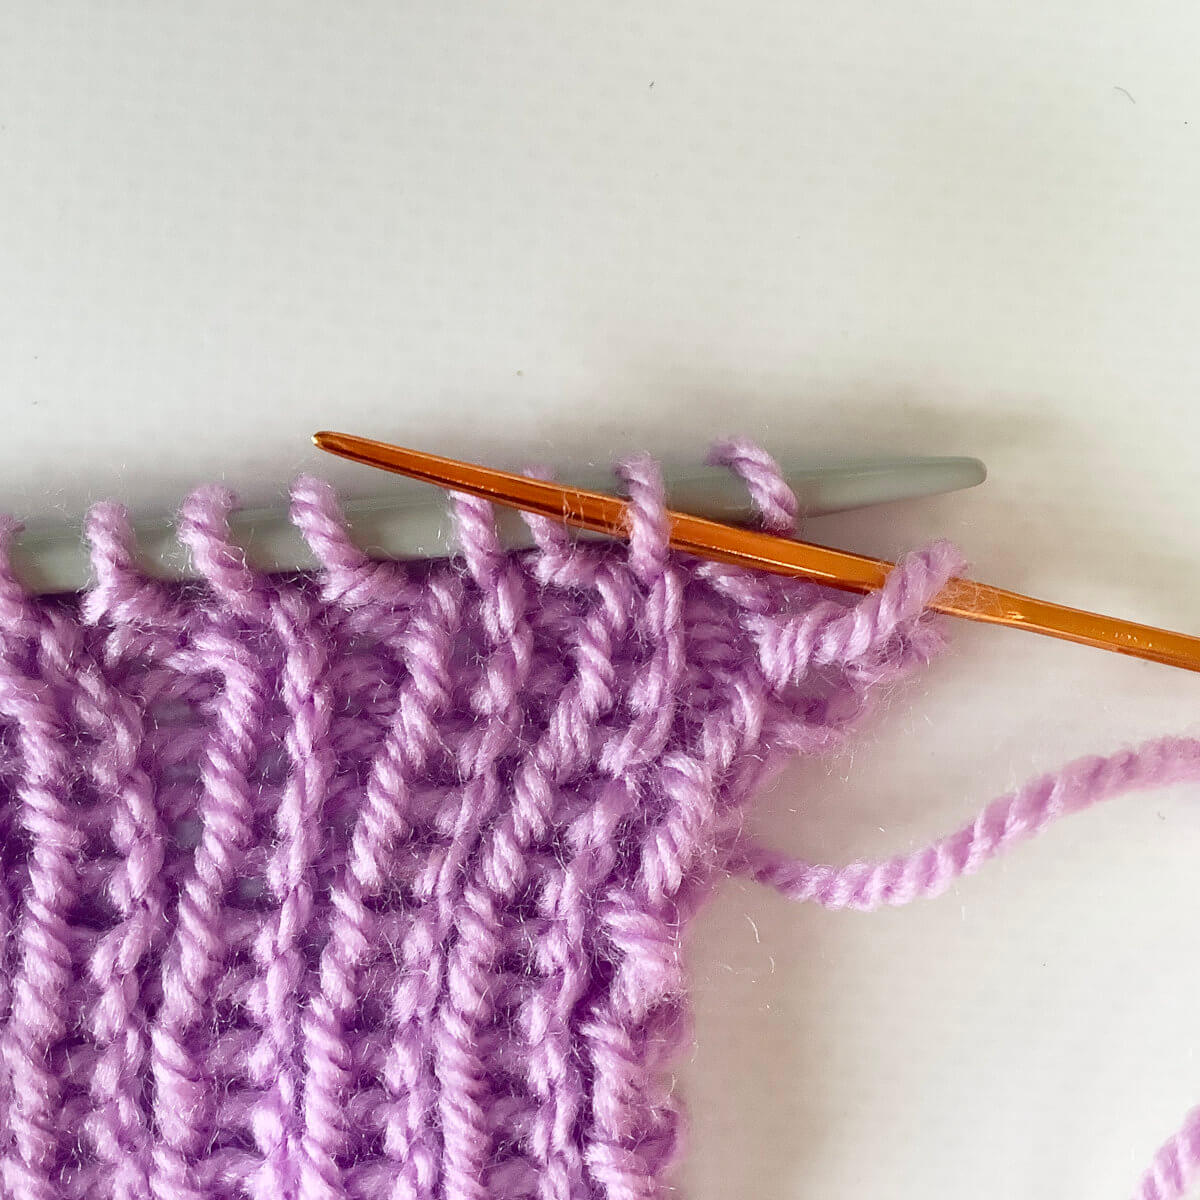
- Still with the darning needle at the front of the work, insert it purl-wise into the second stitch on the needle (a knit stitch), skipping the first (purl) stitch.
Now pull the yarn through.
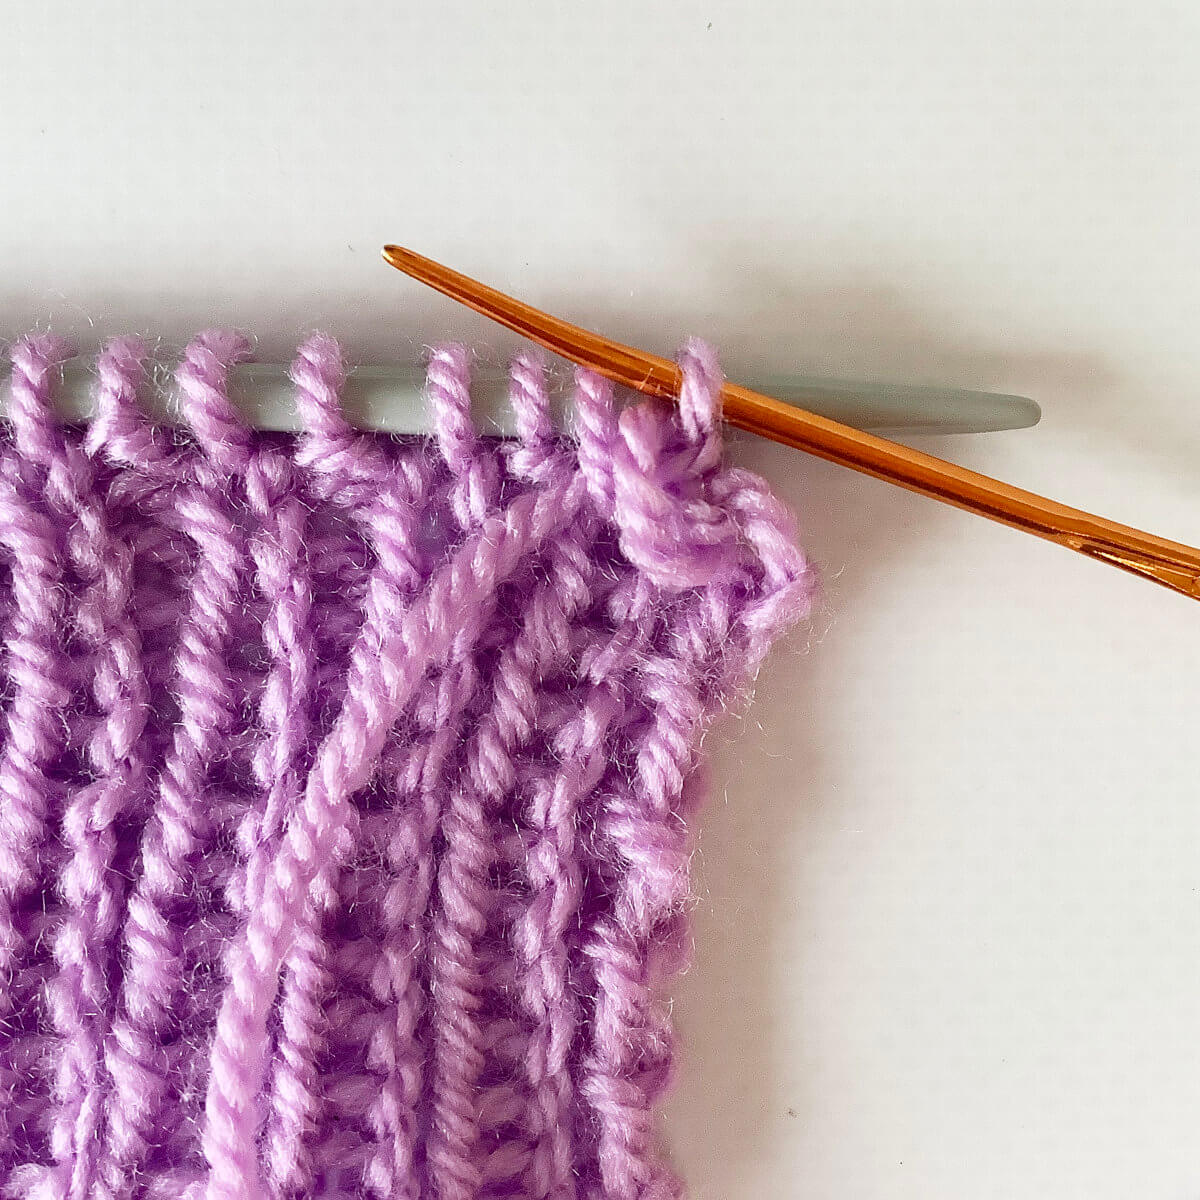
- Next, insert the darning needle purl-wise into the first stitch (the purl stitch that was skipped in the previous step), and slip it off the knitting needle.
Pull the yarn through.
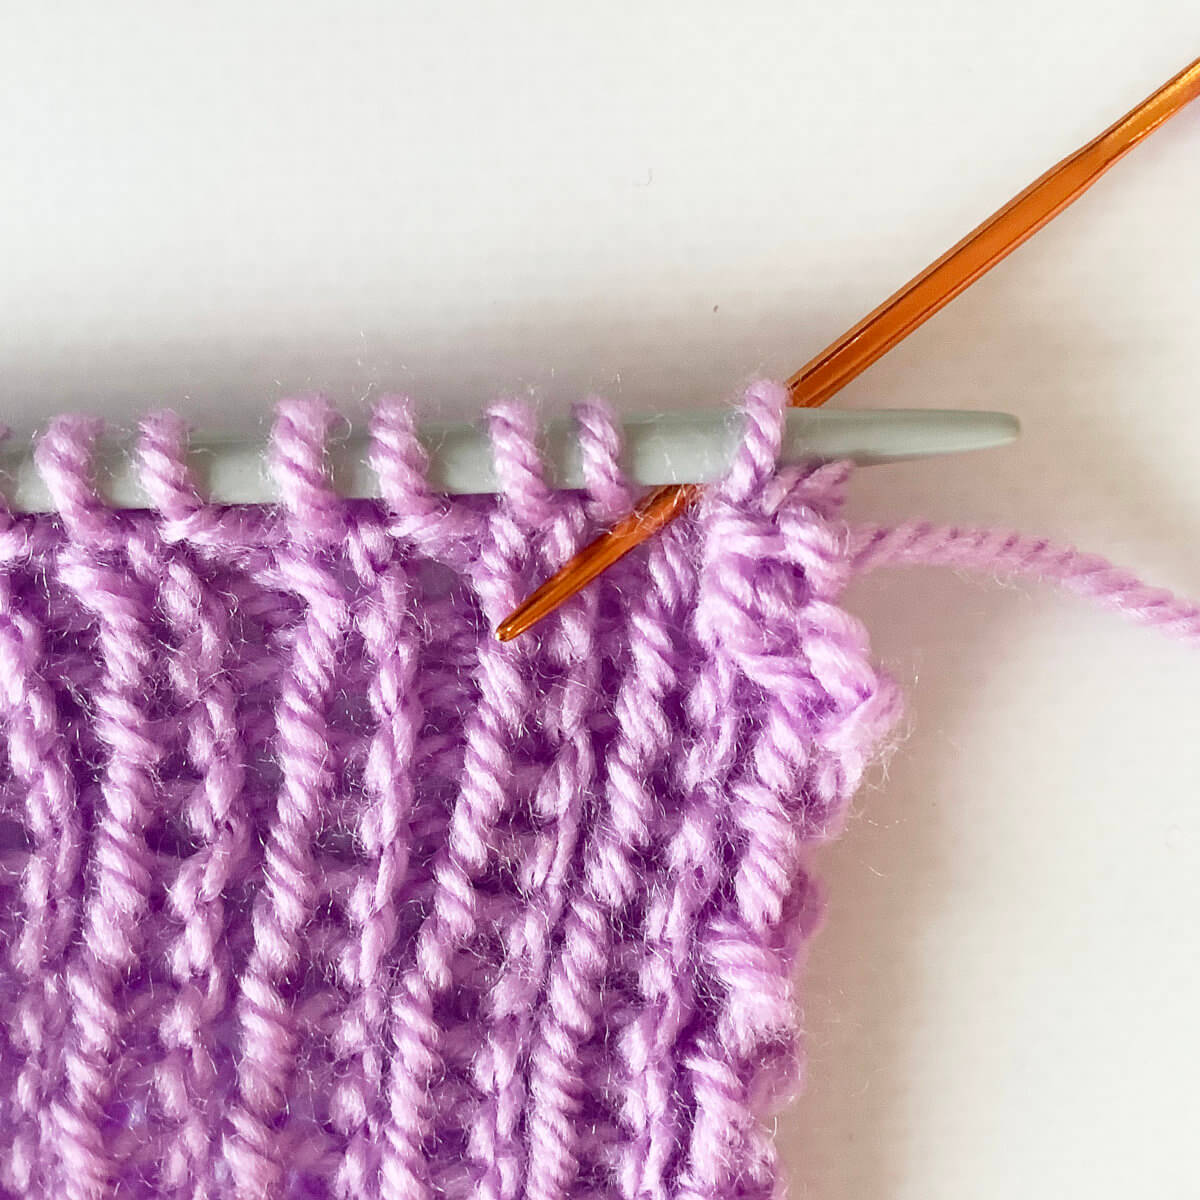
- Next, hold the darning needle behind the work, insert it between the first 2 stitches on the needle from back to front, then twist it around to insert it knit-wise into the second stitch (purl stitch) on the needle. This is similar to step 3.
Pull the yarn through.
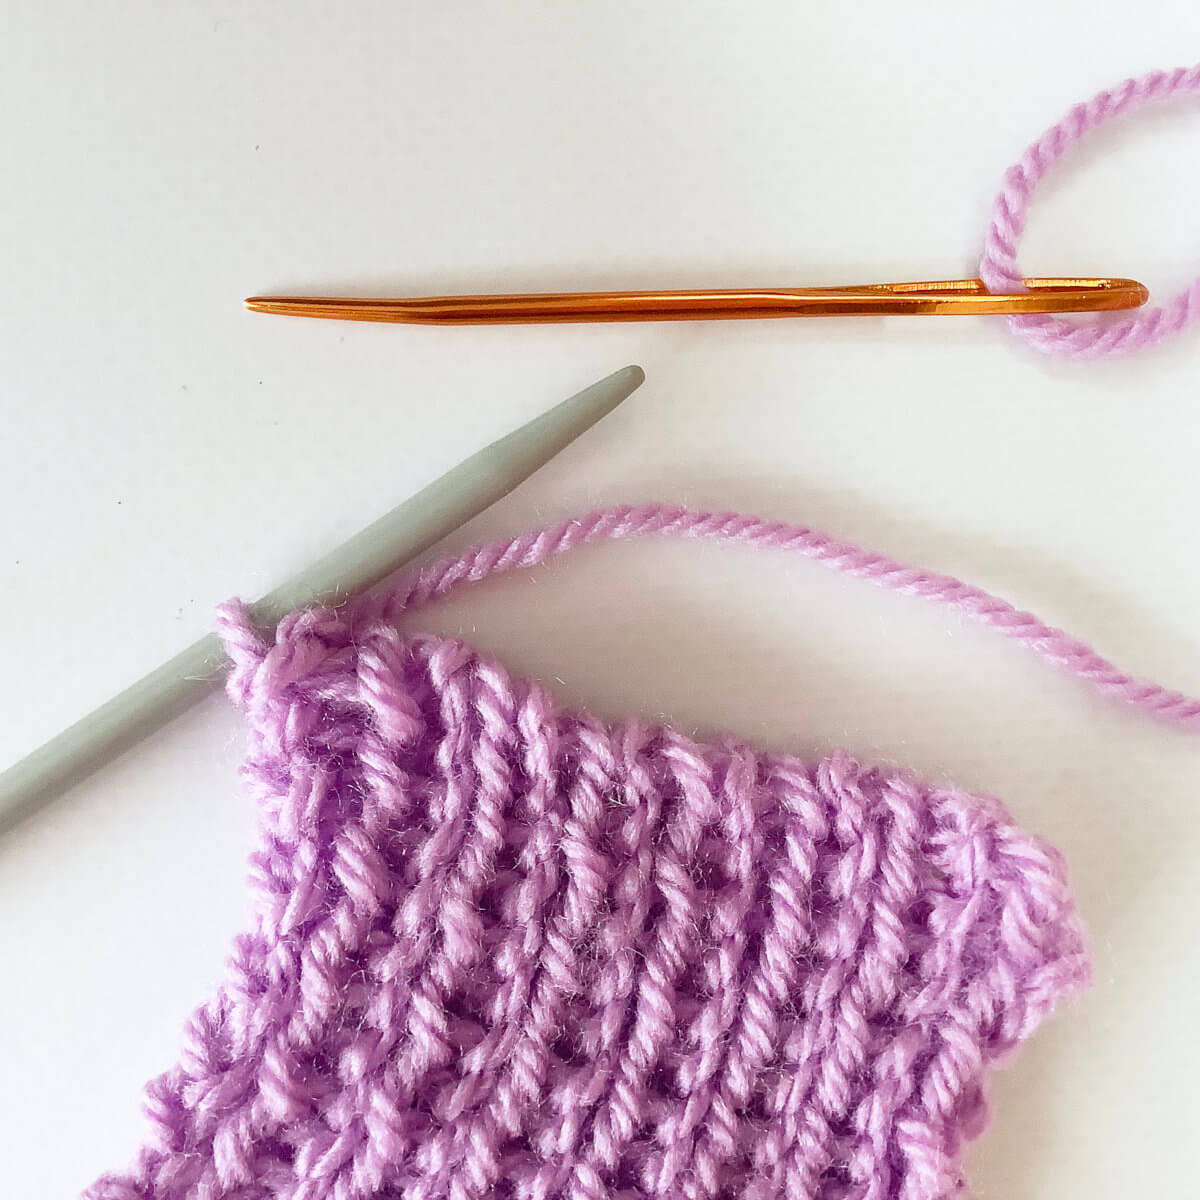
- Repeat steps 4 to 7 until 3 stitches remain on the knitting needle.
In this tutorial I used a swatch with an odd number of stitches. If you have a piece with an even number of stitches, repeat steps 4 to 7 until 2 stitches remain.
- To finish the bind-off work steps 4 to 6 once again (in case of an even number of stitches work only step 4 once more), so only 1 stitch remains, then insert the darning needle purl-wise into the last stitch and pull the yarn through.
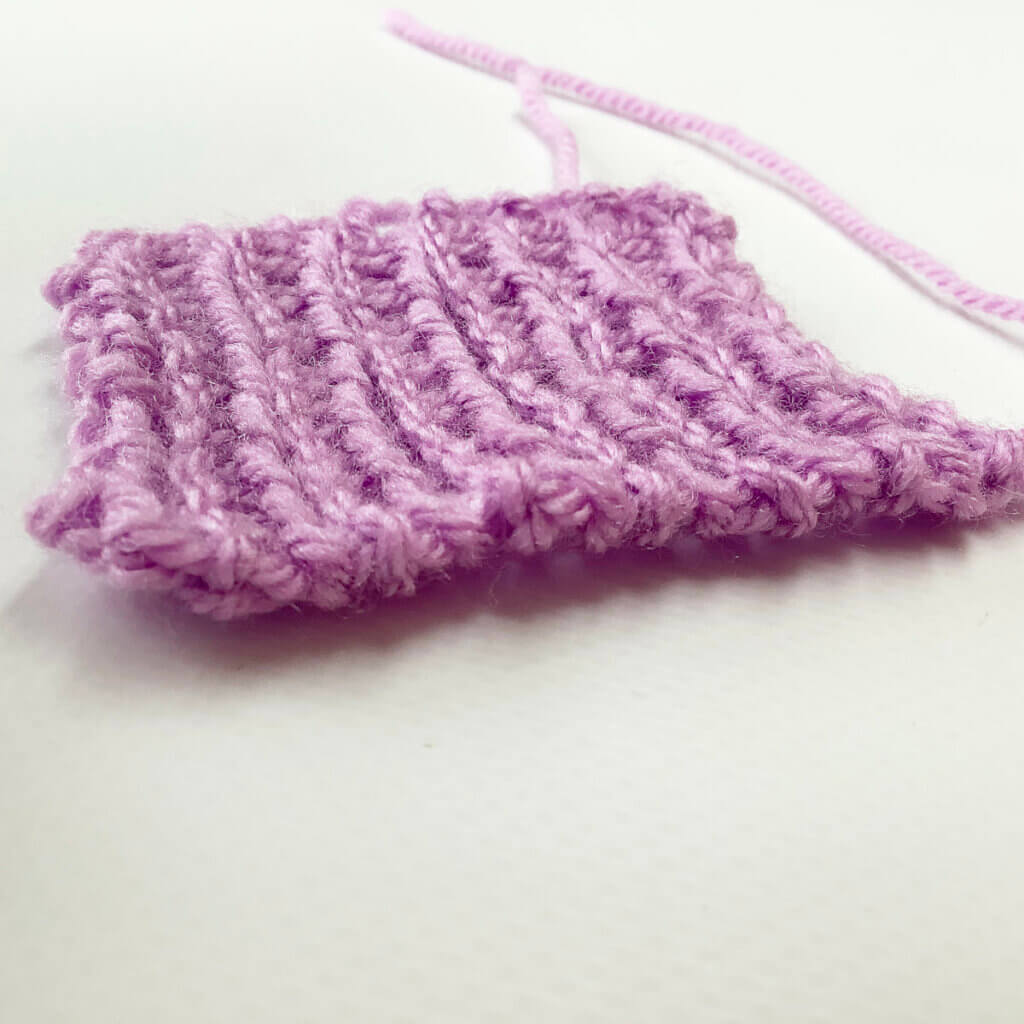
- This is the bind-off result, isn’t it neat?!

When viewed from the side, this is how the bind off edge looks:

Thanks to my Patreon supporters for bringing you this freebie! Creating quality patterns and tutorials is a lot of work and resource-intensive. However, I find it important to give you free content like this tutorial. Thanks to the generous support of my Patreon supporters, I can make it happen. Thank you, patrons! Click here to join, or click here to read more about La Visch Designs on Patreon.

 syndrome")

