You probably recognize this: All those beautiful skeins of yarn in a lush variety of materials and colors and no way to enjoy it all because it is all tucked away in the stash. It really is a shame to have to put it all away to protect it against the effects of UV light, odors, dust, pets and vermin. It makes it pretty hard to enjoy the woolly splendor….
Why not make a rotating exhibition of your favorite yarns on your favorite spot in the house? Regular “tossing” of the wool stash also has its advantages. It discourages moths and makes it possible to nip an infestation in the bud. Also, doing this we can enjoy all the yarn, even if we are busy with things other than crochet and knitting.
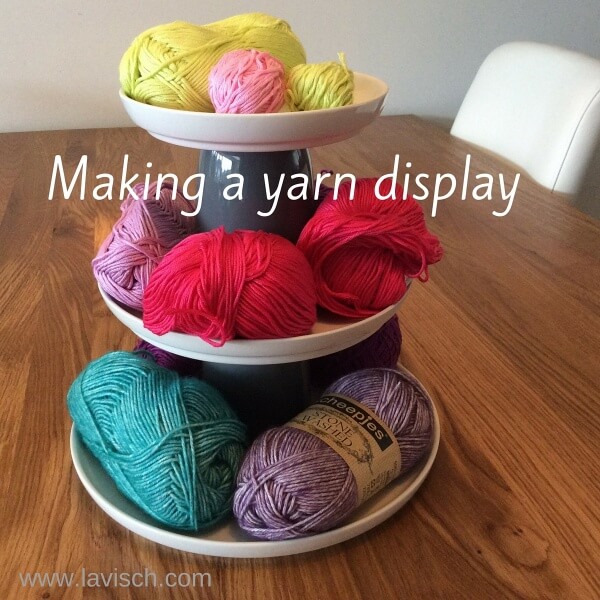
Therefore, I want to show you in this post how you can make an etagere yourself for superb display of your favorite skeins of yarn.
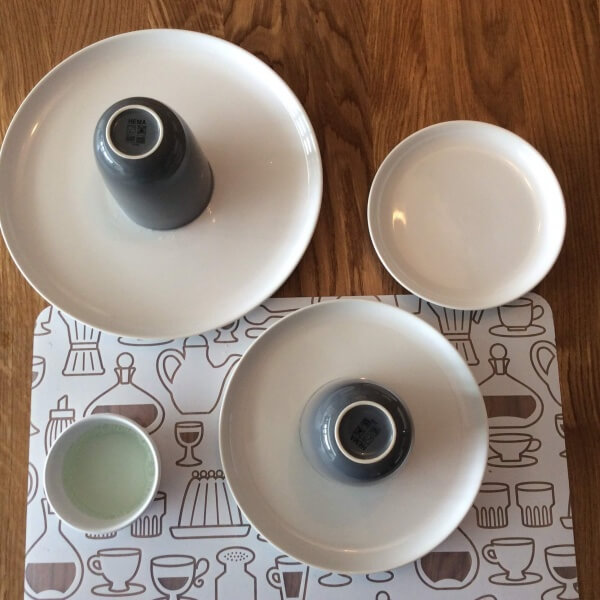
Materials
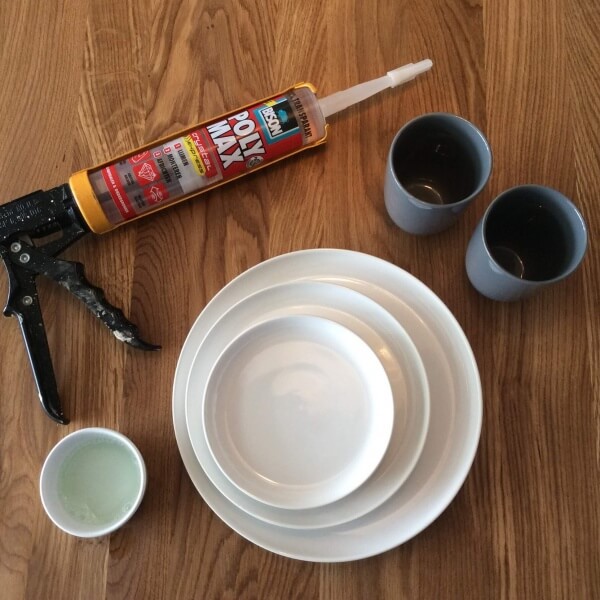
- 3 plates / dishes in varying sizes
- 2 cups, glasses or ice cream sundaes
- A sealant gun with Polymax (DIY store)
- Ruler
- Bowl with soapsuds
- Some paper towels
In this tutorial I use plates and cups I bought at the Hema. However, if you want an etagere with a more vintage or romantic appearance, a thrift store can be a good place to look. Often there is a great variation to get some lovely plates with flowers, gold edges and fine glassware for friendly prices.
I like to use Polymax glue instead of the glue from a regular glue gun. Polymax has the great advantage that you can get the glue loose again if it does not go right the first time. Also, with this kit the glue joints can be smoothed after applying similar to silicone sealant. This makes the result very nice with less effort!
Step by step
1. Start by properly washing your plates and cups. You want to have them really clean and free of dust and greasy spots.
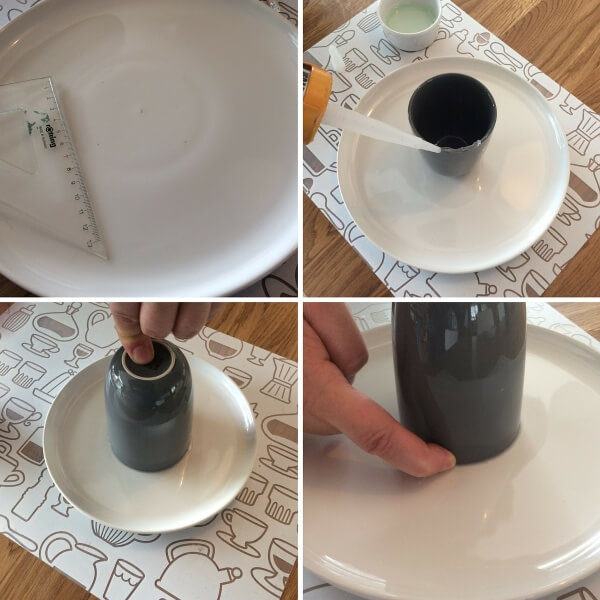
2. Grab the biggest plate and measure accurately where the exact midpoint is. Mark this on the plate with pencil, the markings can be brushed off later easily.
3. Grab a cup and apply your glue on the top edge.
4. Turn the cup and put it upside down on the big plate. Make sure you put it right in the middle. If necessary, use the ruler to measure whether it is indeed in the middle. At this stage you can still push the cup around a little to position it correctly if necessary.
5. Press the cup lightly.
6. Make your wet finger with a little of the soapy water and smooth down the connection between the cup and the plate while continuing to press the cup to the plate. Use paper towels to wipe your fingers.
7. Repeat steps 2 to 6 for the plate in the middle size. Allow the glue to harden at least 2 hours. After 4 hours the Polymax has fully cured, but you can proceed before that time if you’re careful!
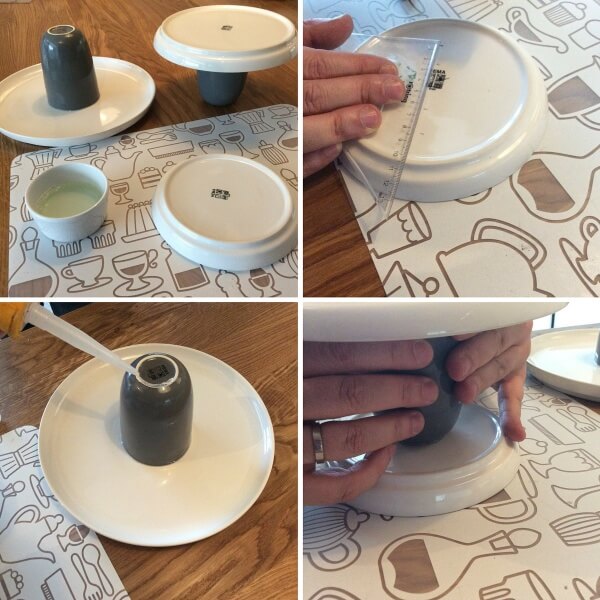
8. Now we go on to finish our etagere: Take the smallest plate, turn it over, and measure at the bottom exactly where the middle is.
9. Take the medium-sized plate with attached cup and apply glue to the bottom of the cup.
10. Turn over and position the cup in the center of the smallest plate. Gently press down and smooth the adhesive seam as previously if the shape of your cup permits. In my case that is not possible, but it doesn’t matter much because it will be hard to see anyway.
11. Repeat steps 8 to 10 to join the largest size plate-with-cup on top of the medium sized plate.
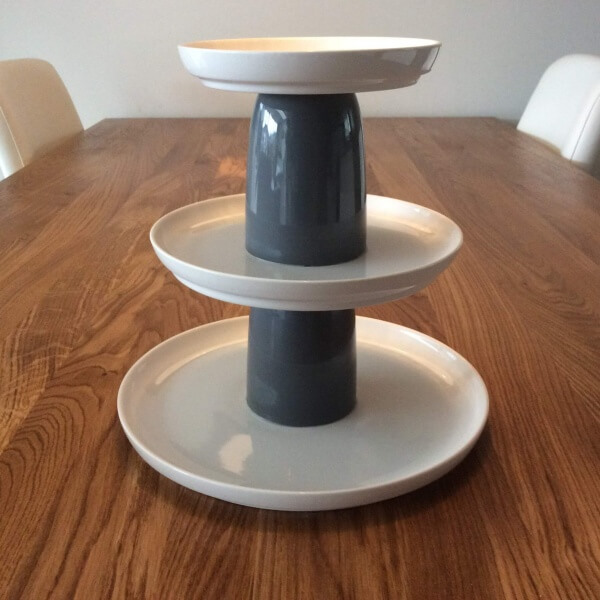
12. Let the glue harden now for at least 4 hours. After this you can turn it around: your etagere is ready!
Tip
It is not a disaster if there gets some glue somewhere else on your plate or cup. Polymax dries up as a kind of transparent rubber. Because of this it is possible to simply scratch it off with your nails once dried, if it is in places you do not want it to be.
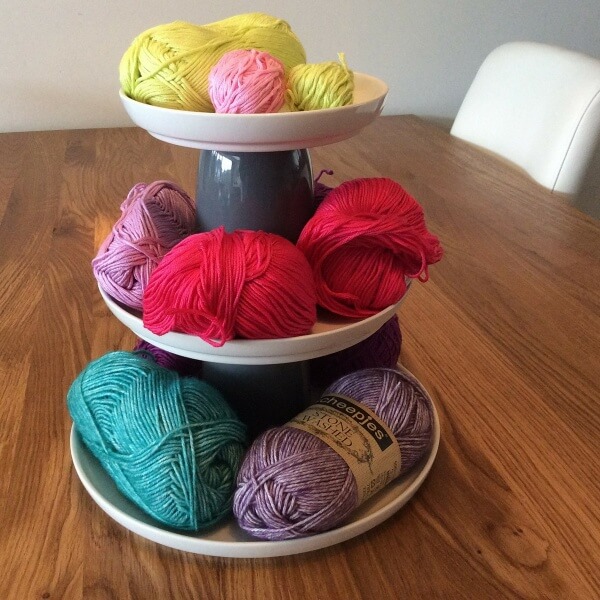
And here is mine, filled with some colored beauties that would otherwise have been put away in some drawer…