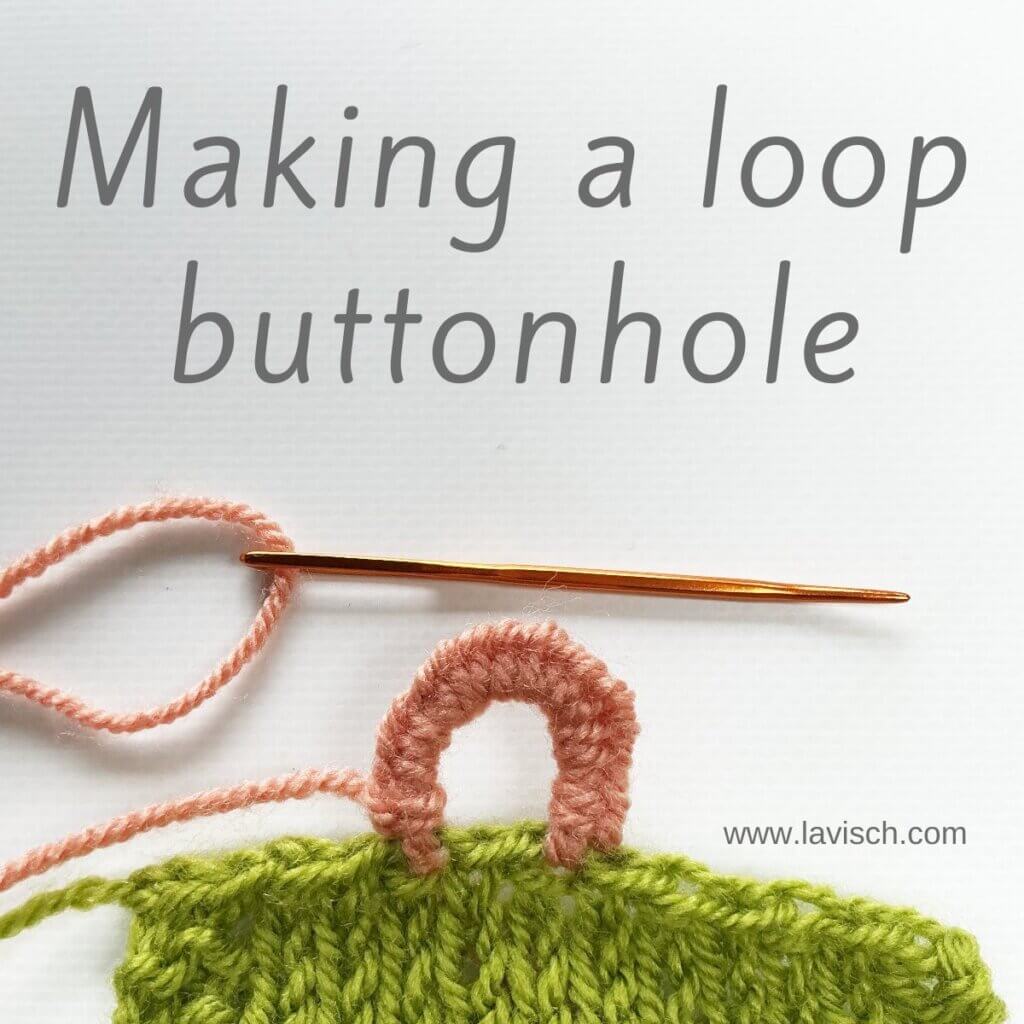
A loop buttonhole is one of those small finishing details that can completely change how polished your project looks. Instead of working a buttonhole into the fabric itself, you create a simple loop right at the edge. It removes the need to plan out your buttonholes while still knitting or crocheting your project. In other words: It’s perfect for cardigans, cuffs, keyhole openings, or anywhere you want a flexible, decorative closure.
In this step-by-step photo tutorial, I show you how to create a neat, loop buttonhole along the edge of your work using a darning needle. The same effect could however also be achieved by crocheting into the loop. Ok, get your things, and follow along!
Materials used


Yarn: Paintbox Yarns Simply DK, a good value, good quality 100% acrylic yarn, here in the color Lime for the swatch, and Vintage Pink for the buttonhole loop.
Darning needle: Hiya Hiya Darn It Yarn Needle, or any other tapestry needle.
Working the loop buttonhole step by step
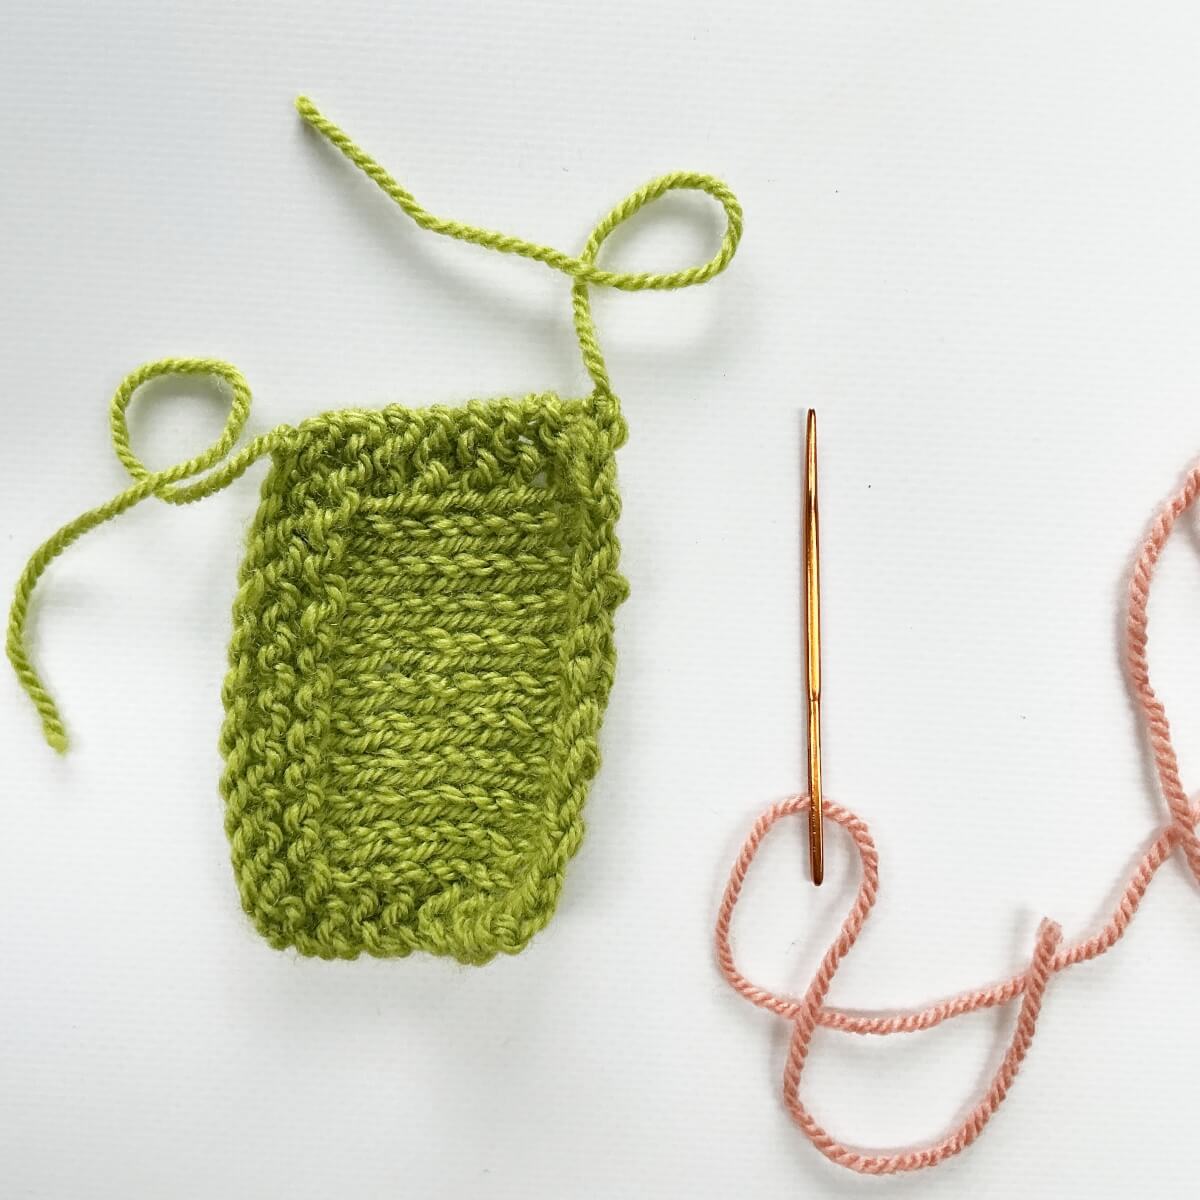
- First, make sure you have your darning needle threaded with the yarn you want to use for the buttonhole loop.
The buttonhole loop can be attached to any side of a piece of knitting or crochet. In this tutorial, I will be attaching it to the bind-off edge of this swatch.
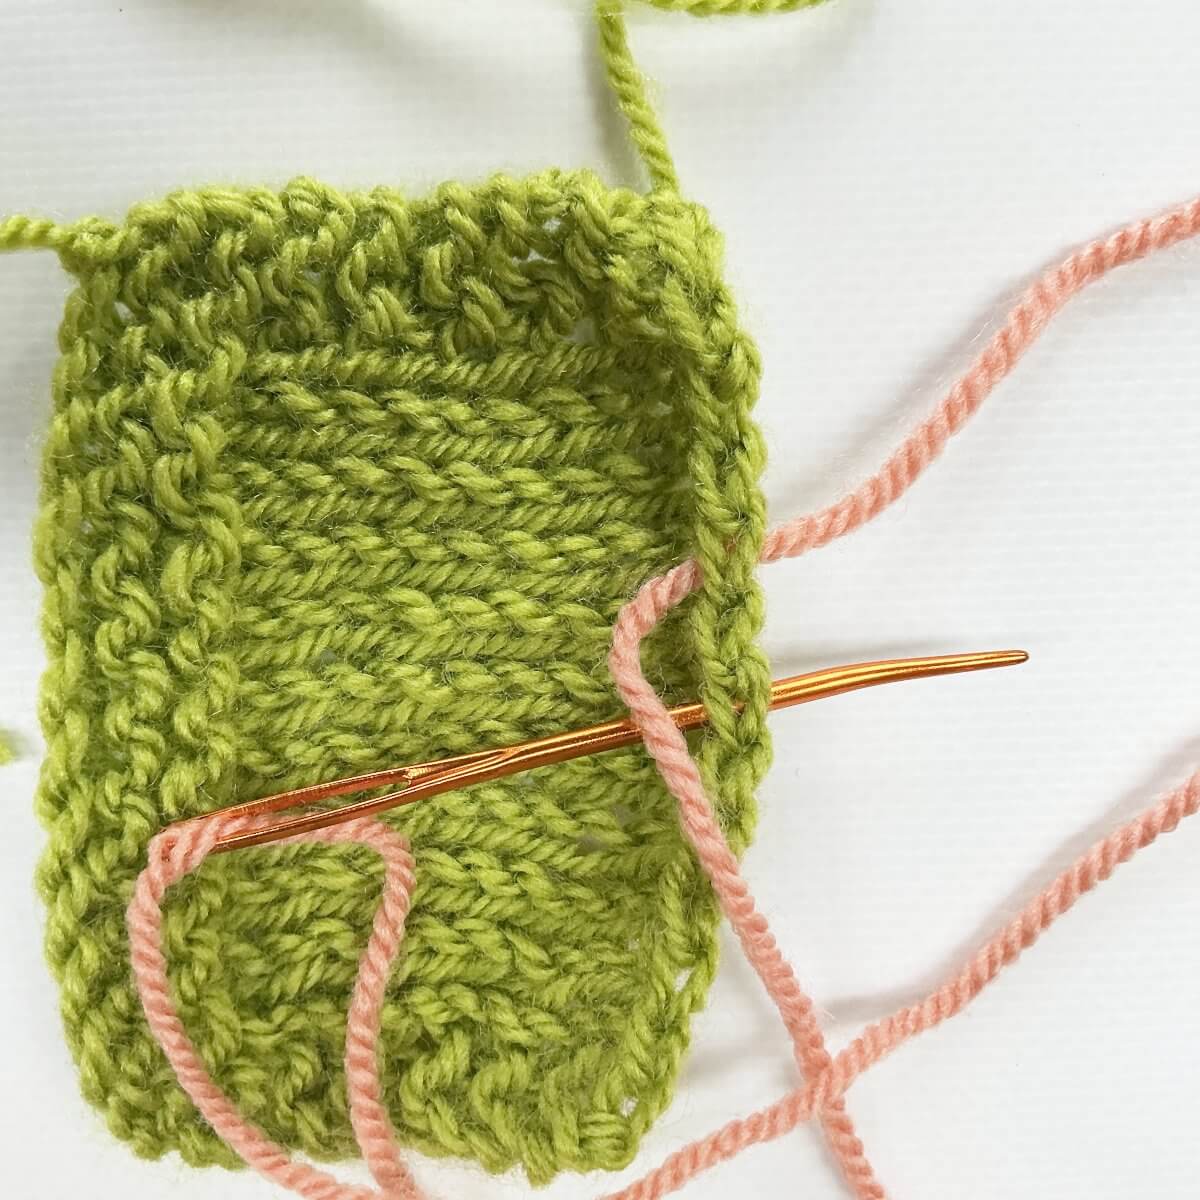
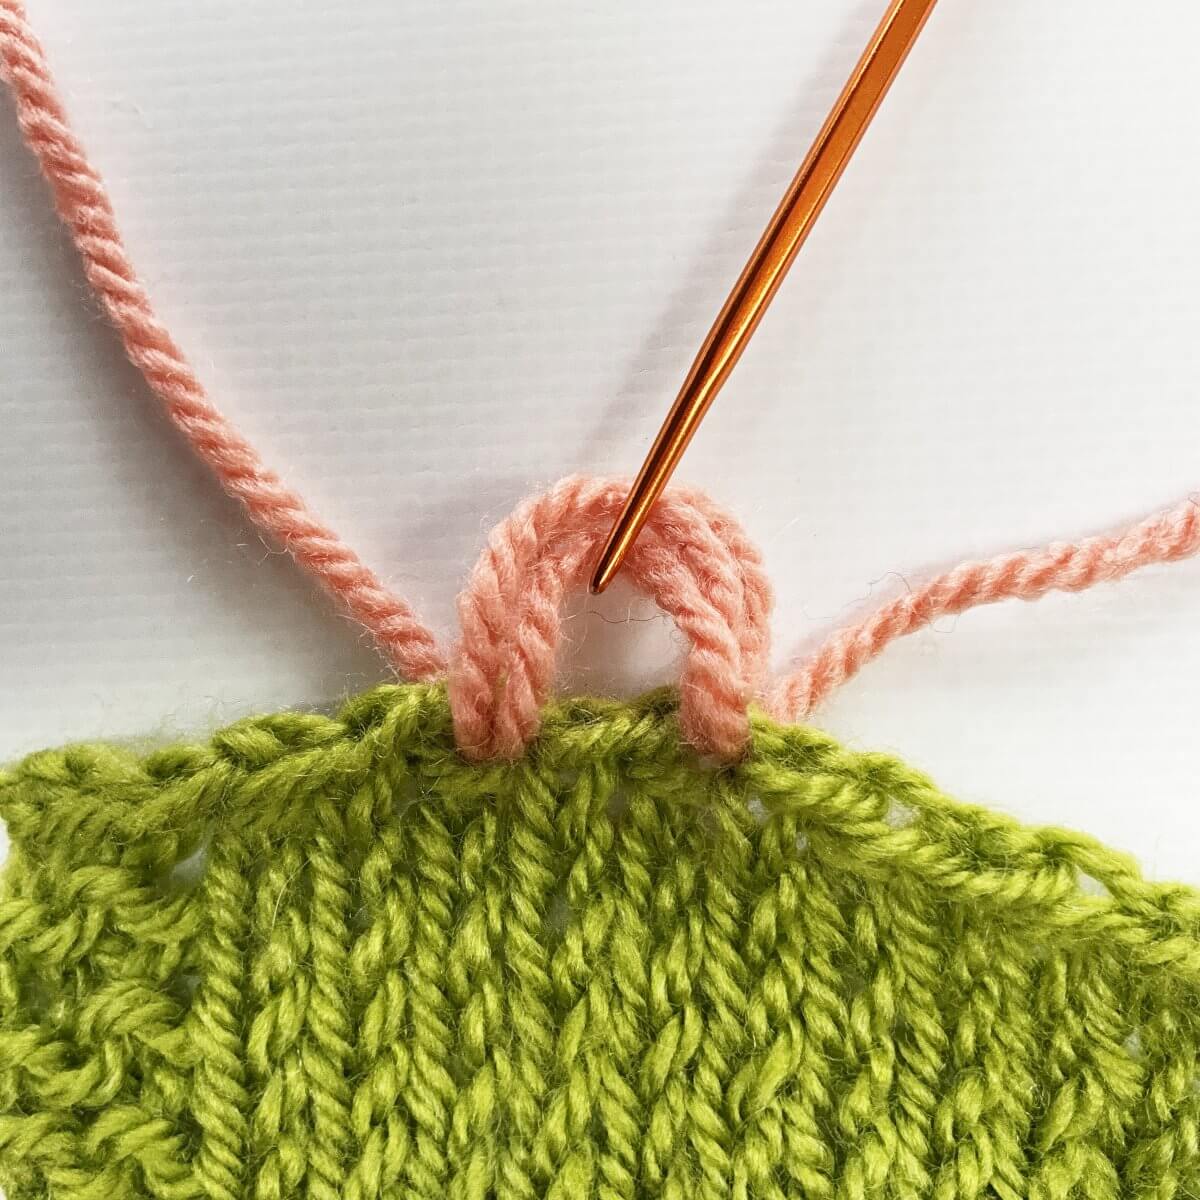
- To start, I insert the darning needle from bottom to top through both loops of one of the stitches on the edge. Pull it through for a bit.

- Next, insert the darning needle from top to bottom through both loops of another of the stitches on the edge.
I skipped 1 stitch, because I though that would give me a nice size for a buttonhole. You can leave less or more room between the 2 points as needed for the size of the buttons you intend to use.
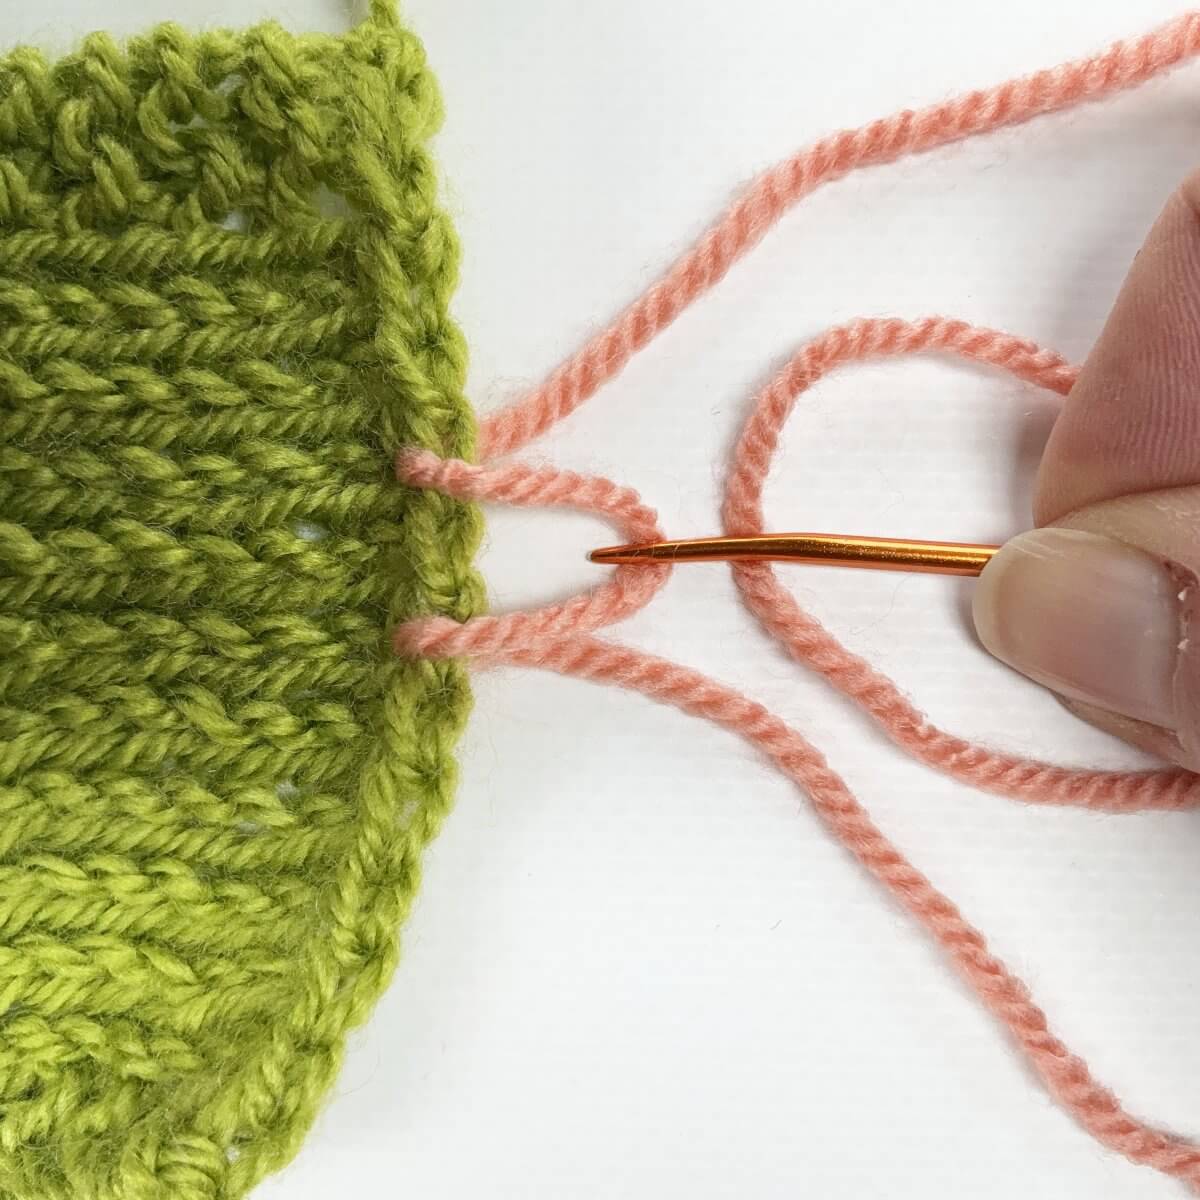
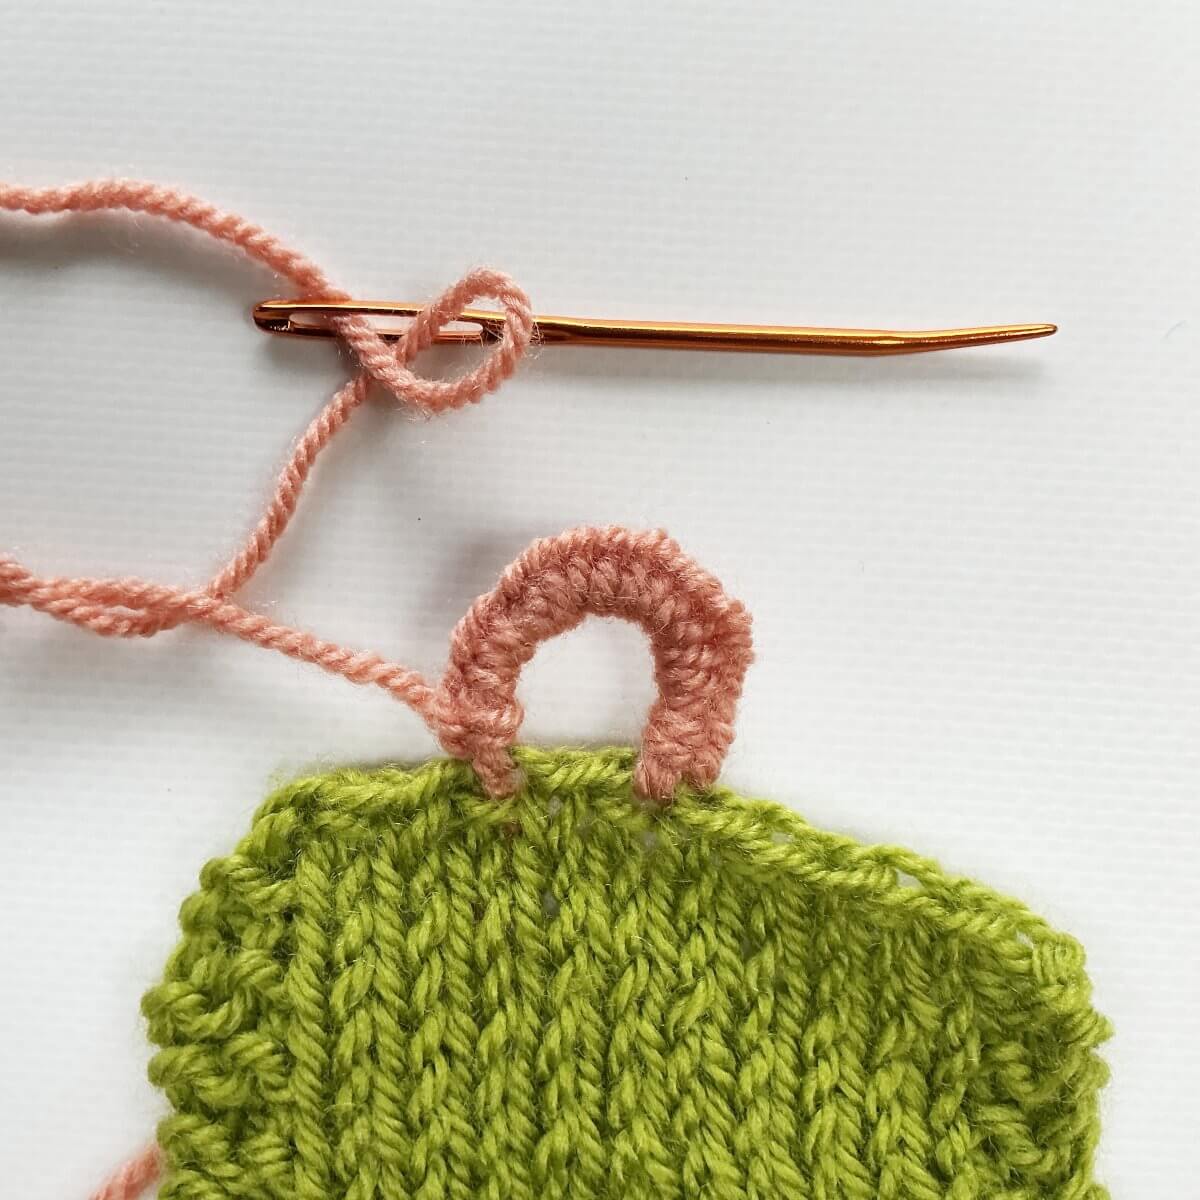
- Pull the yarn through until you have a loop of the desired size for your button.
The loop kept flipping up, so I used the darning needle to hold it down for the picture.
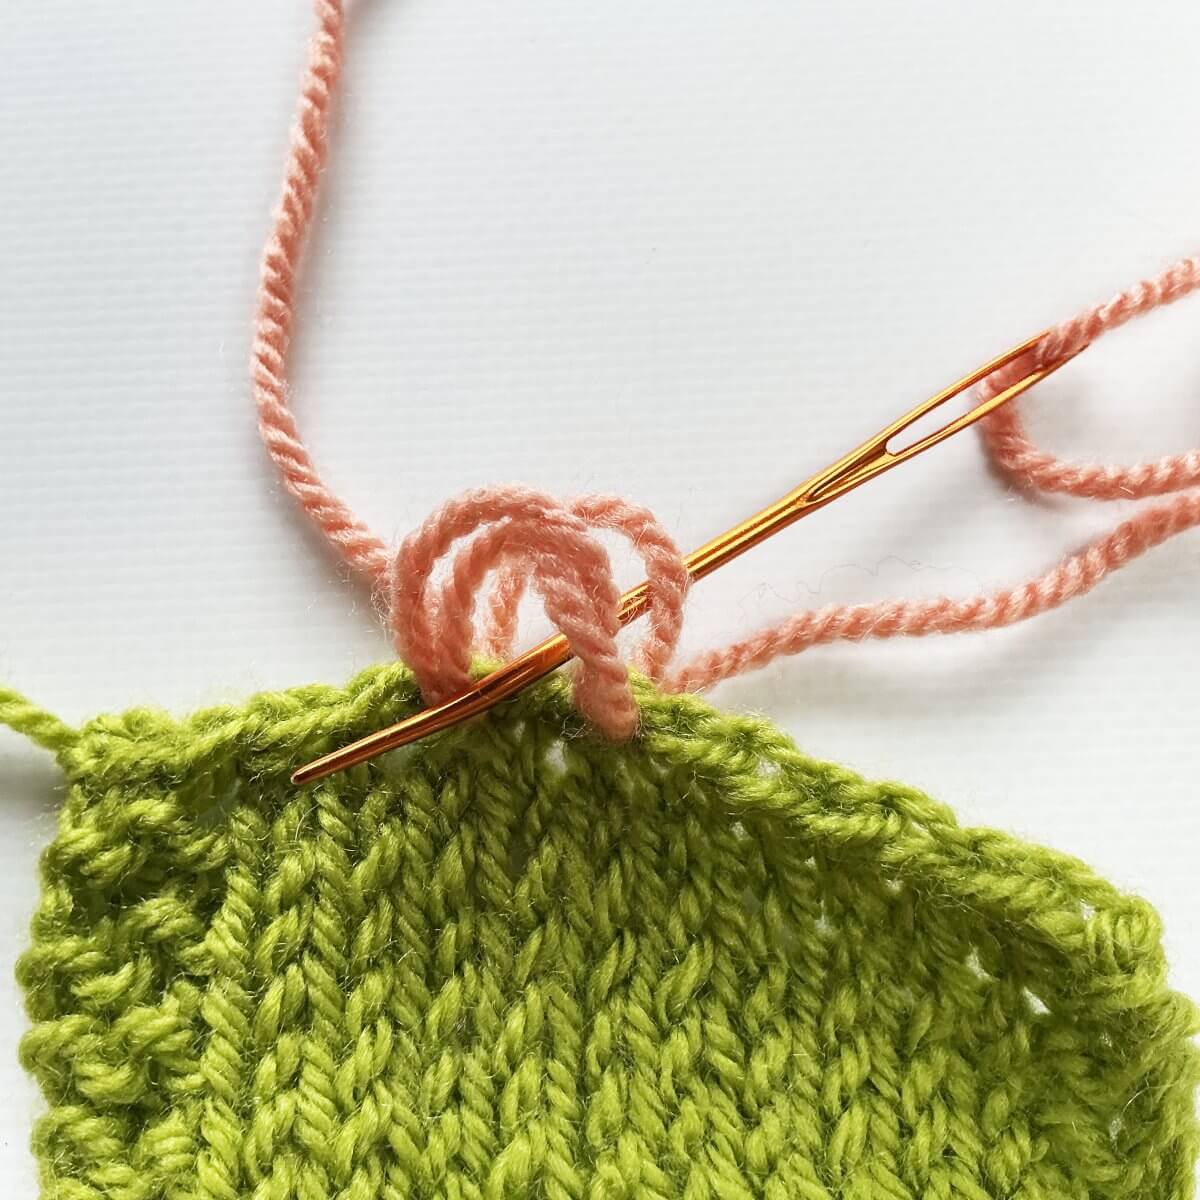
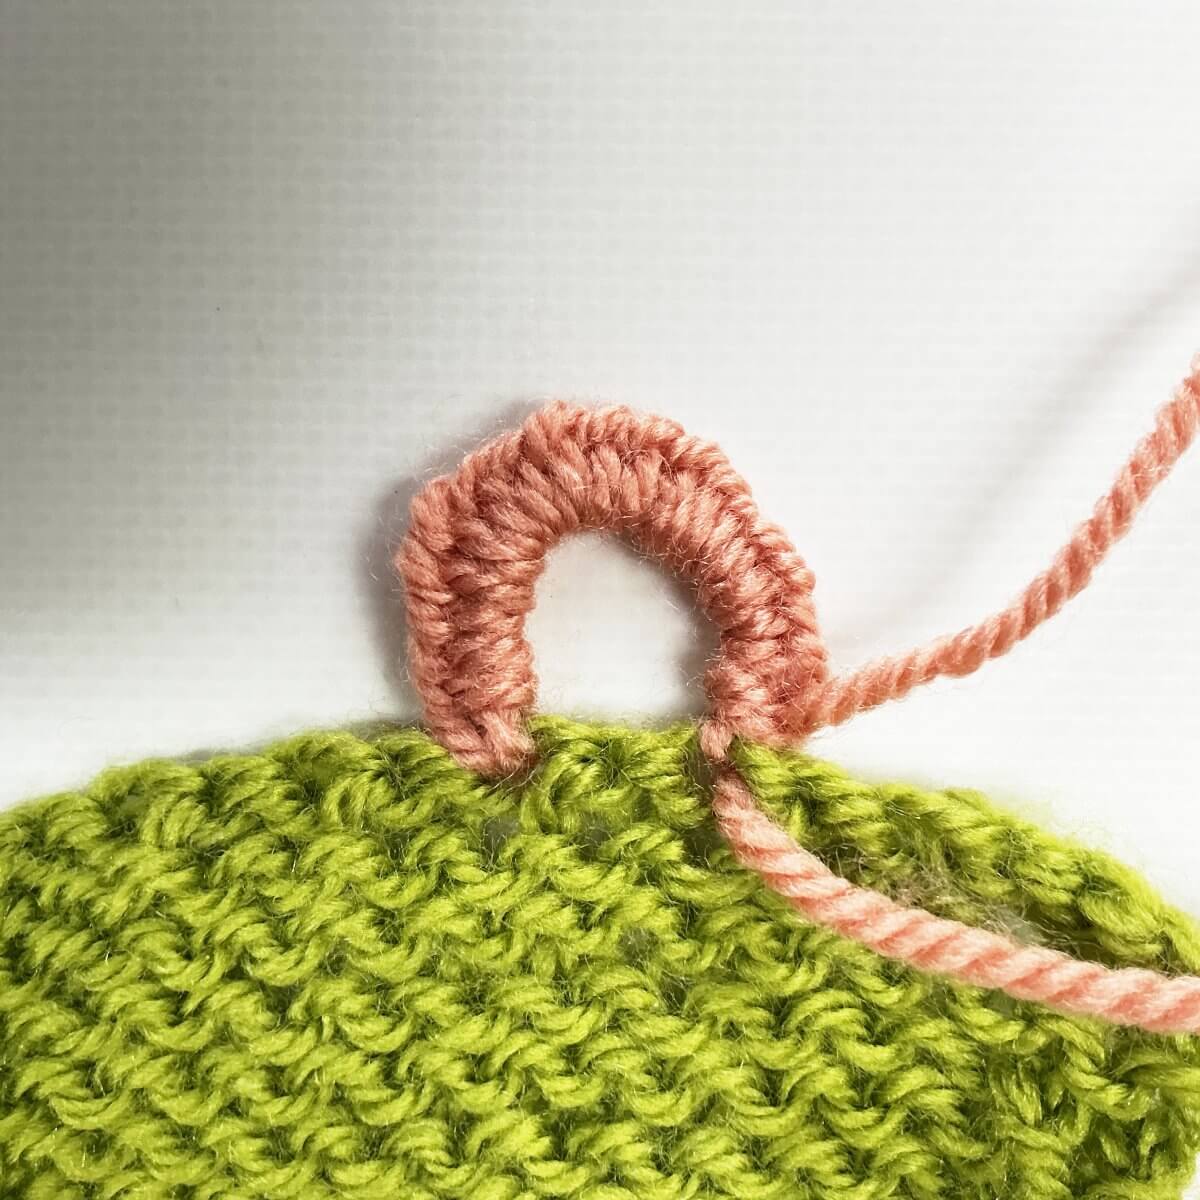
- Repeat steps 2-4 a couple of times. This gives a sturdier buttonhole. The number of times, depends on the thickness of your yarn, as well as on the desired size of the loop.
I changed the orientation of the edge, because this proved to be easier to work.
- Next, take your darning needle, and insert it from bottom to top into the loop.
- Pull the yarn through almost, but not entirely all the way. Now take the darning needle and insert it top to bottom through the loop that your working yarn has formed.
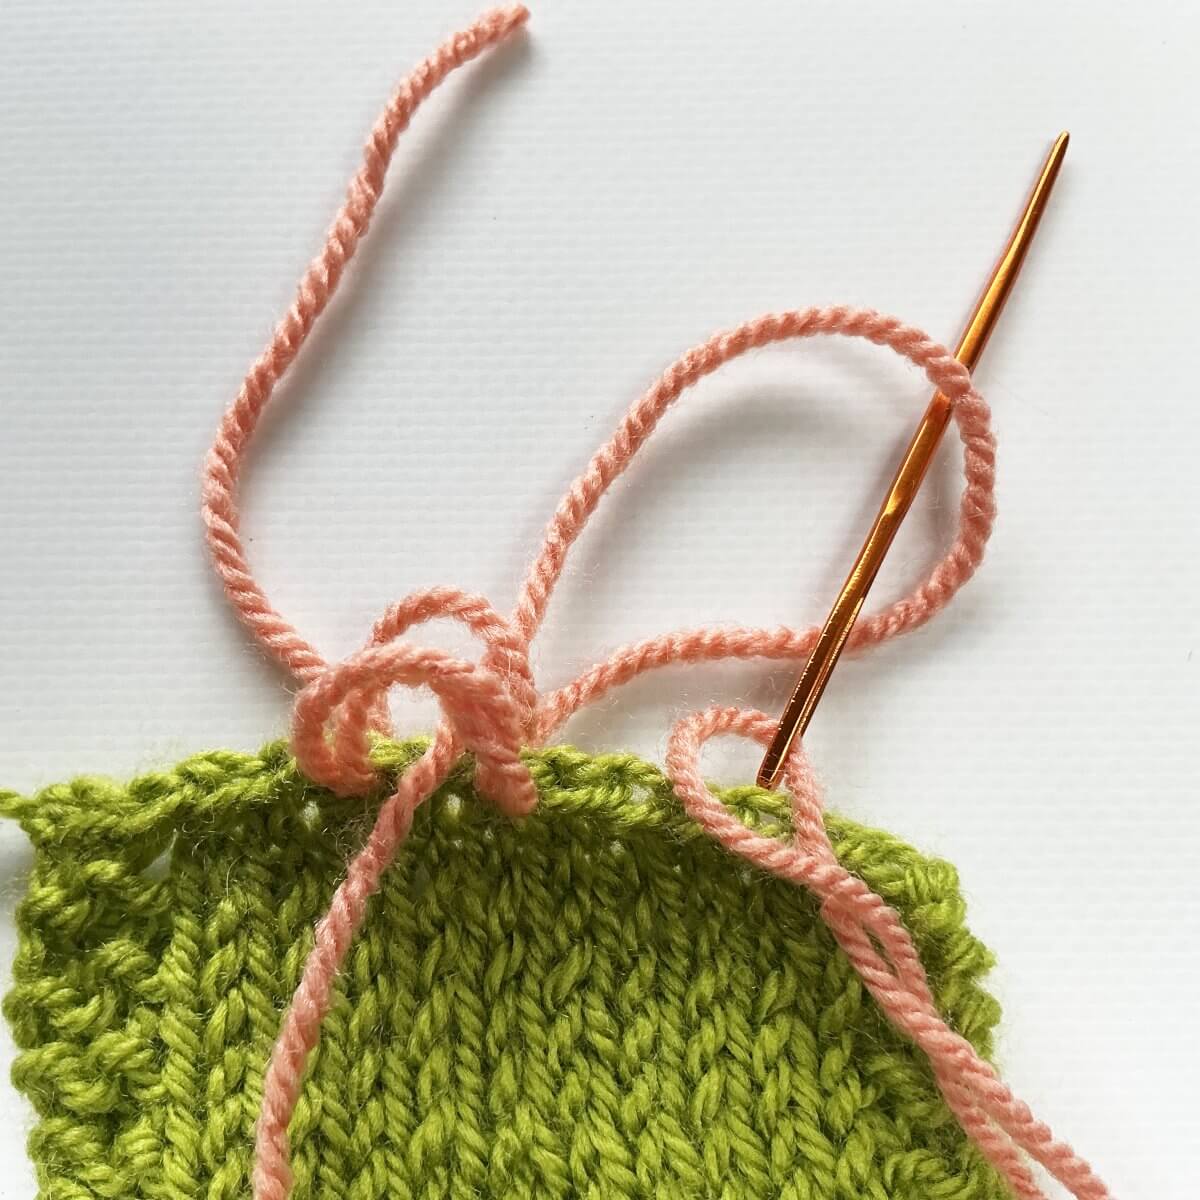
- Pull it all through, and tighten the knot you have created. Make sure to push it right next to the fabric of the piece you’re attaching the buttonhole to.
- Repeat steps 6-8 as often as needed to completely cover the loops of yarn made in steps 2-5.
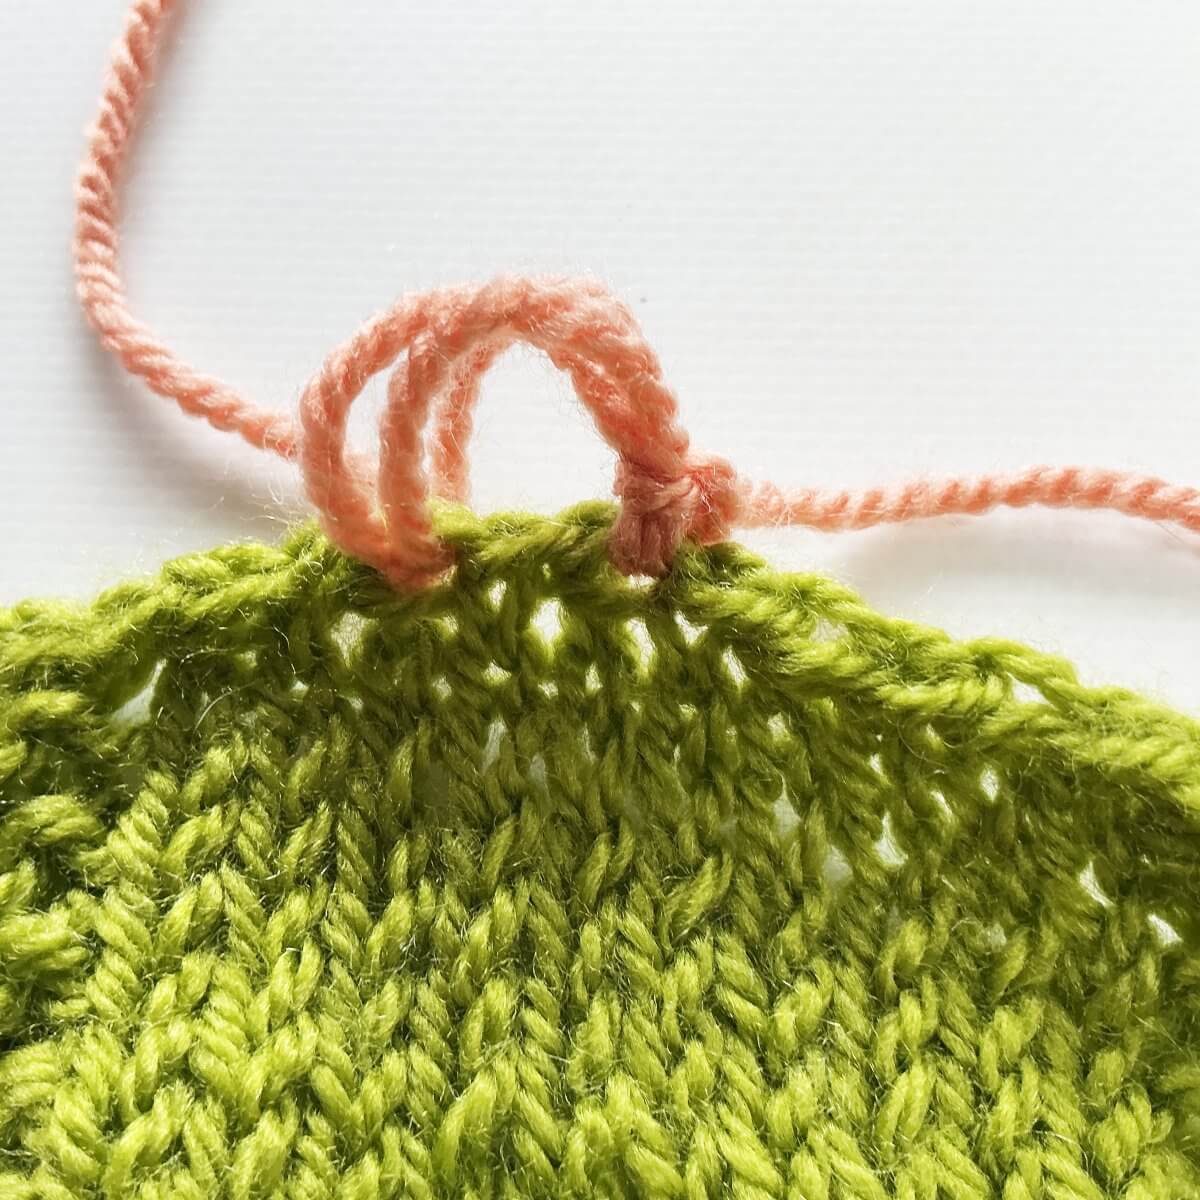
- To finish, you can thread the yarn through the buttonhole loop, back to the start. Tie a knot, and weave in the ends.

Thanks to my Patreon supporters for bringing you this freebie! Creating quality patterns and tutorials is a lot of work and resource-intensive. However, I find it important to give you free content like this tutorial. Thanks to the generous support of my Patreon supporters, I can make it happen. Thank you, patrons! Click here to join, or click here to read more about La Visch Designs on Patreon.


