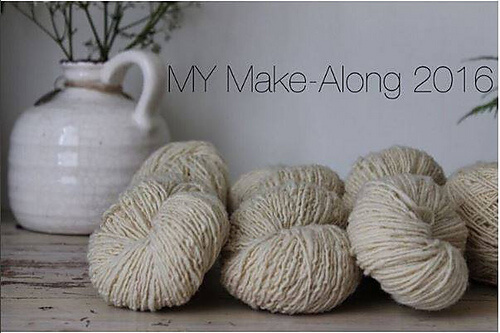
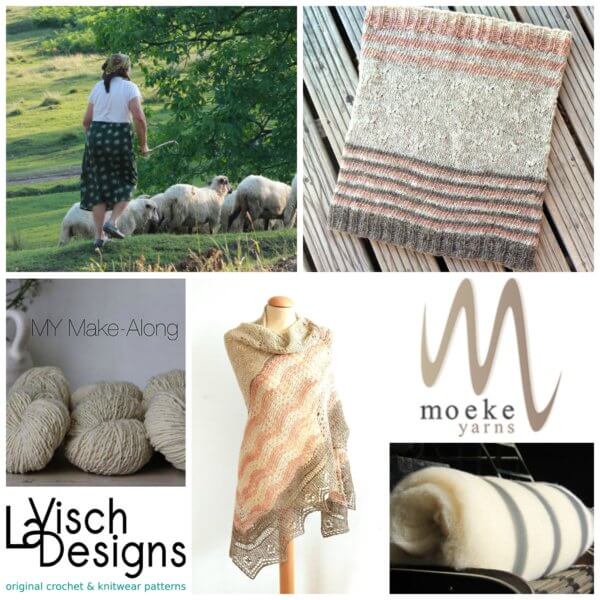
crochet

MY Make Along 2016

Moeke Yarns & La Visch Designs together in the MY Make along 2016

Moeke!

“Moeke”, a somewhat old-fashioned word that makes most people probably think about their mother or grandmother. For me my first thoughts go out to the wonderful rustic yarn by Moeke Yarns. Somewhat thick and thin, and not the softest yarn in the stash, it does not sound like a yarn to idolize.

That I am nevertheless crazy about it is because of the great character of this 100% wool yarn, how it feels, how it smells… I would swear that there is something addictive in these specific wool fumes.

MY Make Along 2016 and make a La Visch Designs pattern!
© Moeke Yarns

Story

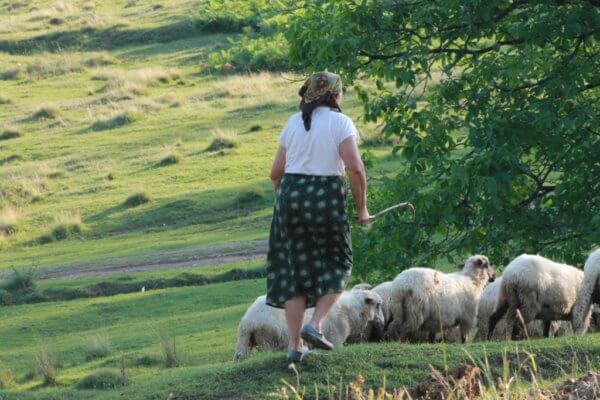
The story of Moeke Yarns is as special as the yarn itself. It’s a real family business consisting of Ioana (living in the Netherlands), her brother Radu and his wife Simina and their parents (in Romania). In 2013, Ioana was visiting her parents in Romania and found two large bags of yarn spun by her grandmother.

It was then that she realized that Romania has a good number of traditional breeds of sheep and a long tradition in wool processing. However, this tradition likely to be lost due to the poor economic conditions: shepherds can’t find people to sell their wool to and eventually burn it to get rid of it. What a terrible thing!

MY Make Along 2016 and make a La Visch Designs pattern!
© Moeke Yarns

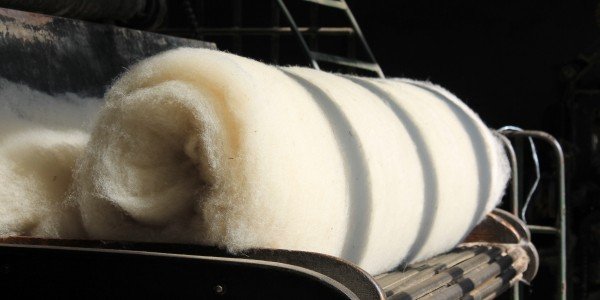
Ioana and her brother decided to start making yarn from the fleece of animal friendly kept Romanian sheep. In line with the traditional way of processing, the wool is washed without harsh chemicals and spun locally using machines that have been in use for over 100 years. And to remain with the ecological responsible thought, the yarn is only available in natural colors. Now, several years later, the brand is (unsurprisingly) a worldwide success

MY Make Along 2016 and make a La Visch Designs pattern!
© Moeke Yarns

MY Make Along 2016

And that brings me to the following: The MY Make Along 2016! This is an international event, which starts on September 12. It is dedicated to knitting, crocheting and weaving, using yarns by Moeke Yarns. An event which designers and creators who share a deep love of creating, respect for animals and nature, are brought together.

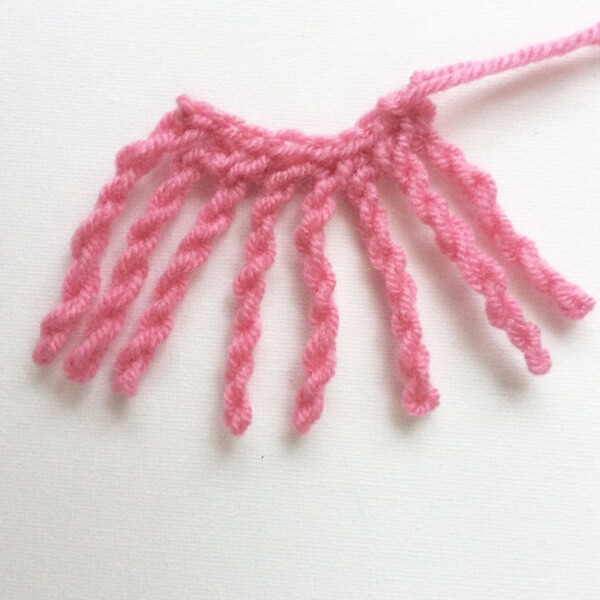
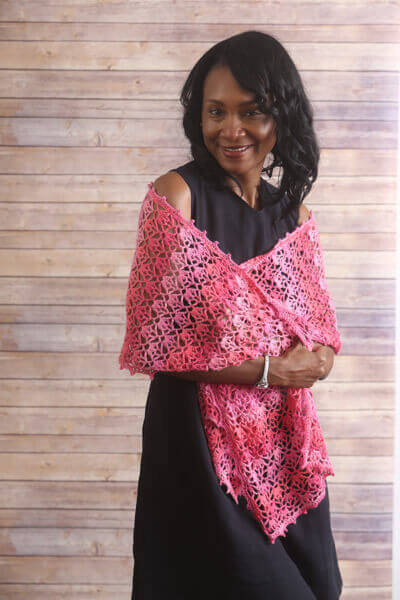
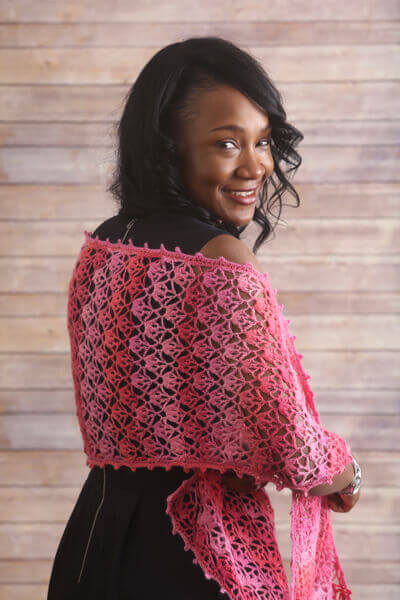
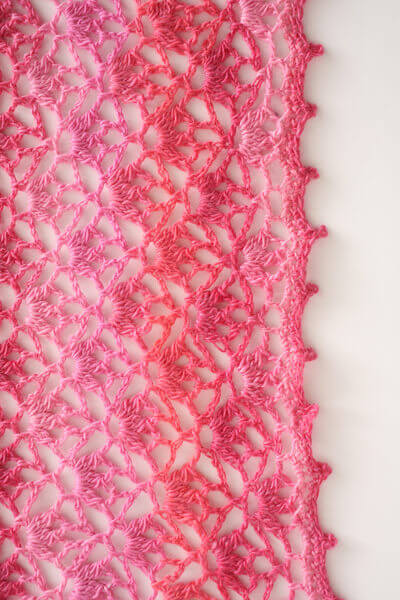
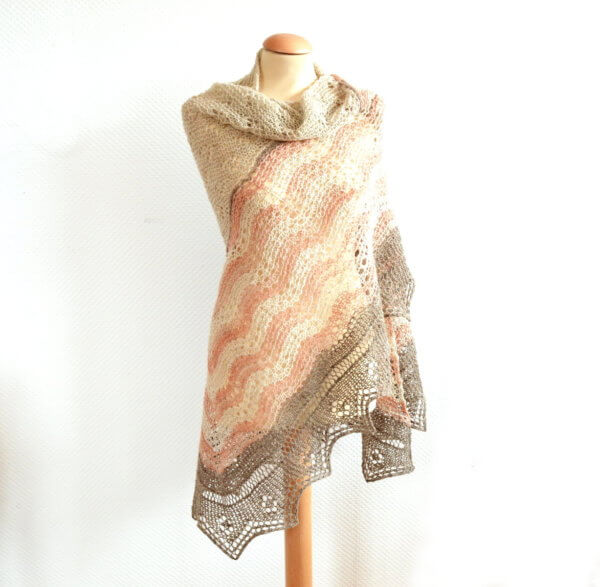
And yes, I am one of the participating designers! Two of my designs will be eligible for the Make Along. One of these is my Elena Half Hap design, the other (a cowl pattern)  will be published in a couple of weeks.

Elena Half Hap, a design by La Visch Designs

Participating

To participate in the Make Along there are 2 conditions: 1) make one or more of the selected patterns designed for Moeke Yarns that are or will be released this year, and 2) use a yarn by Moeke Yarns to make your project.

On the following website you can read all about the participating designers, the sponsors and the prizes you can http://www.moeke-yarns.com/index.php/MY2016

The Make Along will run through Instagram and Facebook. Join the Facebook group to get involved, find the group on https://www.facebook.com/groups/538312436376878/ 
Also, you can follow the hashtag #mymakealong2016 on Instagram and Facebook as well as the blog of Moeke Yarns 
(http://www.moeke-yarns.com/index.php/blog) for updates and news about the Make Along.

I’m looking forward to see you in the MY Make Along 2016!

MY Make Along 2016 Read More »

tutorial: crochet the star stitch

Crochet the Star Stitch - a tutorial by La Visch Designs - www.lavisch.com

The star stitch is a very pretty stitch, which also gives projects a lovely texture. You may also have heard of this stitch by the name of “Marguerite Stitch”. In this post, I will show you how to crochet the reversible half-star version. This means that each side of the fabric will show half a star, giving a completely reversible fabric. Instructions are also given to transform it into the full-star, non-reversible star stitch.

The star stitch is worked as a multiple of 2 + 1 + stitches plus three turning chains. If you want to work this stitch on an existing piece in another stitch pattern, start with a multiple of 3 + 1 stitches and 3 turning chains before you turn your work and starting the first row in star stitch.

It is of course also possible to crochet the star stitch in the round. In that case, work a multiple of 2 + 1 stitches and crochet the 3 turning chains after joining in the round.

In this post I’ll show you how to work the star stitch as a flat piece working back and forth. These instructions are written in American English crochet terminology.

The star stitch step by step

First row

1. In this example, I crochet the star stitch directly on the starting chain, which I made 16 chains long.

Crochet the Star Stitch - a tutorial by La Visch Designs - www.lavisch.com


2. When inserting the hook in a chain stitch, there are of course several options on where in the stitch exactly to insert your hook. However, for the best result in this stitch, I would suggest inserting your hook in the single bumps at the back of the starting chain.

Crochet the Star Stitch - a tutorial by La Visch Designs - www.lavisch.com

First star

3. Insert the hook into the second chain from the hook and pull up a loop.

Crochet the Star Stitch - a tutorial by La Visch Designs - www.lavisch.com

4. Also repeat step 3 for the third to sixth chain from the hook. Take care to pull up the last few loops a little bit longer than the first ones. You now have 6 loops on your hook.

Crochet the Star Stitch - a tutorial by La Visch Designs - www.lavisch.com

5. Make a yarn over and pull the yarn through all the loops on the hook.

Crochet the Star Stitch - a tutorial by La Visch Designs - www.lavisch.com

6. Crochet 1 chain, your first star is now done.

Crochet the Star Stitch - a tutorial by La Visch Designs - www.lavisch.com

Second star

7. To start the next star, insert your hook in the chain just made and pull up a loop.

Crochet the Star Stitch - a tutorial by La Visch Designs - www.lavisch.com

8. Then insert the hook under the two loops you can see on the side of the last pulled up loop from the previous star and pull a loop.

Crochet the Star Stitch - a tutorial by La Visch Designs - www.lavisch.com

9. Now insert your hook in the last chain of the starting chain in which the previous star was made. This was the sixth chain from the hook. Pull up a loop.

Crochet the Star Stitch - a tutorial by La Visch Designs - www.lavisch.com

10. To complete all the loops for the second star, insert the hook into the next chain from the starting chain and pull a loop. This was the seventh chain from the hook. Repeat for the eighth chain from the hook. Remember to make these last loops a bit longer again than the previous loops. You now have again six loops on the hook.

Crochet the Star Stitch - a tutorial by La Visch Designs - www.lavisch.com

11. Make a yarn over and pull the yarn through all the loops on the hook. Crochet 1 chain, this completes the second star.

Crochet the Star Stitch - a tutorial by La Visch Designs - www.lavisch.com

12. Repeat steps 7 to 11 until the end of the row. You can clearly see in this example how pretty the bottom edge is, because I have worked in the back bumps of the starting chain.

Crochet the Star Stitch - a tutorial by La Visch Designs - www.lavisch.com

Second row
For the full-star non-reversible version of the star stitch, work a full row in sc or hdc before continuing with steps 13 to 16.

13. Crochet 3 chains and turn work. Make sure you do not crochet these chains too tight, because you will crochet into them later on.

star stitch_13

14. Insert your hook in the second chain from the hook (in the bump on the back of the turning chain!) and pull up a loop. Repeat for the third chain from the hook. Next pull up loops in the first, second and third stitches from the previous row.

Crochet the Star Stitch - a tutorial by La Visch Designs - www.lavisch.com

15. Make a yarn over and pull the yarn through all the loops on the hook. Crochet 1 chain, this completes the first star of the second row.

Crochet the Star Stitch - a tutorial by La Visch Designs - www.lavisch.com

16. For the next stars of this row, repeat steps 7 to 11. To pull up the last loop for the last star of the row, you insert the hook in the chain that you skipped when making the first star of the previous row. Depending on how loose your turning chain was made, this may be a bit tight …

Crochet the Star Stitch - a tutorial by La Visch Designs - www.lavisch.com

17. Repeat steps 13 to 16 for the rest of your project. For the full-star non-reversible version of the star stitch, work a full row in sc or hdc before every repeat of steps 13 to 16.

tutorial: crochet the star stitch Read More »

free pattern – wine glass charms

Crochet wine glass charms - A free pattern by La Visch Designs

Here in the Netherlands Summer is having a somewhat hesitant start. The time for garden parties is bound to arrive soon though. Those I really enjoy: Firing up the BBQ, eating tasty sandwiches and salads and of course enjoying yourself with friends and family until the early hours. On those occasions I like to have a glass of wine. At busy parties there however usually comes a time that I really don’t know which one of the glasses on the table is mine…

For this I have found a solution: Wine glass charms! The idea is that you attach a unique charm to every glass, so you can always easily see which one is yours. Of course I wouldn’t be me if I didn’t make such charms myself!

In this post I’m giving you the pattern for wine glass charms that I designed to use with leftover bits of crochet cotton and a variety of buttons. These charms can of course also be used on other glasses with a stem. This pattern uses lobster stitch cord, that I explained step by step in this tutorial.

Crochet wine glass charms - A free pattern by La Visch Designs

Pattern wine glass charms

This pattern is written in American English crochet terminology.

Materials

  • Crochet Cotton, I used Schoeller + Stahl Manuela Häkelgarn No. 5 [100% mercerized cotton; 220 m / 50 g]
  • Various different buttons with a diameter of 10 to 20 mm (3/8 to 13/16 inch)
  • 1 crochet hook in size 2 mm (US steel crochet hook size 1)

Instructions

Round 1: Ch 2, 6 sc in second ch from hook and sl st closed to first sc. (6 sts)
Make sure you keep a yarn tail of about 30 cm (12 inch).

Round 2: Ch 1, 2 sc in each st, sl st to first ch of round. (12 sts)

Round 3: Ch 1, [2 sc in next st, 1 sc] 6 times, sl st to turning ch to close the round. (18 sts)

Round 4: Ch 1, [2 sc, 2 sc in next st] 6 times, sl st to turning ch to close the round. (24 sts)

Round 5: Ch 1, [2 sc in next st, 3 sc] 6 times, sl st to turning ch to close the round. (30 sts)

Next: Make a lobster stitch cord with a length of 12.5 cm / 5 inches.

Next: Close the cord into a loop by attaching the end with a sl st to the point where the start exists the crochet circle. Break yarn.

Finishing
Use the yarn tail from the center of the circle to sew on a button and weave in all ends.

Below you can find some examples of different types of buttons used. As you can see you can achieve very different effects by using various kinds of buttons!

Crochet wine glass charms - A free pattern by La Visch Designs

free pattern – wine glass charms Read More »

tutorial: crochet lobster stitch cord

Lobster stitch cord tutorial by La Visch Designs

Being it for handles of bags, bracelets, necklaces or other things, crochet cord often comes in handy. Personally, though, I don’t really like making a cord by doing single crochet stitches in a chain because it always so finicky to do. A good and attractive alternative is making a lobster stitch cord.

This type of cord is a tad thicker than a cord made from a chain and single crochet, and therefore also somewhat firmer. Really a good attribute when making bag handles! Of course, if you make lobster stitch cord of a thinnish yarn, the resulting cord will also be finer and thinner than when made from worsted or heavier weight yarn. And best of all: besides being rather decorative, a lobster stitch cord is started with only 2 stitches! You can determine how long to make it as you go.

In this post, I’ll show you how to crochet lobster stitch cord. These instructions are written in American English crochet terminology.

Lobster stitch cord step by step

For this example, I’m using Zeeman Super Soft yarn and a crochet hook size 4 mm (US G/6).

Lobster stitch cord tutorial by La Visch Designs

1. Start by chaining 2 stitches, followed by 1 single crochet in the second chain from the hook.

Lobster stitch cord tutorial by La Visch Designs

The result will look like the picture below. You can see that the stitch you have just created is pointing down on the side of the hook. This is indicated by the arrow on the right.

Lobster stitch cord tutorial by La Visch Designs

2. In this step, you turn the work towards you, as indicated by the left arrow pictured above. The stitch just made is now facing you, make sure the thread of yarn stays behind the work. In the picture below, the arrow indicates the very same stitch after rotating the work.

Lobster stitch cord tutorial by La Visch Designs

3. Insert your hook in the stitch and make a single crochet by pulling up a loop, wrap the yarn around your hook and pulling it through the two loops on the hook.

Lobster stitch cord tutorial by La Visch Designs

4. After the stitch you just made, you see two loops on the underside of your work (see arrow). These are indicated by the two white lines. Now turn your work towards you, similar as in step 2. Next insert the hook into the two indicated loops and make a single crochet by pulling up a loop, wrap the yarn around your hook and pulling it through the two loops on the hook.

Repeat step 4 until your cord has the desired length.
And that is all there is to it!

Lobster stitch cord tutorial by La Visch Designs

tutorial: crochet lobster stitch cord Read More »

tutorial: crochet the bullion stitch

Bullion stitch tutorial by La Visch Designs

One of the many special crochet stitches is called the “bullion stitch”. This is a very decorative stitch, which can also be used to crochet flowers, jewelry or beautiful edges to projects.

In this post, I’ will show you how to crochet the bullion stitch. Please note that American crochet terminology is used.

The bullion stitch step by step

For this tutorial, I started with a small swatch in half double crochet (hdc).

Bullion stitch tutorial by La Visch Designs

1. Wrap the yarn loosely around your hook. How much time depends on how high you want the bullion stitch to be. Here I am making the bullion stitches in a hdc fabric, therefor I am wrapping the yarn seven times around my hook. When making bullion stitches in a double crochet fabric, wrapping 10 times may be better. It really depends on your individual gauge, though.

Bullion stitch tutorial by La Visch Designs

2. Insert the hook into the next stitch and pull up a loop.

Bullion stitch tutorial by La Visch Designs

3. Make a yarn over …

Bullion stitch tutorial by La Visch Designs

4. … and pull the yarn through all the loops on the hook. You will notice that this can be rather difficult when you have wrapped the yarn too tightly around the hook in step 1. This completes your first bullion stitch.

Bullion stitch tutorial by La Visch Designs

And this is how it looks when you’ve made multiple bullion stitches in between normal (in this case) half double crochet stitches.

Bullion stitch tutorial by La Visch Designs

Tips

As you may have noticed, it can be tricky to wrap the yarn loose enough around the hook in step 1. It can help to hold a thin knitting needle, crochet hook or yarn needle next to your hook while wrapping the yarn. Wrapping your yarn around both automatically means a looser wrap!

Also, use the right type of crochet hook! As you can see in the picture below, the tip of the green hook sticks out relative to the shaft of the hook. This makes it more difficult to pull a loop of yarn through multiple loops on the hook. With an in-line shaped hook like the bamboo one pictured below, both tip and shaft have the same thickness. This makes this type of crochet hook much better suited for making bullion stitches.

Bullion stitch tutorial by La Visch Designs

tutorial: crochet the bullion stitch Read More »

asymmetrical wedge shawl

Wedge by La Visch Designs

The asymmetrical wedge shawl has a distinct asymmetrical shape, setting it apart from more traditional crochet shawls. Make a fast, large and cozy shawl in an aran weight yarn as described here, or make it a scarf in a fingering weight yarn. Because this shawl is worked in a single piece from the tip up, it can easily be made in any size you want.

This pattern is written in American English crochet terminology.


Pay what you want: (minimum €6.50)

Add to cart


Size and finished measurements

Wingspan of 193 cm (76 inches) measured along the longest edge and a depth of 105 cm (41 inches), measured after blocking.

Difficulty

Techniques used in the Asymmetrical Wedge Shawl consist of fdc, ch, sc and dc stitches. Because of this the pattern is suitable for the advanced beginner.

Pattern details

  • Worked flat back and forth.
  • Gauge is not critical in this design. For the sample shawl: 10 sts and 5.3 rows = 10 cm / 4 inches in dc after wet blocking.
  • Pattern languages included: English and Dutch (Dit patroon omvat zowel een Nederlandse als een Engelse versie).
  • Digital PDF has 3 pages (A4 size).

Materials

  • Yarn: 550 m / 600 yds Garnstudio Drops Alaska (100% wool; 69 m (75 yds) / 50 g) in #11 Red. Substitute for any wool aran weight yarn with a plied structure for a similar result.
  • A size 6 mm (US J/10) crochet hook.
  • Yarn needle

asymmetrical wedge shawl Read More »

sedum shawl

Sedum Shawl by La Visch Designs

The Sedum Shawl is a lovely two-tone shawl with a striped body and delicate contrasting lace edging. Make it in the small size for a sweet kerchief or in one of the three larger sizes for a lovely elegant and warm cover-up.

This shawl is worked from the top-down in one piece, starting at the neck edge. The instructions for the border of the shawl are provided both fully charted and written out.

This pattern is written in American English crochet terminology.


Pay what you want: (minimum €6.50)

Add to cart


Size and finished measurements

This pattern includes 4 sizes: S (M, L, XL) with a wingspan of 126 (155, 200, 229) cm (50 (61, 79, 90) inches) and a depth of 60 (77, 100, 115) cm (24 (30, 39, 45) inches), measured after blocking. The shawl pictured is in size L.

Difficulty

Techniques used in The Sedum Shawl consist of sl st, sc, hdc, dc and ch st. Because of this the pattern is suitable for the advanced beginner.

Pattern details

  • Worked flat back and forth.
  • Gauge is not critical in this design. For the sample shawl: 14 sts / 9 rows = 10 cm (4 inches) over hdc, measured after blocking.
  • Pattern languages included: English and Dutch (Dit patroon omvat zowel een Nederlandse als een Engelse versie).
  • Digital PDF has 3 pages (letter size).

Materials

  • Yarn: Used in the sample: Ice Yarns Virgin Wool Deluxe (100% wool; 280 m (306 yds) / 100 g) in lilac and blue / petrol. Use yarn in DK weight in the following quantities:
    • MC – Lilac: 275 (445, 760, 1025) m or 300 (485, 835, 1120) yds.
    • CC – Blue / Petrol: 200 (275, 390, 490) m or 215 (305, 425, 535) yds. Used in the sample: Ice Yarns Virgin Wool Deluxe (100% wool; 280 m (306 yds) / 100 g) in lilac and blue / petrol.
  • Size 5.5 mm (US I/9) and size 6 mm (US J/10) crochet hooks.
  • Yarn needle
  • 2 removable stitch markers (optional)

sedum shawl Read More »

tutorial: crochet fringe

Making crochet fringe - a tutorial by La Visch Designs

It can be fun to decorate the edges of a scarf or shawl with fringe. The traditional way to make fringe consists of cutting yarn into equal lengths, bundle these and tie them to the edge of your work. I personally think the result can be very pretty, but rather a hassle to get it that way.

The fact is that I always have trouble to get all the pieces of wool to the same length. And when tying the yarn bundles together, everything shifts, making it very difficult to get an even result. In this post, I will show you an alternative way to attach lovely crochet fringe to a project.

You can directly crochet this fringe onto a scarf or shawl. This can of course also be a store-bought knit or crochet item. Also, you can follow this tutorial to make a fringe attached to a crocheted chain to sew on the item of choice as well. In this example, we will do the latter. These instructions are written in American English crochet terminology.

Crochet fringe step by step

1. As indicated, in this example, I will show you how to make a “loose” fringe attached to a crochet chain. To start, make a chain of the desired length.

Making crochet fringe tutorial

2. Insert your hook into that point of the item where you want to make the fringe. If this fringe is based on a loose chain, I think it looks best to insert the hook in the “bump” at the back of the chain stitch. Of course, you can insert the hook in the other parts of the stitch, but it will look slightly different.

Making crochet fringe tutorial

3. Next, pull up a loop and pull it through the loop already on your hook. Pull the loop out to the desired length. Here I have used a ruler, to make sure all fringes will be the same length.

Making crochet fringe tutorial

4. Then turn the hook around, it does not matter if you do this clockwise or counterclockwise. Just make sure you remain consistent with the direction of your entire project. Continue turning until the loop wants to fold back onto itself. In this example, that happened at about 25 twists. Make sure you make about the same number of twists for every fringe in your project to keep them looking alike.

Making crochet fringe tutorial

5. Next, fold back the loop onto itself. I often use my finger to ensure that the loop folds in the right spot.

Making crochet fringe tutorial

6. This will look something like this:

Making crochet fringe tutorial

7. Finish your first fringe by securing it with a slip stitch in the same stitch you started it in.

Making crochet fringe tutorial

8. Repeat steps 2 to 7 until the complete edge or chain is worked. The result will look something like this:

Making crochet fringe tutorial

Enjoy embellishing your projects with this lovely crochet fringe!

tutorial: crochet fringe Read More »

cherry blossoms stole

cherry blossoms stole

In the April 2016 issue of I Like Crochet it is all about the change of seasons: Melting icicles, green grass, flowers emerging from once-frozen soil—Spring is here! This issue is filled with light and lacy projects for that transition between cool-to-warm weather.

For the “fantastic florals” section in this issue, I have designed the Cherry Blossoms Stole. Pictures courtesy of I like Crochet Magazine.

This lovely stole features a dainty floral lace pattern, perfect to dress up any outfit. Wear it as a shoulder wrap to show off the full stunning flower pattern, or as a simple lacy scarf. Take advantage of a beautiful fingering weight yarn with long color runs, as pictured, for a truly spectacular look.

This pattern is now also available through La Visch Designs!

cherry blossoms stole

cherry blossoms stole Read More »

paris pillbox hat & cowl

Paris Pillbox by La Visch Designs

Originally published as an exclusive design inside Issue #20 of Happily Hooked Magazine, the Paris Pillbox Hat & Cowl is now also available directly from La Visch Designs! The hat in this set is in the pillbox shape reminiscent of the Forties and Fifties of the previous century. A most stylish way of keeping your head warm! To complete the set there is also a matching cowl.

The Paris Pillbox Hat and Cowl are worked from the top down and feature an eye-catching textured stitch pattern.

This pattern is written in American English crochet terminology.


Pay what you want: (minimum €6.50)

Add to cart


Size and finished measurements

Hat: Sizes S (M, L): 48.5 (58, 65) cm (19 (23 ¾, 26 ½) inches) circumference.
Cowl: Sizes S (M, L): 67 (84, 101) cm (26 (33, 40) inches) circumference and 20 cm (8 inches) high.

Difficulty

Techniques used consist of puff stitches, dc, dc increases, sc, bphdc and ch stitches. Because of this, the pattern is suitable for the intermediate crocheter.

Pattern details

  • Worked in the round
  • Gauge Hat: 14 sts / 11.4 rounds = 10 cm / 4 inches measured over dc in the crown of the hat.
  • Gauge Cowl: Gauge is not critical in this cowl design. For the sample cowl: 12.6 sts / 9 rounds = 10 cm (4 inches) in stitch pattern (after blocking).
  • Pattern language is English
  • Digital PDF has 4 pages (letter size)

Materials

  • Yarn: Garnstudio DROPS Alaska (100% wool; 69 m (75 yards) / 50 g) in red 01 in the following quantities:
    Hat: 94 (114, 135) m (103 (125, 148) yds) or 2 (2, 2) balls of yarn.
    Cowl: 175 (220, 265) m (190 (240, 285) yds) or 3 (4, 4) balls of yarn.
    Substitute for any aran weight yarn for a similar result.
  • Crochet hook Hat: 5 mm / US # H-8 (or size to get gauge).
  • Crochet hook Cowl: 6 mm / US # J-10.
  • Yarn needle
  • 1 removable stitch marker to indicate the end of rounds (optional)

paris pillbox hat & cowl Read More »