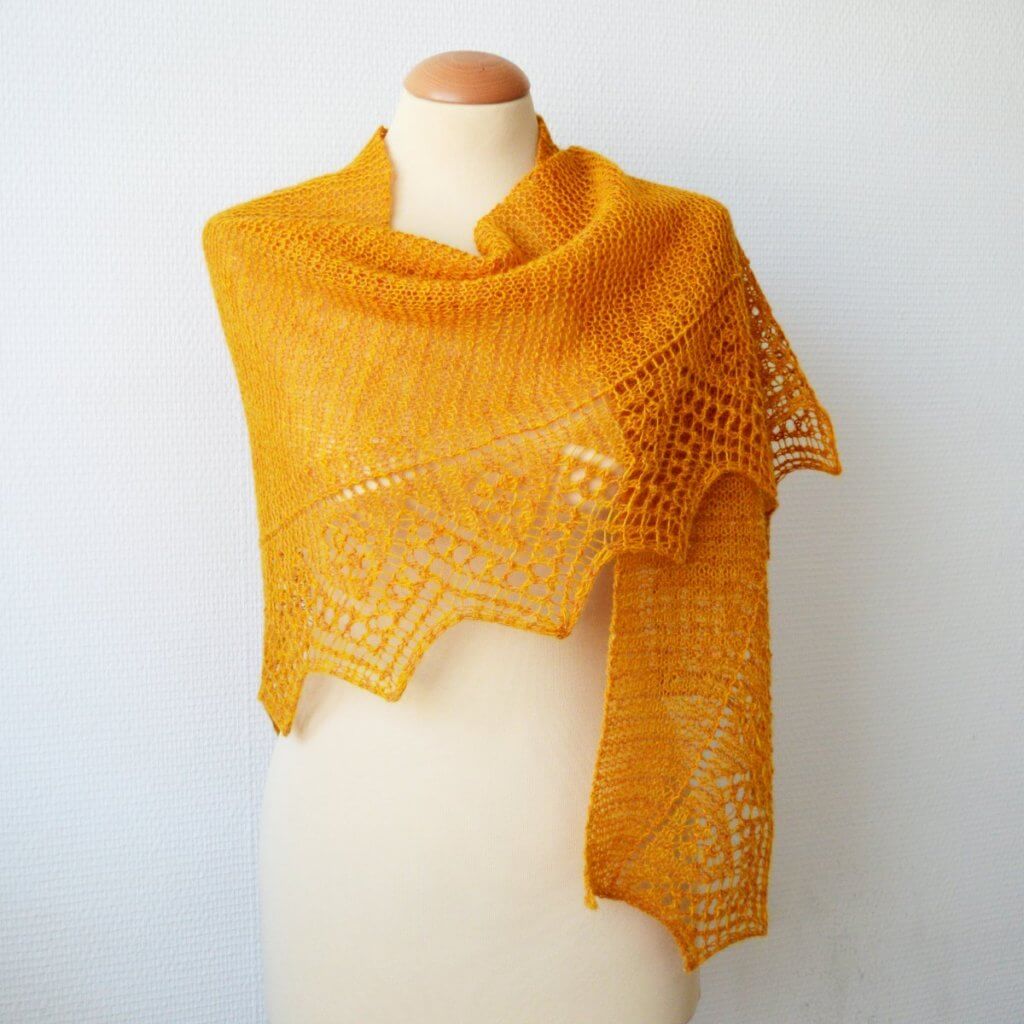
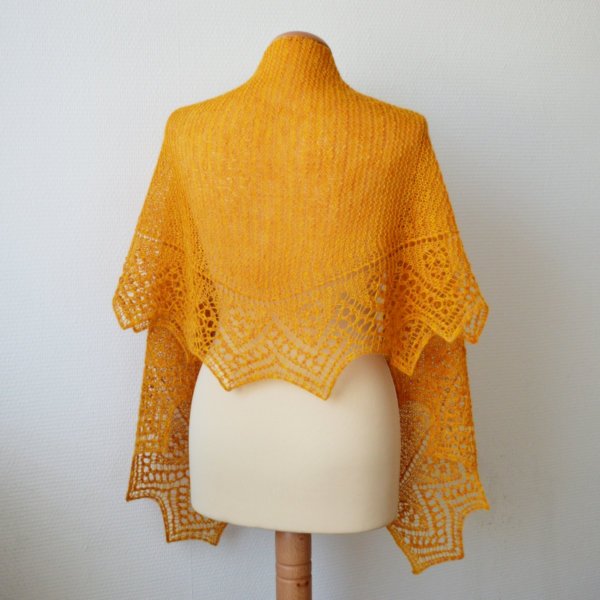
Kurkuma is a shallow, triangle scarf, knit sideways. This design features lace patterning in the tradition of the Shetland isles. The triangle edging is worked at the same time as the body of the shawlette.
Worked at a loose gauge, Kurkuma is a lovely and airy layering piece.
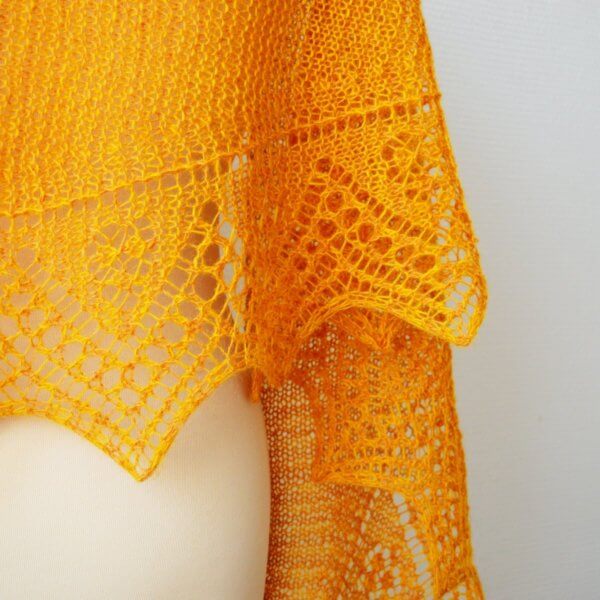
The pattern contains both fully written out as well as charted instructions for the lace. The lace in the
border of the shawl is true lace knitting, worked on both wrong and
right side rows.
Pay what you want: (minimum €6.50)
€
Difficulty level
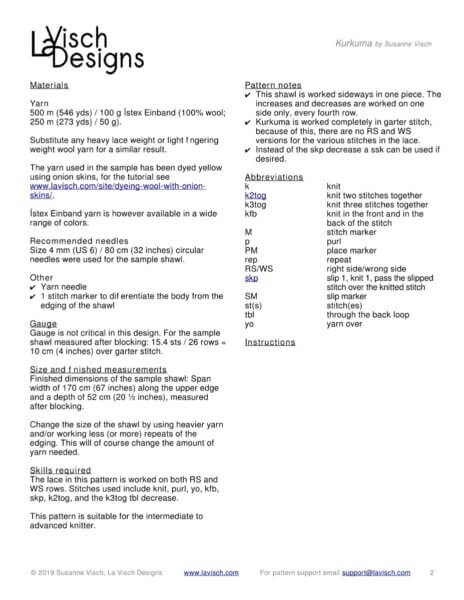
The lace in this pattern is worked on both RS and WS rows. Stitches used include knit, purl, yo, kfb, skp, k2tog, and the k3tog tbl decrease.
This
pattern is suitable for the intermediate to advanced knitter.
Sizes and finished measurements
Finished dimensions of the sample shawl: Span width of 170 cm (67 inches) along the upper edge and a depth of 52 cm (20 ½ inches), measured after blocking.
The size of this shawl is, however, easily adjusted.
Pattern details
Gauge: Approx. 15.4 sts / 26 rows = 10 cm (4 inches) over garter stitch, after blocking. Gauge is not critical in this design.
Pattern languages included: English and Dutch (Dit patroon omvat zowel een Nederlandse als een Engelse versie)
Digital PDF has 4 pages for the English version and 5 for the Dutch version (letter size)
Materials
Yarn: 500 m (546 yds) / 100 g Ístex Einband (100% wool; 250 m (273 yds) / 50 g). Substitute any lace weight or light fingering weight wool yarn for a similar result. The yarn used in the sample has been dyed yellow using onion skins (click for the tutorial!). Ístex Einband yarn is however available in a wide range of colors.
Size 4 mm (US 6) / 80 cm (32 inches) circular needles.
Yarn needle.
1 stitch marker to differentiate the body from the edging of the shawl.
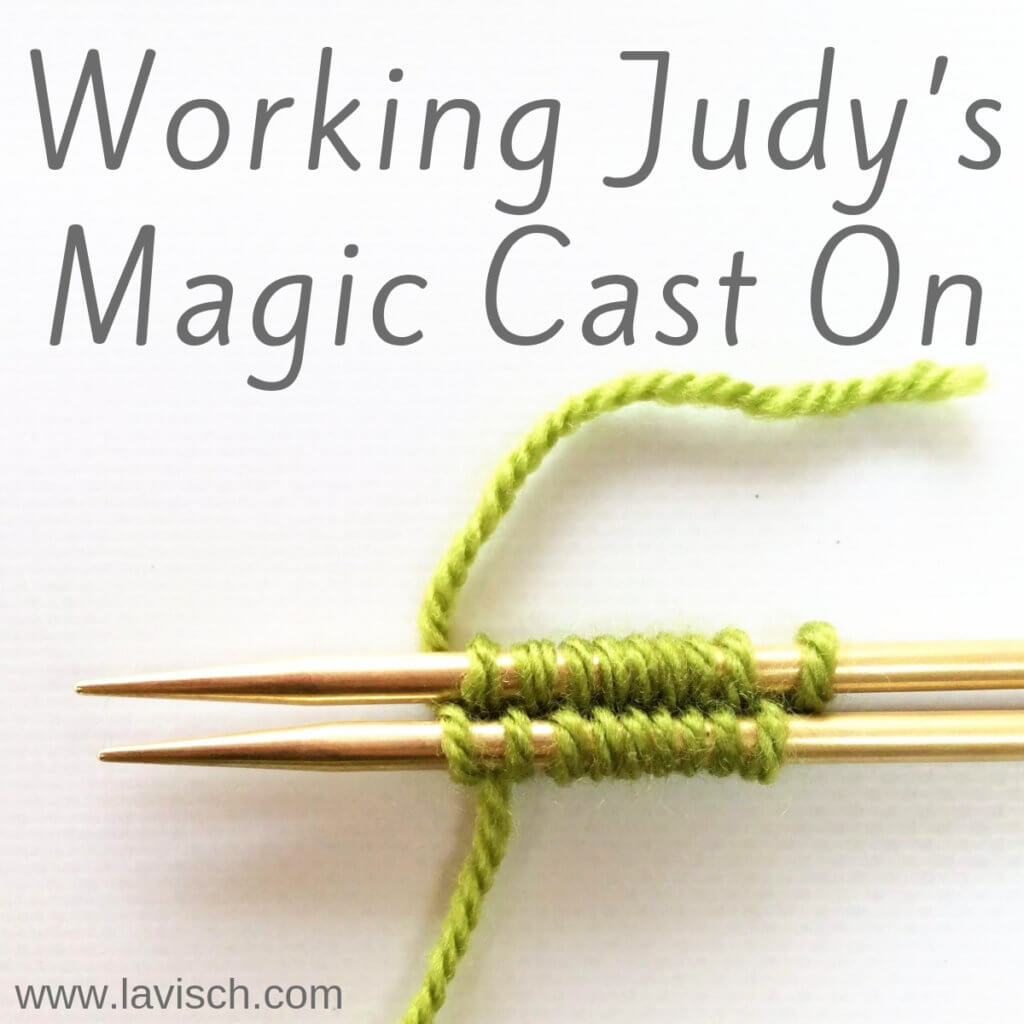
Perhaps you’ve heard about Judy’s Magic Cast On: a truly magic and invisible cast on for toe-up socks. This cast on was first devised by Judy Becker and shared in her article on Knitty. It’s a very clever cast on, as it creates a truly seamless start of your work. As Judy shares in her article, this cast on can be used for a wide range of projects and not just for socks. It can be used for anything that requires knitting in the round and a neat, seamless start.
Since I’m such a fan of this technique, I’m giving you my take on this cast on in this tutorial.
Materials used
Yarn: * Paintbox Yarns Simply DK, a good value, good quality 100% acrylic yarn, in the color 128 Lime Green.
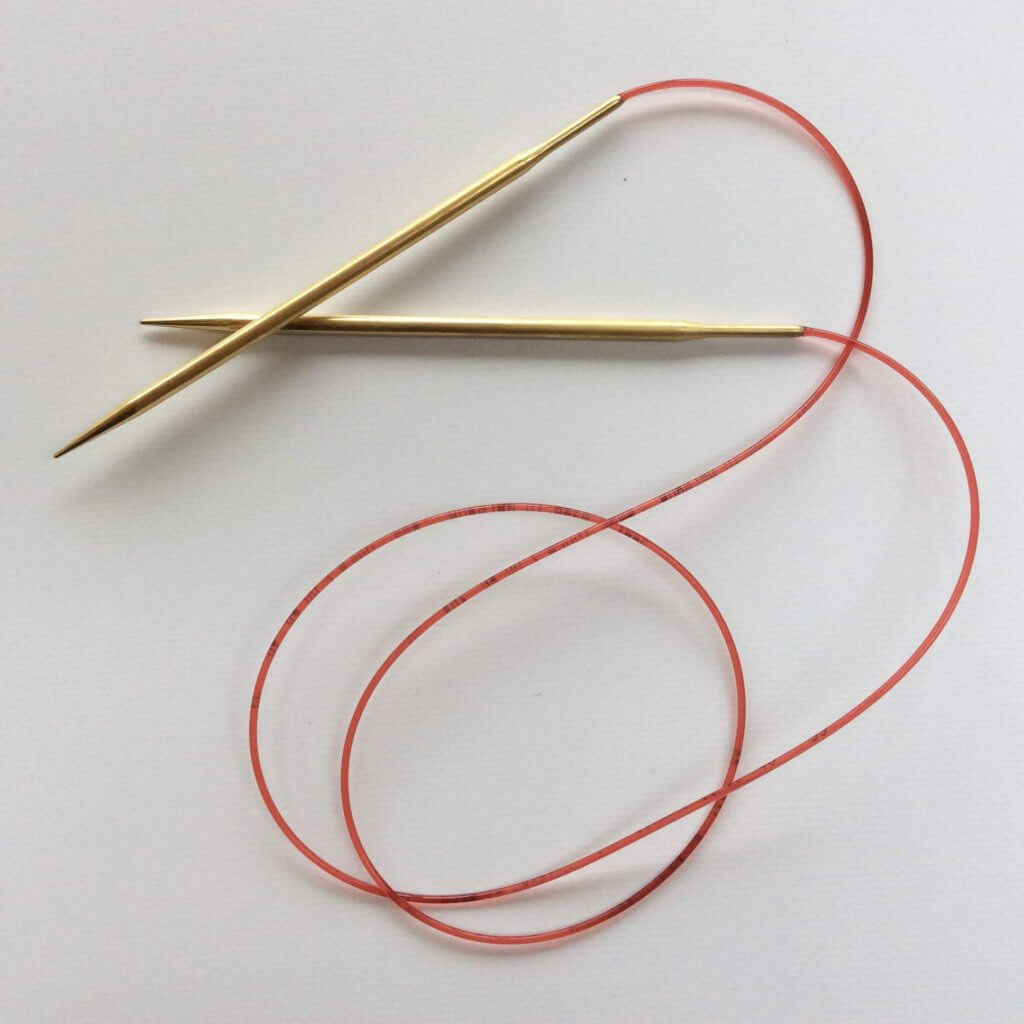
Needles: * Addi Lace Circular Needles, in this tutorial I used the 4 mm (US 6) size with a cable length of 100 cm (40 inches). I would like to advise using at least a cable length of 80 cm (32 inches) to facilitate magic loop knitting.
Working Judy’s Magic Cast On step by step
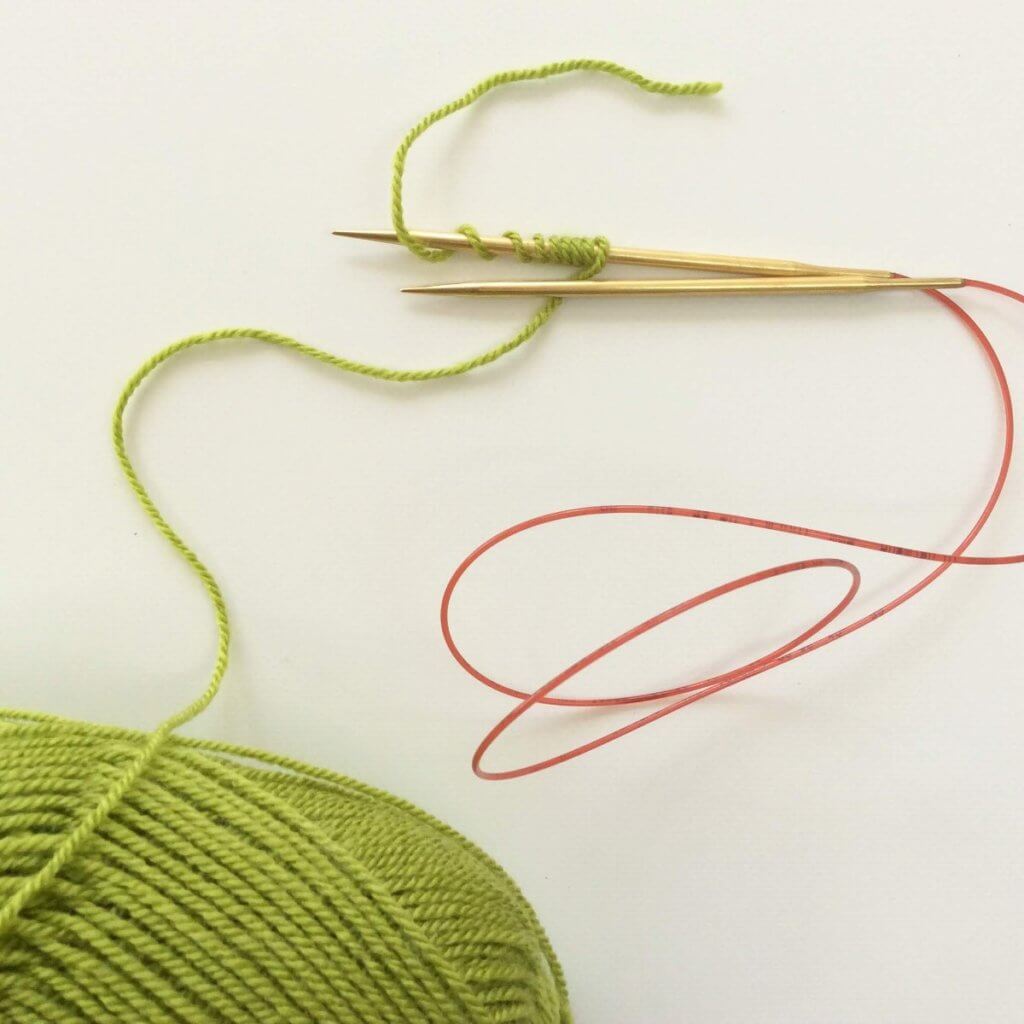
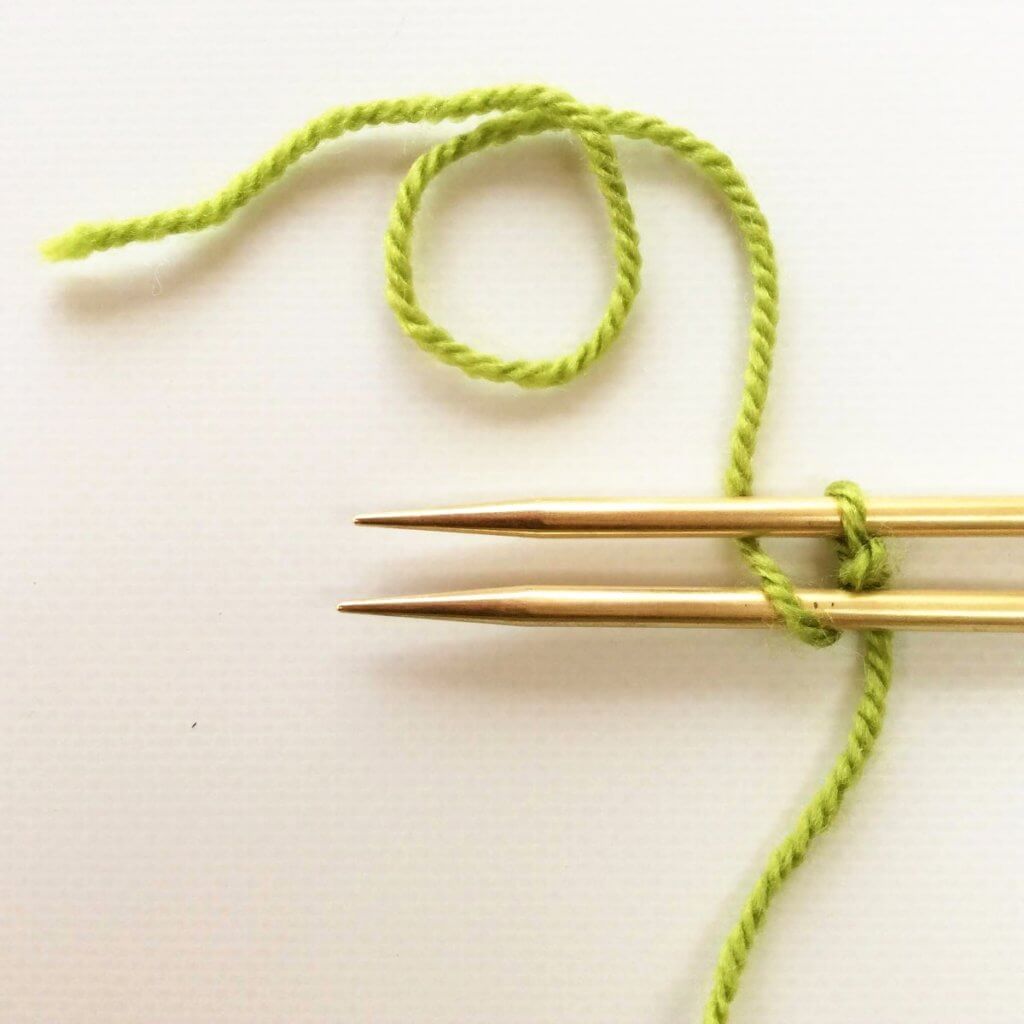
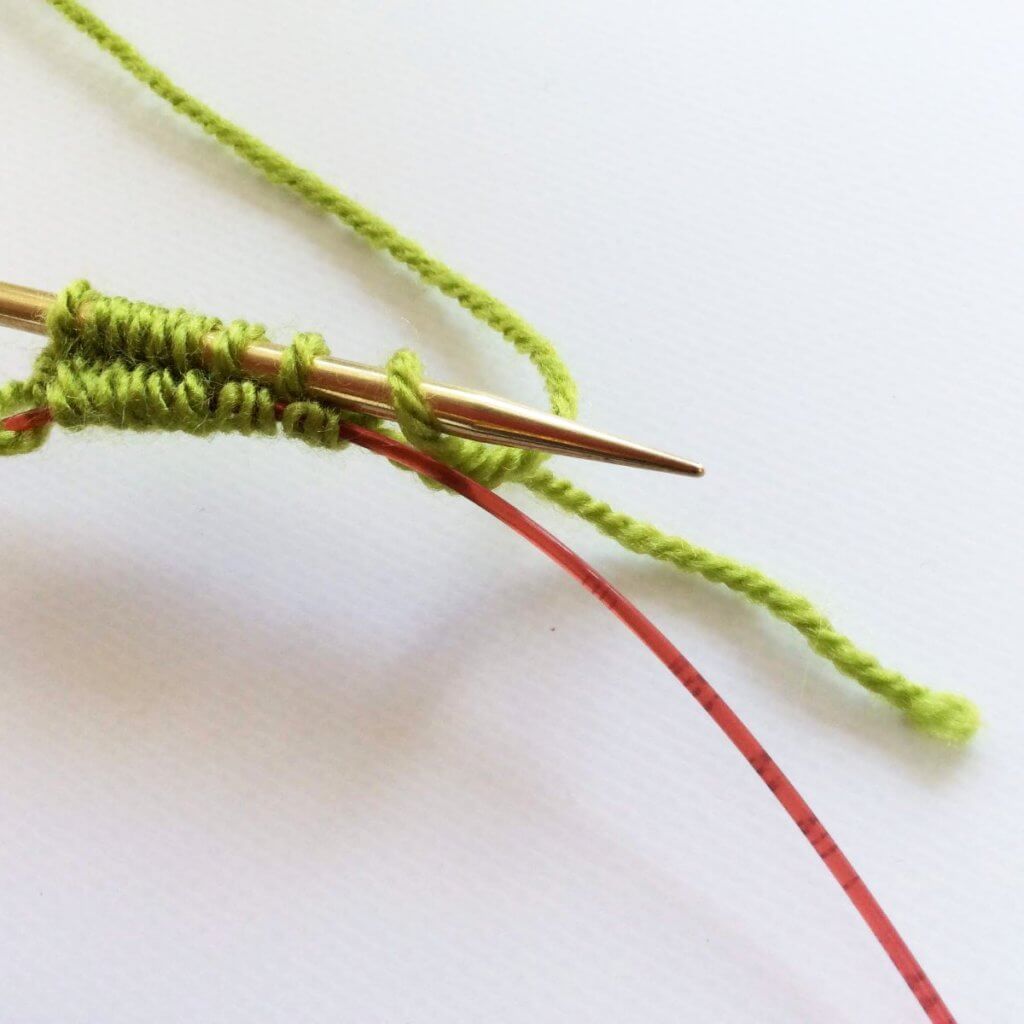
1. This cast on is worked with both the yarn tail and the working yarn. This means, that to start, we need to estimate a sufficient length of yarn tail. One method to do this is to wrap the yarn around your needle once for every stitch to cast on, and then give yourself approx. 15 cm / 6 inches extra so you’ll have enough to weave in later.
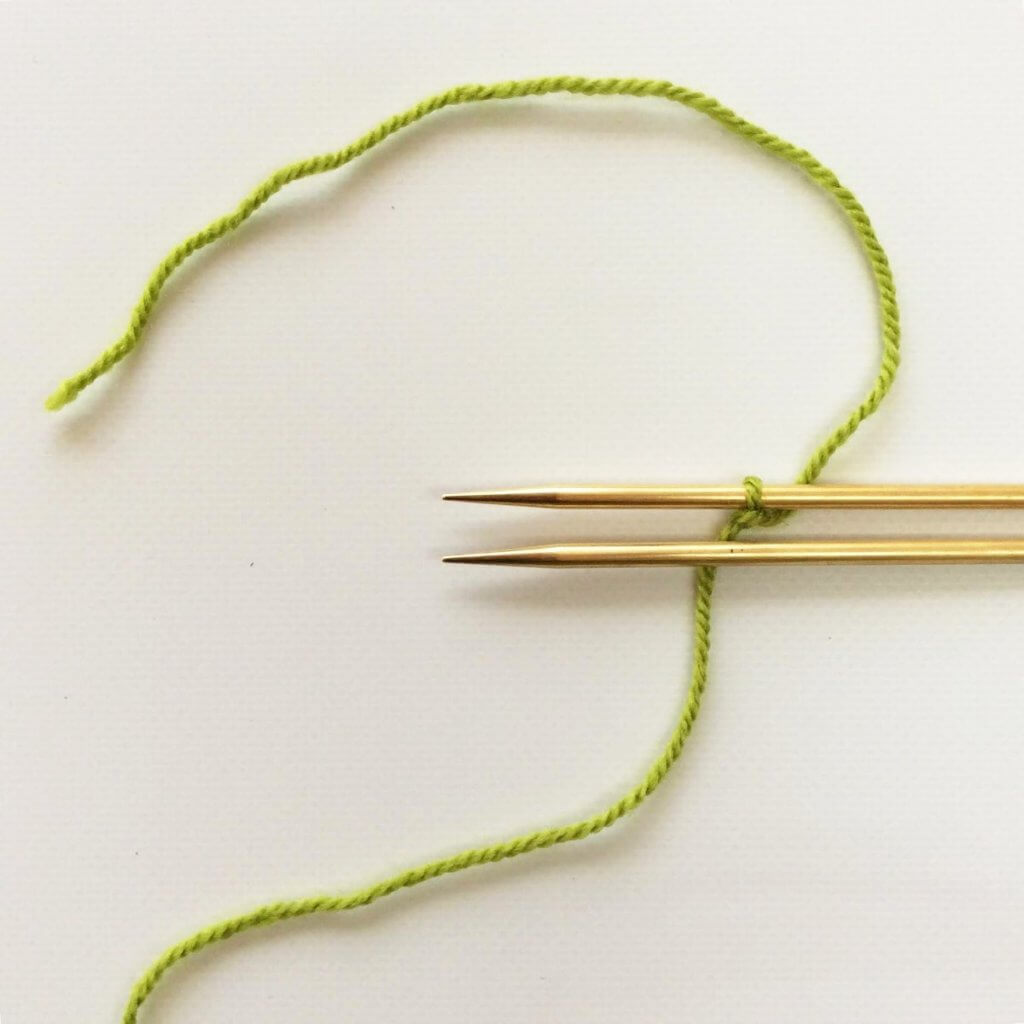
2. Make a slipknot leaving a yarn tail as determined in the previous step and place it around the top needle. Pull to tighten this first loop/cast on stitch. Arrange the yarn in such a way, that the yarn tail is above the top needle and the working yarn is below the bottom needle as pictured.
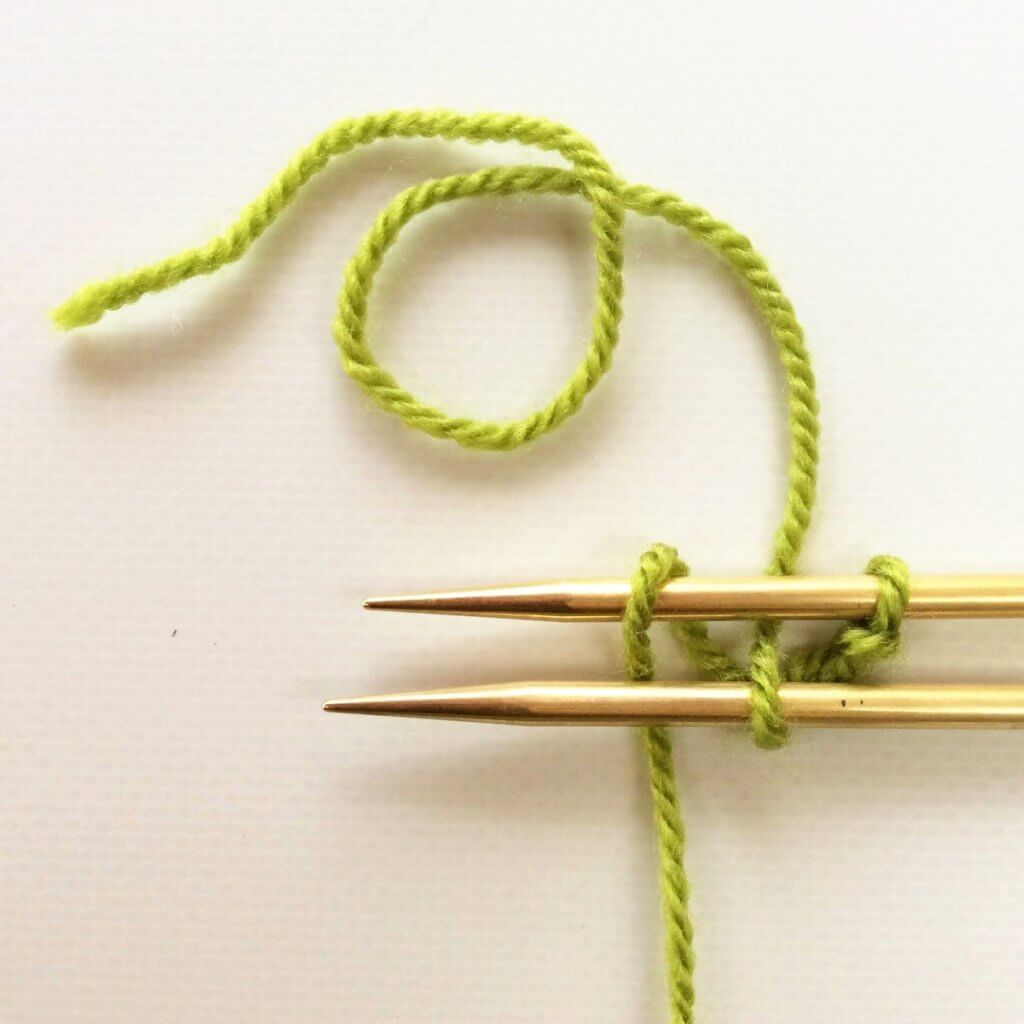
3. Now move the yarn tail downwards, under and then over the bottom needle and next underneath the top needle to bring it back to its starting position. You now have cast on a loop on the bottom needle.
4. Next, take the working yarn and move it under and then over the top needle and next underneath the bottom needle to bring it back to its starting position. You now have cast on a loop on the top needle.
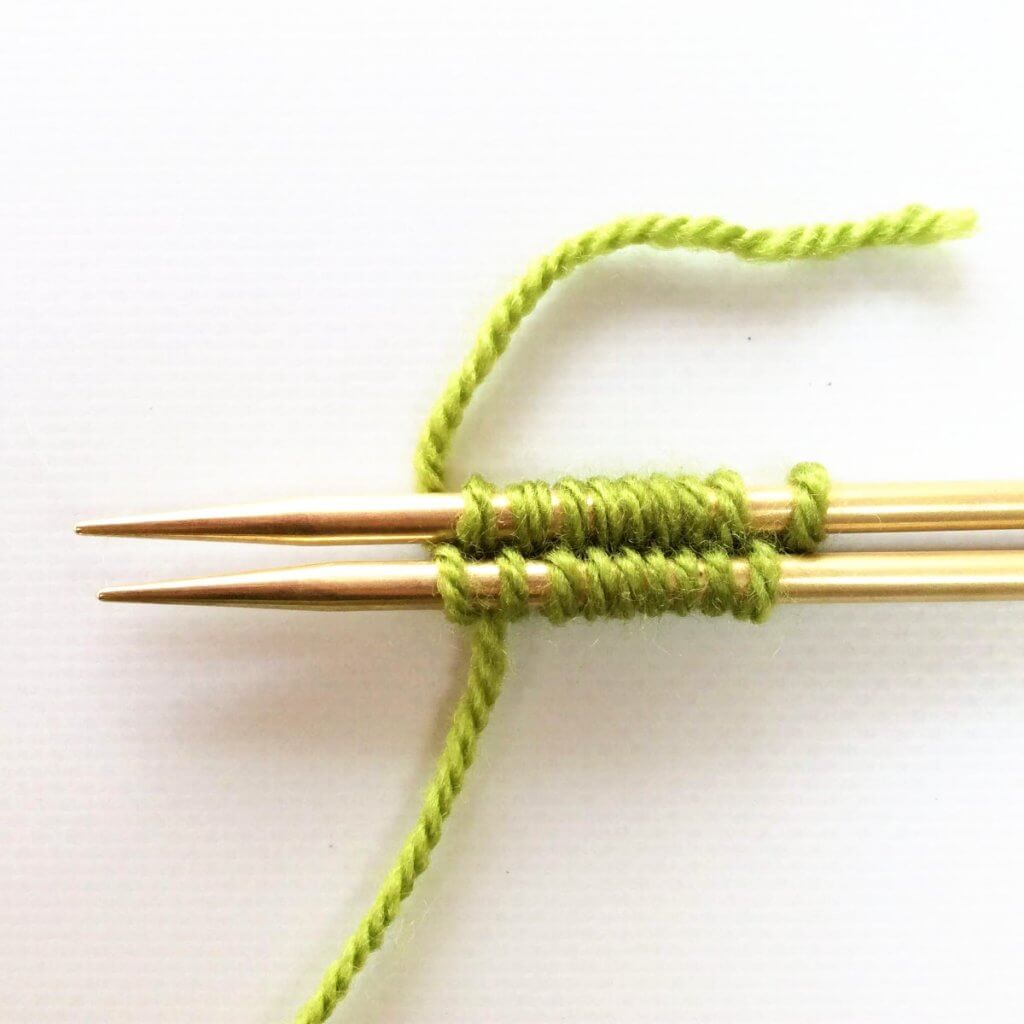
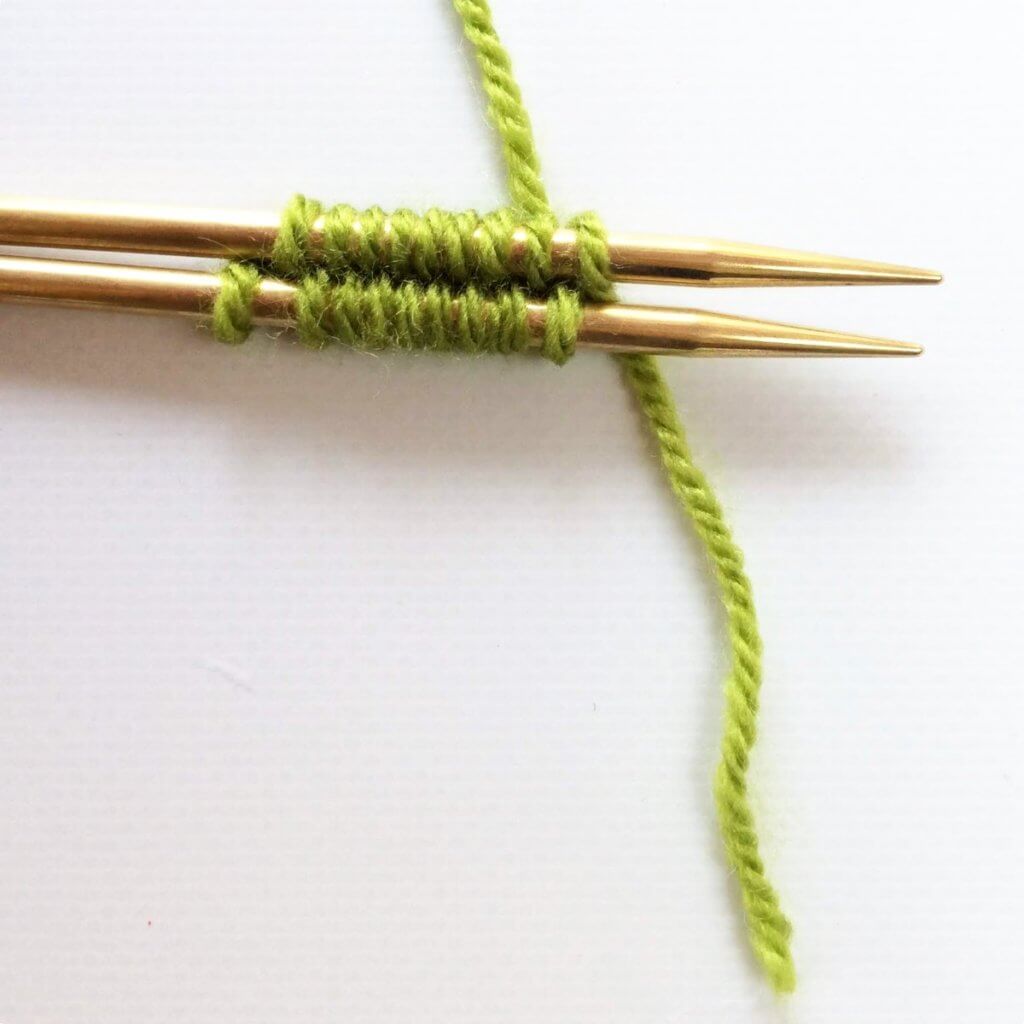
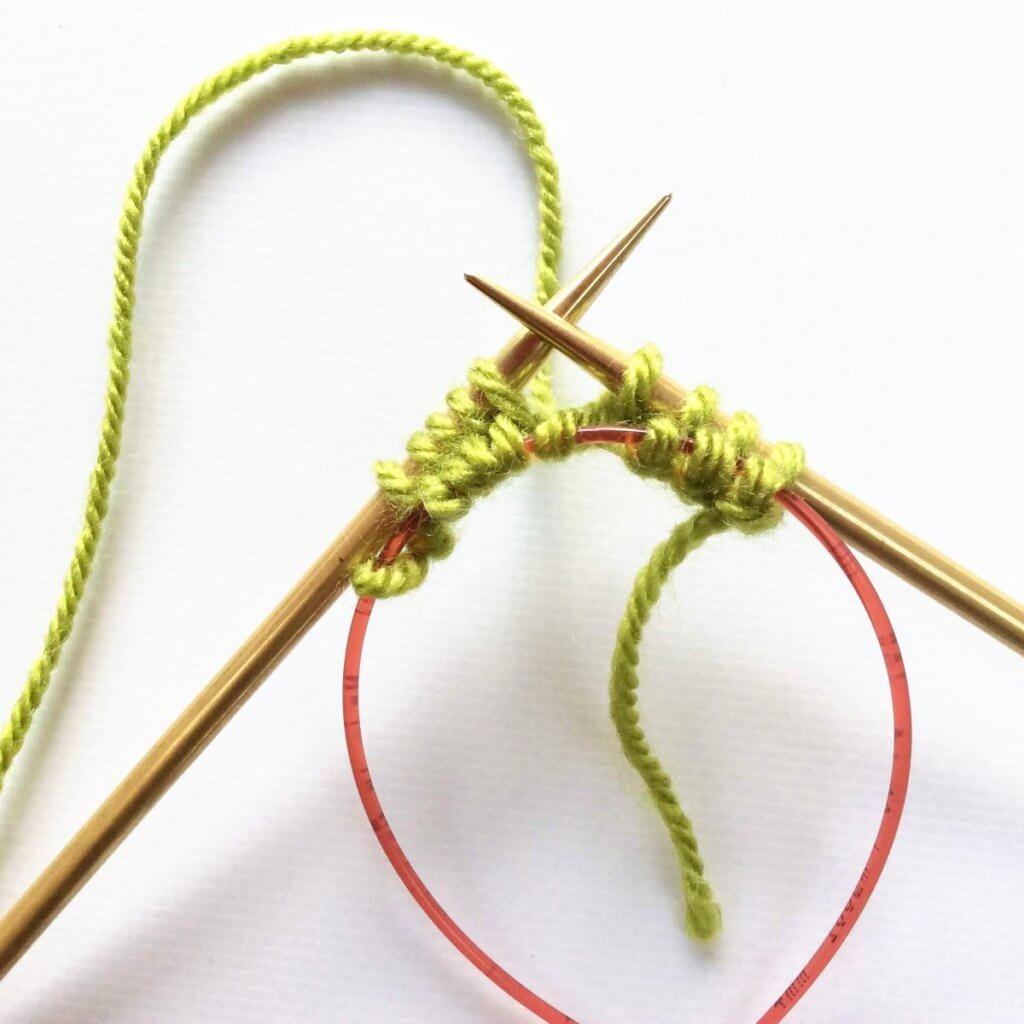
5. Repeat steps 3 and 4 until you’ve cast on the required number of stitches. Take care not to tighten these stitches too much, since this will encourage a little bump to form on each side of the cast on stitches. In this picture, a total of 18 stitches, 9 stitches per needle, have been cast on. (And yes, I really should have used a slightly longer yarn tail….)
Working the first round after the cast on
There are some peculiarities with the first round after the stitches are cast on using Judy’s Magic Cast On. Read on to find out more!
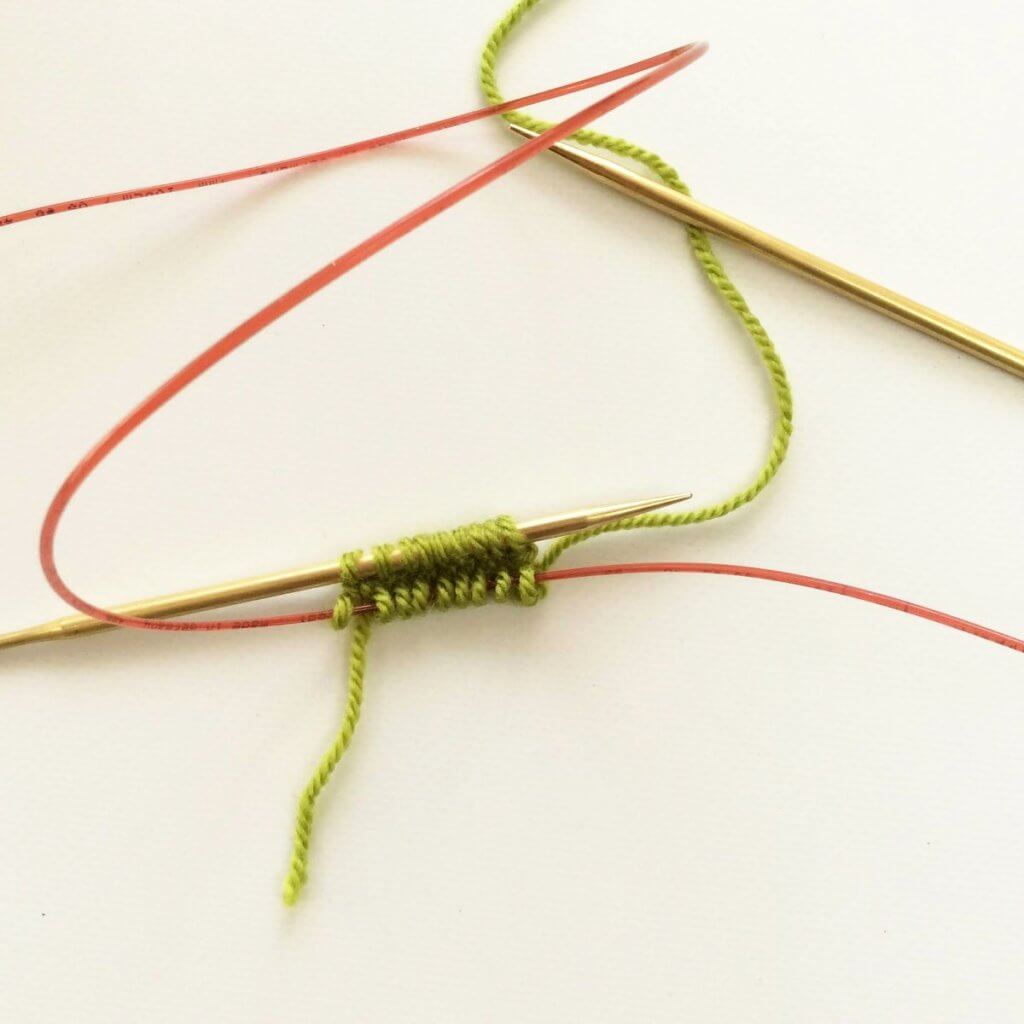
1. Turn the needles so that the bottom needle is now on top and ready to serve as your main (left-hand) needle.
2. Pull out the other needle to place its stitches on the cable and to use the tip as your working (right-hand) needle to knit into all the stitches on the main needle, magic loop style. Make sure that the yarn tail lies between the working yarn and the main needle. This way you can lock the yarn tail in place once you start knitting.
3. Knit the stitches on the main (left-hand) needle. If the first stitch loosens up a bit, just tighten it back up by softly pulling the yarn tail.
4. Next, turn your work so that the working yarn is on the right again.
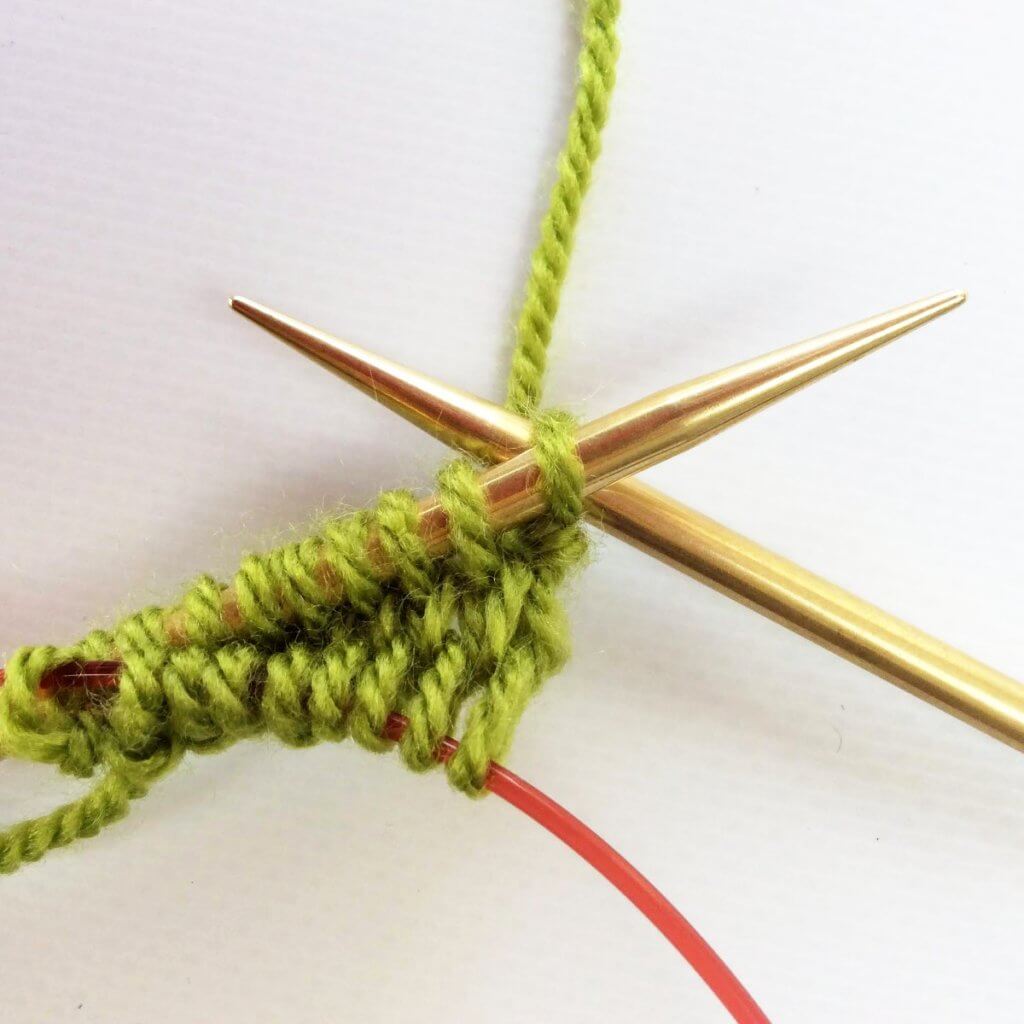
5. Pull gently on the left-hand cable loop to pull the needle into the stitches and the former bottom needle is now on top and ready to serve as your main (left-hand) needle.
6. Likewise, pull out the other needle to place the stitches just worked on the cable, and to use the tip as your working (right-hand) needle to knit into all the stitches on the main needle, magic loop style.
7. Work the second set of the cast on stitches. Only this time, knit them through the back loop to correct their stitch mount.
The result
Once all the above steps are followed, this is the result. You’re now ready to continue with your knitting in the round (using magic loop) as described in your pattern.
And this is how to work Judy’s Magic Cast On and the first round after casting on!
Thanks to my Patreon supporters for bringing you this freebie! Creating quality patterns and tutorials is a lot of work and resource-intensive. However, I find it important to give you free content like this tutorial. Thanks to the generous support of my Patreon supporters, I can make it happen. Thank you, patrons! Click here to join, or click here to read more about La Visch Designs on Patreon.
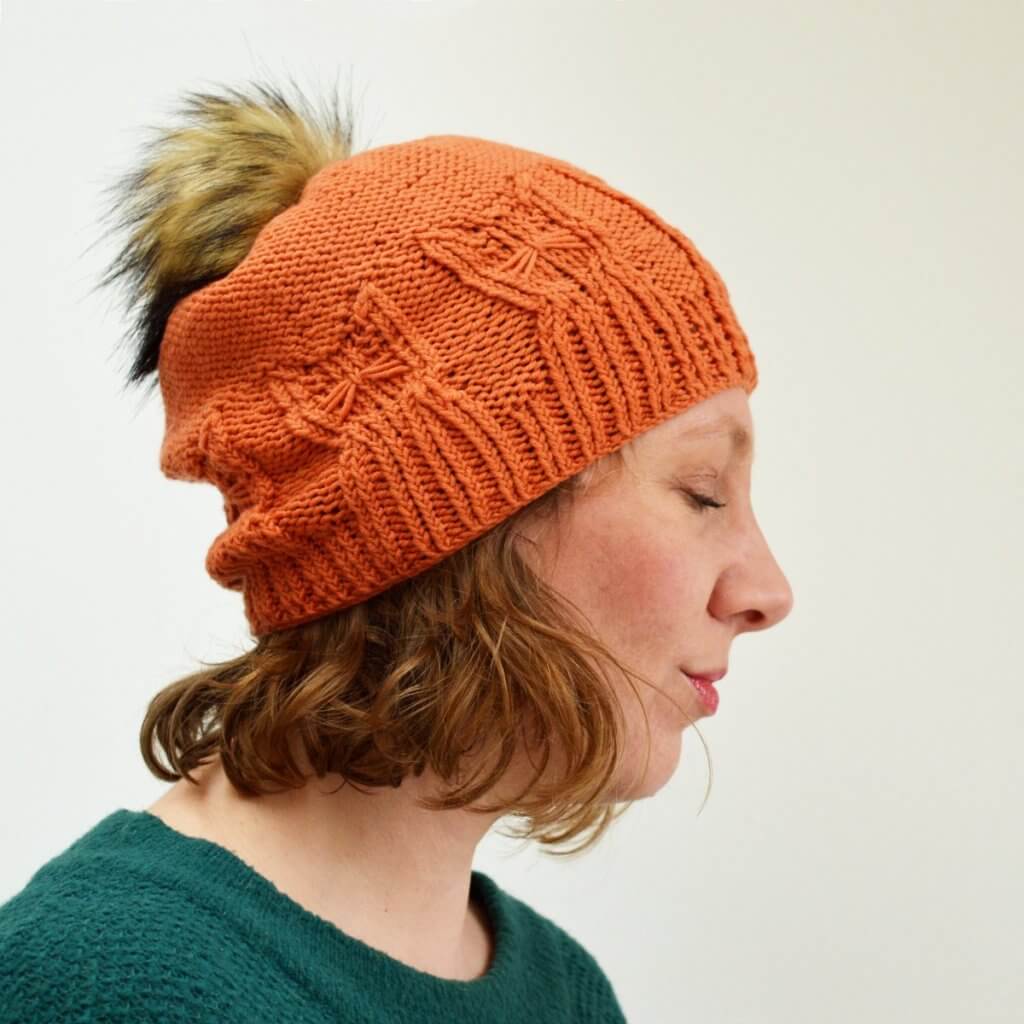
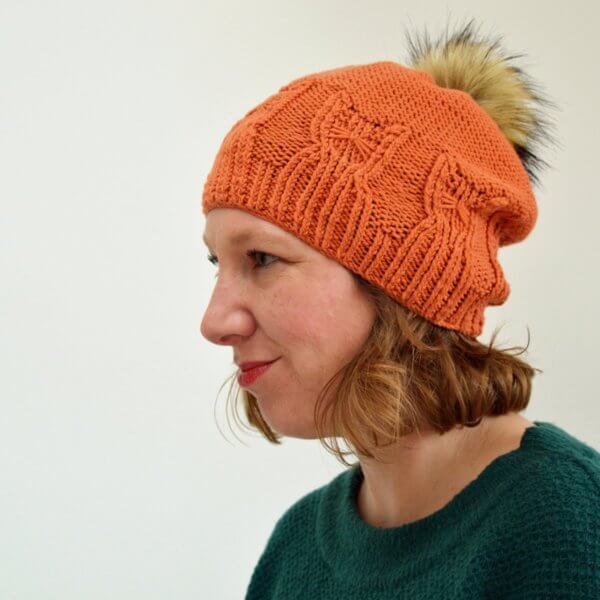
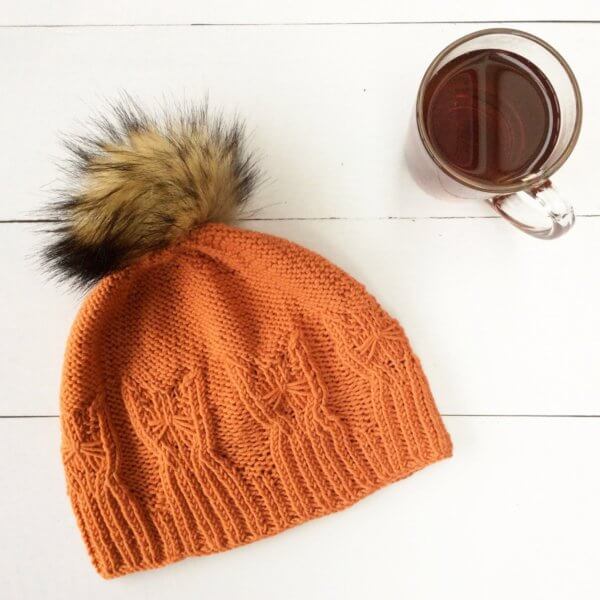
Are you a cat lover? I know I am! I love to surround myself with those furry critters and enjoy their soothing purr. Kitties All Around is a cute hat with cables and texture to create a kitty cat motif. Twisted stitches are worked to make the motif “pop” from the reverse stockinette background.
This pattern contains instructions for 4 sizes, ranging from child to adult. The Kitties All Around hat is seamless and knitted from the bottom up. The instructions for the cat motif are provided both charted and written out.
Pay what you want: (minimum €4.90)
€
Difficulty level
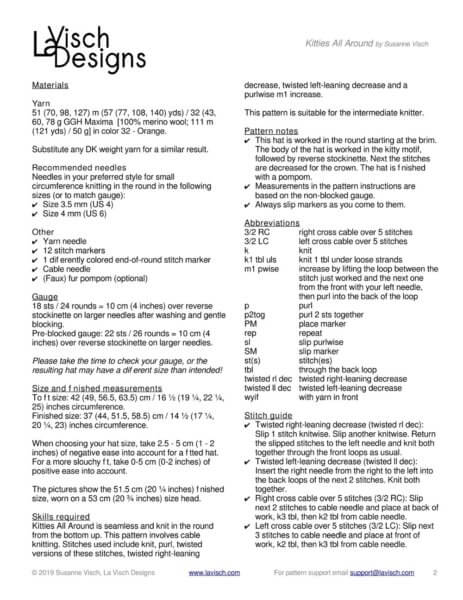
Kitties All Around is seamless and knit in the round from the bottom up. This pattern involves cable knitting. Stitches used include knit, purl, twisted versions of these stitches, twisted right-leaning decrease, twisted left-leaning decrease, and a purl wise m1 increase.
This pattern is suitable for the intermediate knitter.
Sizes and finished measurements
To fit size: 42 (49, 56.5, 63.5) cm / 16 ½ (19 ¼, 22 ¼, 25) inches circumference.
Finished size: 37 (44, 51.5, 58.5) cm / 14 ½ (17 ¼, 20 ¼, 23) inches circumference.
When choosing your hat size, take 2.5 – 5 cm (1 – 2 inches) of negative ease into account for a fitted hat. For a more slouchy fit, take 0-5 cm (0-2 inches) of positive ease into account. The pictures show the 51.5 cm (20 ¼ inches) finished size, worn on a 53 cm (20 ¾ inches) size head.
Pattern details
Kitties All Around is written for a gauge of approx. 18 sts / 24 rounds = 10 cm (4 inches) over reverse stockinette on larger needles after washing and gentle blocking.
Pattern languages included: English and Dutch (Dit patroon omvatzoweleen Nederlandse alseen Engelse versie)
Digital PDF has 4 pages (letter size)
Materials
Yarn: 51 (70, 98, 127) m (57 (77, 108, 140) yds) / 32 (43, 60, 78 g GGH Maxima [100% merino wool; 111 m (121 yds) / 50 g] in color 32 – Orange. Substitute any DK weight yarn for a similar result.
Knitting needles in your preferred style for small circumference knitting in the round in the following sizes (or to match gauge): Size 3.5 mm (US 4) and Size 4 mm (US 6).
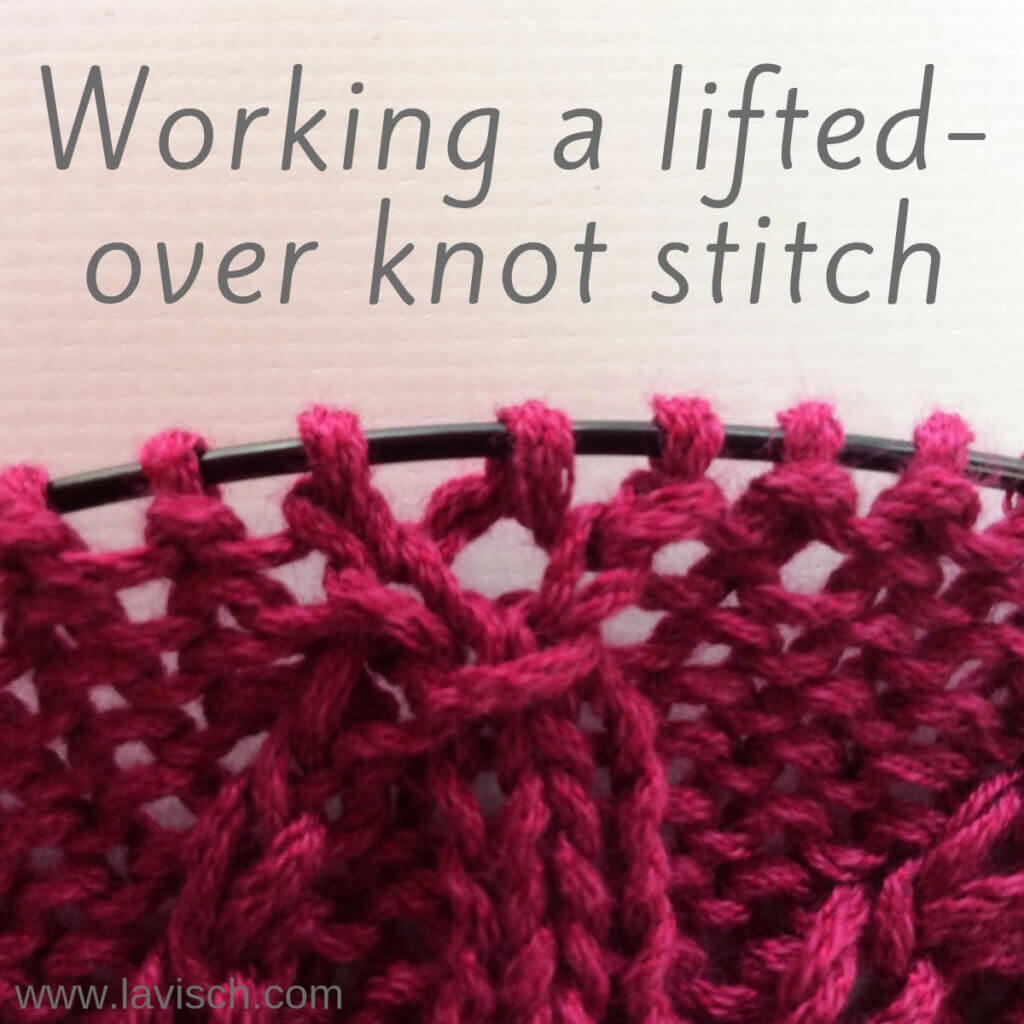
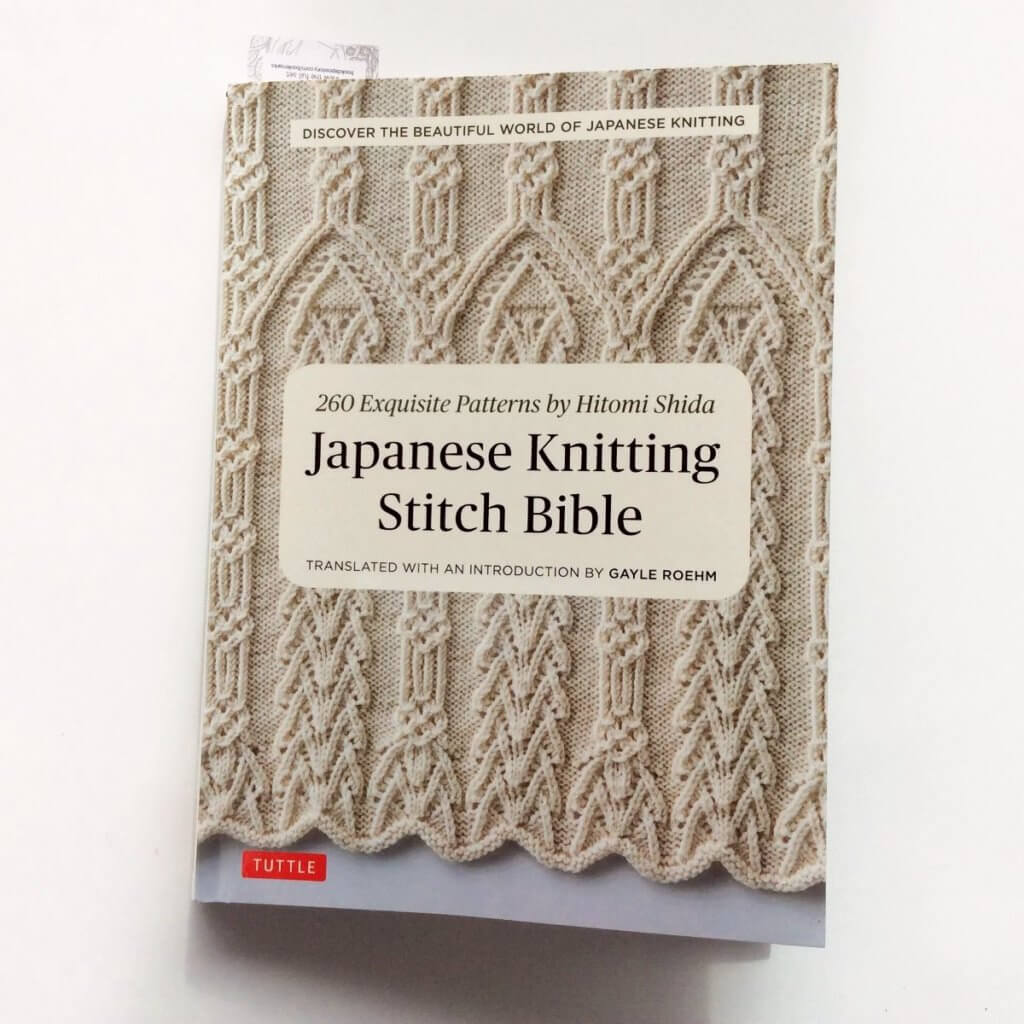
I find myself working more and more of the lovely intricate stitch patterns in the Japanese Knitting Stitch Bible by Hitomi Shida. In these stitch patterns, there are a lot of types of stitches that I personally haven’t encountered before. A good reason to make some new tutorials! In this post, I’ll go into how to work a lifted-over knit stitch.
There are, of course, many variations of this type of stitch. They can be worked over 3 to 5 stitches and in any combination of purl and knit stitches, either regularly or through the back loop. What they all have in common, however, is that one of the stitches is lifted over the others, after which the remaining stitches are worked, in combination with a yarn over to bring the number of stitches back to the original number. Characteristic of the lifted-over knot stitch is the horizontal bar that is created by the lifted-over stitch.
In this tutorial I’ll explain the version of the lifted-over knot stitch that is explained in the Japanese Knitting Stitch Bible by the following text:
Insert tip of RN into the third st; lift it up and over the first two sts and let it drop; k, yo, k.
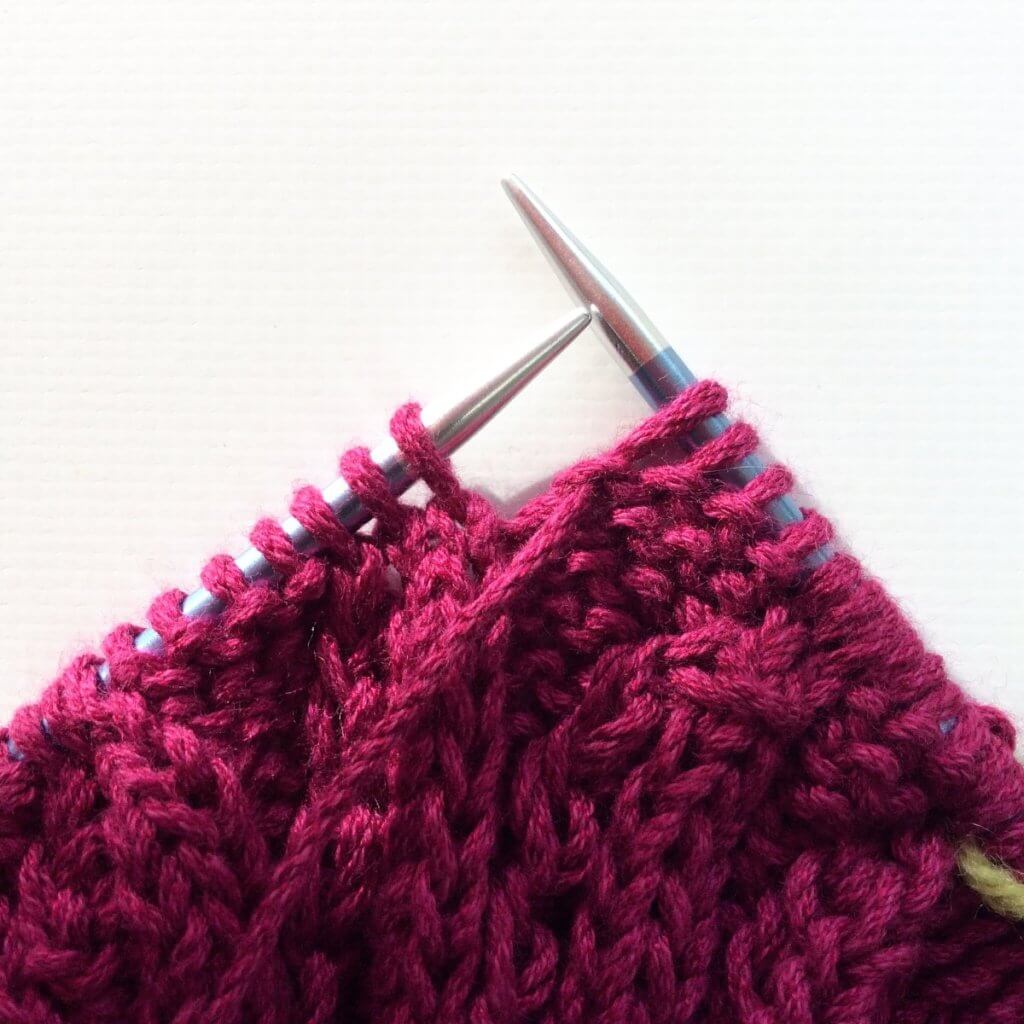
This particular version is worked over 3 stitches, the 3 that are near the tip of the left-hand needle in the picture below.
Working a lifted-over knot stitch step by step
1. To start, insert your right-hand needle purl wise into the third stitch from the tip of the left-hand needle.
2. Lift this stitch up and pull it over the two stitches nearer to the tip as well as over the needle tip itself. Be careful, this action may pull the other two stitches along and off the needle.
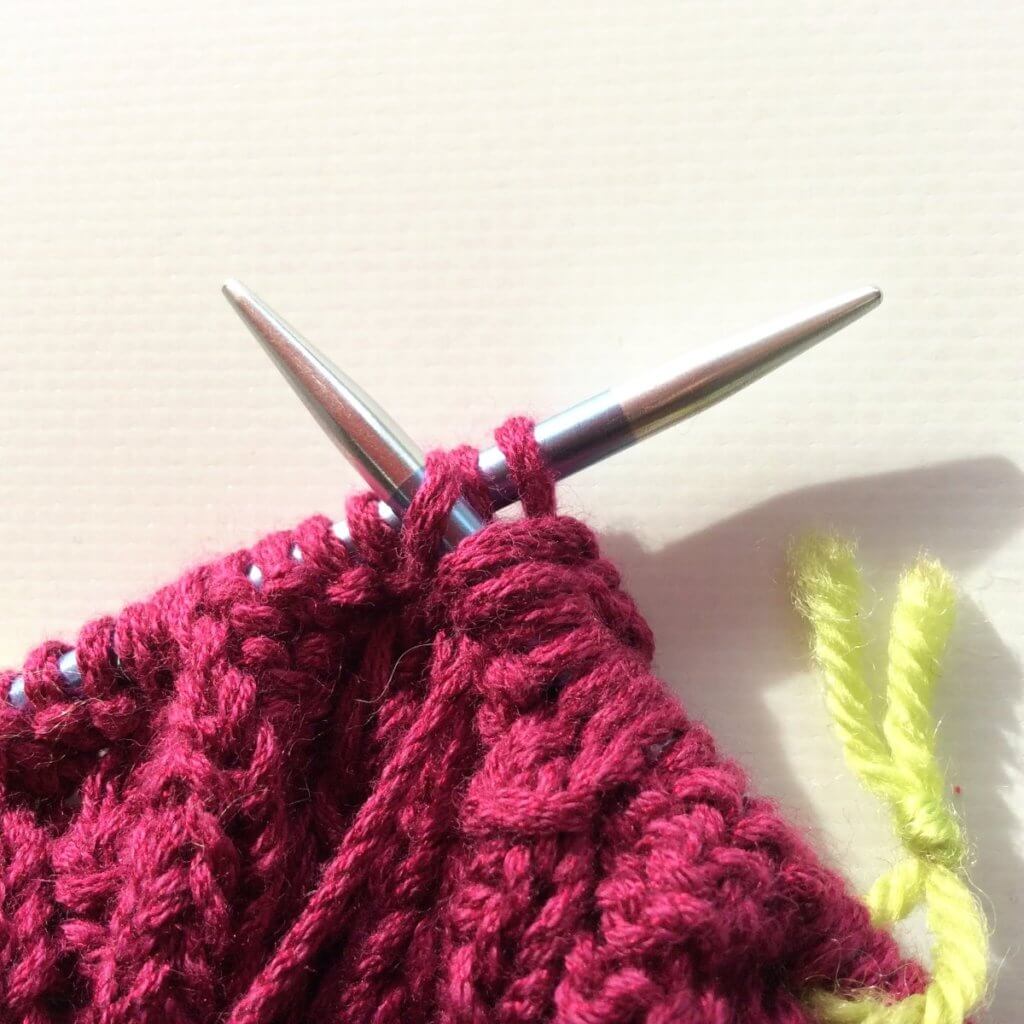
3. Now knit one stitch.
4. Yarn over…
5. … and work another knit stitch to complete the lifted-over knot stitch.
6. In the below picture another row is worked. This reveals the true appearance of this lifted-over knot stitch!
On a side note, in this piece of knitting is more going on than just the lifted-over knot stitch. Tutorials for these other types of stitches will follow!
The yarn used in this tutorial is Debbie Bliss “Piper” in Magenta. It’s a yarn with a composition of 50% cotton and 50% viscose. As you can see, it has a great stitch definition! Perfect for trying out those intricate Japanese stitch patterns.
Thanks to my Patreon supporters for bringing you this freebie! Creating quality patterns and tutorials is a lot of work and resource-intensive. However, I find it important to give you free content like this tutorial. Thanks to the generous support of my Patreon supporters, I can make it happen. Thank you, patrons! Click here to join, or click here to read more about La Visch Designs on Patreon.
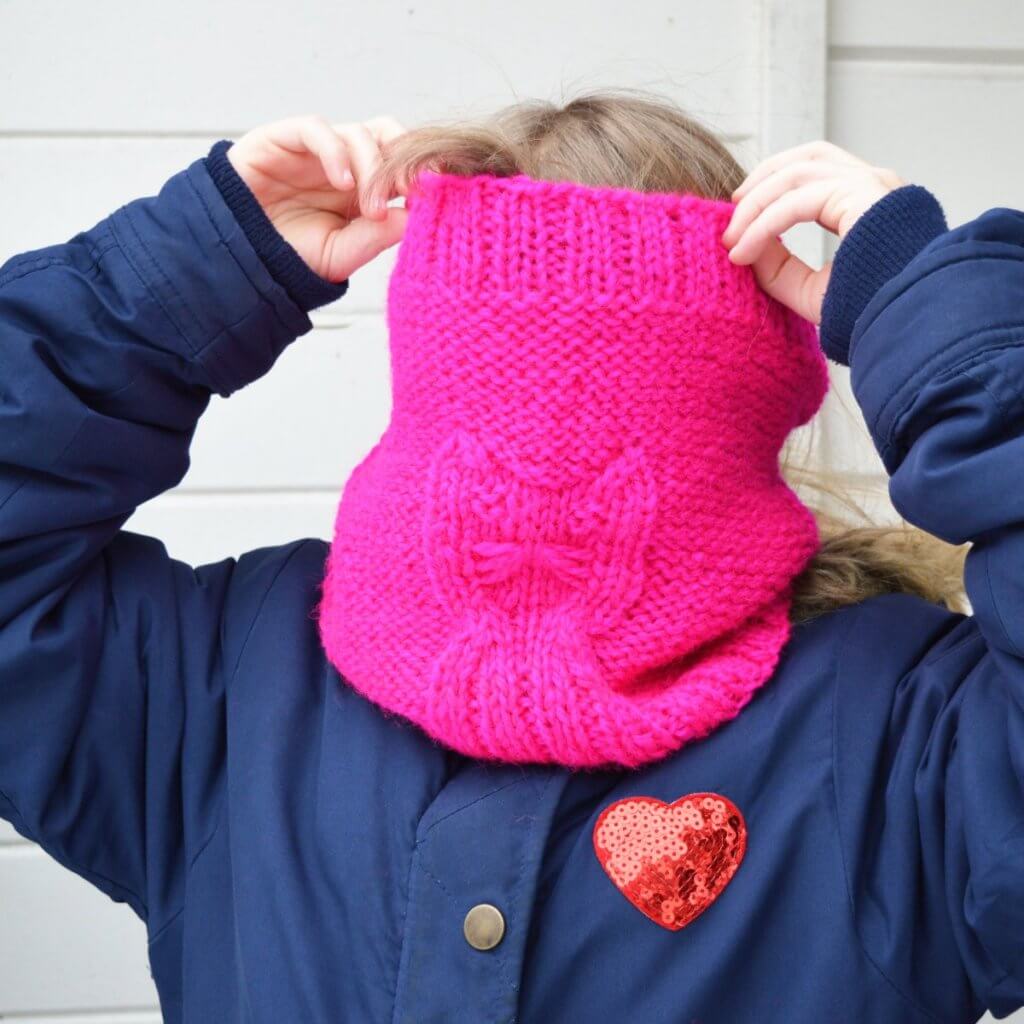
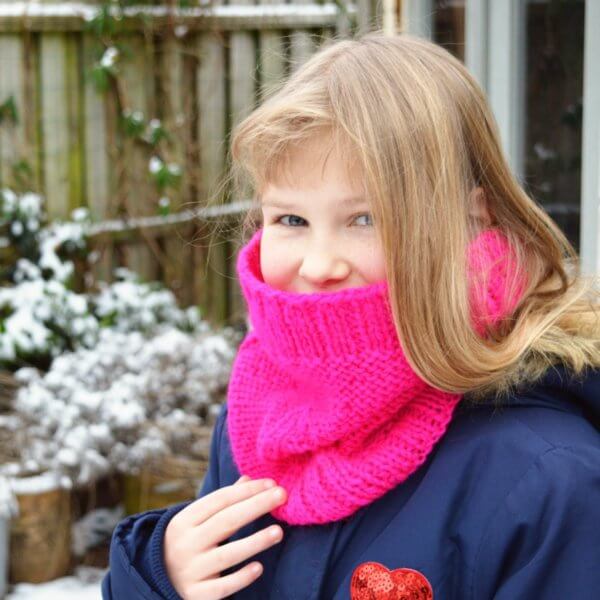
Dear daughter requested a hat with kitty cats, and of course, there should be a matching cowl! The Bast Cowl is a cute cowl with cables and texture to create a kitty cat motif. Worked in a bulky weight yarn this cowl knits up super quick, perfect for a last minute gift!
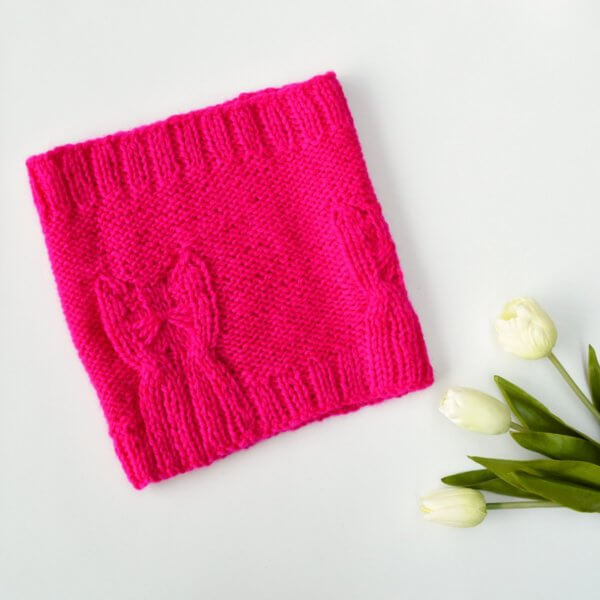
This pattern contains instructions for 3 sizes. The Bast Cowl is seamless and knitted in the round. The instructions for the cat motif are provided both charted and written out.
Pay what you want: (minimum €5.50)
€
Difficulty level
Bast
is seamless and knit in the round from the bottom up. This pattern
involves cable knitting. Stitches used include knit, purl, k2tog, skp
and a purlwise m1 increase.
This
pattern is suitable for the intermediate knitter.
Sizes and finished measurements
Finished size S (M, L): 53 (71, 88) cm / 21 (28, 34 ⅔) inches circumference and 26.5 cm / 10 ½ inches high. The
pictures show size
S.
Pattern details
Bast is written for a gauge of approx. 14 sts / 17 rounds = 10 cm (4 inches) over reverse stockinette on larger needles after washing and gentle blocking.
Pattern languages included: English and Dutch (Dit patroon omvat zowel een Nederlandse als een Engelse versie).
Digital PDF has 3 pages (letter size).
Materials
Yarn: 108 (144, 180) m (119 (158, 198) yds) / 66 (88, 110) g Vams PT3 by Rauma [100% wool; 82 m (90 yds) / 50 g] in color 44 neon Pink. Substitute any bulky yarn of a similar or slightly heavier weight for a similar result.
Knitting needles in your preferred style for small circumference knitting in the round in the following sizes (or to match gauge): Size 4.5 mm (US 7) and Size 5 mm (US 8).
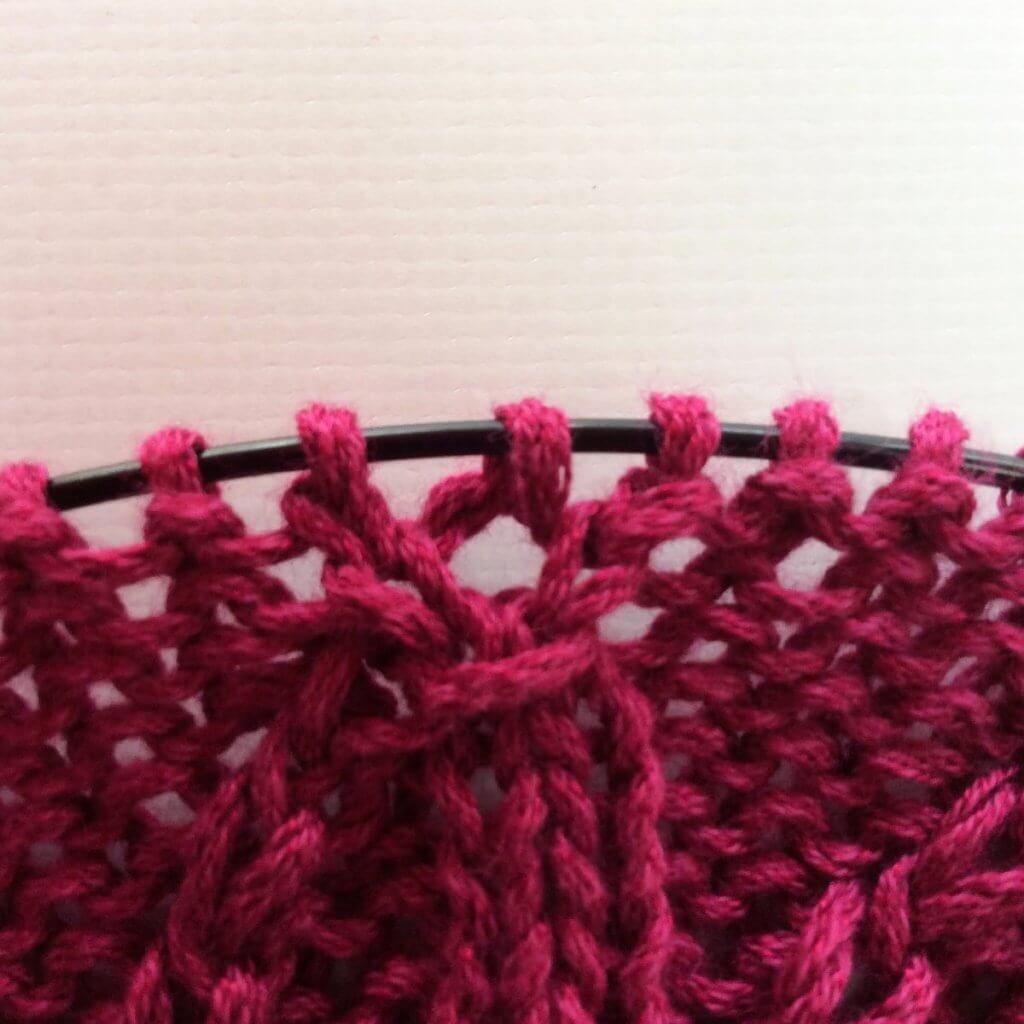
Perhaps you’ve seen some examples of this technique floating around the net. Knitted pieces with parallel stripes of stitches that are much bigger than the surrounding ones in either garter stitch, or reverse stockinette. In this tutorial, I show you how to crochet a braid in your knitting. This will include step by step instructions on what I did to achieve a similar result. And I will, of course, also share with you what I found out and would do differently next time I use this technique.
Crochet a braid in your knitting step-by-step
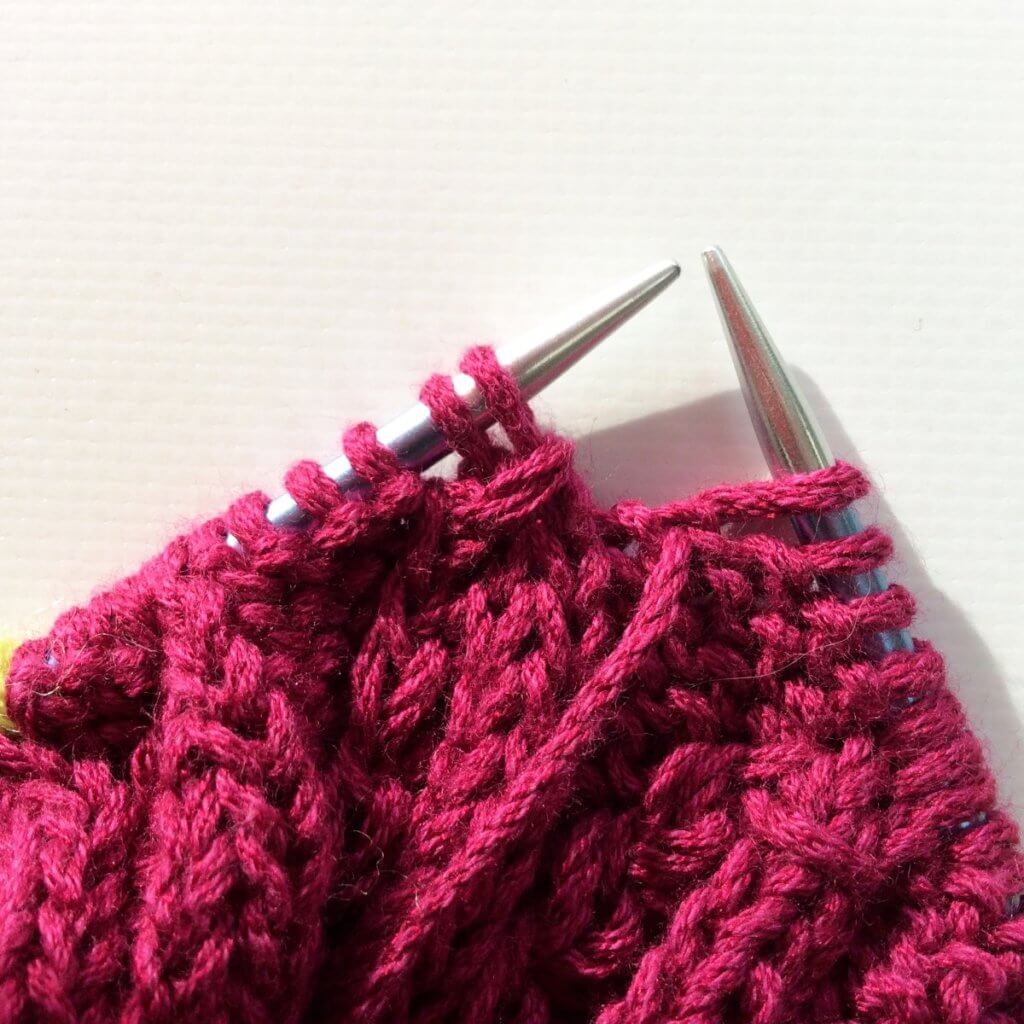
1. Cast-on any number of stitches using your preferred method. For this little swatch, I used the knitted-on cast-on, which is also known as the cable cast-on.
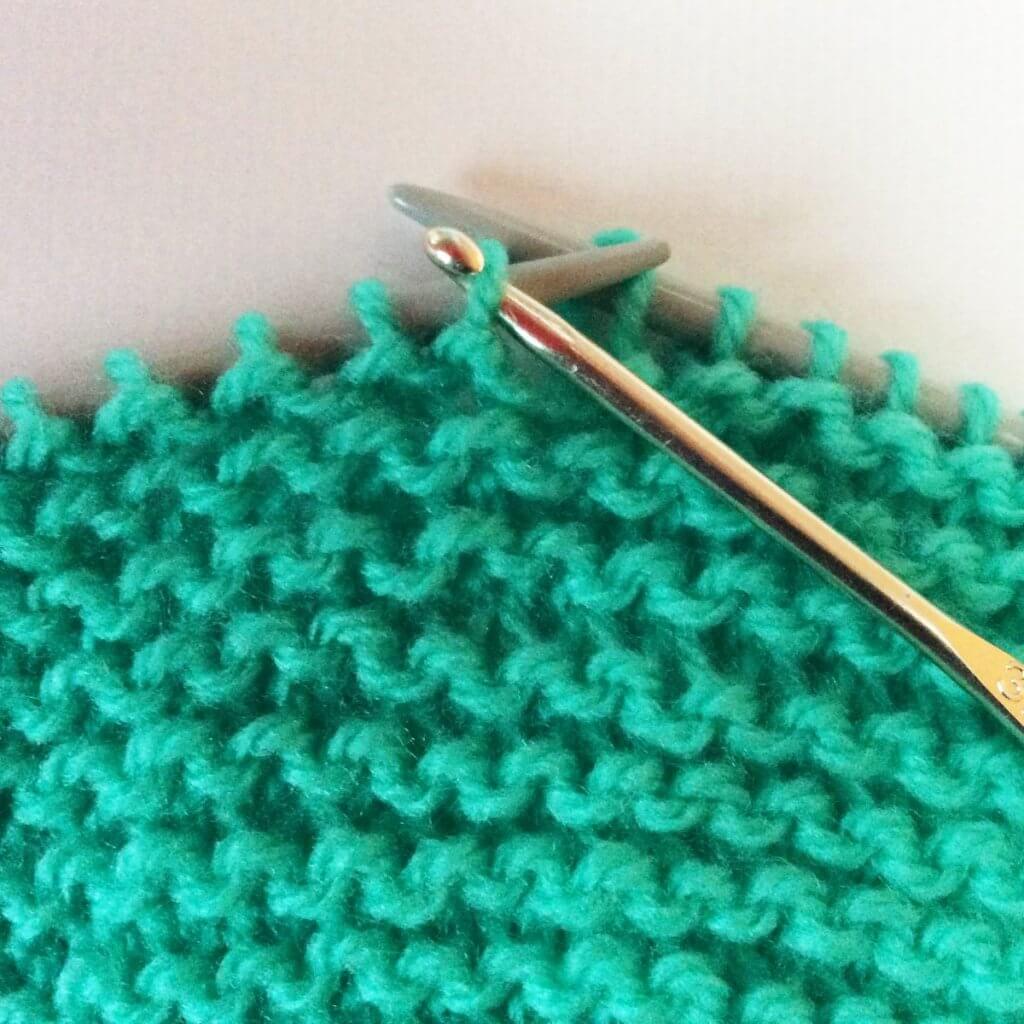
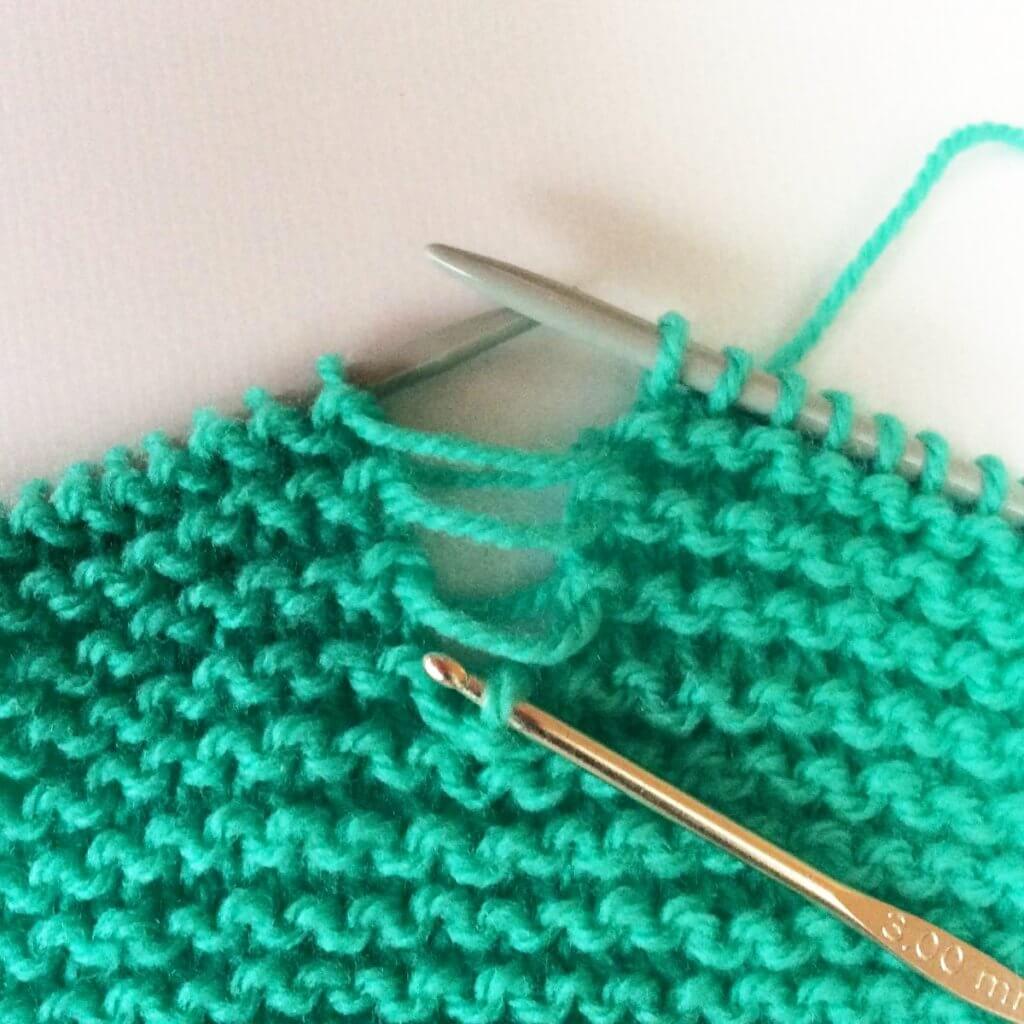
2. Next, knit across the row and put a yarnover at every place in in the piece where you want to position the braid. I did mine where the needle is pointing. It can be handy to place a stitch marker on each side of the yarnover. This makes it easier to determine which stitch to drop down later on. I didn’t do that here, because it’s only 1 stitch in the exact middle of the swatch. No issues in keeping my place!
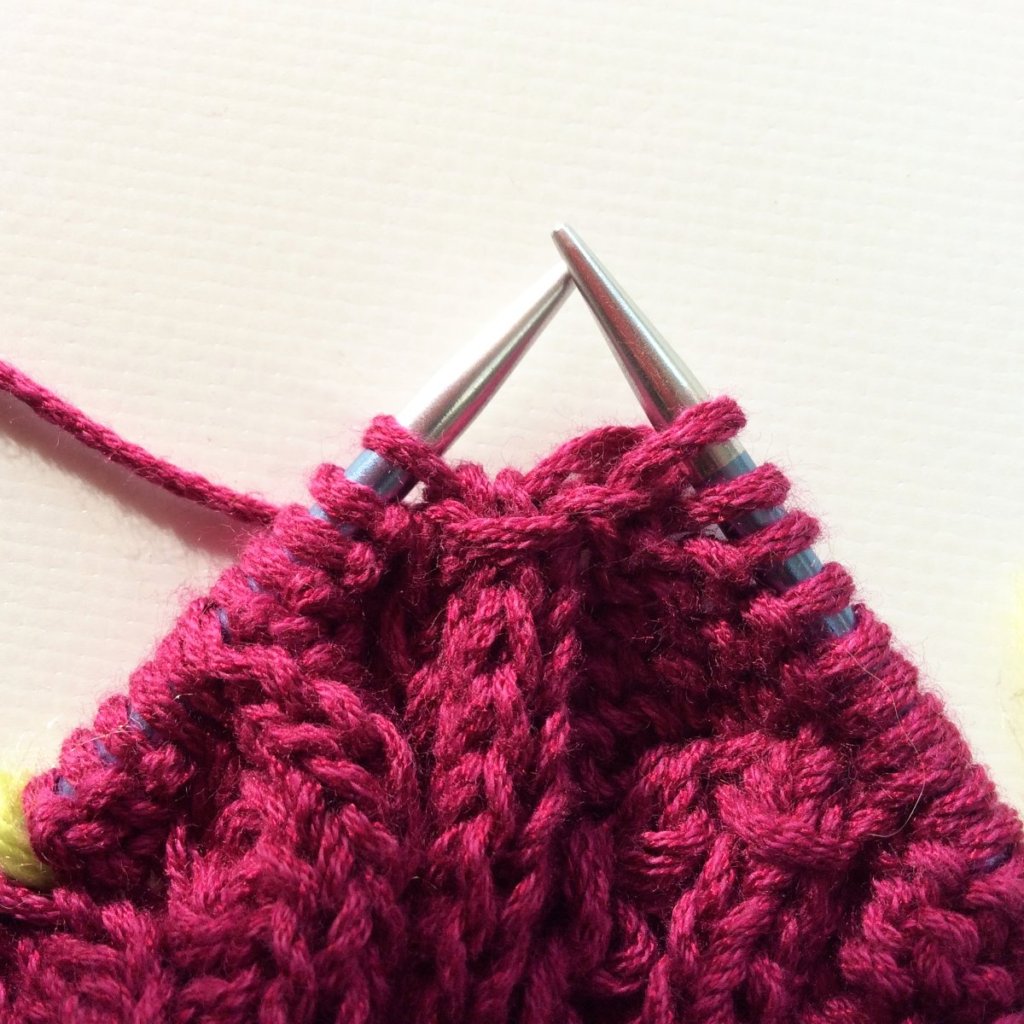
3. Now knit until the piece has the desired height/length. Make sure to work the number of rows that is a multiple of the number of strands you want to make the braid with. A multiple of 2 for a 2-strand braid and 3 for a 3-strand braid. Next, locate the stitch that’s directly above the yarnover in your first row. This is where the stitch markers can come in useful.
4. Drop the stitch down until you’ve reached the yarnover/cast-on edge. Use you fingers to tease the yarn strands loose if necessary.
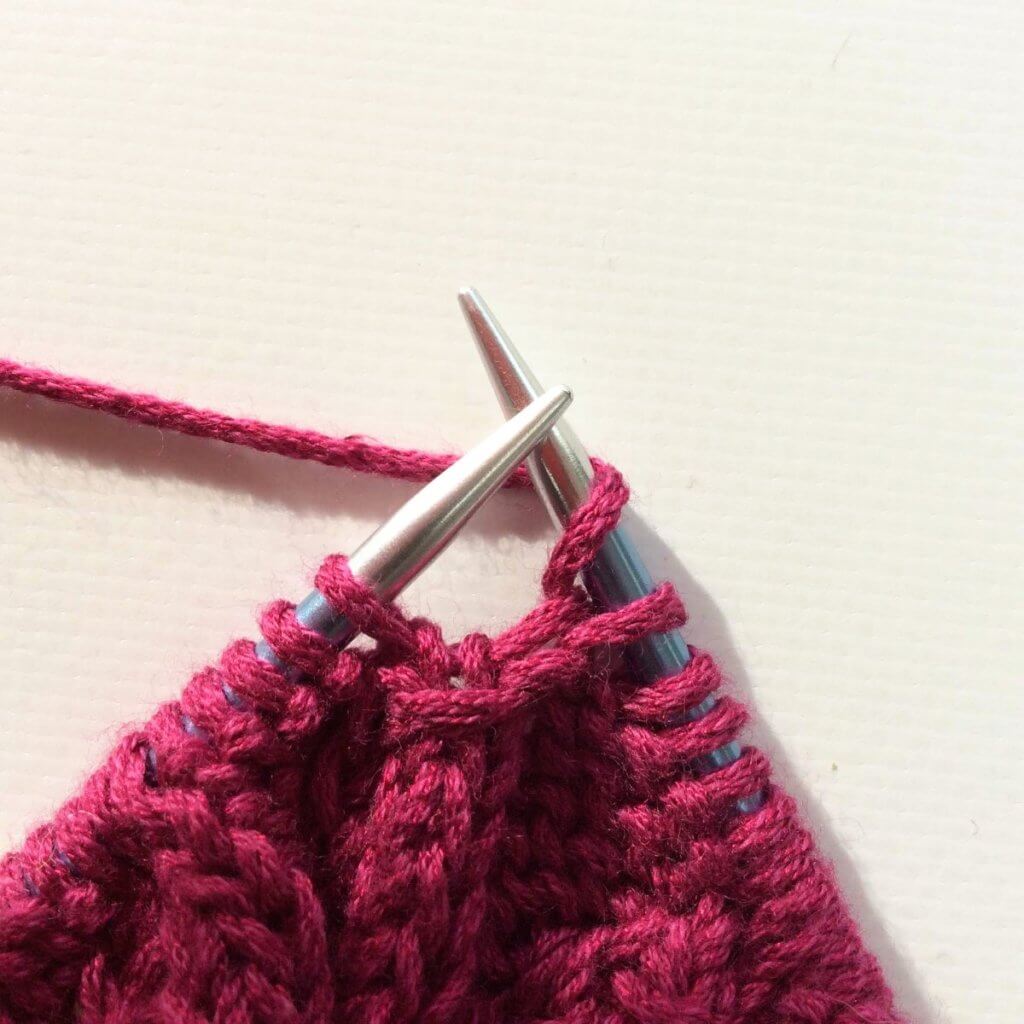
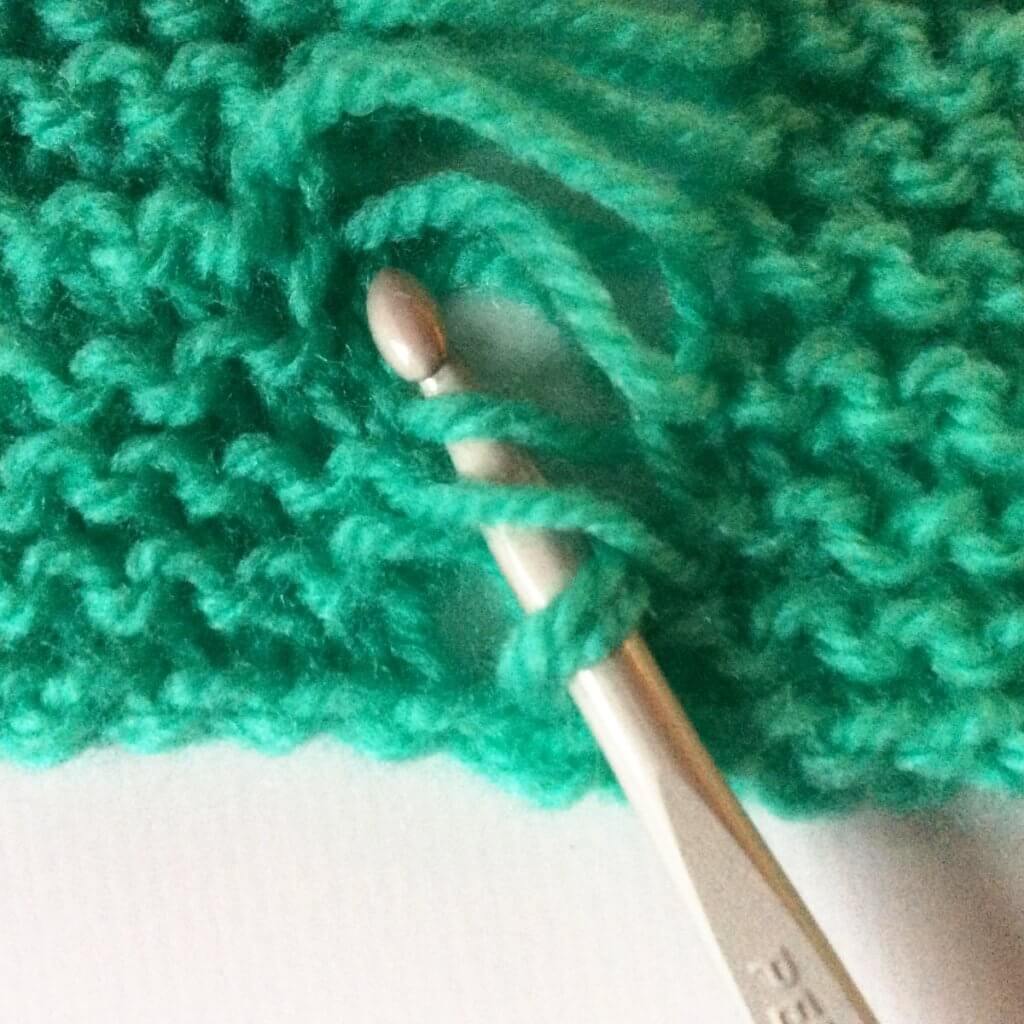
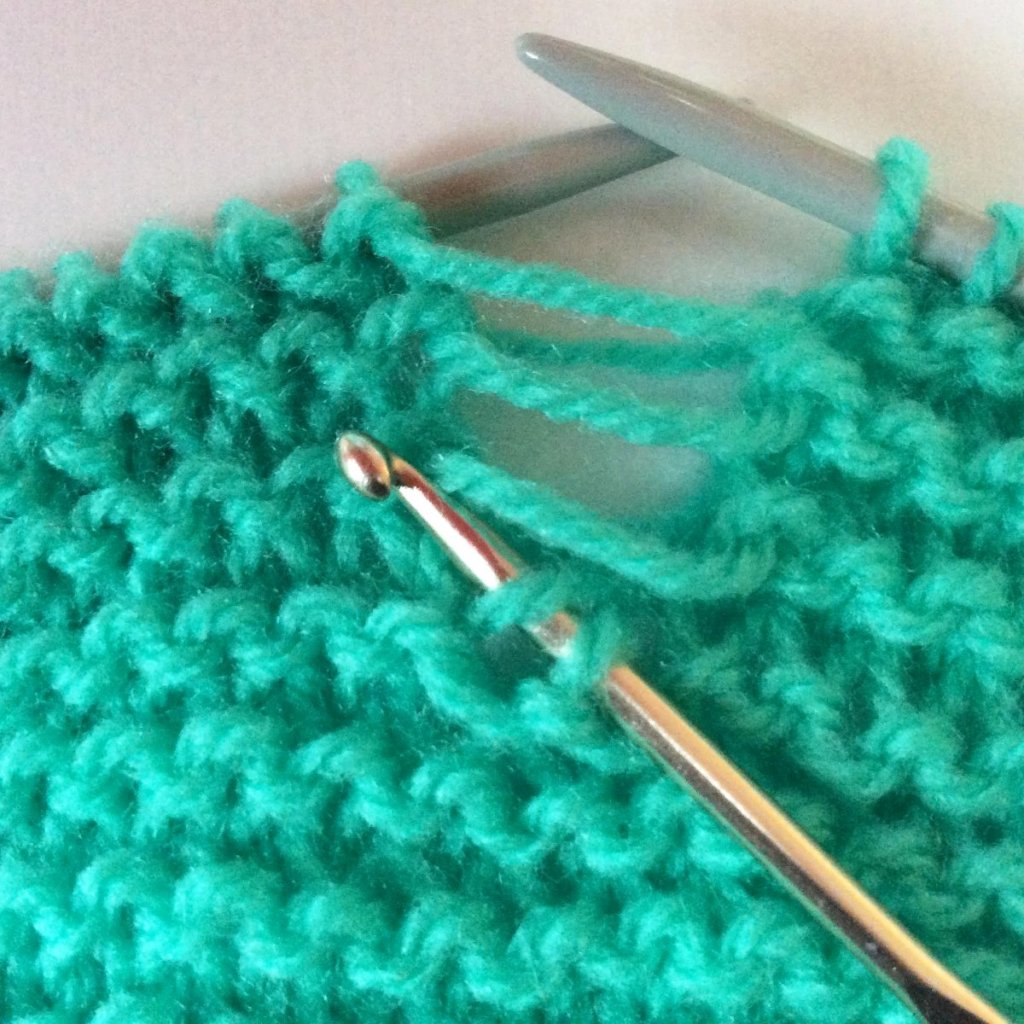
5. Now we’re going to take a crochet hook and work our way back up the piece using multiple strands of yarn. In this example I’m doing 2 strands together. To start, we have to pick up the 2 strands of yarn directly above the cast-on edge. I’m picking them up twisted, to ensure that the tension of this first bit of braid is not looser than the following ones. To do so, I inserted my crochet into the work as pictured, and then twisted the hook clockwise.
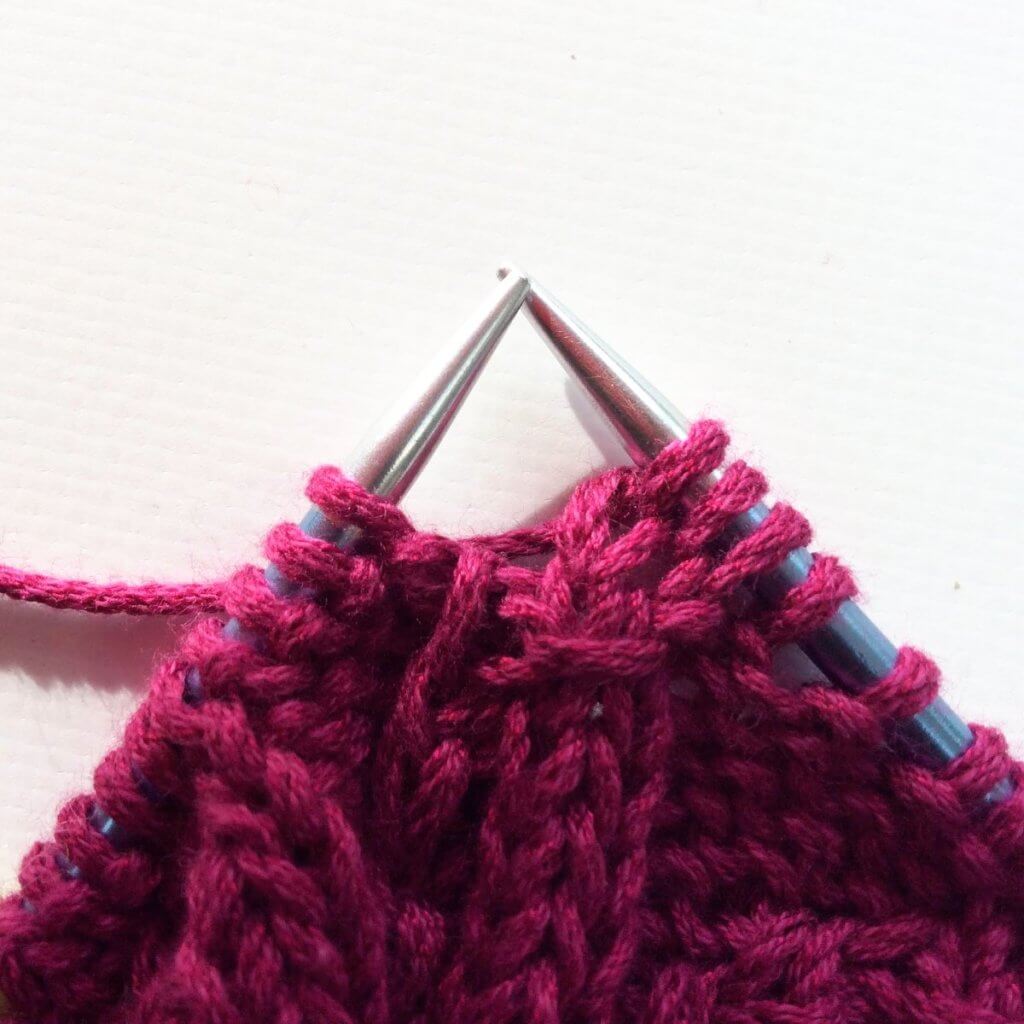
6. Next, insert your hook below the next 2 strands and pull them through the loop on the hook to form a stitch.
7. This is how it looks:
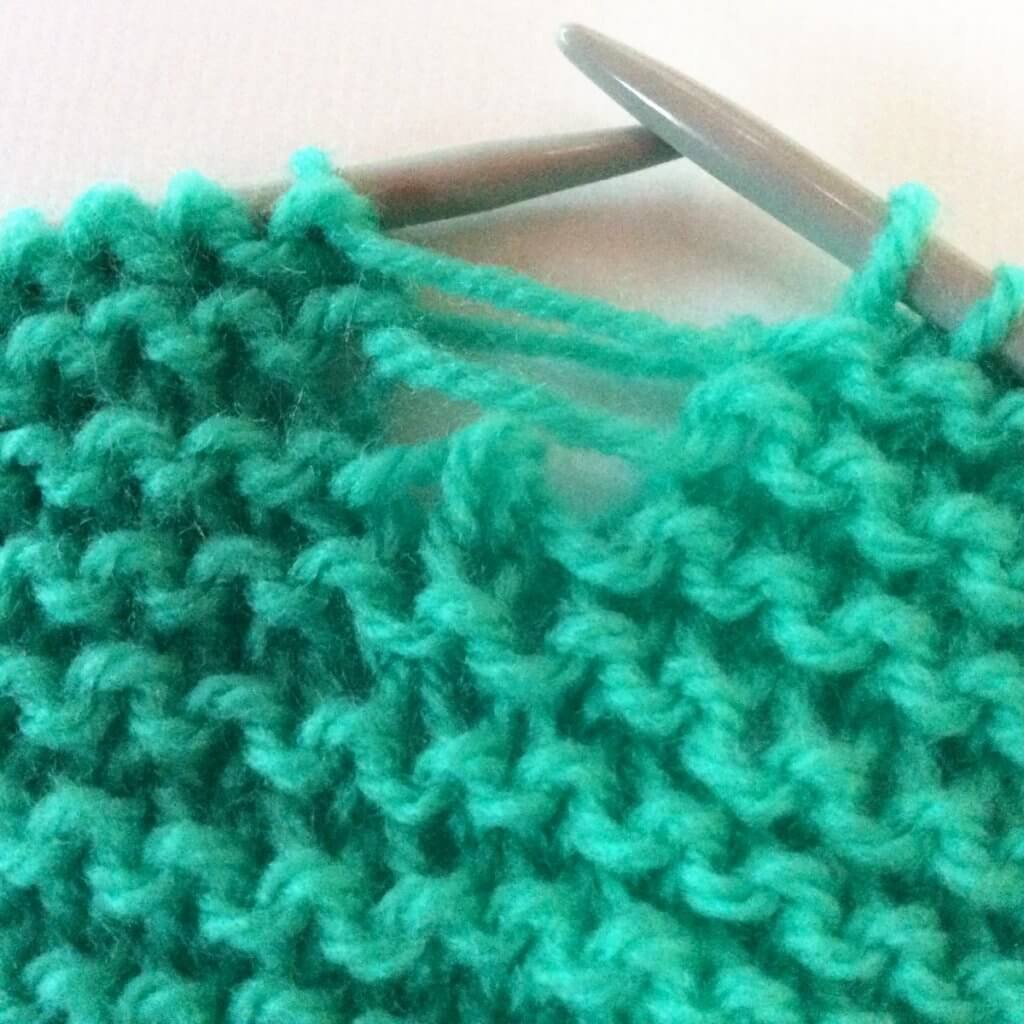
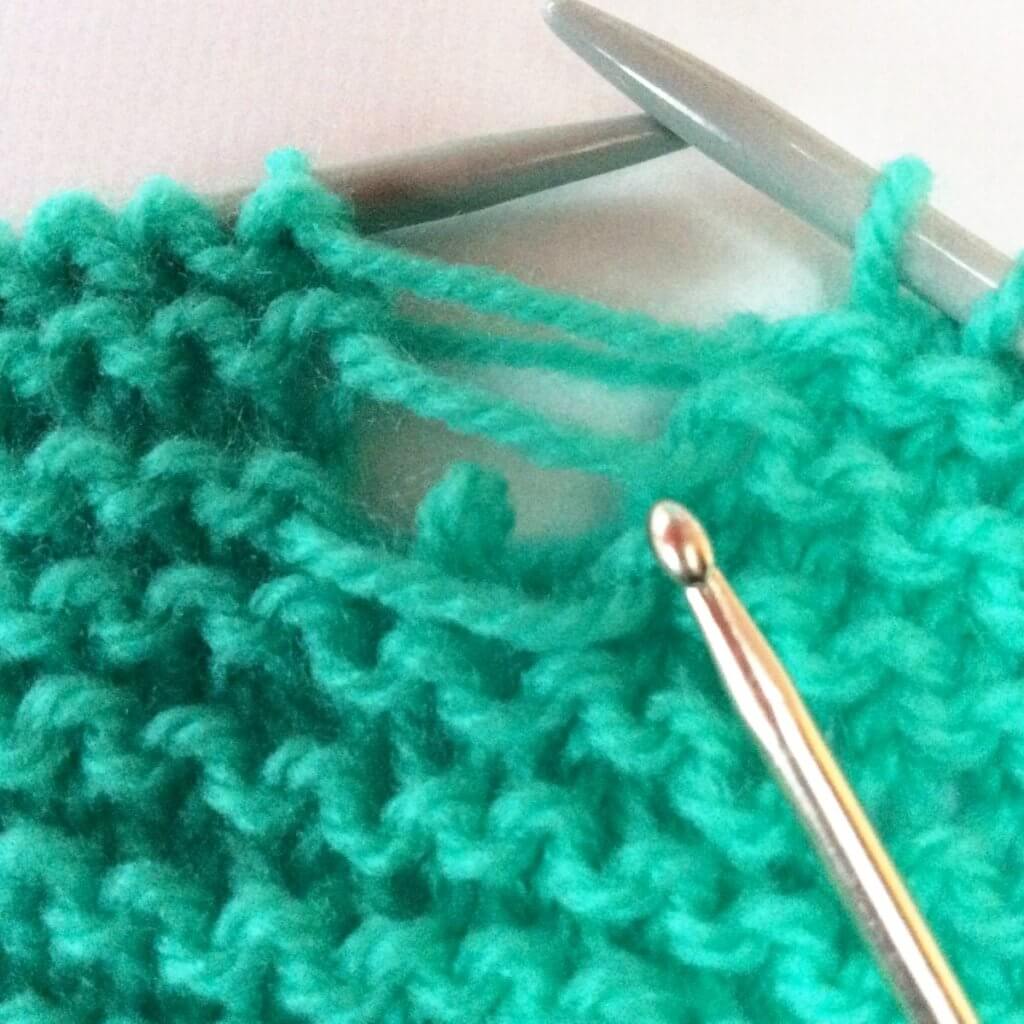
8. Keep on inserting your hook below the next 2 strands and pulling them through the loop on the hook. Repeat until there are no more loose strands in the piece to work back up.
9. Now you can place the last loop back on the needle. Knit accros the row to fix it into place. And that’s it!
Things I’d do differently next time
When I was working on this little swatch, I thought of a couple of things I would do differently next time. I didn’t feel the braid was fat enough against the background of garter stitch. Perhaps a 2-strand braid works better against a background of reverse stockinette.
I did try out a 3-strand braid, for the picture, see below. With this one, however, I noticed that the fabric started pulling around the braid. To counter this I would suggest not working 1 yarnover in the first row, but a double one instead. Just drop the extra loop on the following row and work regular stitches per your stitch pattern in the ones after that.
When there are 2 columns of stitches dropped to free up strands for the braid, I expect the braid itself will also be more volumineus. Which is a good thing, because it will make it stand out better against the background.
Thanks to my Patreon supporters for bringing you this freebie! Creating quality patterns and tutorials is a lot of work and resource-intensive. However, I find it important to give you free content like this tutorial. Thanks to the generous support of my Patreon supporters, I can make it happen. Thank you, patrons! Click here to join, or click here to read more about La Visch Designs on Patreon.
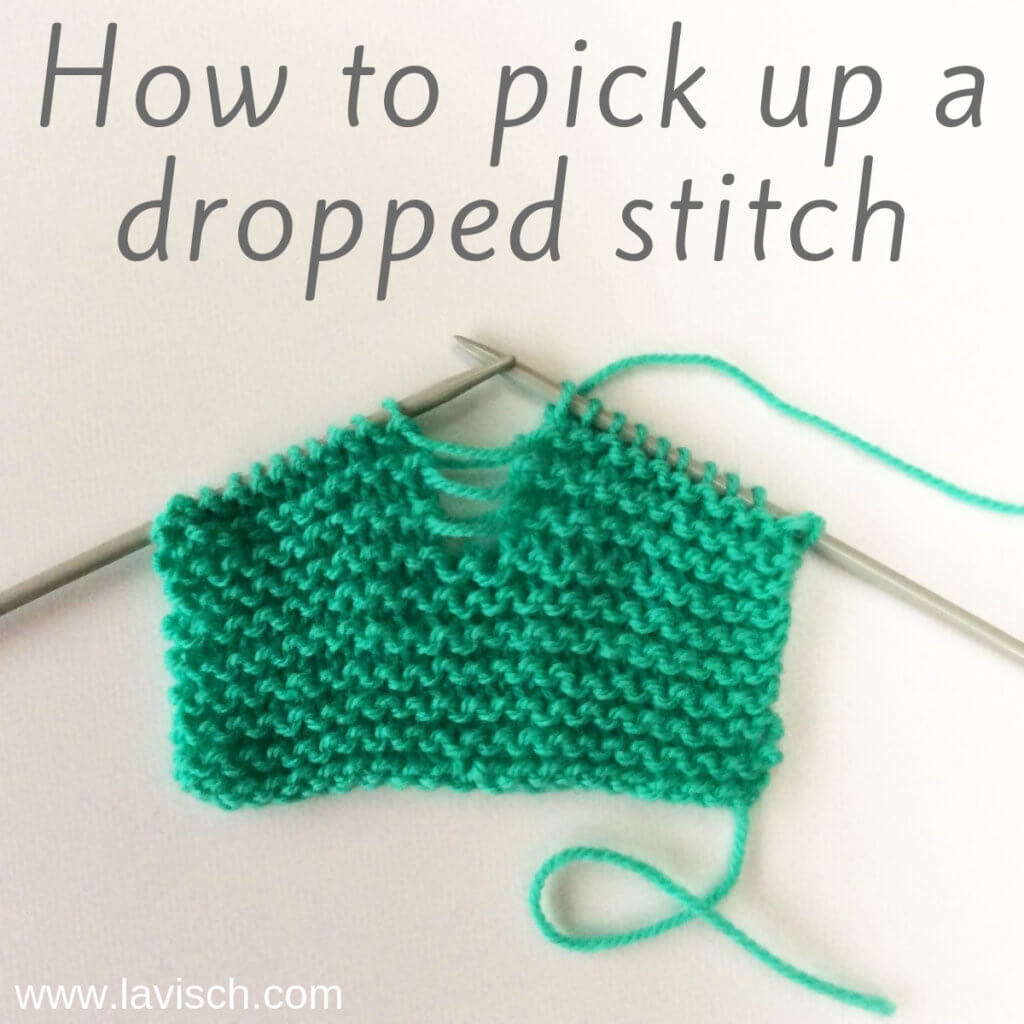
It happens to all of us: dropping a stitch in the middle of your knitting… When using a somewhat sticky yarn it’s usually just a matter of placing the stitch back on the needle and continue as before. When using a smooth, slippery yarn, it can however be that the dropped stitch runs down in your work, leaving a wake loose threads behind. The same can happy with a less smooth yarn, if it isn’t detected at first that a certain stitch has escaped from the needles.
Don’t panic, though! Picking up a dropped stitch in plain knitting like stockinette or garter stitch really isn’t that hard. In this tutorial, I’ll show you how to pick up a dropped stitch. All you need is a crochet hook in size similar or a tad smaller than the size knitting needles used.
Pick up a dropped stitch step-by-step
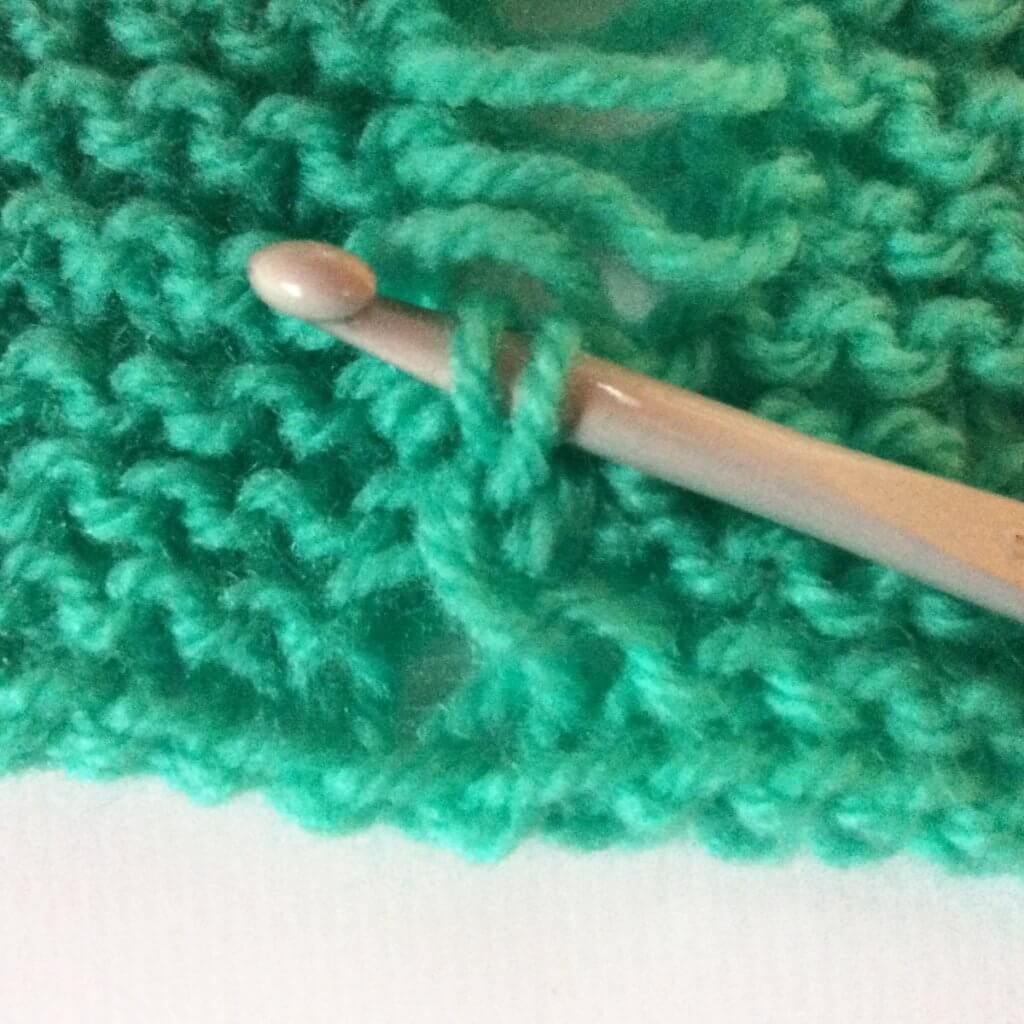
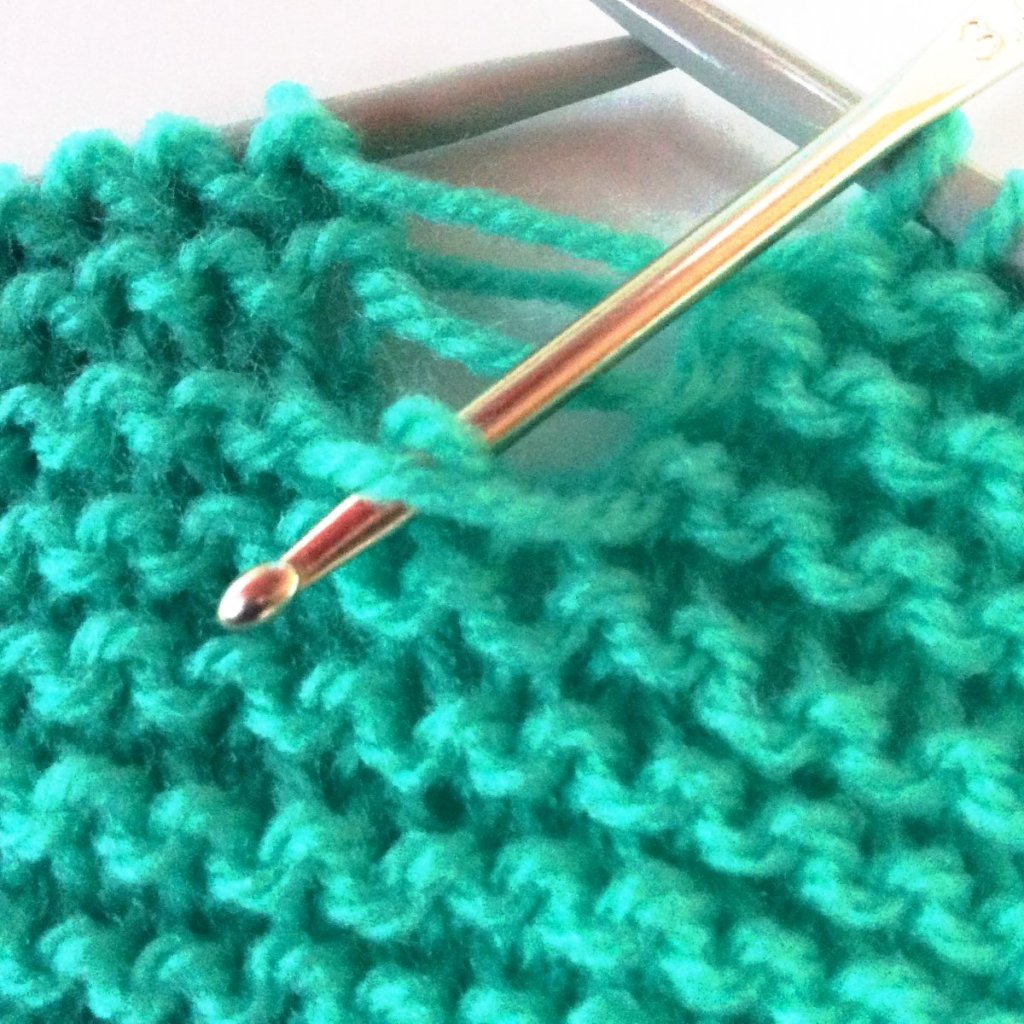
1. First, get your crochet hook and catch that run-away stitch before it runs down even further! Pay attention to the stitch itself and the one directly below: see that it has a purl bump directly below the captured stitch? This means that in this swatch (in garter stitch) the next stitch to be worked is to be a knit stitch. For that reason, I insert my crochet hook from the front to the back through the stitch.
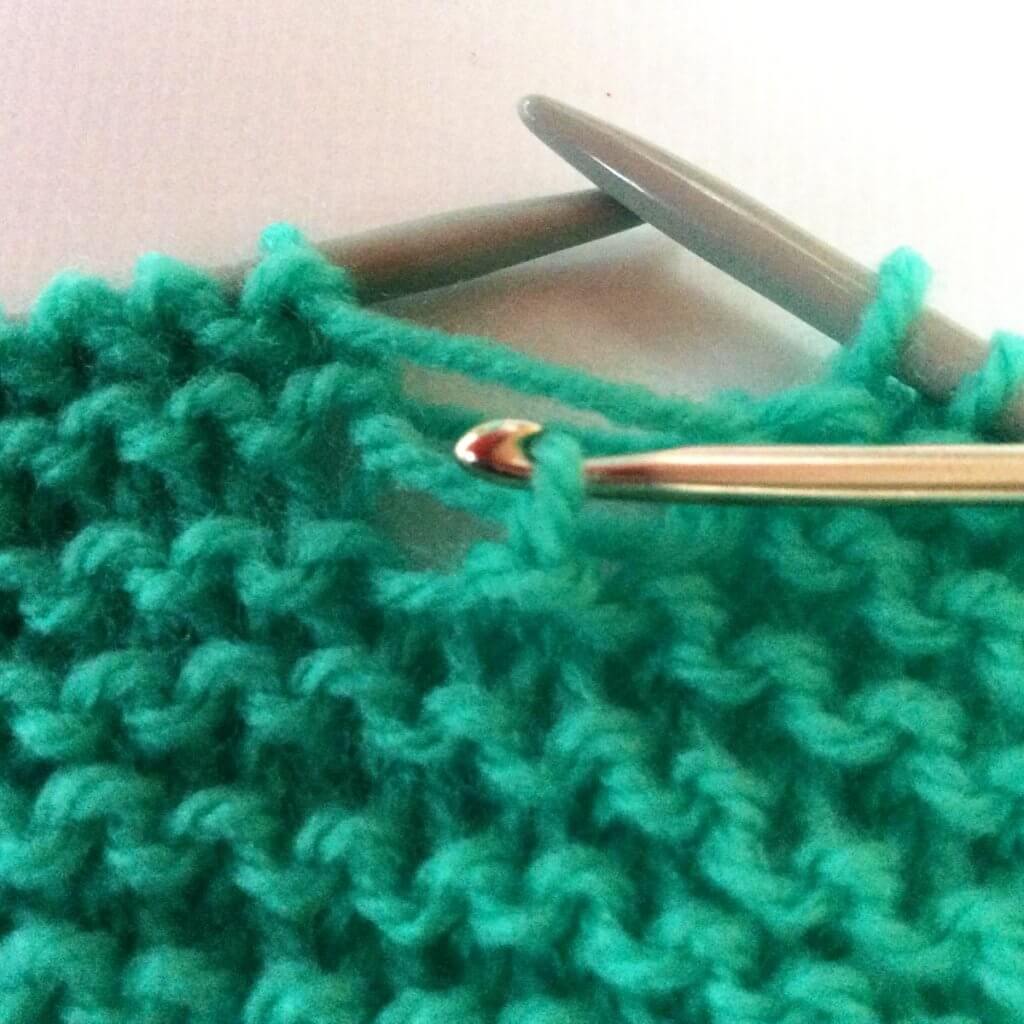
2. Next, grab the loose thread directly above and pull it through the first stitch on the hook.
3. In this picture you see how this looks once the crochet hook has been removed. Now, if we were picking up a dropped stitch in stockinette fabric we would just repeat steps 1 and 2. We are, however working in garter stitch, so a few more steps are needed.
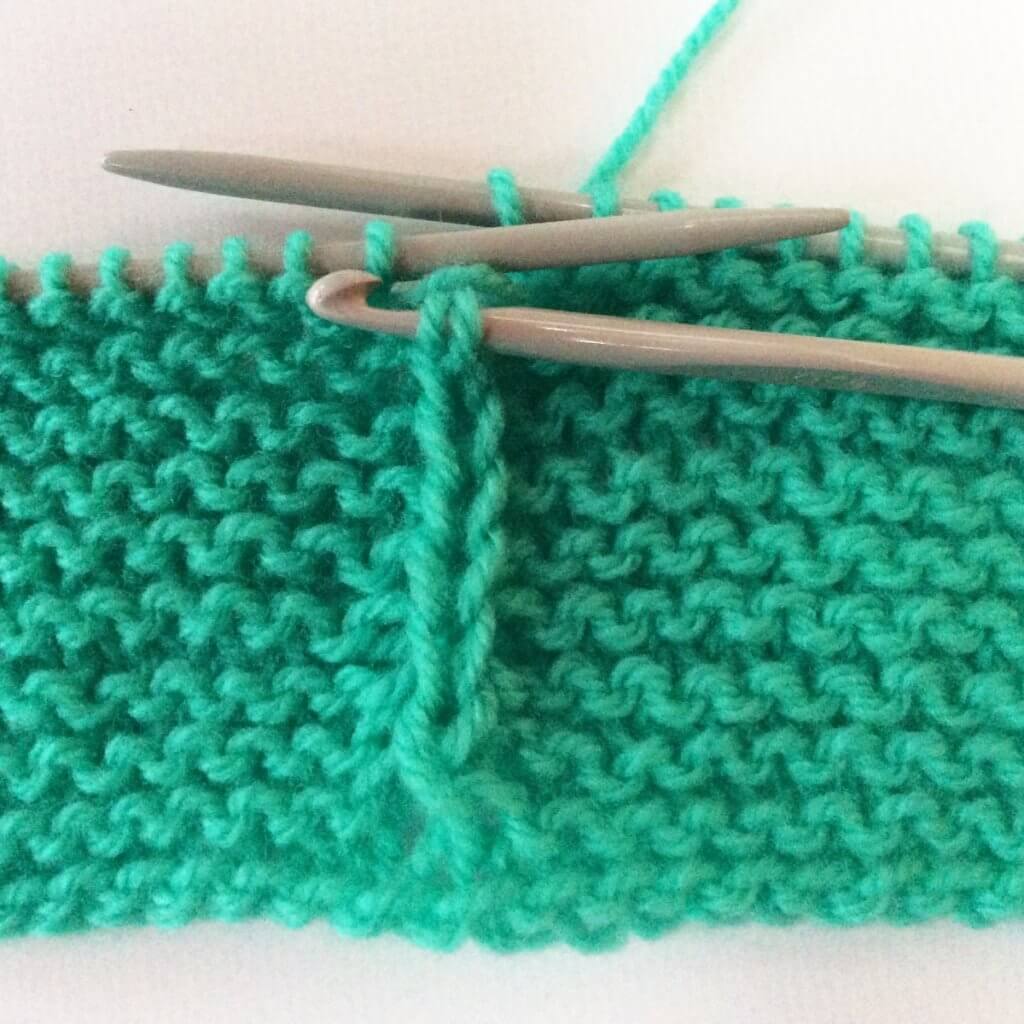
4. For the next stitch to be laddered back up, we need to work a purl stitch. To start, I move the next loose thread directy above the stitch from the back to the front of the work.
5. Next, insert the crochet hook into the stitch from the back to the front, grab the loose thread and pull it through the stitch on the hook.
6. Now we have made a lovely purl stitch! You can recognize it by the purl bump (horizontal) directly below the loop on the hook.
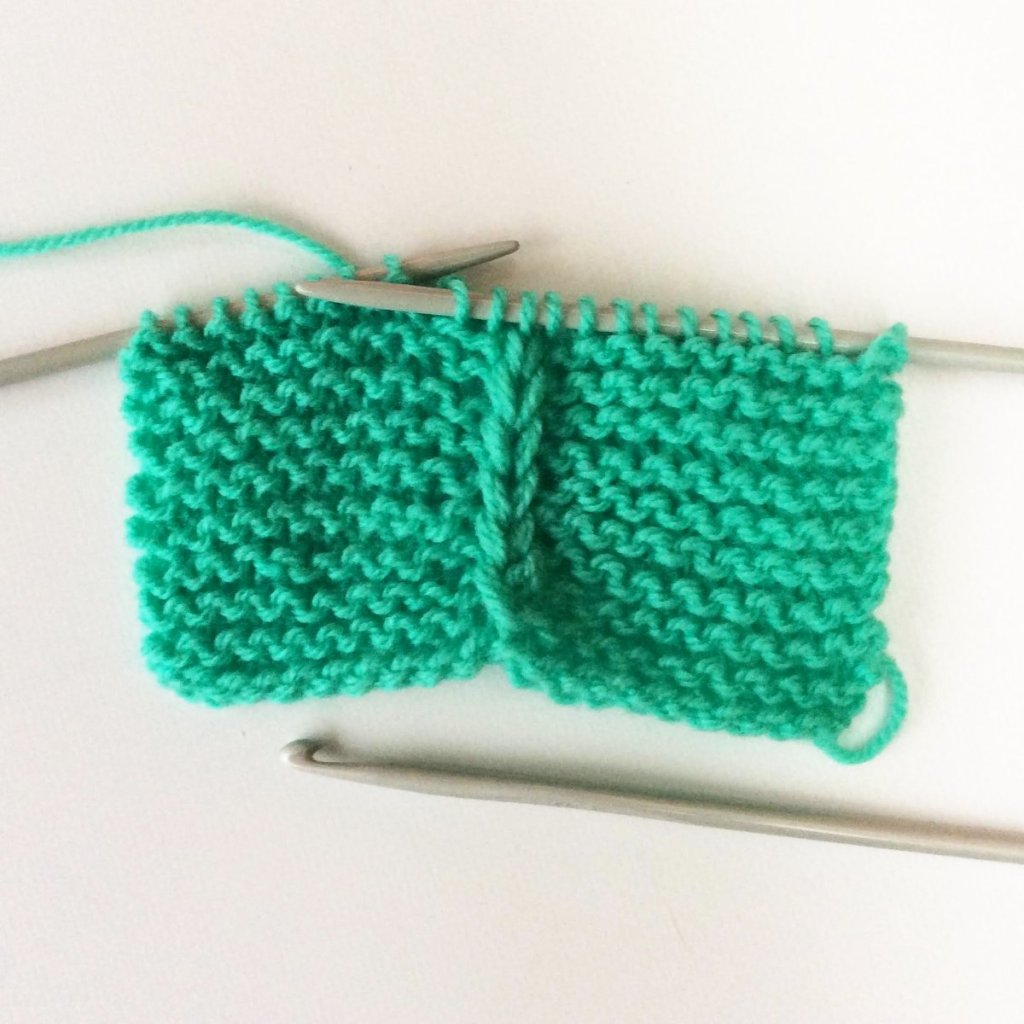
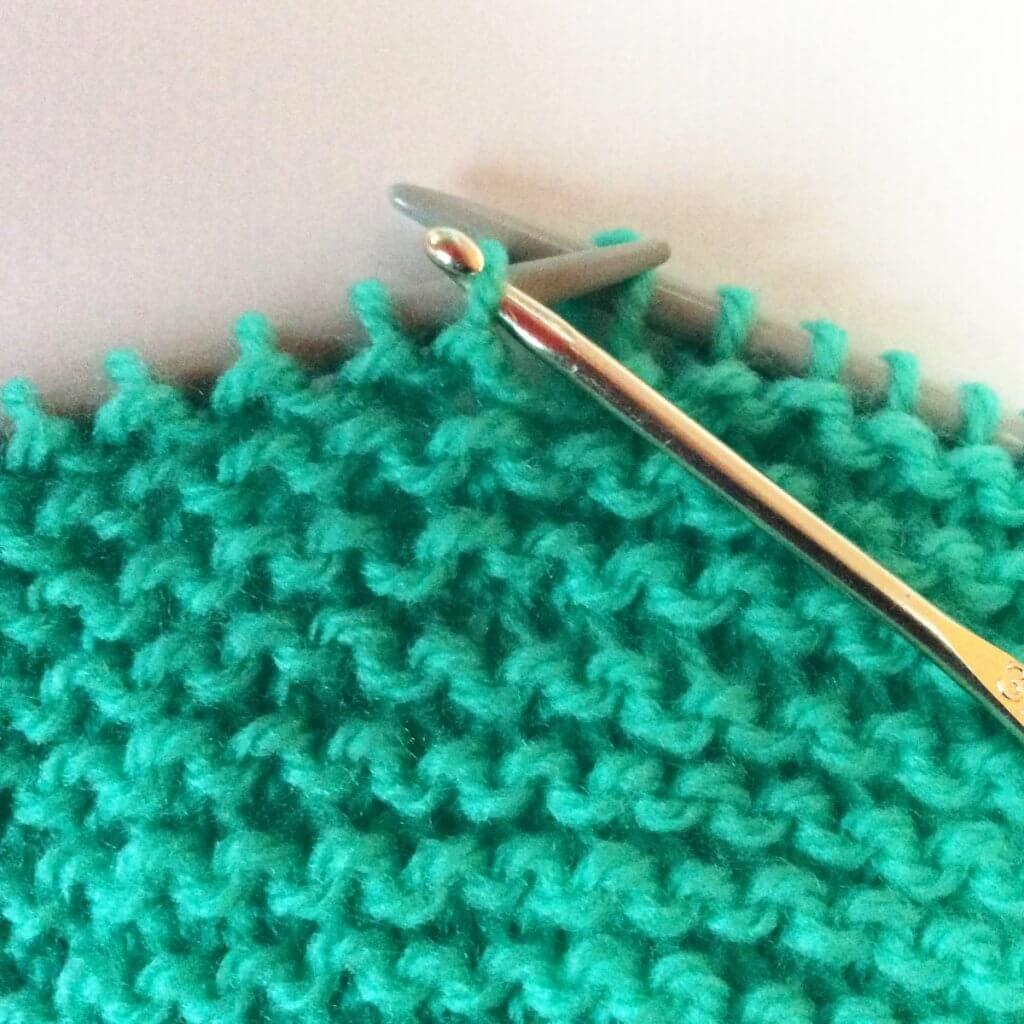
7. Repeat steps 1-6 as often as needed to work your way back up and place the dropped stitch back on the needle. And that’s how to pick up a dropped stitch!
Some more thoughts
In this example in garter stitch, I started with a knit stitch. If the stitch had run down another row, though, I would have had to start with a purl stitch instead. In other words: steps 4-6 followed by steps 1-3 instead of the other way around. This is why it’s so important to learn how to read your knitting!
Also, laddering a stitch back up can cause some pulling and unevenness in the fabric. This usually evens out with blocking though. If you have a lot of difference in the tension, you can also tease the stitches back to approx. the same size using a spare knitting needle.
Thanks to my Patreon supporters for bringing you this freebie! Creating quality patterns and tutorials is a lot of work and resource-intensive. However, I find it important to give you free content like this tutorial. Thanks to the generous support of my Patreon supporters, I can make it happen. Thank you, patrons! Click here to join, or click here to read more about La Visch Designs on Patreon.
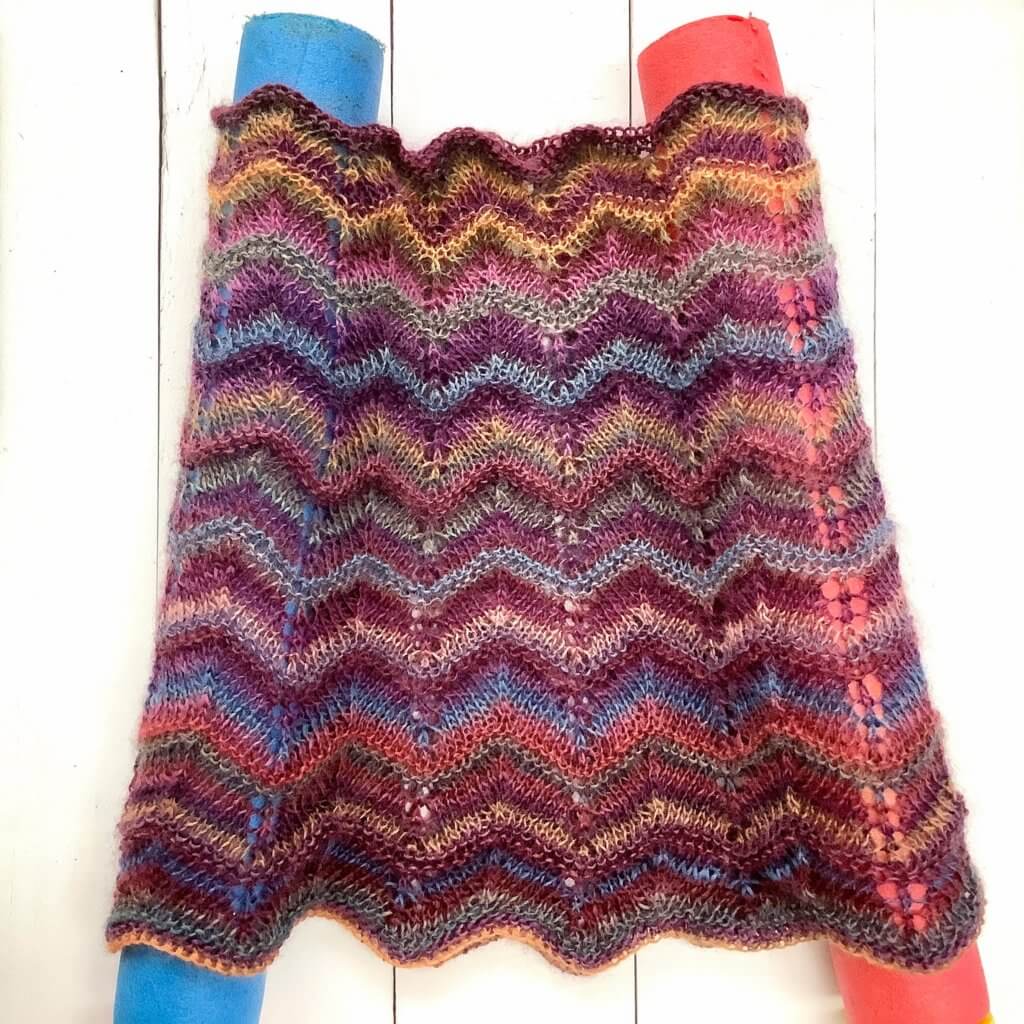
Knitting cowls is something I really love to do occasionally because it’s just so zen. You know, round and round and, well, round! But after binding off comes the blocking of the cowl and that’s where it can become somewhat tricky….
I mean, shawls I stretch out to the max. and pin them down on my blocking mats. But if I do this with a cowl I get those sharp creases in the cowl where the fabric was folded. Just gently patting a cowl into shape gets the same result. So how to prevent crease lines when blocking a cowl?
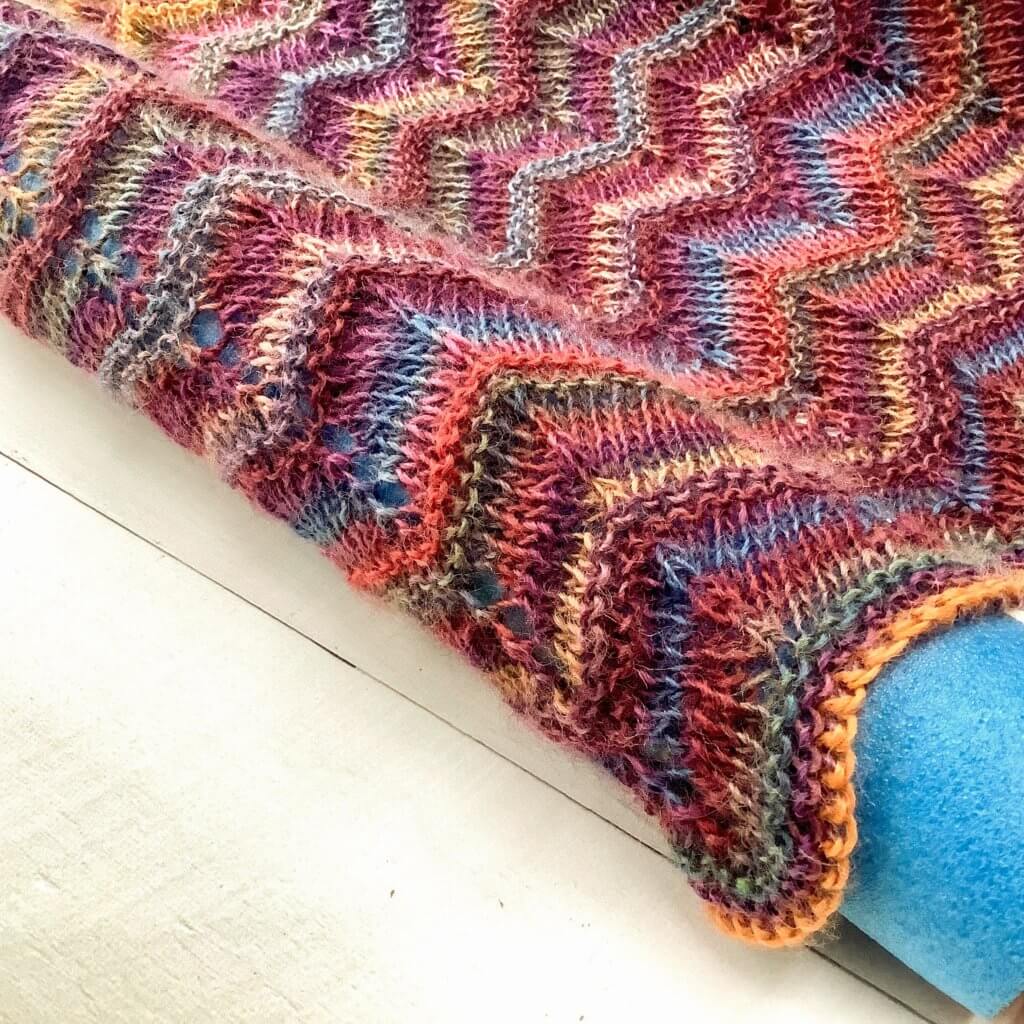
Next comes the simple solution to preventing creases: the humble pool noodle!
Just insert 2 pool noodles into the cowl, gently pat it all into shape and leave the cowl be until it’s completely dry. You can, of course, use any cylindrical shaped object as long as you’ve got two, they’re long enough and resistant to wetness. They are after all to be inserted into a wet garment.
I like to call this the PNAB technique. It stands for Pool Noodle Aided Blocking, you know, as a similar acronym like CAD/CAM. The use of the pool noodles prevents creases in the cowl really well. It also works with conical shaped cowls:
And that’s all there is to it, I just love those handy crafting hacks!
Oh, and for those wondering, the cowl featured in the first picture is the Flits! cowl. The one in the blocking picture is the Bast Cowl, which makes a set with the Bast hat. The cowl with the lacy chevron patterning is the Indian Summer Rye cowl. Sometimes I just love knitting cowls!
Thanks to my Patreon supporters for bringing you this freebie! Creating quality patterns and tutorials is a lot of work and resource-intensive. However, I find it important to give you free content like this tutorial. Thanks to the generous support of my Patreon supporters, I can make it happen. Thank you, patrons! Click here to join, or click here to read more about La Visch Designs on Patreon.
Deborah
is one of the lovely ladies who often test knit my patterns. So when
she expressed a fondness of a specific
shawl construction combined with lots of lace I was happy to oblige
with a design containing all those elements. This one is for you,
Deborah!
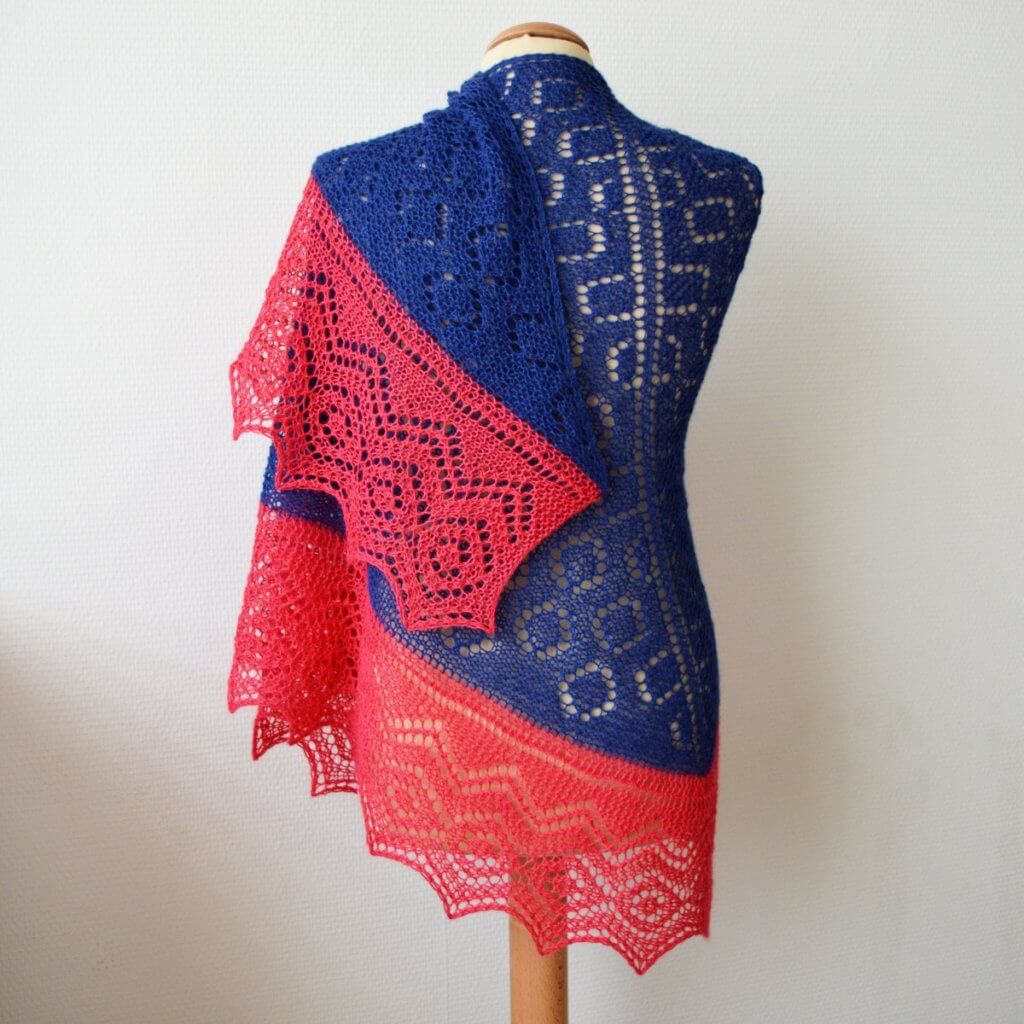
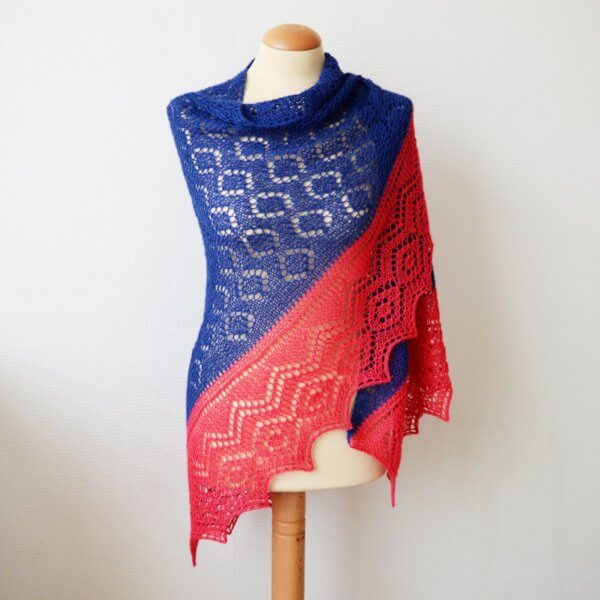
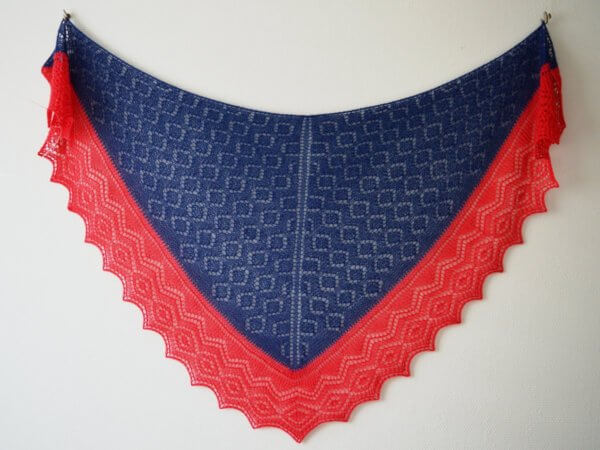
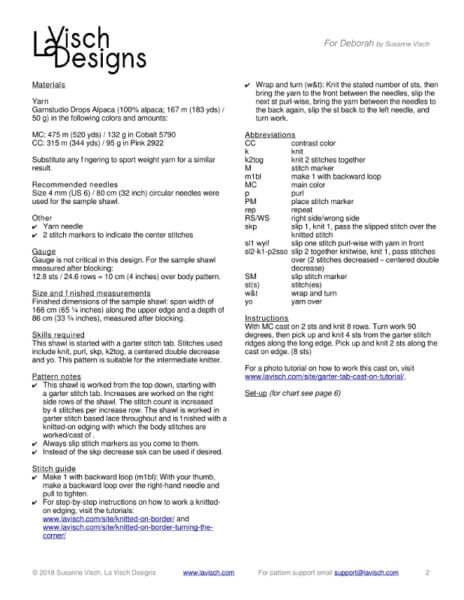
This shawl is knitted from the top-down in one piece, starting at the neck edge with a garter tab. The For Deborah shawl is finished with an edging that is knitted on sideways and attached to the live stitches of the body as it is being worked. The instructions for the edging are provided charted and written out.
Pay what you want: (minimum €6.50)
€
Difficulty level
This shawl is started with a garter stitch tab. Stitches used include knit, purl, skp, k2tog, a centered double decrease and yo. This pattern is suitable for the intermediate knitter.
Sizes and finished measurements
Finished dimensions of the sample shawl: span width of 166 cm (65 ¼ inches) along the upper edge and a depth of 86 cm (33 ¾ inches), measured after blocking.
Pattern details
Gauge: approx. 12.8 sts / 24.6 rows = 10 cm (4 inches) over body pattern. Gauge is however not critical in the For Deborah shawl design.
Pattern languages included: English and Dutch (Dit patroon omvat zowel een Nederlandse als een Engelse versie).
Digital PDF has 7 pages in the English version and 8 in the Dutch version (letter size).
Materials
Garnstudio Drops Alpaca (100% alpaca; 167 m (183 yds) / 50 g) in the following colors and amounts: MC – 475 m (520 yds) / 132 g in Cobalt 5790 and CC – 315 m (344 yds) / 95 g in Pink 2922. Substitute any fingering to sport weight yarn for a similar result.
Size 4 mm (US 6) / 80 cm (32 inches) circular needles.
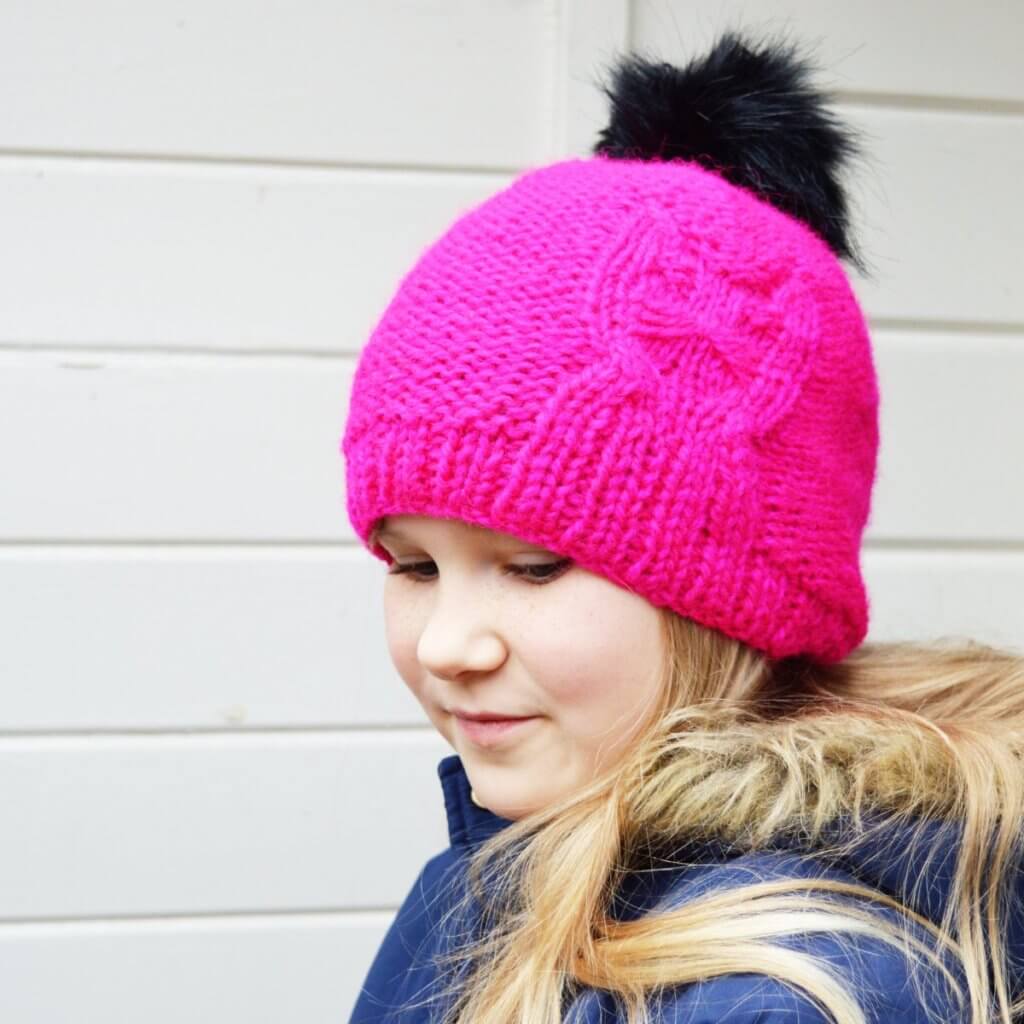
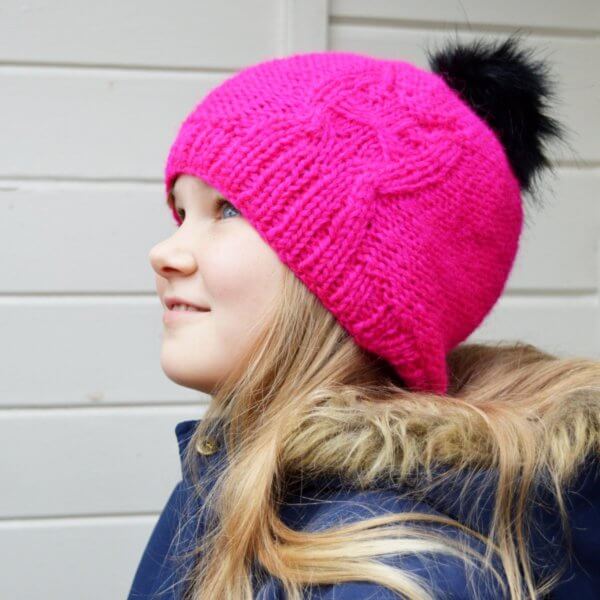
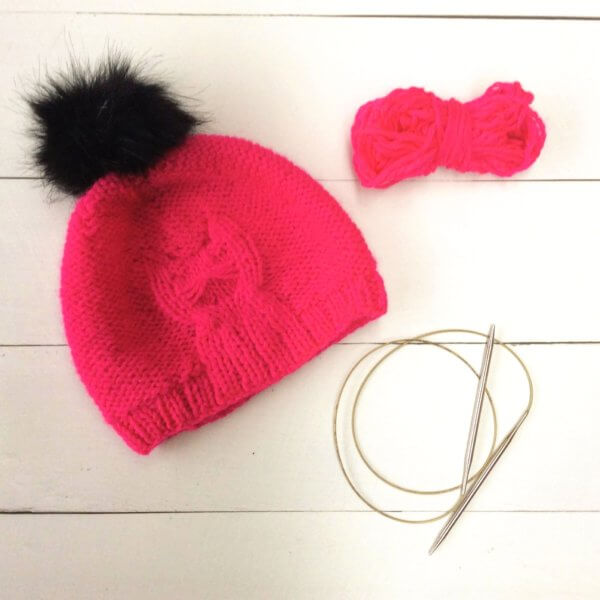
What is one to do when dear daughter requests a hat with kitty cats? Design one, of course! Bast is a cute hat with cables and texture to create a kitty cat motif. Worked in a bulky weight yarn this hat knits up super quick, perfect for a last minute gift!
This pattern contains instructions for 5 sizes, ranging from child to adult. The Bast hat is seamless and knitted from the bottom up. The instructions for the cat motif are provided both charted and written out.
Pay what you want: (minimum €4.90)
€
Difficulty level
Bast is seamless and knit in the round from the bottom up. This pattern involves cable knitting. Stitches used include knit, purl, k2tog, p2tog, skpand a purl wise m1 increase. This pattern is suitable for the intermediate knitter.
Sizes and finished measurements
To fit size: 47 (52, 56.5, 61.5, 66) cm / 18 ½ (20 ½, 22 ¼, 24 ¼, 26) inches circumference. Finished size: 42 (47, 51.5, 56.5, 61) cm / 16 ½ (18 ½, 20 ¼, 22 ¼, 24) inches circumference.
When choosing your hat size, take 2.5 – 5 cm (1 – 2 inches) of negative ease into account for a fitted hat. For a more slouchy fit, take 0-5 cm (0-2 inches) of positive ease into account. The pictures show the 51.5 cm (20 ¼ inches) finished size, worn on a 52 cm (20 ½ inches) size head.
Pattern details
Bast is written for a gauge of approx. 13 sts / 21 rounds = 10 cm (4 inches) over reverse stockinette on larger needles after washing and gentle blocking.
Pattern languages included: English and Dutch (Dit patroon omvatzoweleen Nederlandse alseen Engelse versie)
Digital PDF has 3 pages in the English version and 4 in the Dutch version (letter size)
Materials
Yarn: 44 (55, 65, 78, 91) m (48 (60, 72, 85, 100) yds) / 26 (33, 40, 47, 56) g Vams PT3 by Rauma [100% wool; 82 m (90 yds) / 50 g] in color 44 neon Pink. Substitute any bulky yarn of a similar or slightly heavier weight for a similar result.
Knitting needles in your preferred style for small circumference knitting in the round in the following sizes (or to match gauge): Size 4.5 mm (US 7) and Size 5 mm (US 8).