Short rows are a very handy way to create shaping in knitted fabric. Use it, for example, to raise the back of the neck in sweaters. You can also think of horizontal bust shaping, to prevent a sweater from riding up. I really like German short rows, because they’re pretty invisible in the resulting fabric, and they’re easy to work too. I don’t know how this technique has gotten its name, though. As I understand it, Germans know the technique as the German equivalent of “double stitch” short rows. But who knows how those things evolve?
Grab your materials and let’s get started!
Materials used
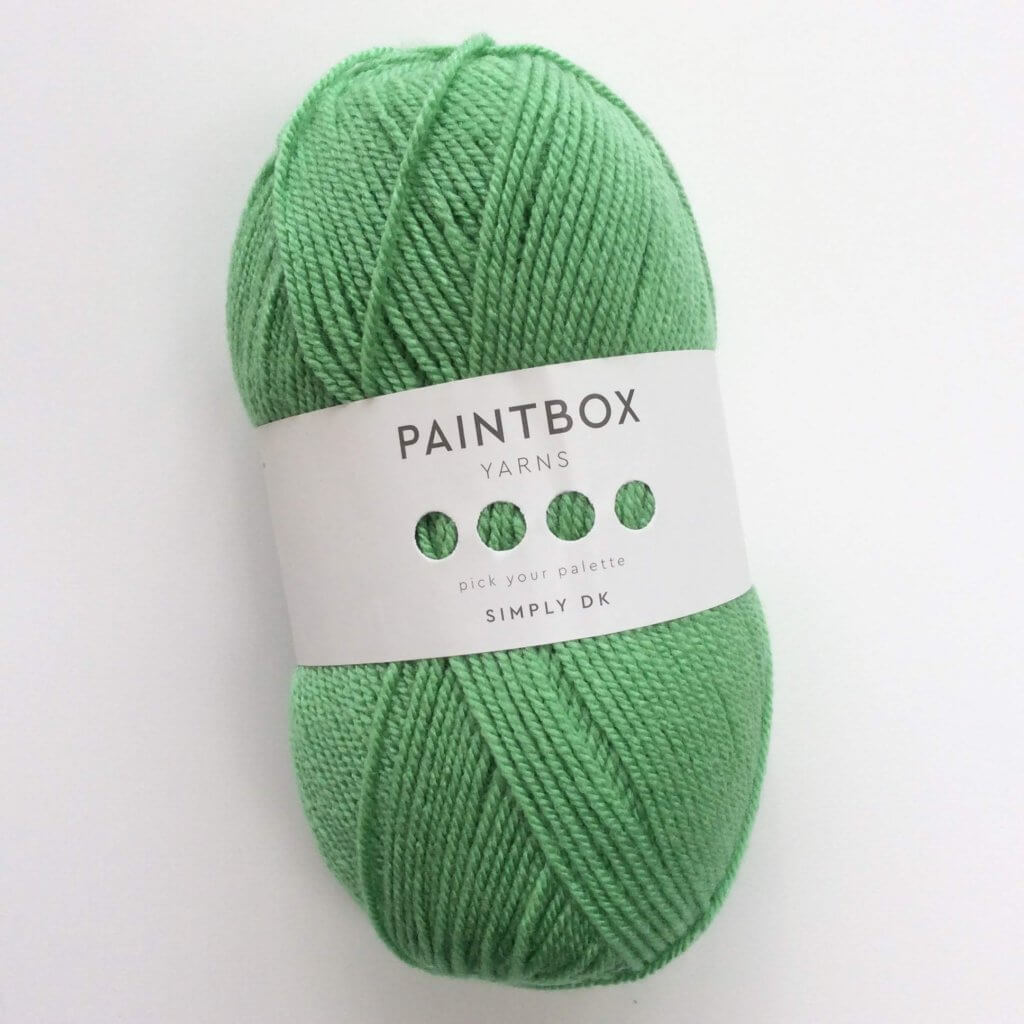

Yarn: Paintbox Yarns Simply DK, a good value, good quality 100% acrylic yarn, here in the color 125 Spearmint Green.
Knitting needles: This is a pair of straights that I picked up at the second-hand store when I started knitting. Brand unknown.
Working German short rows step by step
Please note that while I show the German short rows here from the right side of the fabric, the mechanics are really the same when working them from the wrong side.
- Work as instructed by your pattern until the point where it says “turn and make double stitch”.
- Next, turn your work, making sure you have the yarn at the front of your work, ….
- … and slip the first stitch on the left-hand needle purlwise.
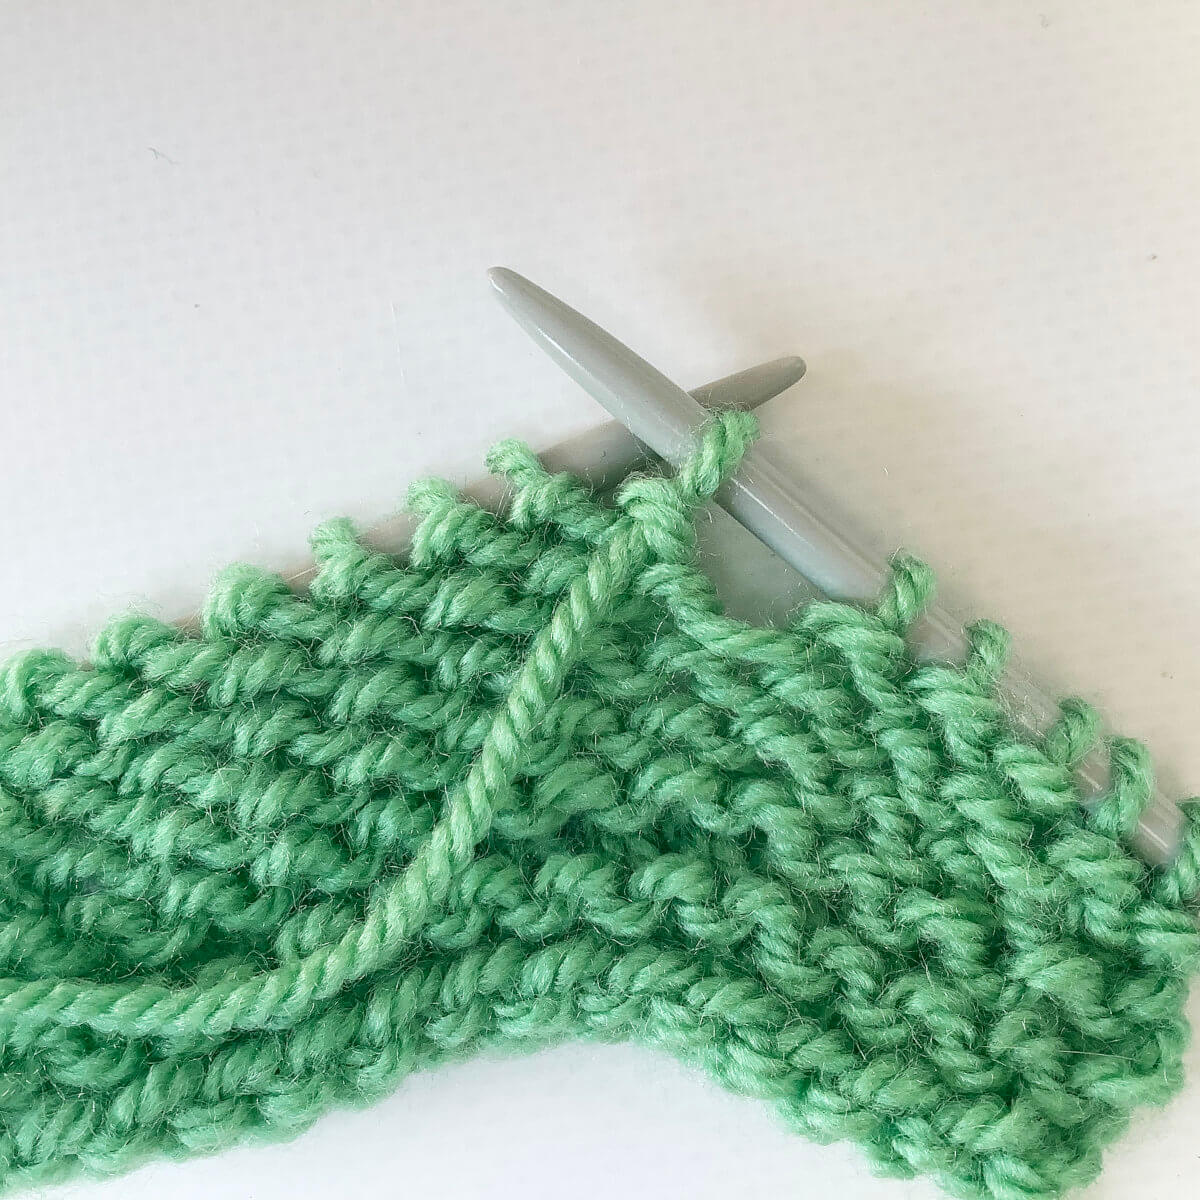
- To make the double stitch, or ds, we now bring the yarn attached to the stitch we slipped over the needle to the back of your work and pull. This lifts it up and over the needle, pulling the base of the stitch with it.
This base consists of 2 strands of yarn, making it look like there are 2 stitches, hence the name “double stitch”.
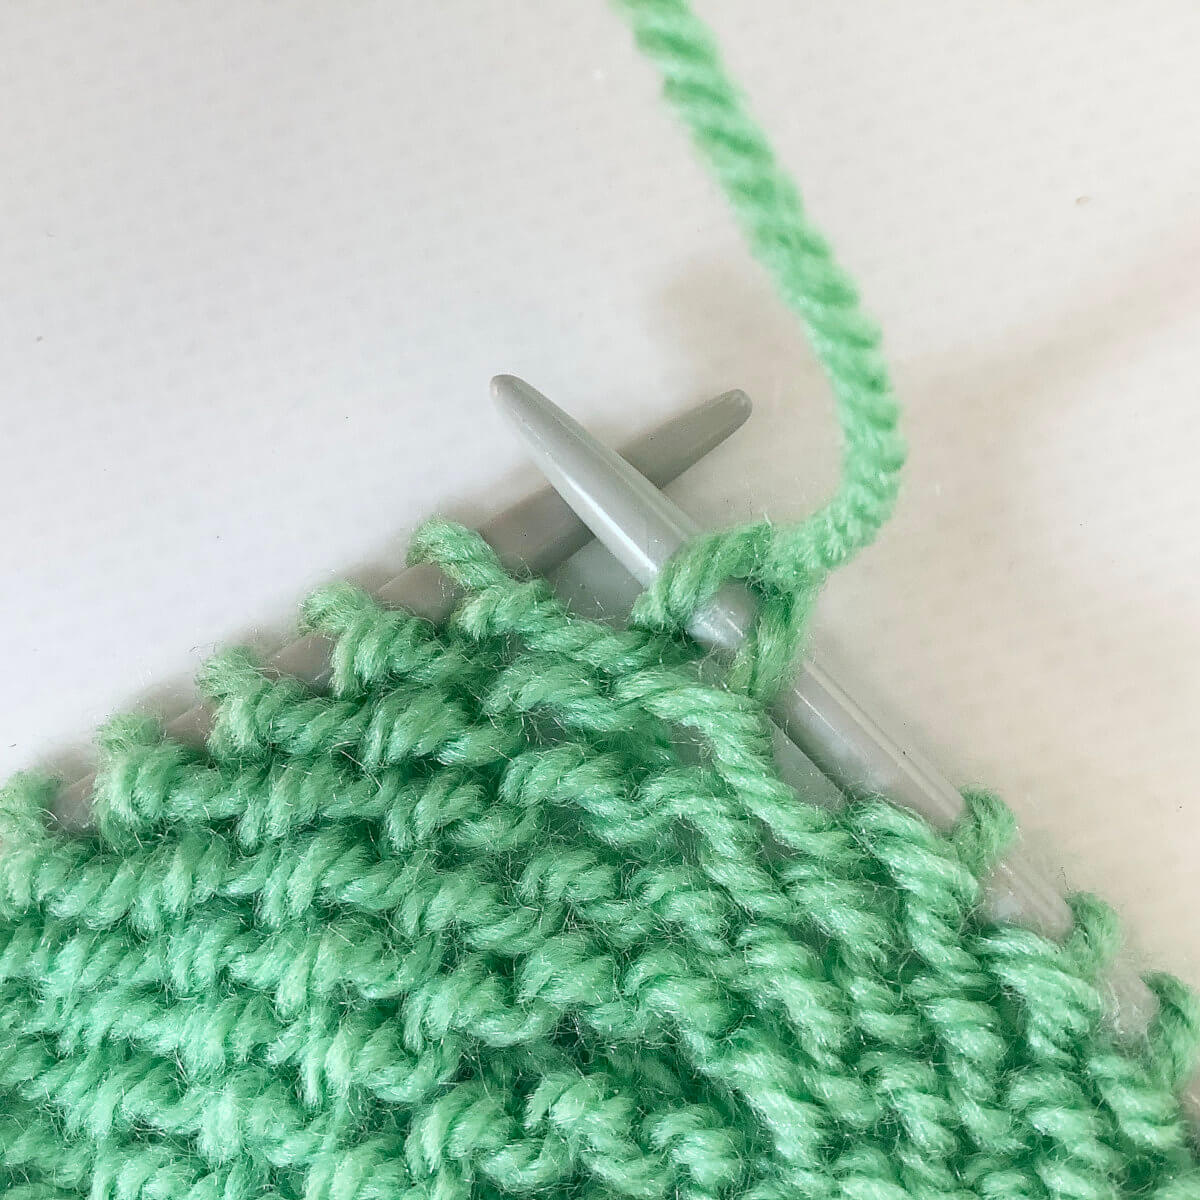
- Next, if the next stitch is to be purled, bring the yarn back to the front of the work between the needle and purl. If the next stitch is to be knit, keep the yarn at the back of the work.
In this step it’s important to keep the tension on the yarn, to make sure the double stitch does not slide back into its previous position, before you secure it with the new stitch worked.
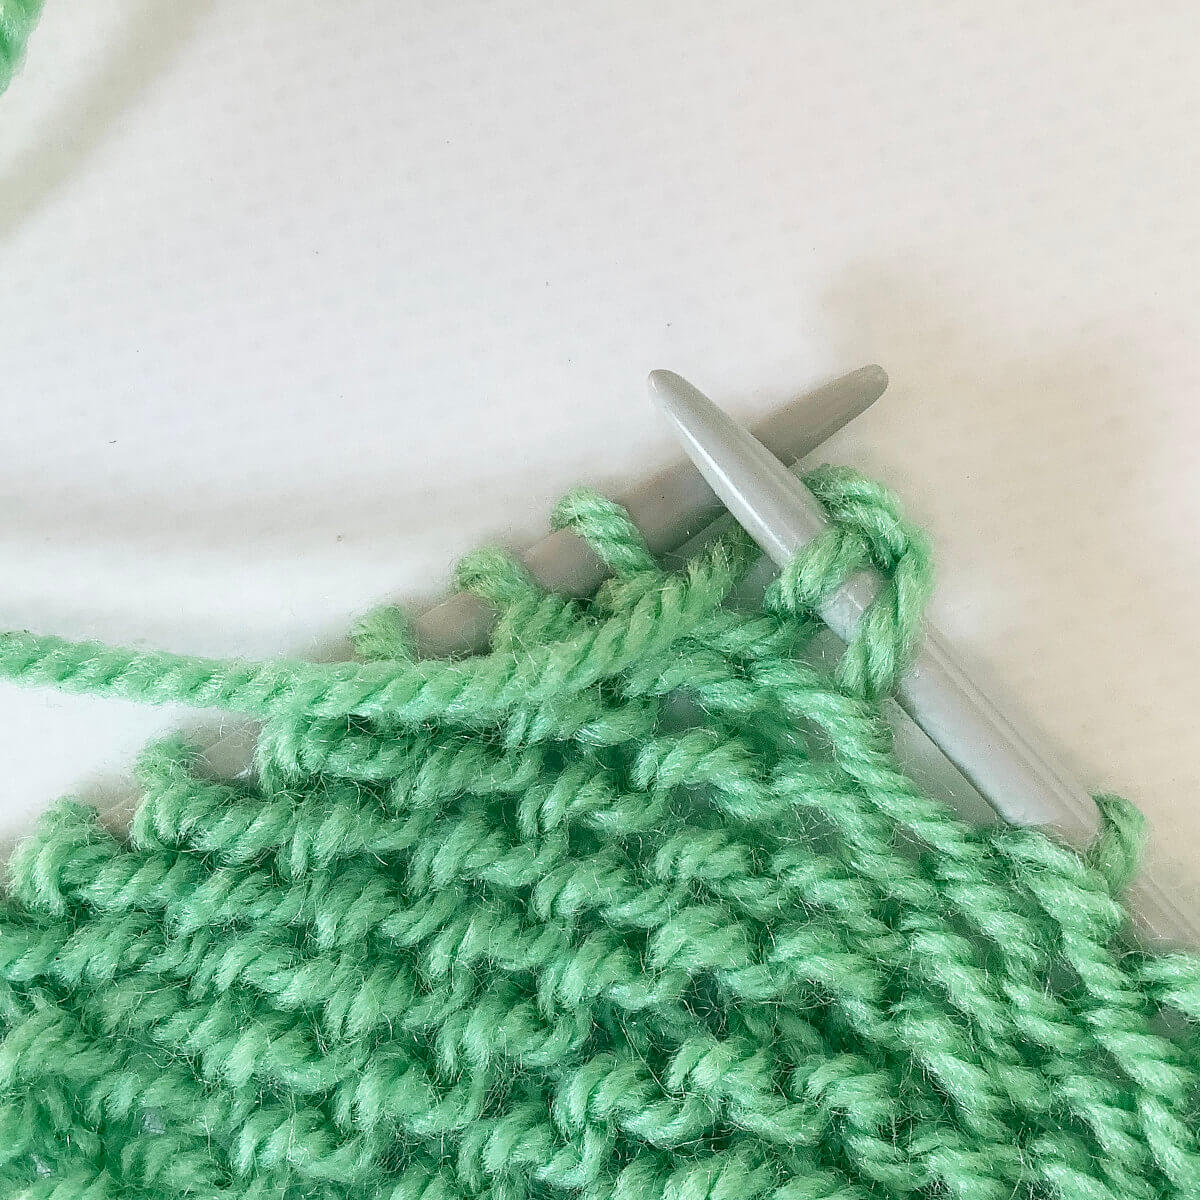
- Then continue to work the pattern, making double stitches as instructed.
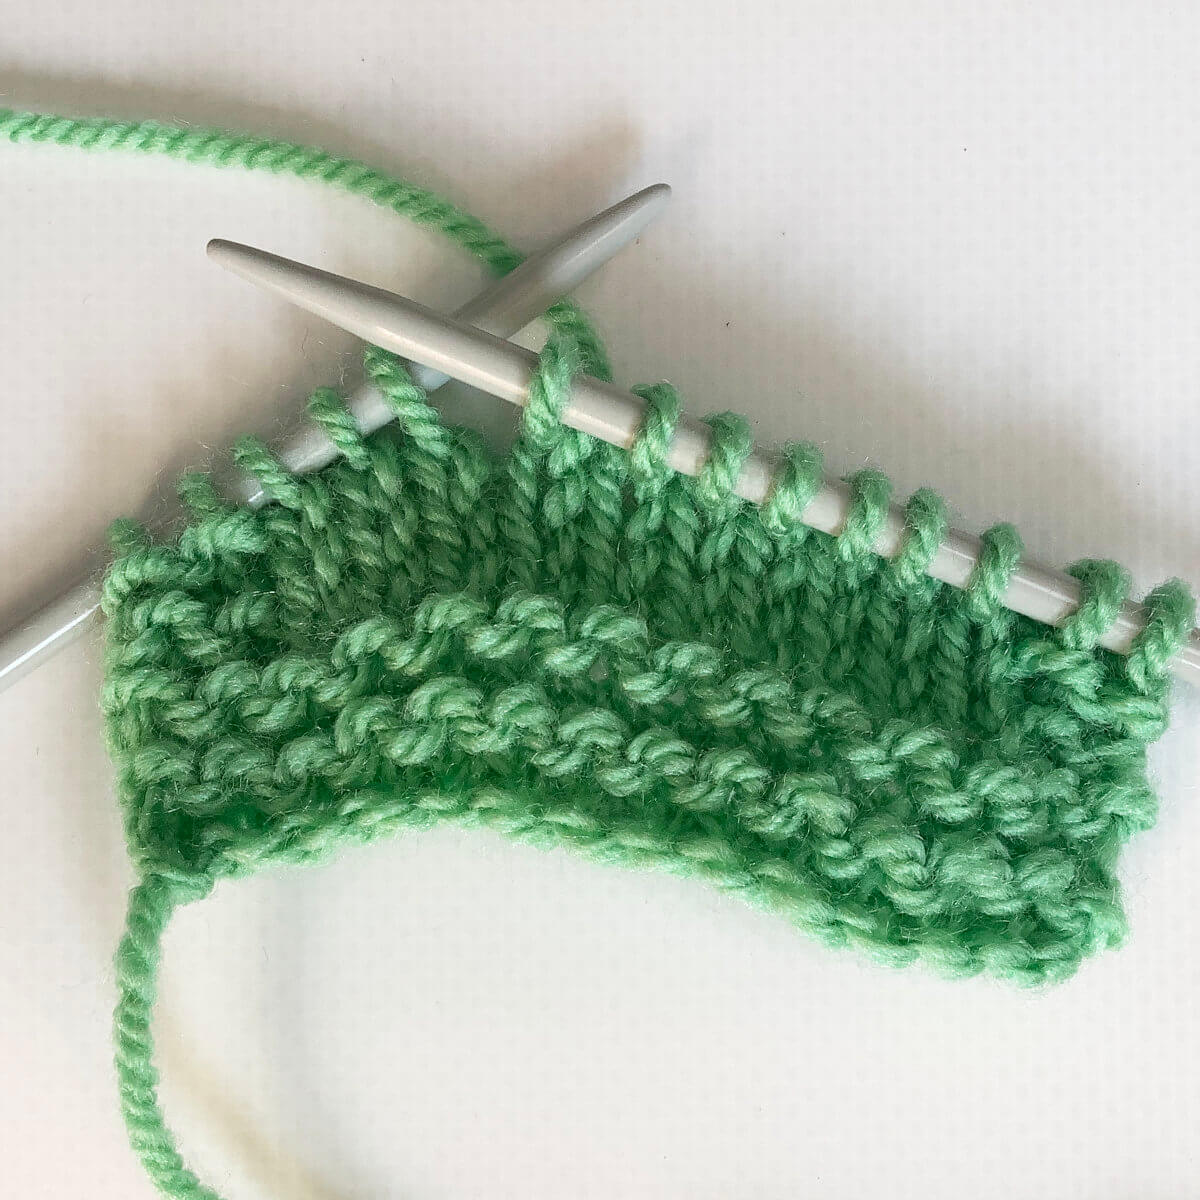
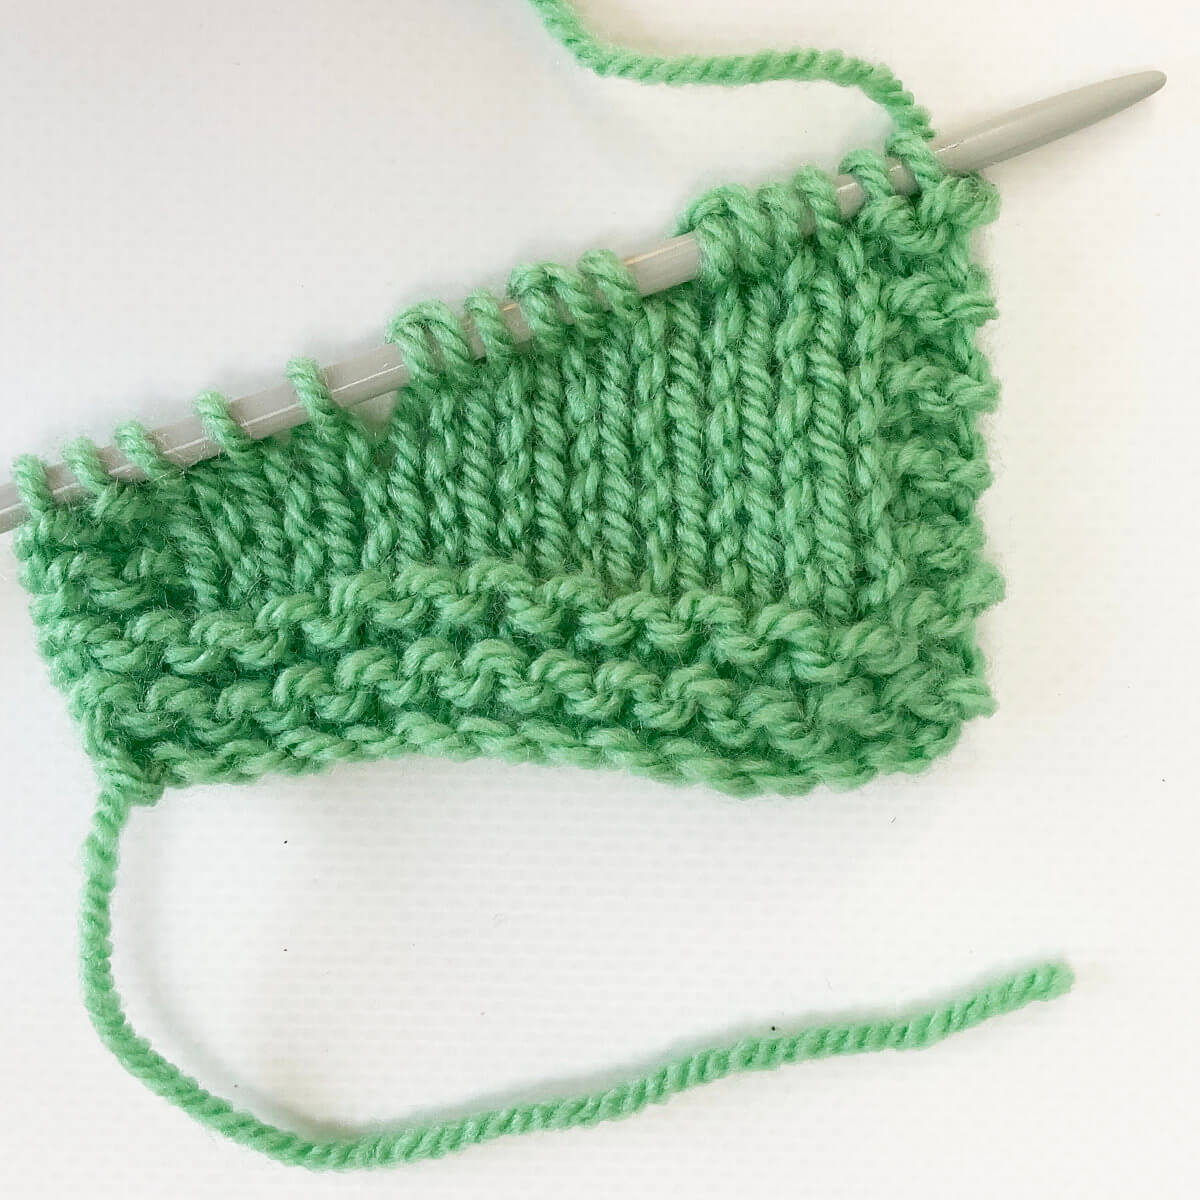
In this example, I purled back to the end of the row, working the last 2 sts as knit stitches to keep the edges in garter stitches. Do you see the ds, just before the turning gap?
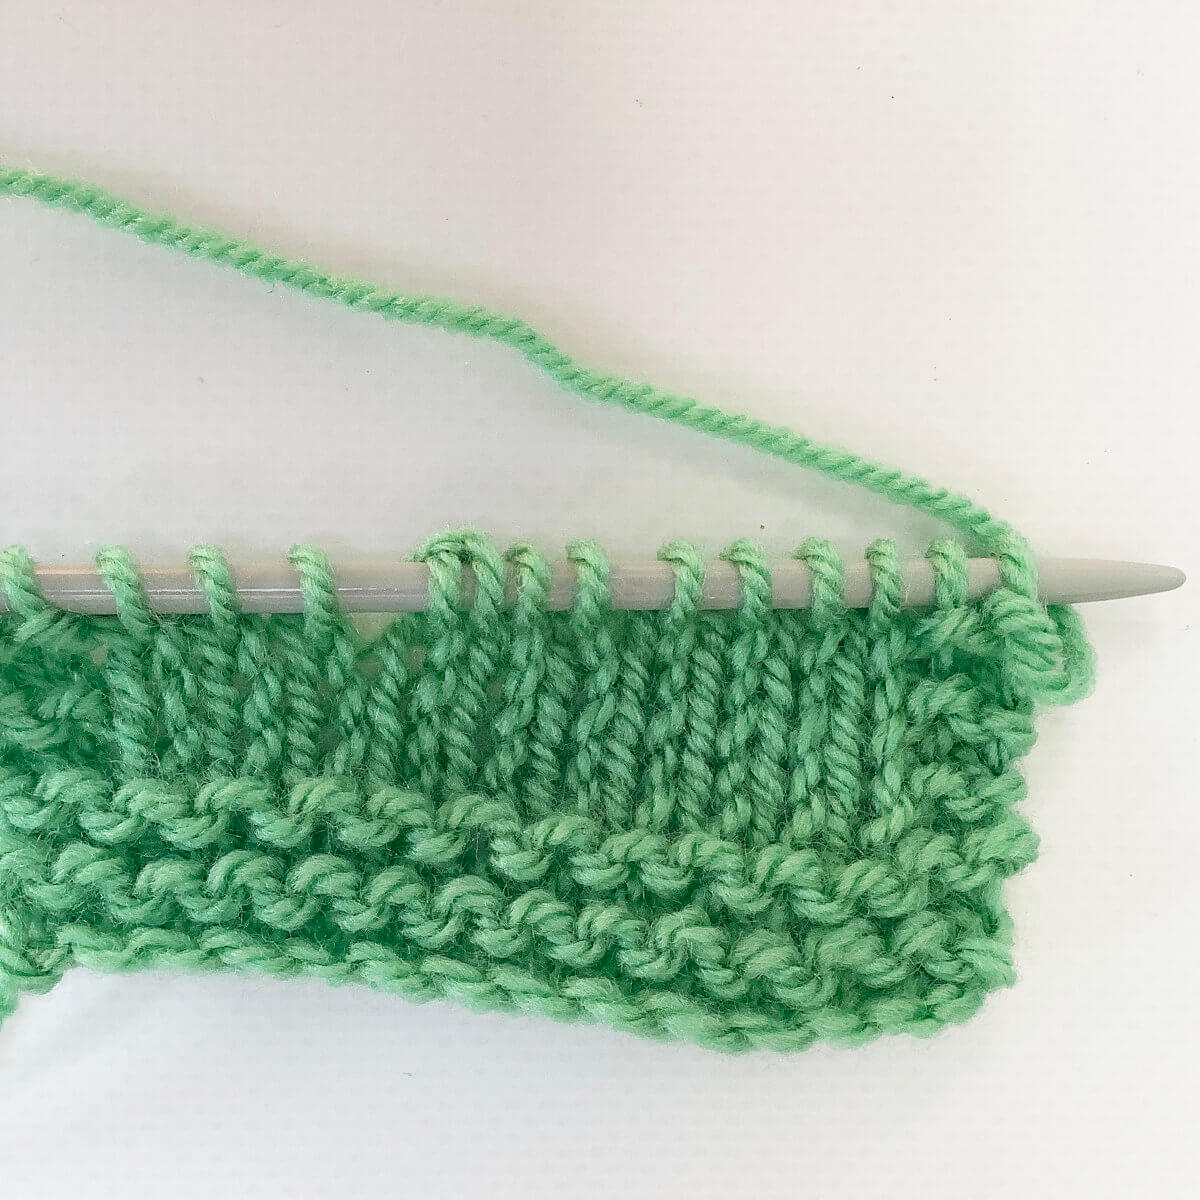
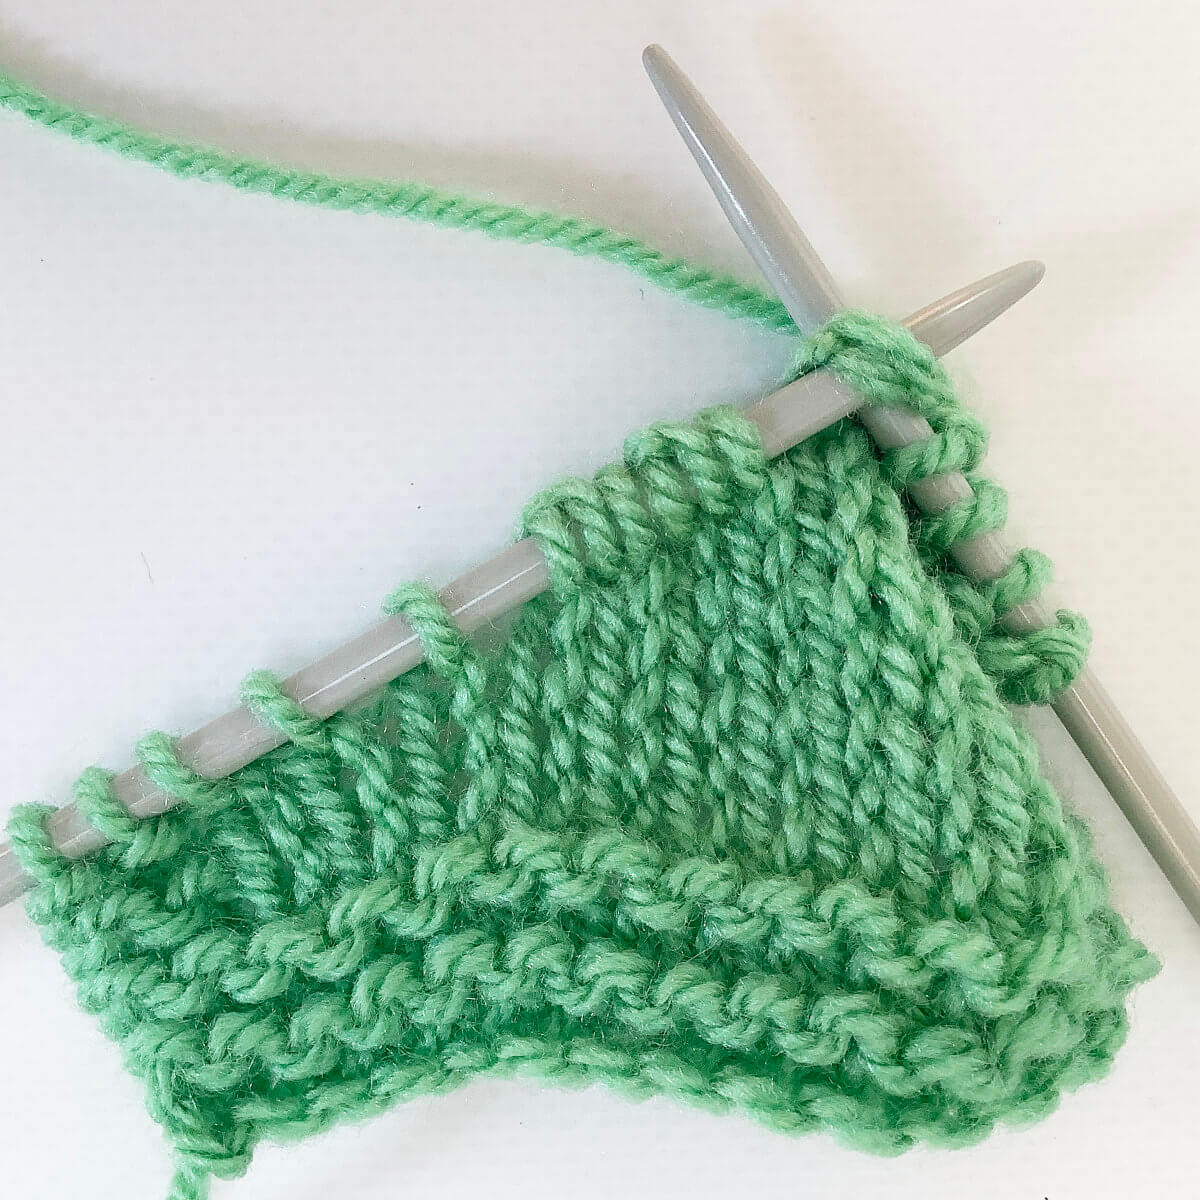
- Then I worked 2 more sets of short rows, with each set turning to the WS at 2 sts before the last “turning gap”.
Please note: the ds is counted as a single stitch here! In other words: I worked steps 1 to 6 of this tutorial twice more. This is then the result:
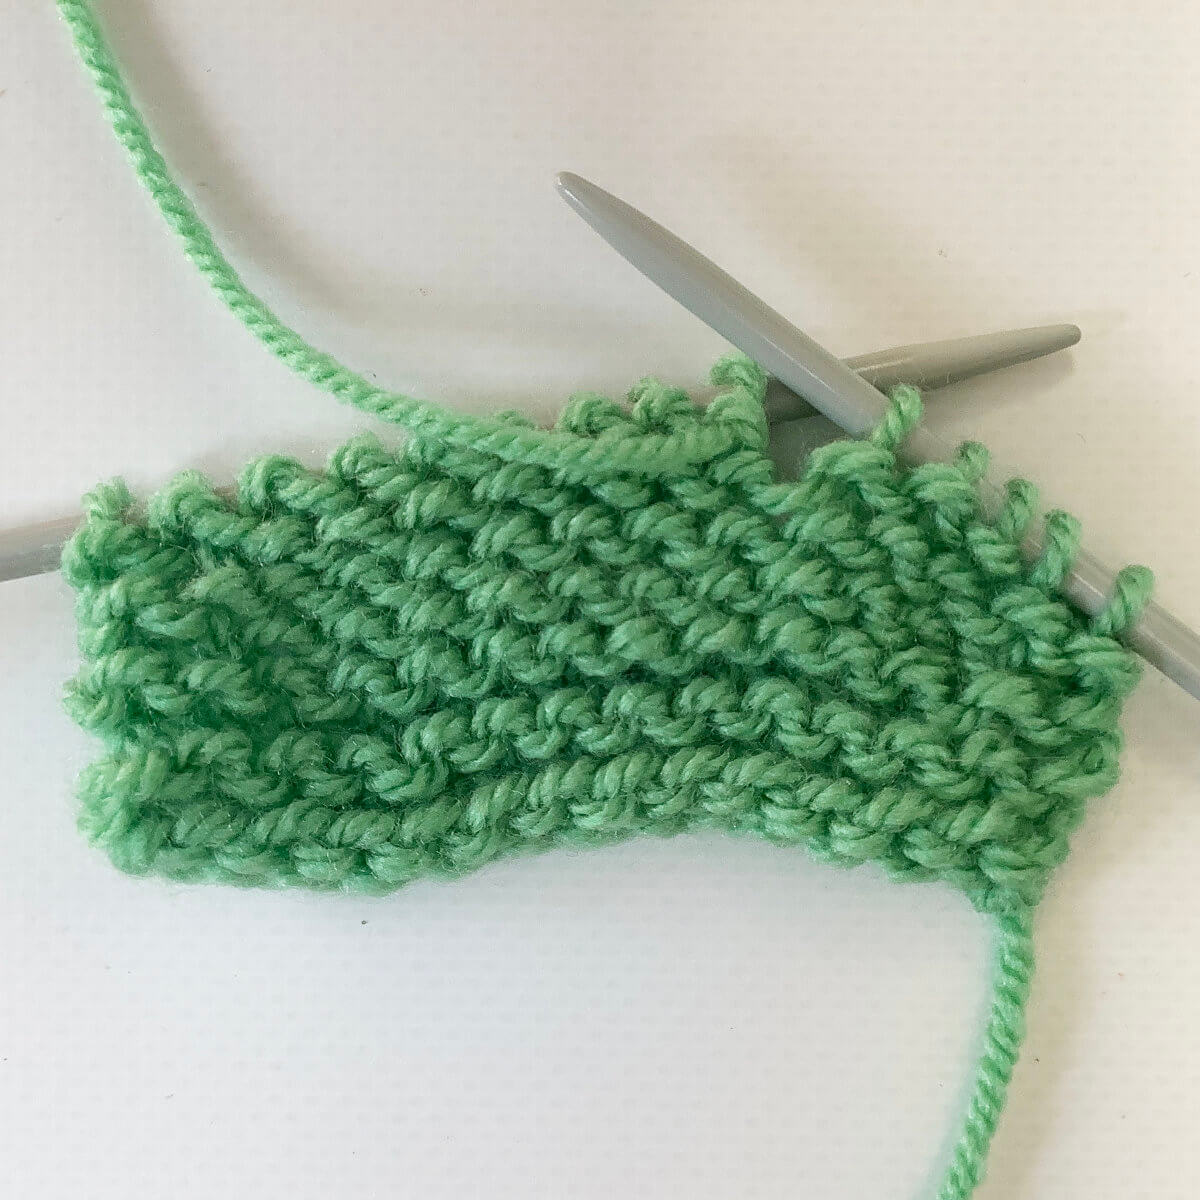
- At a certain point, you won’t be working short rows anymore and will resume working over the entire row or round of the work. To close the “turning gaps” you will be working over the double stitches.
Whenever you encounter a double stitch, just knit or purl over both strands as if it were a single stitch.
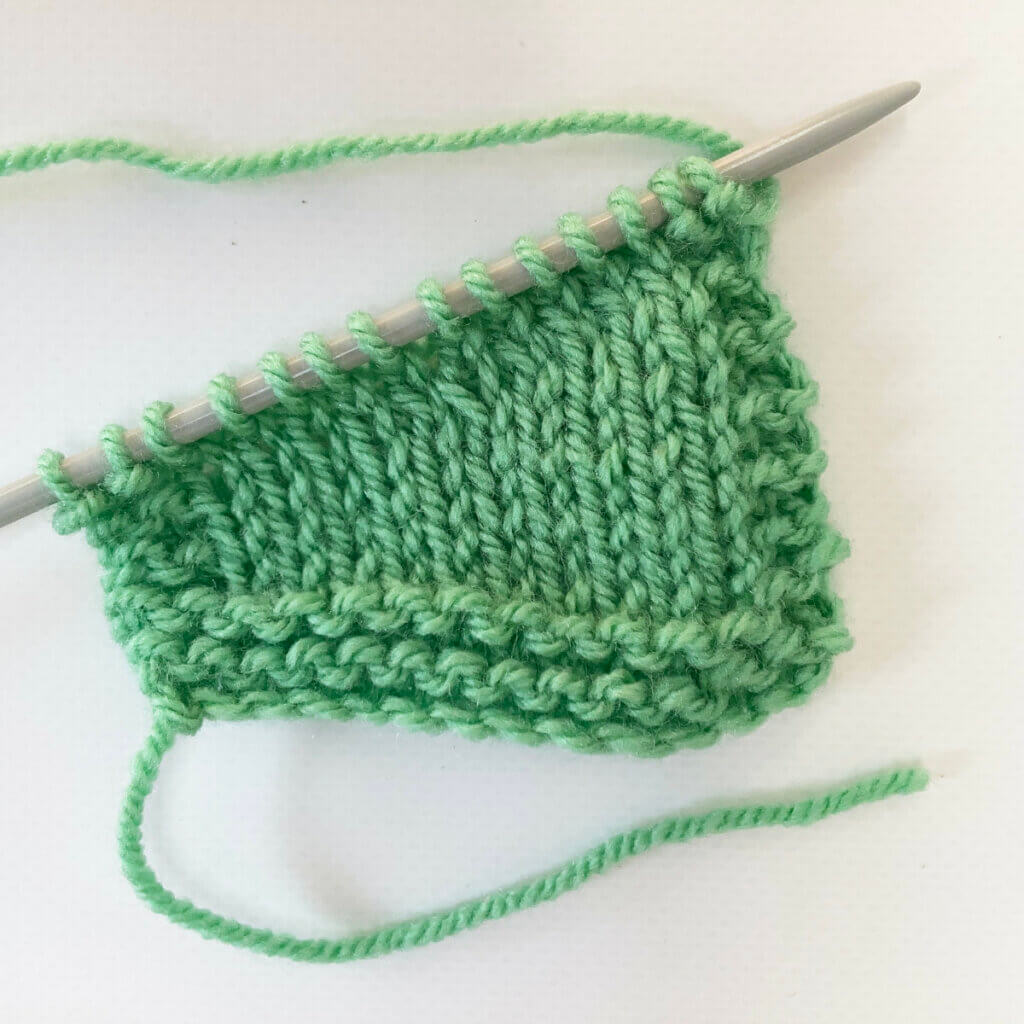
The result
When viewed from the right side:
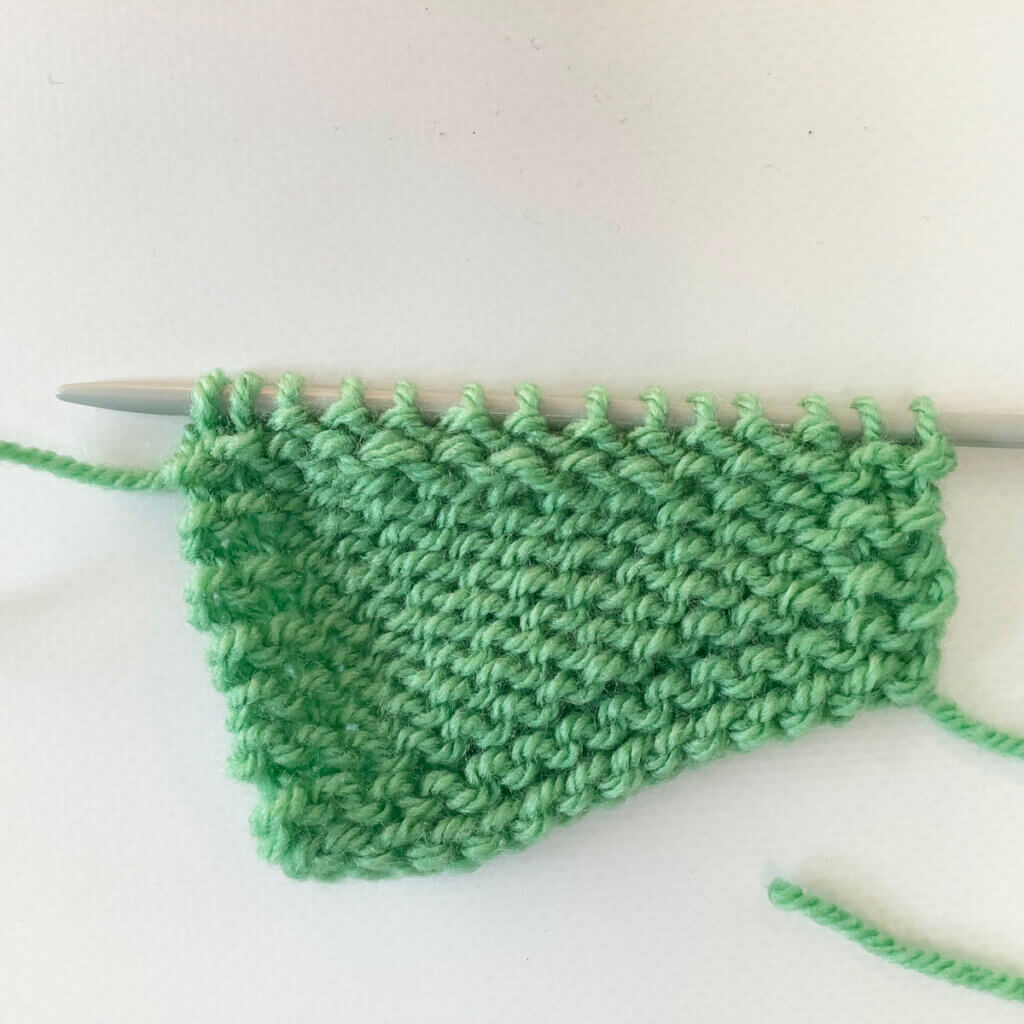
And, of course, when viewed from the wrong side of the fabric:
Substituting German for wrap & turn short rows
When you have knitting instructions that contain classic wrap & turn short rows, you can’t just substitute them with German short rows. If you do that, the stitch counts will be off. As a result, the placement of the shaping will be slightly different from what’s intended in the pattern. The main difference between both methods is that with wrap & turn, the wrapped stitch is slipped but not worked. This means it technically isn’t part of the short row itself. With German short rows, however, the stitch in the row below the double stitch is the last stitch worked on the previous short row. This means it’s included in the short-row stitch count.
When substituting German short rows for wrap & turn ones on rows that are getting shorter: Work to the number of stitches as mentioned in the w&t instructions before the last turned stitch, then work 1 more stitch and turn your work. At that point, you’re ready to make a ds as described in step 2.
When substituting German short rows for wrap & turn ones on rows that are getting longer: Work 1 fewer stitch before the previous double stitch than called for in the directions for the w&t short rows, and turn your work. Again, you’re now ready to make a ds as described in step 2.

Thanks to my Patreon supporters for bringing you this freebie! Creating quality patterns and tutorials is a lot of work and resource-intensive. However, I find it important to give you free content like this tutorial. Thanks to the generous support of my Patreon supporters, I can make it happen. Thank you, patrons! Click here to join, or click here to read more about La Visch Designs on Patreon.


