cardigans & sweaters

cardigans & sweaters

tutorial – avoiding holes at the underarm with top-down sweaters
Avoiding holes at the underarm with top-down sweaters

Whenever you’re knitting a top-down sweater, there comes a point where you’re going to pick up the held stitches to work the sleeves. There will, however, be a difference between working those sleeves for a raglan or a circular yoke garment vs a set-in sleeve garment where the sleeve cap is worked top down with short rows. In the case of a raglan or circular yoke, stitches are often cast-on at the underarm. In the corners, where those stitches meet the live stitches being held for the sleeves, there is a risk of holes in the resulting garment. Instructions often say to close those up with the yarn tail. But, in my opinion, it’s better to avoid them than to fix them! That’s the reason that in my garment patterns, detailed instructions are included for this.

In this tutorial, I’ll show you how to avoid holes at the underarm with a circular yoke top-down sweater I currently have on the needles. It’s the Knitwords Sweater (Ravelry link!) by Cori Eichelberger.

Materials used
Avoiding holes at the underarm with top-down sweaters - materials

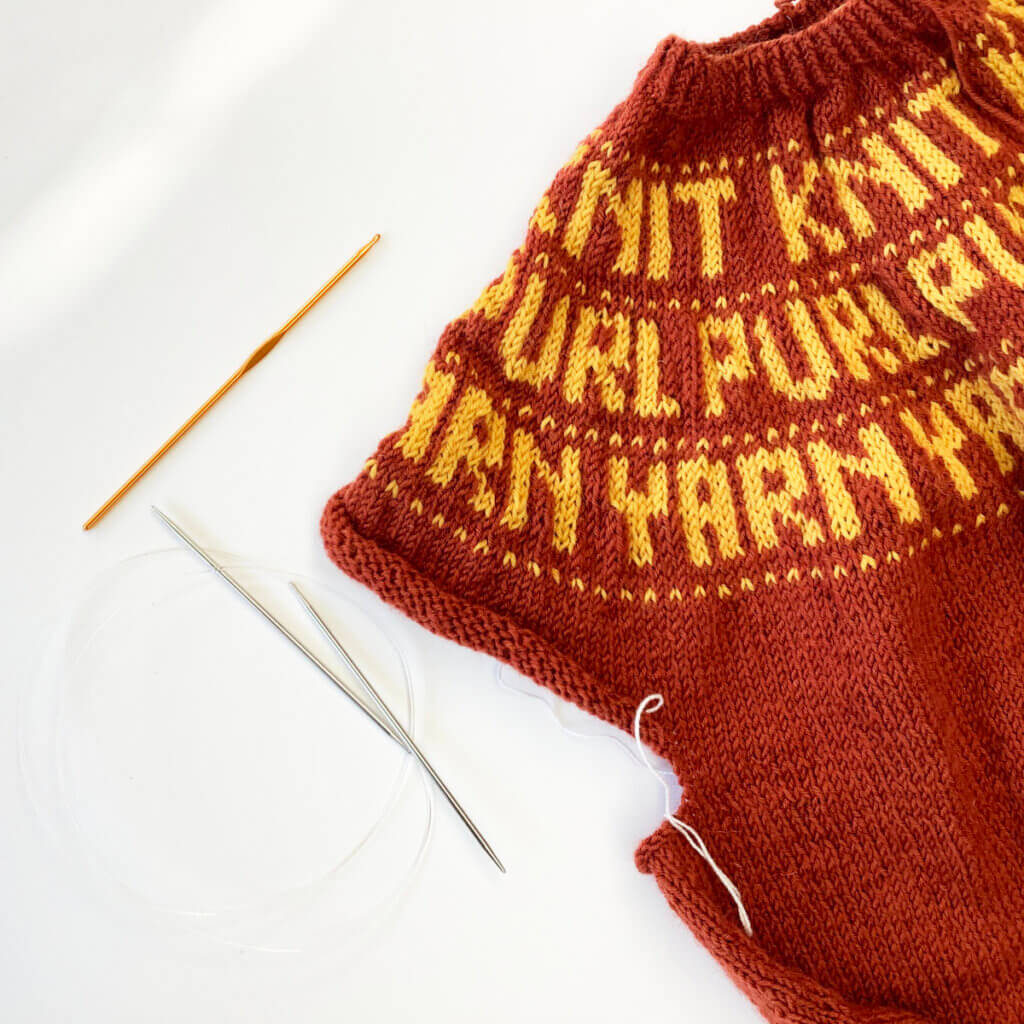
Garment WIP: Knitwords sweater work-in-progress, with the sleeves stitches held on waste yarn. You’ll also need yarn to work the sleeve. Here I’m using a DK weight sock wool.

Other materials: A circular knitting needle in the size needed for the garment gauge, bulb pins or removable stitch markers, and a crochet hook in a similar size as the knitting needles. The crochet hook is optional, but I find it makes picking up stitches a lot easier. Therefor, I certainly recommend using one.

Let’s get started!

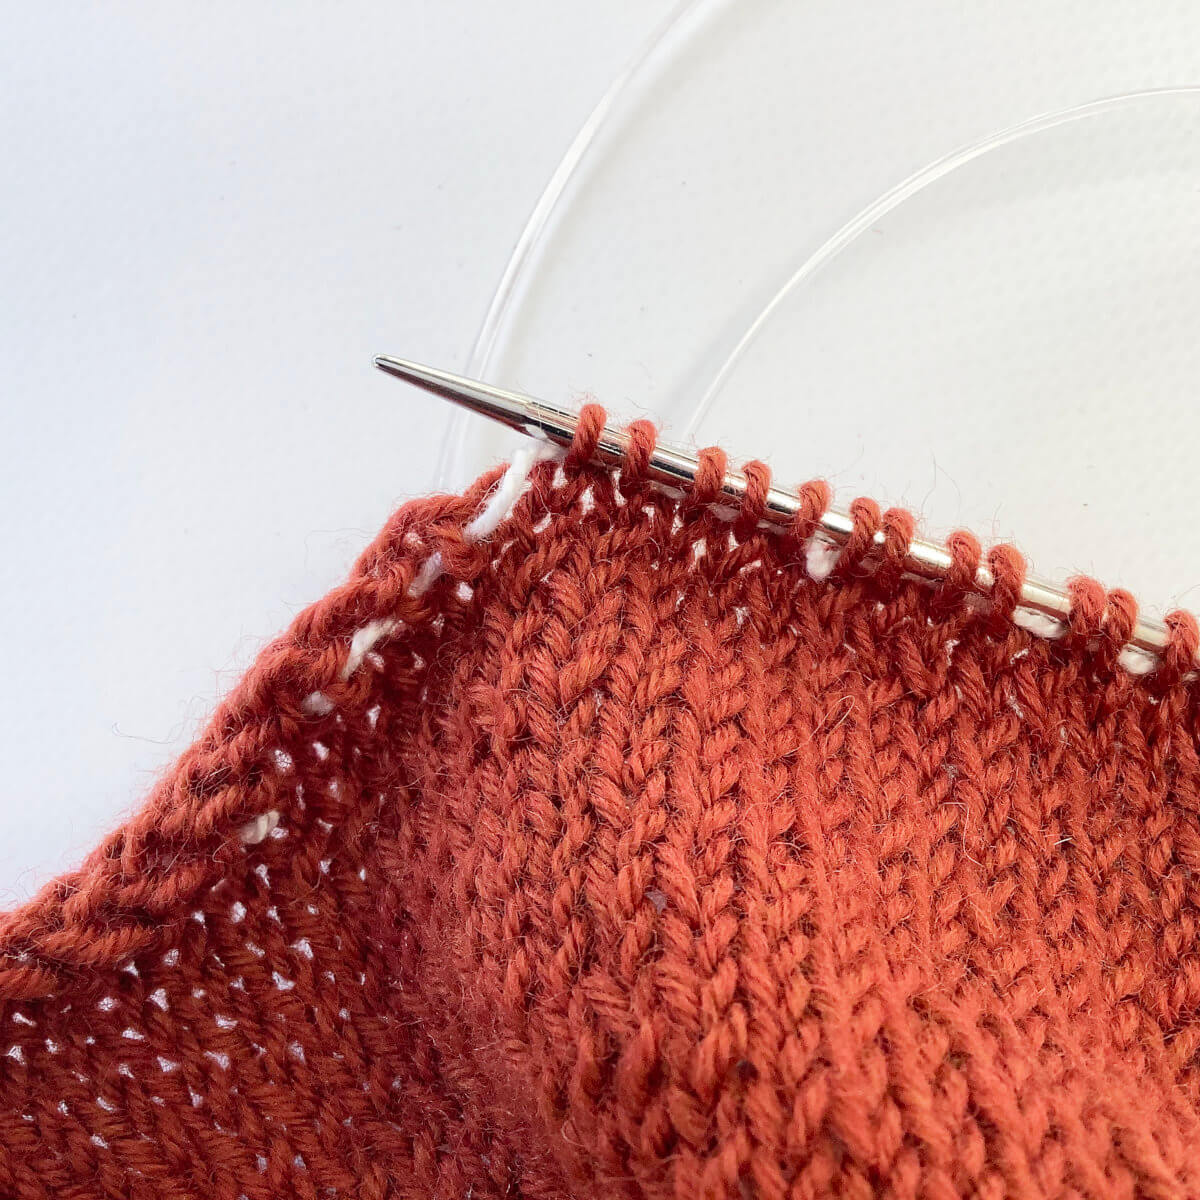
  1. To start, put the live stitches on the knitting needle.

    I’m using a circular needle, but you could, of course, also use DPN’s. I often leave the waste yarn in for a bit, it can be removed once the sleeve has a bit of length and there is no risk of dropping stitches anymore.Step 1 - putting the stitches back on the needle

  2. In this picture, all stitches are replaced on the needle.
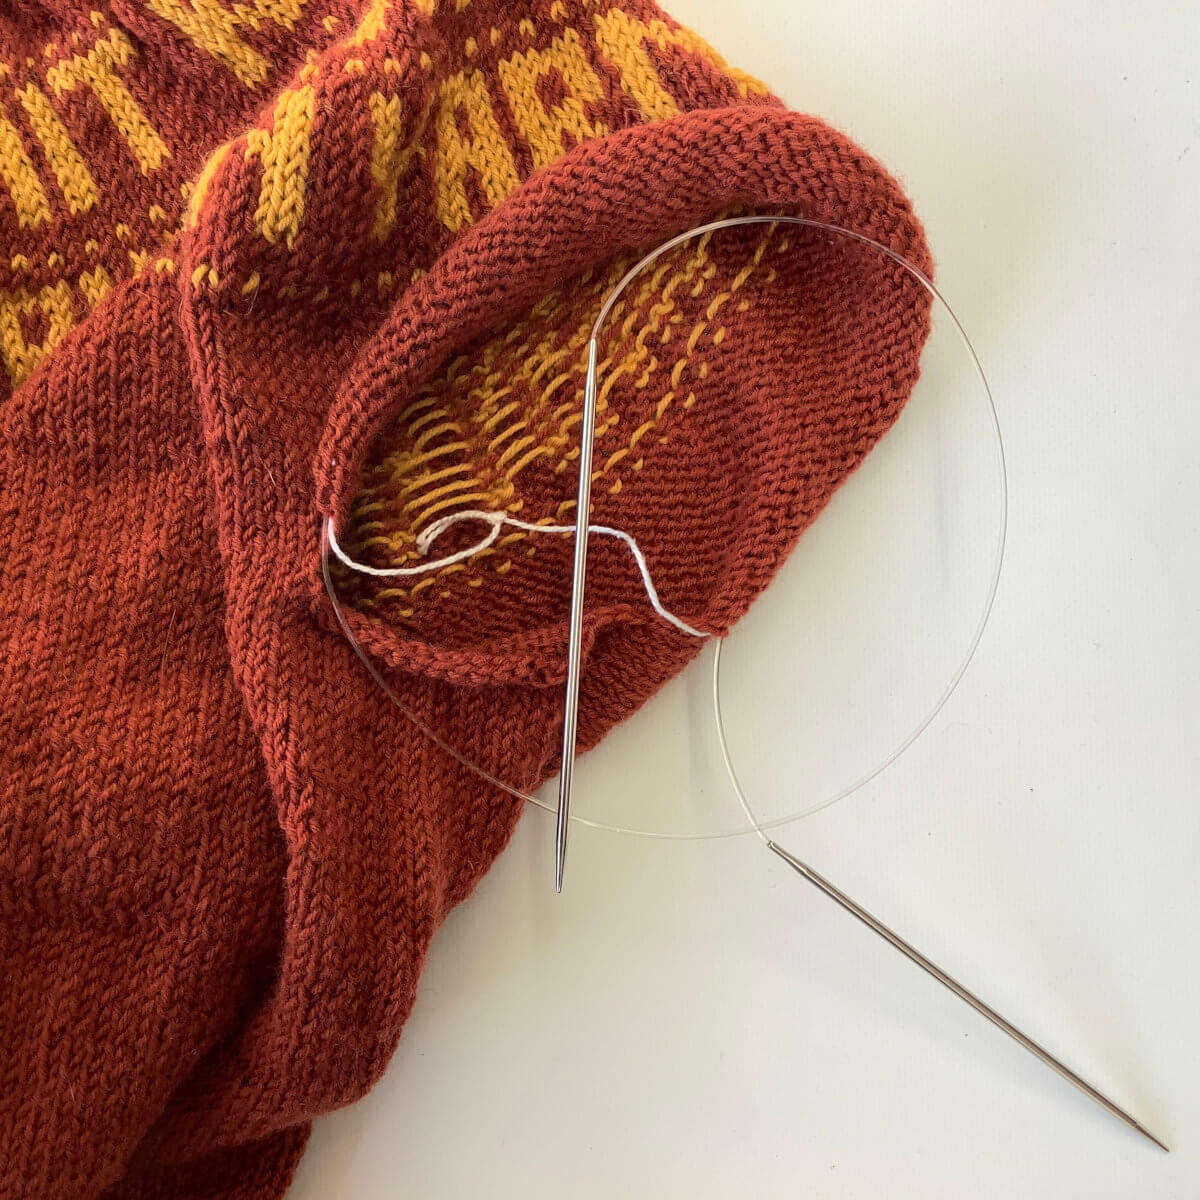
    Step 2

  3. Here, you can see the stitches that were cast-on for the underarm. I have marked the first and the last stitch, because this will make it easier to know where to start and stop picking up those stitches.
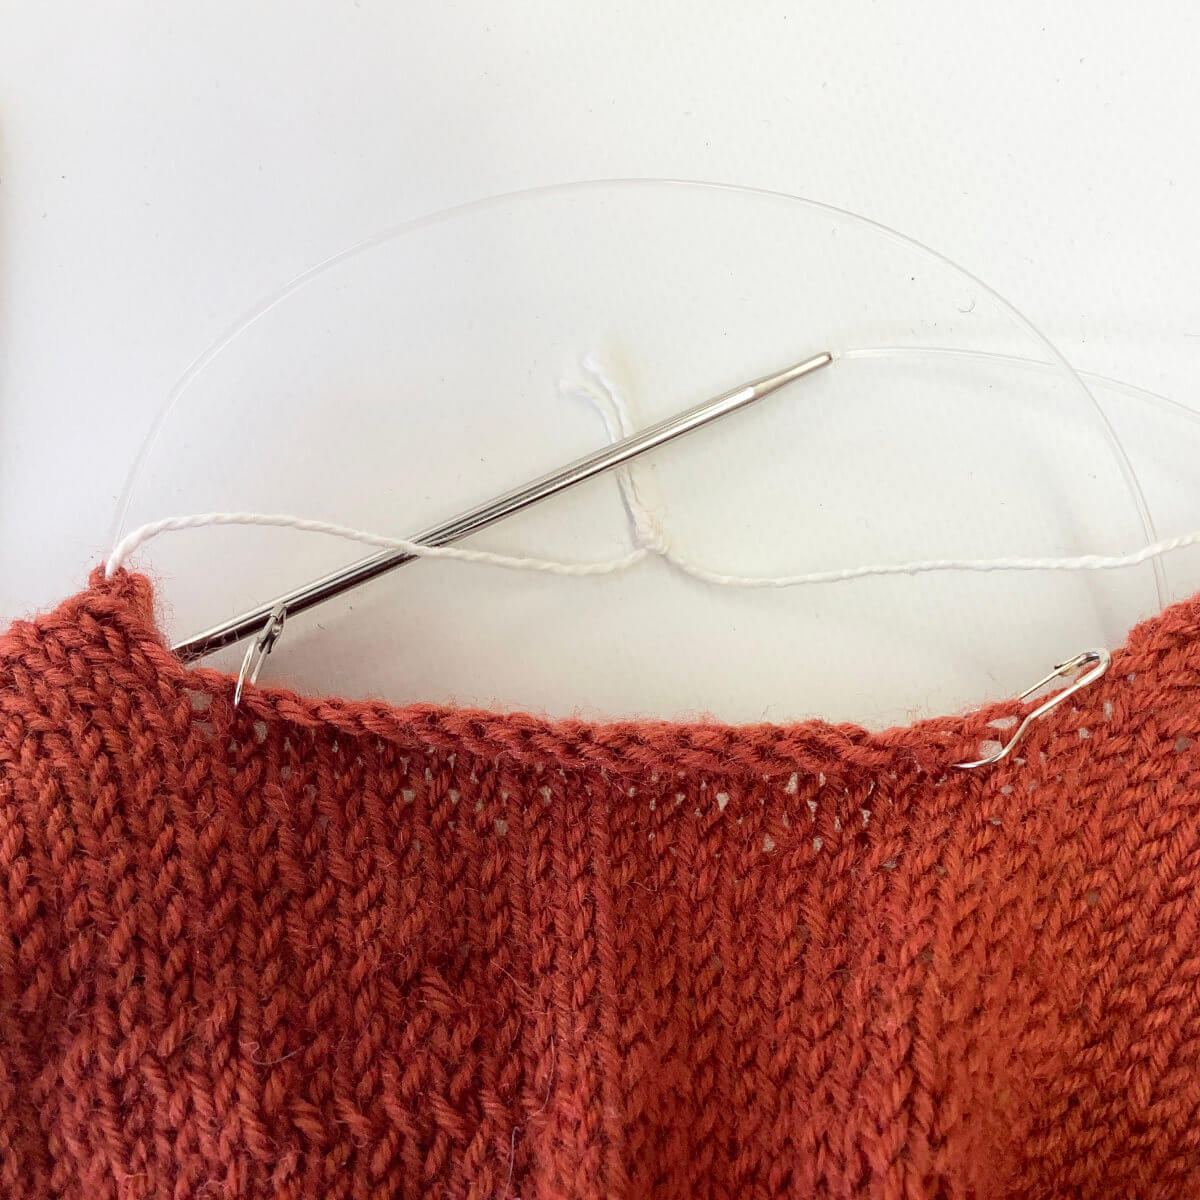
    Step 3 of avoiding holes

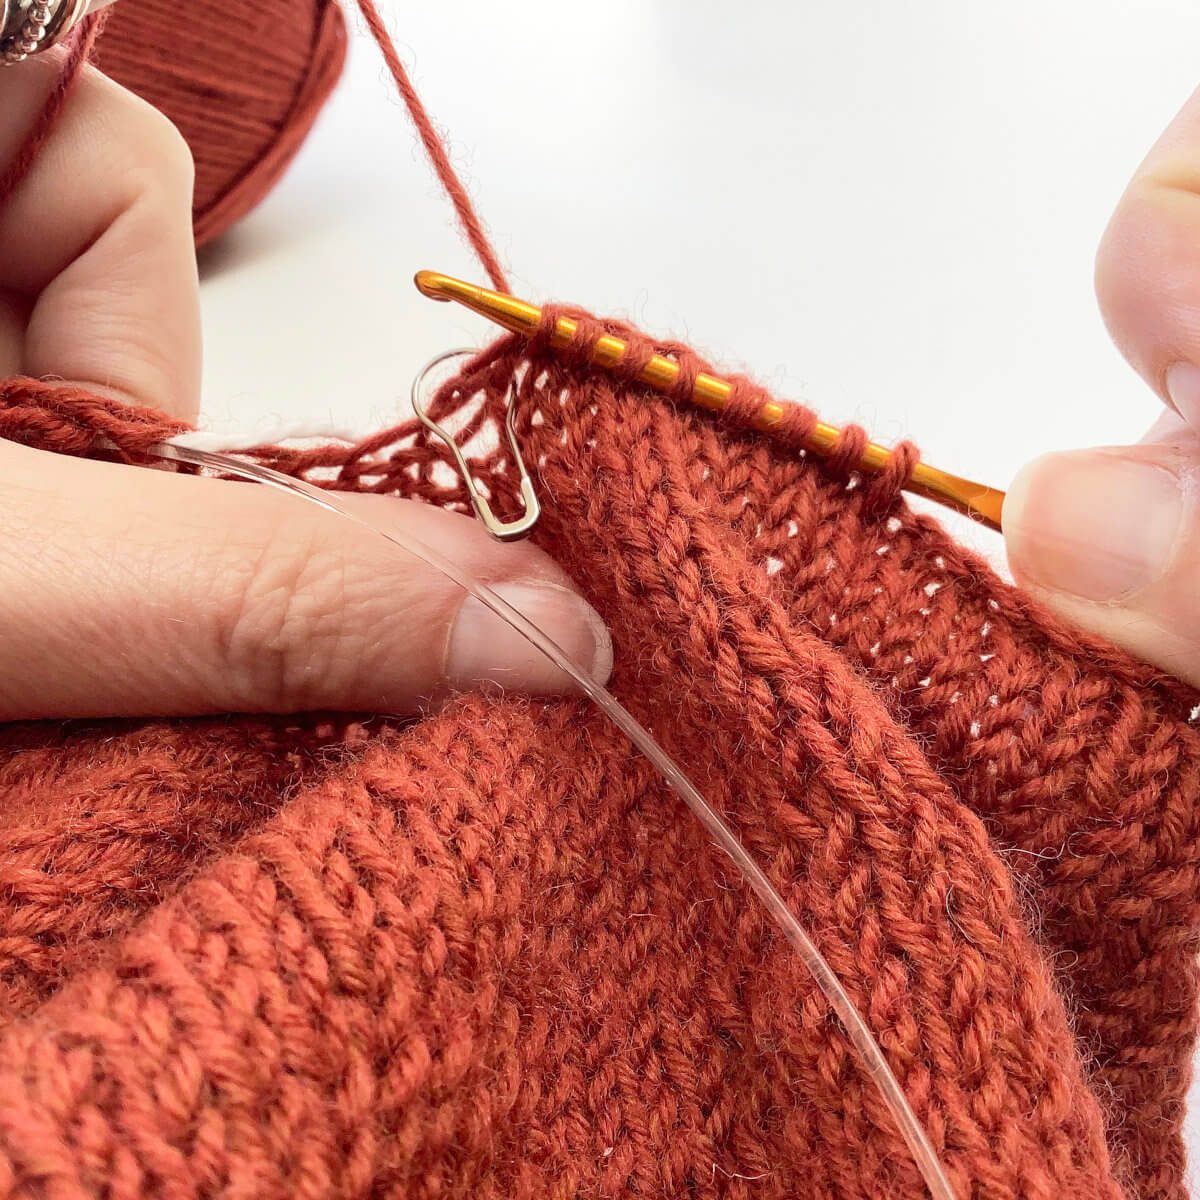
  4. Next, find the middle of those stitches (if you want the end-of-round to be in the middle). Insert the crochet hook in the middle of the “V” formed by the stitch….
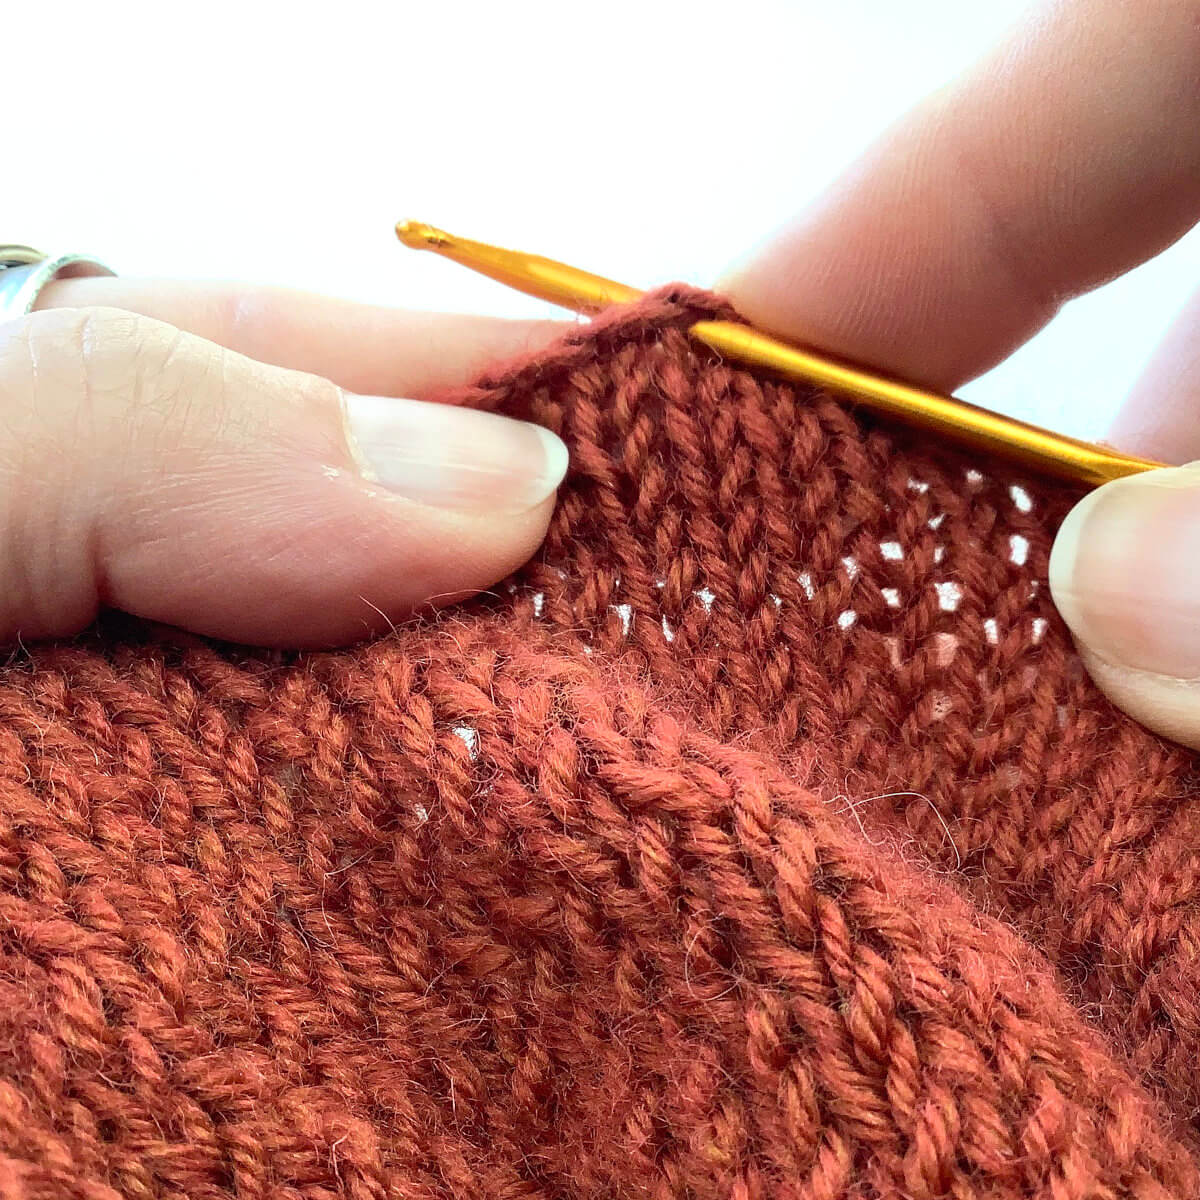
    step 4

  5. … wrap the yarn around the hook and pull it through.
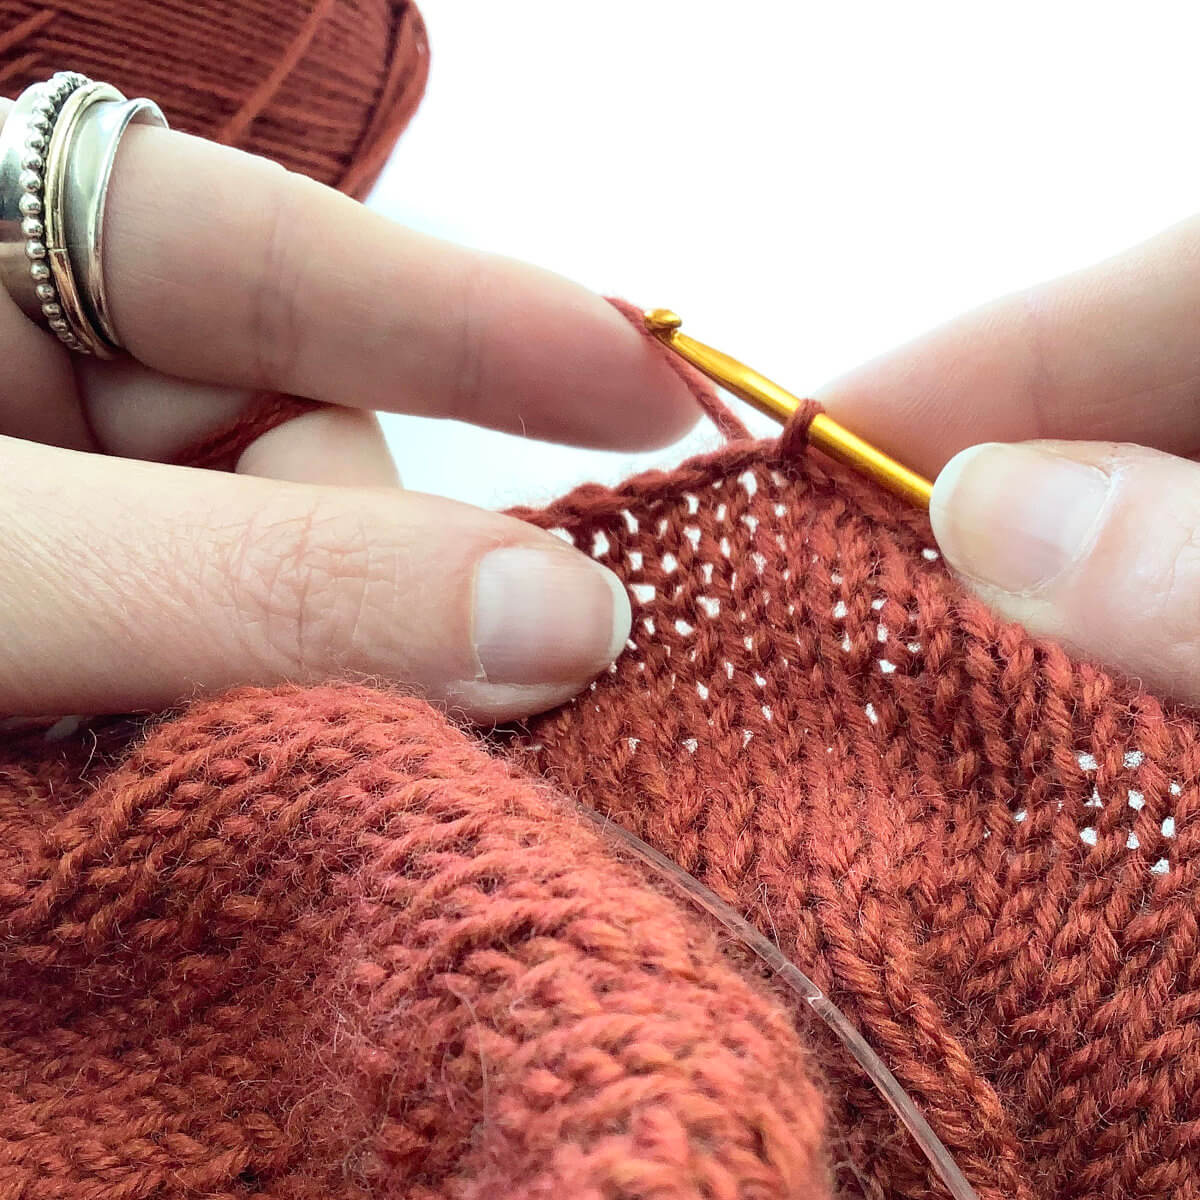
    Step 5 of avoiding holes

  6. Repeat steps 4 and 5 until you’ve worked the marked stitch.

    In this example, I’ve left the picked up and knit stitches on the crochet hook to be placed on the knitting needle once they were all worked. You can, of course, also do that after every stitch worked.step 6

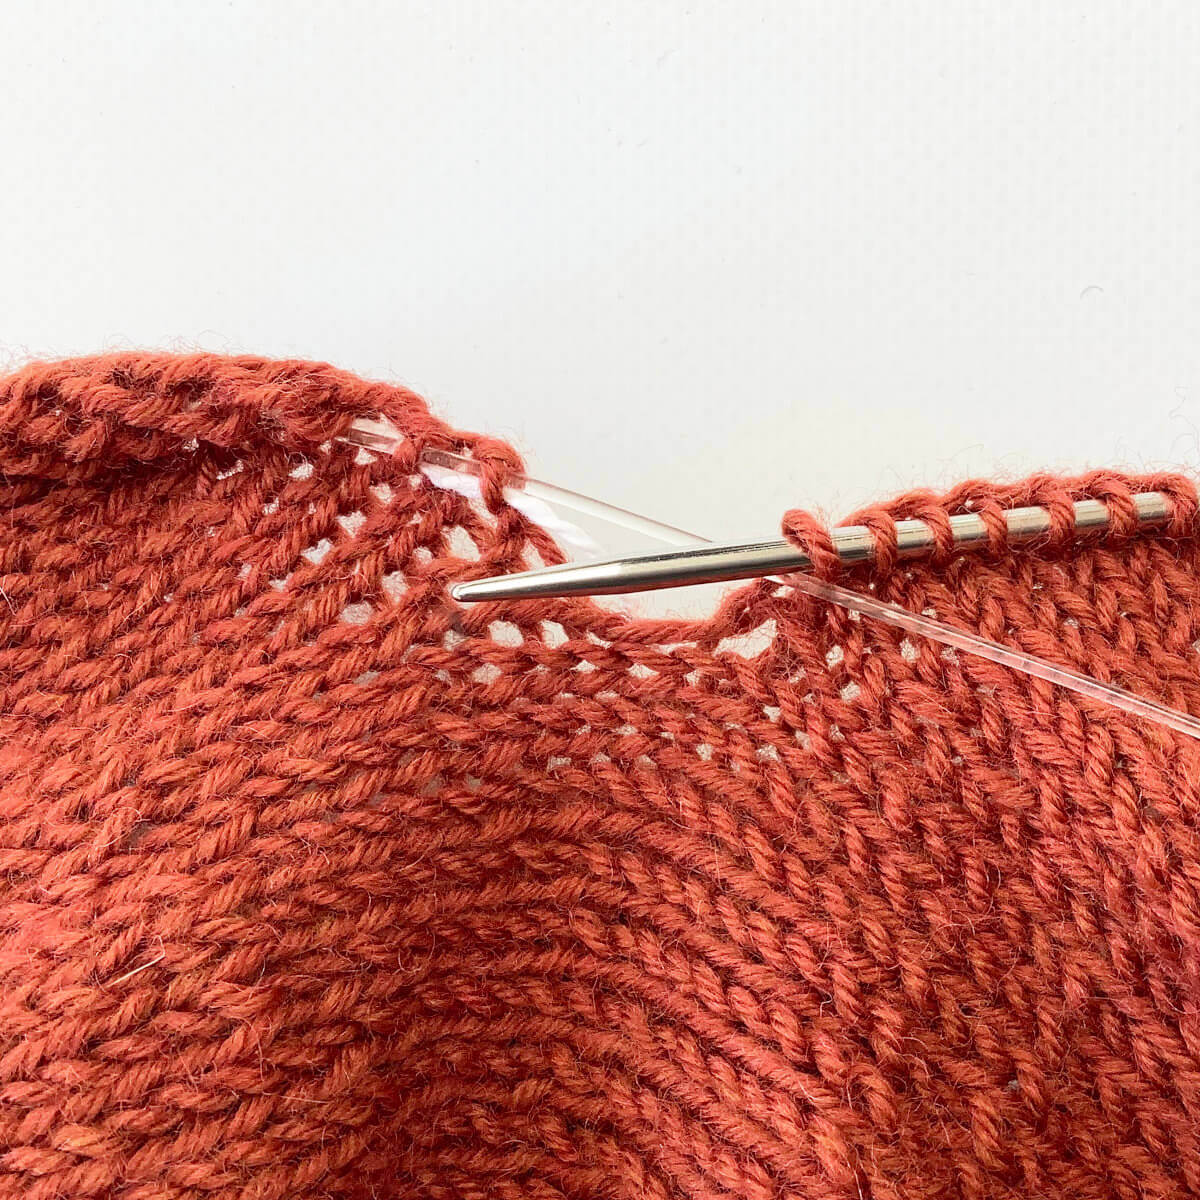
  7. Here, I’ve placed the stitches on the right-hand part of the circular knitting needle.

    Now we’re getting to the actual “avoiding holes” part!Step 7 of avoiding holes

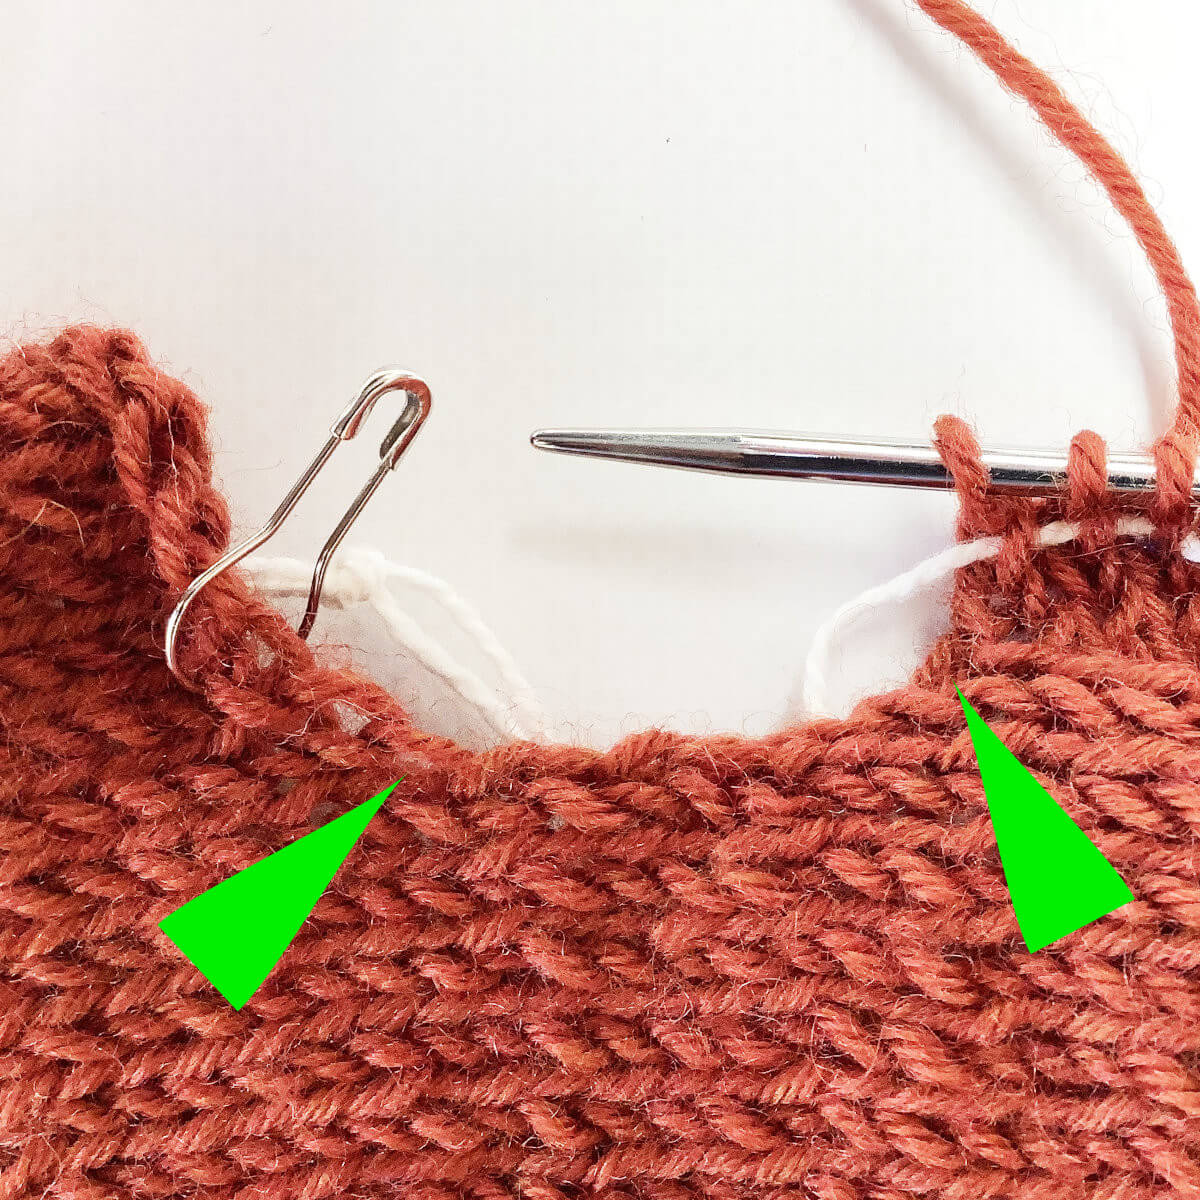
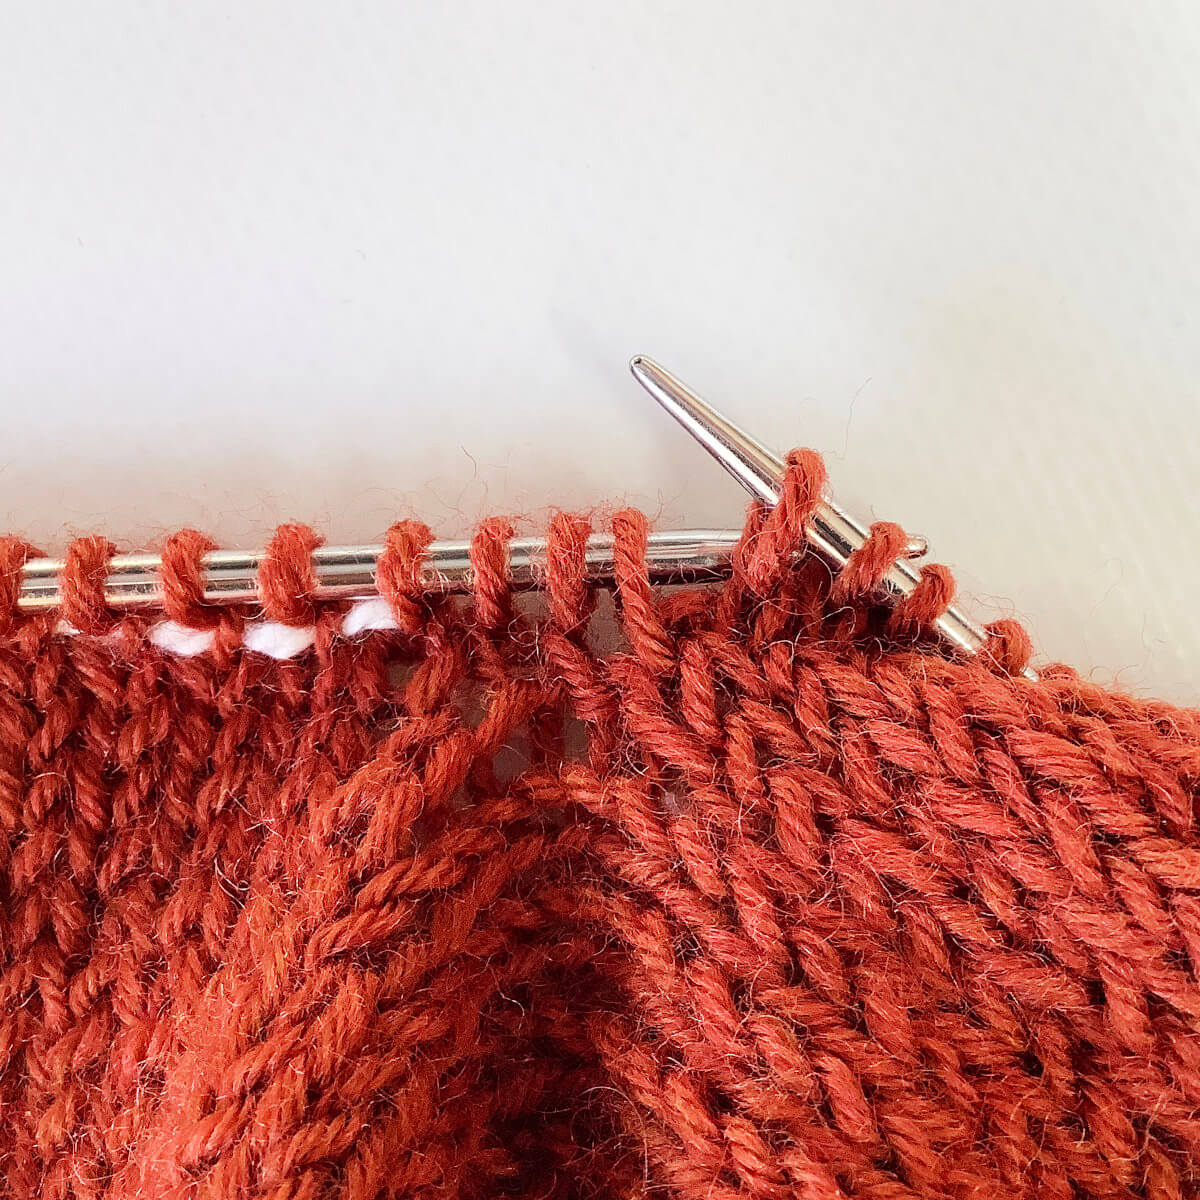
  8. Do you see the 2 strands of yarn indicated by the triangles? This is where we have to pick up extra stitches to avoid those holes!
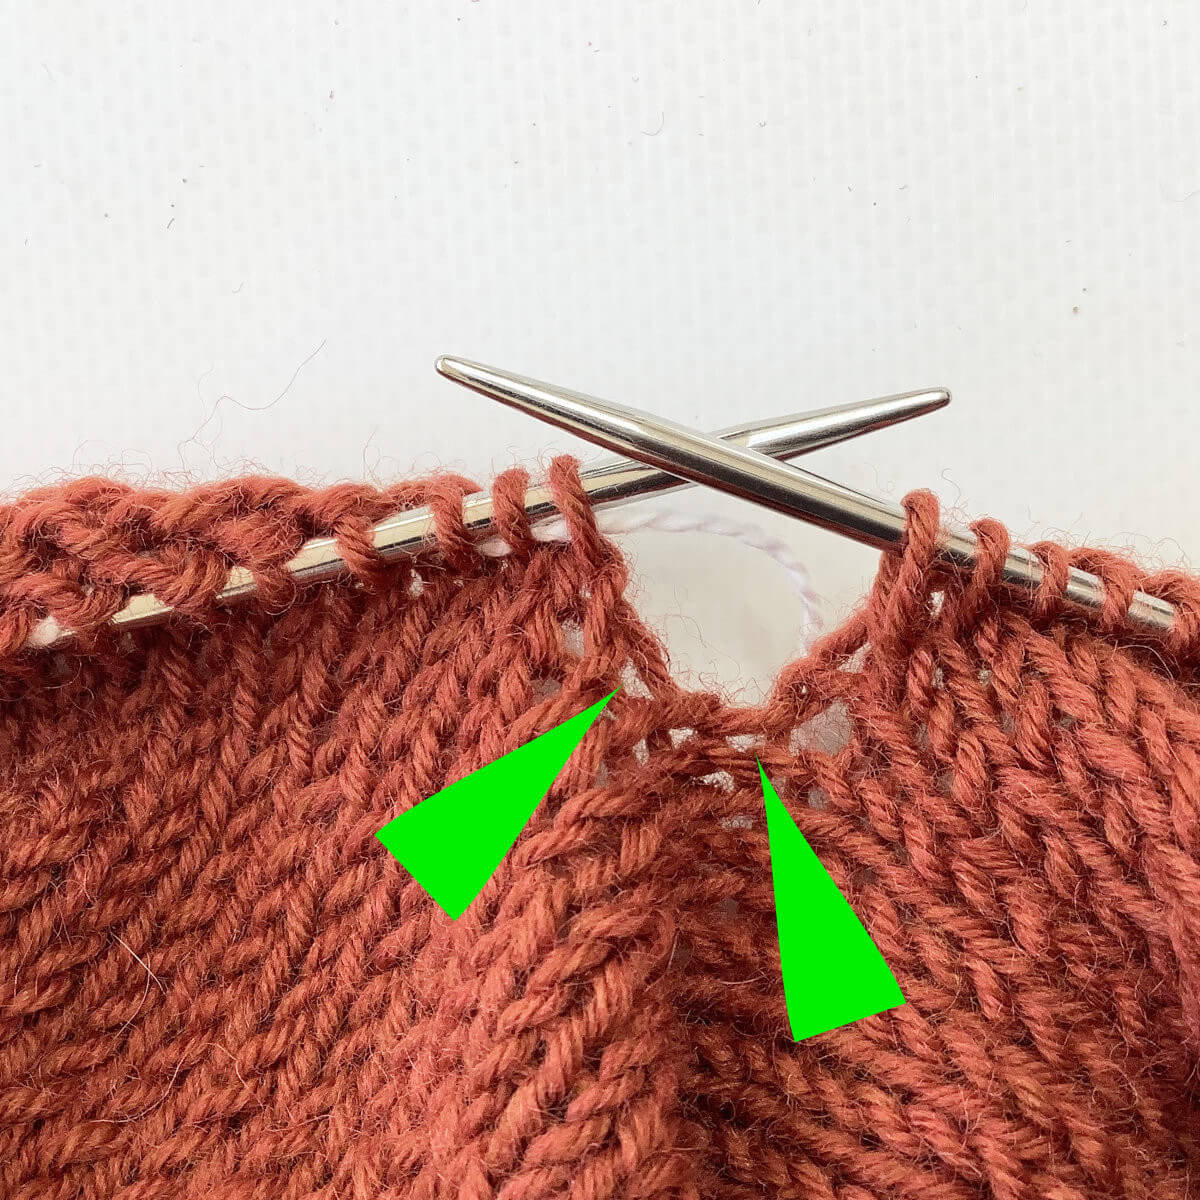
    Step 9

  9. When picking up these stitches, you want to twist the strand, to close up the hole. To do so, insert your crochet hook as pictured…
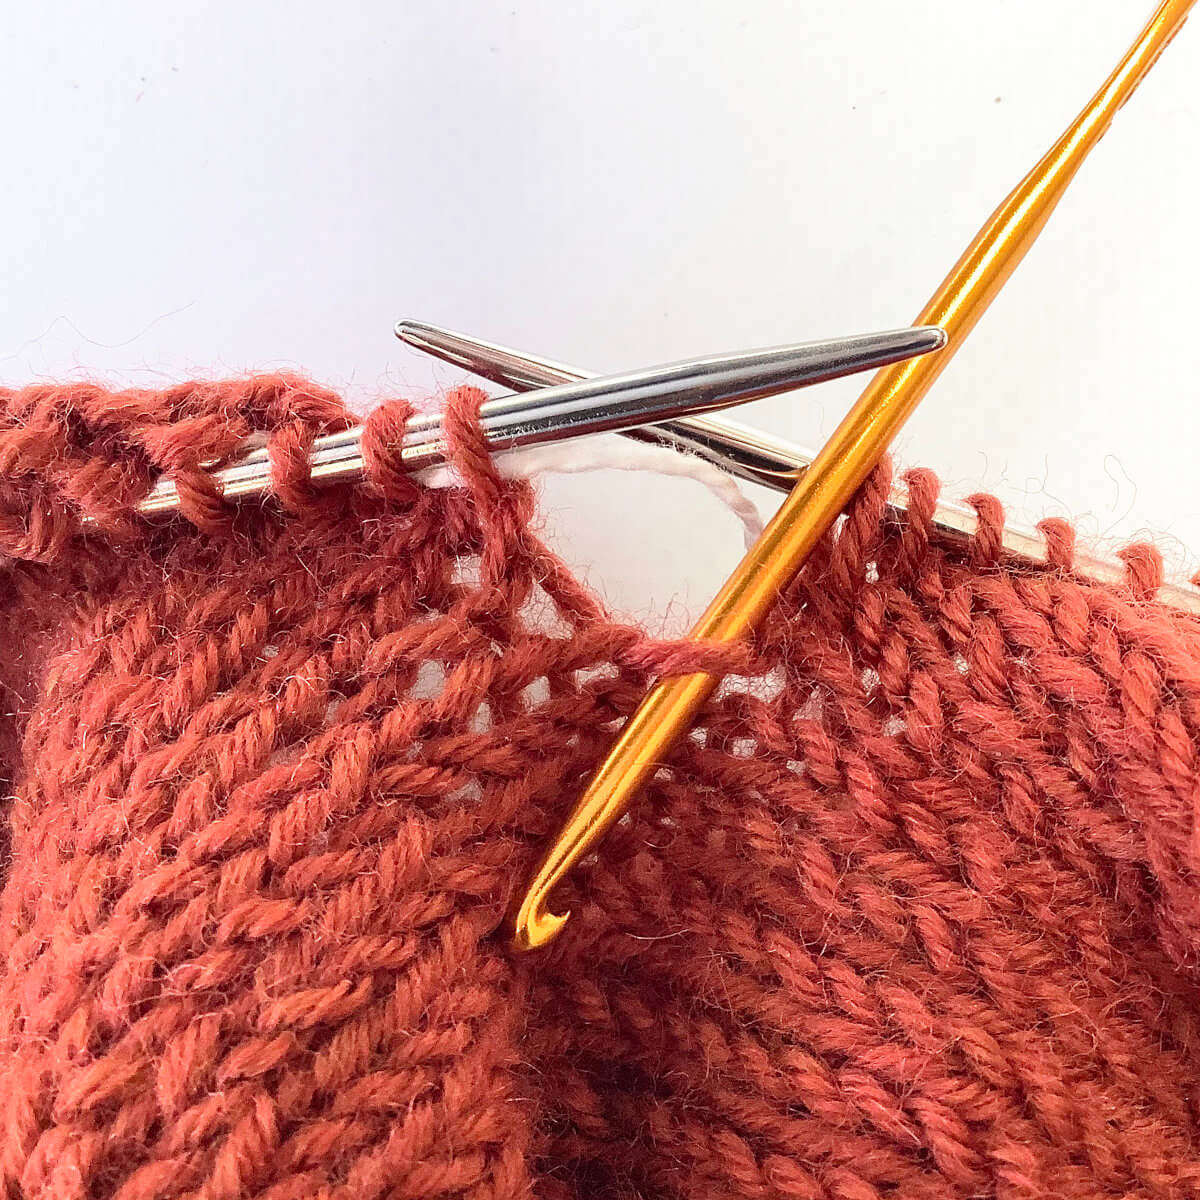
    Step 9 of avoiding holes

  10. … twist the hook around, then wrap the yarn around the hook and pull it through.
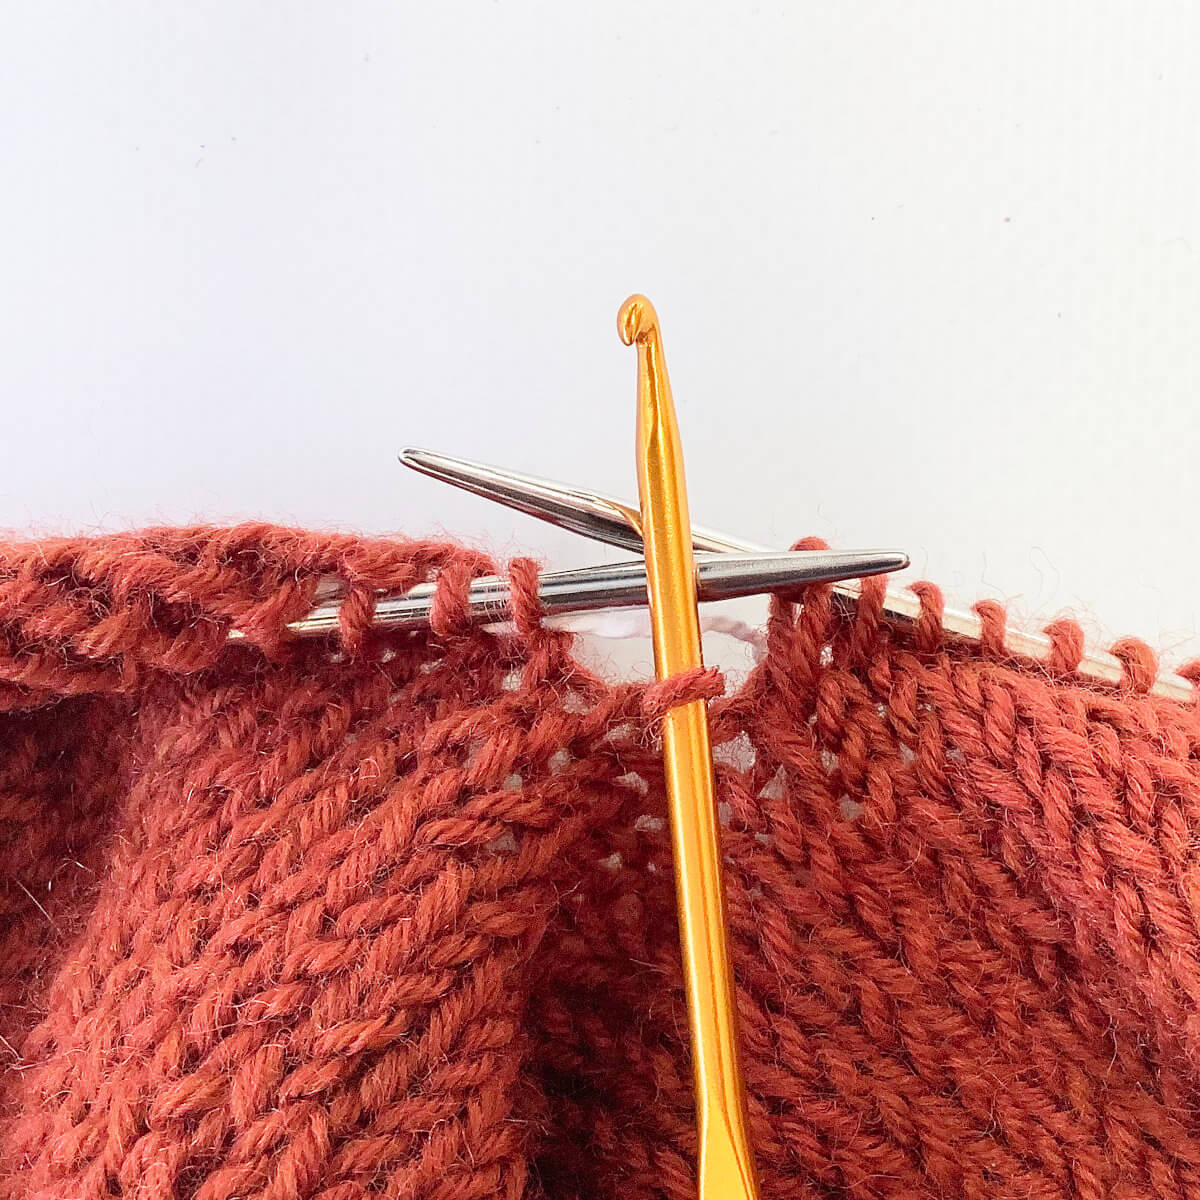
    Step 10

  11. This is how it looks after the stitch has been placed on the needle.
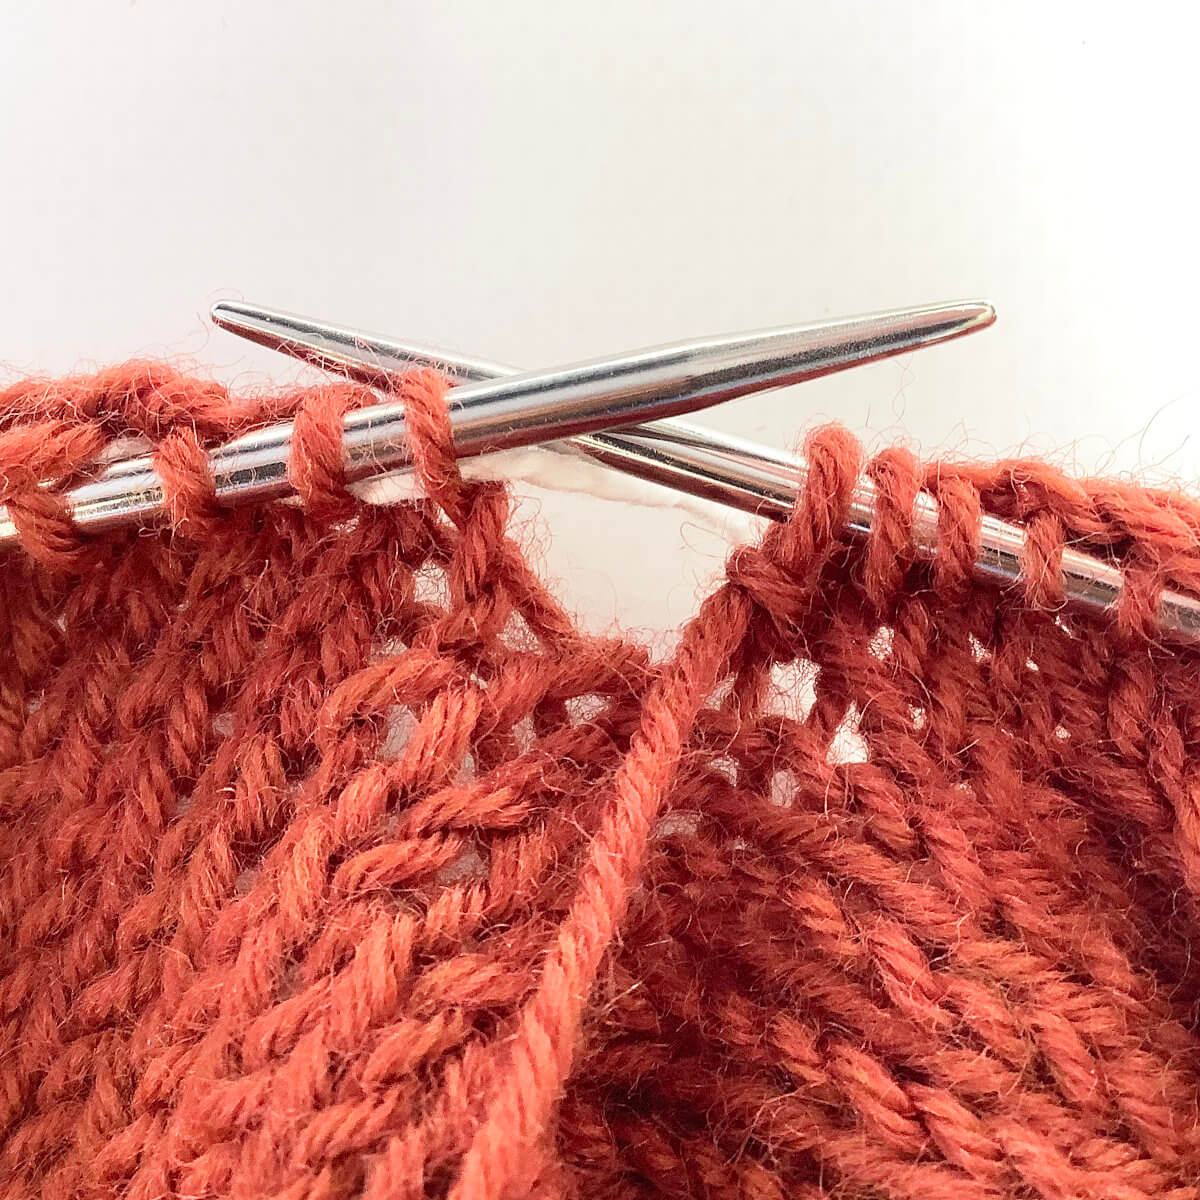
    Step 11

  12. Repeat steps 9-11 for the second strand.
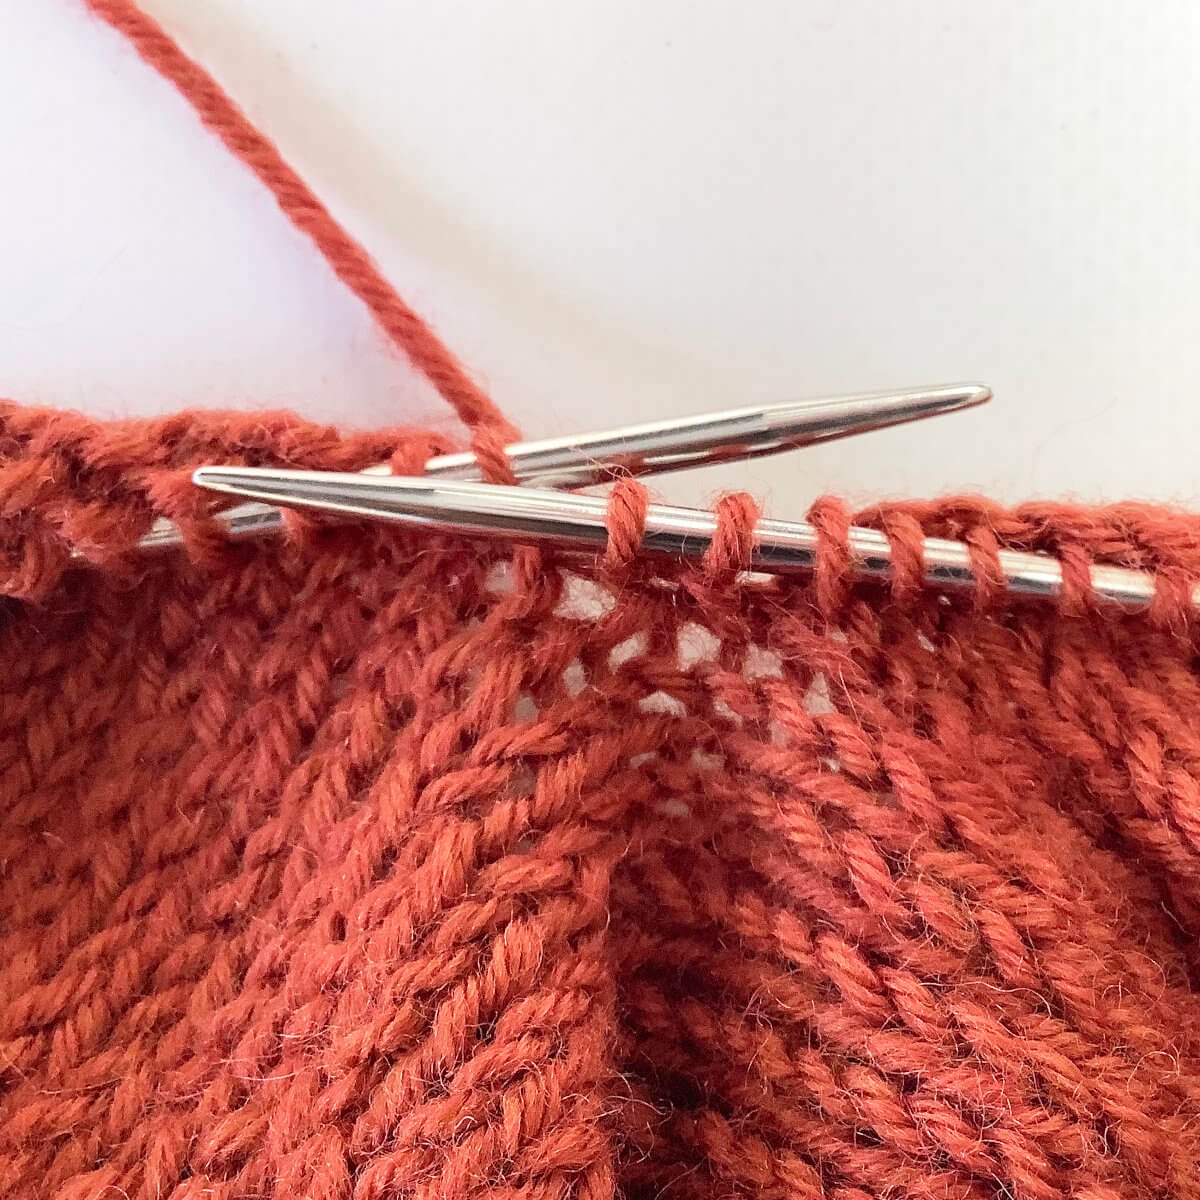
    Step 12 of avoiding holes

  13. Next, work over the live stitches until you’ve worked the last one.

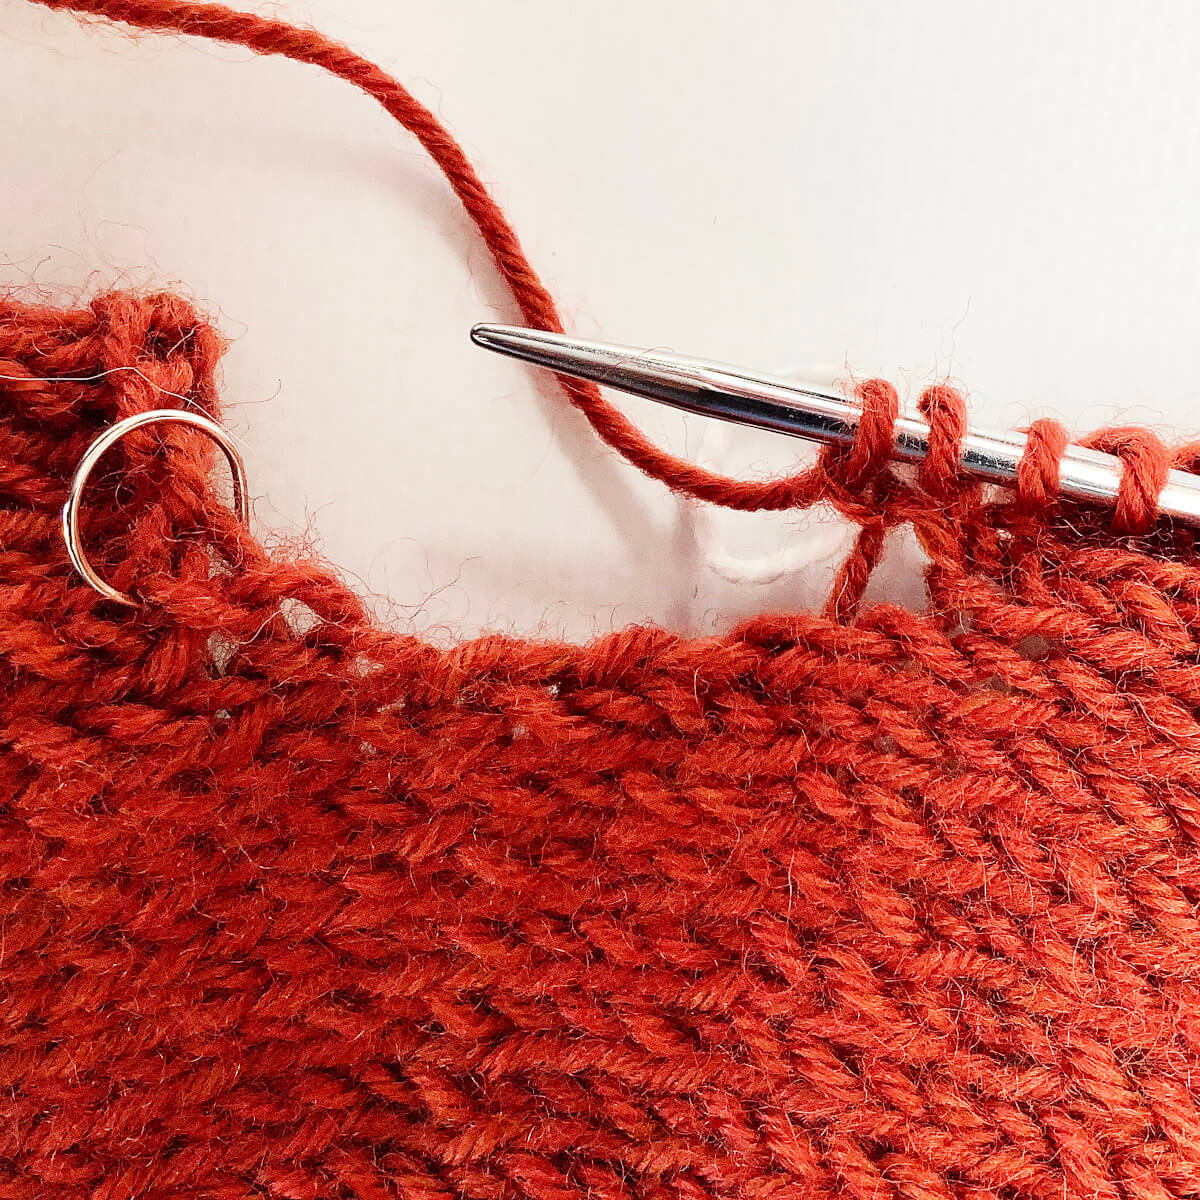
    In my case, this looks like this, because I’ve raised the back neck according to the method described here. As a consequence, the 2 strands of yarn to be picked up to avoid the holes, are more apart than on the other side of the armhole. When not raising the back neck according to this method, it would like similar to the other “corner”.Step 13

  14. Here, I’ve repeated steps 9-11 on the first strand.
    Step 14 of avoiding holes

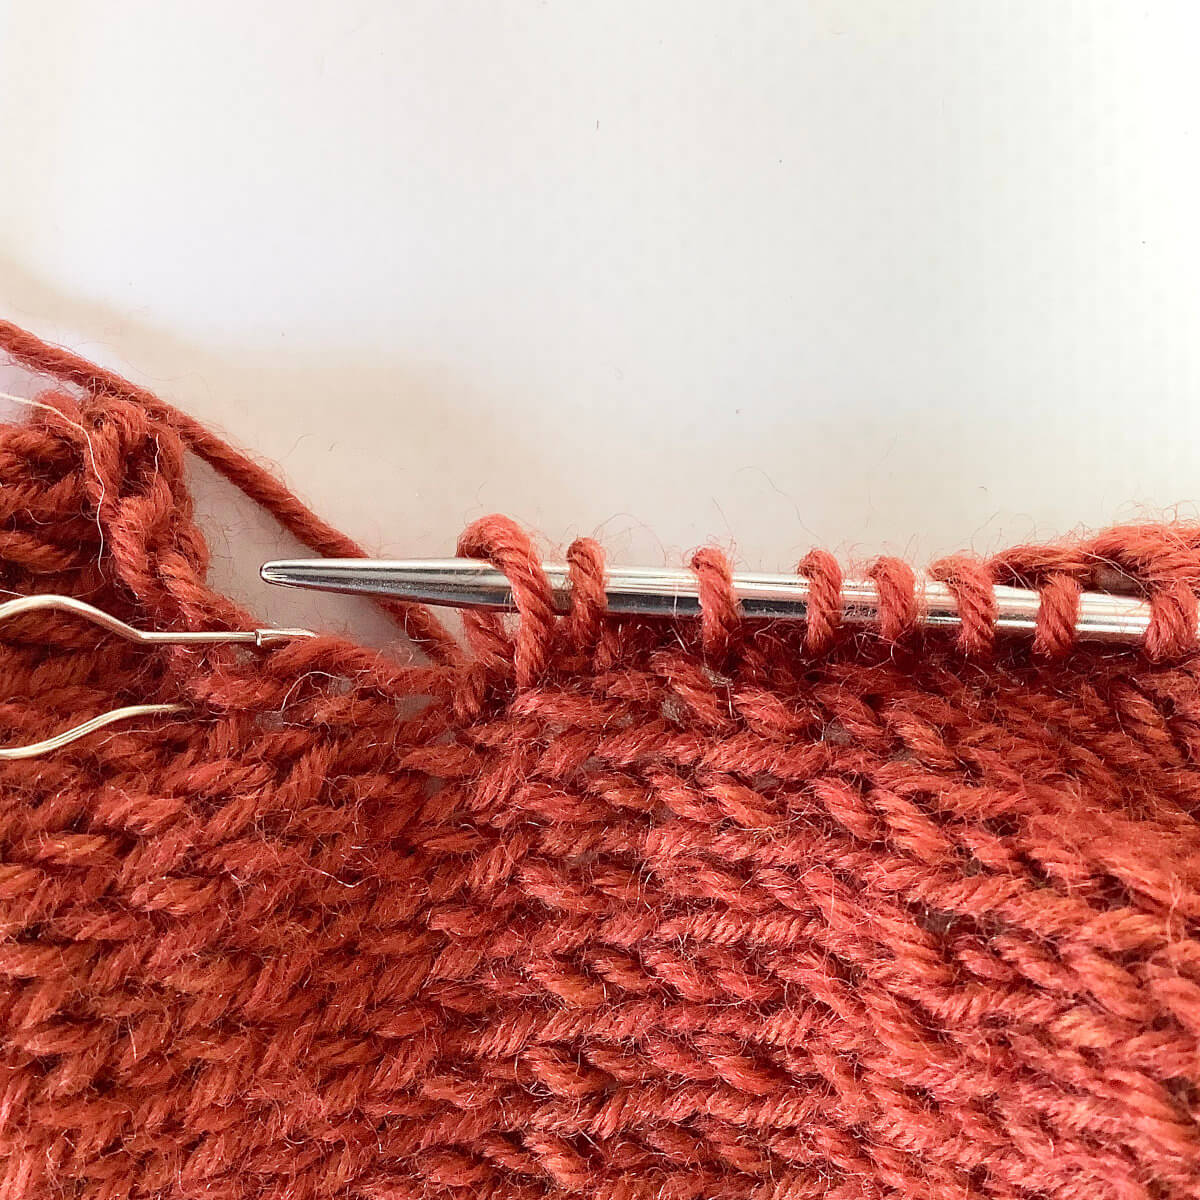
  15. Next, I’ve picked up and knit stitches on the vertical section. And finally, I’ve repeated steps 9-11 on the last strand.
    Step 15

  16. But we’re not ready yet! We’ve picked up an extra 4 stitches total for the corners. It may mean that you have some welcome extra ease in the upper arm. In that case, just follow the pattern for a larger size that has the same approx. number of sleeve stitches. Otherwise, we’ll need to decrease those extra stitches in the following round.

    To do so, work to 1 stitch before the first picked-up-and-knit stitch in the corner.Step 16 of avoiding holes

  17. Next, work 2 decreases over the 4 following stitches.

    Here, I first worked a skp, followed by a k2tog. Repeat this step at the other corner.

The result of avoiding holes at the underarm with top-down sweaters

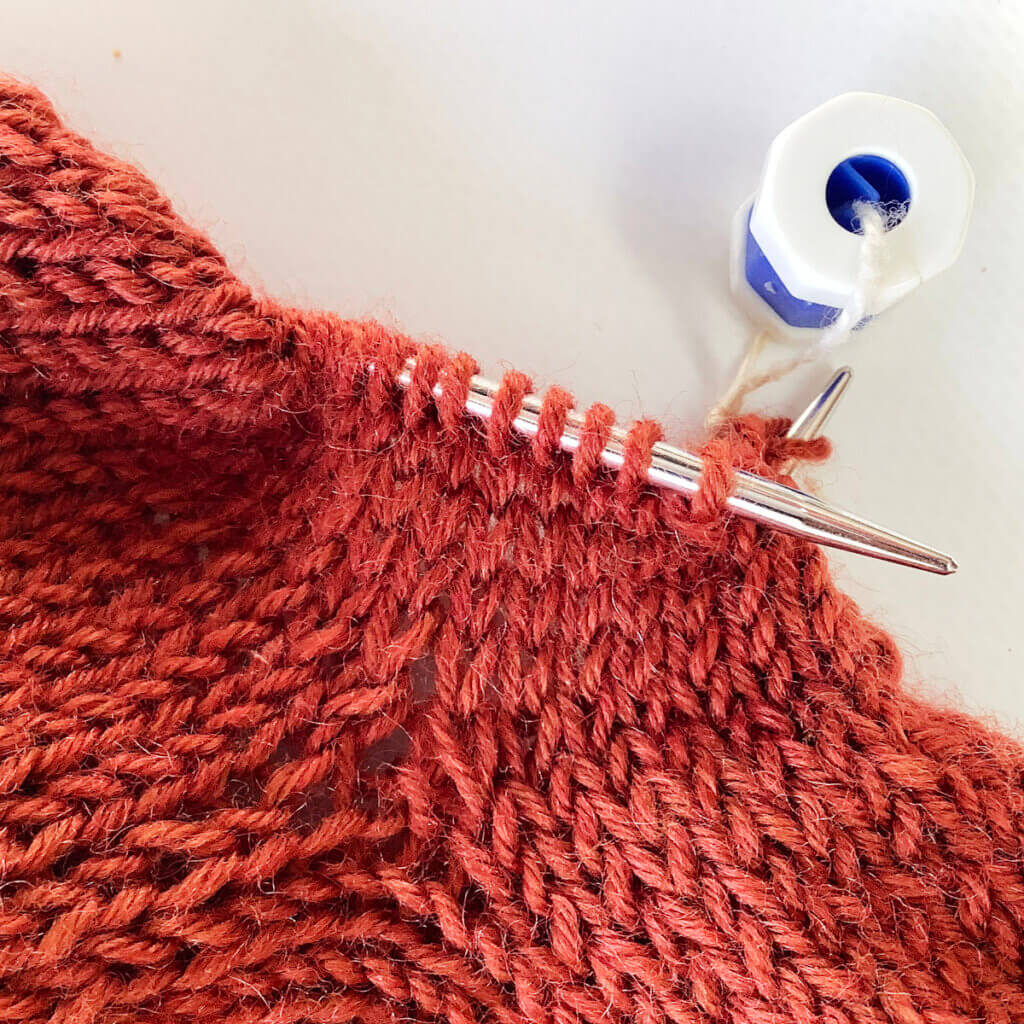
This is how I go about avoiding holes at the underarm with top-down sweaters. The picture below shows how it looks after a few more rounds have been worked. Pretty neat, right?!
The result of avoiding holes
Patreon logo

Thanks to my Patreon supporters for bringing you this freebie! Creating quality patterns and tutorials is a lot of work and resource-intensive. However, I find it important to give you free content like this tutorial. Thanks to the generous support of my Patreon supporters, I can make it happen. Thank you, patrons! Click here to join, or click here to read more about La Visch Designs on Patreon.

tutorial – avoiding holes at the underarm with top-down sweaters Read More »

jade clover tunic

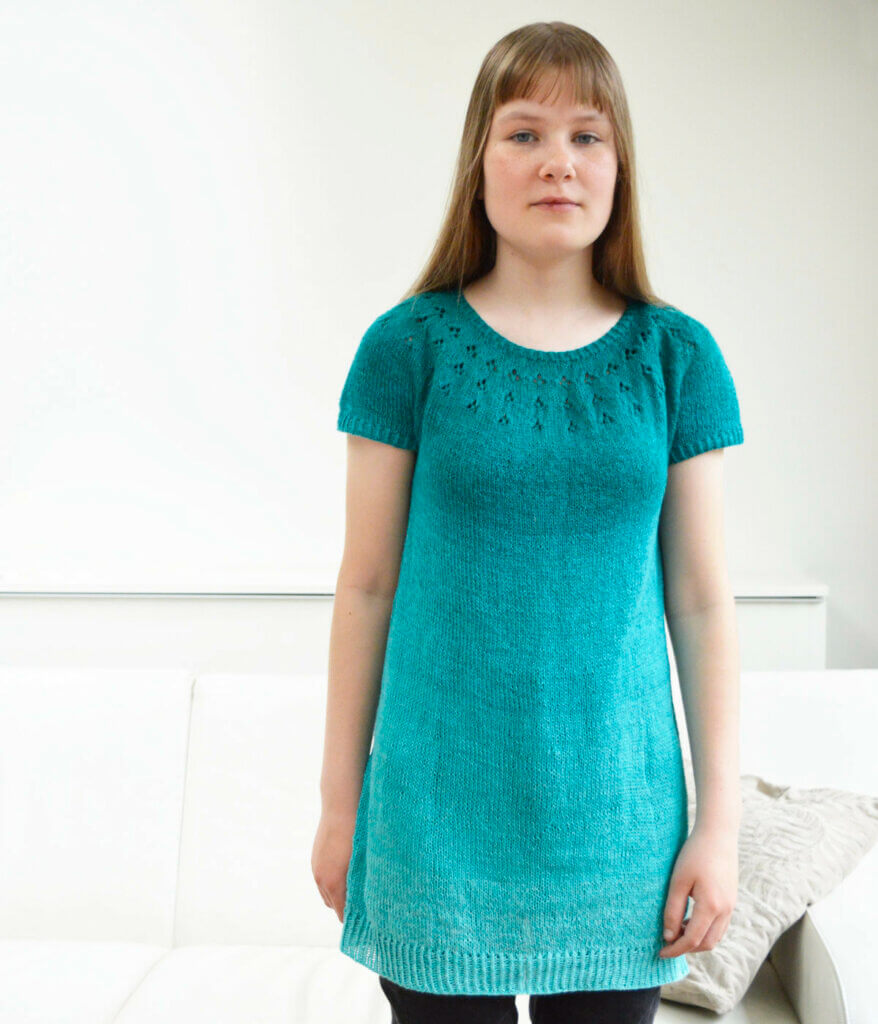
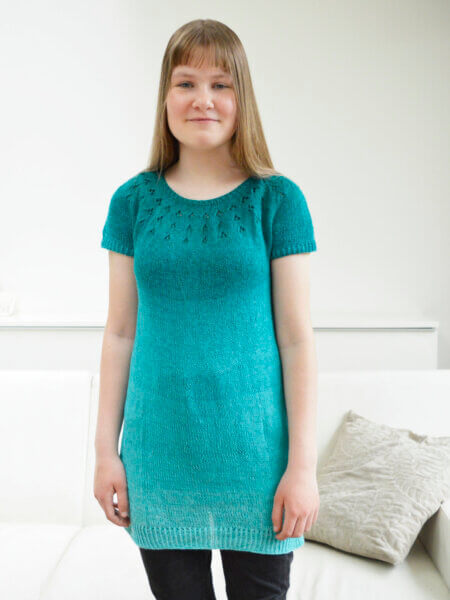
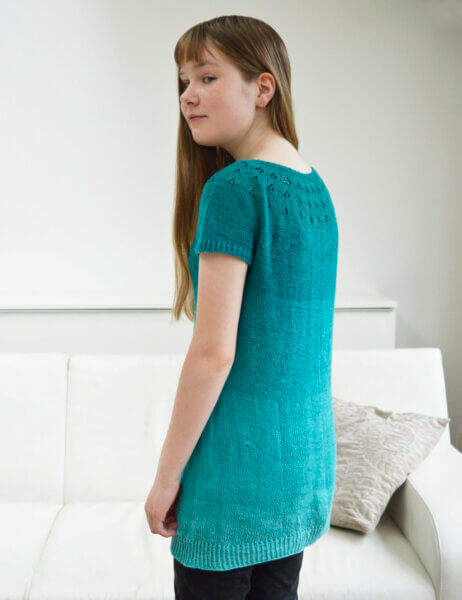
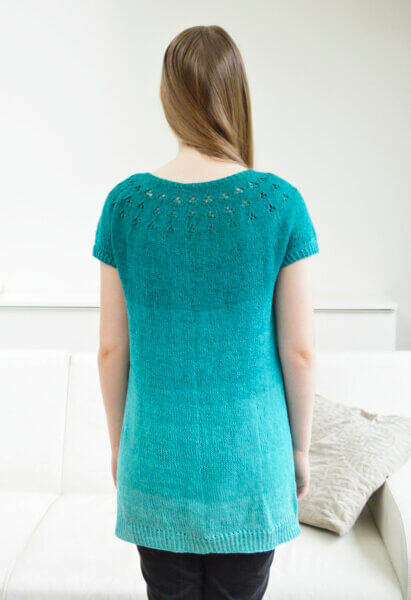
Jade Clover a tunic design by La Visch Designs

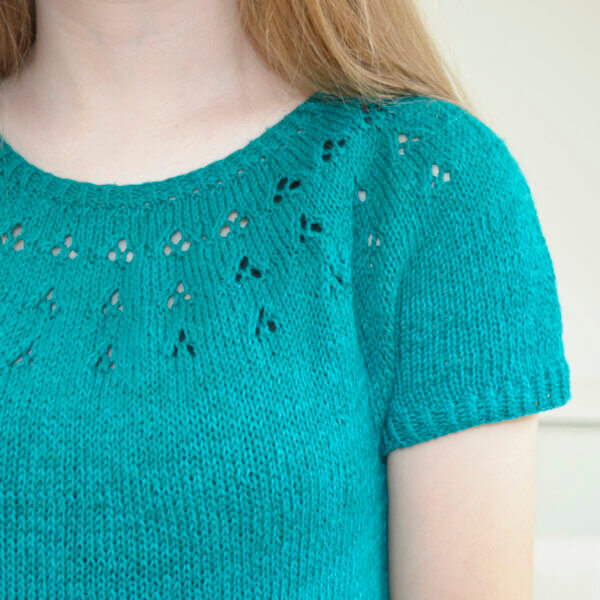
A soft and feminine tunic with sweet lace patterning in the yoke and short sleeves. Jade Clover is worked seamlessly in the round top down in one piece, and with neat twisted rib edgings. With its subtle A-line shaping, this tunic is not only flattering on all sizes. Additionally, it’s also very easy to shorten to tee length, or lengthen to a dress. Not only tips for these modifications as well as for a more flared out body, but also associated yarn requirements are included!

This pattern contains instructions for 11 sizes. These sizes have finished bust measurements ranging from 80 to 146.5 cm (31.5 to 57.75 inches). The sample in size 1 shown is worn with 7.5 cm (3 inches) of positive ease.


Pay what you want: (minimum €9.00)

Add to cart


Difficulty level

Stitches used include knit, purl, knit tbl, k2tog, skp, yo, m1l and m1r. This pattern is therefor suitable for the intermediate knitter.

Sizes and finished measurements

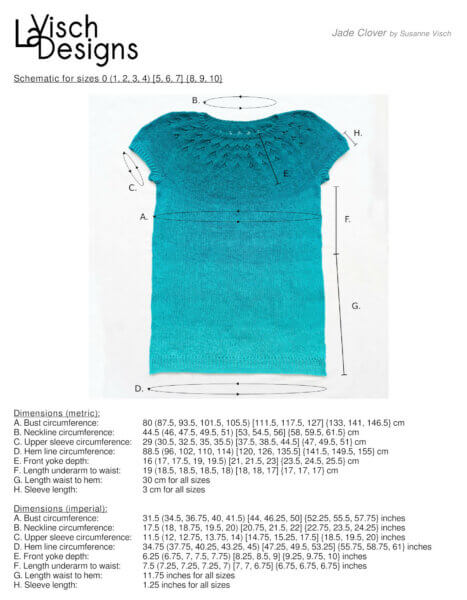
The Jade Clover tunic pattern is available in 11 sizes: Size 0 (1, 2, 3, 4) [5, 6, 7] {8, 9, 10} with a finished bust measurement of 80 (87.5, 93.5, 101.5, 105.5) [111.5, 117.5, 127] {133, 141, 146.5} cm or 31.5 (34.5, 36.75, 40, 41.5) [44, 46.25, 50] {52.25, 55.5, 57.75} inches. For more measurements, please see the schematic in the picture gallery.

The garment is intended to be worn with approx. 5-10 cm (2-4 inches) of positive ease at the full bust. The sample in size 1 shown is worn with 7.5 cm (3 inches) of positive ease.

Pattern details

  • Gauge: 23.5 sts / 30 rounds = 10 cm (4 inches) over stockinette stitch on larger needles, measured after blocking.
  • Pattern languages included: English.
  • Digital PDF has 8 pages (letter size)

Yarn

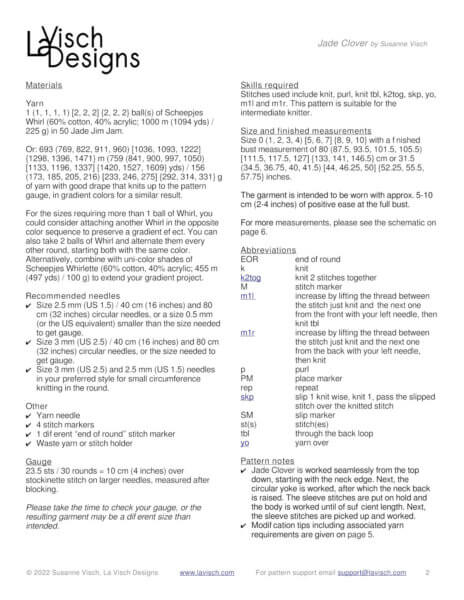
Yarn used in the sample Jade Clover tunic: 1 (1, 1, 1, 1) [2, 2, 2] {2, 2, 2} ball(s) of Scheepjes Whirl (60% cotton, 40% acrylic; 1000 m (1094 yds) / 225 g) in 50 Jade Jim Jam.

Alternatively, use: 693 (769, 822, 911, 960) [1036, 1093, 1222] {1298, 1396, 1471} m (759 (841, 900, 997, 1050) [1133, 1196, 1337] {1420, 1527, 1609} yds) / 156 (173, 185, 205, 216) [233, 246, 275] {292, 314, 331} g of yarn with good drape that knits up to the pattern gauge, in gradient colors for a similar result.

For the sizes requiring more than 1 ball of Whirl, you could consider attaching another Whirl in the opposite color sequence. This will preserve a gradient effect. You can also take 2 balls of Whirl and alternate them every other round, starting both with the same color. Alternatively, combine with uni-color shades of Scheepjes Whirlette (60% cotton, 40% acrylic; 455 m (497 yds) / 100 g) to extend your gradient project.

Materials

  • Knitting needles:
    • Size 2.5 mm (US 1.5) / 40 cm (16 inches) and 80 cm (32 inches) circular needles, or a size 0.5 mm (or the US equivalent) smaller than the size needed to get gauge
    • A size 3 mm (US 2.5) / 40 cm (16 inches) and 80 cm (32 inches) circular needles, or the size needed to get gauge
    • Size 3 mm (US 2.5) and 2.5 mm (US 1.5) needles in your preferred style for small circumference knitting in the round
  • Yarn needle
  • 4 stitch markers
  • 1 different “end of round” stitch marker
  • Waste yarn or stitch holder

jade clover tunic Read More »

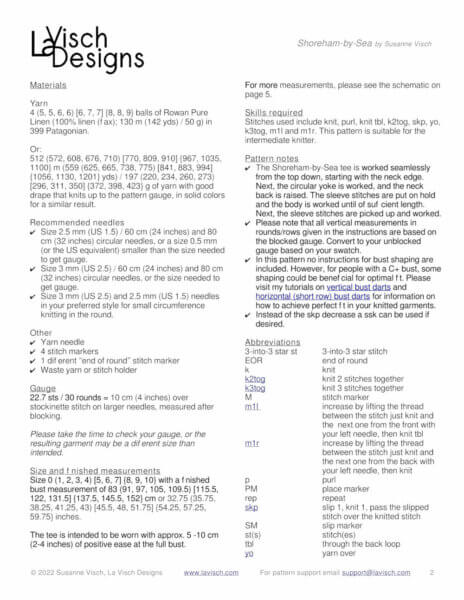
Shoreham-by-Sea tee

Shoreham-by-Sea tee

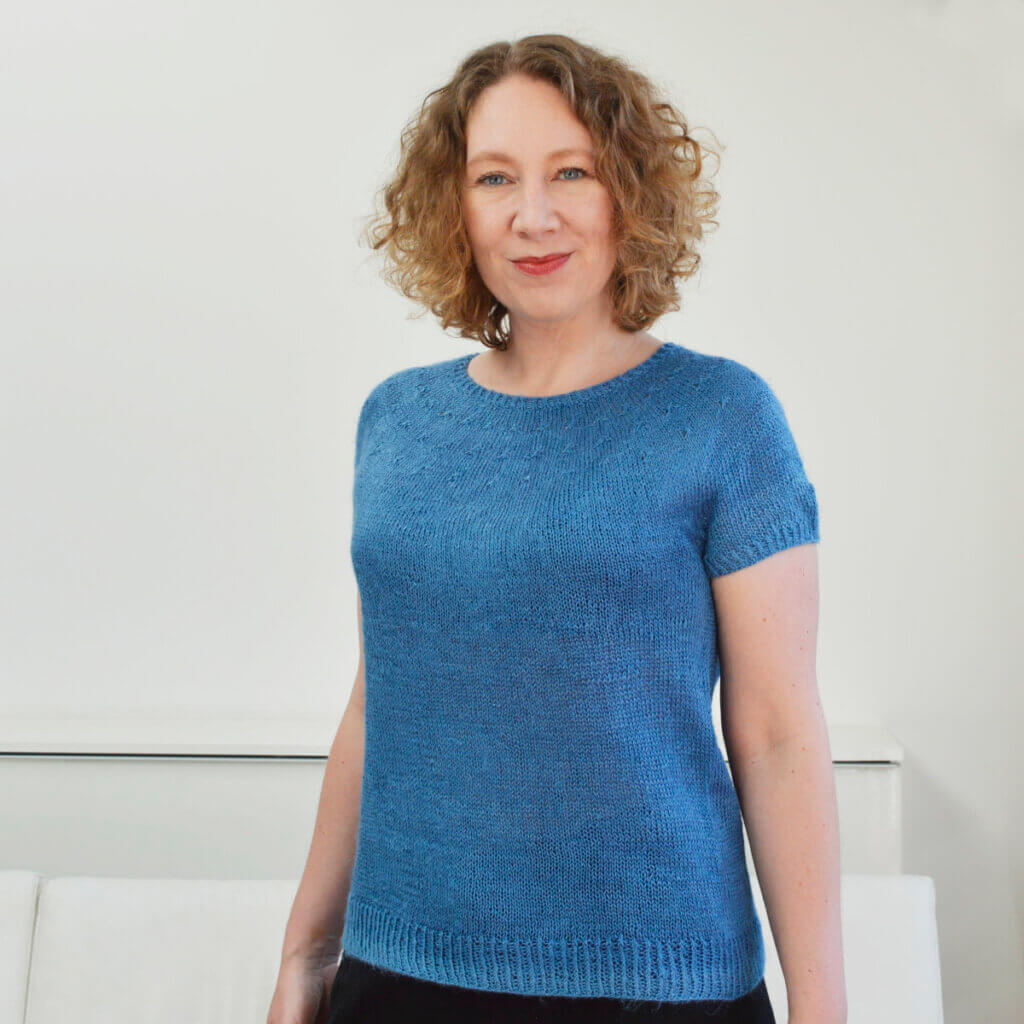
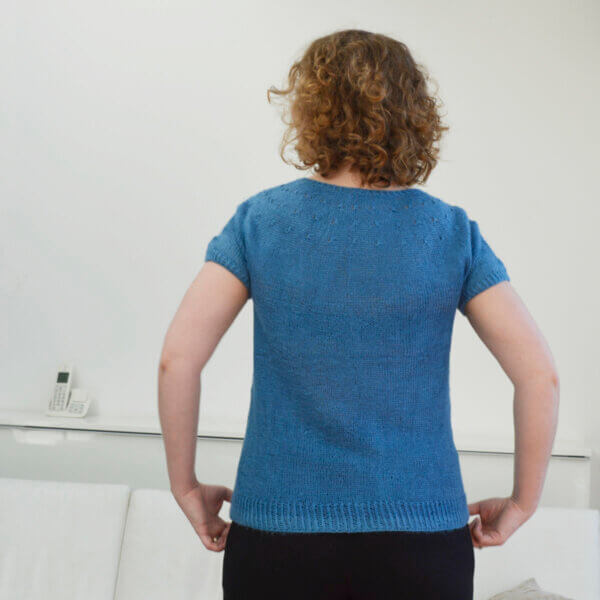
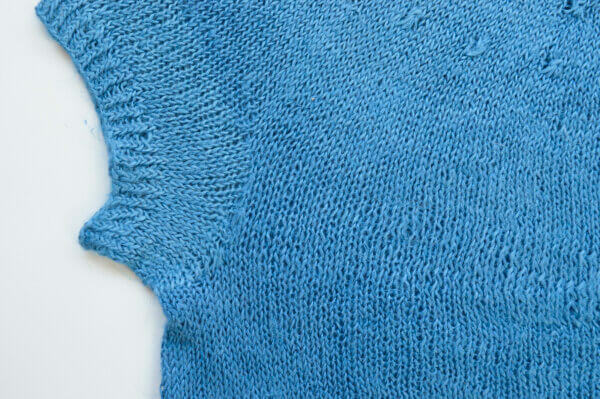
The gorgeous linen yarn in the tee pictured, I bought when visiting Sally in Shoreham-by-Sea some years ago. What better to use it for than a simple top-down tee with a circular yoke construction? The top is completely seamless, with subtle star stitch patterning in the yoke, and neat twisted rib edgings. Worked in a 100% linen yarn, this top is a dream to wear in warm weather. Moreover, it also works great as a layering piece!

Instructions for 11 sizes are included, with finished bust measurements ranging from 81 to 152 cm (32 to 59.75 inches).


Pay what you want: (minimum €8.50)

Add to cart


Difficulty level

Stitches used include knit, purl, knit tbl, k2tog, skp, yo, k3tog, m1l and m1r. This pattern is therefor suitable for the intermediate knitter.

Sizes and finished measurements

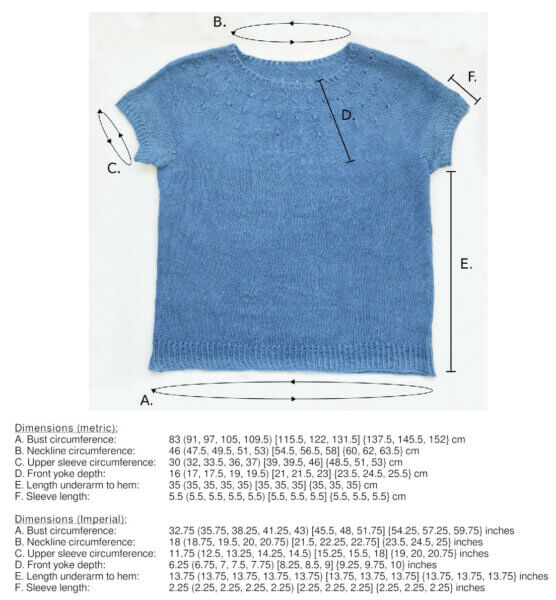
The Shoreham-by-Sea tee pattern is available in 11 sizes: Size 0 (1, 2, 3, 4) [5, 6, 7] {8, 9, 10} with a finished bust measurement of 83 (91, 97, 105, 109.5) [115.5, 122, 131.5] {137.5, 145.5, 152} cm or 32.75 (35.75, 38.25, 41.25, 43) [45.5, 48, 51.75] {54.25, 57.25, 59.75} inches. For more measurements, please see the schematic in the picture gallery.

The tee is intended to be worn with approx. 5 -10 cm (2-4 inches) of positive ease at the full bust. The sample in size 2 shown is worn with 6 cm (2.25 inches) of positive ease.

Pattern details

  • Gauge: 22.7 sts / 30 rounds = 10 cm (4 inches) over stockinette stitch on larger needles, measured after blocking.
  • Pattern languages included: English.
  • Digital PDF has 6 pages (letter size)

Yarn

Yarn used in the sample Shoreham-by-Sea tee: 4 (5, 5, 6, 6) [6, 7, 7] {8, 8, 9} balls of Rowan Pure Linen (100% linen (flax); 130 m (142 yds) / 50 g) in 399 Patagonian.

Alternatively, use: 512 (572, 608, 676, 710) [770, 809, 910] {967, 1035, 1100} m (559 (625, 665, 738, 775) [841, 883, 994] {1056, 1130, 1201} yds) / 197 (220, 234, 260, 273) [296, 311, 350] {372, 398, 423} g of yarn with good drape of approx. sport weight that knits up to the pattern gauge, in solid colors for a similar result. Cotton and cotton blends will work well.

Materials

  • Knitting needles:
    • Size 2.5 mm (US 1.5) / 60 cm (24 inches) and 80 cm (32 inches) circular needles, or a size 0.5 mm (or the US equivalent) smaller than the size needed to get gauge
    • A size 3 mm (US 2.5) / 60 cm (24 inches) and 80 cm (32 inches) circular needles, or the size needed to get gauge
    • Size 3 mm (US 2.5) and 2.5 mm (US 1.5) needles in your preferred style for small circumference knitting in the round
  • Yarn needle
  • 4 stitch markers
  • 1 different “end of round” stitch marker
  • Waste yarn or stitch holder

Shoreham-by-Sea tee Read More »

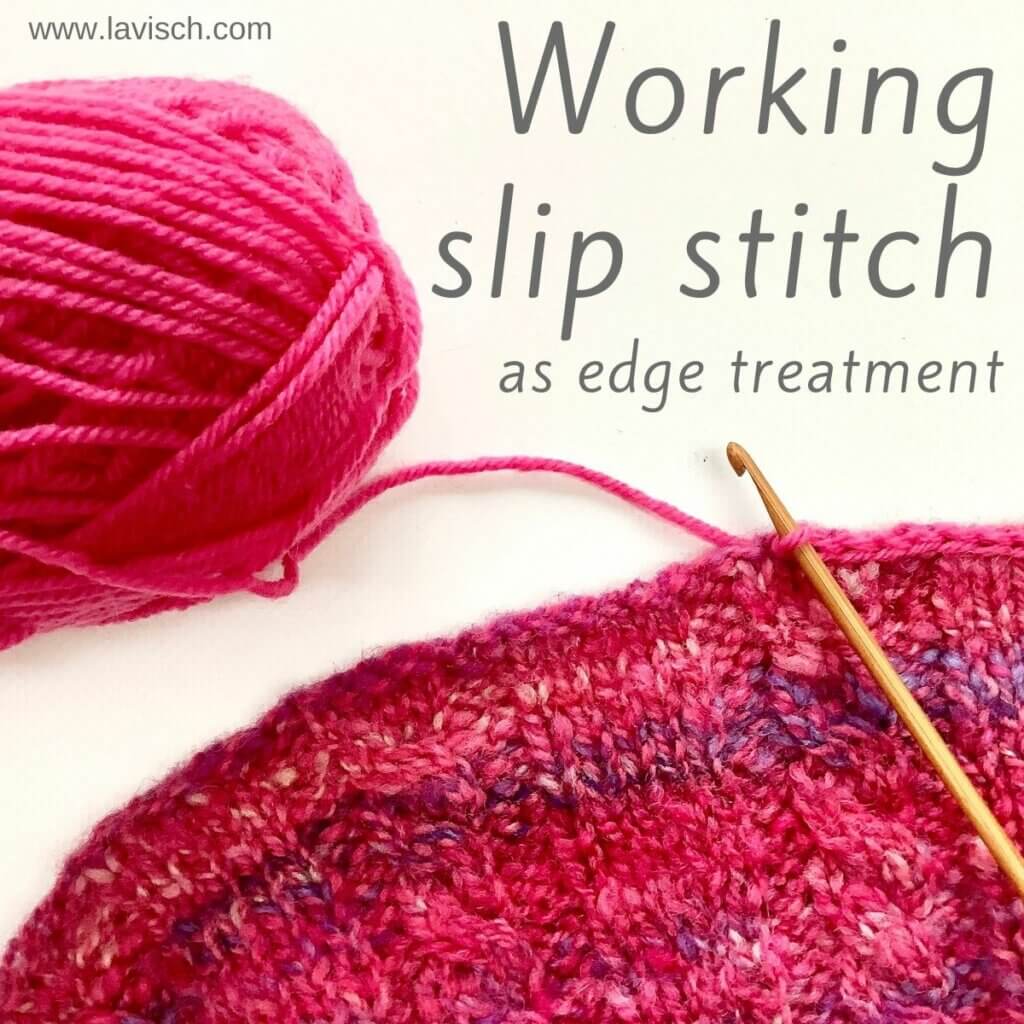
tutorial – working slip stitch (as edge treatment)

Tutorial on workign slip stitch as an edge treatment

In my previous tutorial, I showed you how I went about fixing my mr Greenjeans cardigan to make it more wearable. As part of the fix, I also worked slip stitching along all outer edges of the cardigan, to tie the new contrasting yarn together better with the original elements of the garment. For this reason, I worked the slip stitch with the right side facing. Doing something similar with the same yarn as used in the rest of the project, could be done to make the edges look a tad neater.

Another application for slip stitching as edge treatment would be to work it on the inside (wrong side facing) of the garment. In particular, along the edge of the back neck, and possibly also the shoulder seam. Doing this with a non-stretchy yarn can help prevent stretching and sagging of these edges, if the garment is prone to that.

So, let’s get started!

Working slip stitch step by step

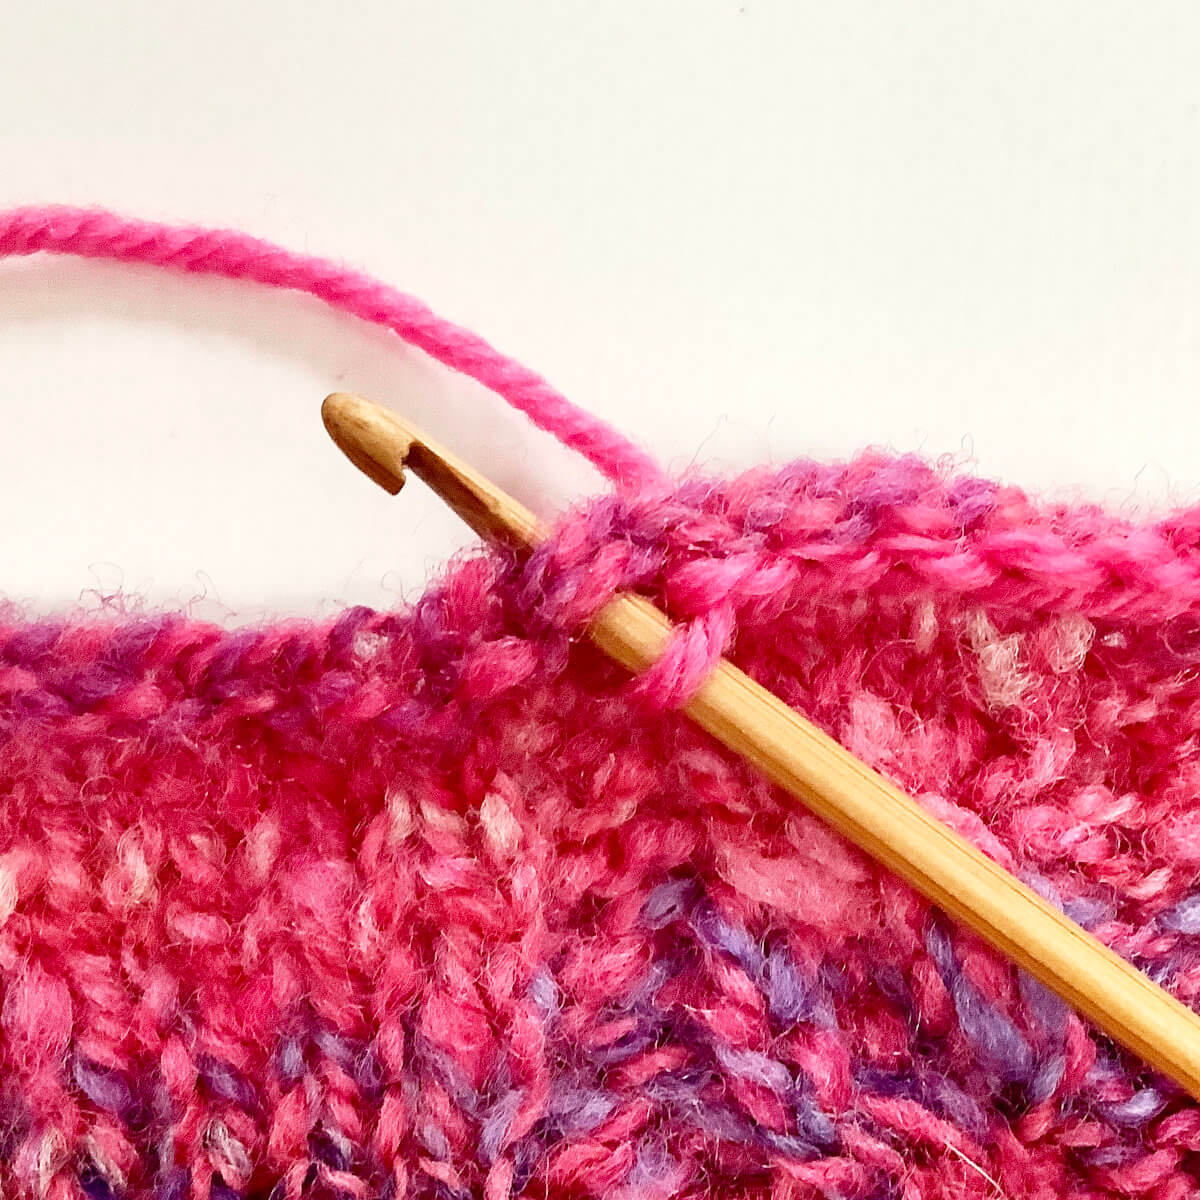
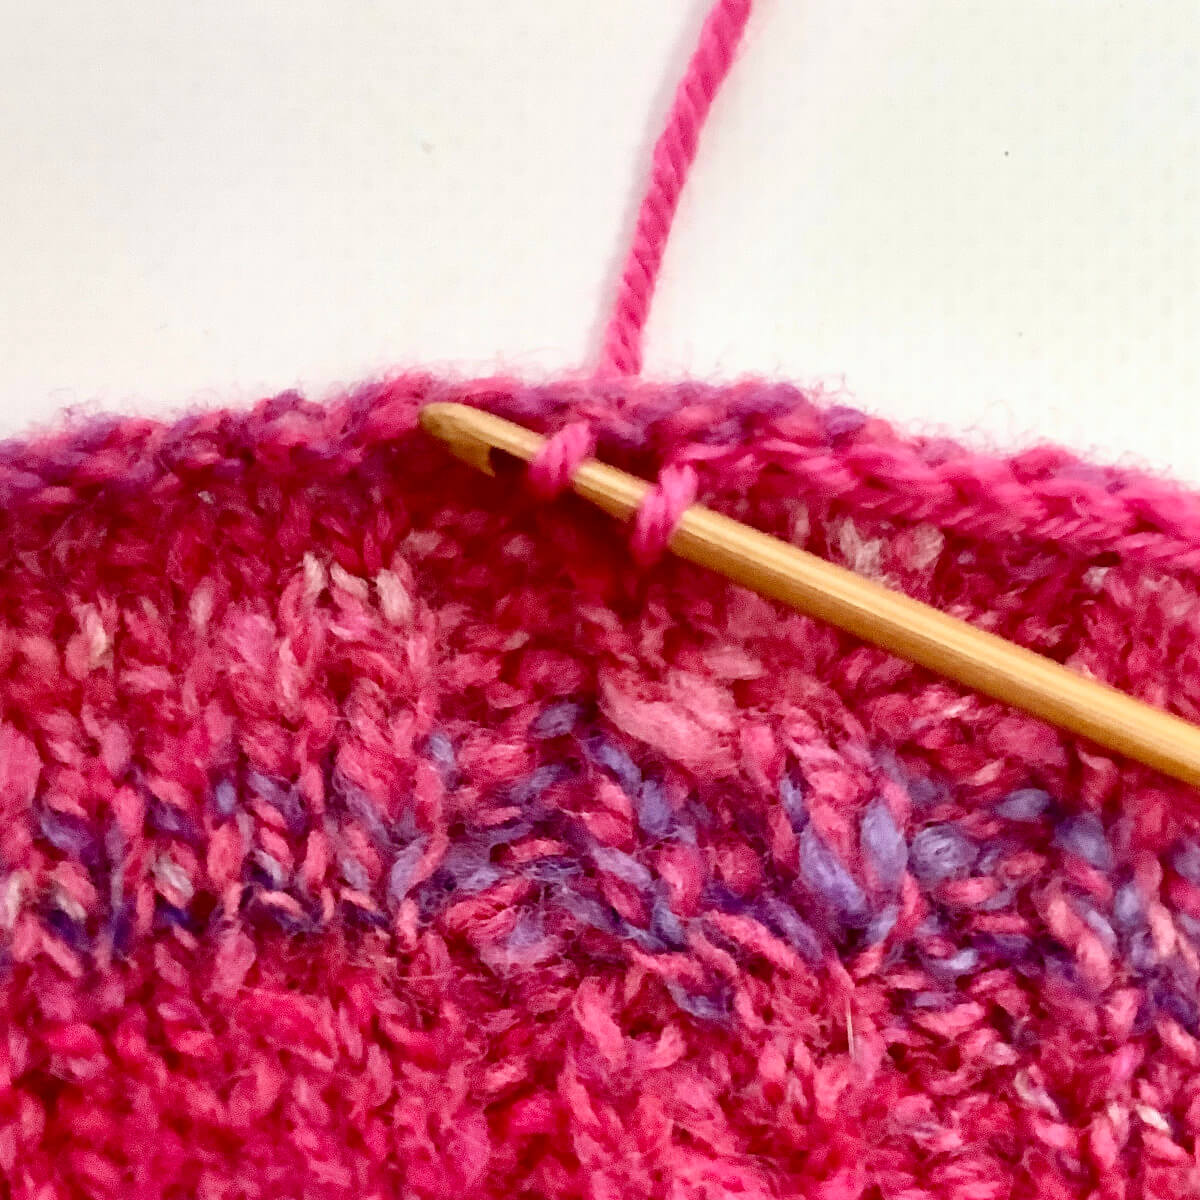
  1. Insert a crochet hook into the stitch at the edge of the fabric.

    On both cast-on and bind-off edge, each stitch looks like a little “V”. Insert the hook underneath both strands of the V.Step 1

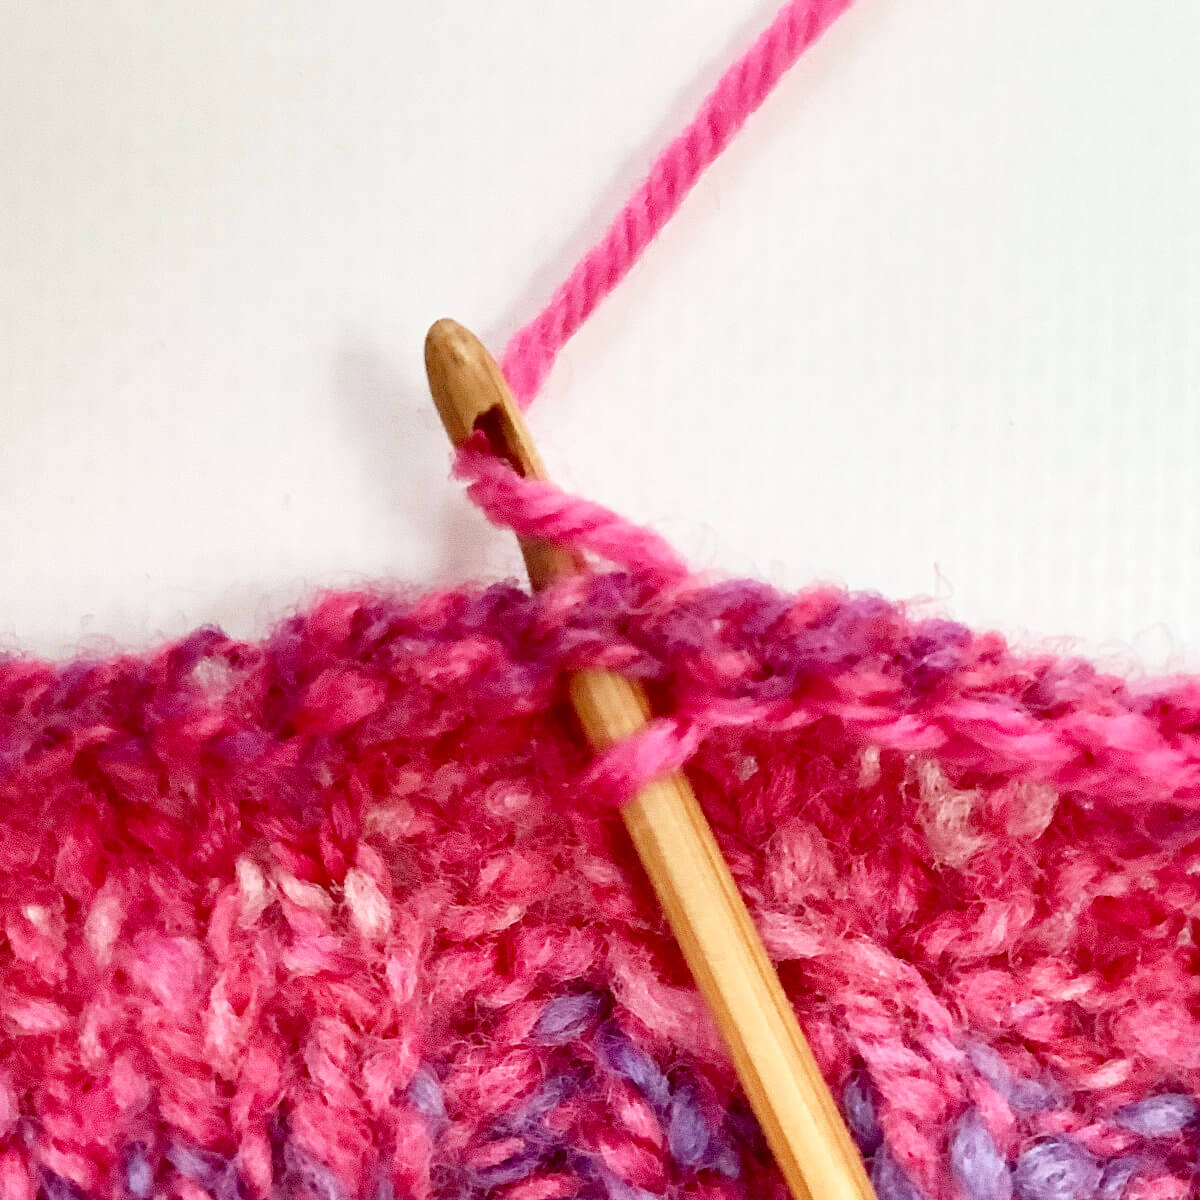
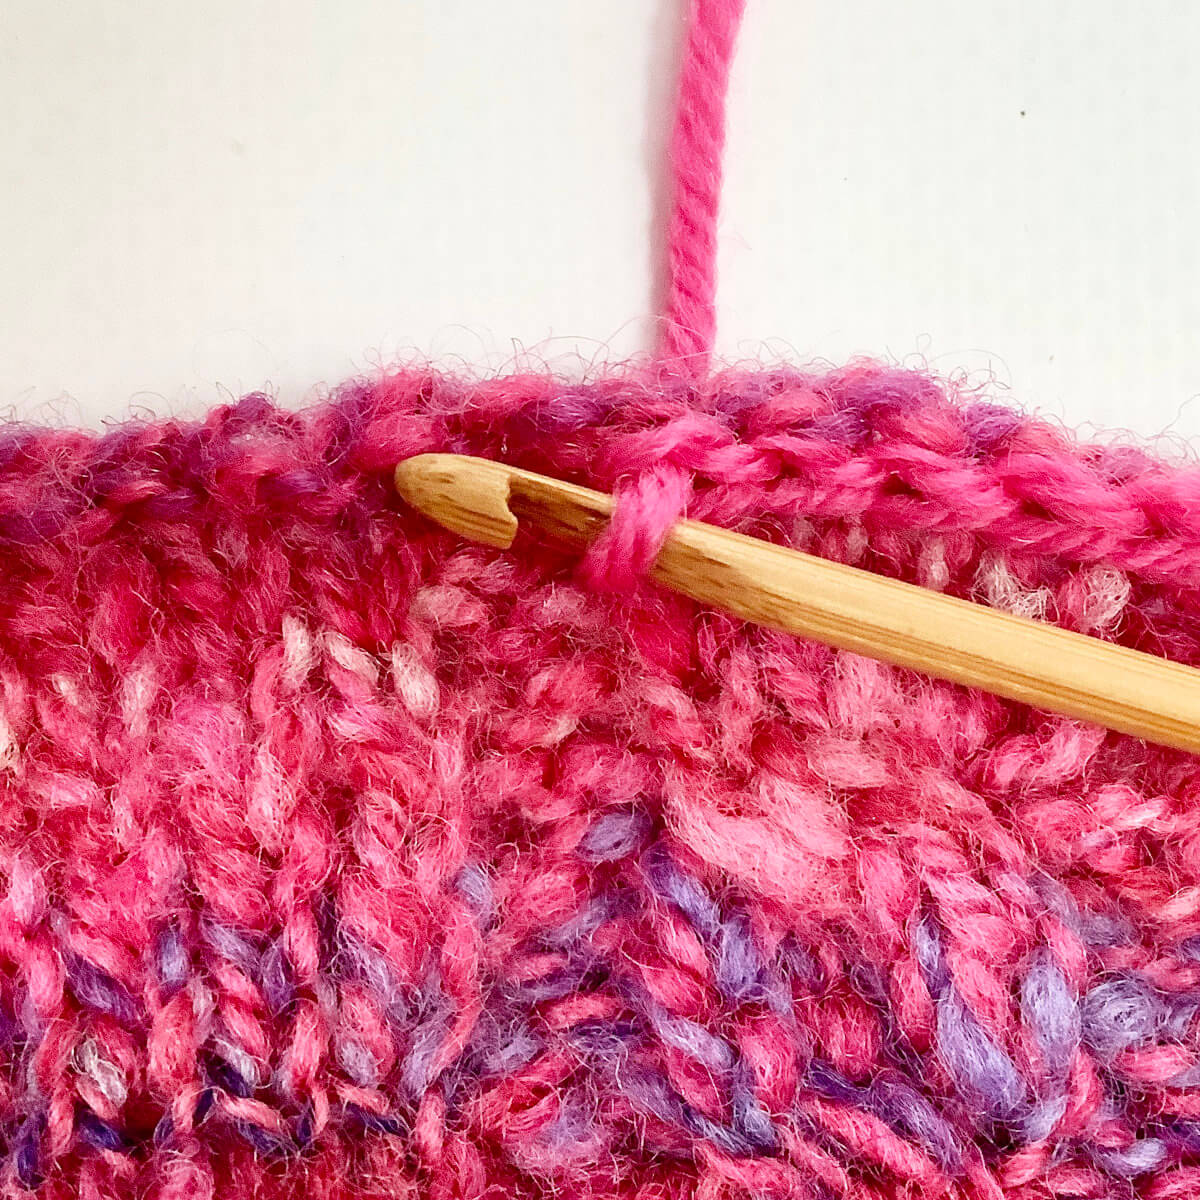
  2. Wrap the yarn around your hook…

    Step 2

  3. … and pull it through.

    You now have 2 loops on your hook.Step 3

  4. To finish, pull the loop that is nearest to the tip of your hook through the other loop.

    Step 4

  5. Repeat steps 1-4 until you run out of edge to work!

    Note that you may want to work 3 slip stitches in the stitch that sits right at the corner of the fabric, to “turn” that corner.

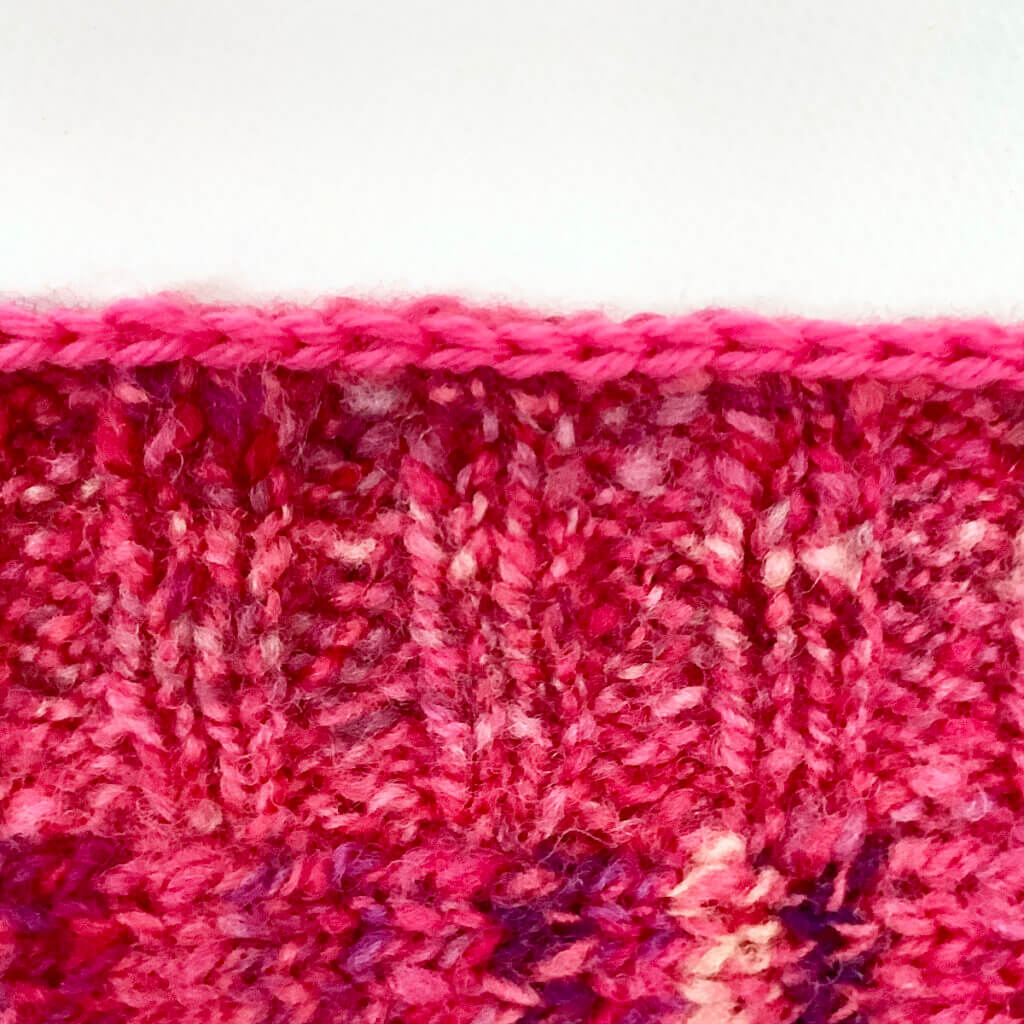
This is the result when viewed from the right side of the fabric:

Slip stitch edge viewed from the front

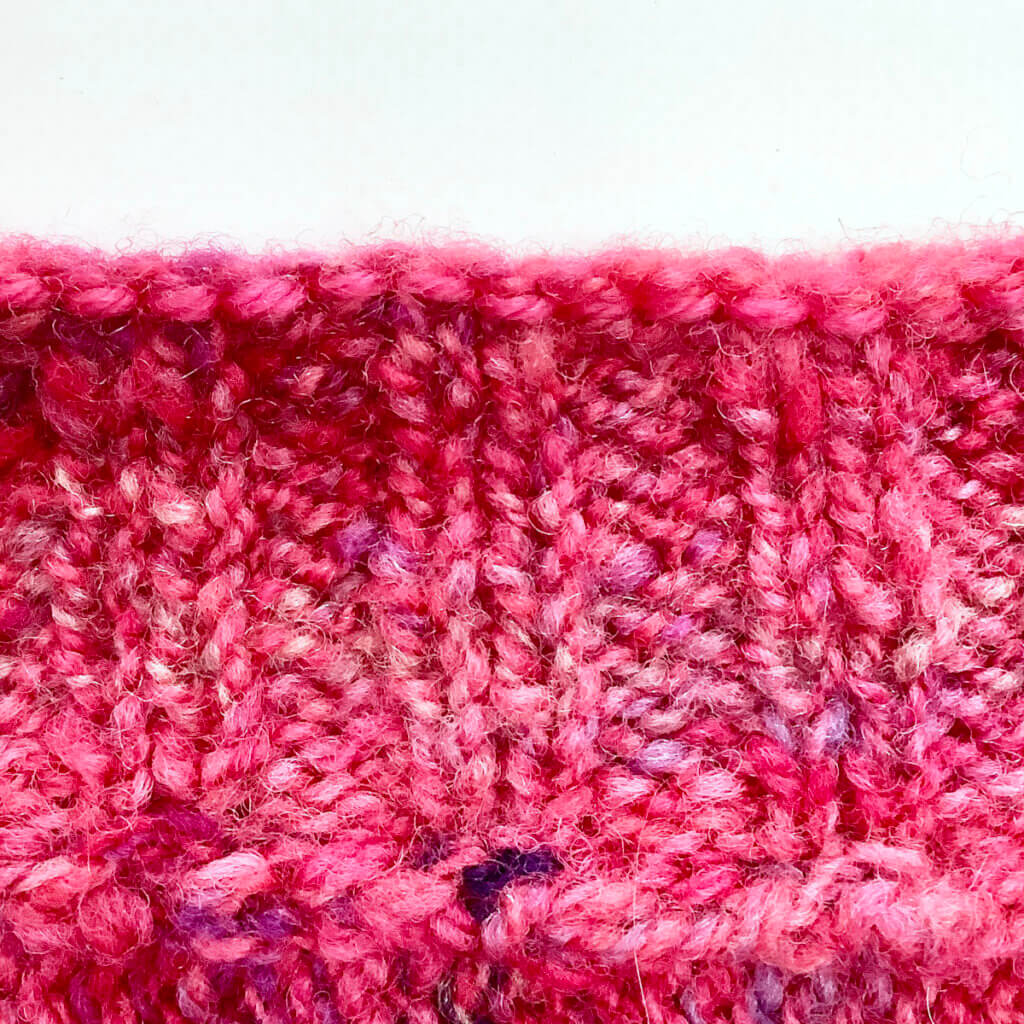
Neat, isn’t it? Below, you can see the very same piece of fabric, viewed from the wrong side. The horizontal line of stitches in the contrasting pink is almost invisible.

Slip stitch edge viewed from the back
Patreon logo

Thanks to my Patreon supporters for bringing you this freebie! Creating quality patterns and tutorials is a lot of work and resource-intensive. However, I find it important to give you free content like this tutorial. Thanks to the generous support of my Patreon supporters, I can make it happen. Thank you, patrons! Click here to join, or click here to read more about La Visch Designs on Patreon.

tutorial – working slip stitch (as edge treatment) Read More »

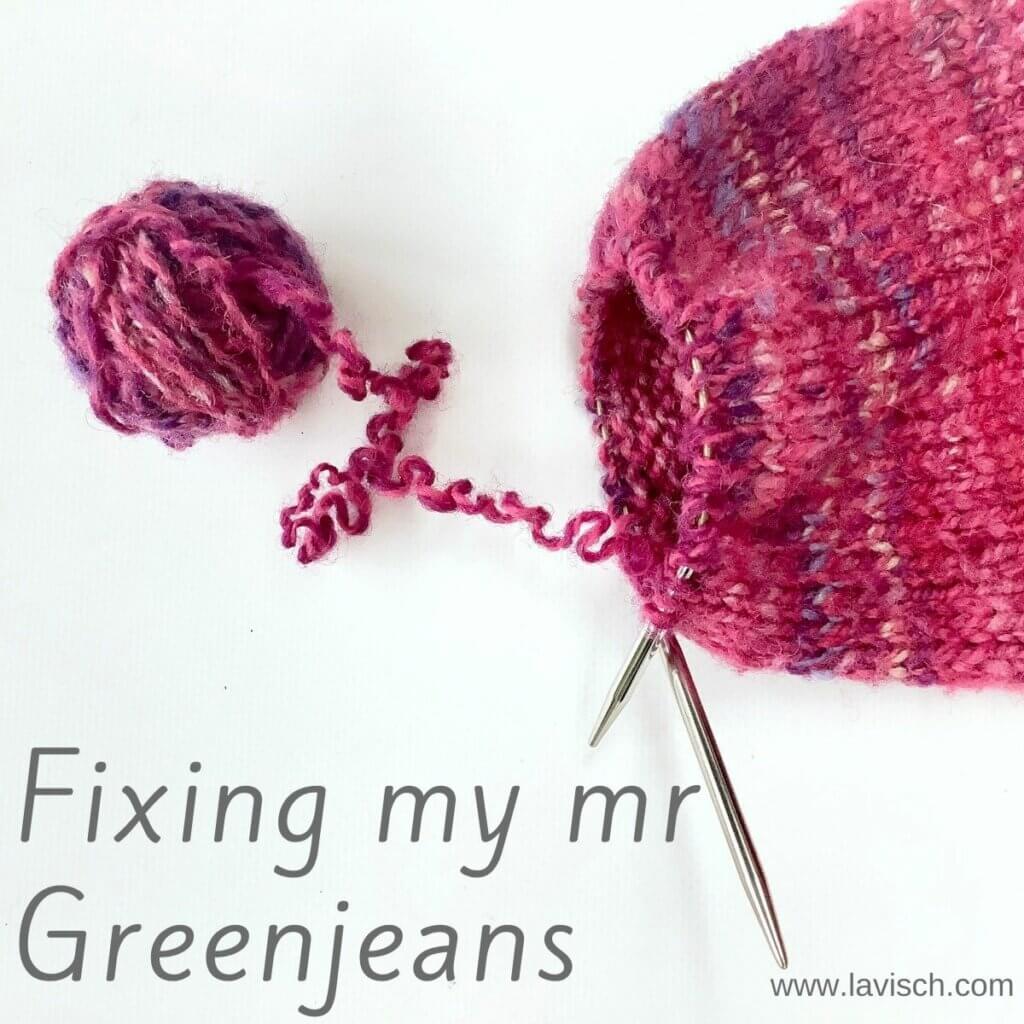
tutorial – fixing my mr Greenjeans

Fixing my mr Greenjeans cardigan

This project has quite the backstory, so I’ll get started to get you up to speed. Back in 2011 I bought 2 batts of Texeler wool, each a whopping 200 g. One was cyclamen pink, the other more pink & purple. I spun each of these into singles, and twined them into an (on average) 2-ply DK-weight yarn. Unfortunately, I don’t have any pictures of the resulting yarn to show you.

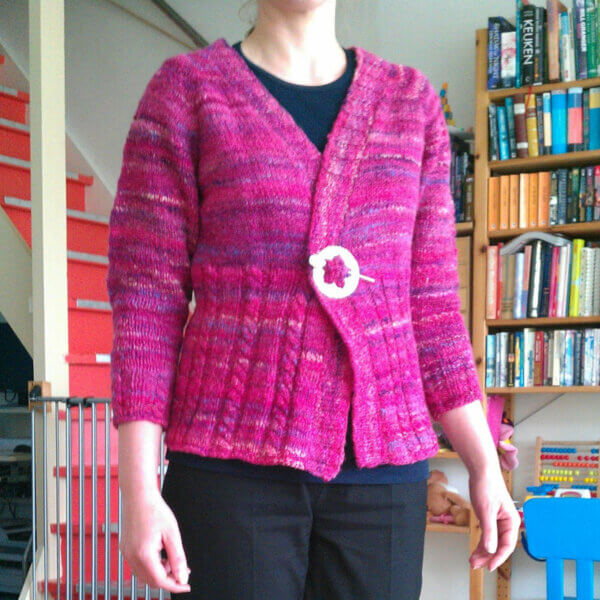
Anyway, I decided to use this yarn to make myself a Mr Greenjeans cardigan, which is a pattern by Amy Swenson, available for free on Knitty. When I started the project, it was just after my youngest was born, and I was still breastfeeding. I expected to lose some weight because of that, so I aimed at a size to end up eventually with a garment with approx. 0 cm / 0″ of ease. Things going as they go, I didn’t finish the project until sometime in 2013. By then I had lost so much baby weight that my mr Greenjeanshad a whopping 14 cm / 5.6” of positive ease! Nevertheless, I put it in my closet and wore it from time to time.

Below you can see how I wore it at the time. I didn’t even make the effort to sew a button on, I just closed it with a shawl pin.

Wearing mr Greenjeans in 2013

Fast-forward to July 2021: Looking back, I really haven’t worn this garment that much. You see, it turned out to be very warm. So warm, in fact, that I only wore it on the coldest days of the year. That combined with the 3/4th length sleeves made it rather unpractical to wear for me. But, I realized that the pink yarn I bought in Greece a couple of years ago, is a lovely match with this cardigan!

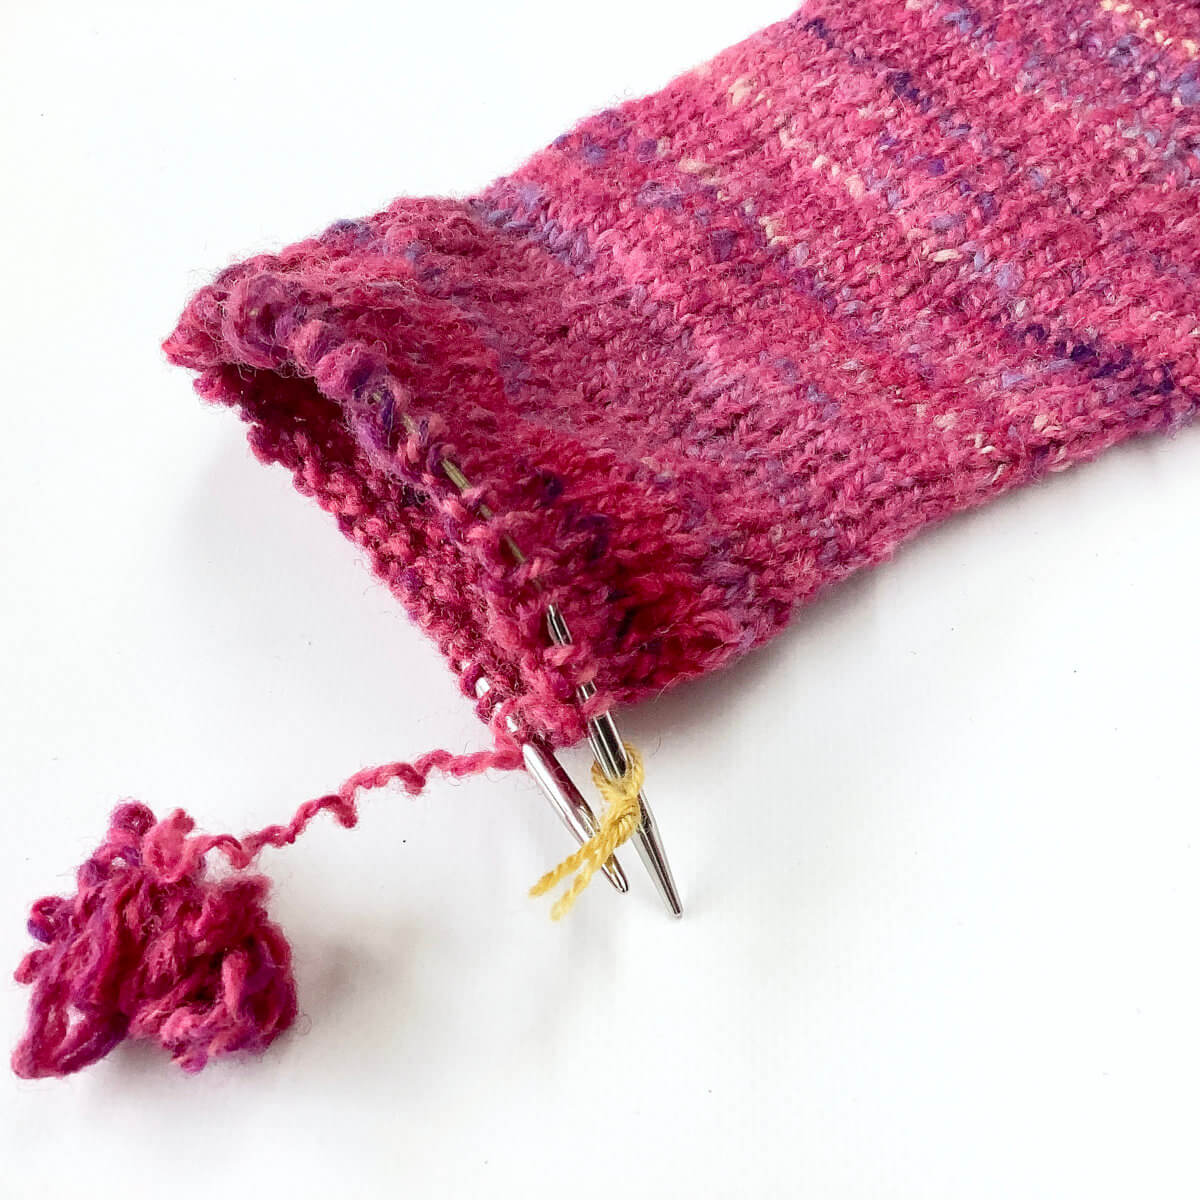
So, long story short, I hatched the plan to fix my mr Greenjeans by undoing the bind-off, work in stockinette until the hand spun is finished and then redo the cuffs with the pink yarn. And I made pictures of what I did!

Fixing my mr Greenjeans step by step

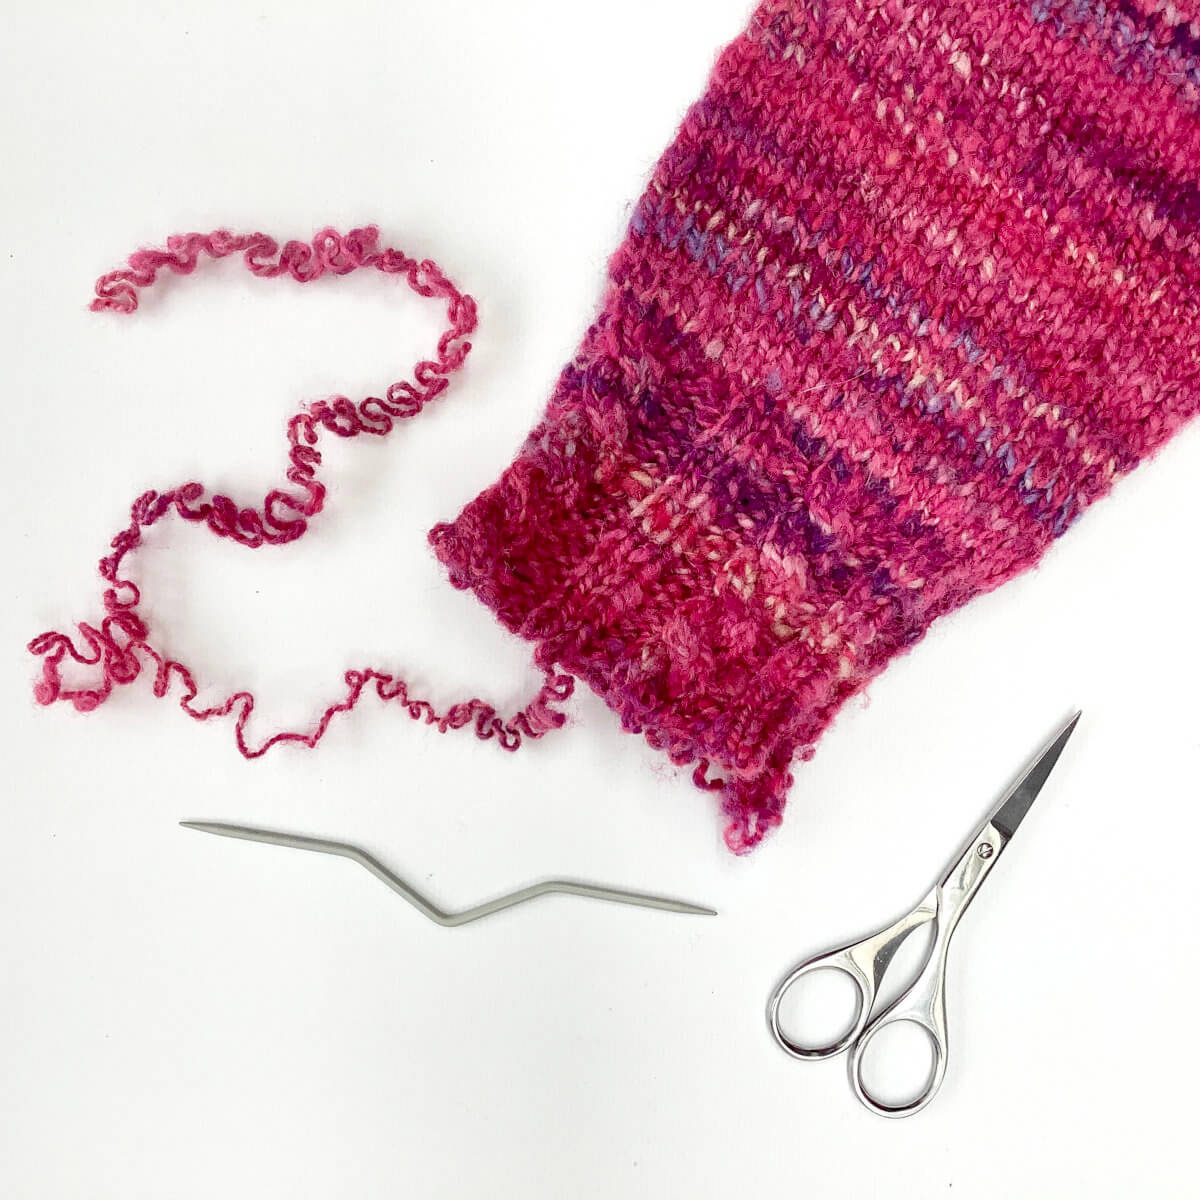
  1. Undoing the bind-off and unraveling the cabled cuffs.

    The original yarn tail was, of course, woven in. However, with some smart and careful snipping, I managed to unravel the bind-off and then rip back the knitting to the point where the stockinette stopped.Step 1

  2. Re-knitting the hand spun yarn.

    I put the stitches on a tiny circular needle, and continued the stockinette section of the sleeve until I couldn’t work another round. And yes, I kept track of the number of rounds to be able to duplicate it for the other sleeve.Step 2

  3. No more round possible!

    I made a total of 18 extra rounds of stockinette in the hand spun yarn.Step 3

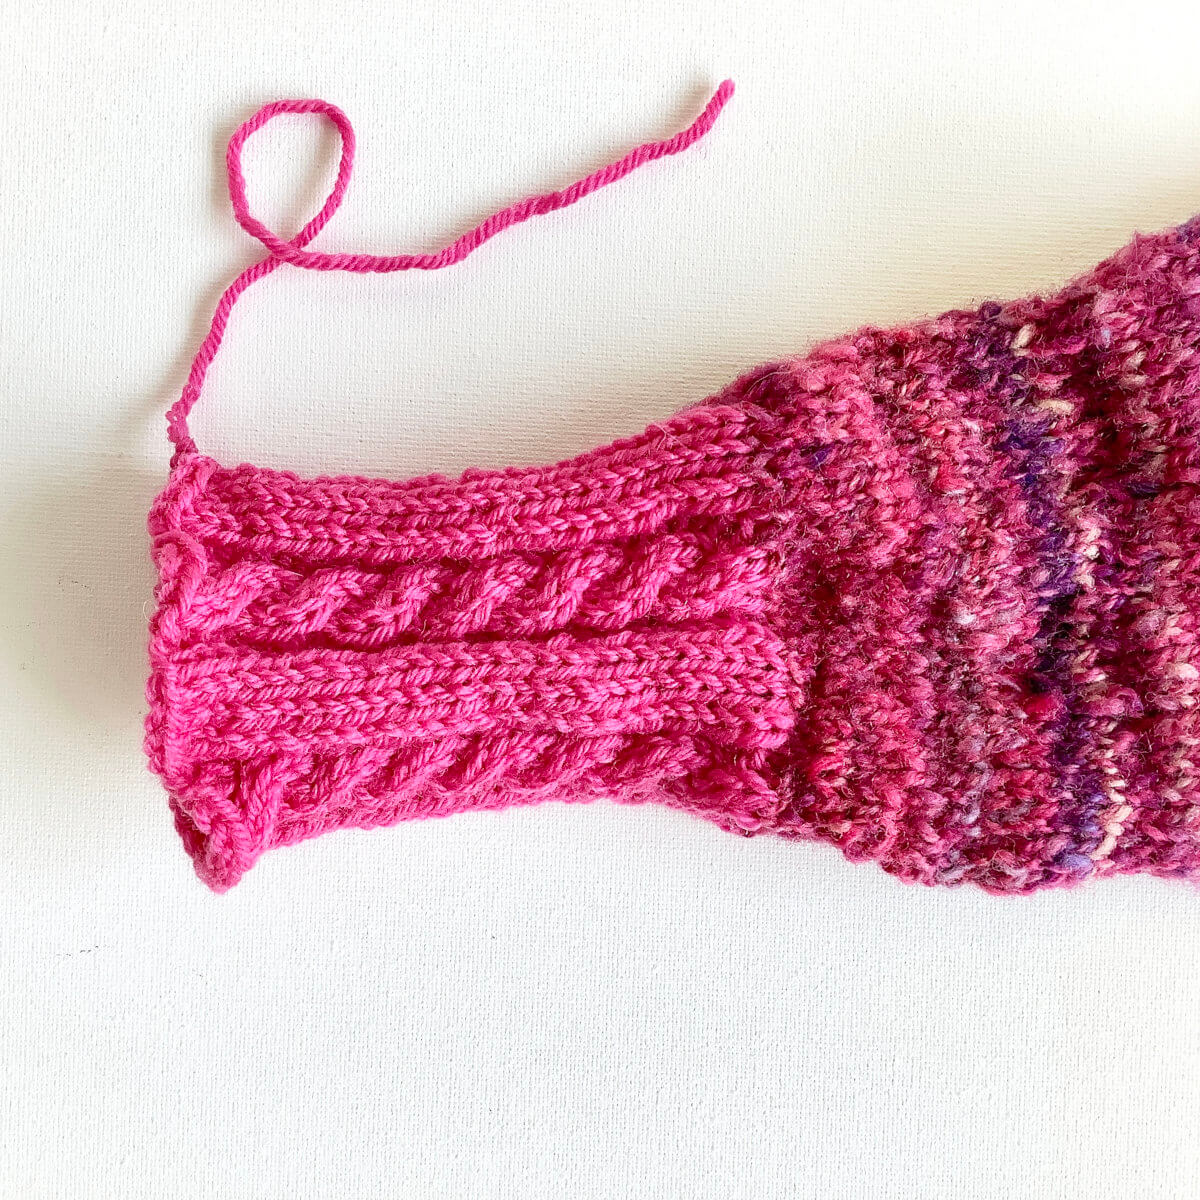
  4. The next step consisted of re-knitting the cabled cuff in the somewhat matching pink yarn.

    Here I made 29 rounds to arrive at a cozy long sleeve length.Step 4

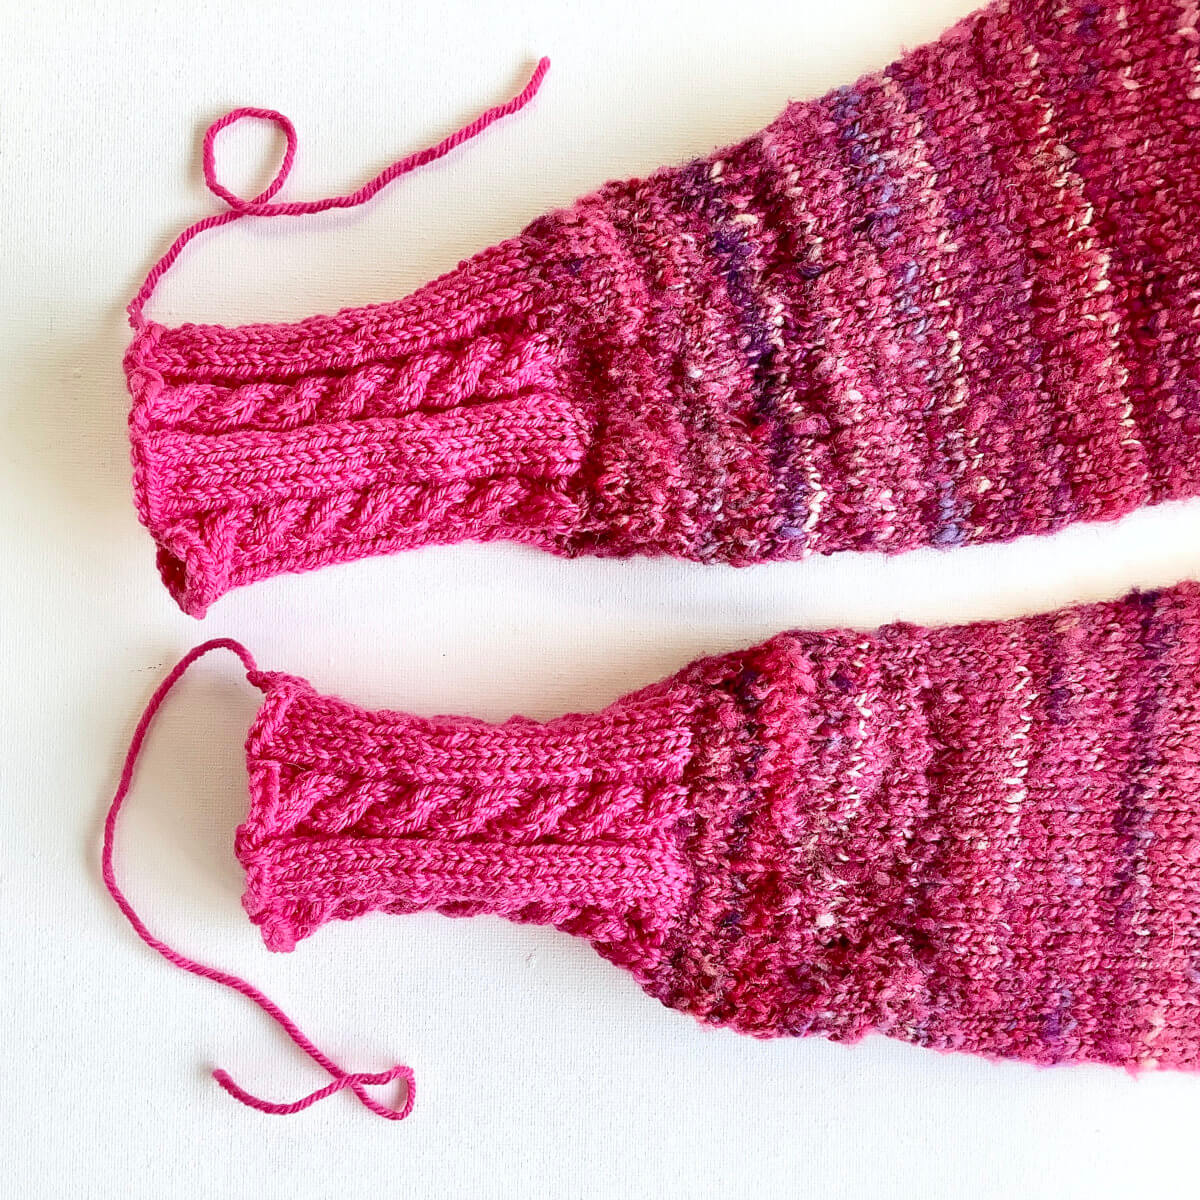
  5. Repeat steps 1 to 4 for the other sleeve!

    Step 5

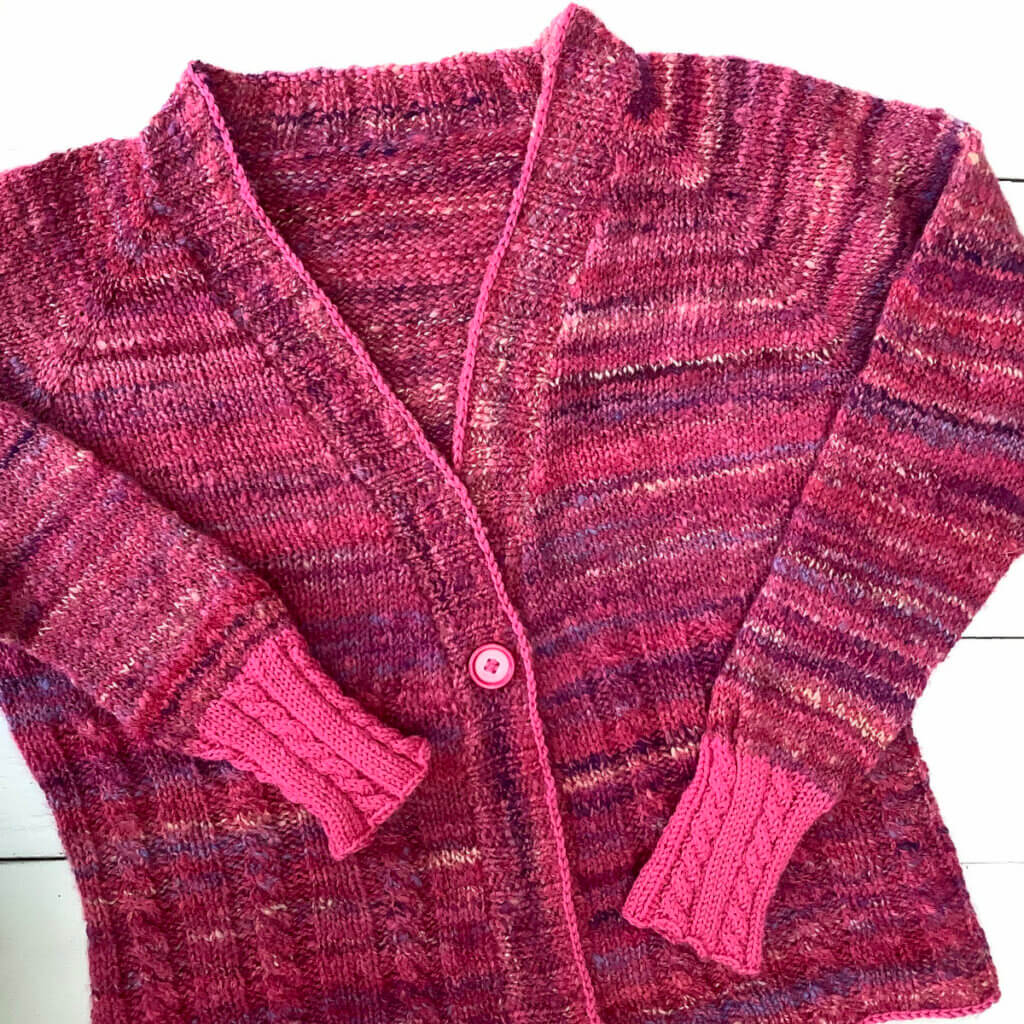
And this is the result of foxing my mr Greenjeans!

The new and improved mr Greenjeans

As you can see, I found a button in the very same pink as the contrast yarn, and actually sewed it on. To tie everything together, I also did some slip stitching along all outer edges of the cardigan. In my next tutorial, I’ll show you how to work slip stitches as an edge treatment!

Patreon logo

Thanks to my Patreon supporters for bringing you this freebie! Creating quality patterns and tutorials is a lot of work and resource-intensive. However, I find it important to give you free content like this tutorial. Thanks to the generous support of my Patreon supporters, I can make it happen. Thank you, patrons! Click here to join, or click here to read more about La Visch Designs on Patreon.

tutorial – fixing my mr Greenjeans Read More »
stip baby cardigan in ‘handwerken zonder grenzen’

Stip Baby Cardigan

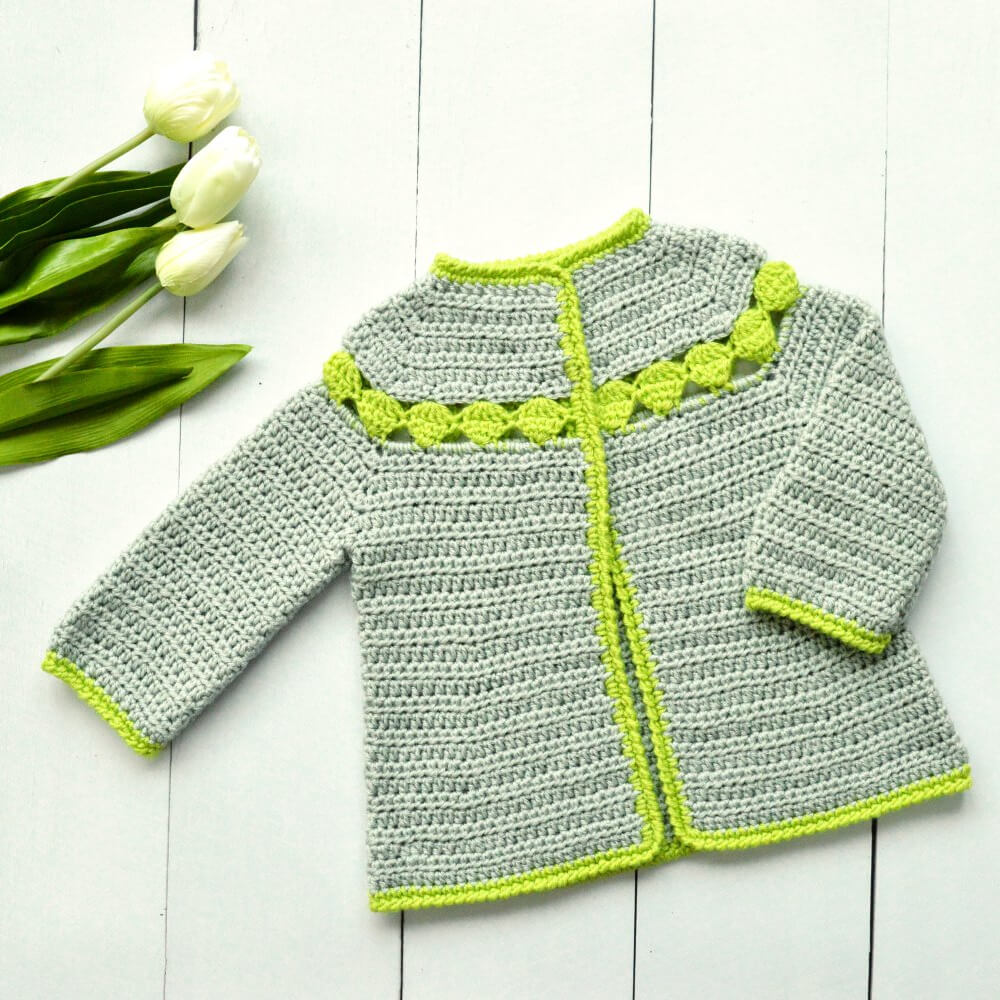
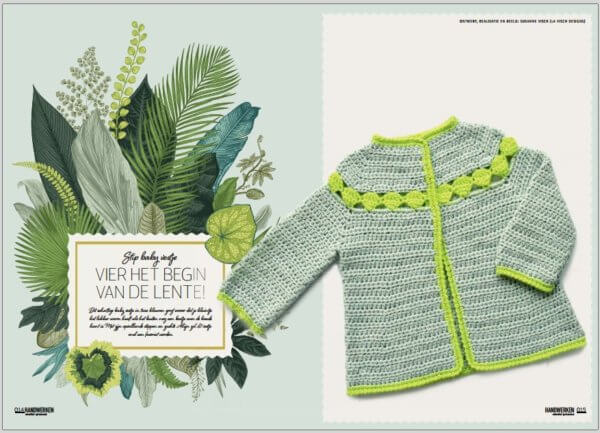
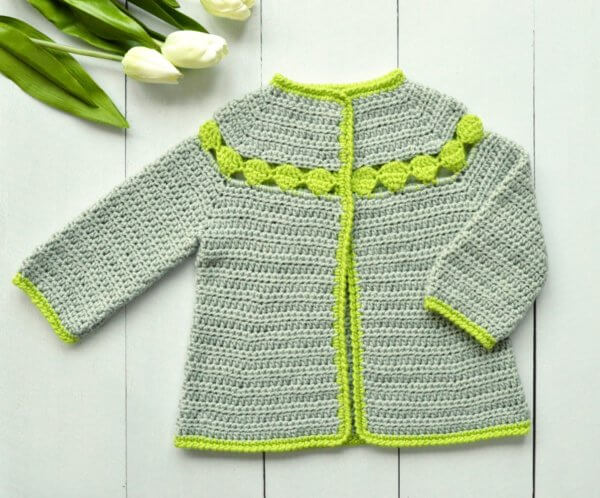
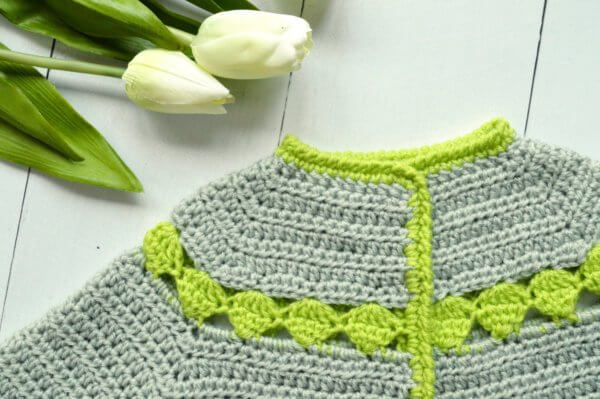
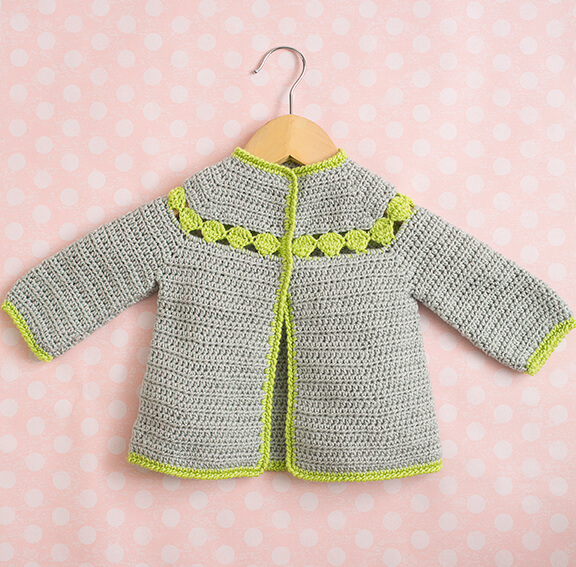
The little two-tone Stip Baby Cardigan is a simple and elegant layering piece. Just the thing for when the weather is still cold and a little extra warmth is much appreciated. With its eye-catching dot yoke and soft A-line shape, it is bound to become a timeless favorite.

This cardigan is worked back and forth from the top down in one piece. Finish it with a reverse single crochet neck and hem finishing in a contrasting color.

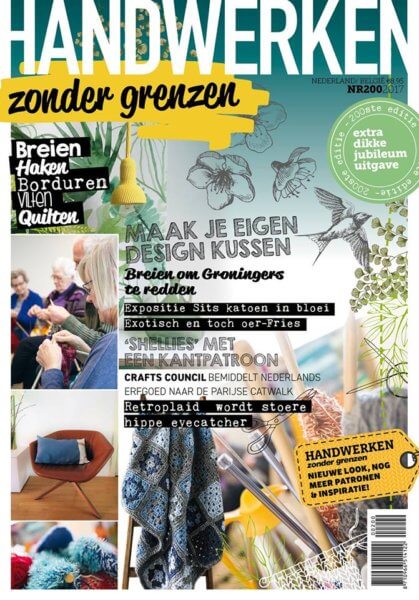
Cover HZG 200

I’m proud to tell you, that the Stip Baby Cardigan design has been published in issue 200 of Handwerken Zonder Grenzen. This is the special anniversary issue of the Dutch magazine Handwerken Zonder Grenzen! You can order this issue in Dutch here.

This pattern is also available in both English and Dutch through La Visch Designs!

Stip Baby Cardigan in Handwerken Zonder Grenzen 200

stip baby cardigan in ‘handwerken zonder grenzen’ Read More »
enigma

Enigma

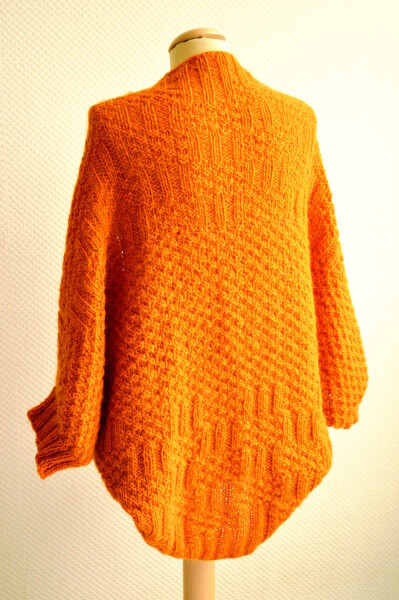
Enigma is a cozy layering piece, perfect for those times that you just want to wrap up in warm woolens. With its easy construction and textured stitch patterns, Enigma is an interesting but relaxing knit.


Pay what you want: (minimum €7.10)

Add to cart


Difficulty level

Stitches used include knit, purl, k2tog, skp, yo and a centered double decrease. This pattern is suitable for the beginning knitter.

Sizes and finished measurements

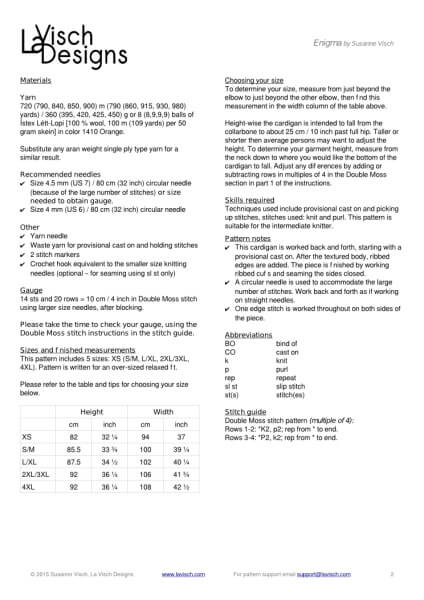
This pattern includes 5 sizes: XS (S/M, L/XL, 2XL/3XL, 4XL). For more sizing information, please see the data page in the picture gallery below. The pattern is written for an over-sized relaxed fit. Instructions are included to customize the fit of the garment.

Pattern details

  • Worked flat
  • Written for a gauge of approx. 14 sts / 20 rows = 10 cm (4 inches) over in Double Moss stitch using larger size needles, after blocking.
  • Pattern languages included: English and Dutch (Dit patroon omvat zowel een Nederlandse als een Engelse versie).
  • Digital PDF has 4 pages in the English version and 5 in the Dutch version (A4 size)

Materials

  • 720 (790, 840, 850, 900) m (790 (860, 915, 930, 980) yards) / 360 (395, 420, 425, 450) g or 8 (8,9,9,9) balls of Ístex Létt-Lopi [100 % wool, 100 m (109 yards) per 50 gram skein]. Substitute any aran weight single ply type yarn for a similar result.
  • Size 4.5 mm (US 7) / 80 cm (32 inches) circular needle (because of the large number of stitches) or size needed to obtain gauge and a size 4 mm (US 6) / 80 cm (32 inches) circular needle.
  • Yarn needle
  • Waste yarn for provisional cast on and holding stitches
  • 2 stitch markers
  • Crochet hook equivalent to the smaller size knitting needles (optional – for seaming using sl st only)

enigma Read More »
knitting history

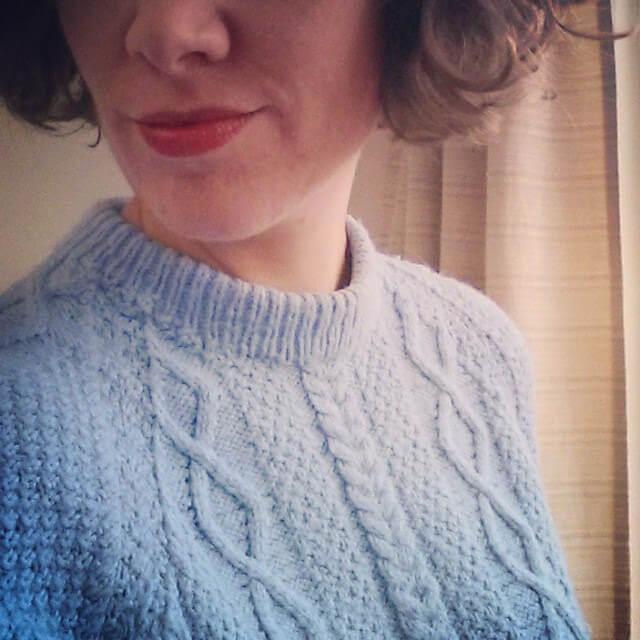
A woman wearing a light blue cablesd sweater

It is quite possible that you are not the only one in your immediate family, who knits or crochets. Perhaps a mother who likes to click the needles. Or maybe a grandmother who regularly made you a sweater when you were little. In this blog I want to share a bit of my personal knitting history with you.

My grandmother was a good knitter. Unfortunately I haven’t experienced this first hand, because she died very young, only a couple of weeks after I was born. All these years my mother had been saving a big pile of sweaters made by my grandmother. Then, about 35 years later my mom visited me and brought along all these sweaters with the question if I would like some. The rest she would finally let go.

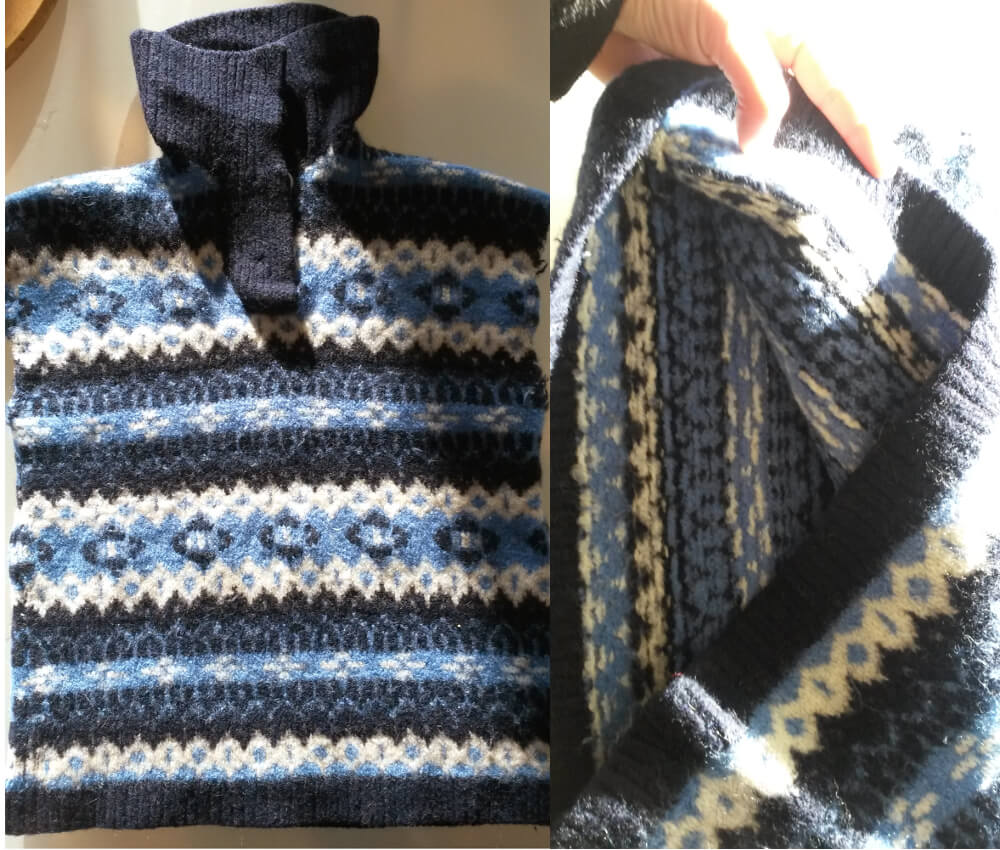
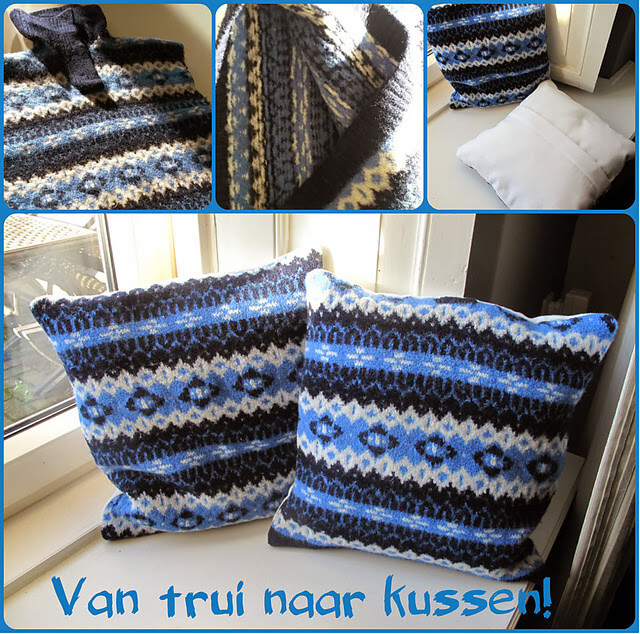
One of the sweaters really does suit me, is very much my style and one I have since worn every winter. That’s the sweater you see pictured above. One of the other sweaters was not wearable for me, but so beautifully made that I could not find it in my heart to throw it out. A gorgeous fair isle sweater made ​in several shades of blue.

A felted fair-isle sweater in shades of blue and white

And suddenly I had the wonderful idea to use this sweater to make something for my mother, so she would still have a tangible reminder of her mother’s knitting. My mother did keep these sweaters for all these years for a reason after all. My thoughts went out to making cushions, with the front of each cushion consisting of a panel of this sweater.

In preparation I had undone all the seams and felted the sweater panels. However, once it came down to cutting the cushion pieces and sewing them I got cold feet… I have absolutely no experience with sewing and was terrified to ruin this irreplaceable piece of felt. After some thinking I put a note about it with a plea for help in the”DutchKarma Swap Group” on Ravelry. A very sweet lady came to my rescue and transformed my grandmother’s sweater into these lovely pillow covers:

The sweater turned into pillow cases

And my mother? She did not expect this gift at all and was extremely happy with this piece of our shared knitting history!

knitting history Read More »
stip baby cardigan

Stip Baby Cardigan


The little two-tone Stip Baby Cardigan is a simple and elegant layering piece for when the weather is still cold and a little extra warmth is much appreciated. With its eye-catching dot yoke and soft A-line shape, this cardigan is bound to become a timeless favorite.

The cardigan is worked back and forth from the top down in one piece. Finish the piece with a reverse single crochet neck and hem finishing in a contrasting color.
This pattern is written in American English crochet terminology.


Pay what you want: (minimum €7.10)

Add to cart


Sizing

This pattern includes the following baby sizes:
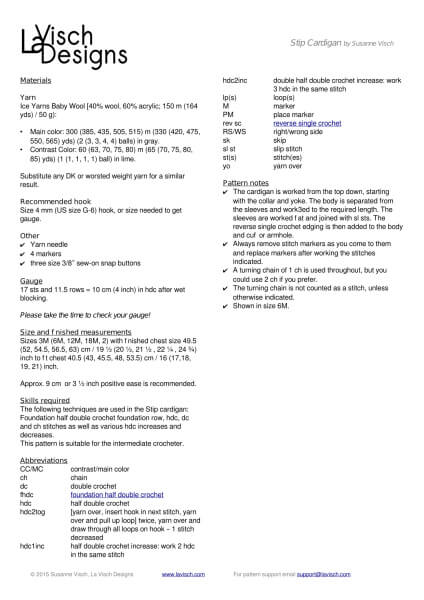
3M (6M, 12M, 18M, 2) with finished chest size 49.5 (52, 54.5, 56.5, 63) cm / 19 ½ (20 ½, 21 ½, 22 ¼ , 24 ¾) inches to fit chest 40.5 (43, 45.5, 48, 53.5) cm / 16 (17, 18, 19, 21) inches.
Approx. 9 cm or 3 ½ inches positive ease recommended.

Difficulty

Techniques used in the Stip Baby Cardigan consist of foundation half double crochet foundation row, hdc, dc and ch stitches as well as various hdc increases and decreases.
This pattern is therefor suitable for the intermediate crocheter.

Pattern details

  • Crochet this design top-down
  • Gauge: 17 sts and 11.5 rows = 10 cm (4 inches) in hdc after wet blocking.
  • Pattern languages included: English and Dutch (Dit patroon omvat zowel een Nederlandse als een Engelse versie).
  • Digital PDF has 4 pages (A4 size)

Yarn

For this design you need yarn in DK or worsted weight in the following quantities for a similar result:

  • Main color: 300 (385, 435, 505, 515) m (330 (420, 475, 550, 565) yds) in gray.
  • Contrast Color: 60 (63, 70, 75, 80) m (65 (70, 75, 80, 85) yds) in lime.

Materials

  • Size 4 mm (G-6) crochet hook
  • Yarn needle
  • 4 removable stitch markers
  • three size 3/8 inches sew-on snap buttons

stip baby cardigan Read More »
lime-trimmed cardigan

Lime-Trimmed Cardigan

This pattern was originally published in I Like Crochet issue February 2015 as part of the “Downright darling: adorable baby patterns” chapter. In this issue, I’m presenting the Lime-Trimmed Cardigan. Photo courtesy of I like Crochet Magazine.

This pattern is now also available through La Visch Designs under the name Stip Baby Cardigan.

This little two-tone baby cardigan is a simple and elegant layering piece. Great for when the weather is still cold and a little extra warmth is much appreciated. With its eye-catching dot yoke and soft A-line shape, it is bound to become a timeless favorite

lime-trimmed cardigan Read More »