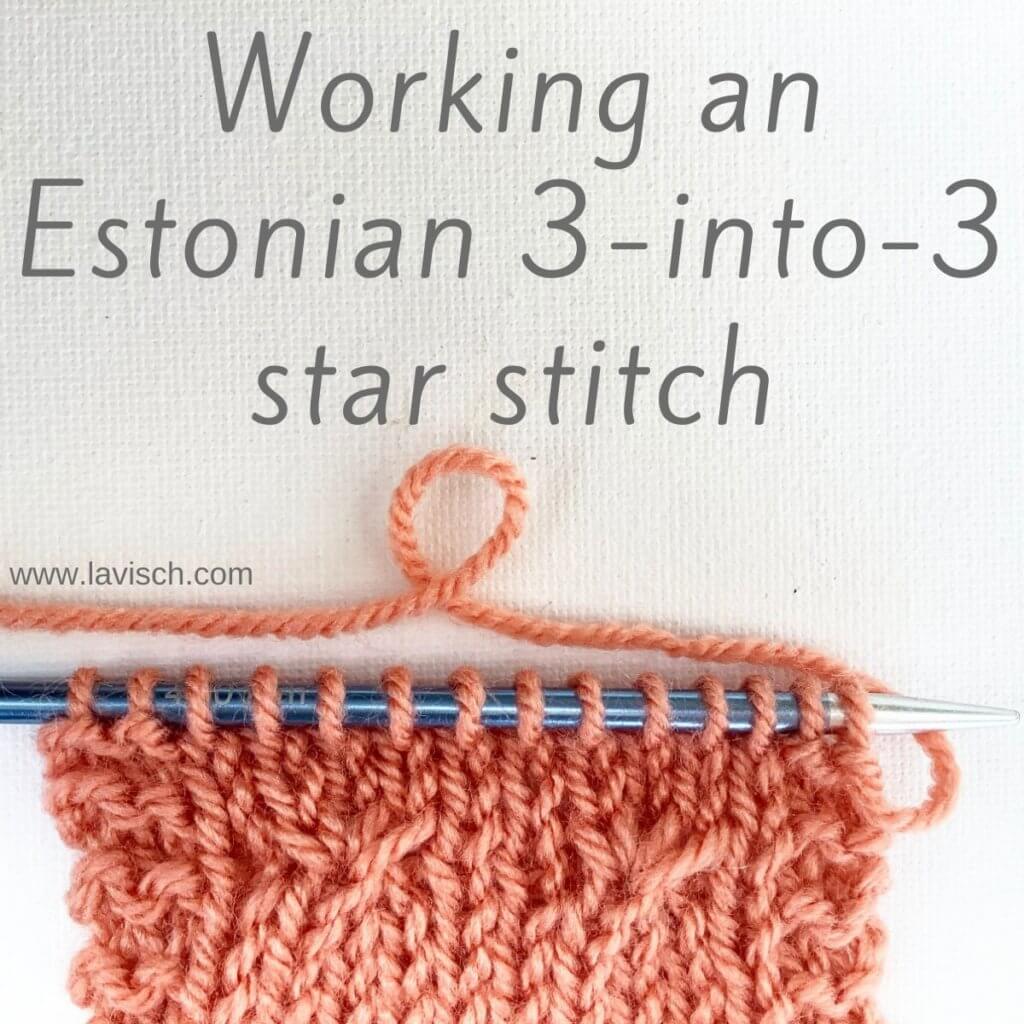
tutorial – working an Estonian 3-into-3 star stitch
Estonian knitting, especially the lace knitting, is quite a bit different from other types of lace knitting. This is in a large part due to combination of openwork and texture that is the most prominent feature of Estonian lace knitting. You may have heard of the book * Pitsilised Koekirjad by Leili Riemann, for those interested in Estonian lace knitting, it’s a true treasure trove!
Anyway, often-used design elements include nupps and gathers. Another type of stitch that’s often used is the star stitch. This is the generic name for the type of stitch where interesting patterns are created by making 3 stitches out of 3; or 5 stitches out of 5 and then purling all stitches on the next row.
It’s also possible to decrease or increase stitches this way, by, for example, making 3 stitches out of 5, or 9 out of 5. Increasing with the star technique can be used to start flower-like lace shapes by first increasing 5 stitches to 9 (or 11) and over the next couple of rows gently decreasing the extra stitches away again.
Focus of this tutorial
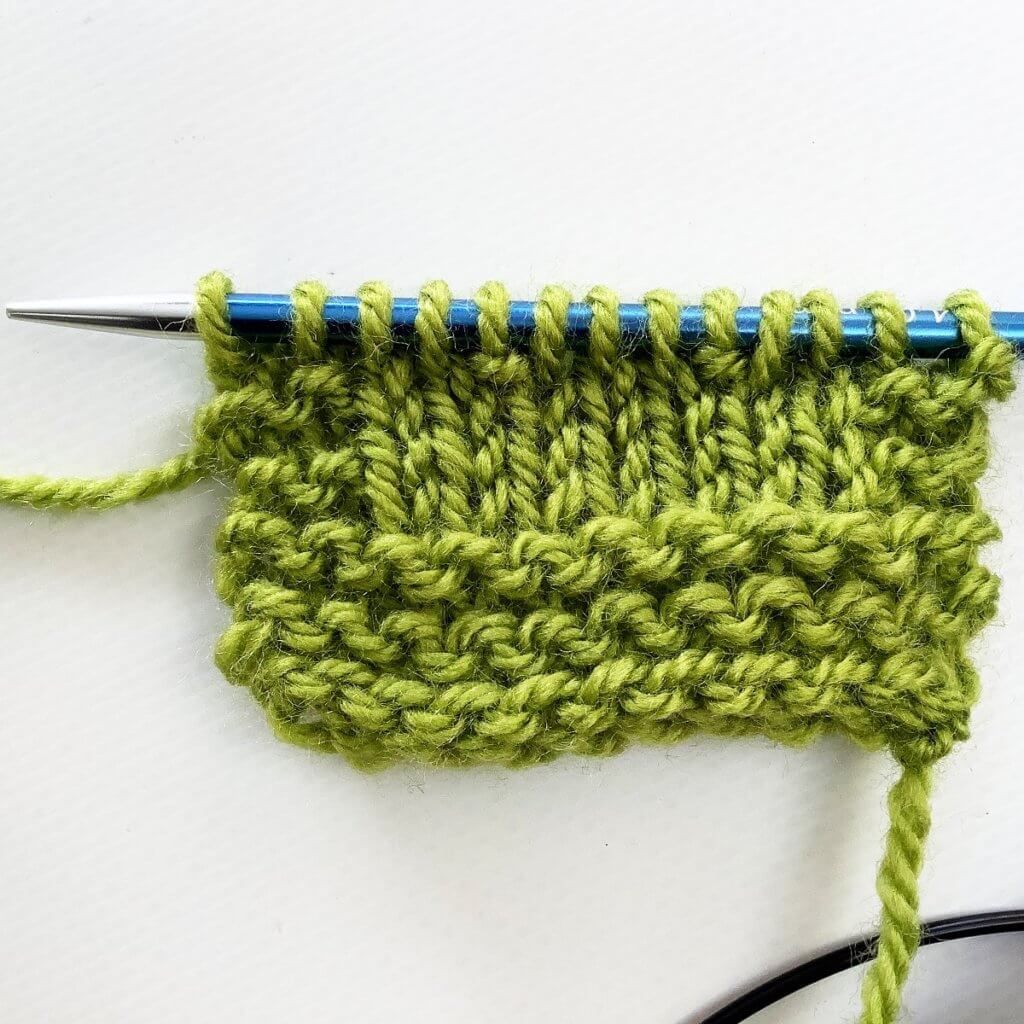
In this tutorial I will focus on a basic 3-into-3 star stitch on a stockinette background. A 3-into-3 star stitch is made by knitting 3 stitches together without dropping stitches from left-hand needle; yarn over, knit the same 3 stitches together again before dropping it all from the left-hand needle.
When worked in the yarn-needle combination shown here, the results will be a nicely textured fabric. When worked with relatively large needles for the yarn chosen, a more lacy effect will be the result.
Materials used


Yarn: * Paintbox Yarns Simply DK, a good value, good quality 100% acrylic yarn, here in the color 155 Vintage Pink.
Needles: * KnitPro Zing Fixed Circular Needles. In this tutorial, I used the 4 mm (US 6) size with a cable length of 80 cm (32 inches).
Working an Estonian 3-into-3 star stitch step by step
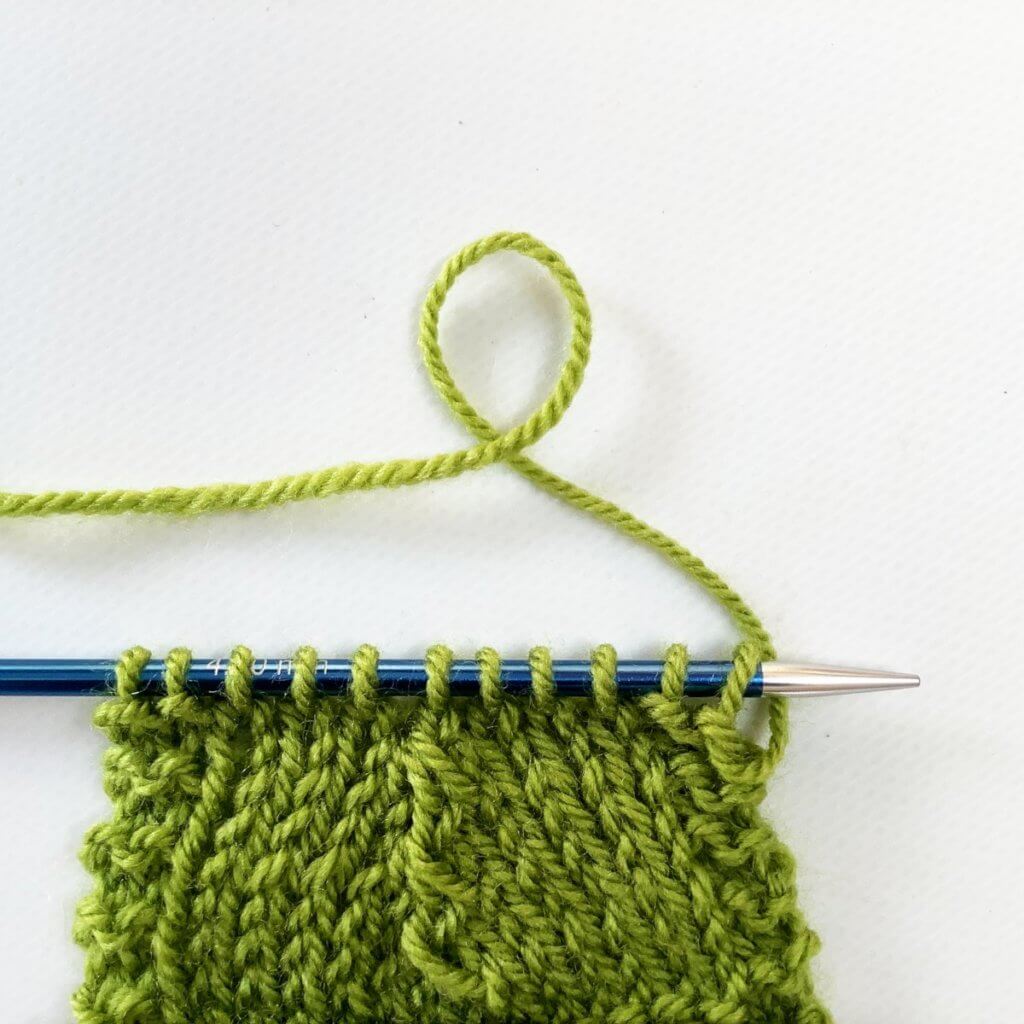
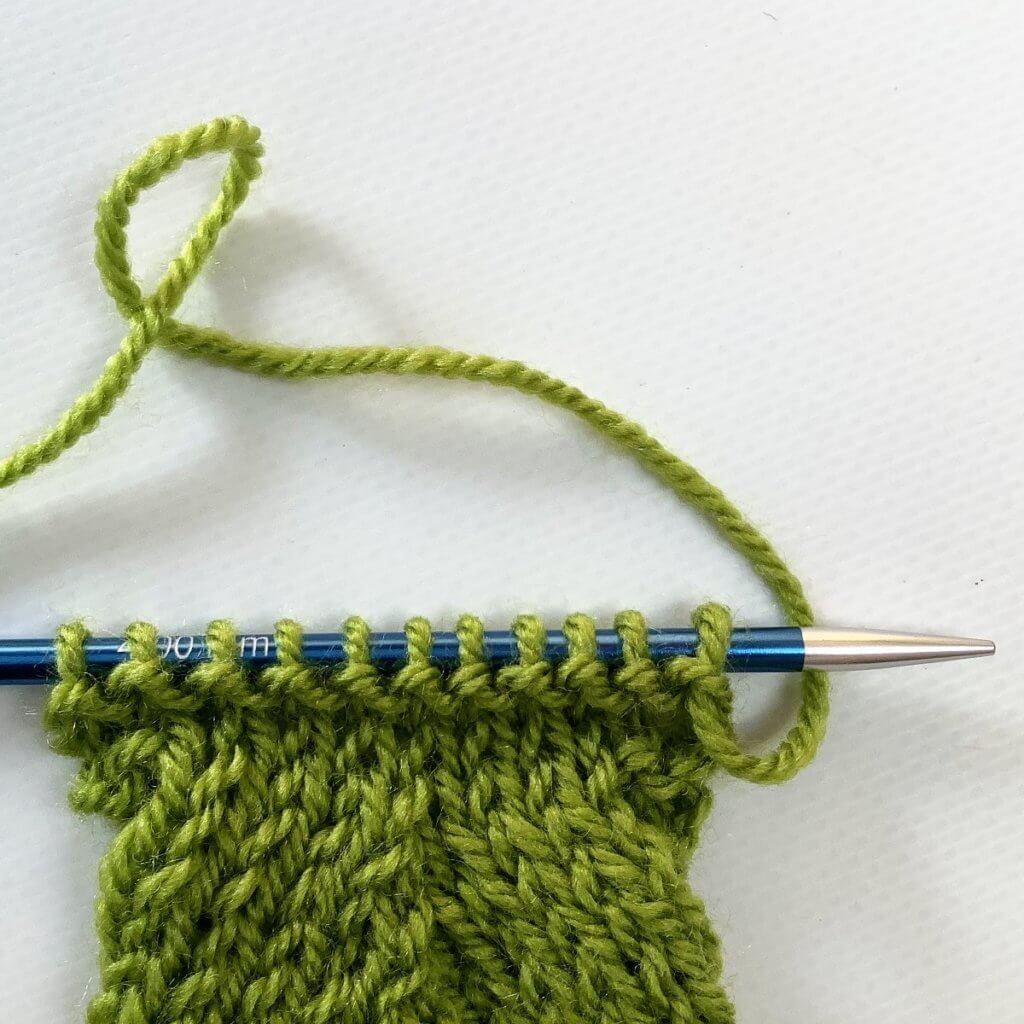
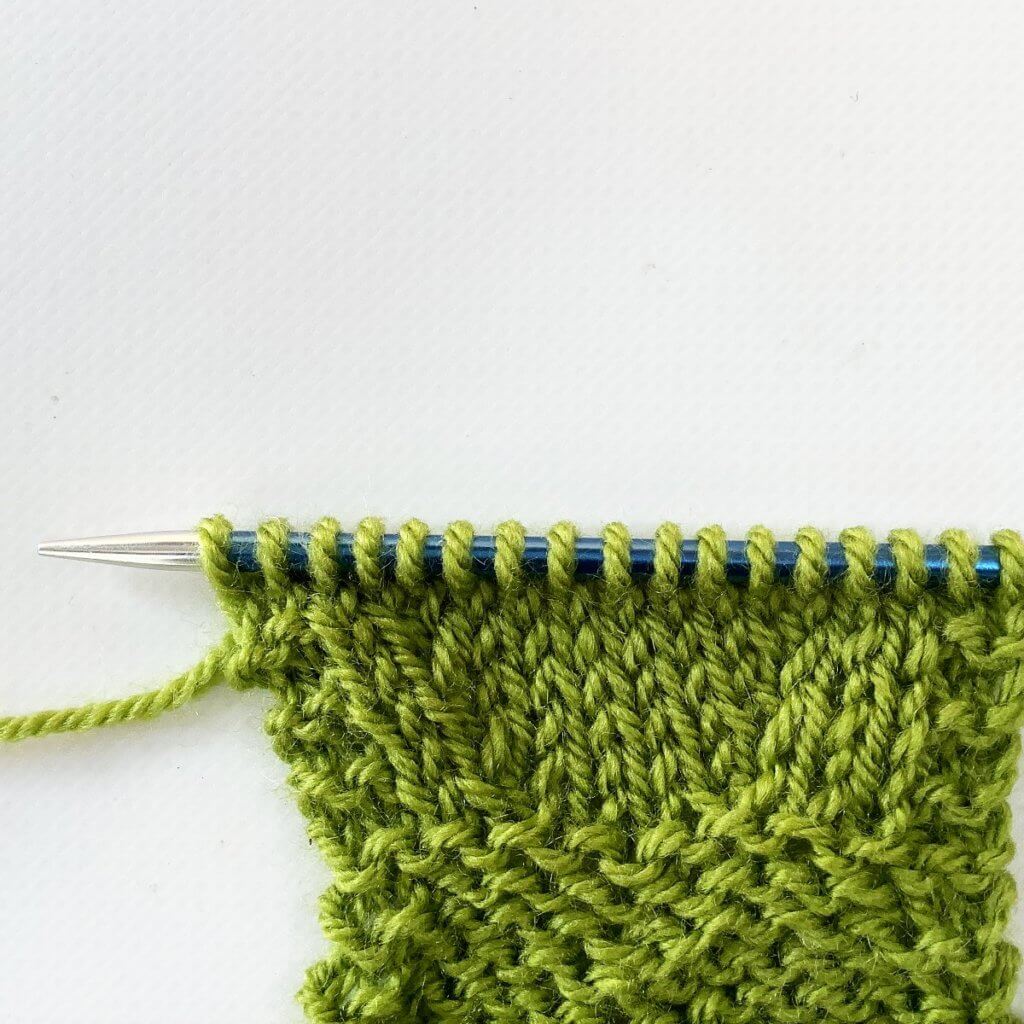
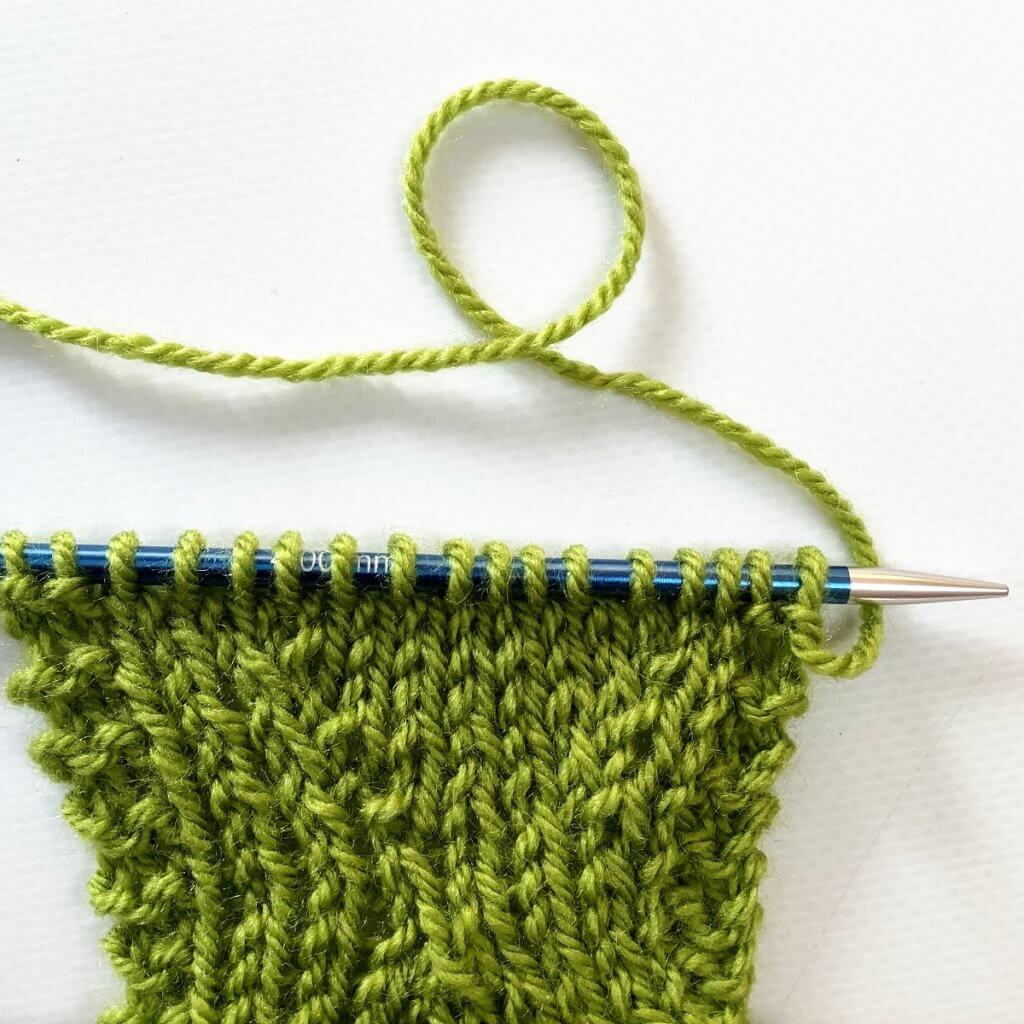
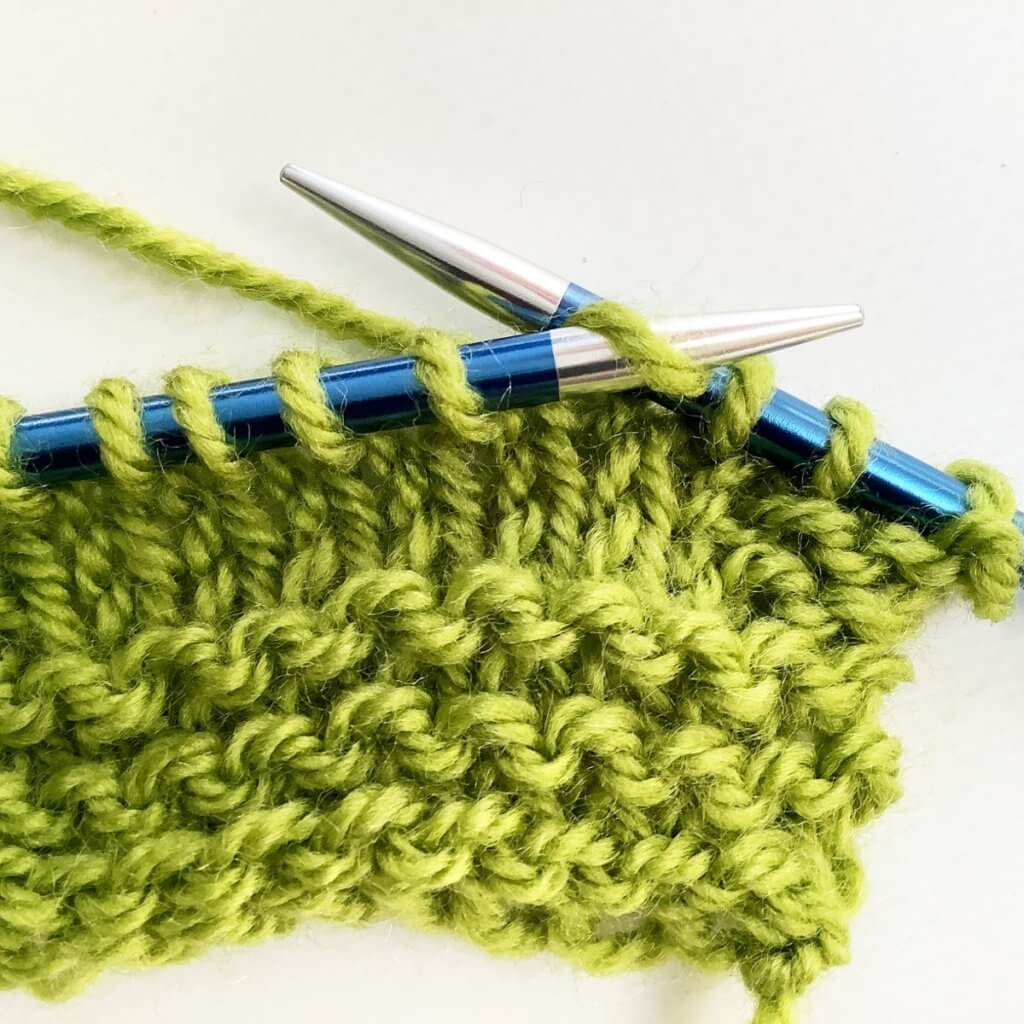
1. First, work your way across the row until you’ve reached the point where you want to make the star stitch.
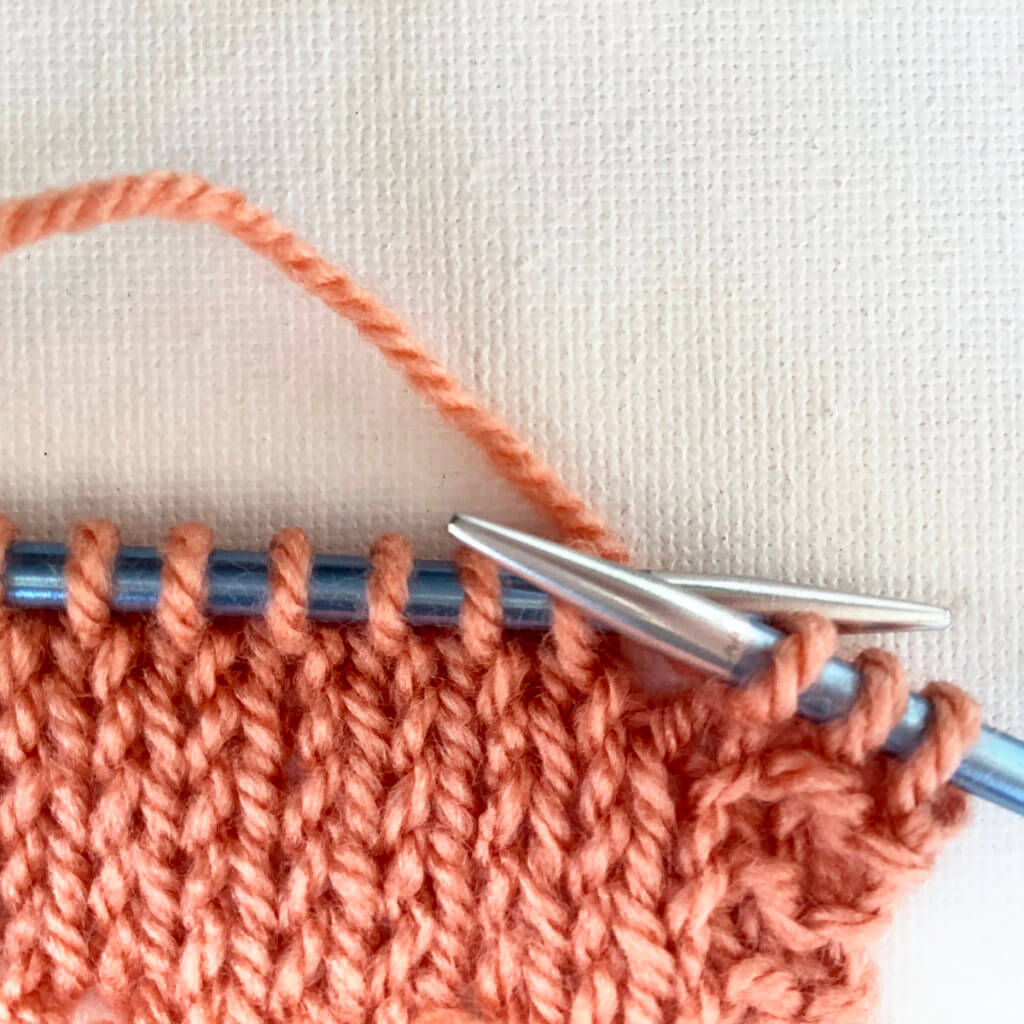
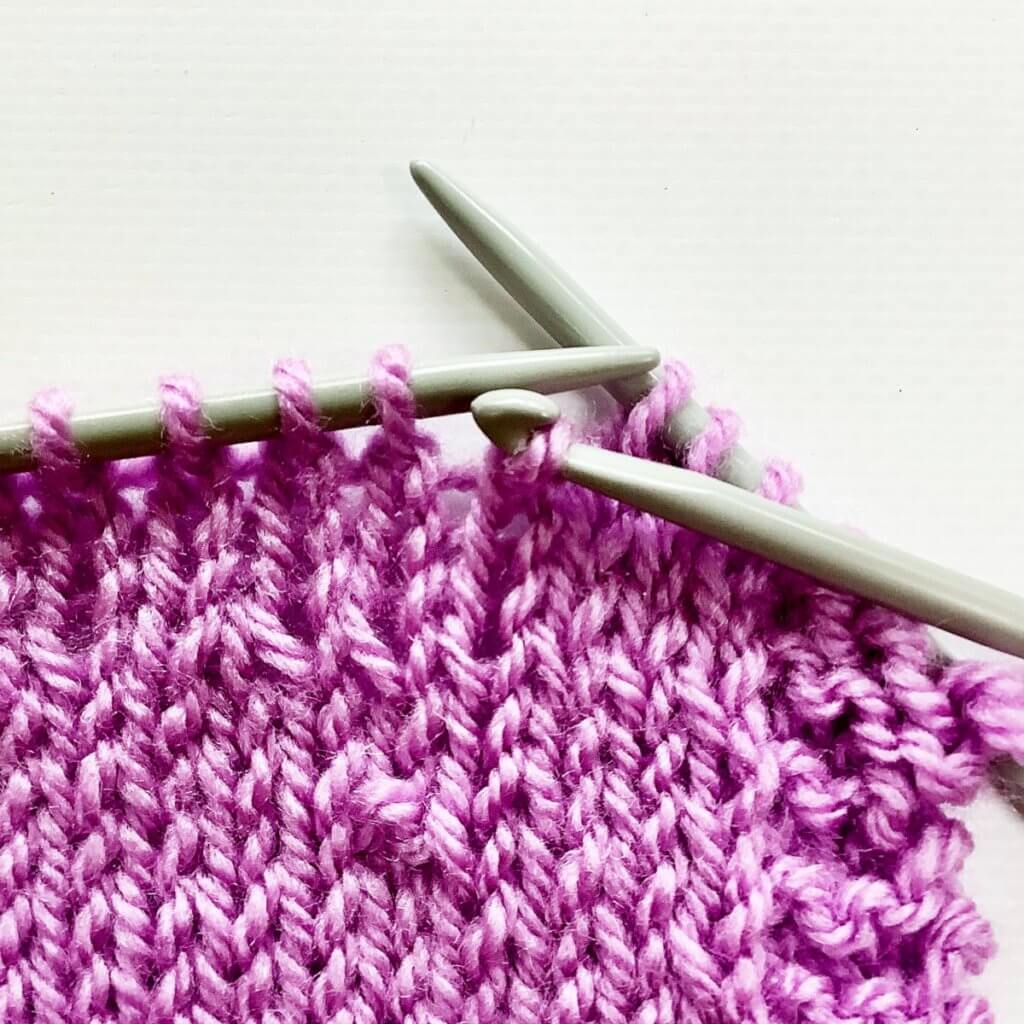
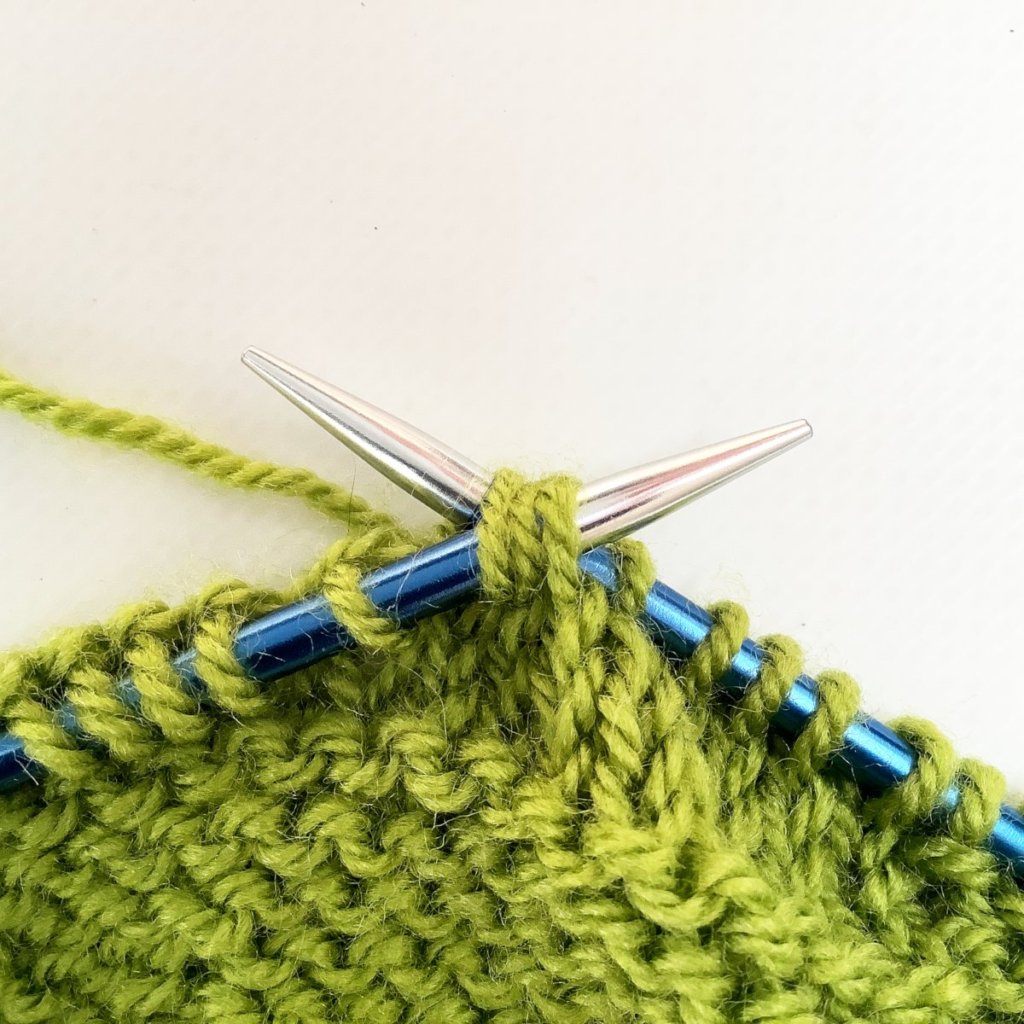
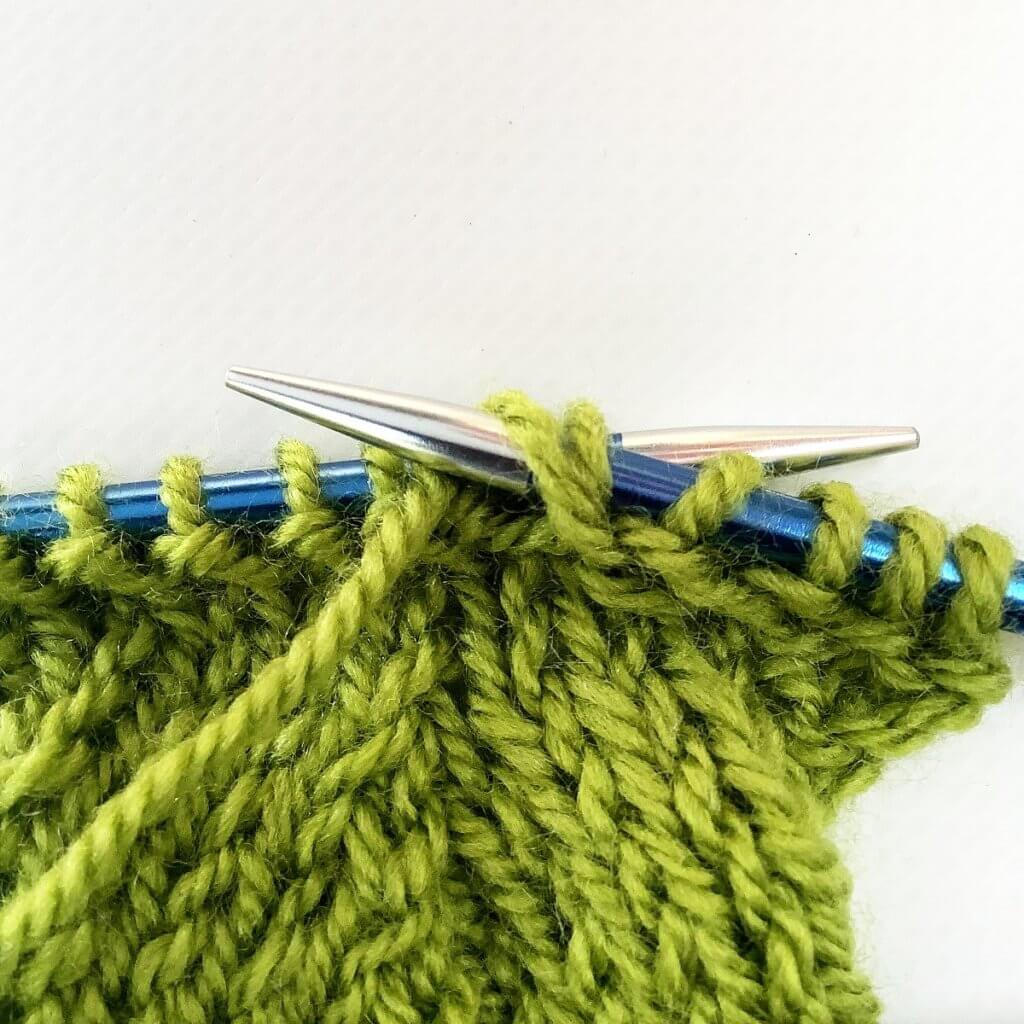
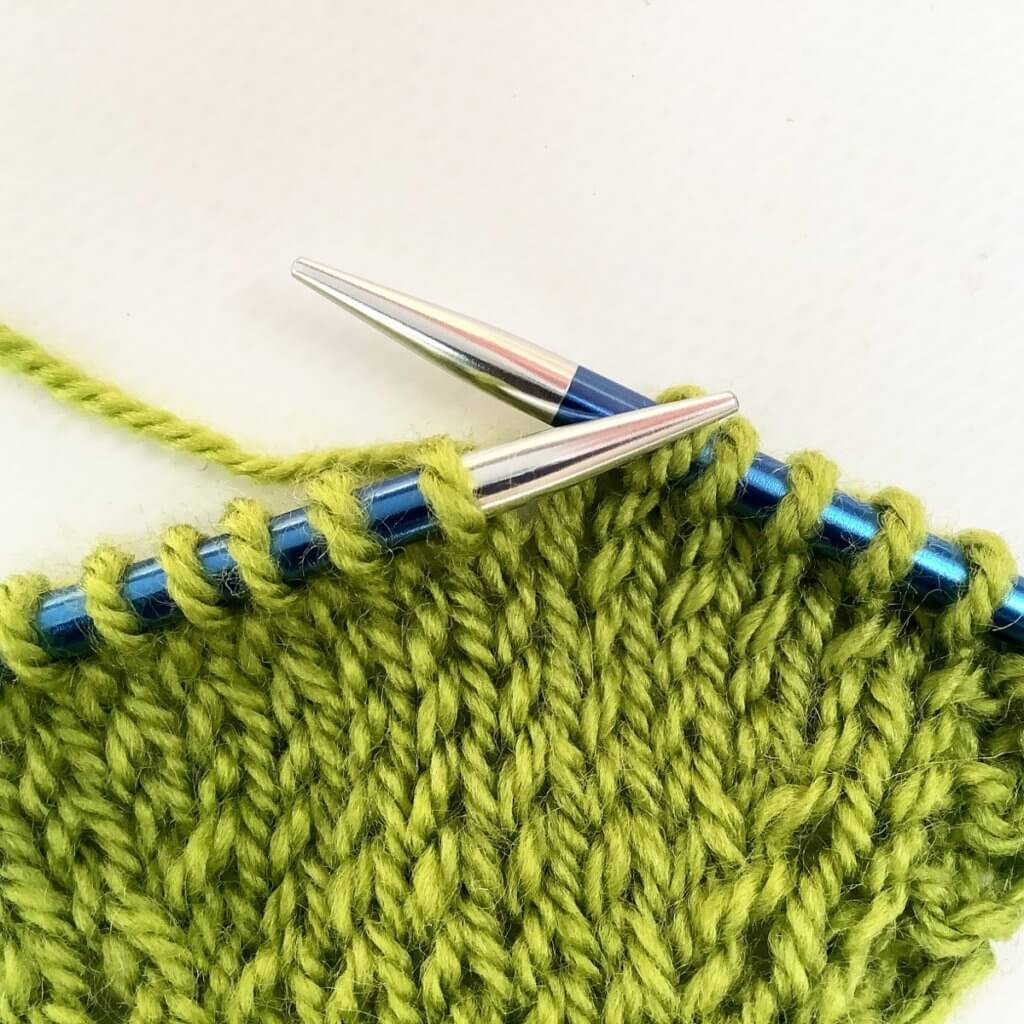
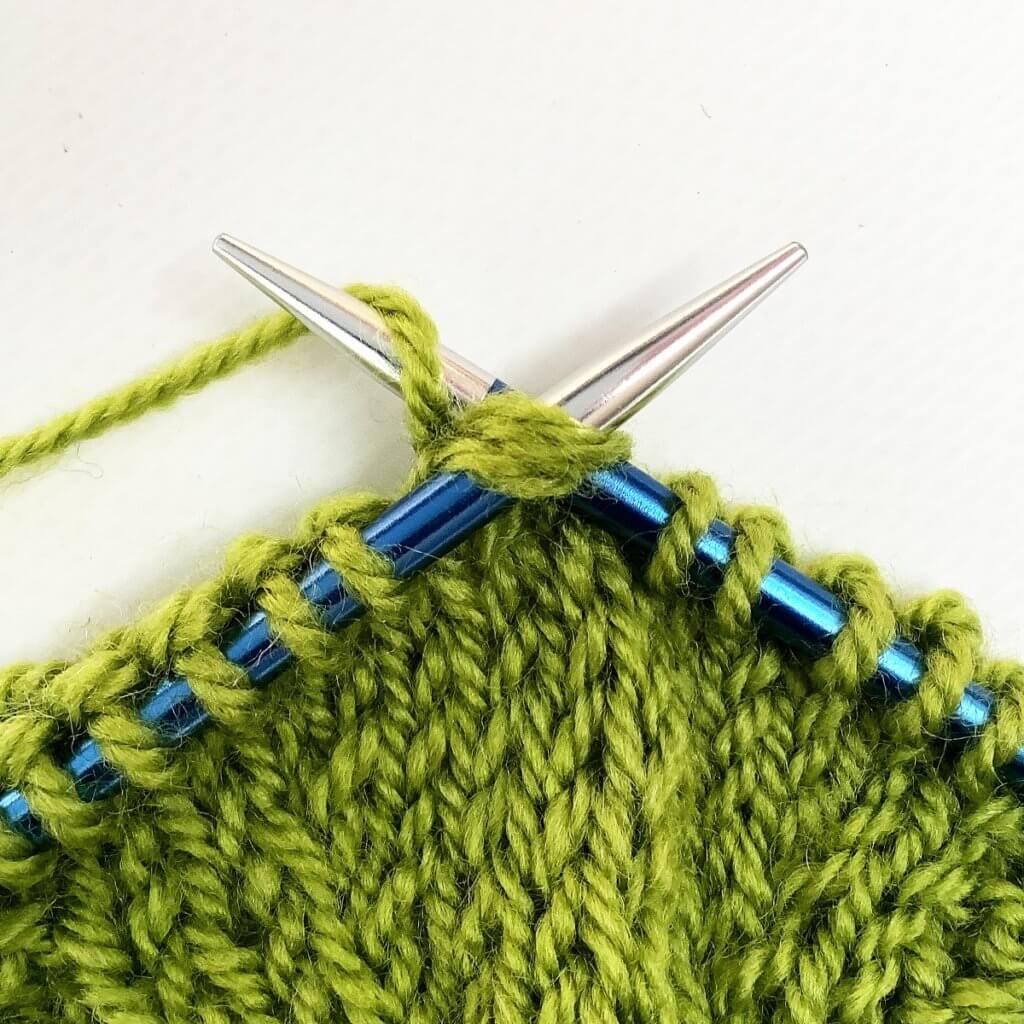
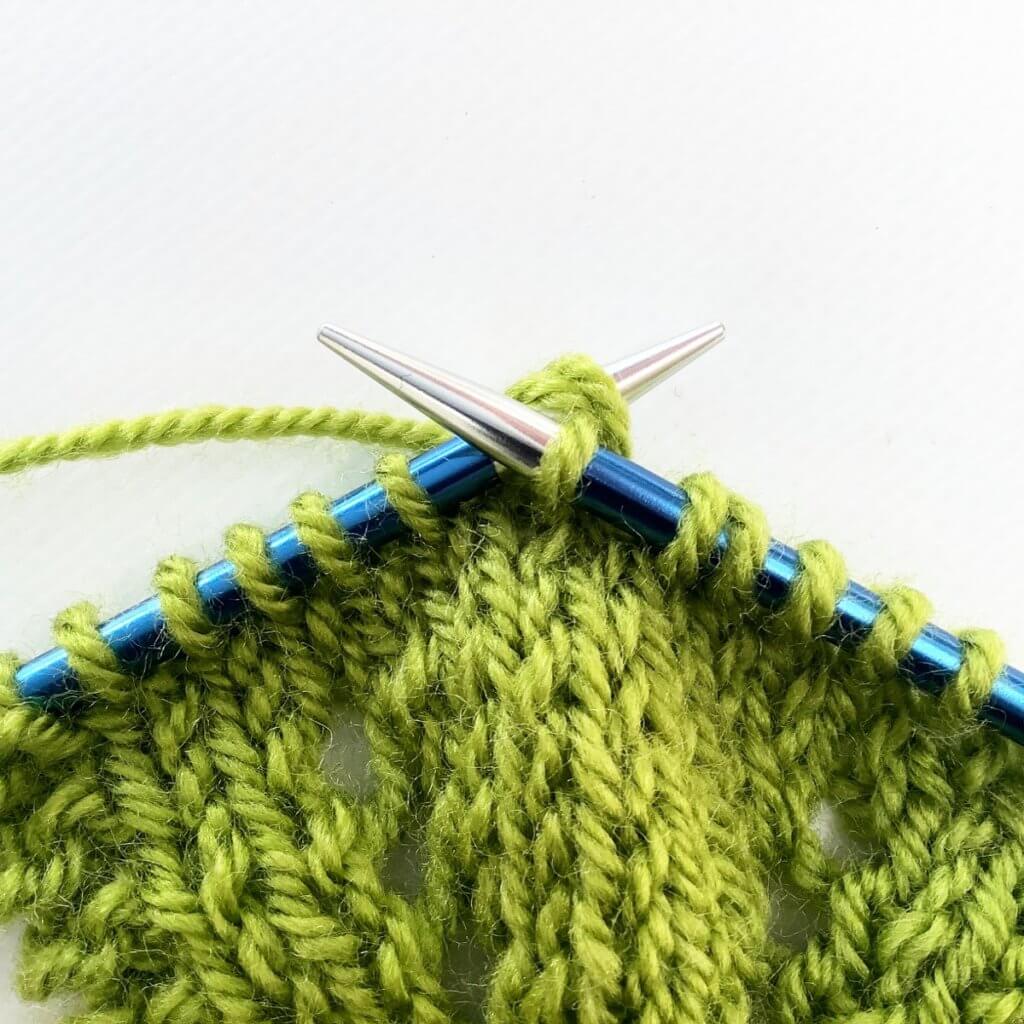
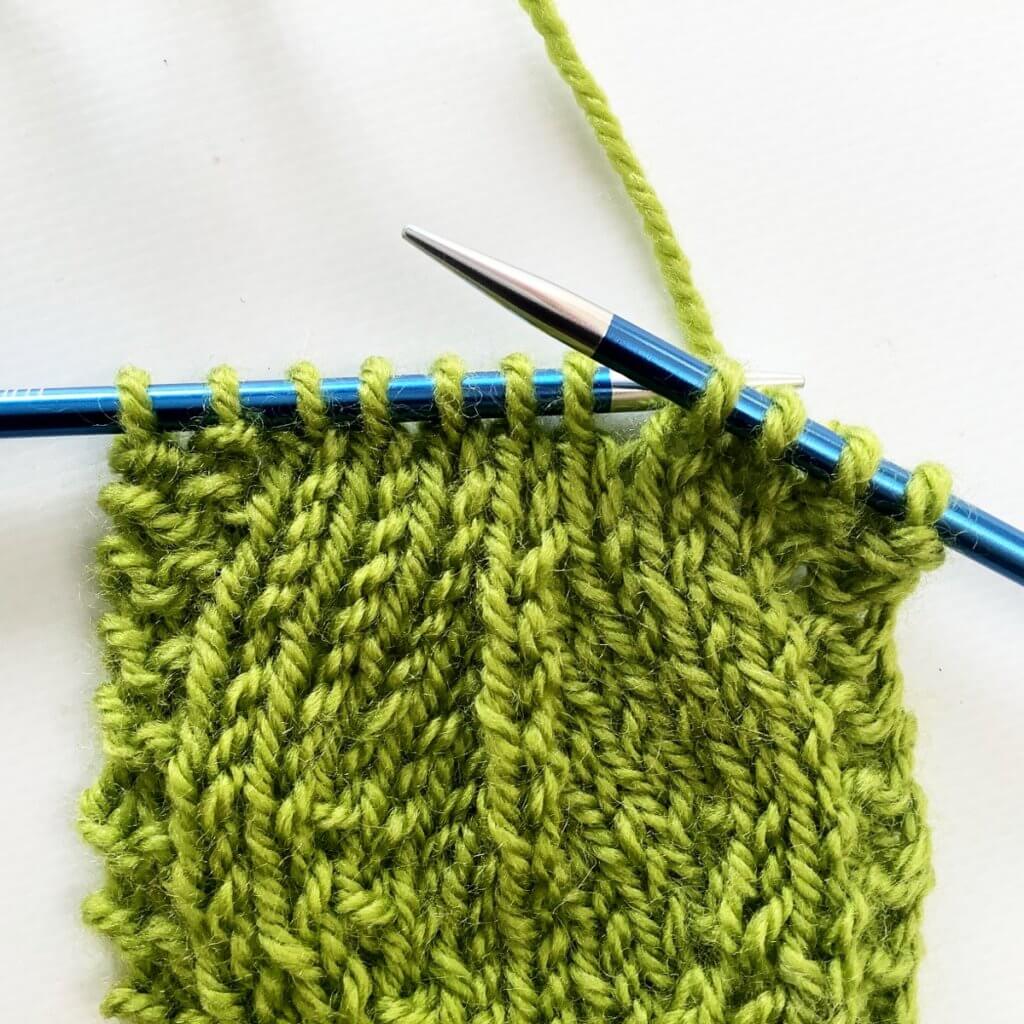
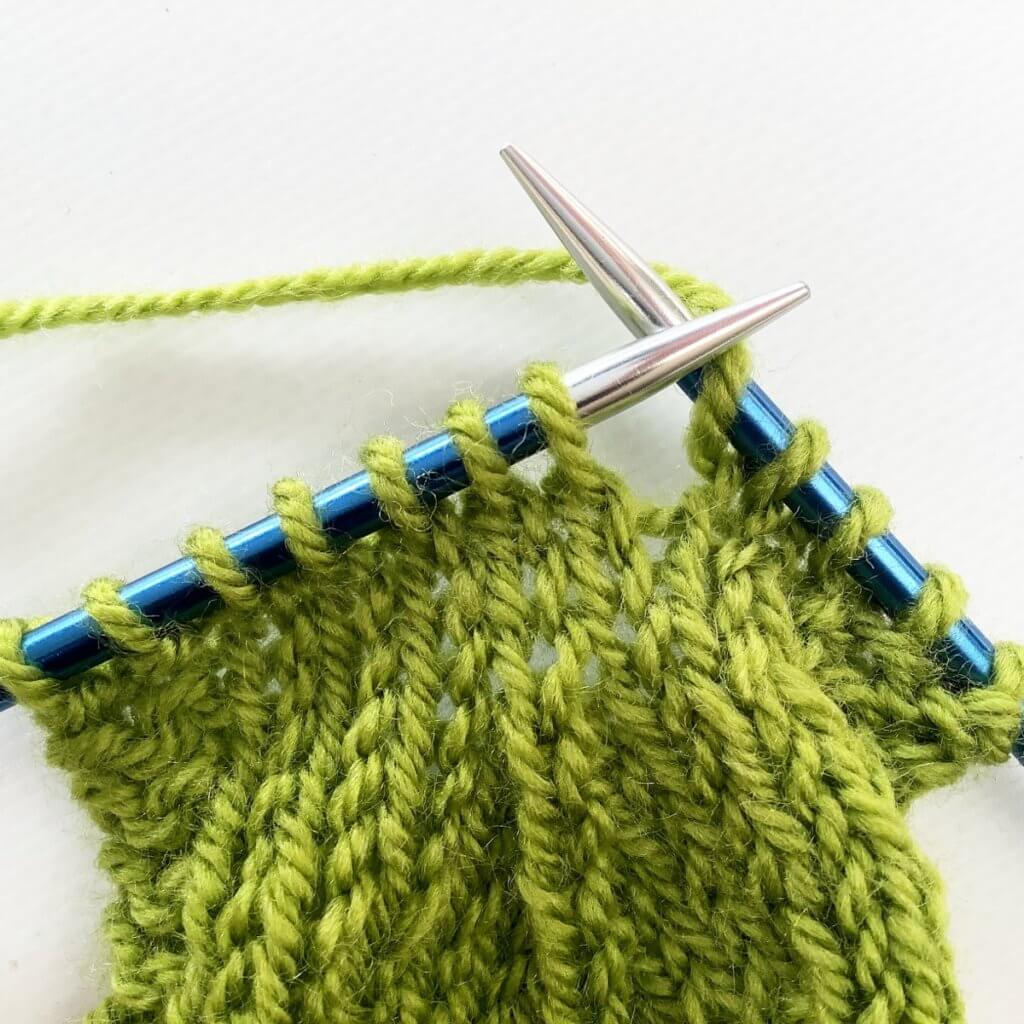
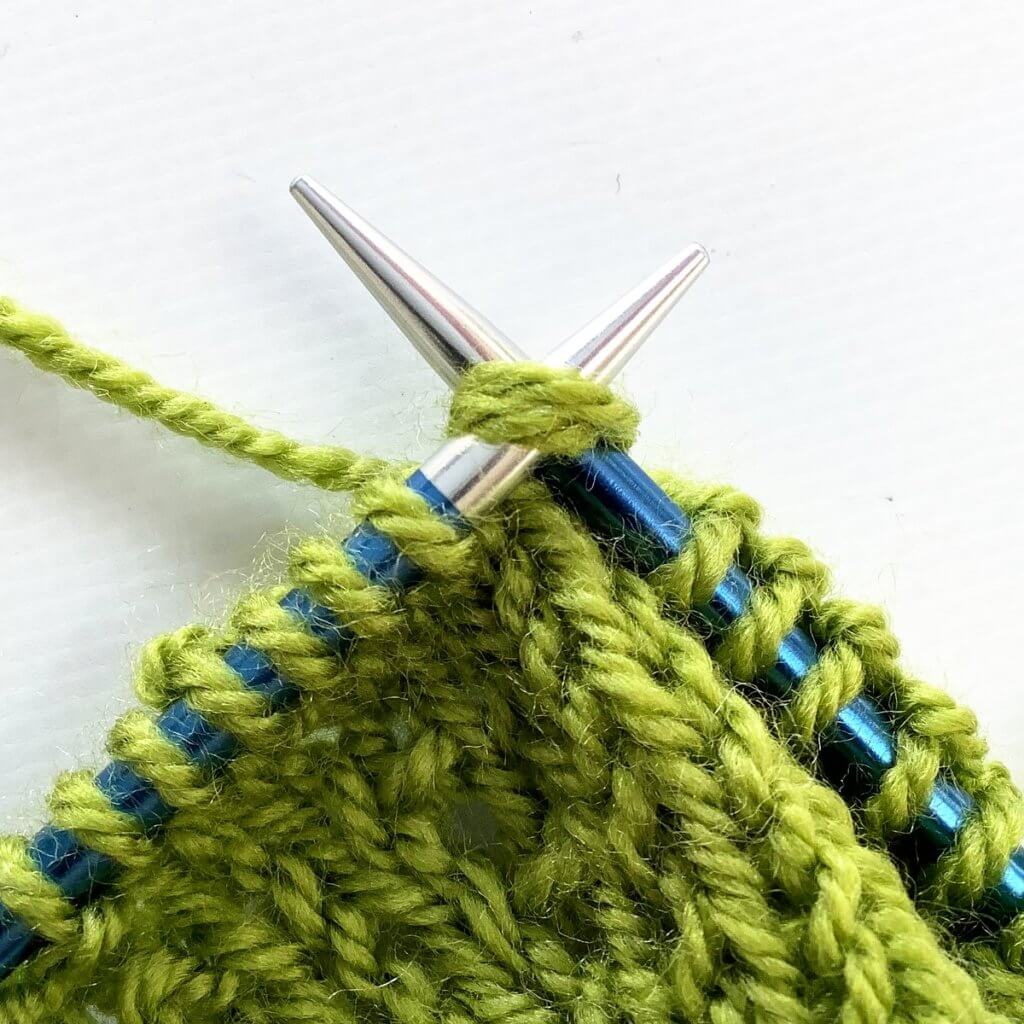
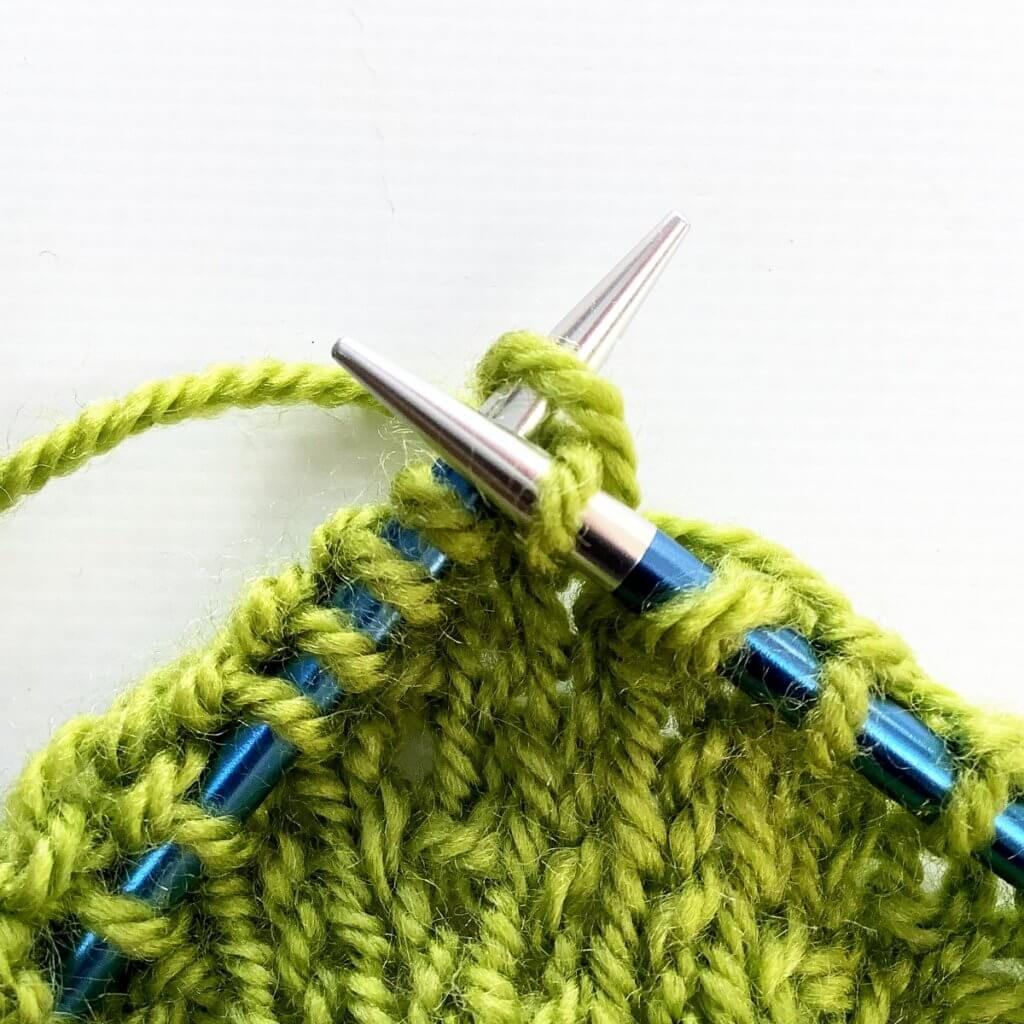
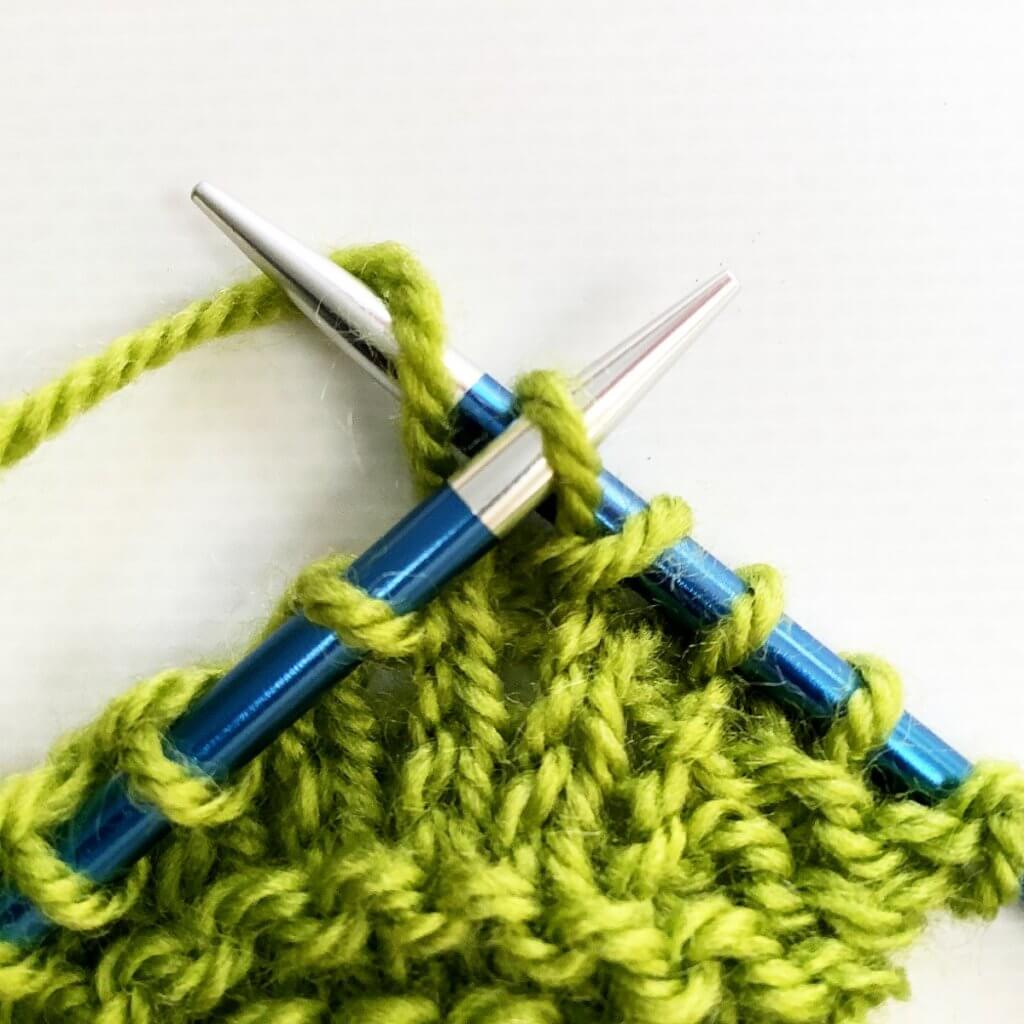
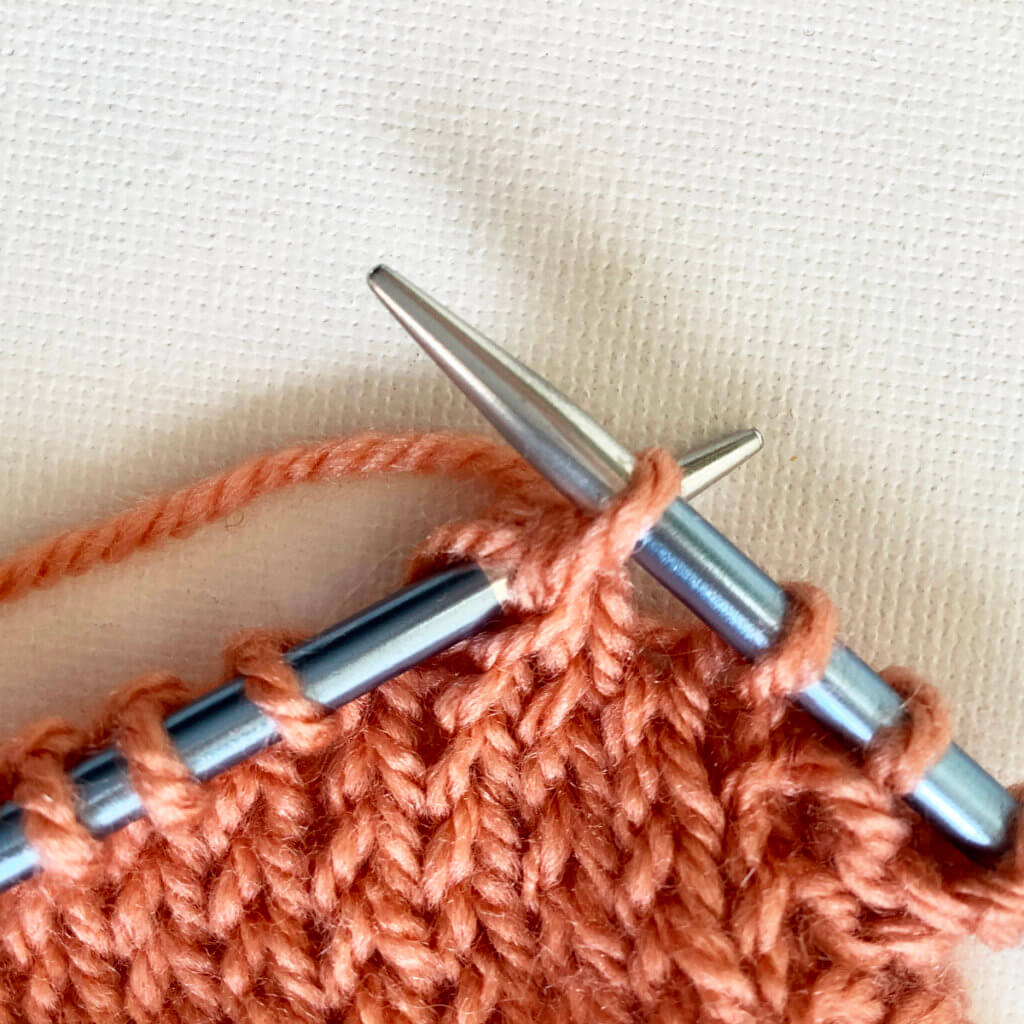
2. Next, insert the tip of the right-hand needle into the first 3 stitches at the same time as if to knit.

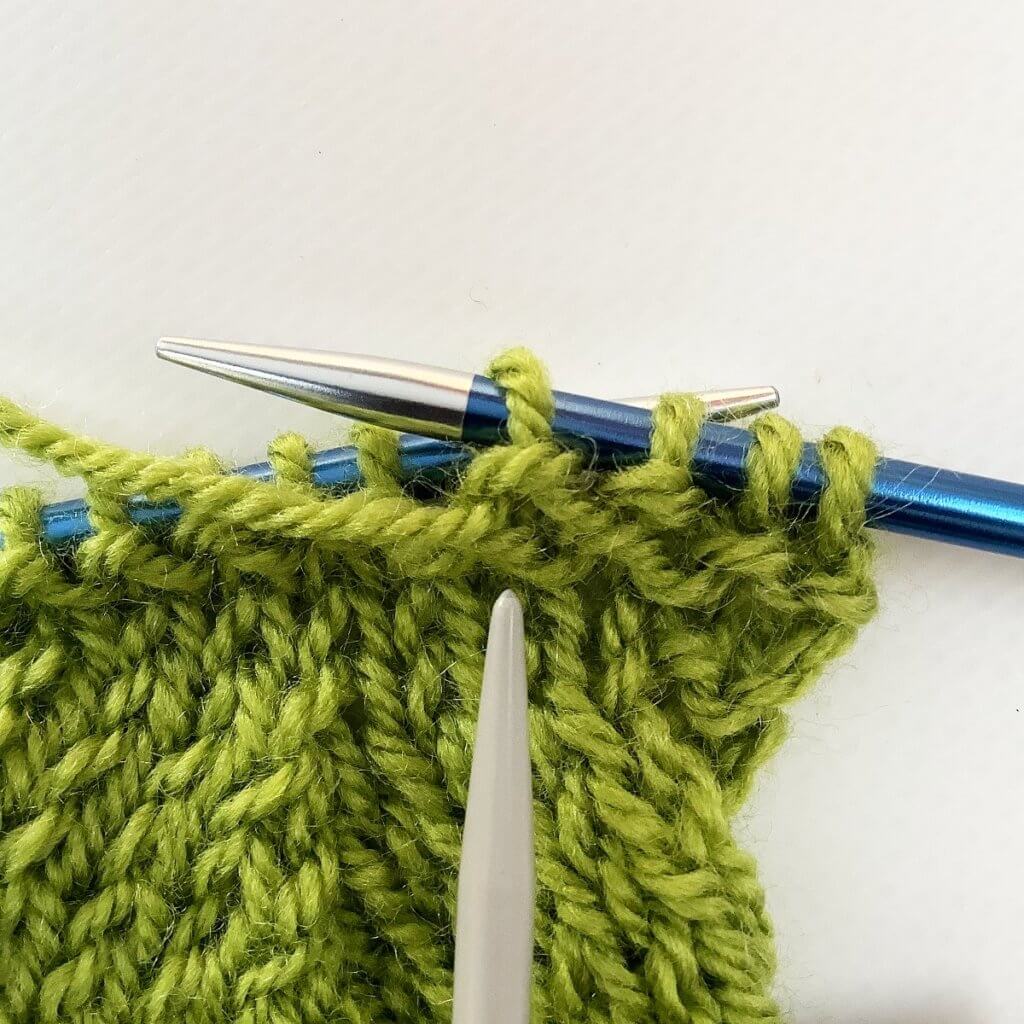
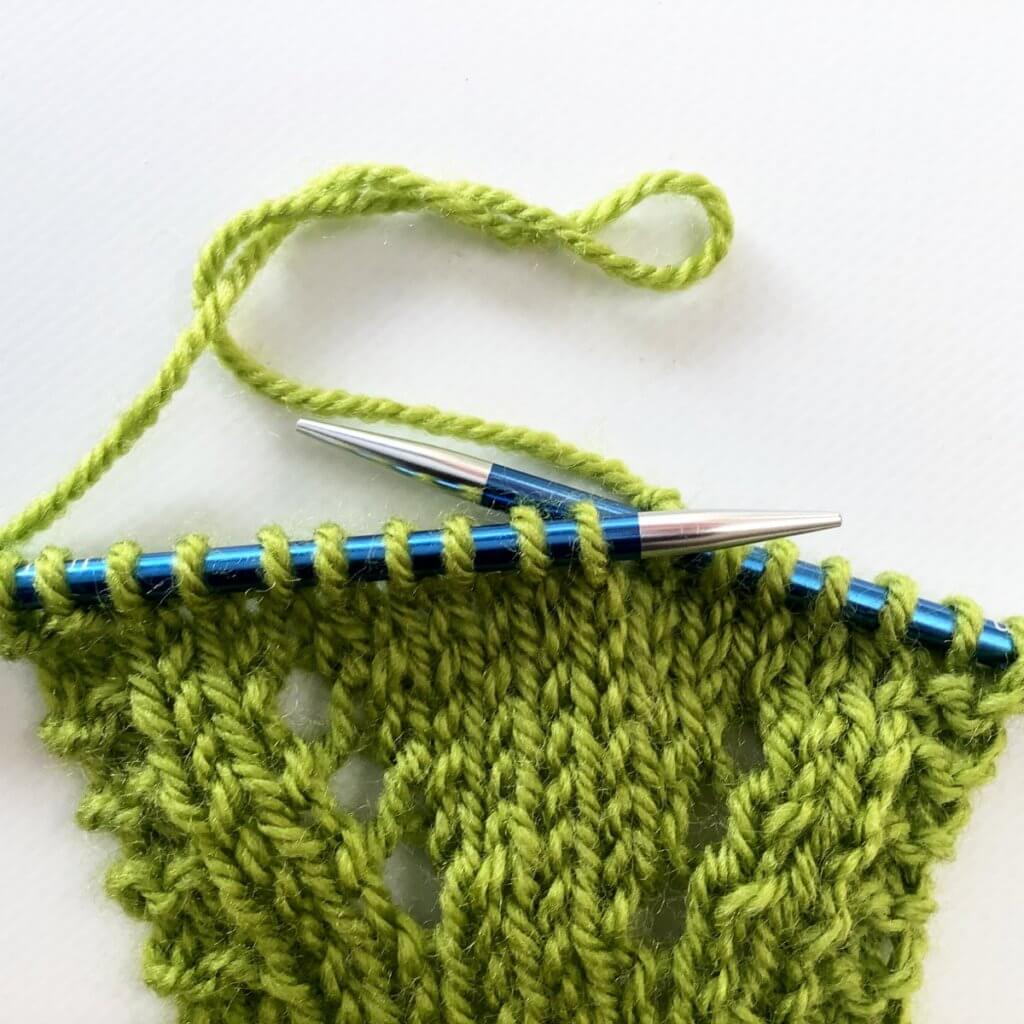
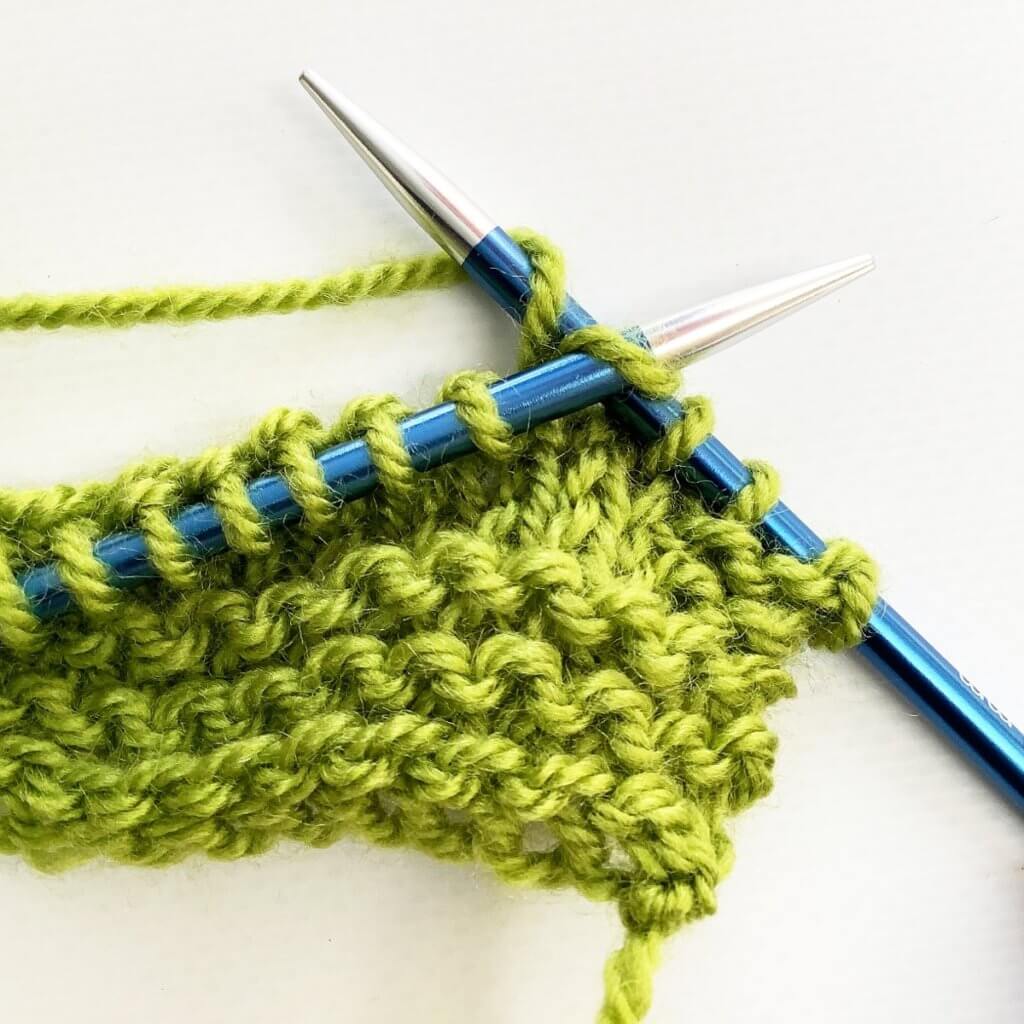
3. Wrap the yarn around the needle and pull it through the stitches you inserted the right-hand needle in. Don’t drop the stitches off the left-hand needle yet!
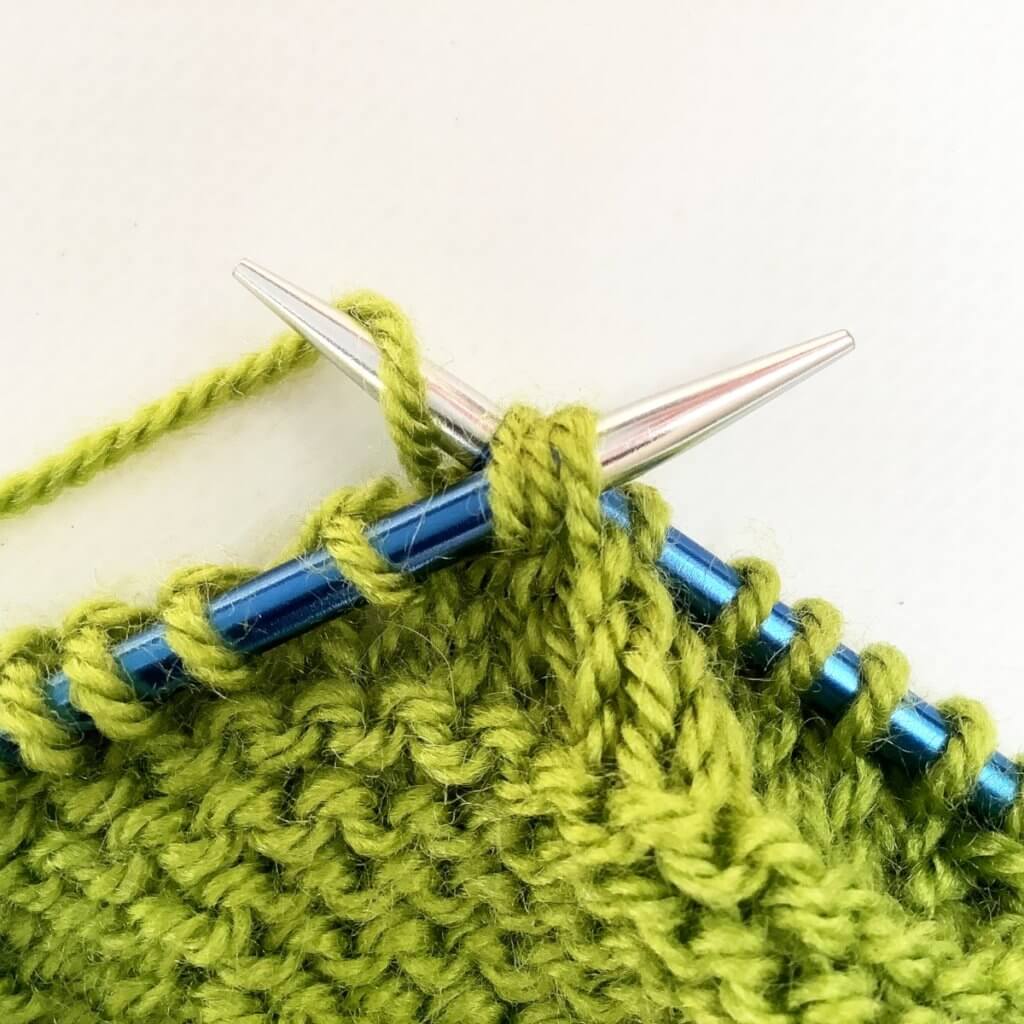
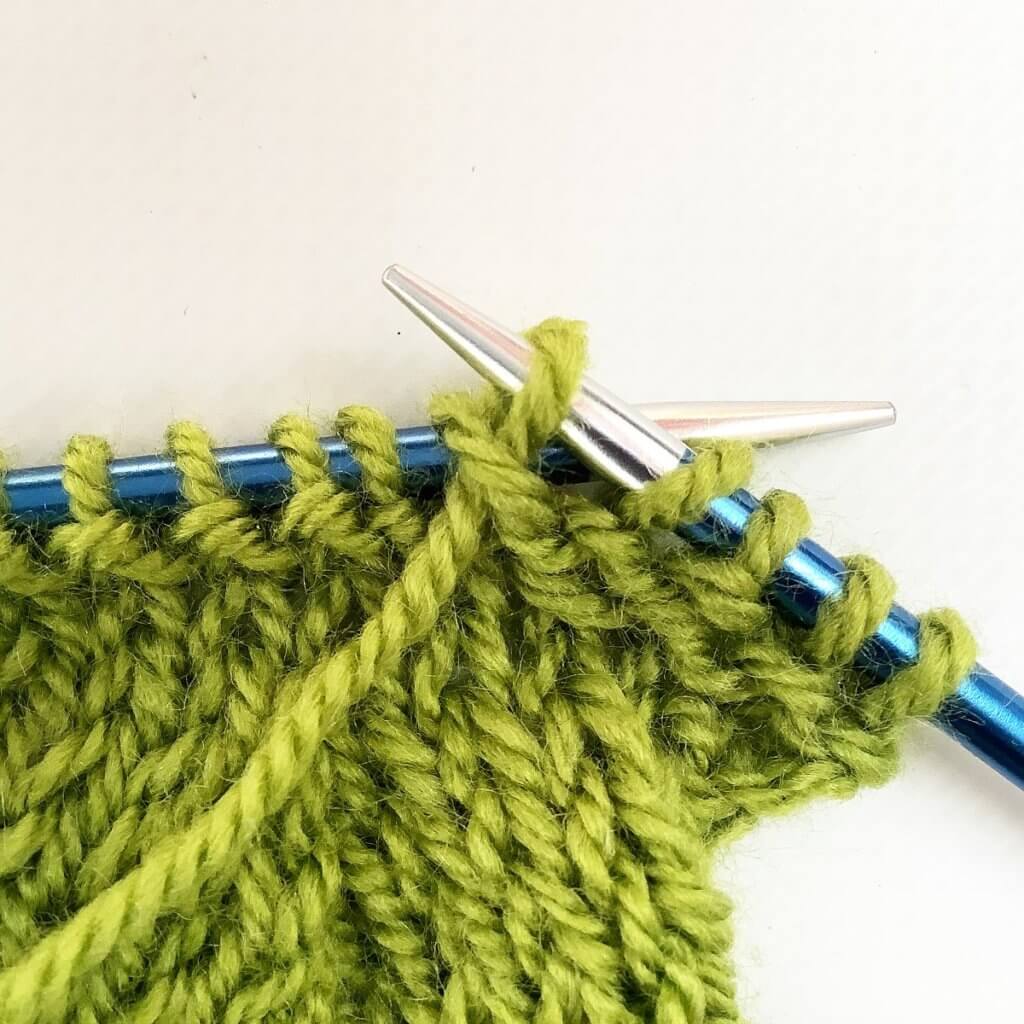
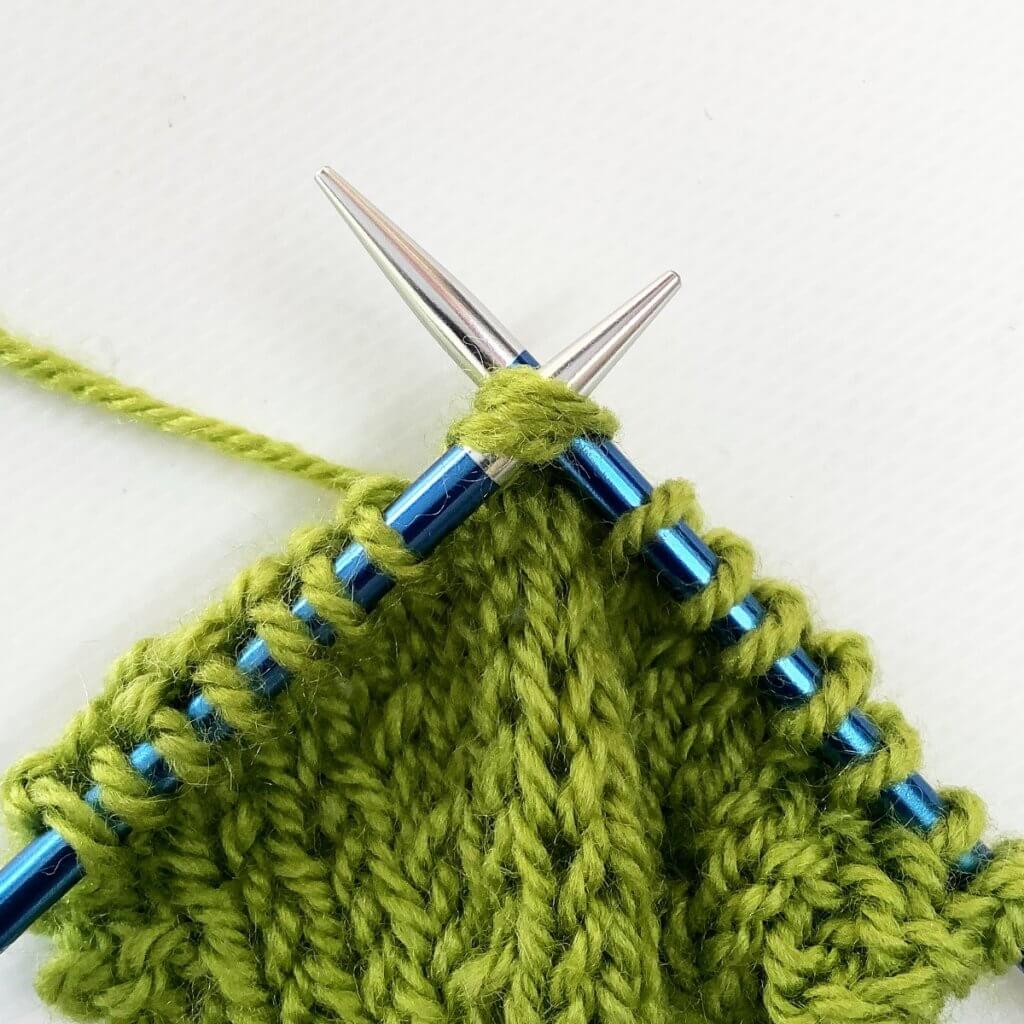
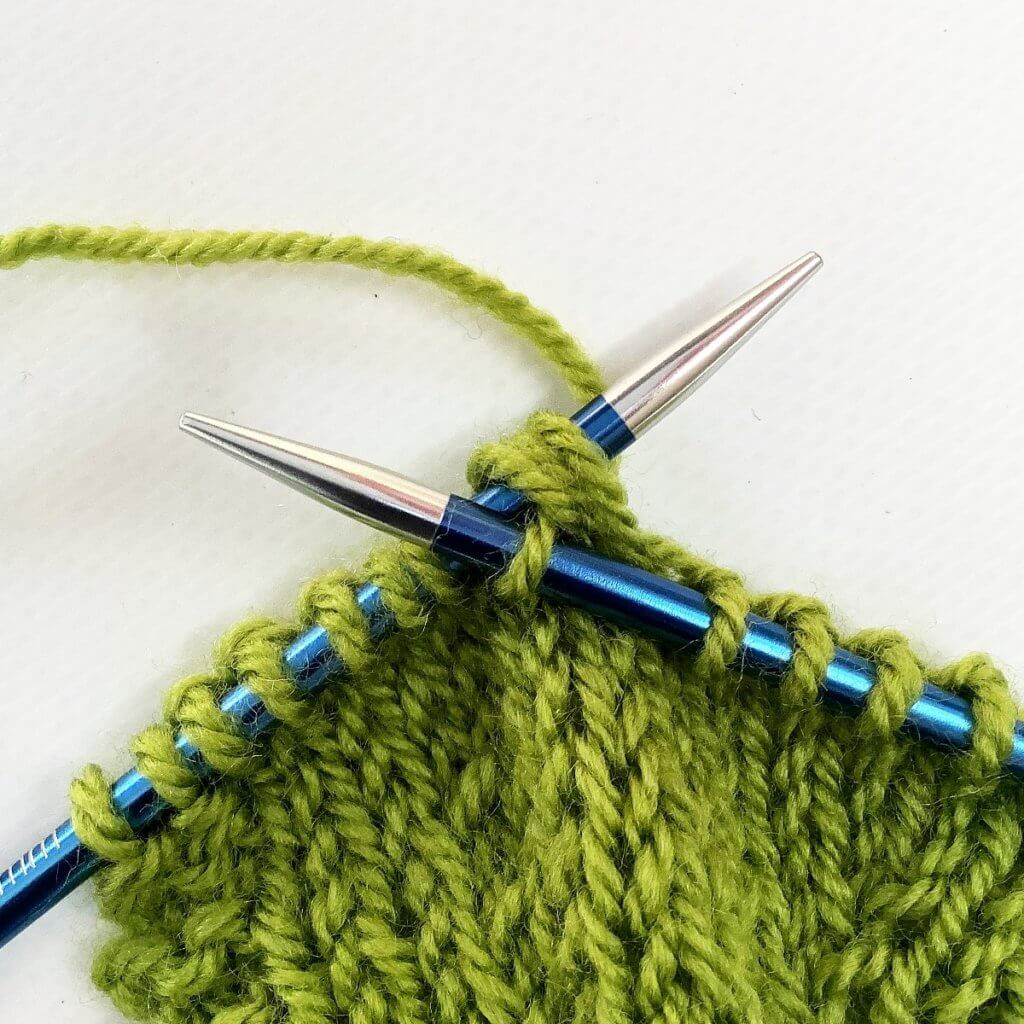
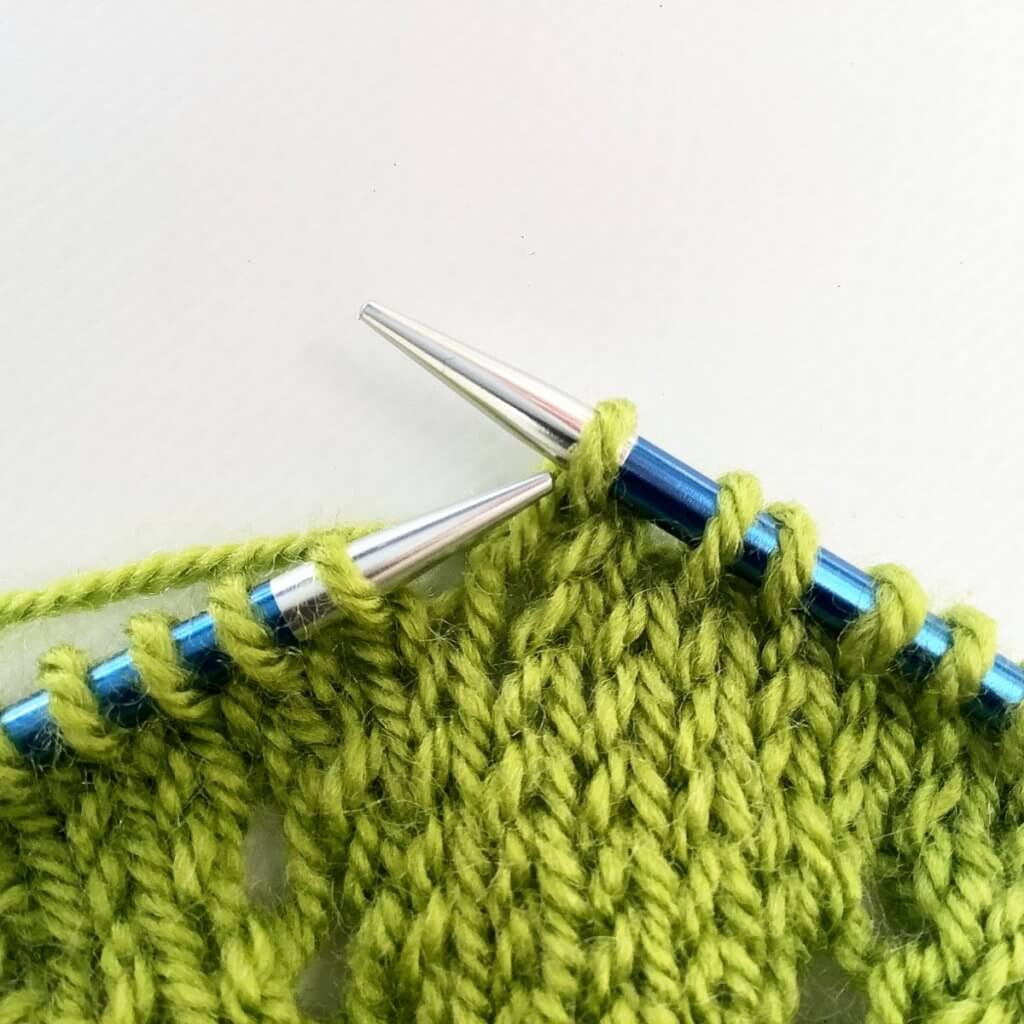
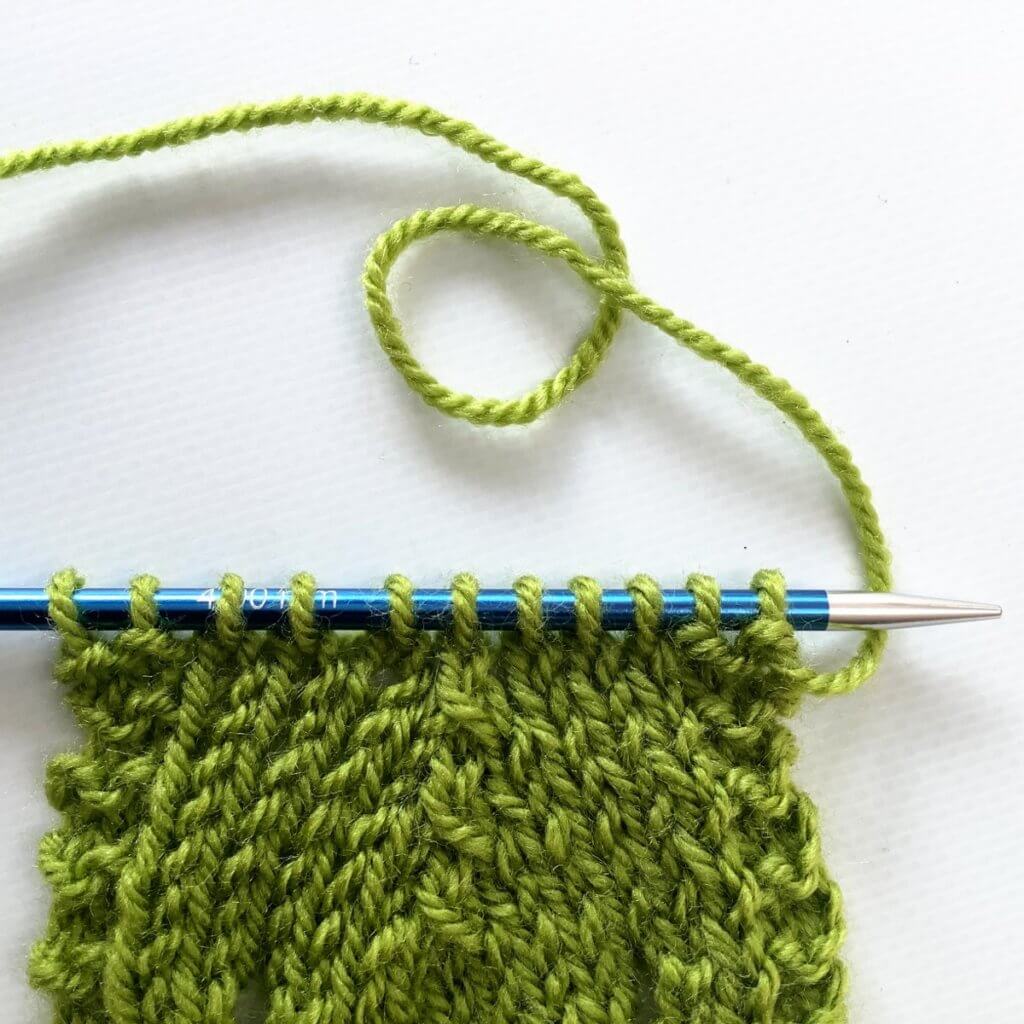
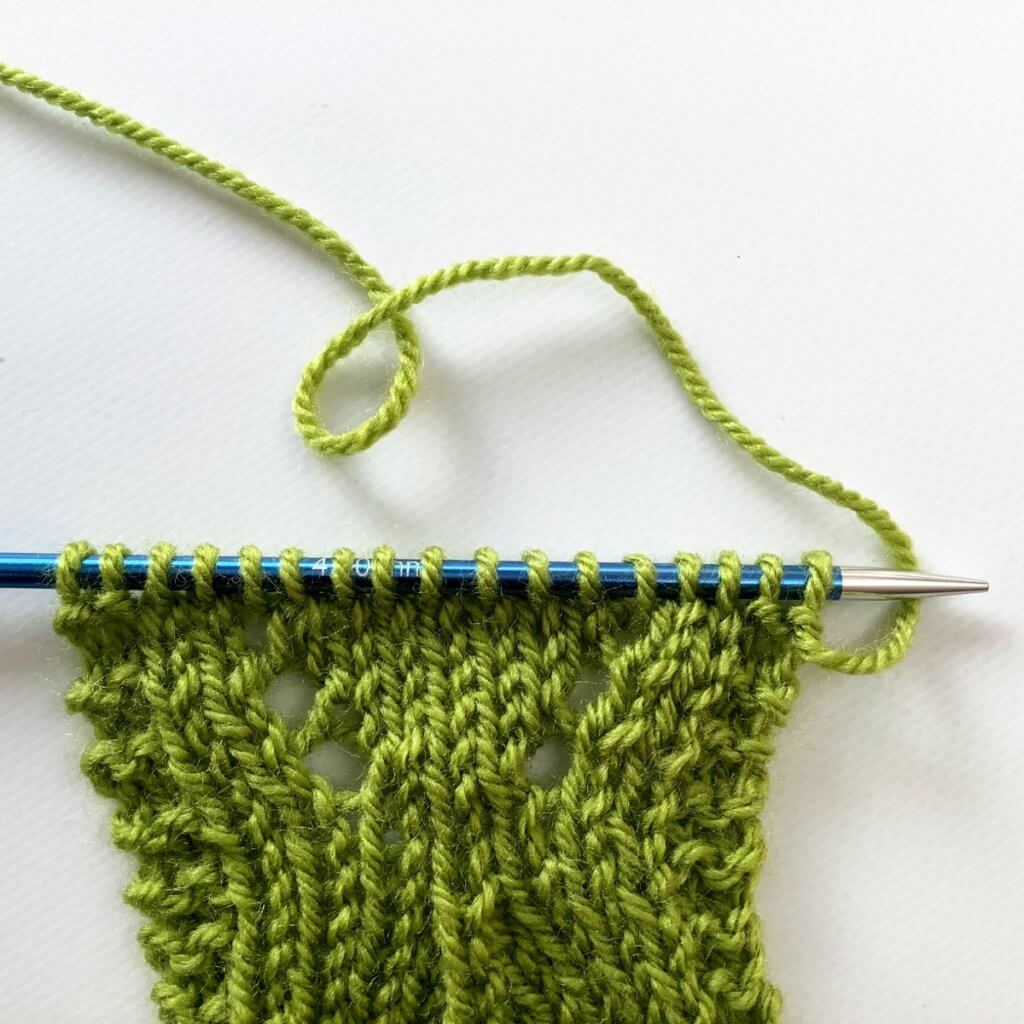
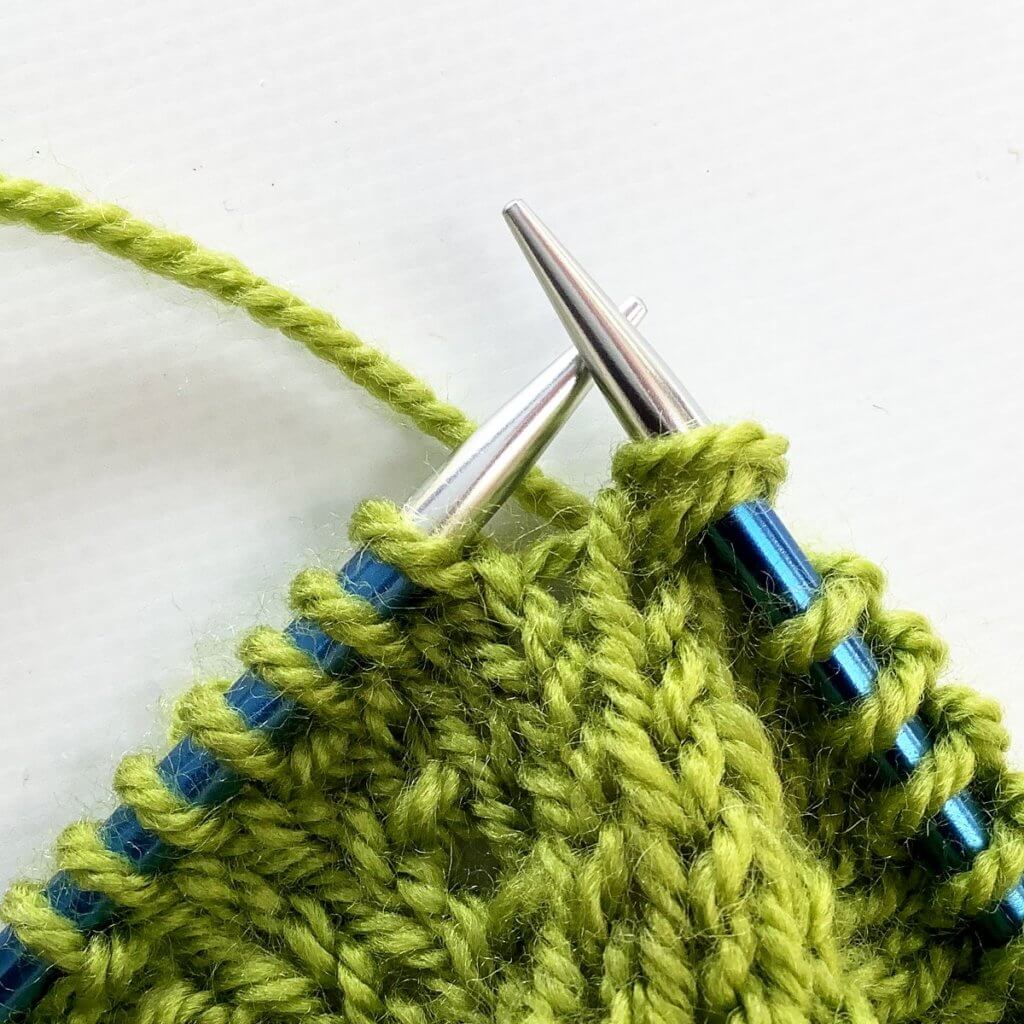
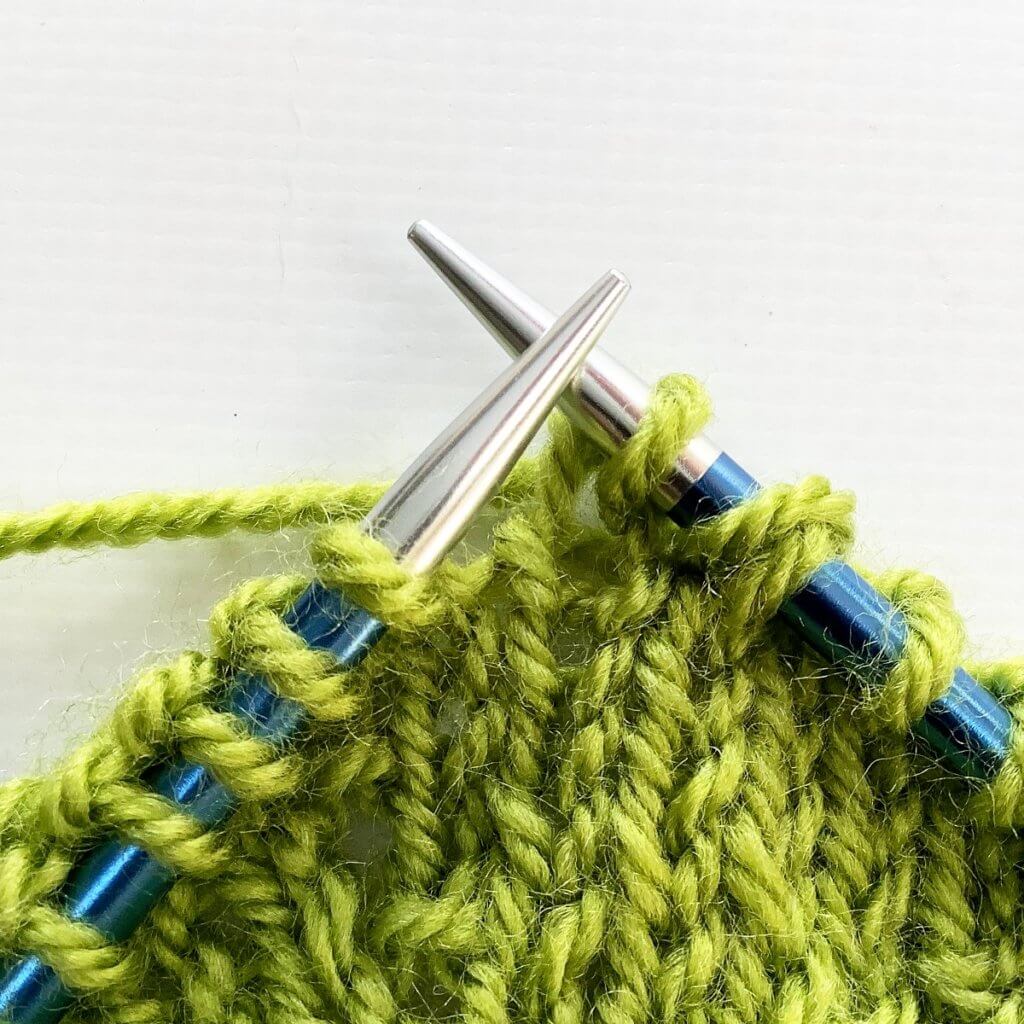
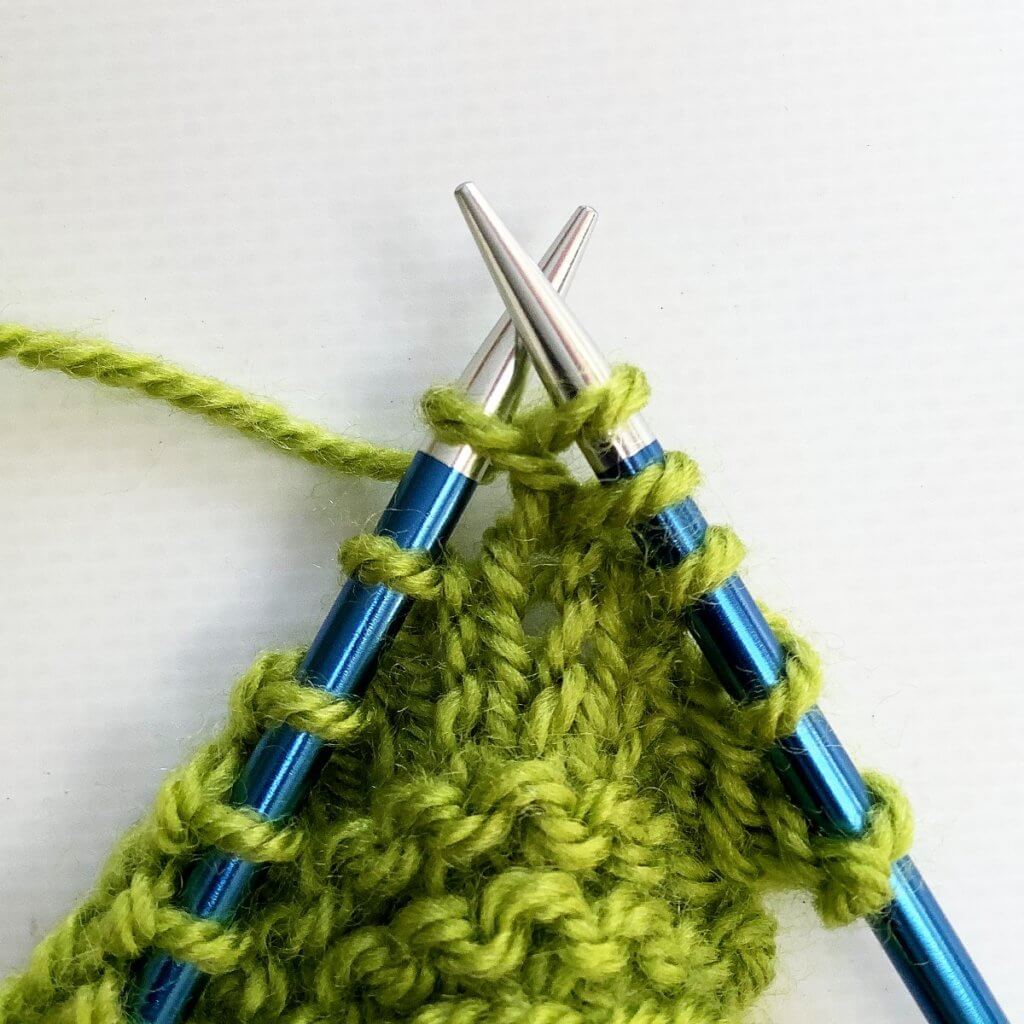
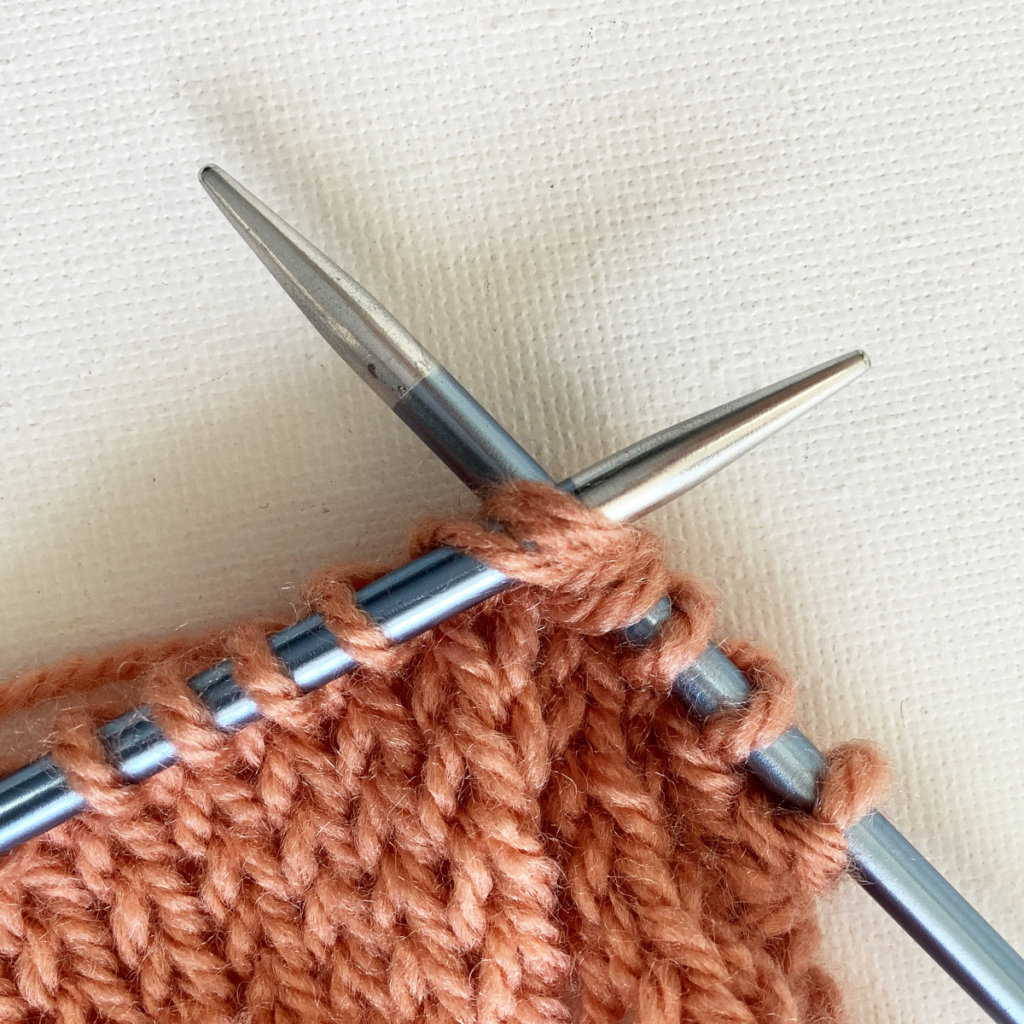
4. Wrap the yarn around the right-hand needle to form a yarn over.

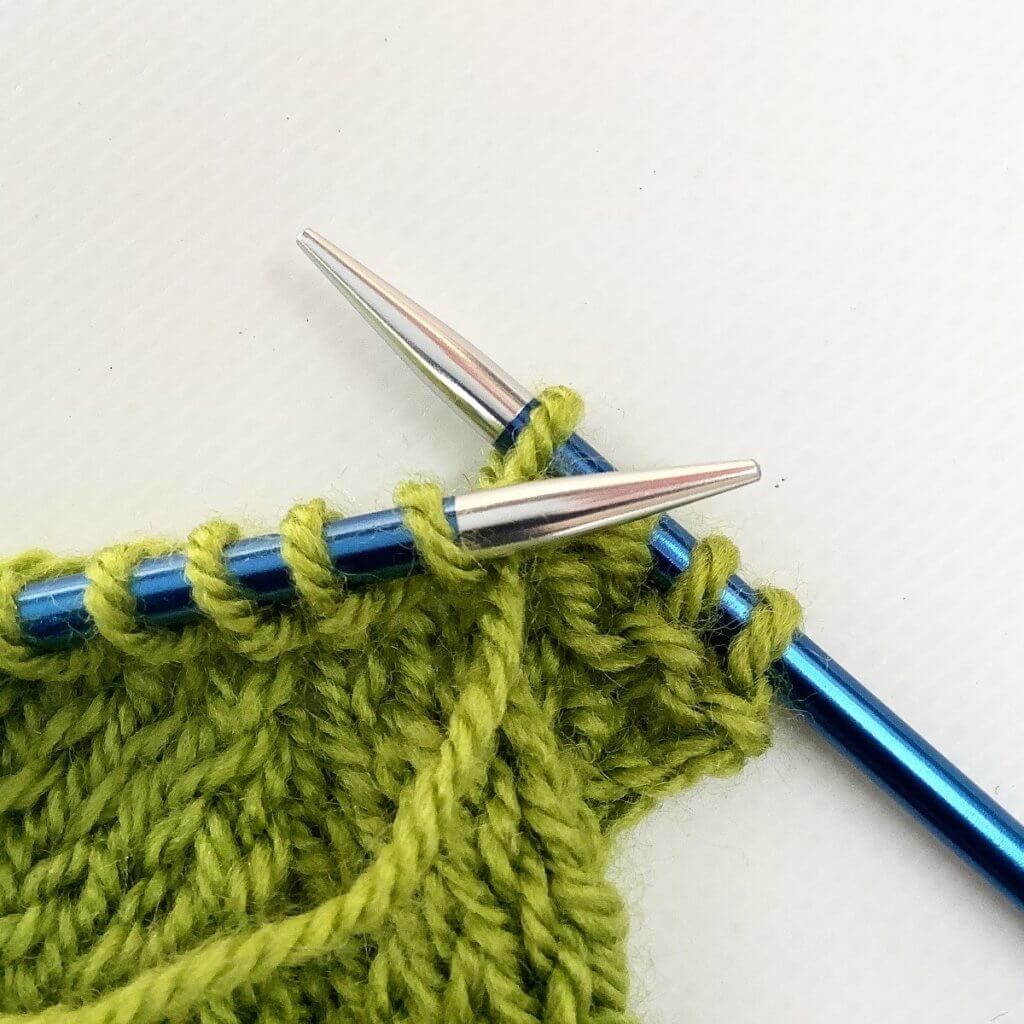
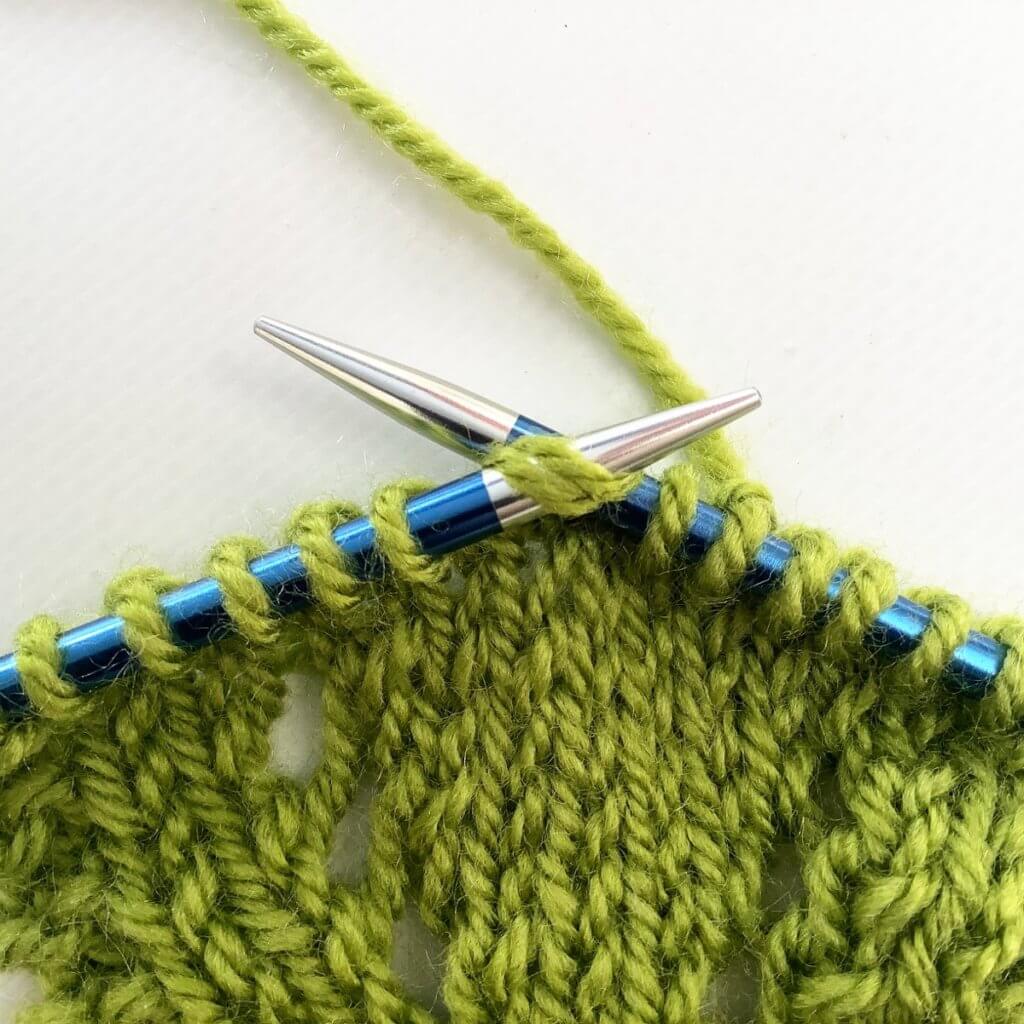
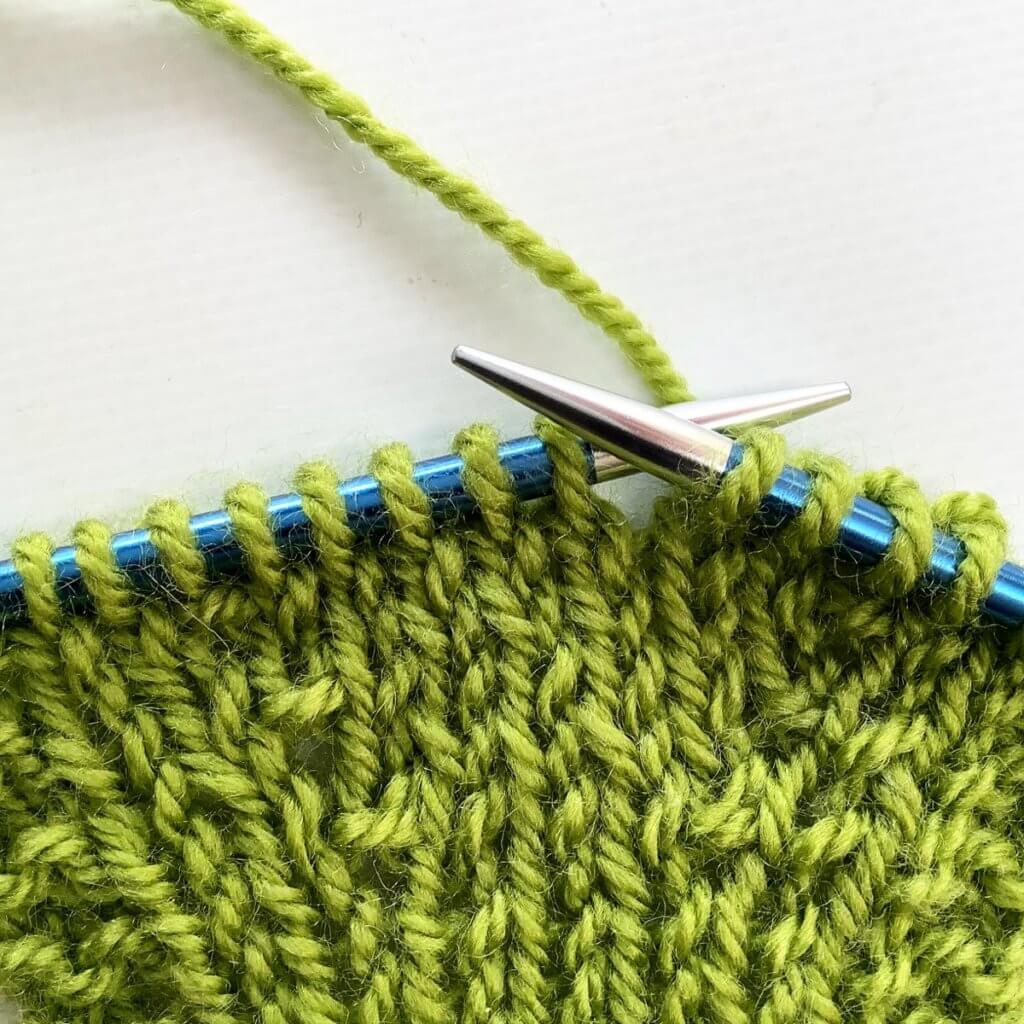
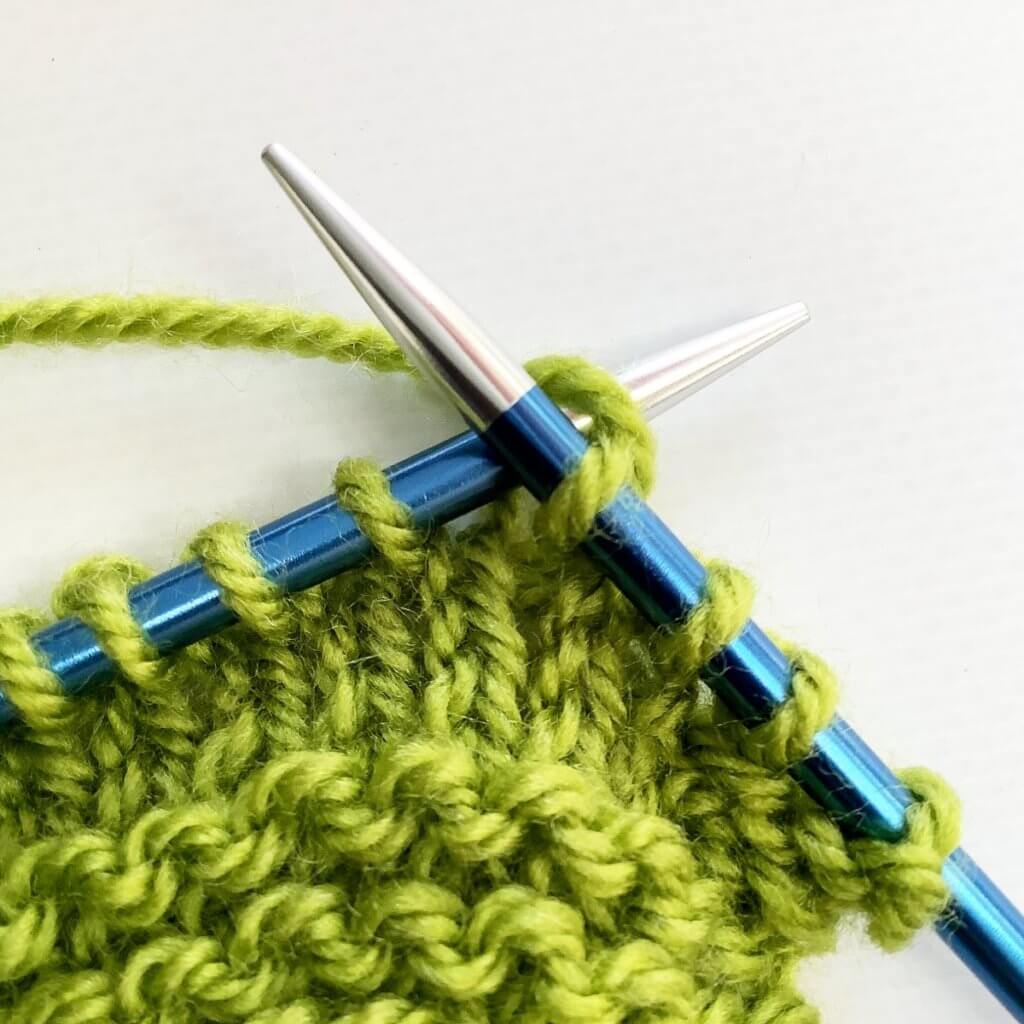
5. Again, insert the tip of the right-hand needle into the 3 stitches at the same time as if to knit.
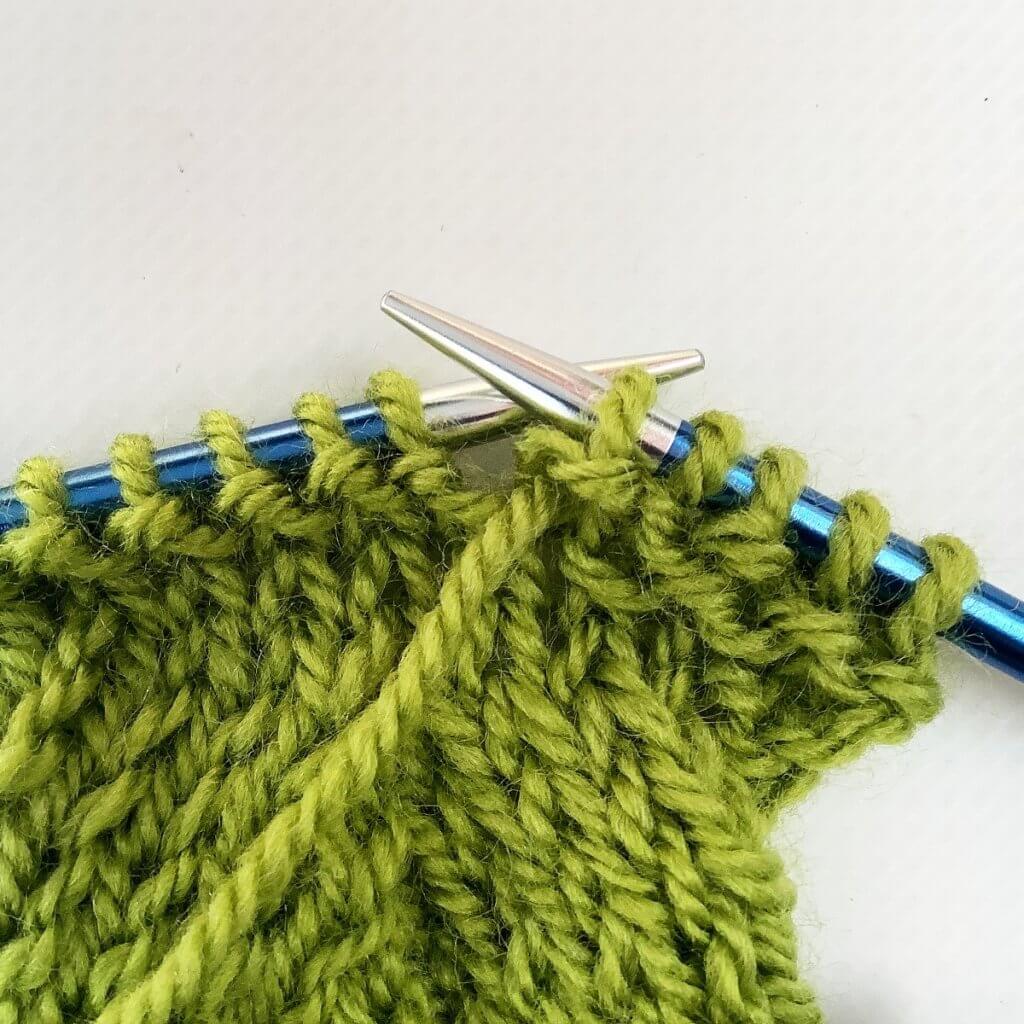
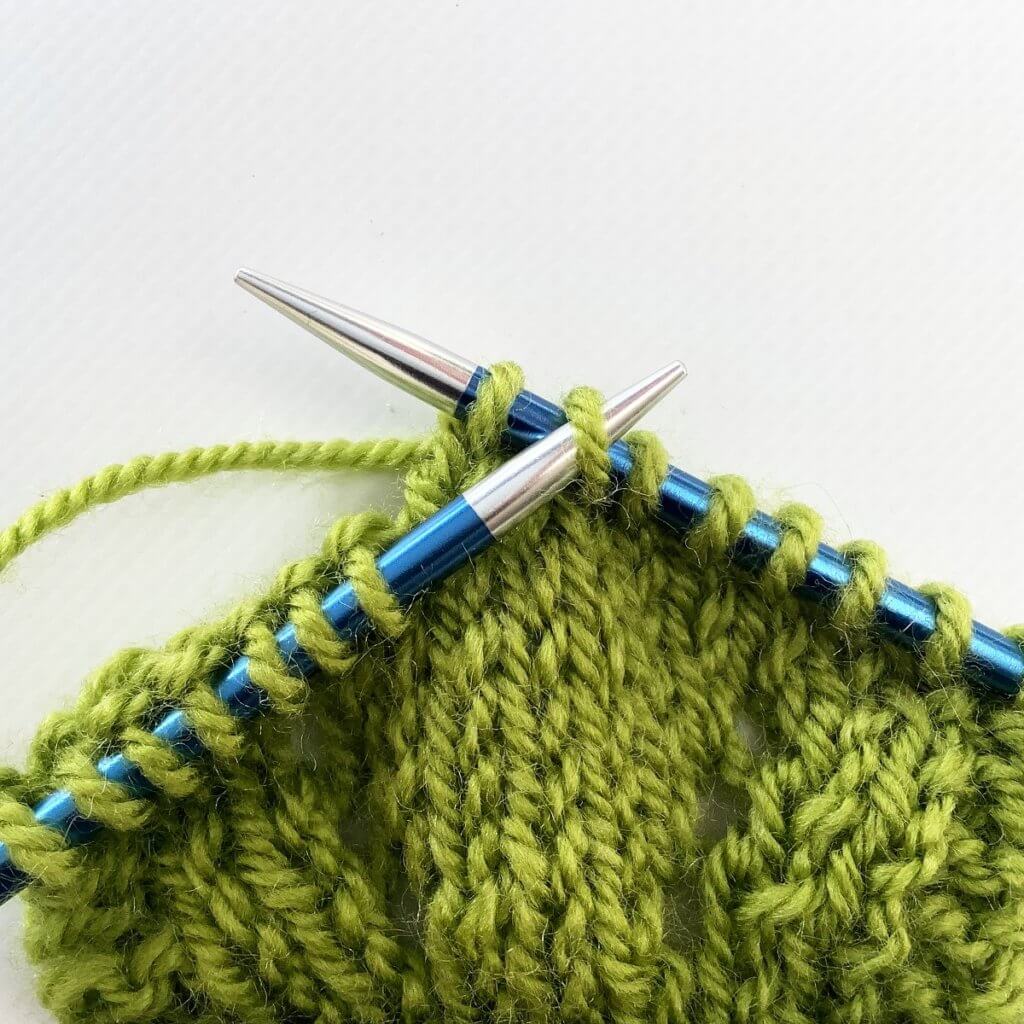
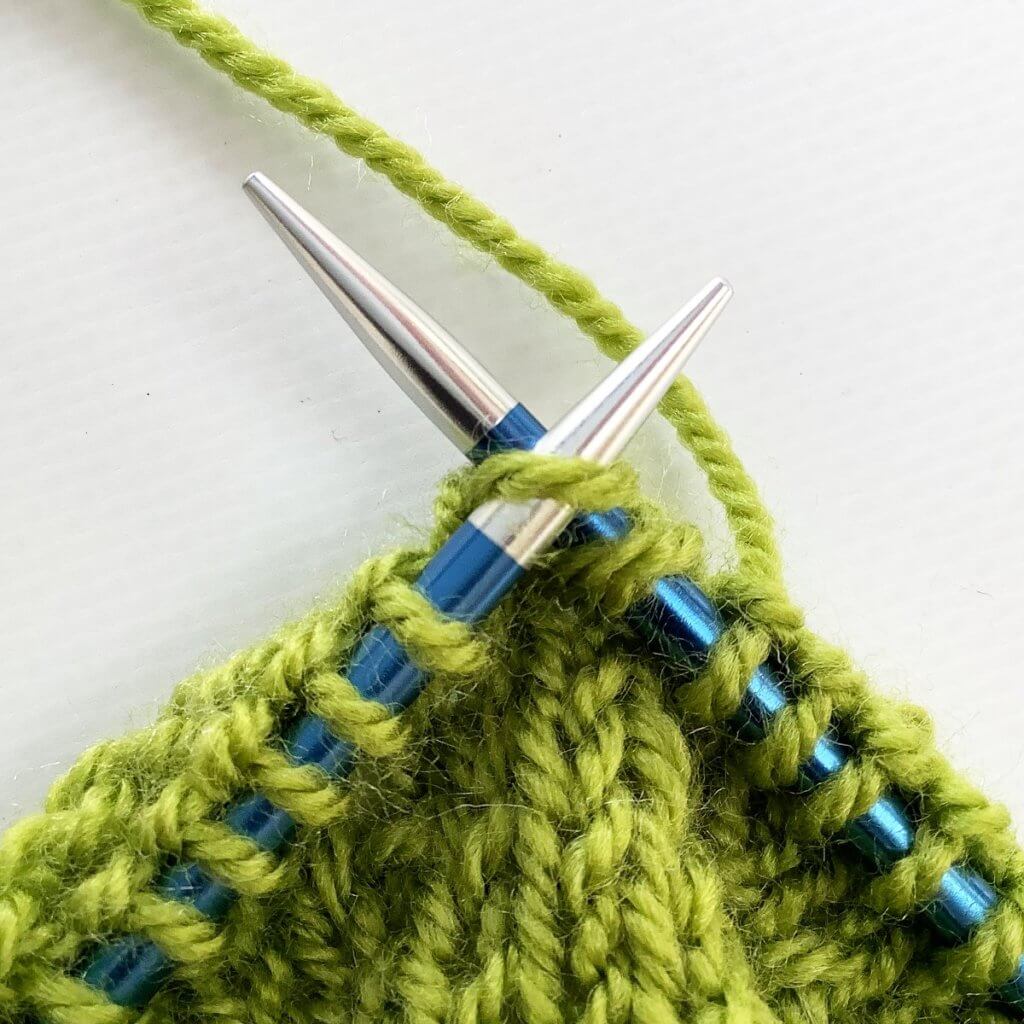
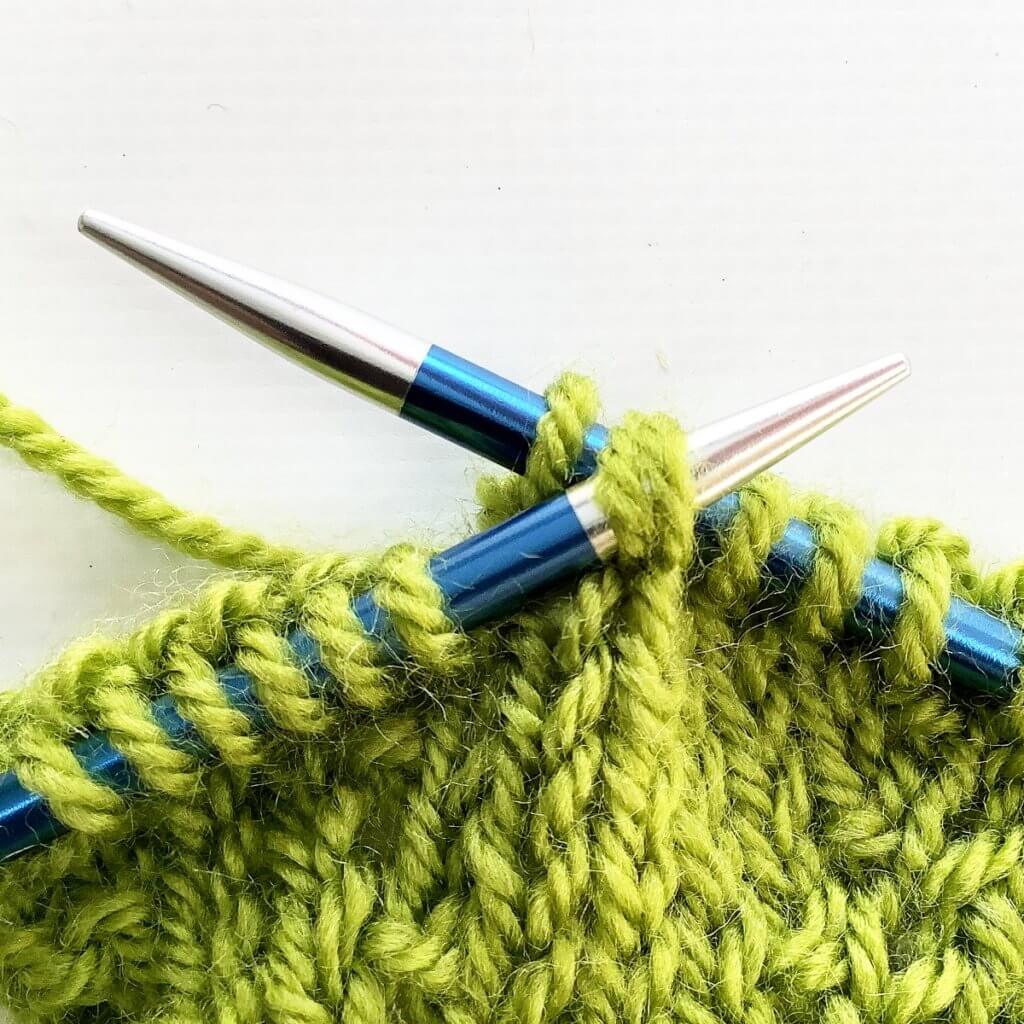
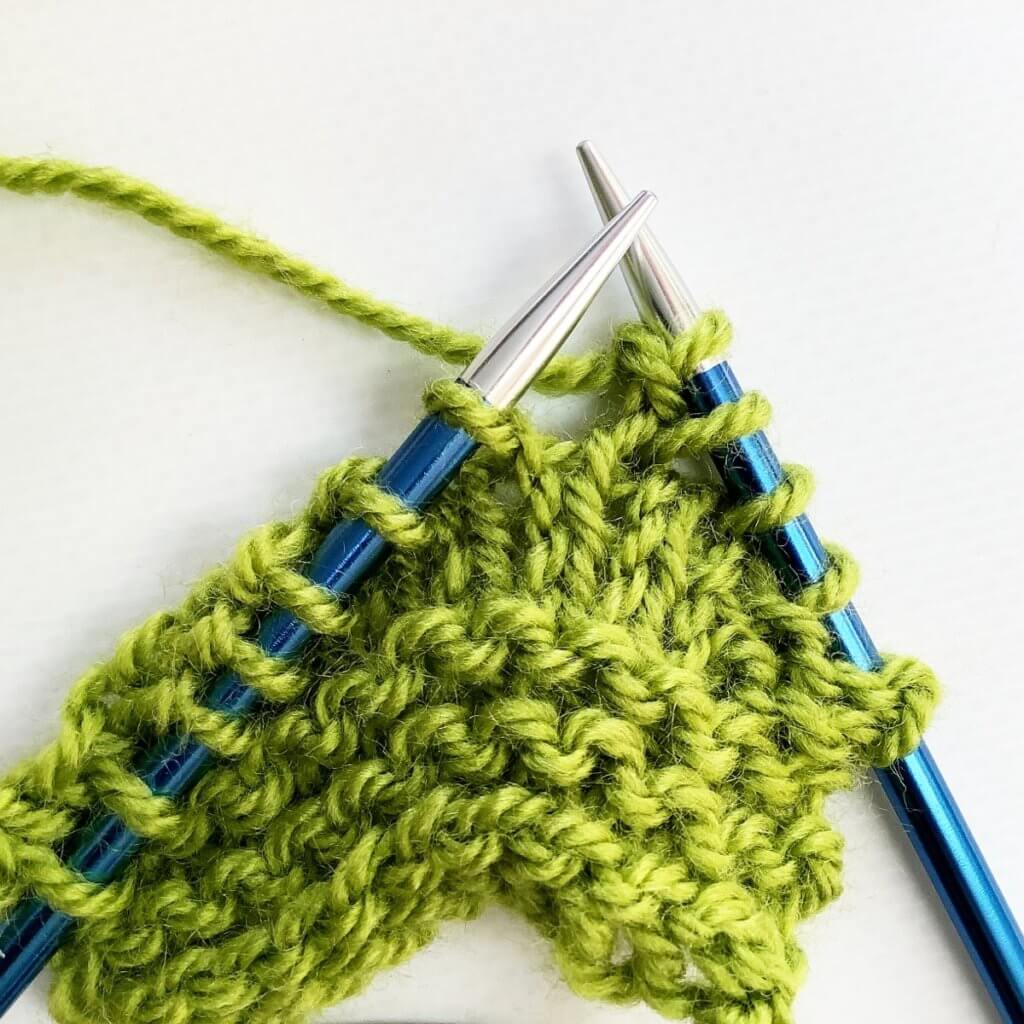
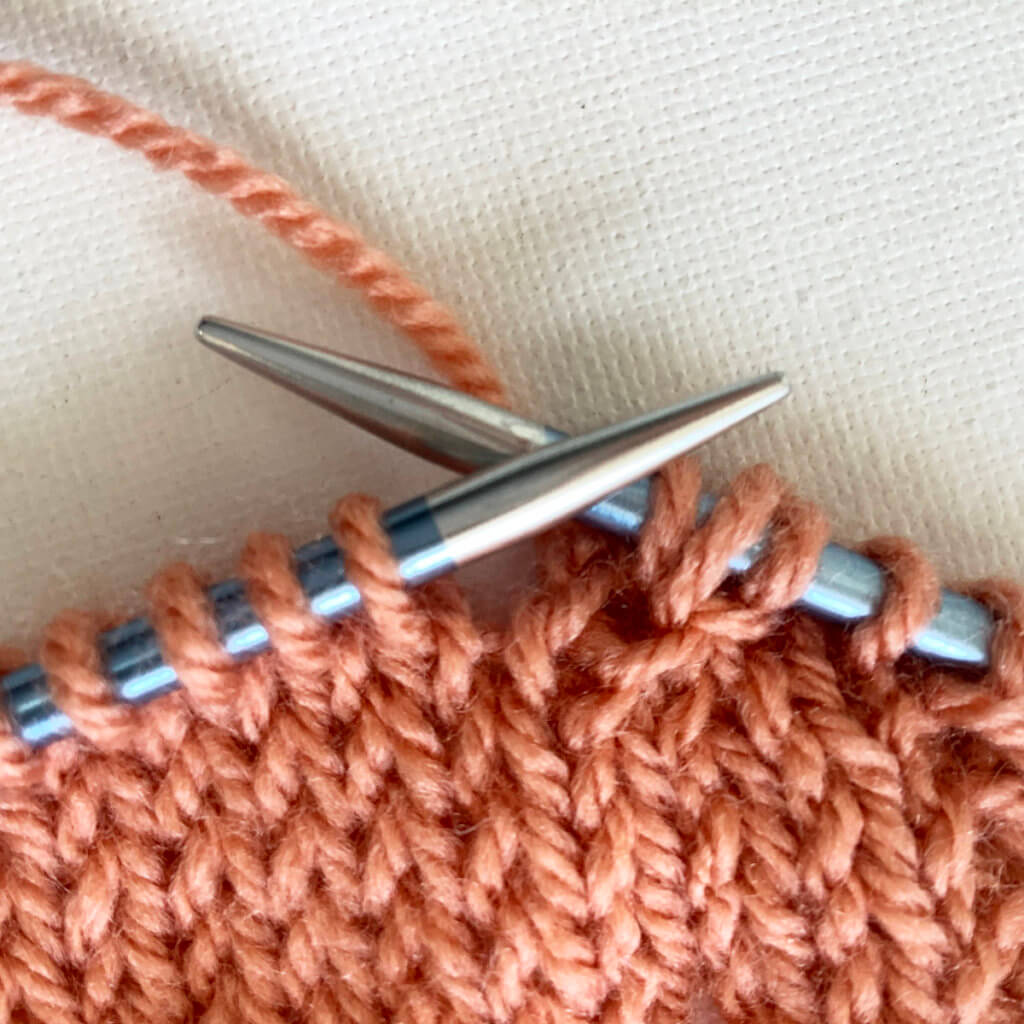
6. Again, wrap the yarn around the needle and pull it through the stitches you inserted the right-hand needle in.

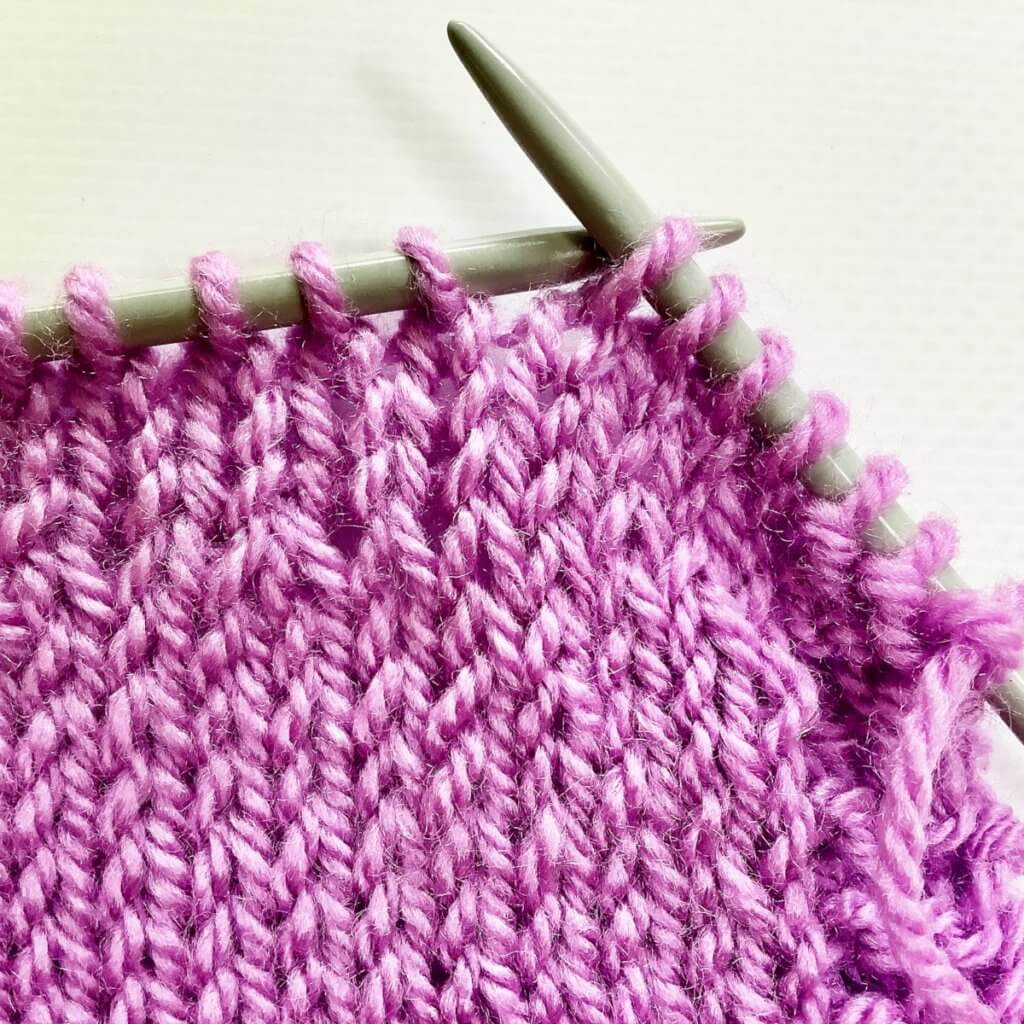
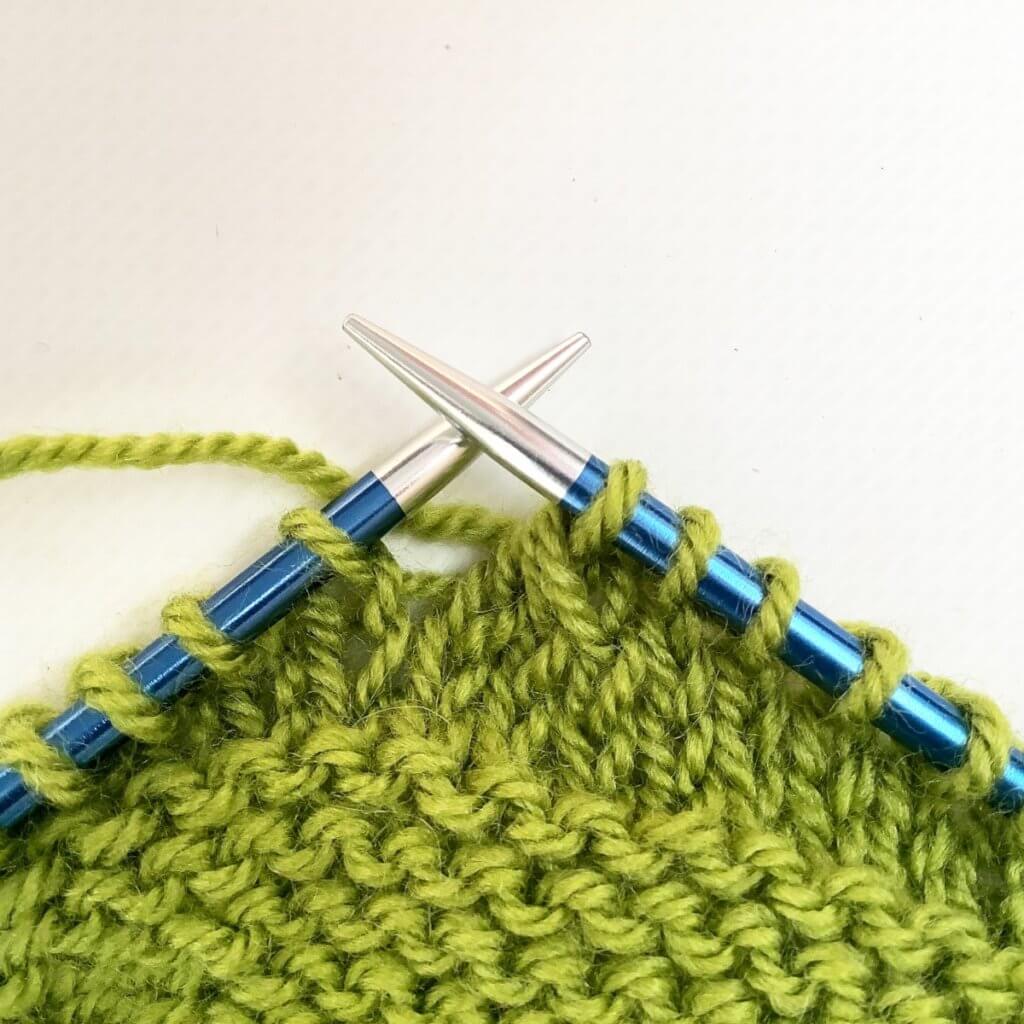
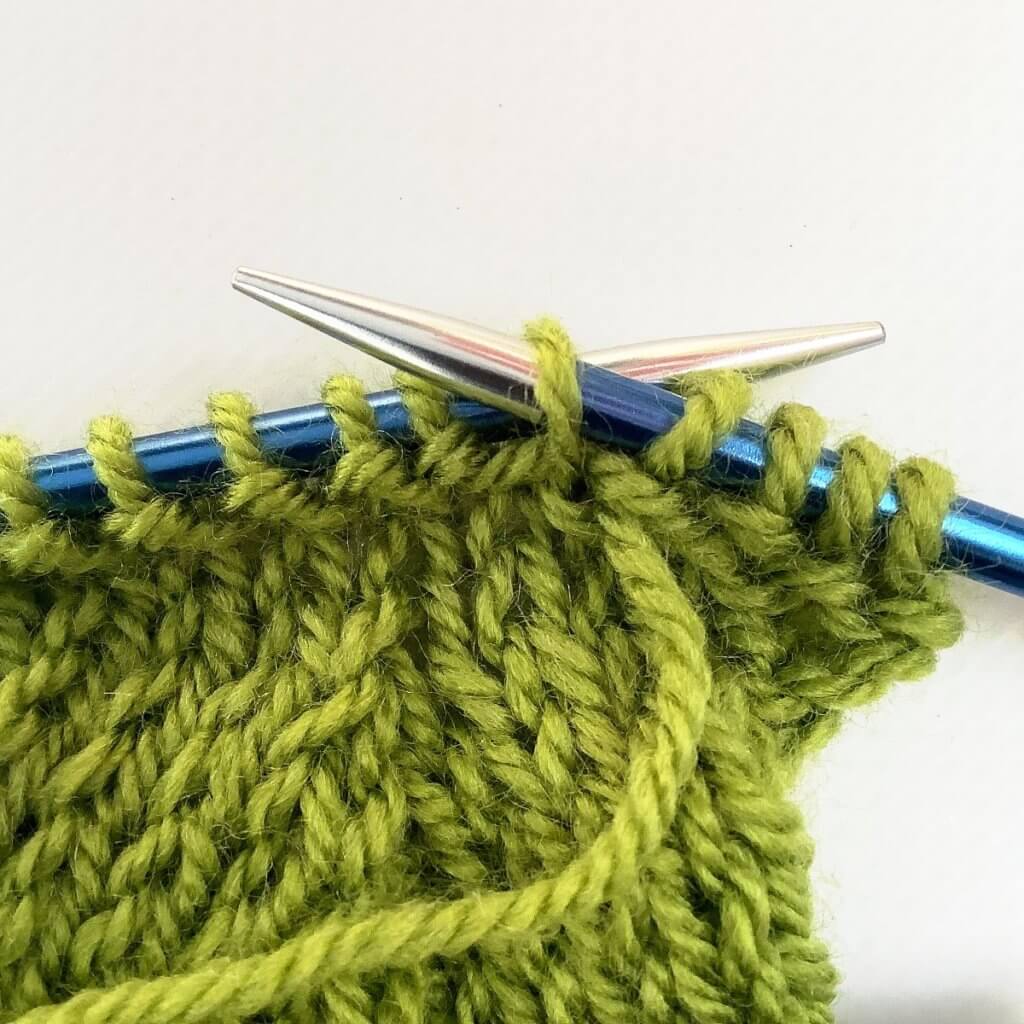
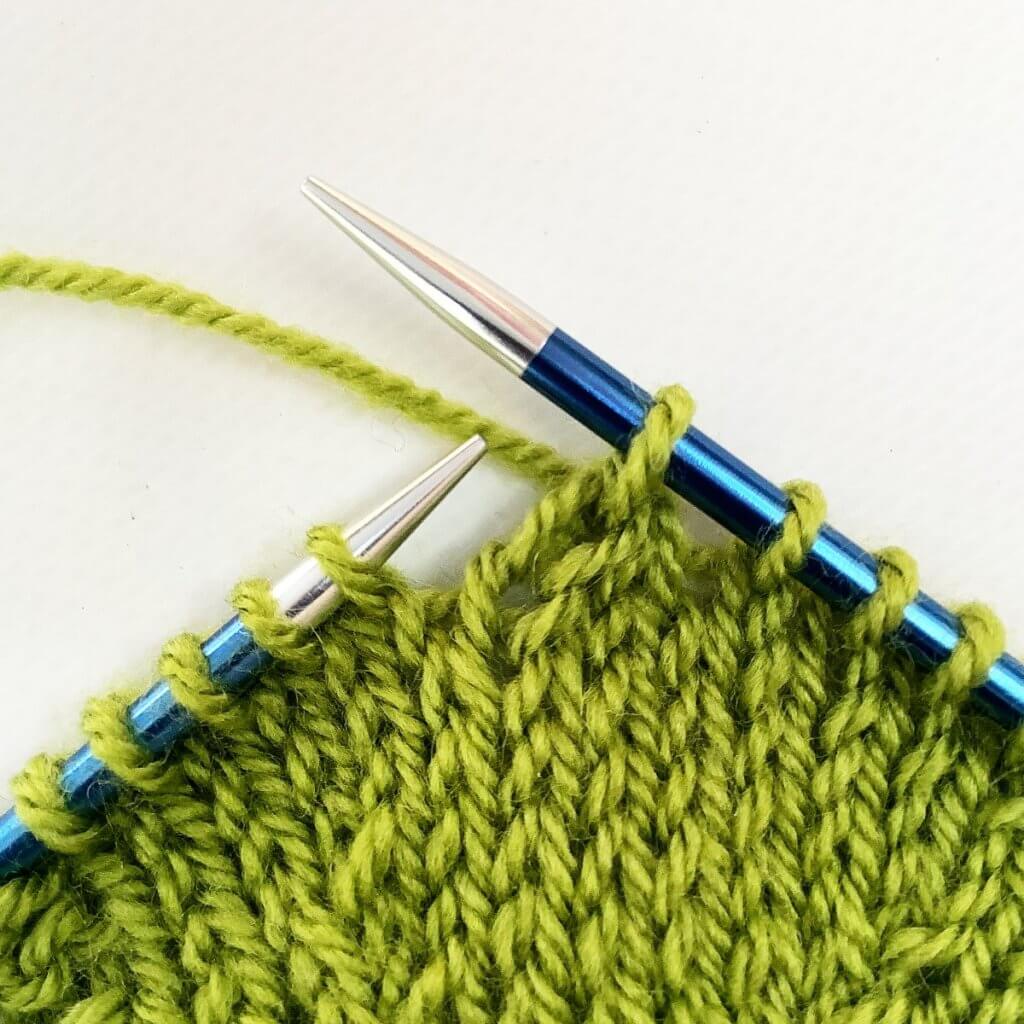
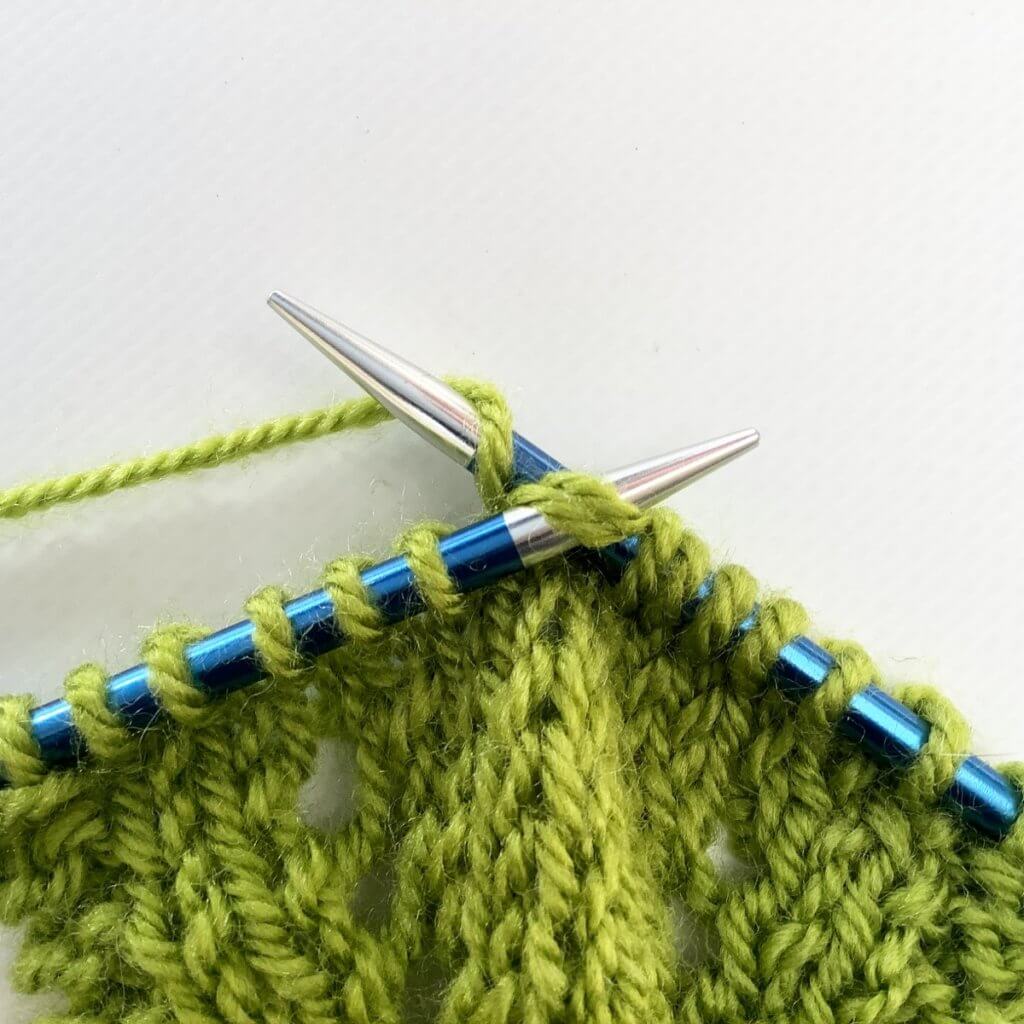
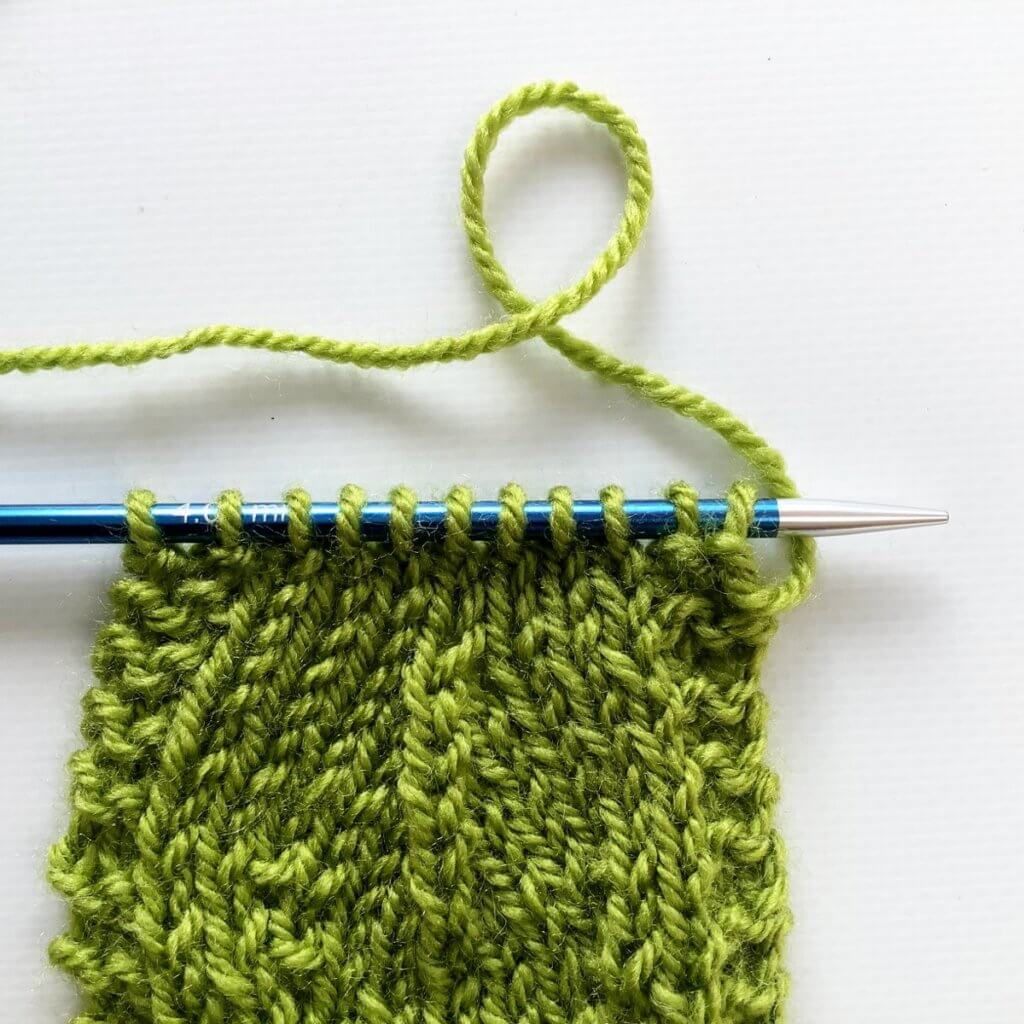
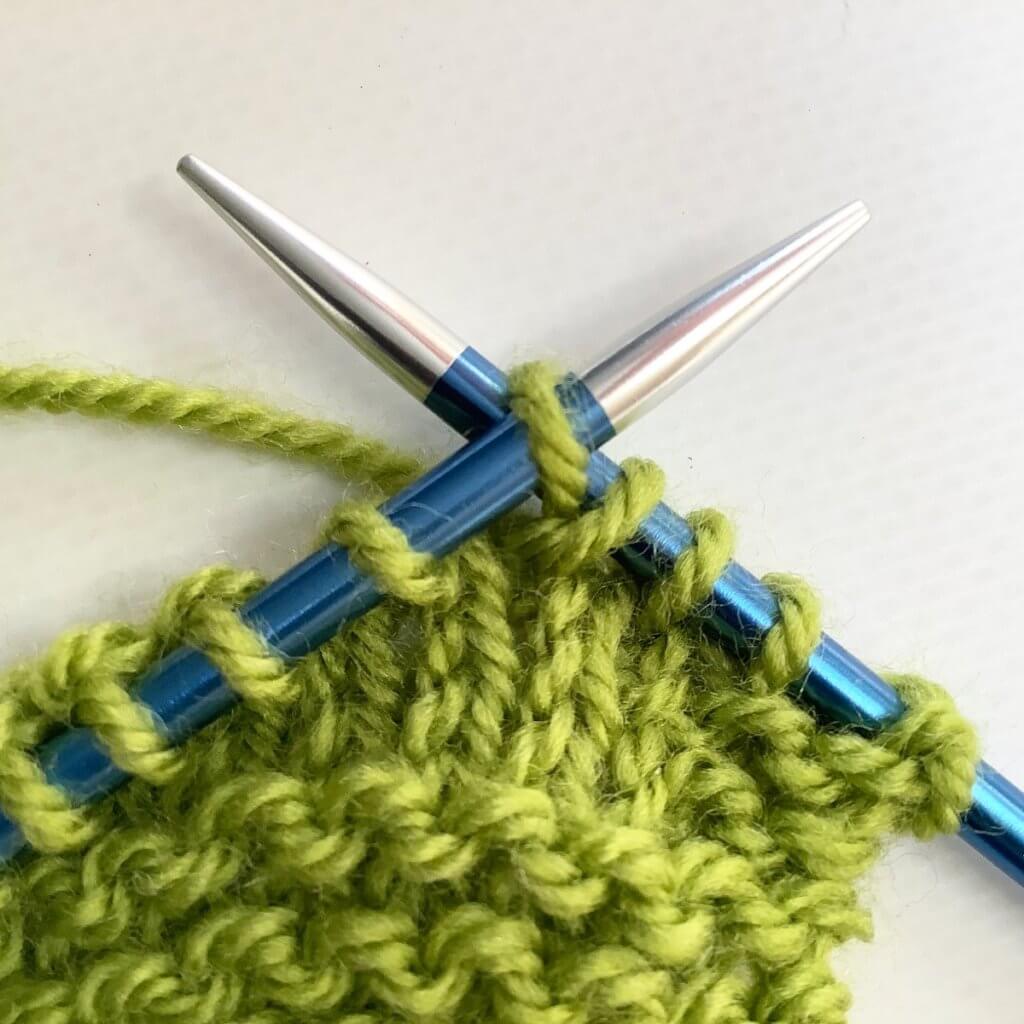
7. Now you can drop the stitches off the left-hand needle to finish the star stitch.
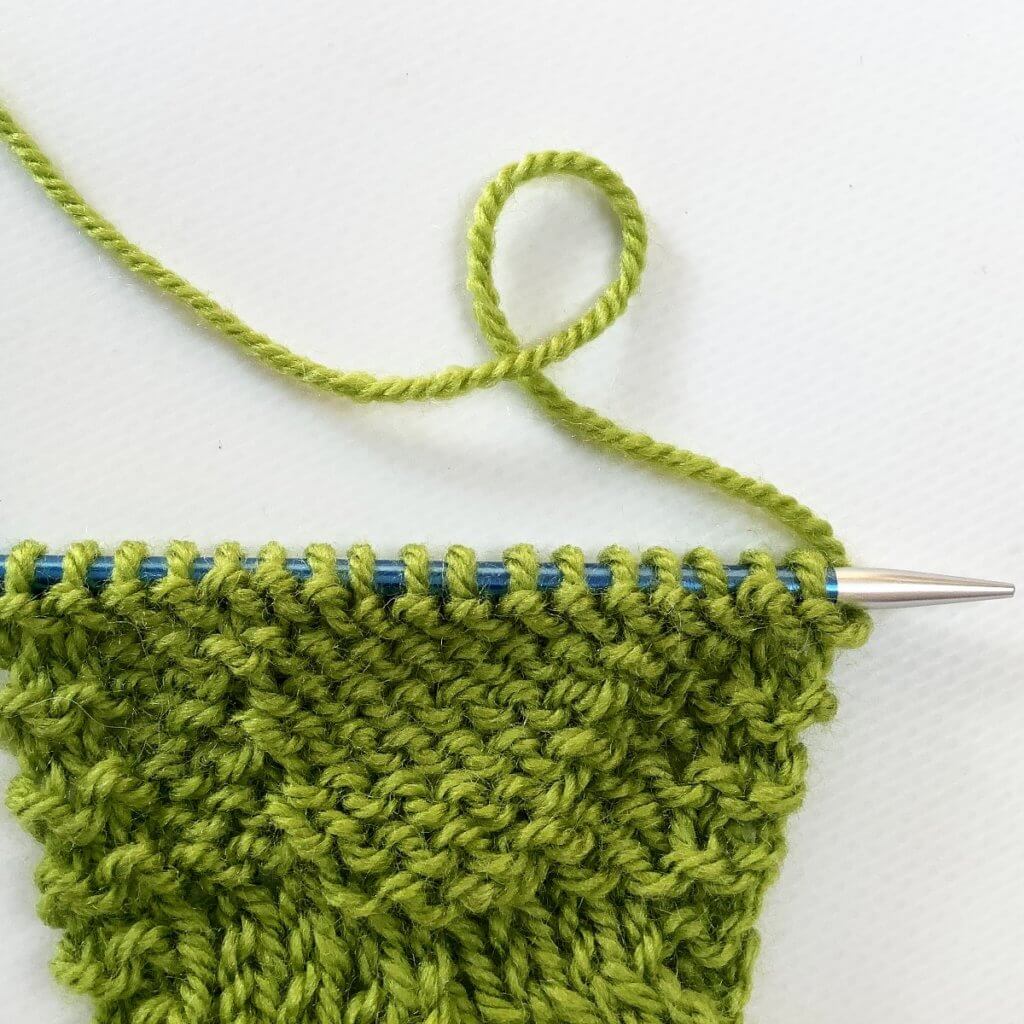
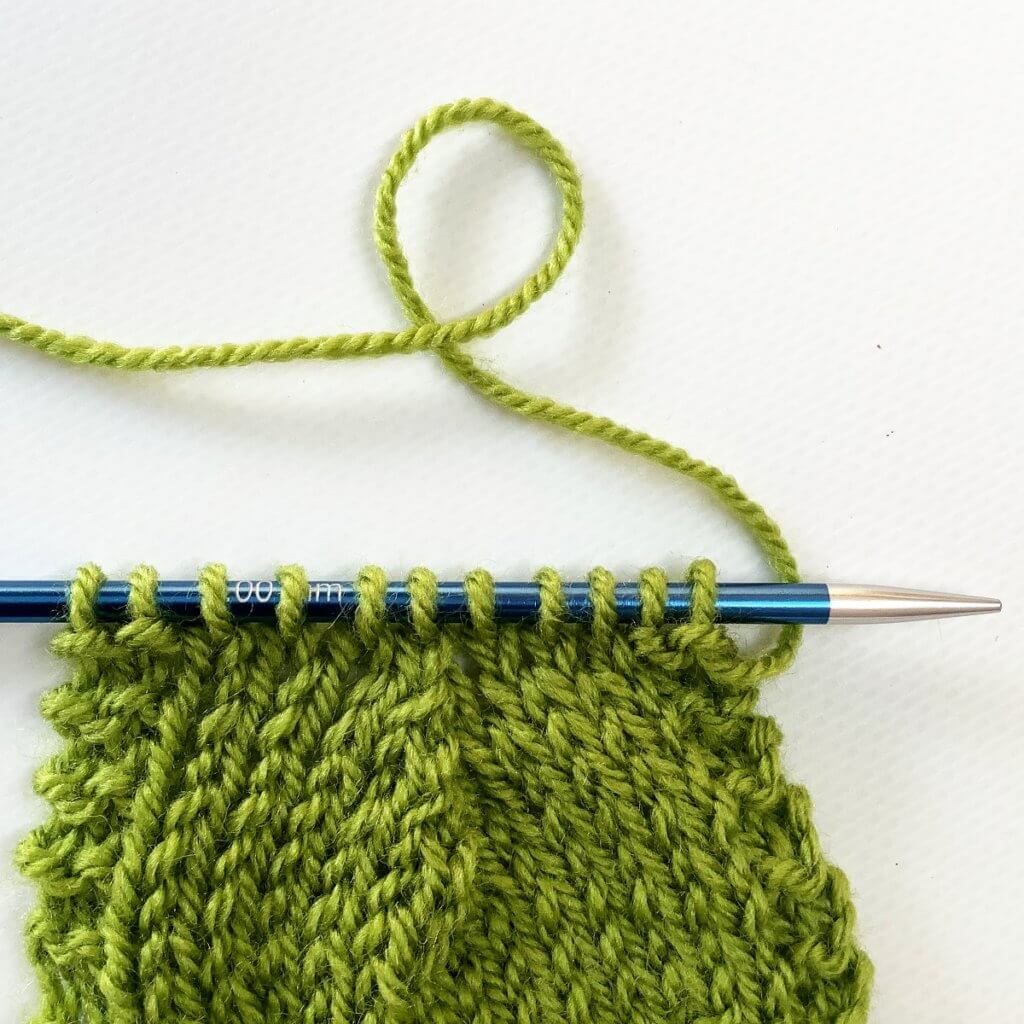
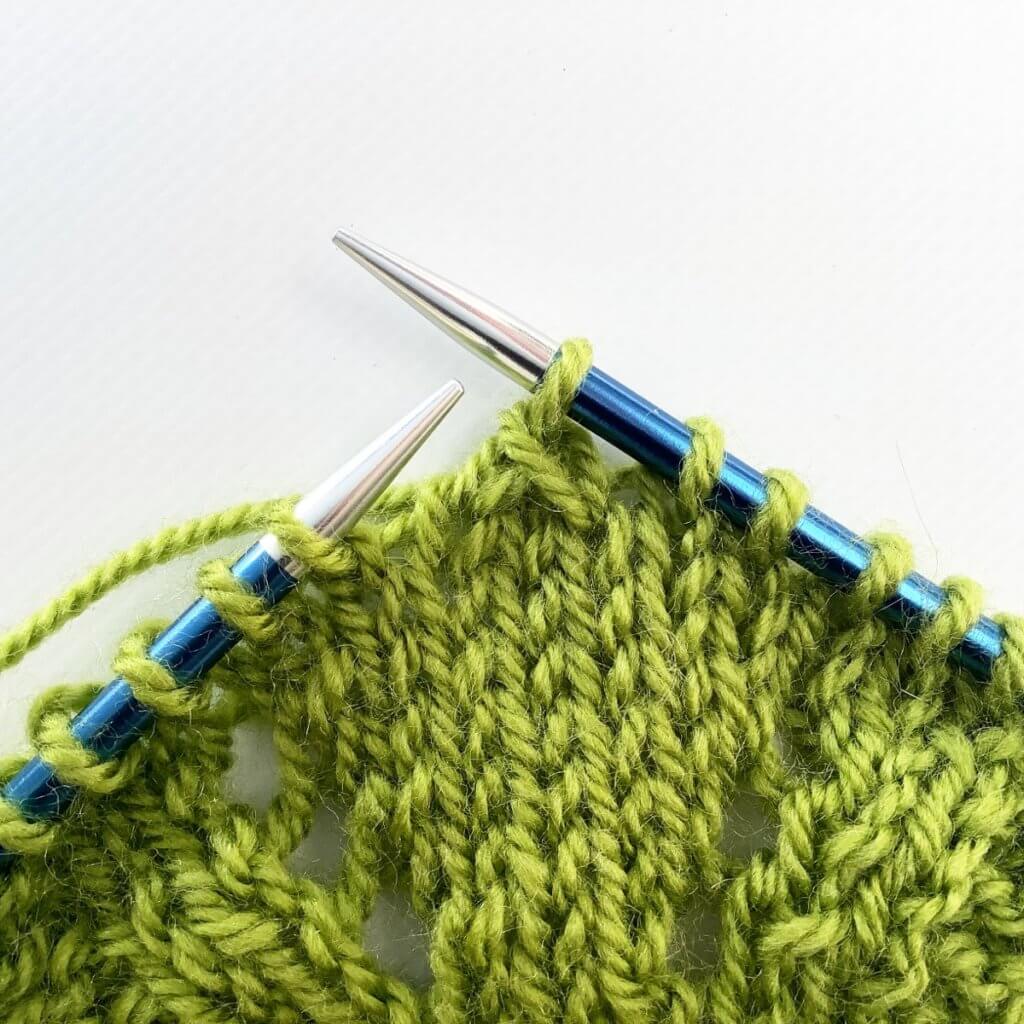
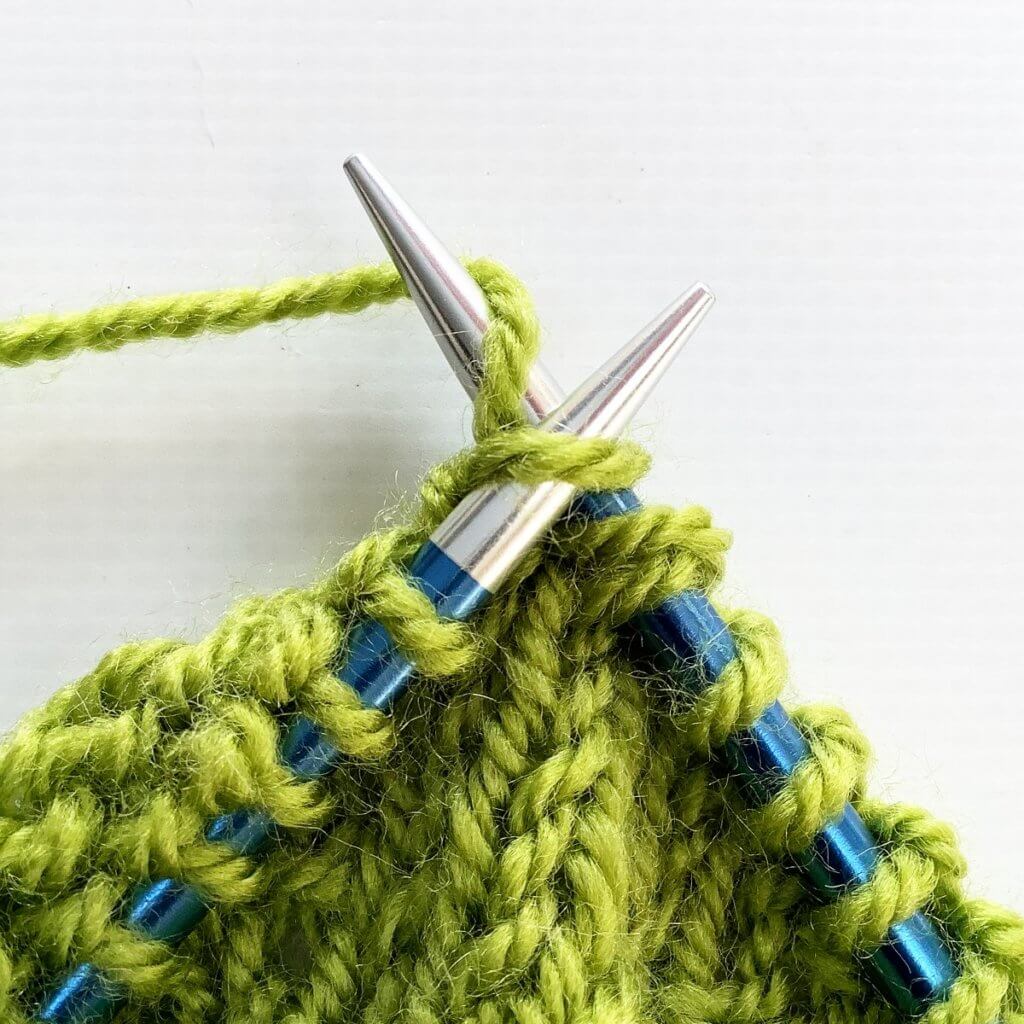
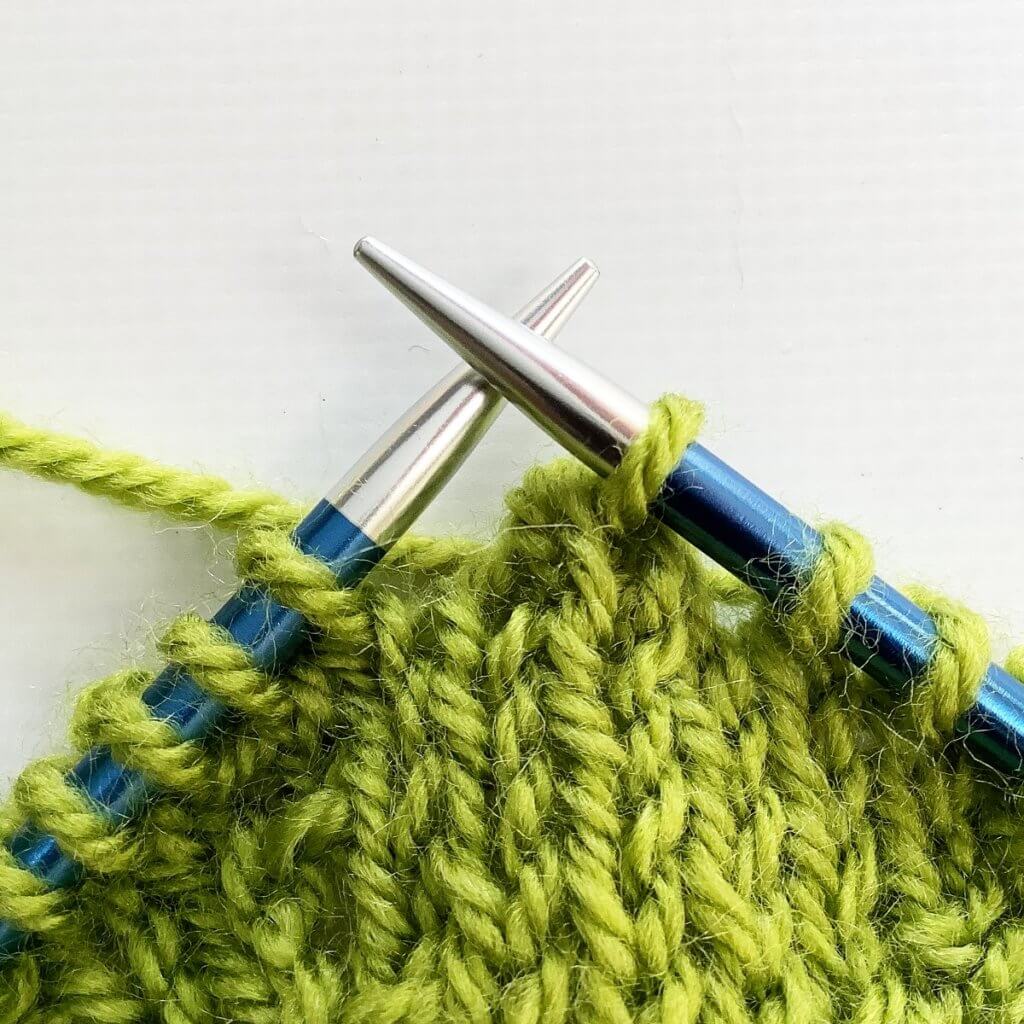
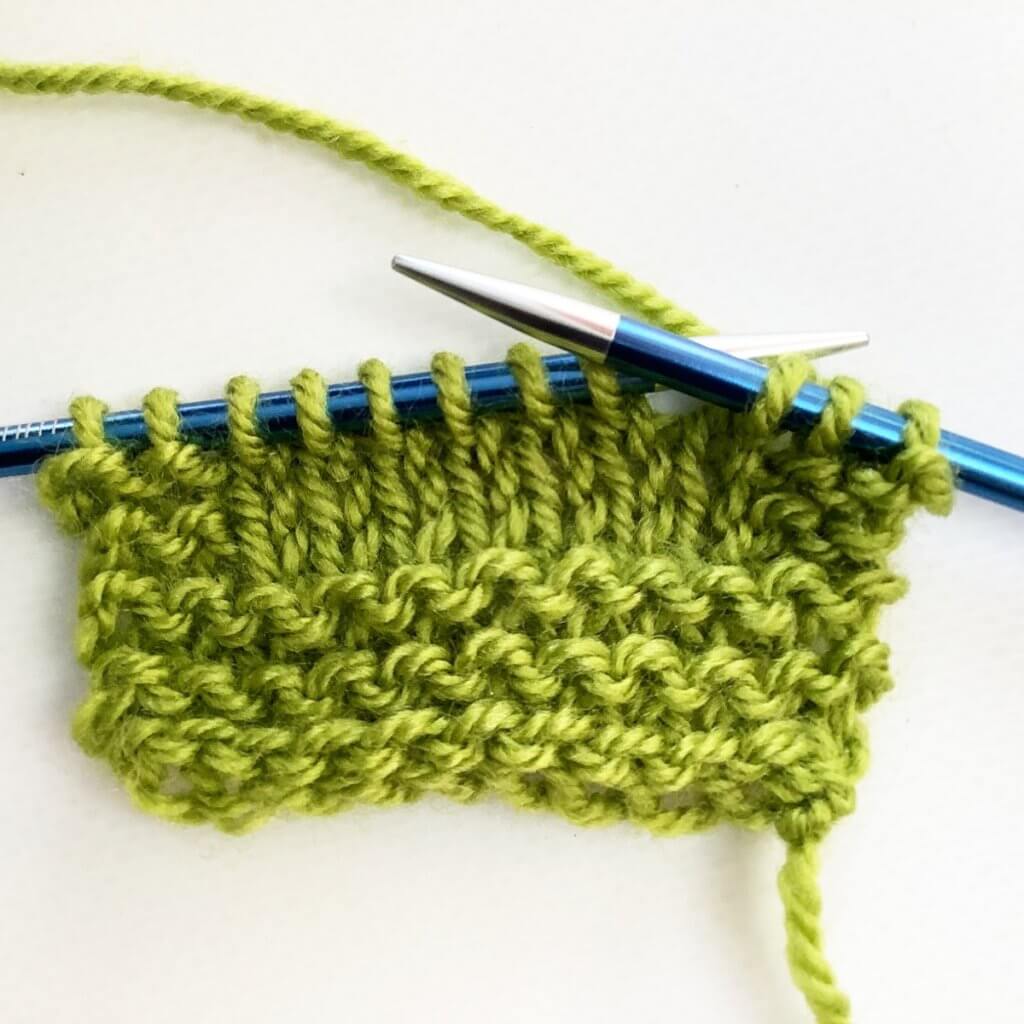
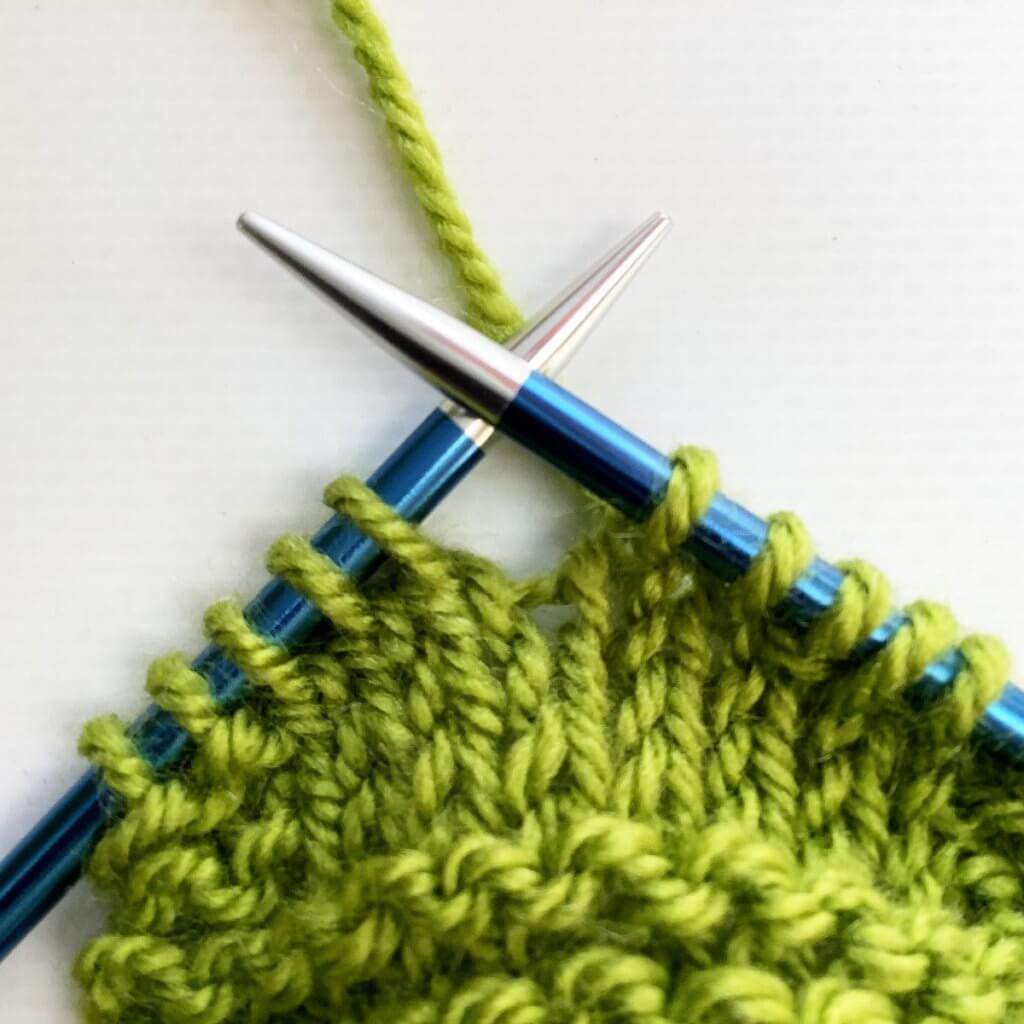
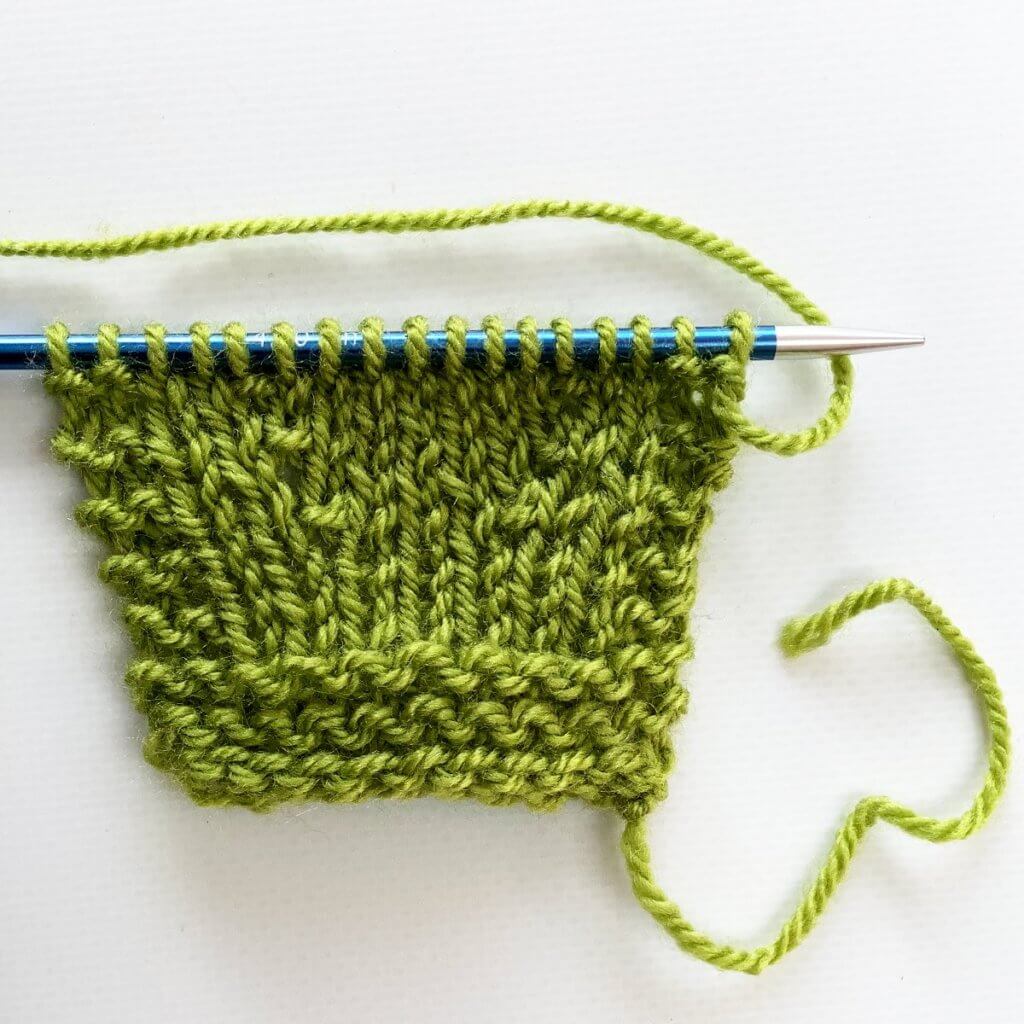
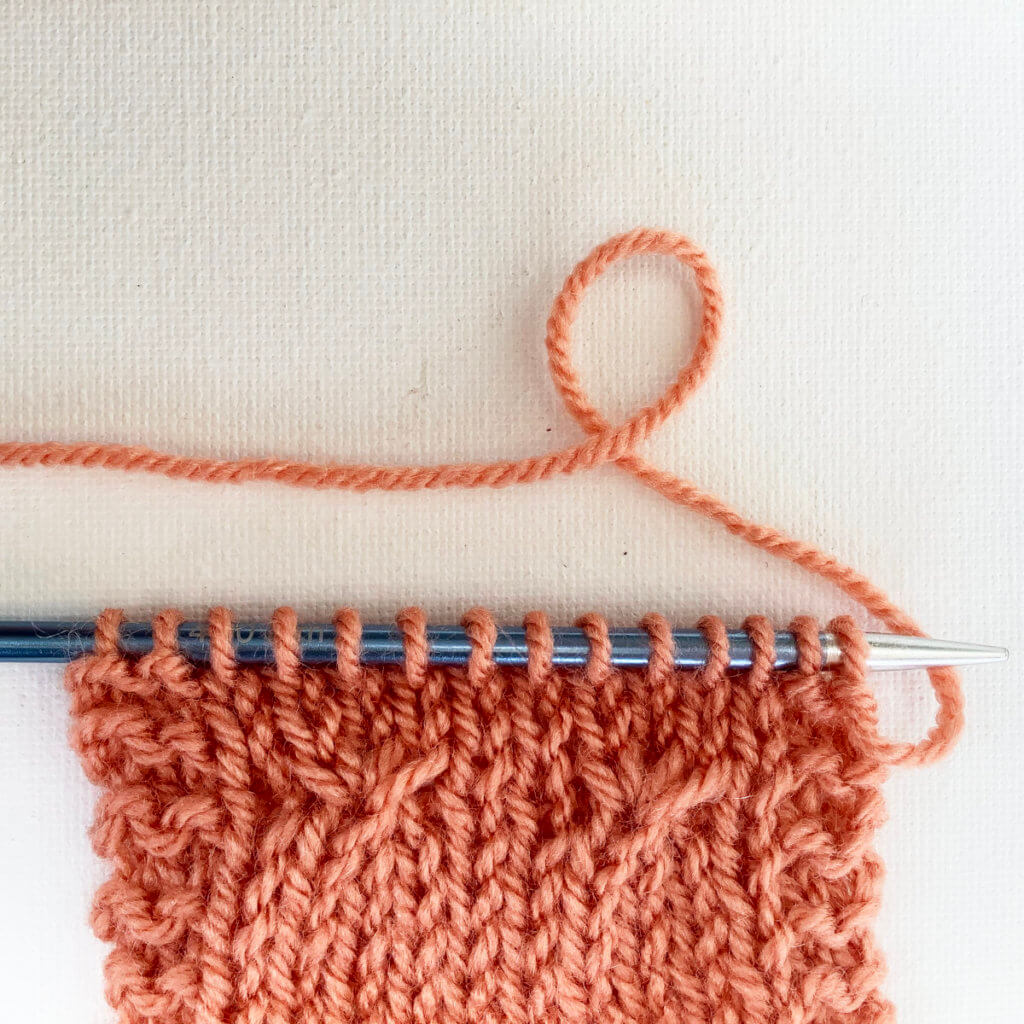
And this is how it looks after 3 more rows in stockinette have been worked, with 2 star stitches in a single row. Pretty, isn’t it?!

Thanks to my Patreon supporters for bringing you this freebie! Creating quality patterns and tutorials is a lot of work and resource-intensive. However, I find it important to give you free content like this tutorial. Thanks to the generous support of my Patreon supporters, I can make it happen. Thank you, patrons! Click here to join, or click here to read more about La Visch Designs on Patreon.
tutorial – working an Estonian 3-into-3 star stitch Read More »