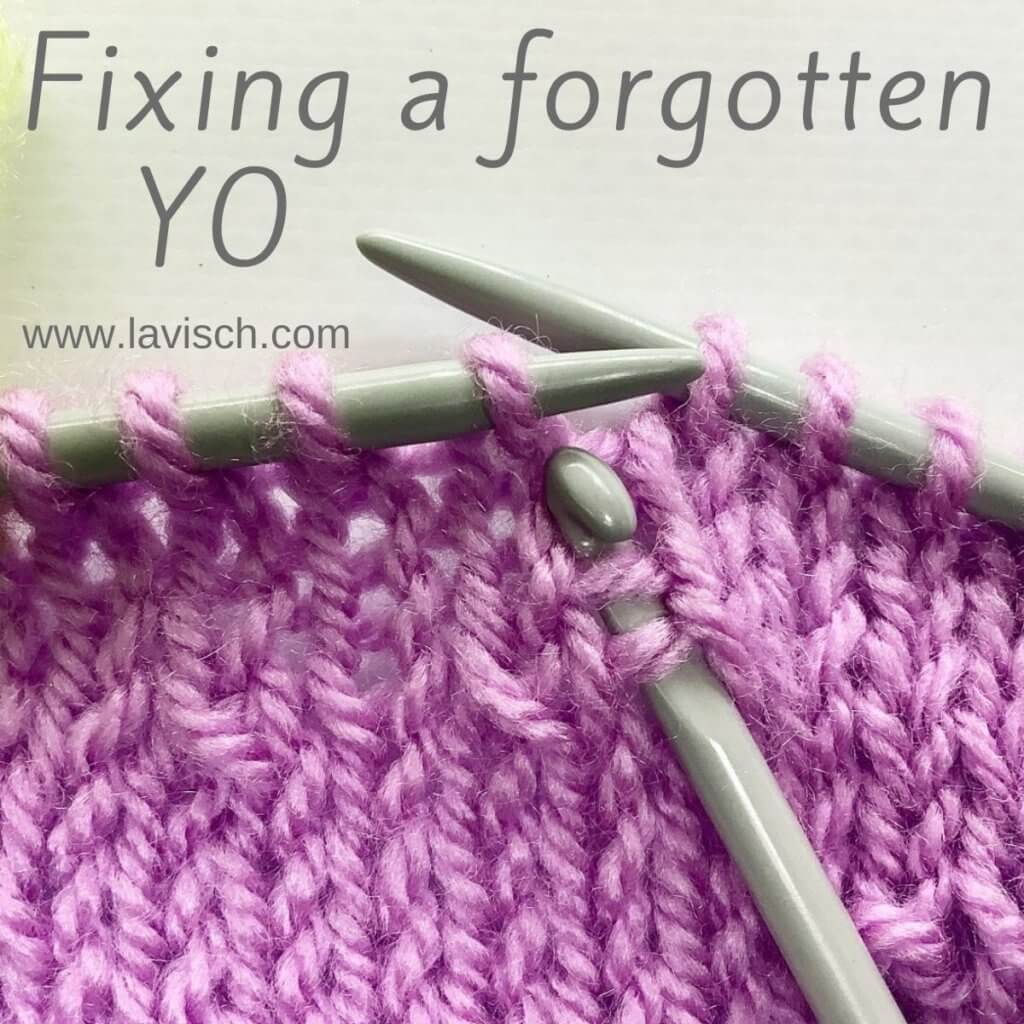
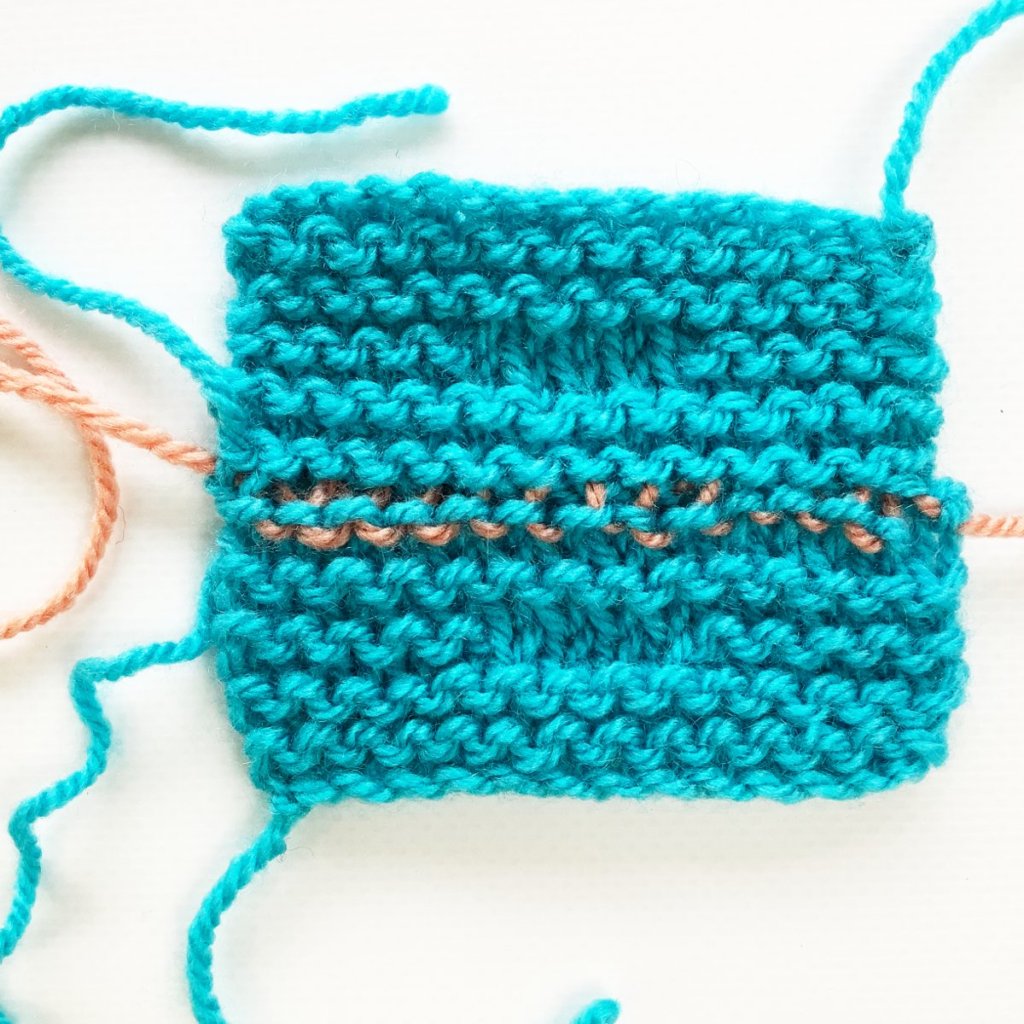
If you’ve ever knit lace or eyelet-patterning you know it can happen easily: a short distraction. And when your attention is somewhere else a yarn over or yo is forgotten and all patterning and shaping is thrown off-course. It may even be that you won’t notice it until several more rows or rounds have been worked.
Personally, I have a very big aversion against ripping out my work, just because I forgot one teeny tiny stitch a couple of rows back. I mean, it certainly is an option, but I consider it to be more of a last resort type of option.
So, without further ado, here a way to fix that forgotten yo without issues and stress!
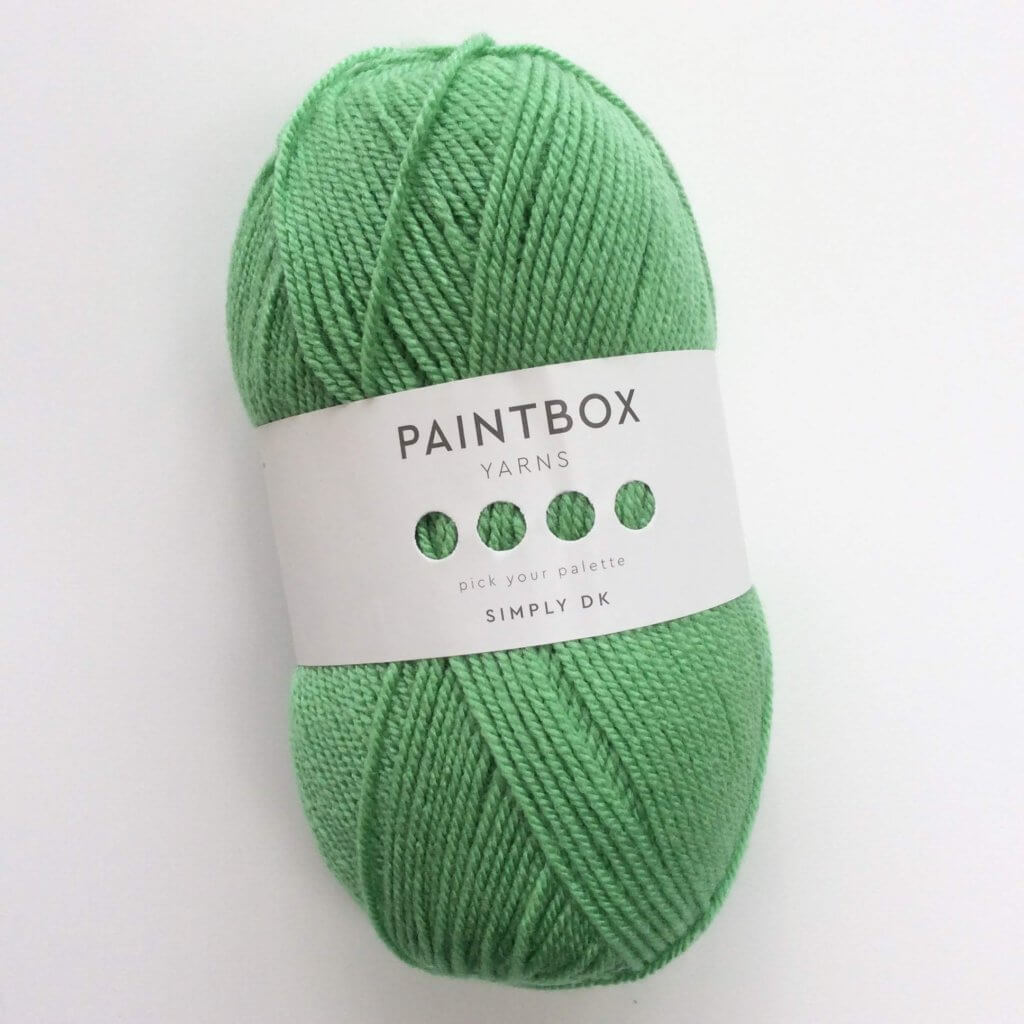
Materials used
Yarn: * Paintbox Yarns Simply DK, a good value, good quality 100% acrylic yarn, here in the color 142 Tea Rose.
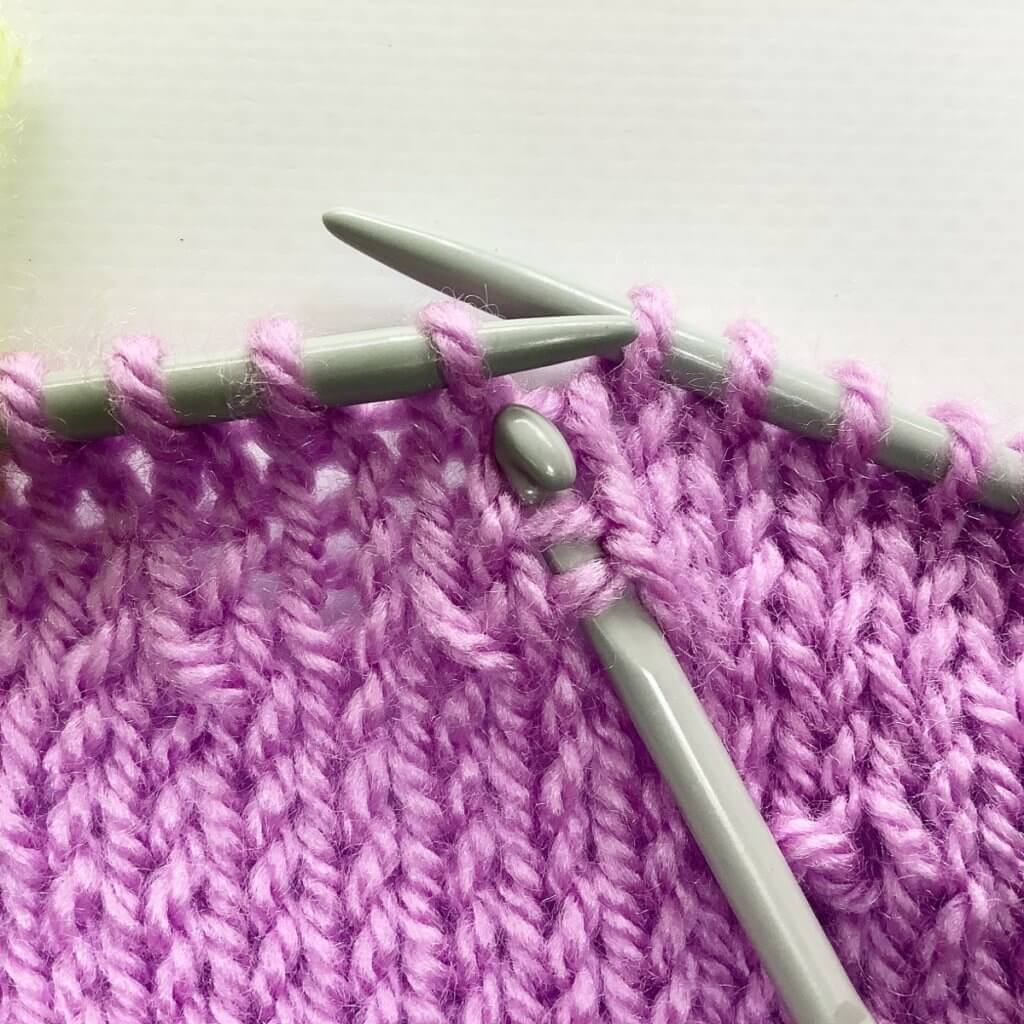
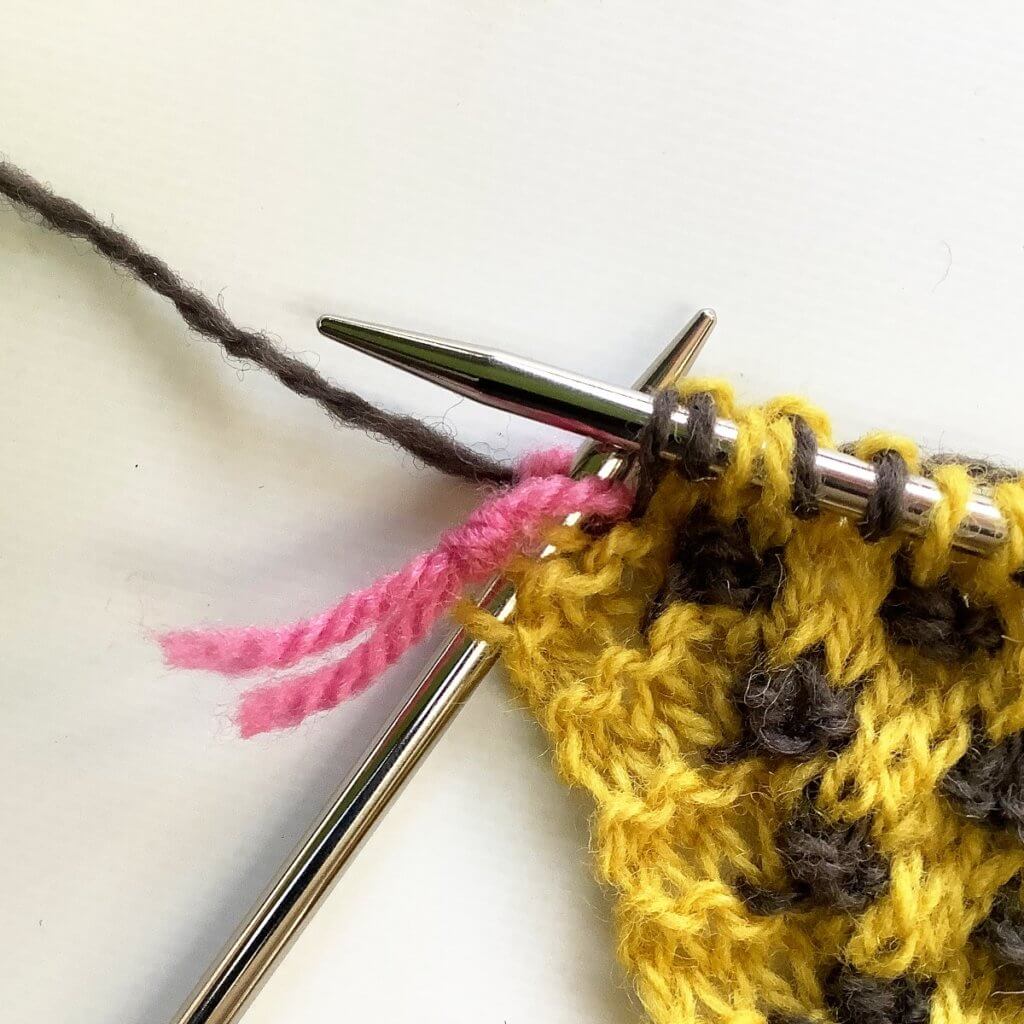
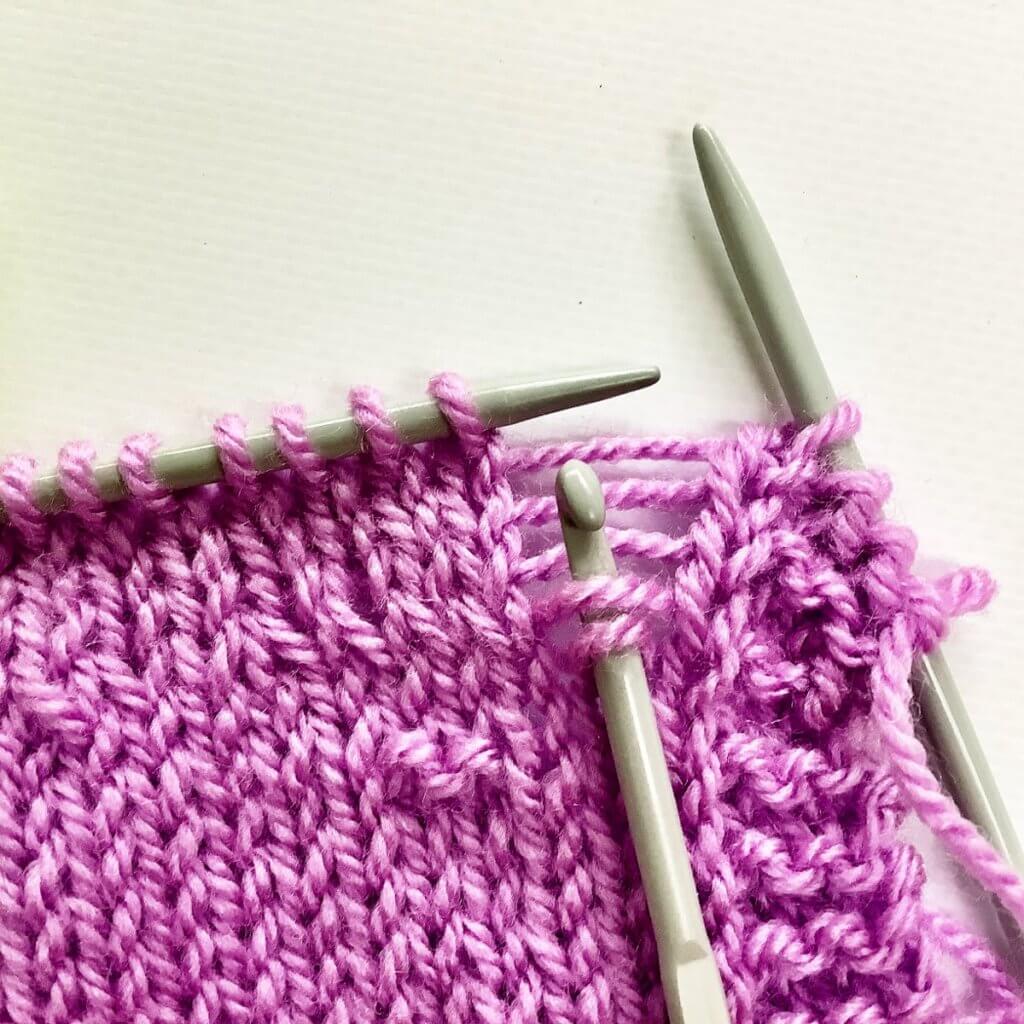
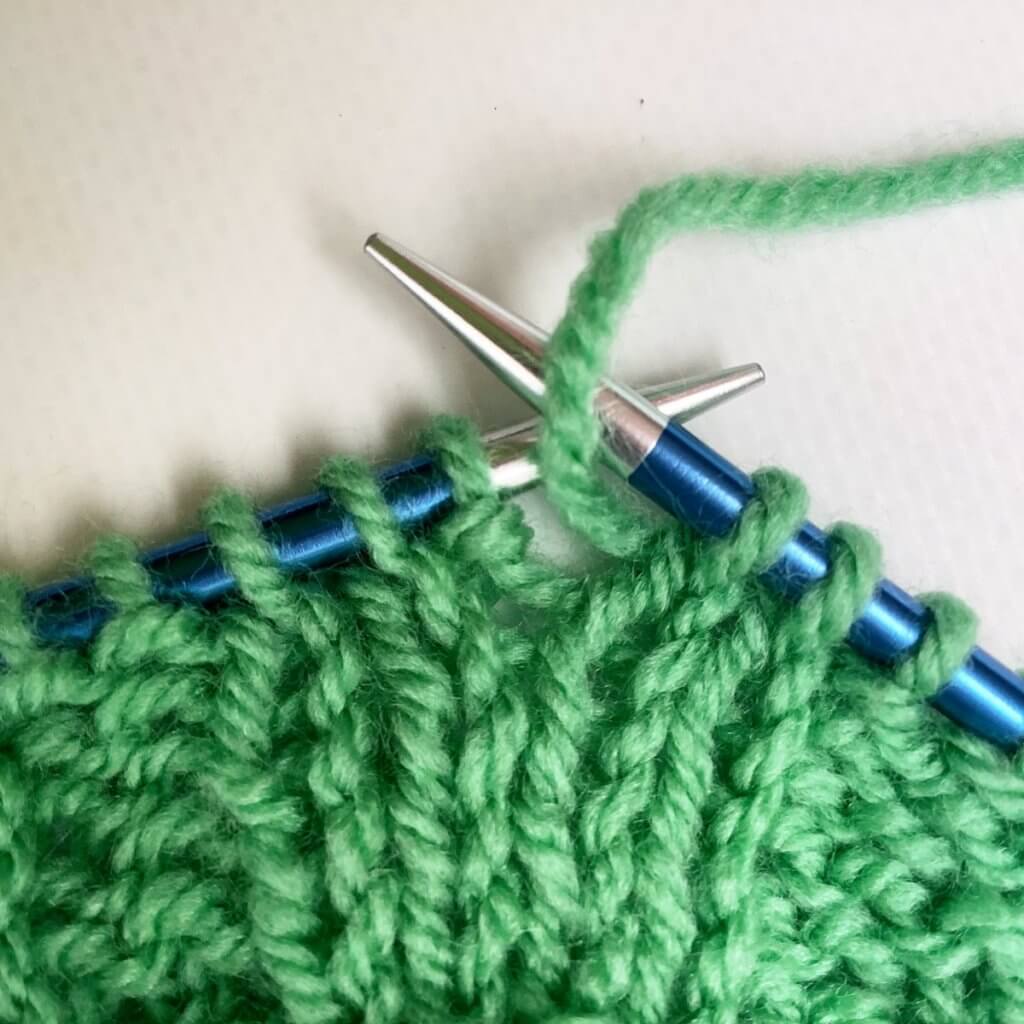
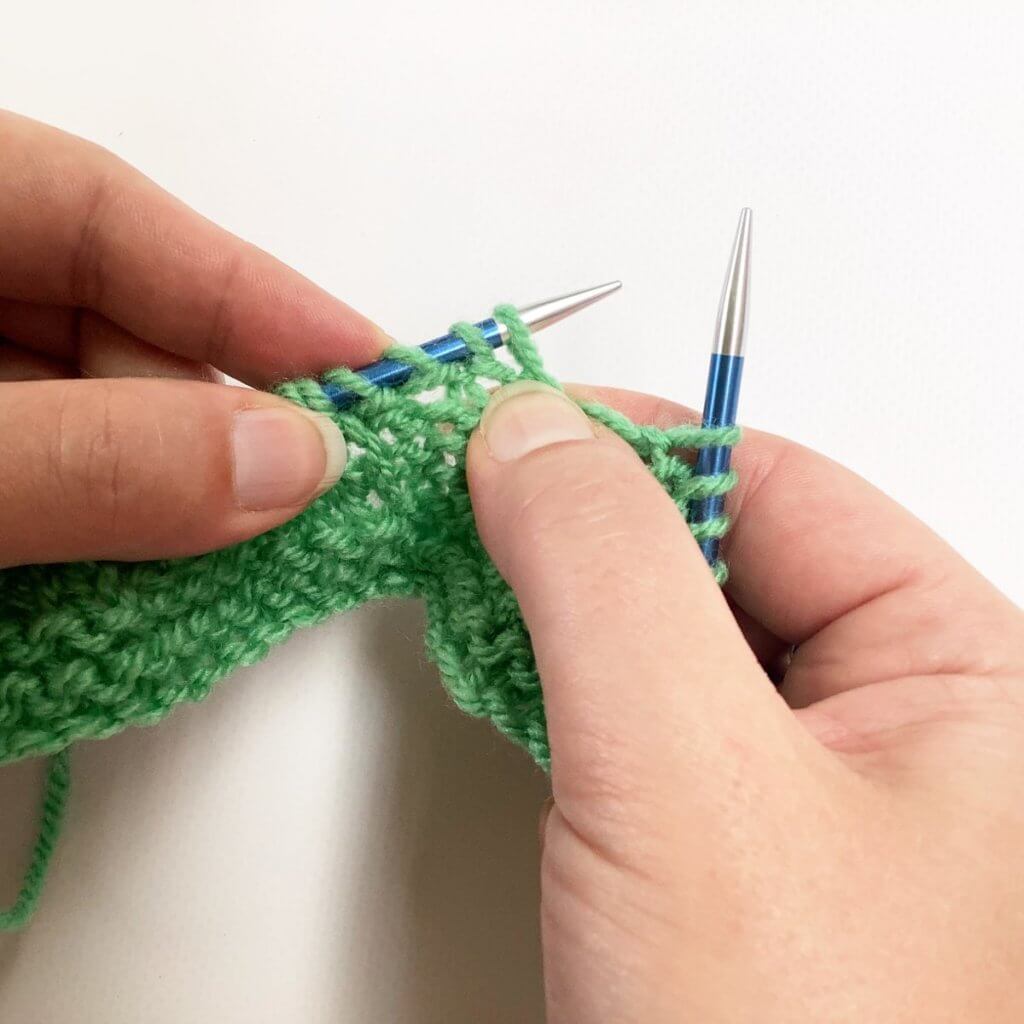
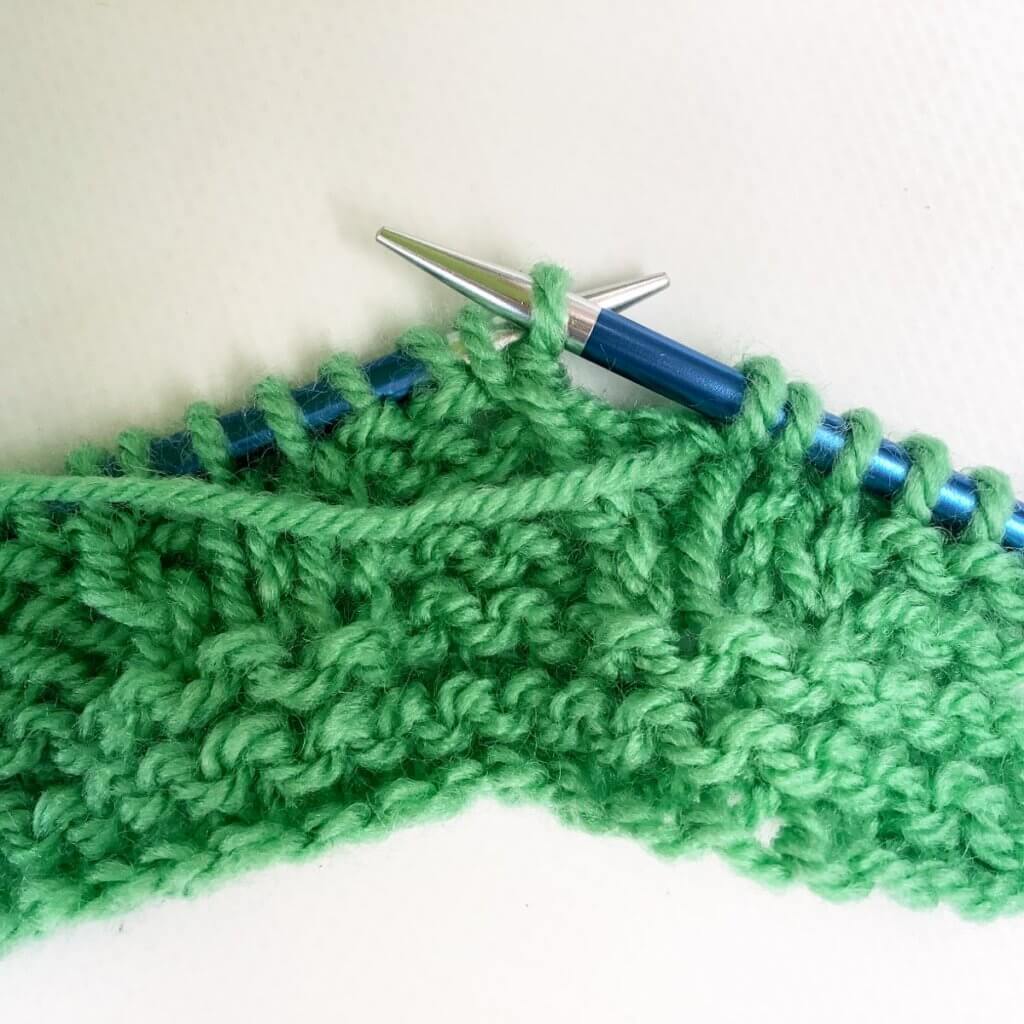
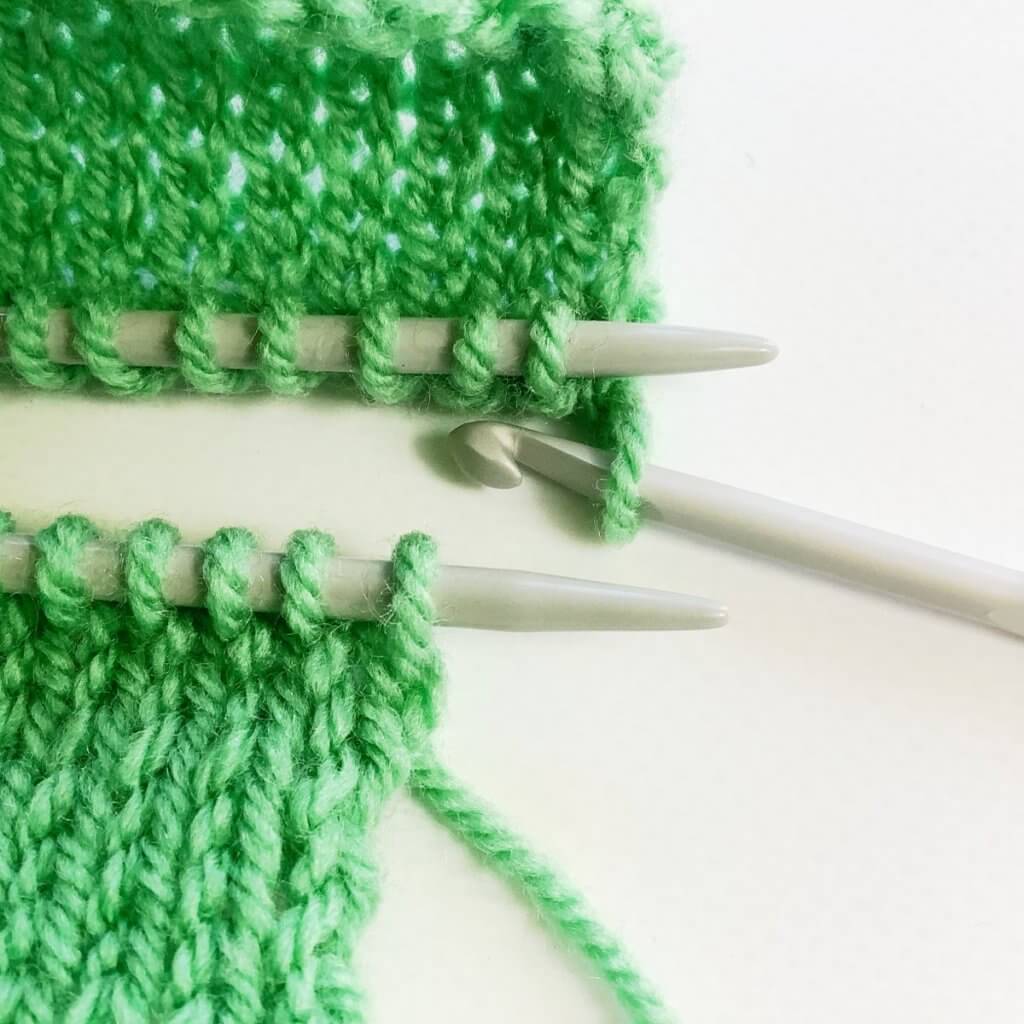
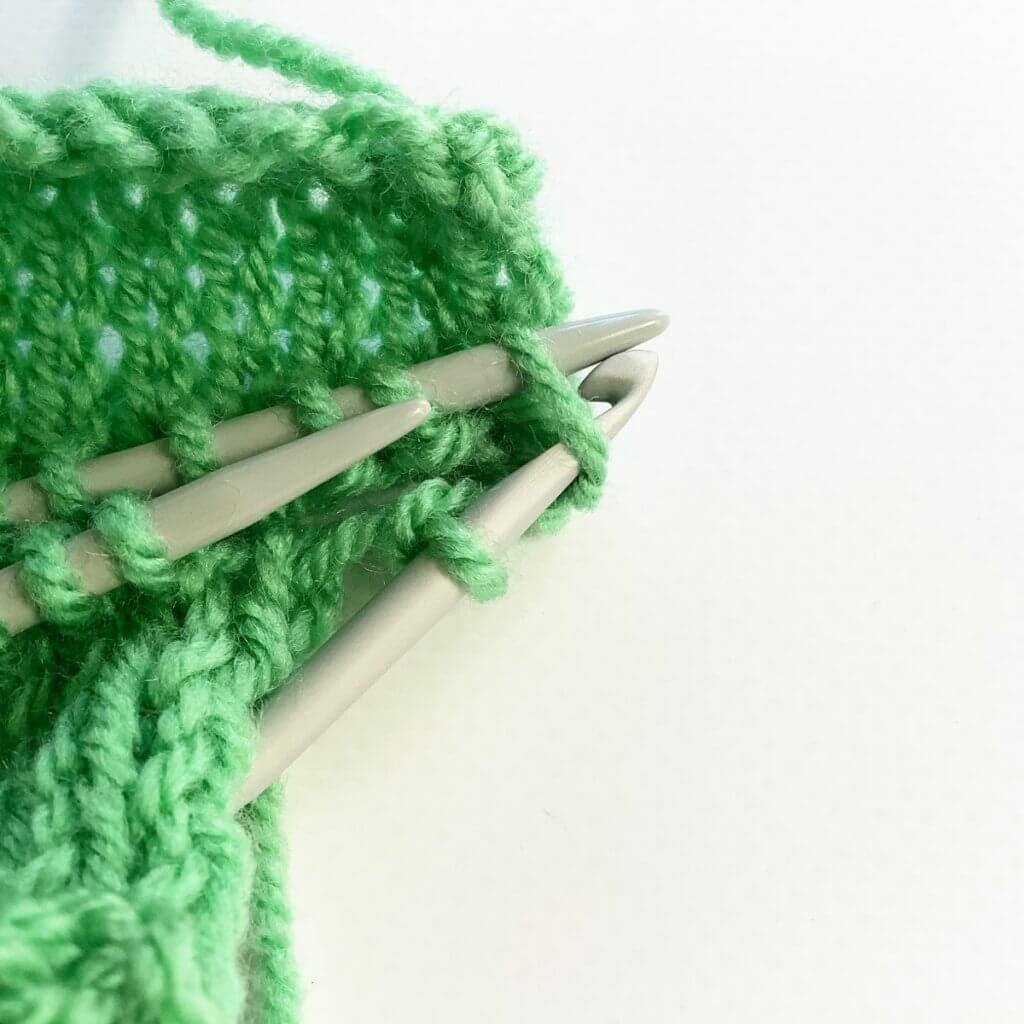
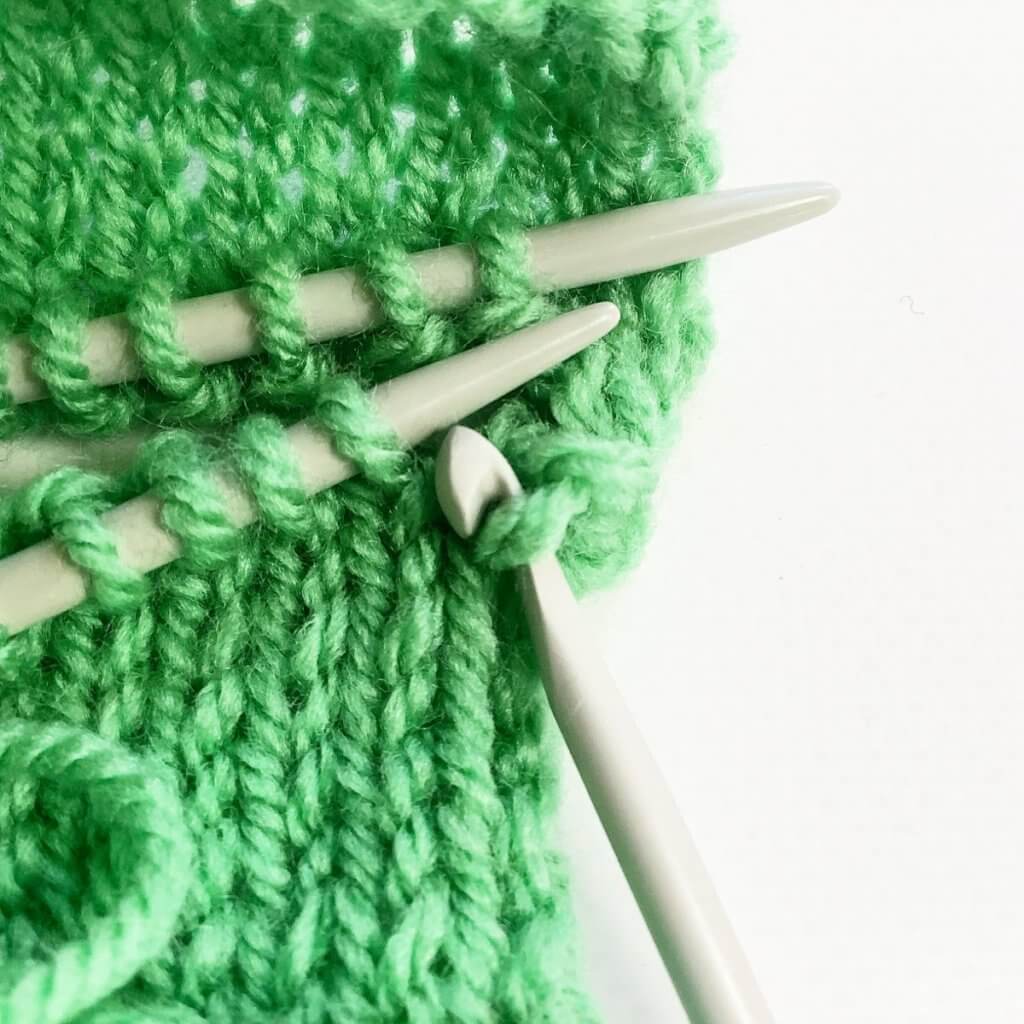
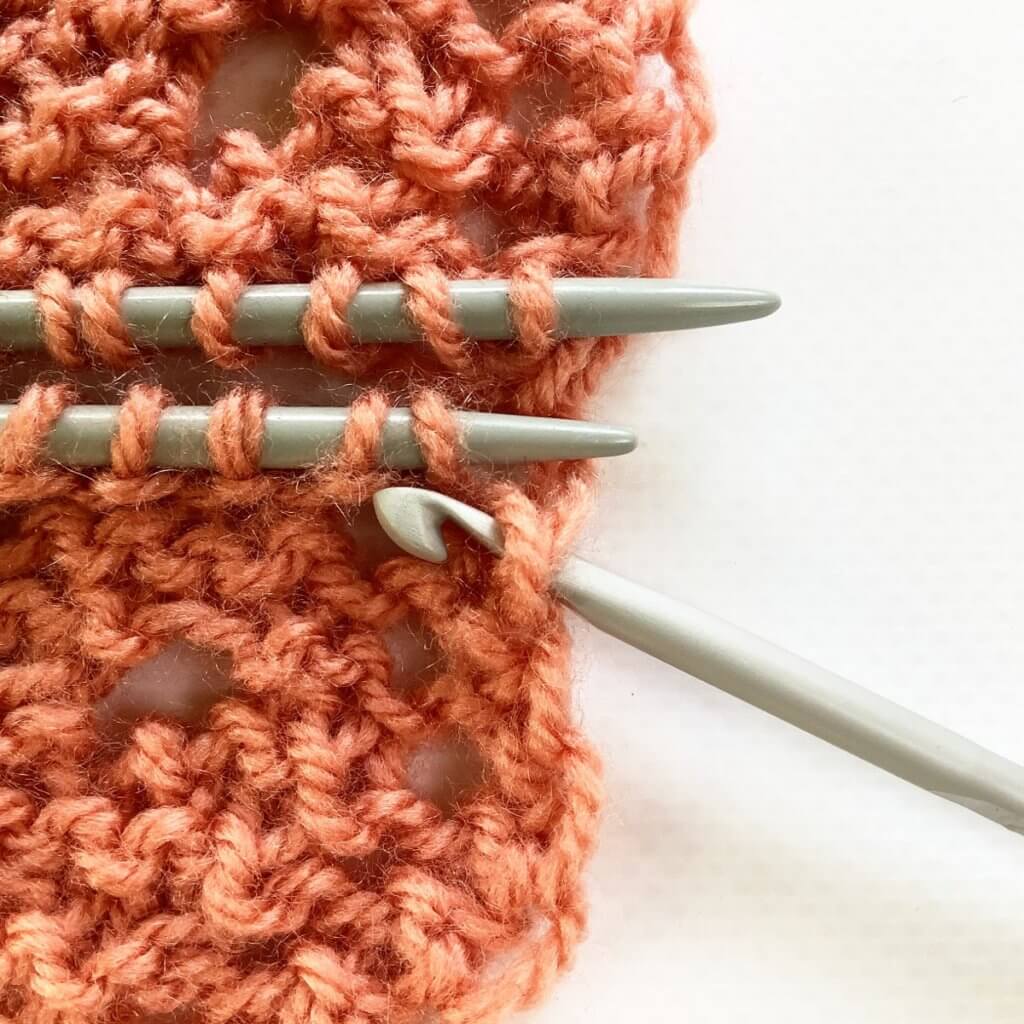
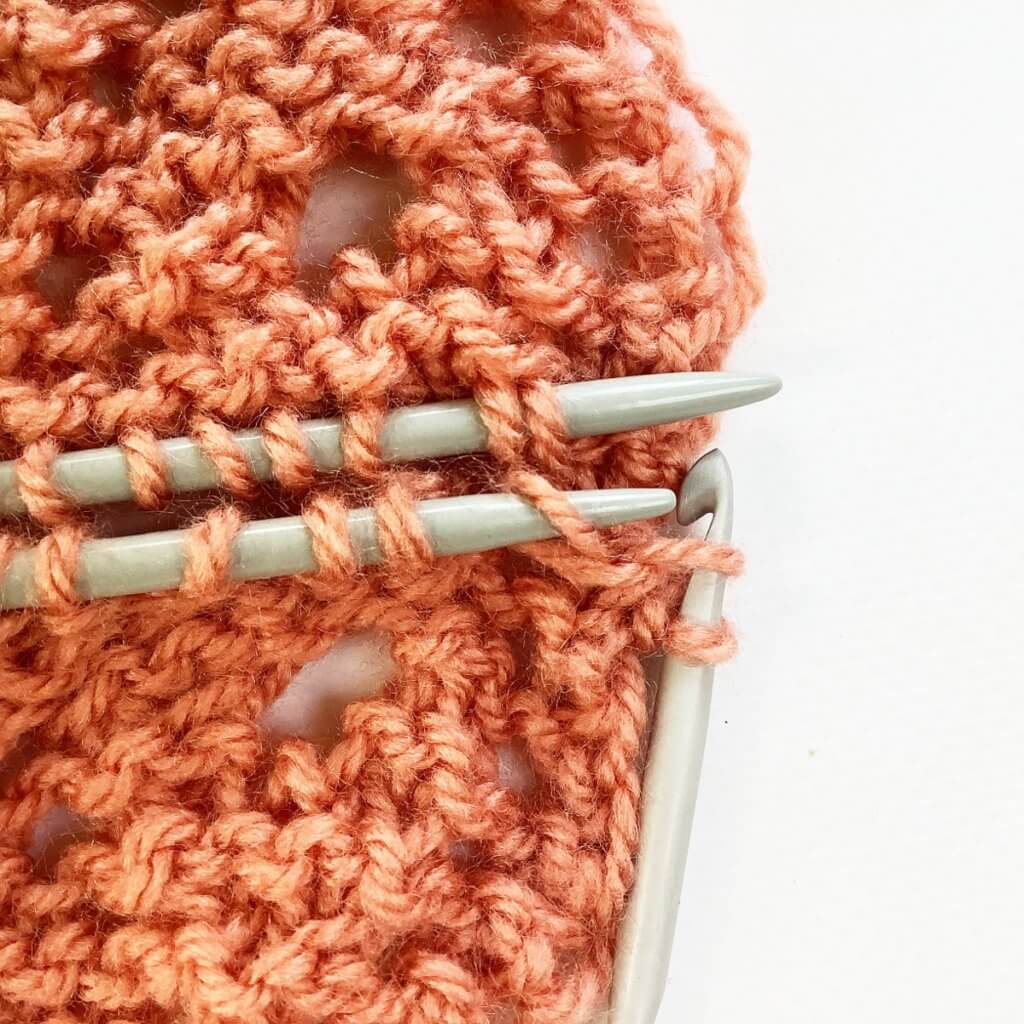
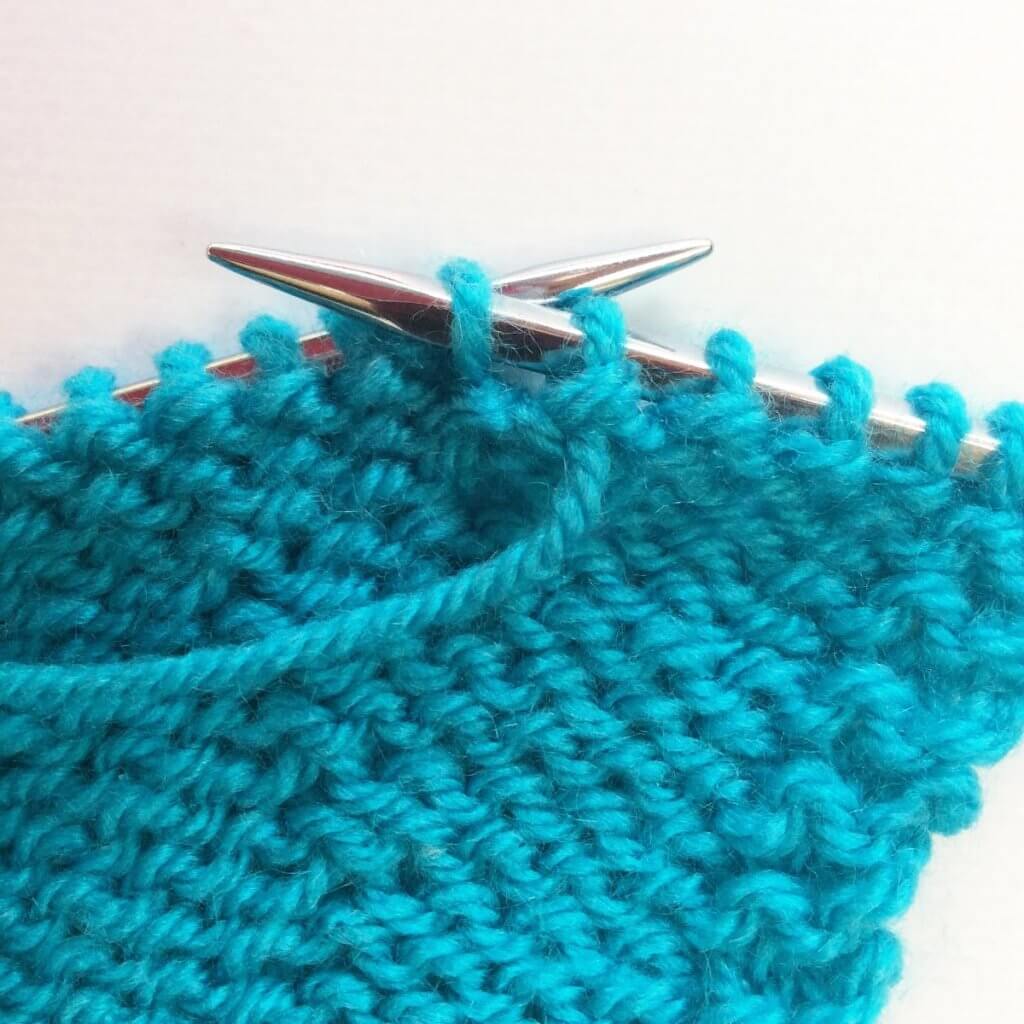
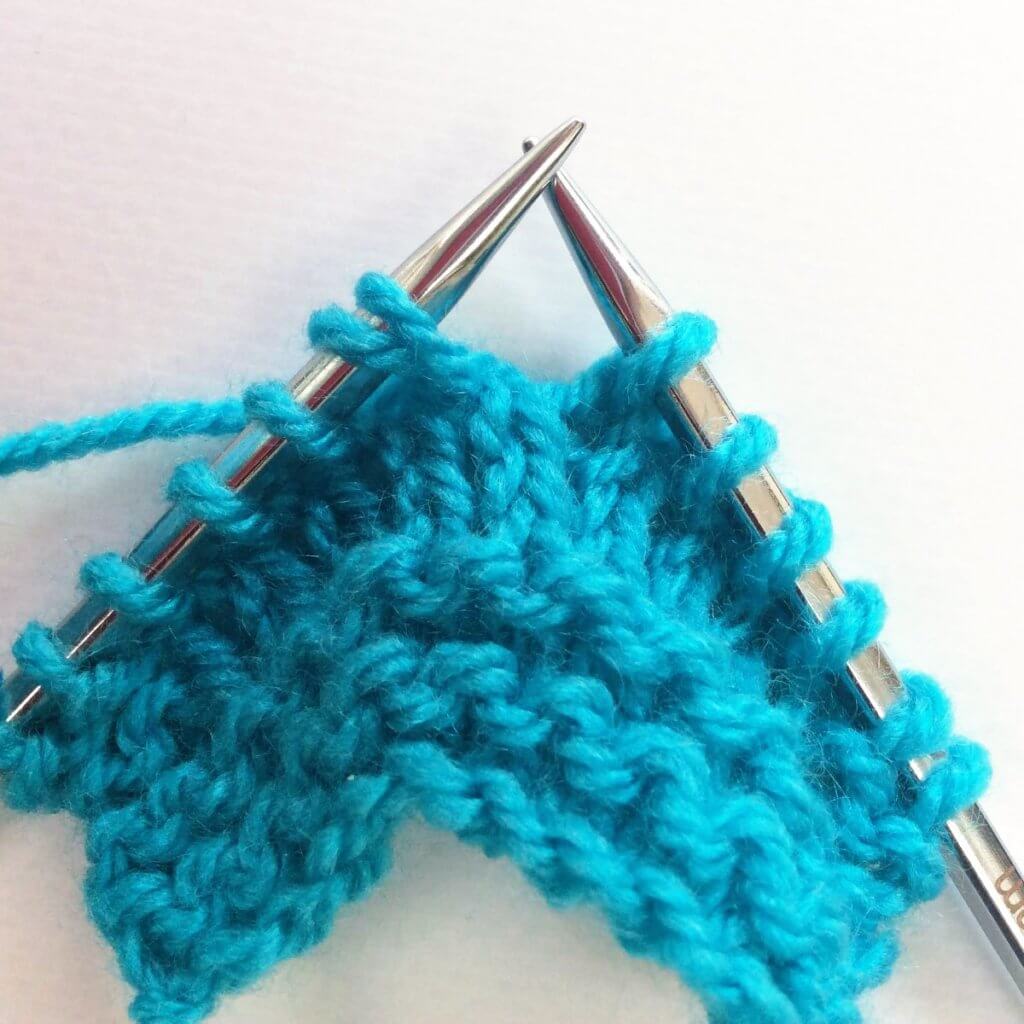
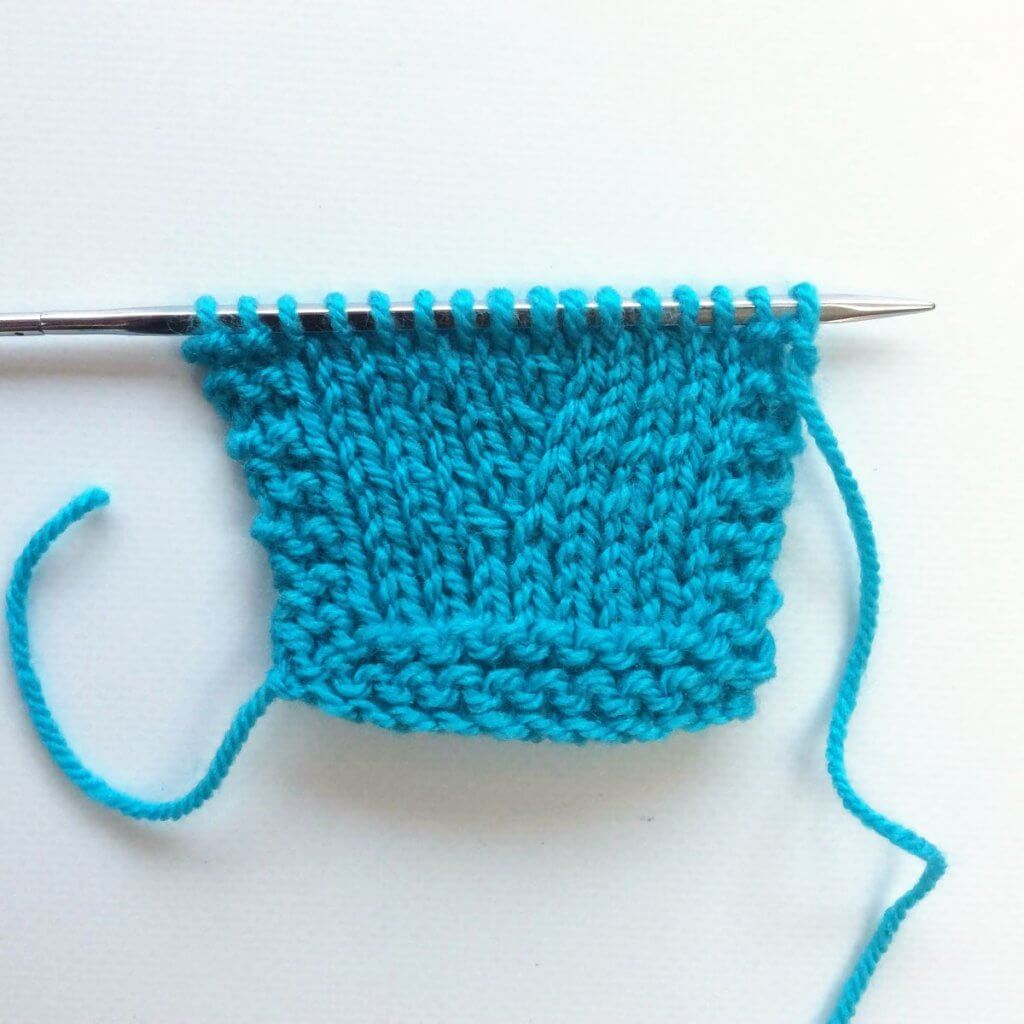
1. First, go to the spot in your knitting where the yo should have been. If you look carefully, you can see horizontal threads between the 2 columns of stitches. Do you also see the left-leaning decrease, 4 stitches down on the left-hand needle?
Right next to it is where the forgotten yo should have been. This means we need to insert the crochet hook from bottom to top underneath threads 3 and 4, counting from the needle down.
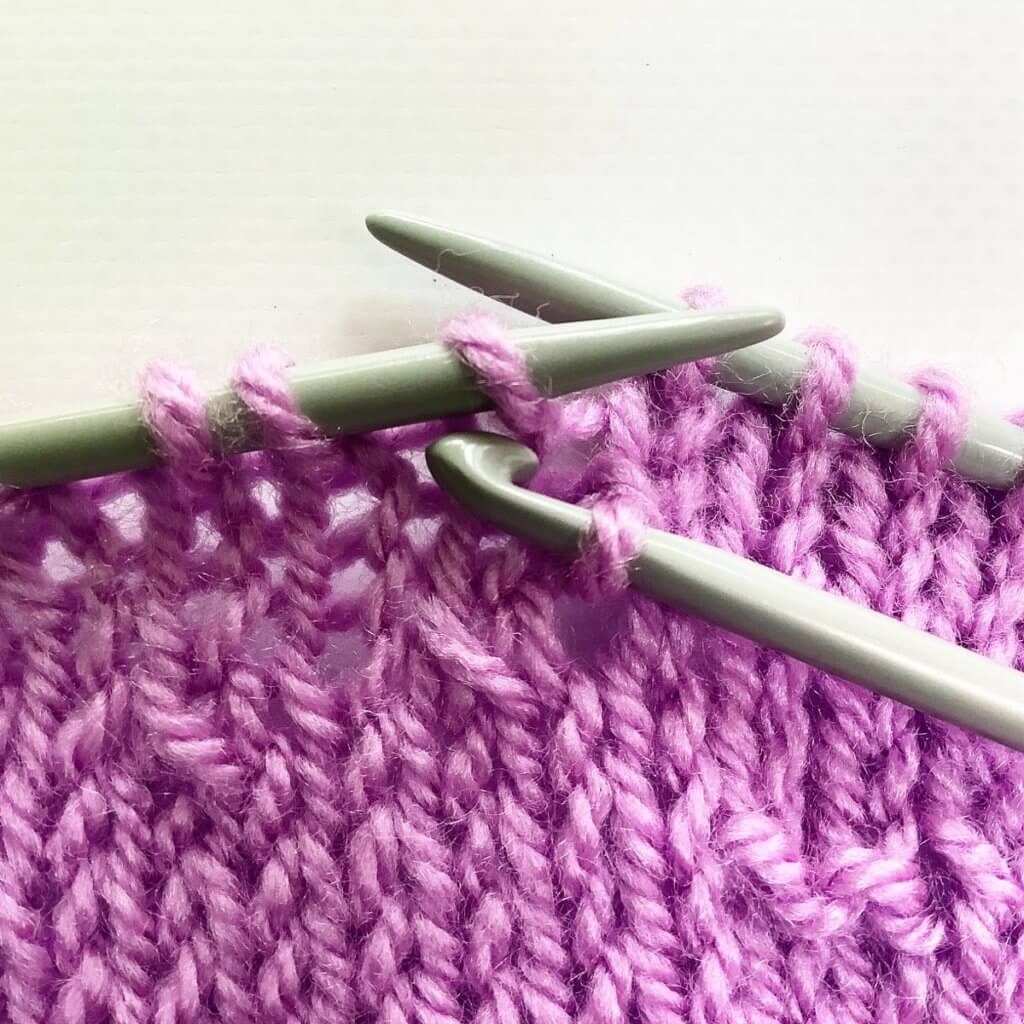
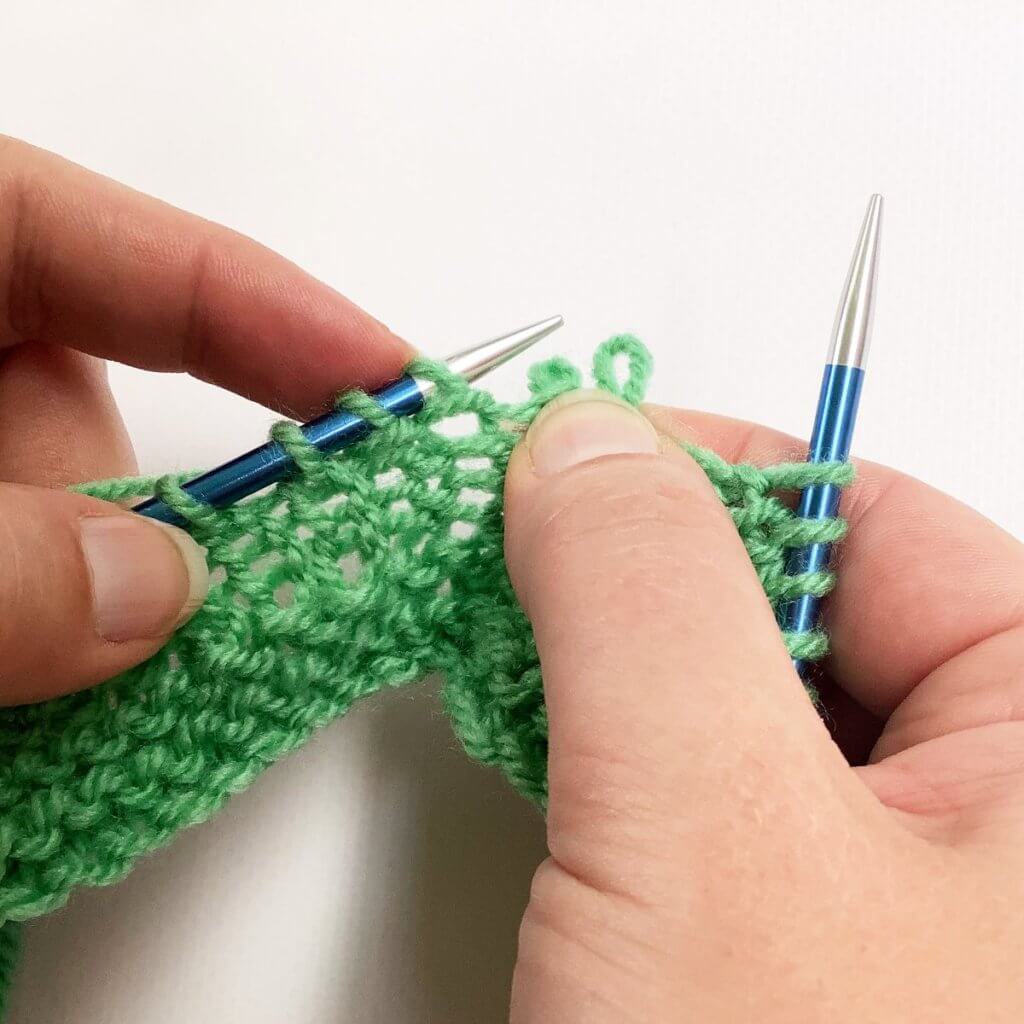
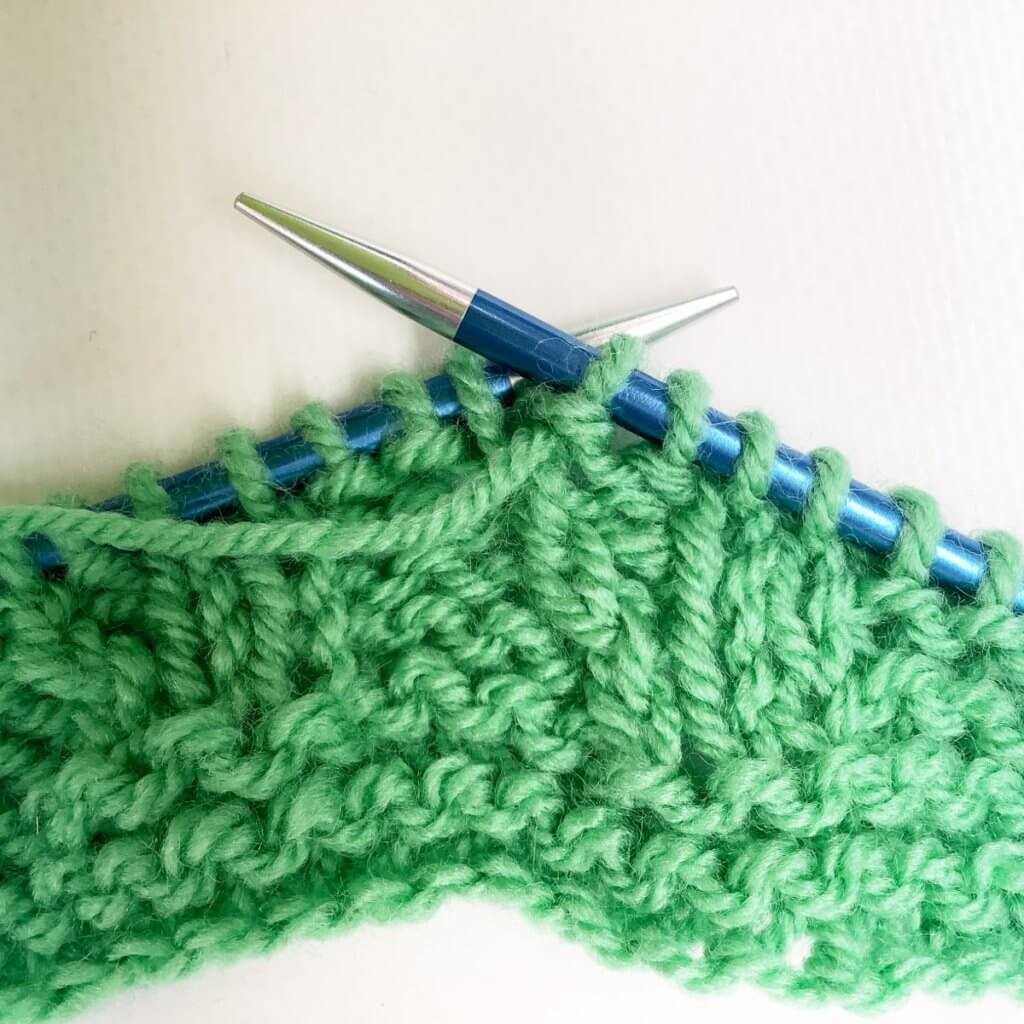
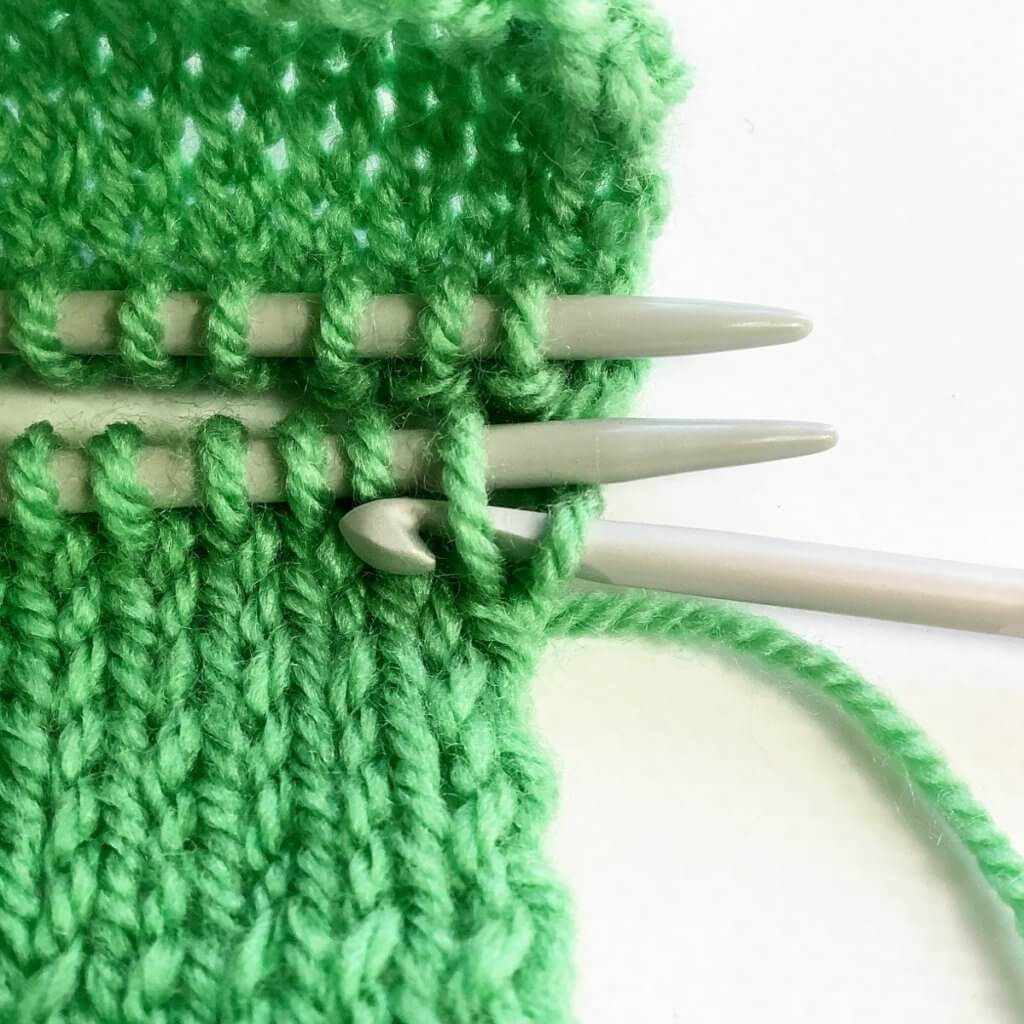
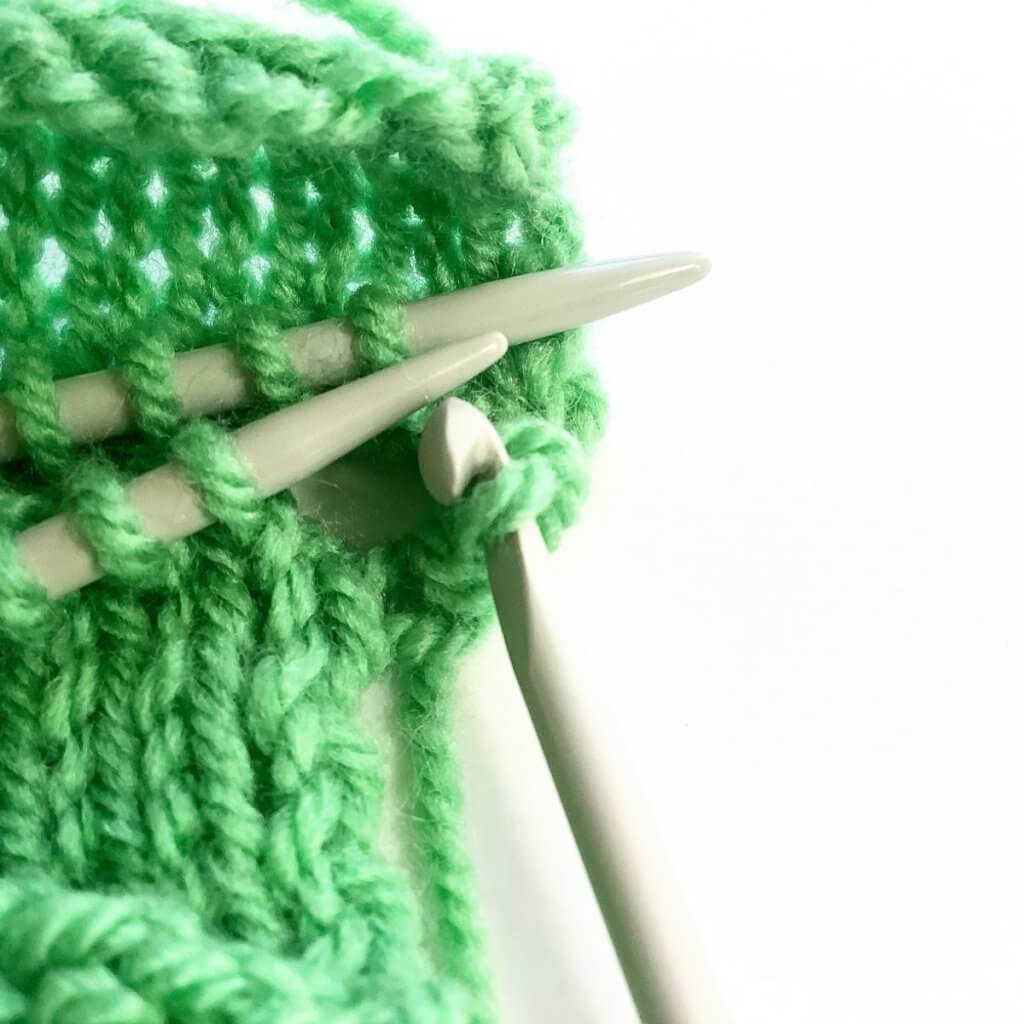
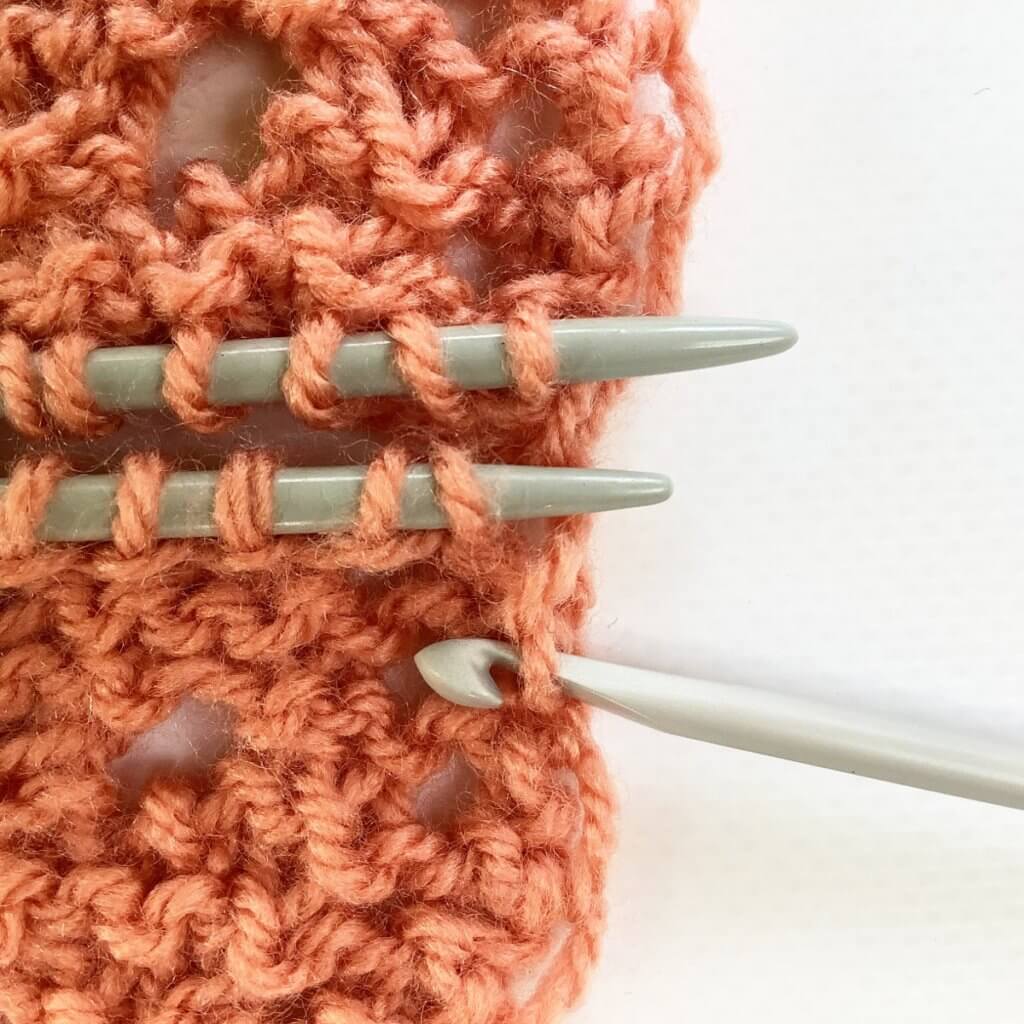
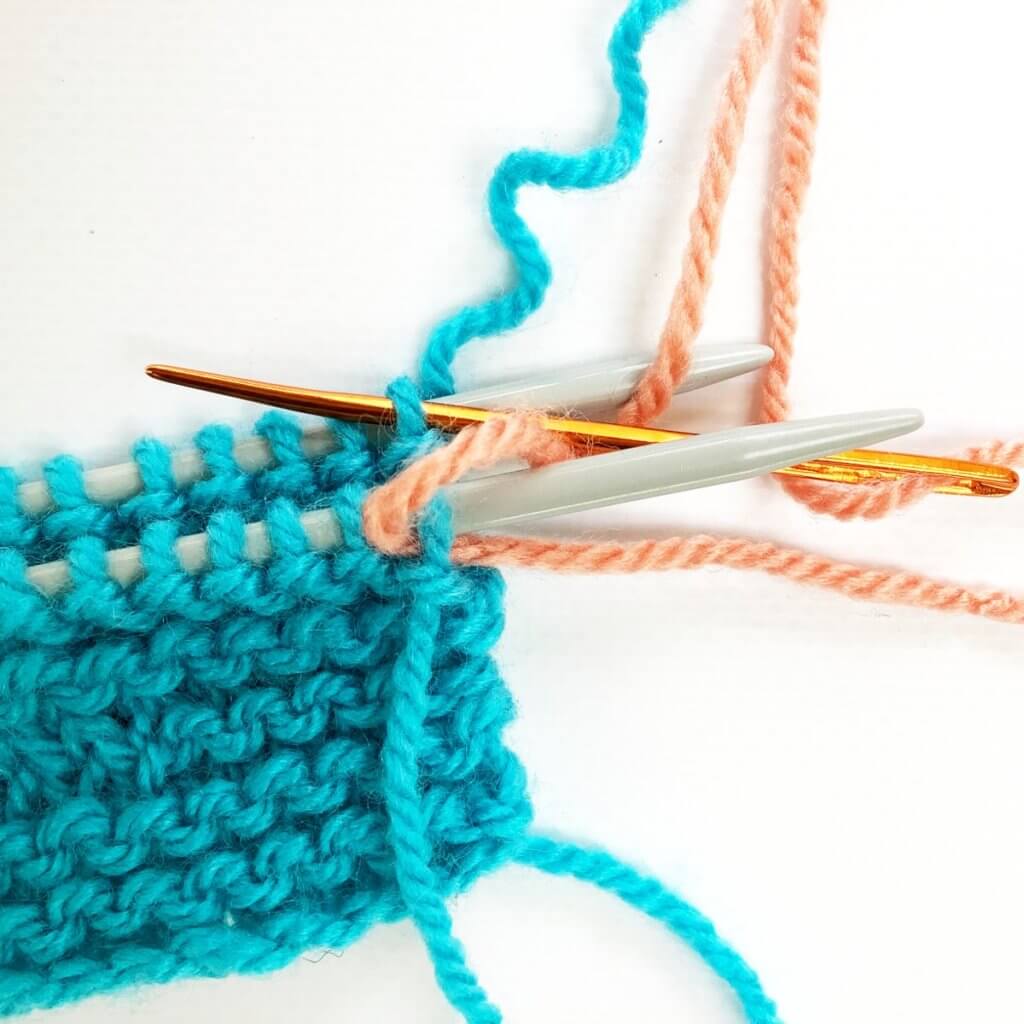
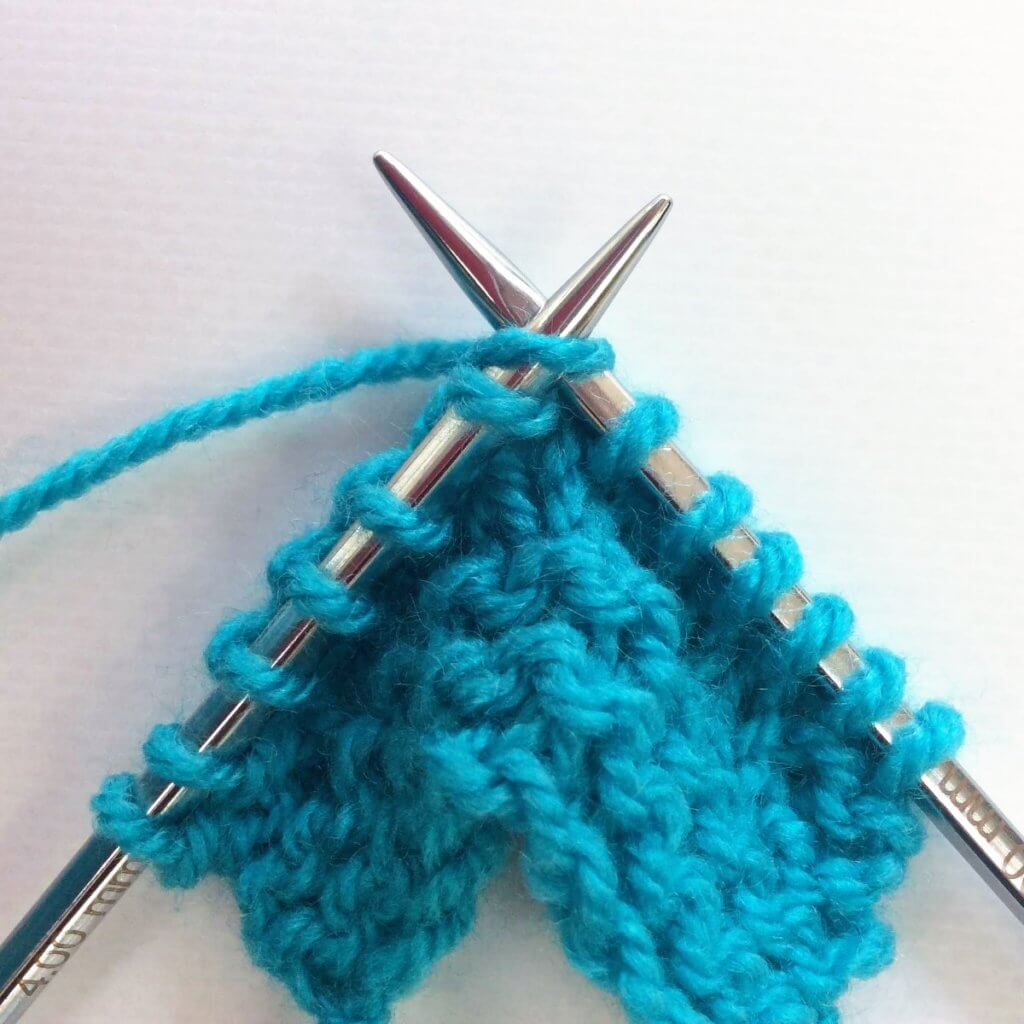
2. Next, pull the top thread through the other one on the hook to create the yarn over or yo.
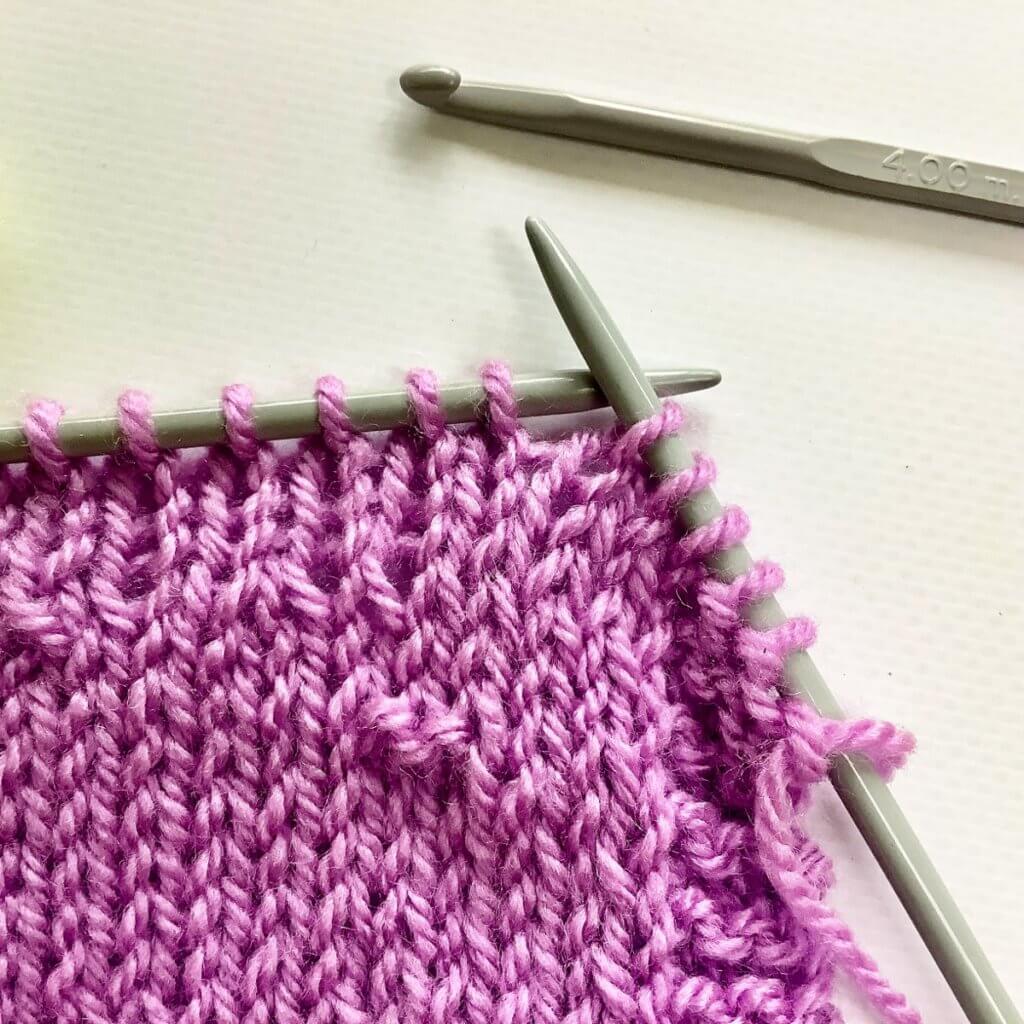
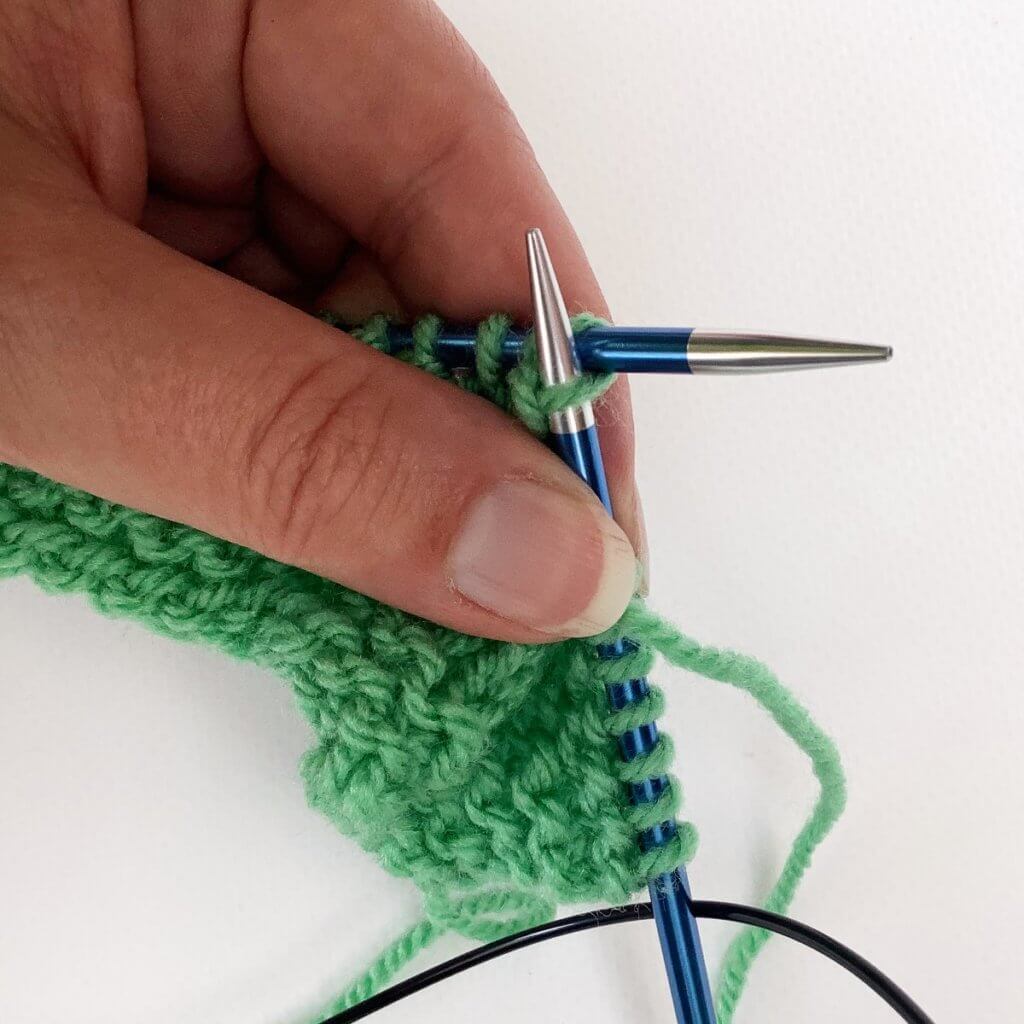
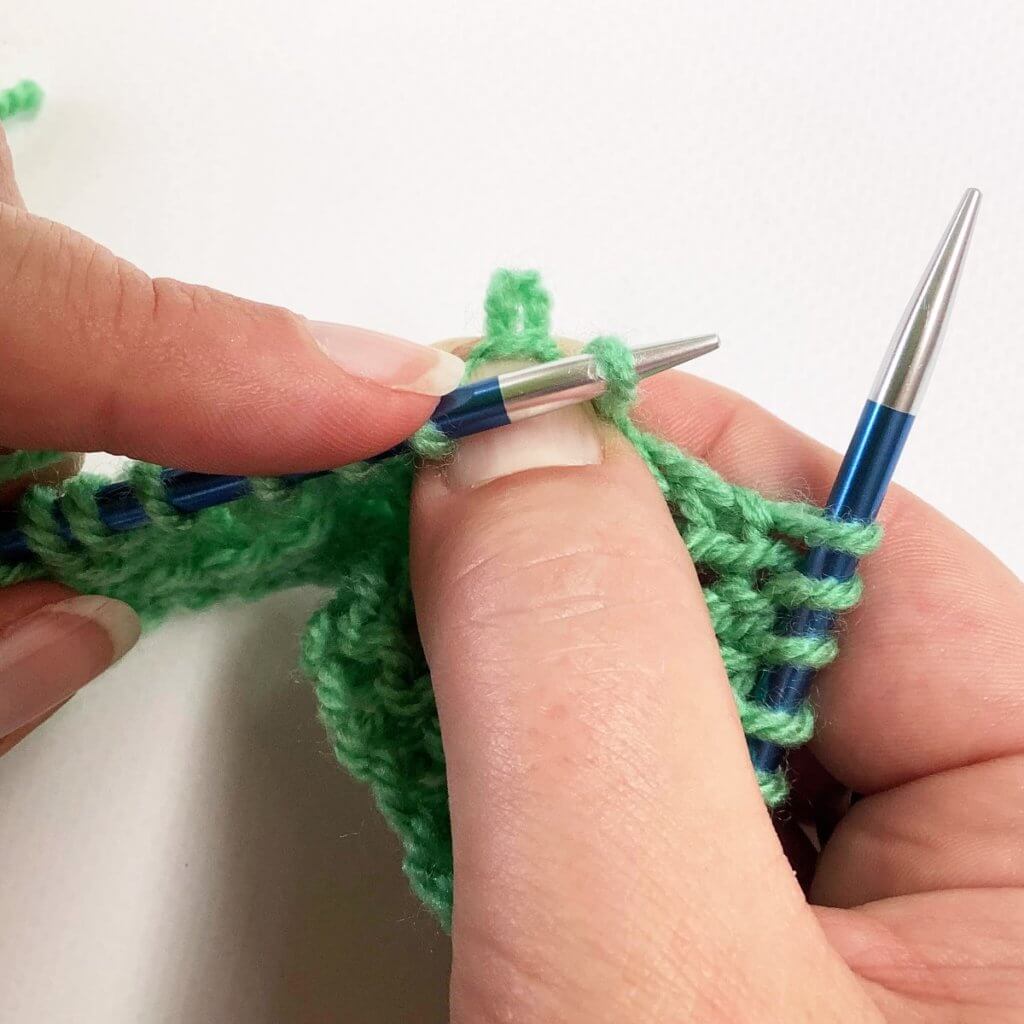
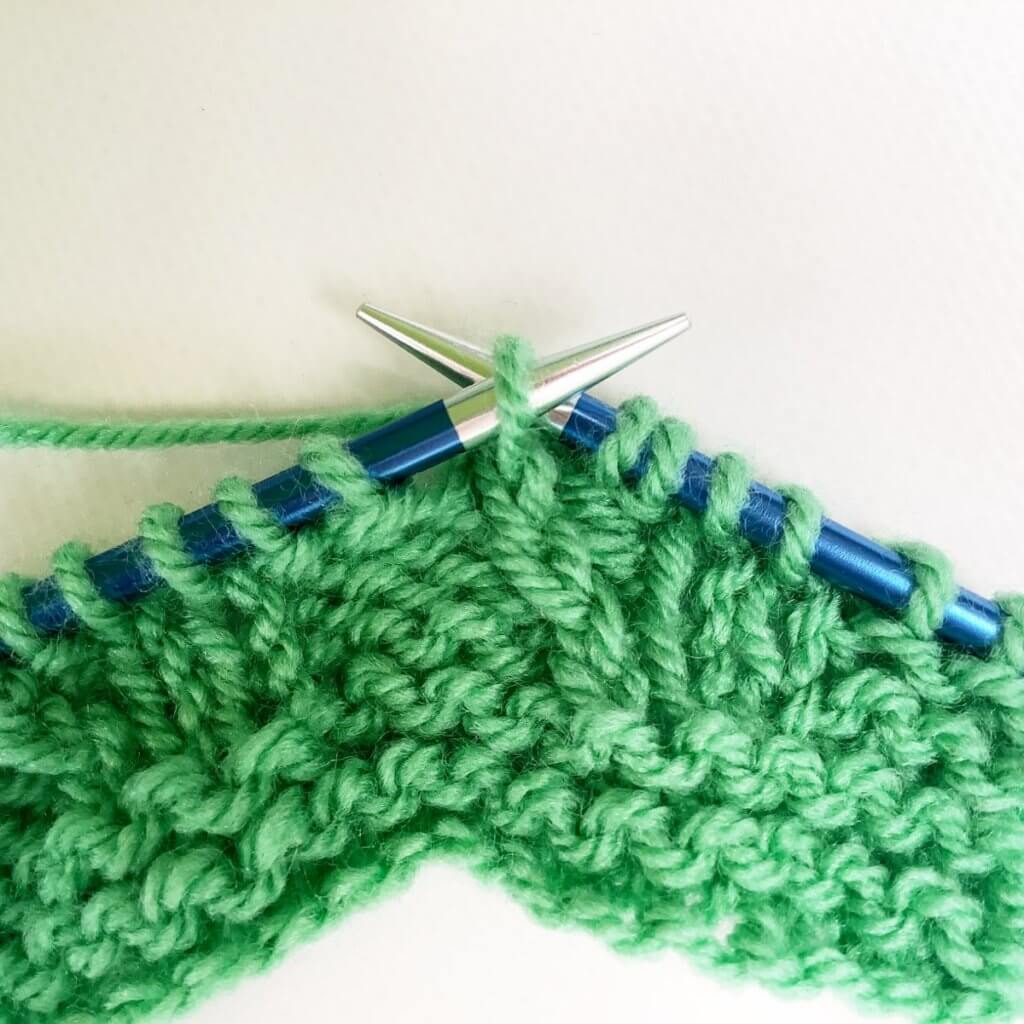
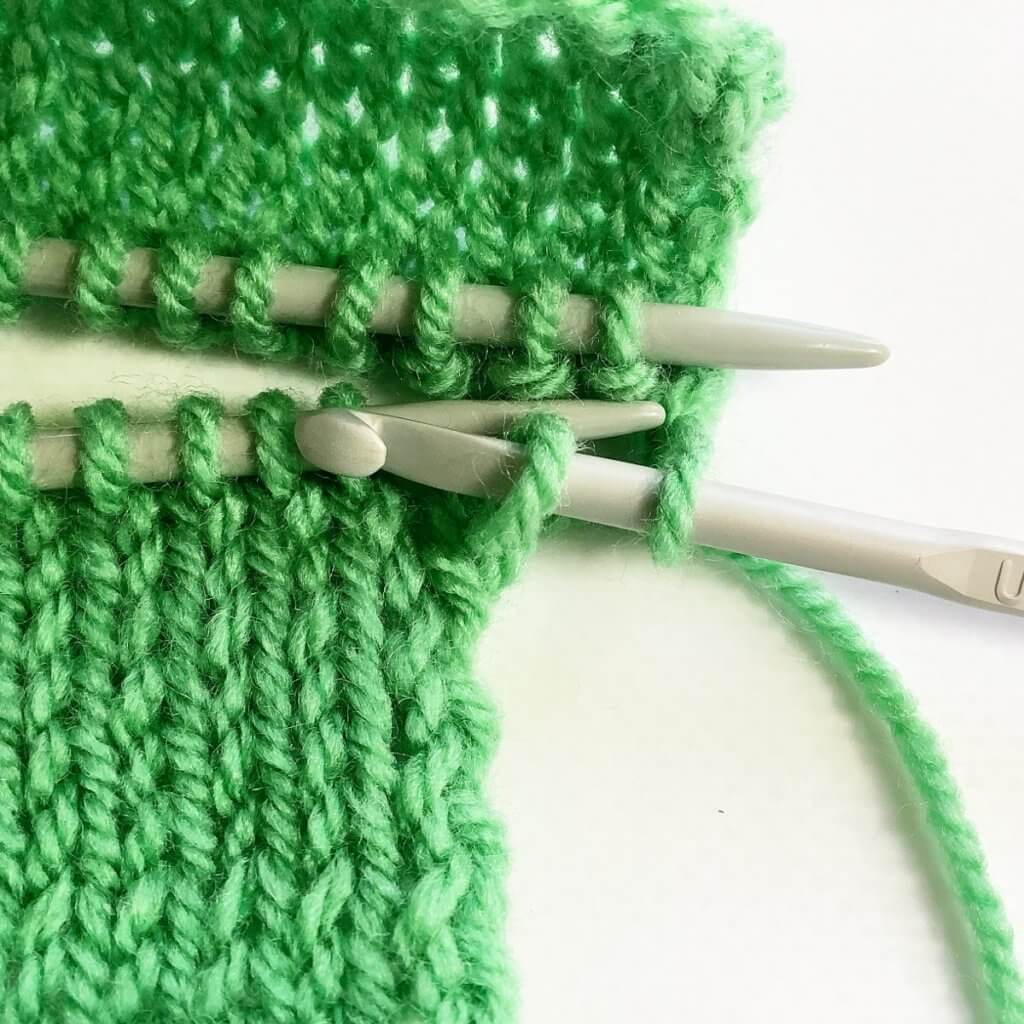
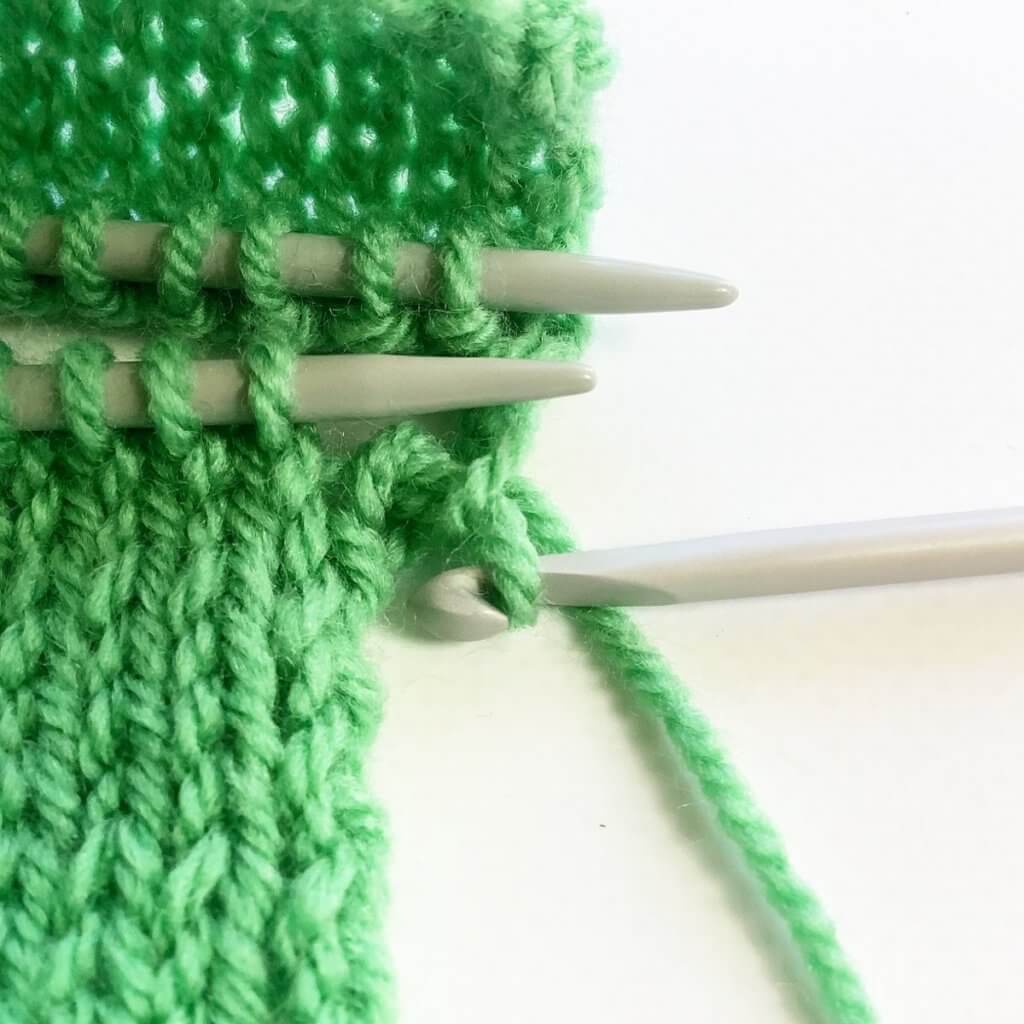
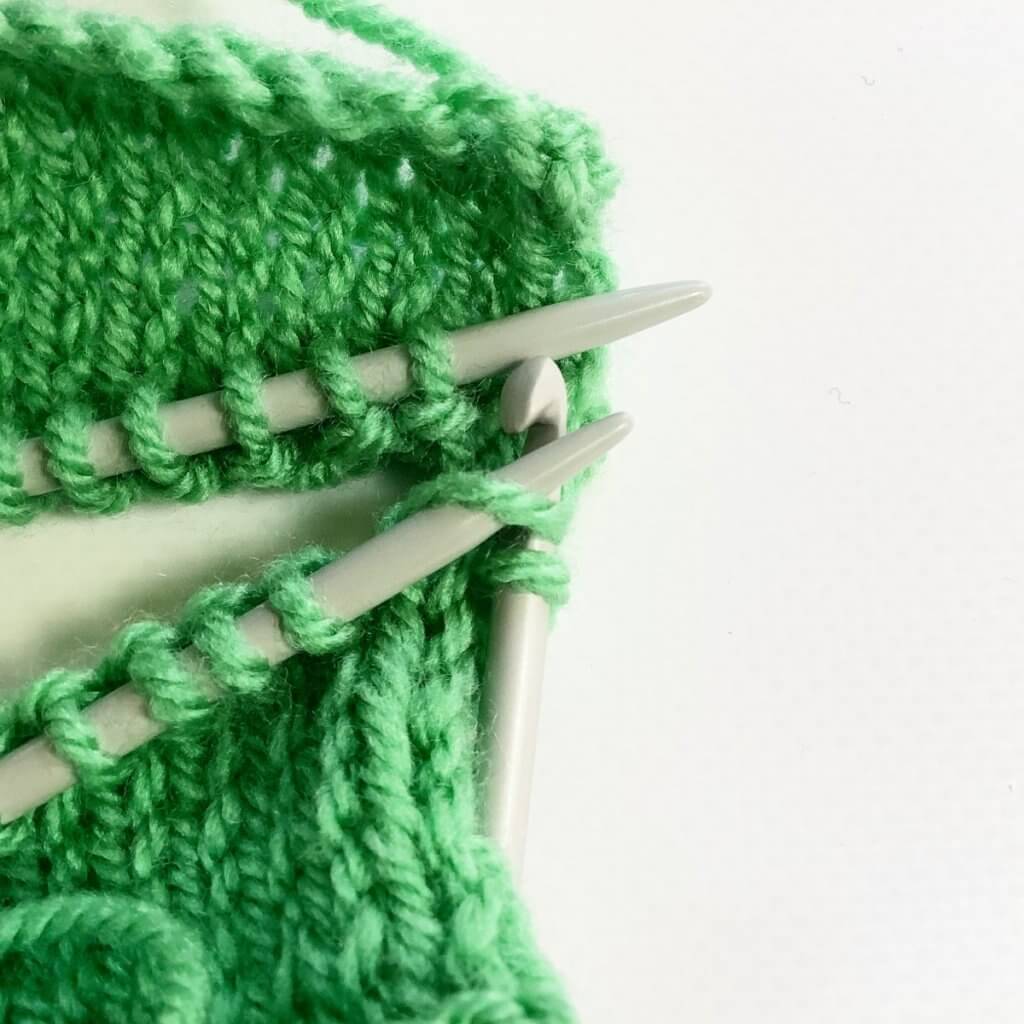
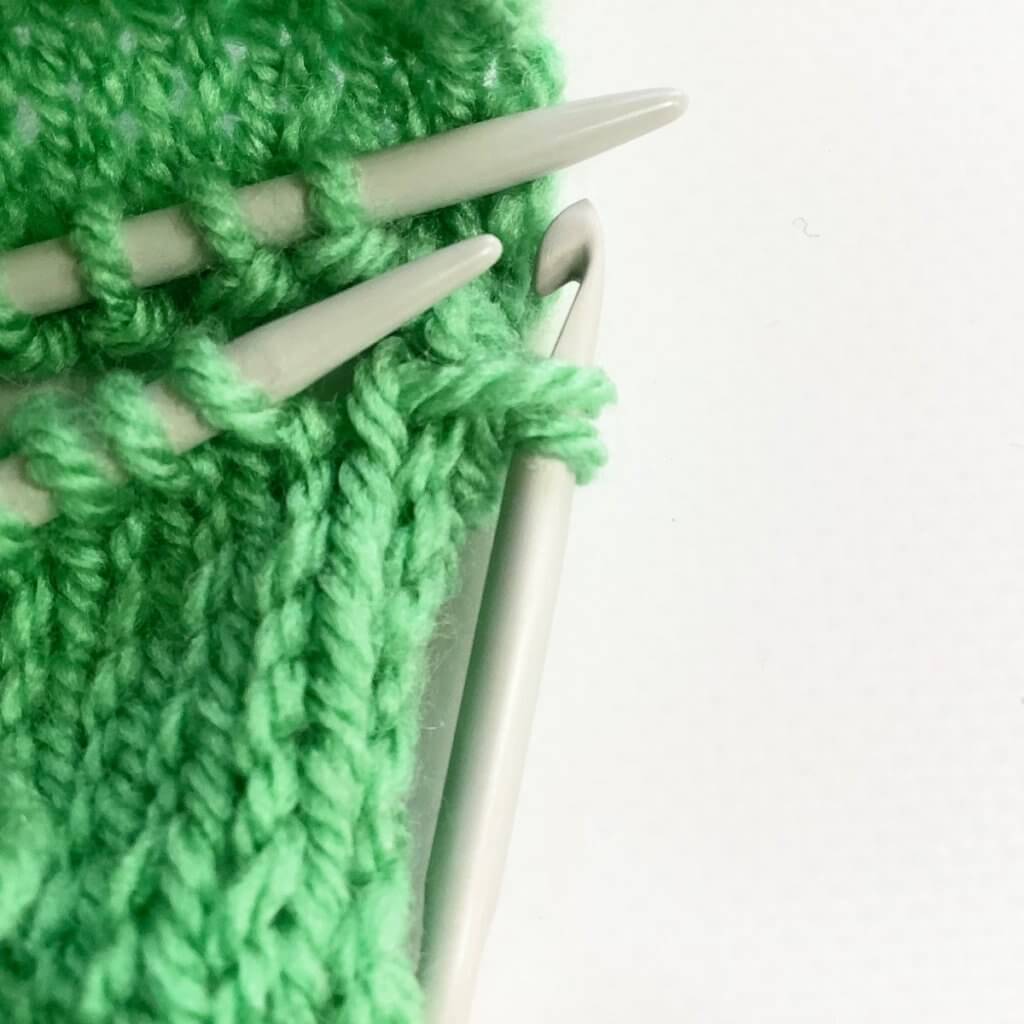
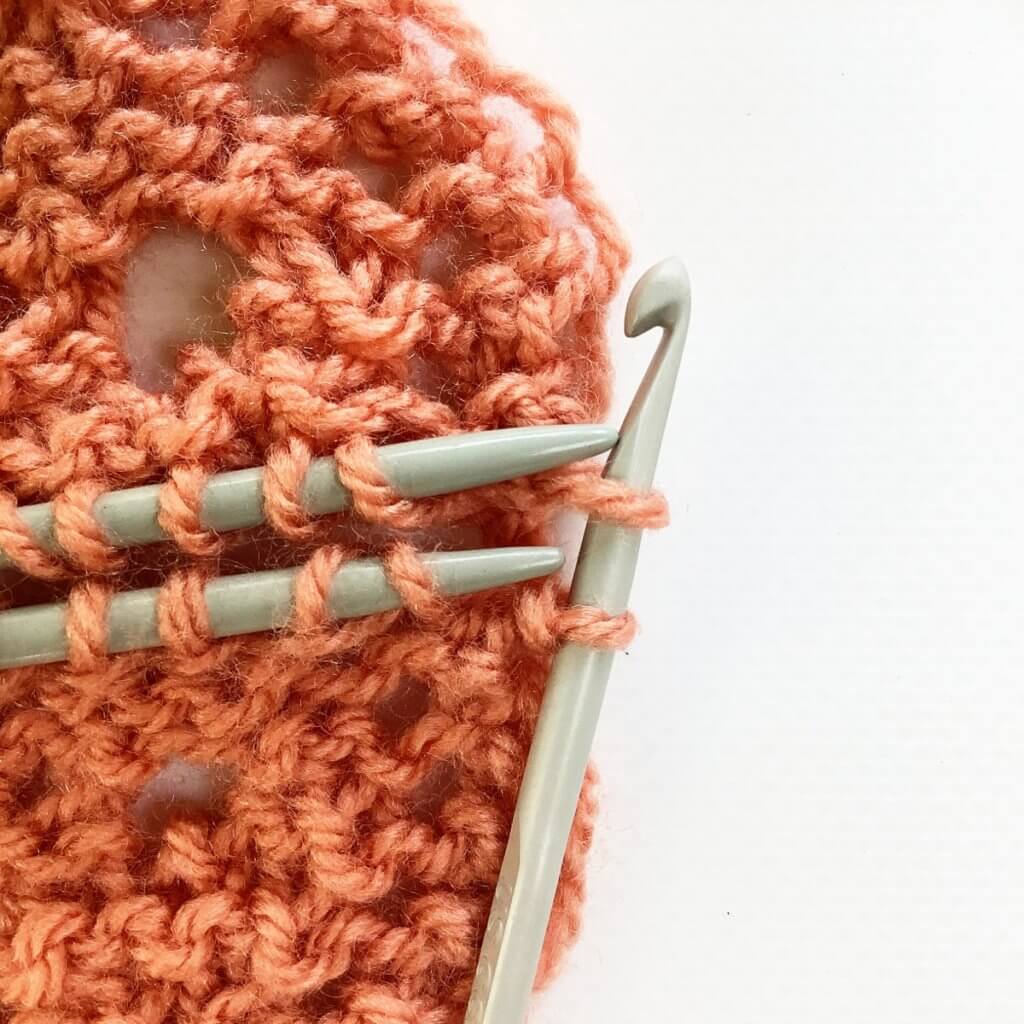
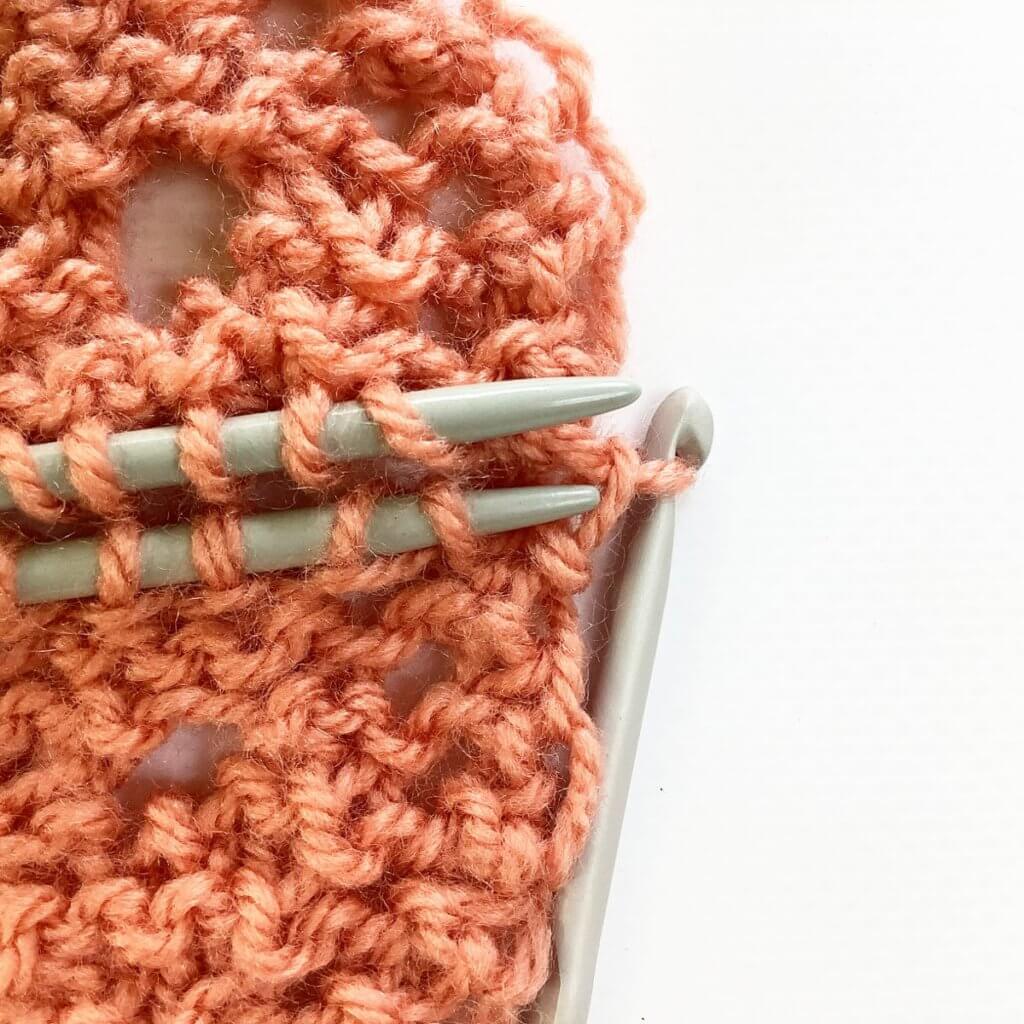
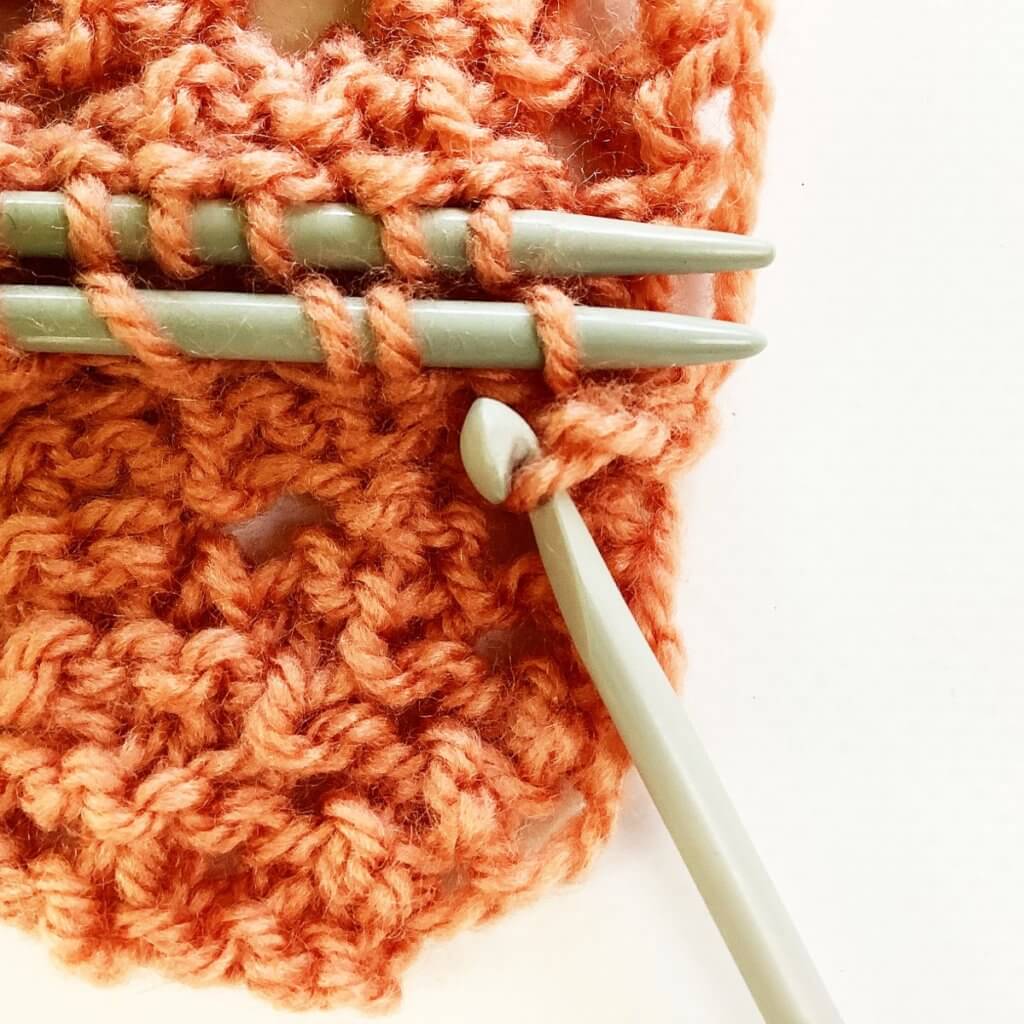
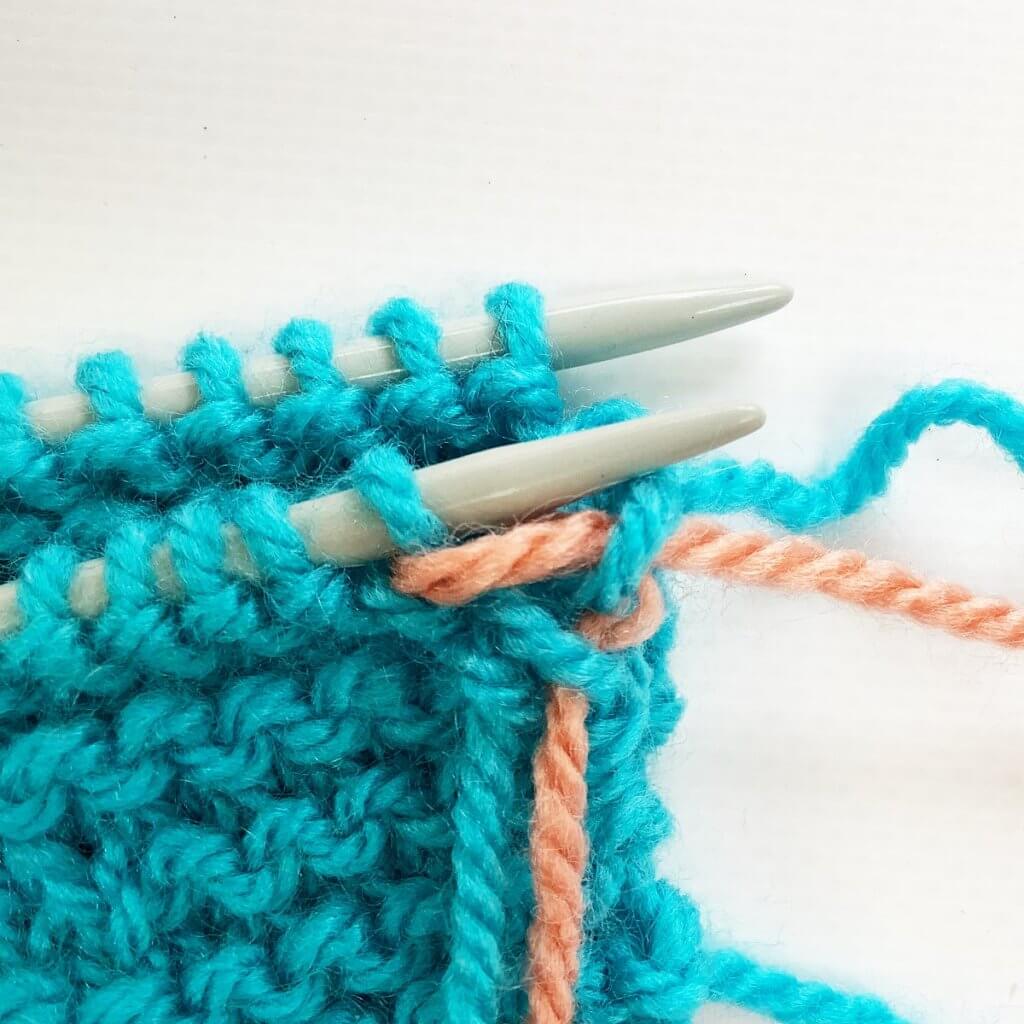
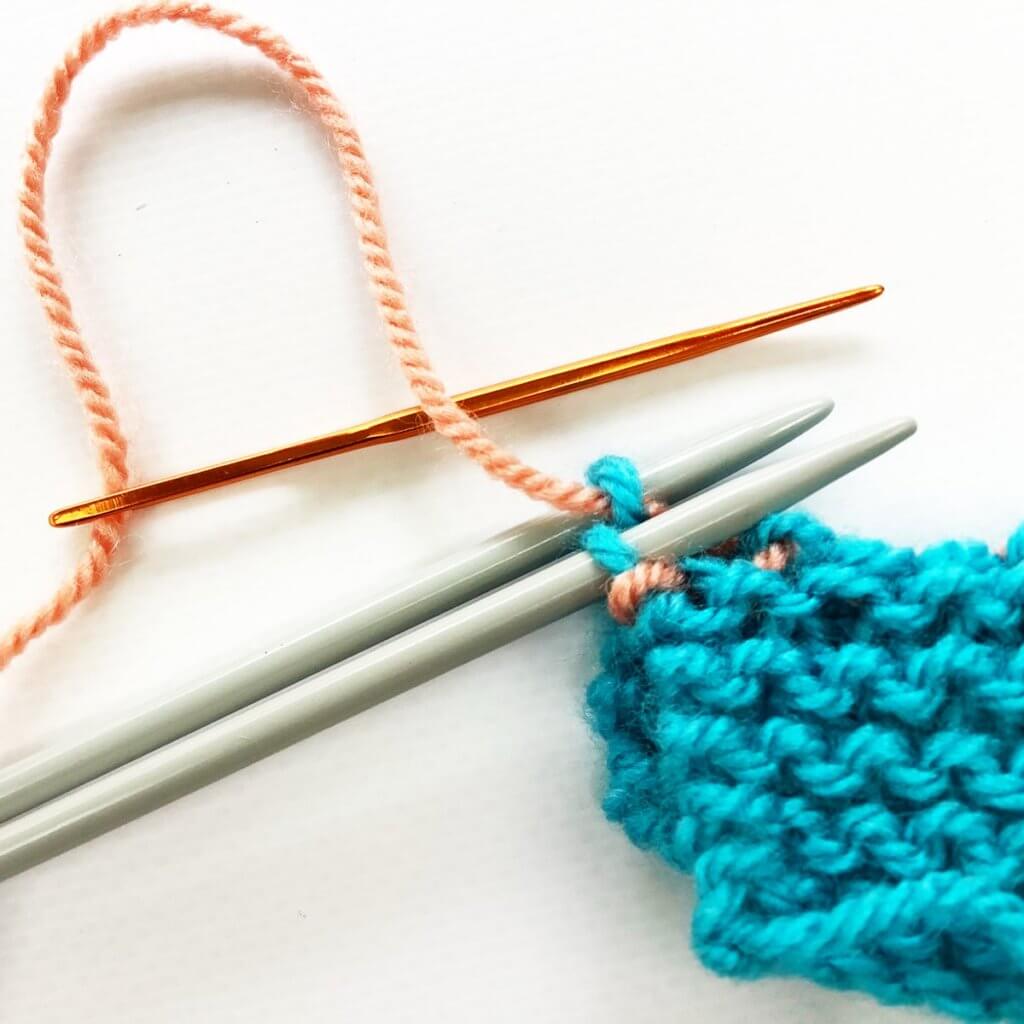
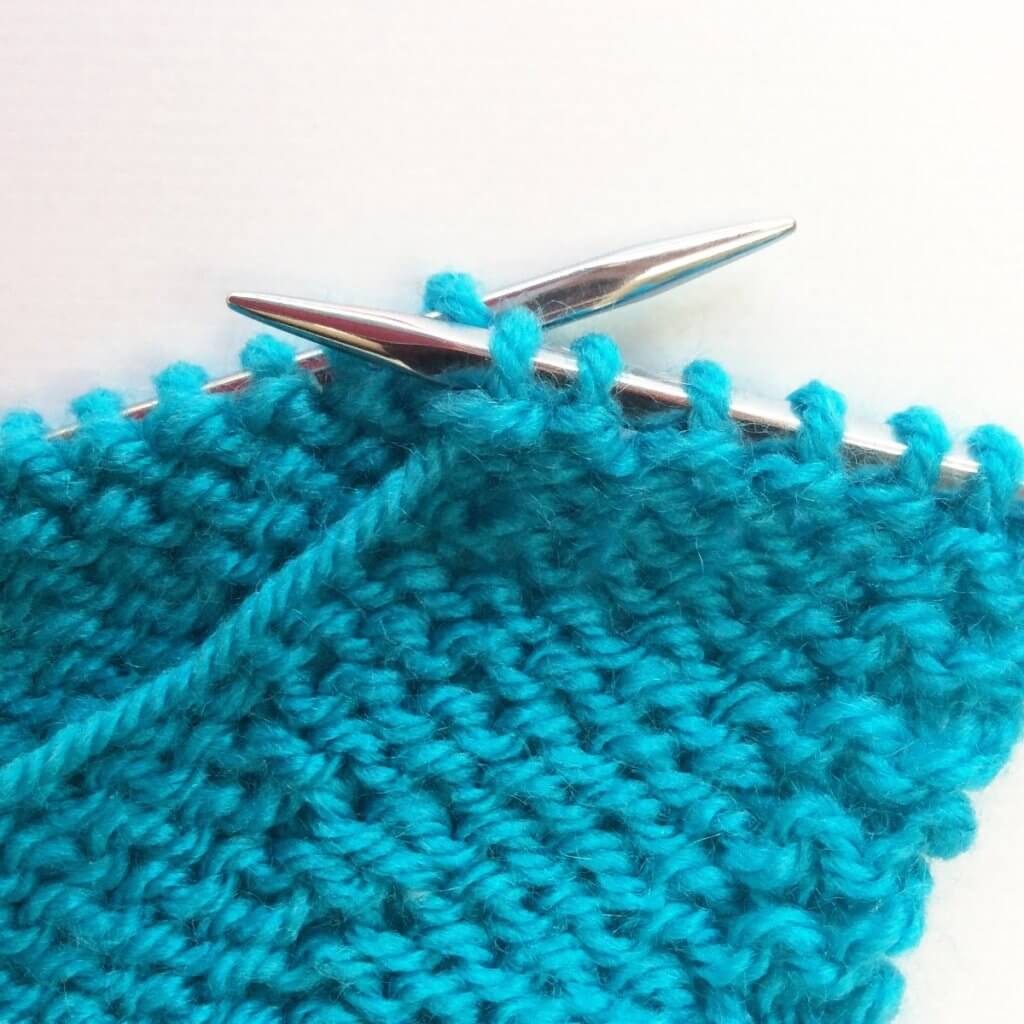
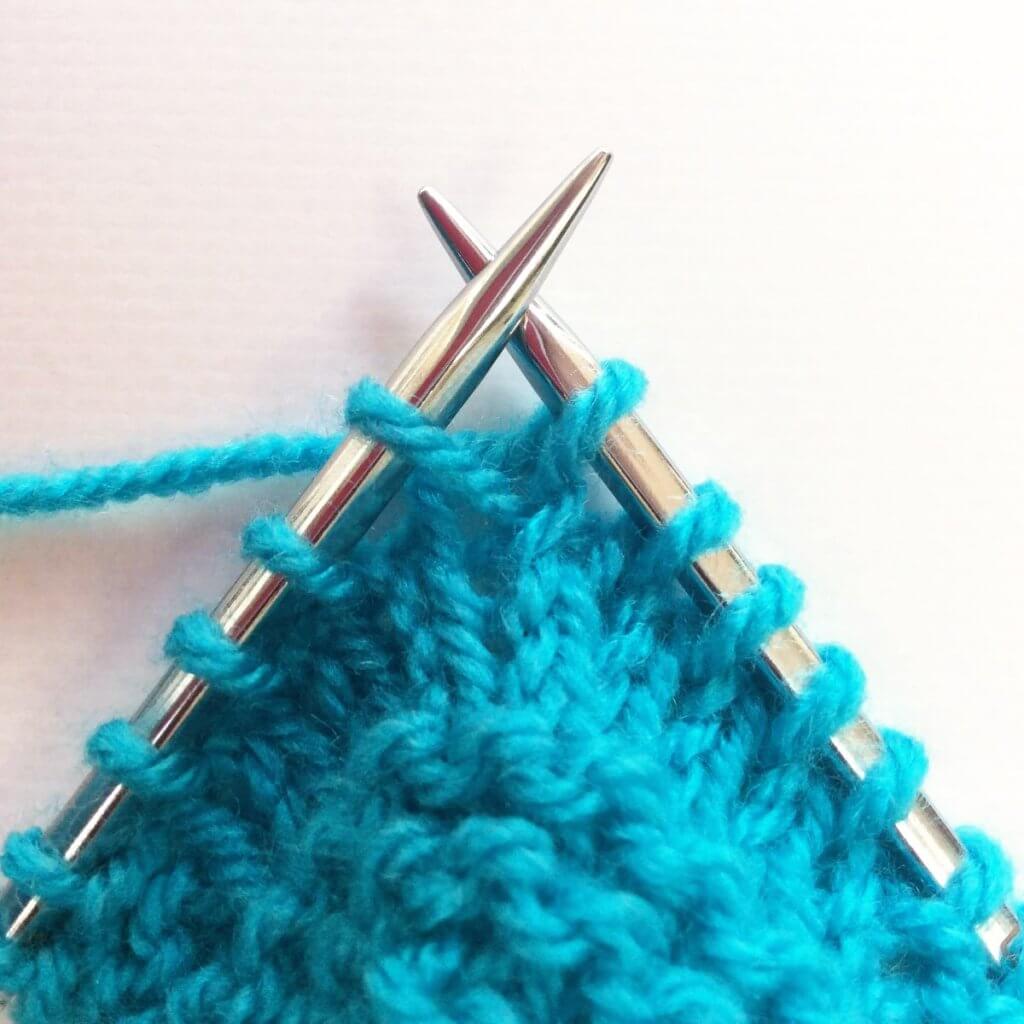
3. The next step is to insert the crochet hook underneath the horizontal thread directly above new yo and pull the thread through the loop already on the hook to make a new knit stitch. Repeat this (for stockinette) as often as needed until you’ve run out of threads to pull through and place the stitch on the left-hand needle.
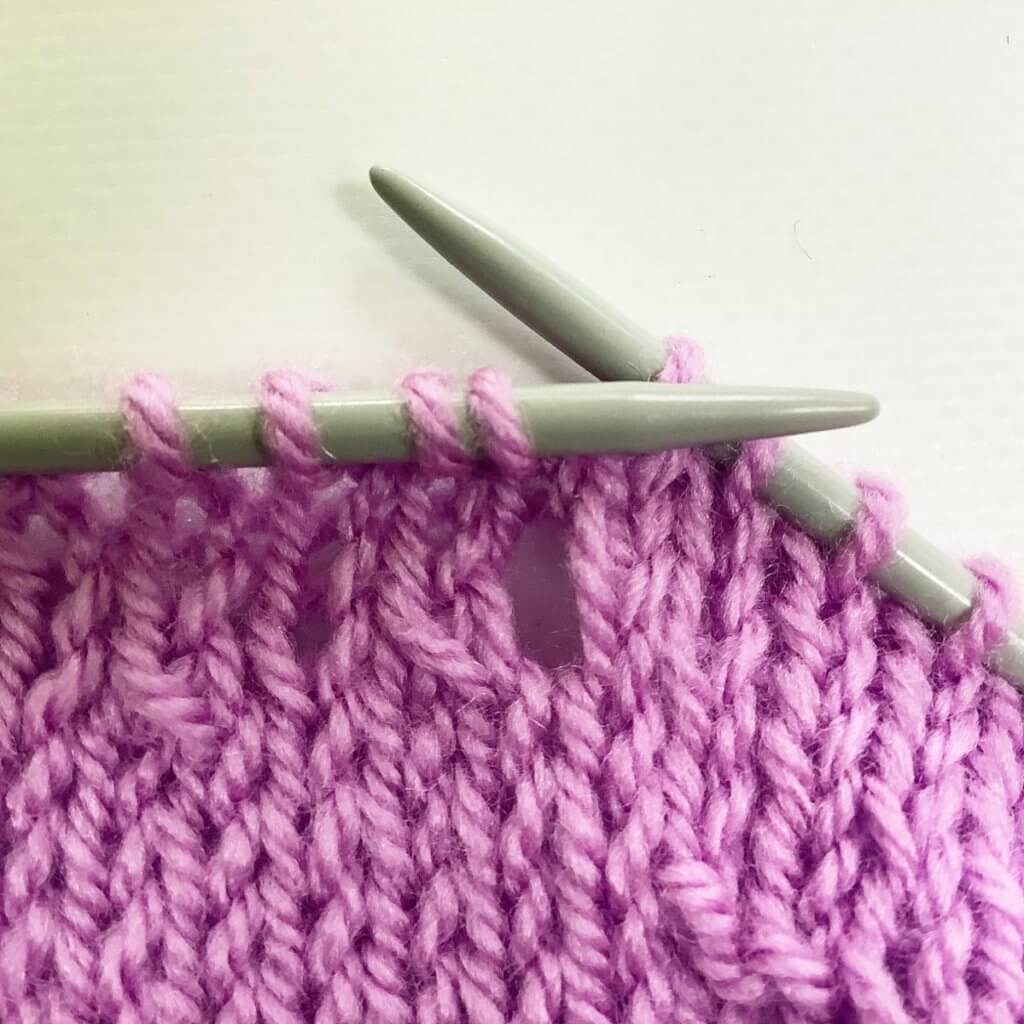
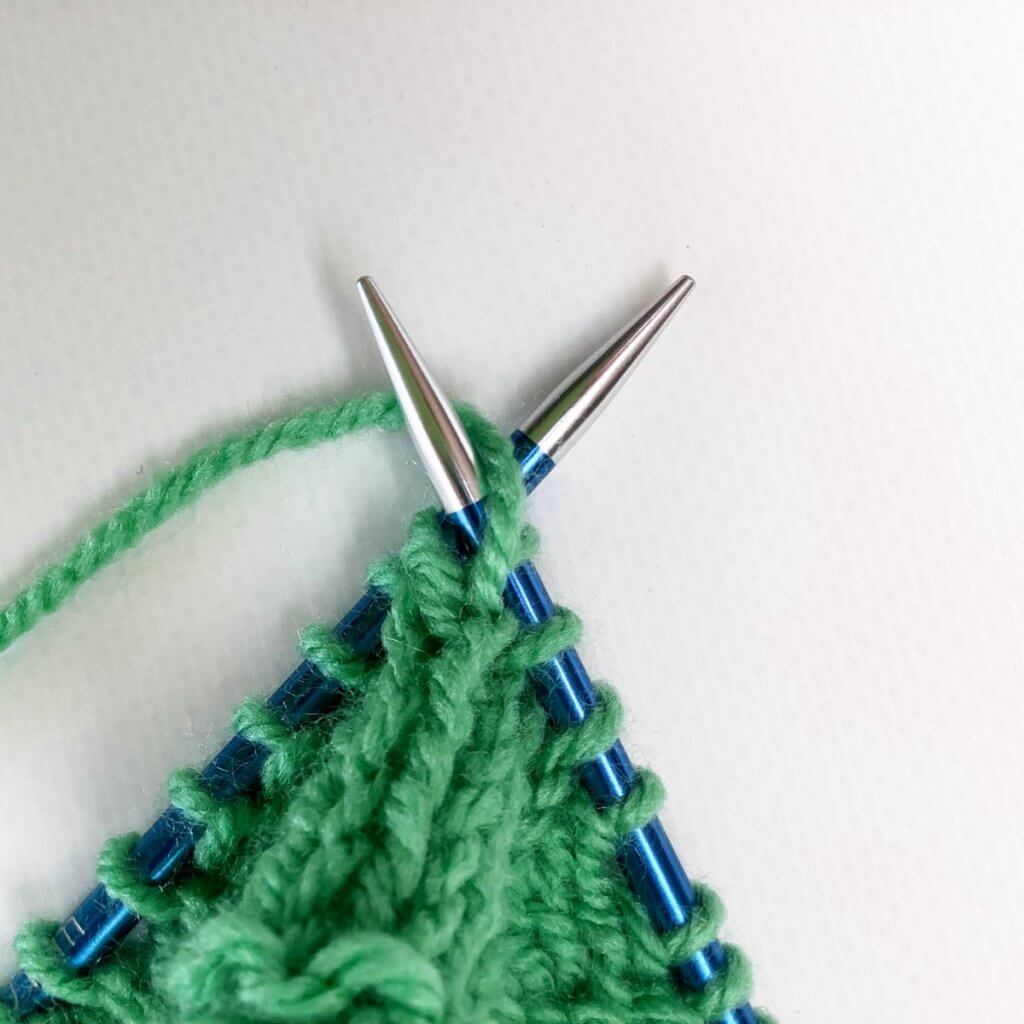
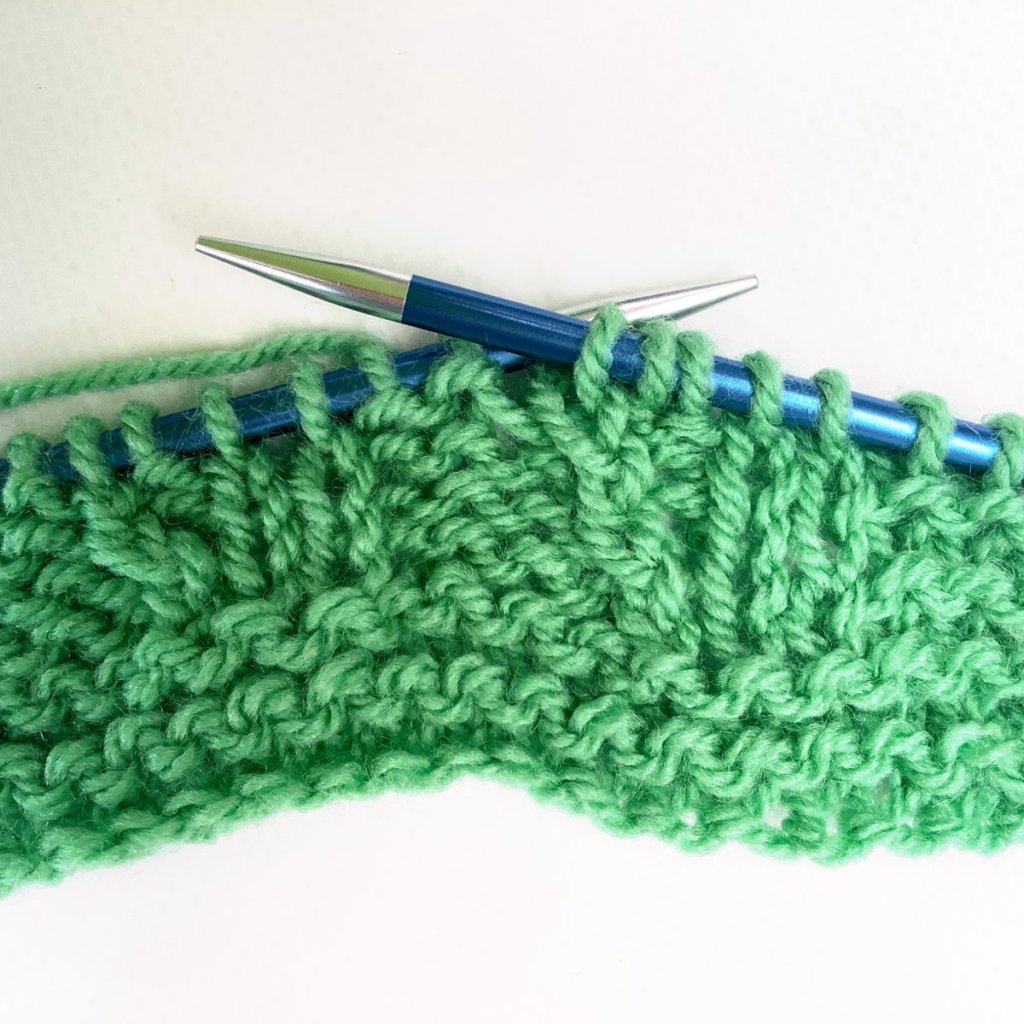
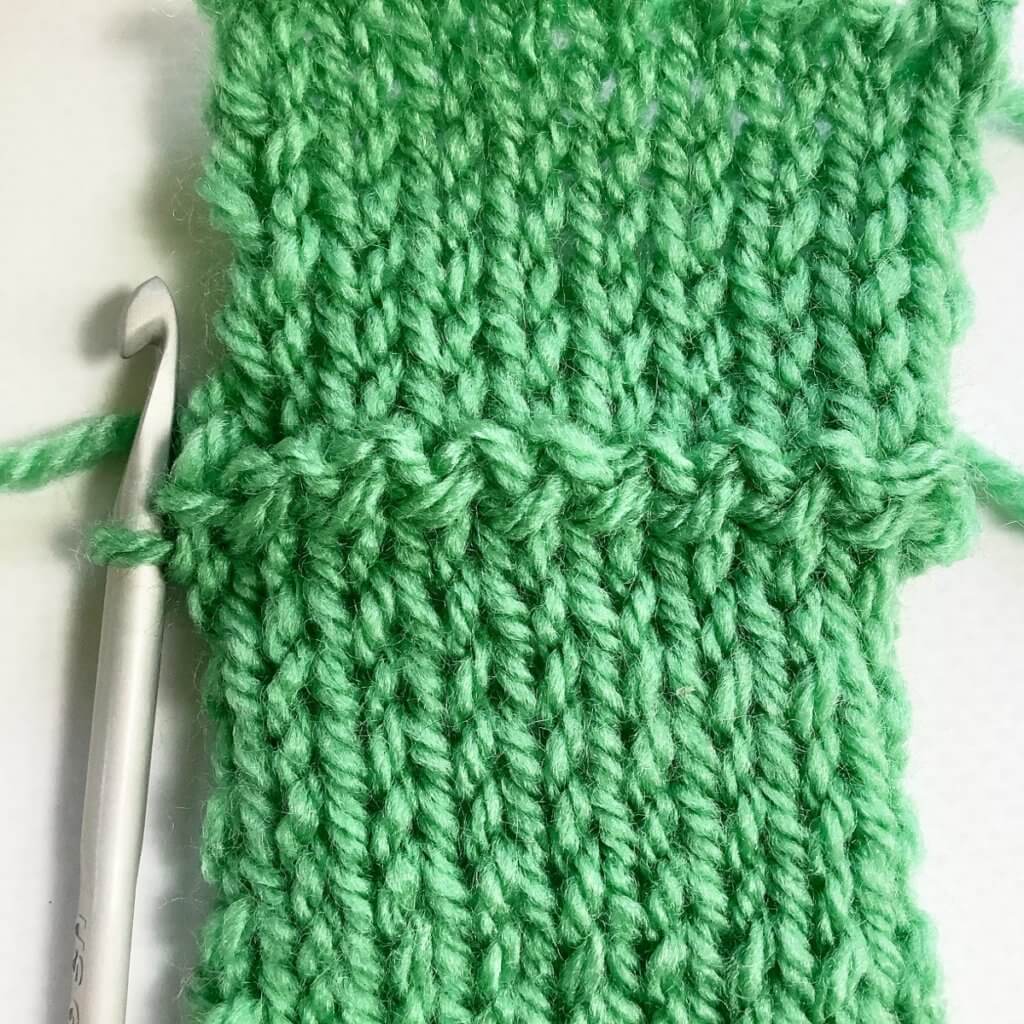
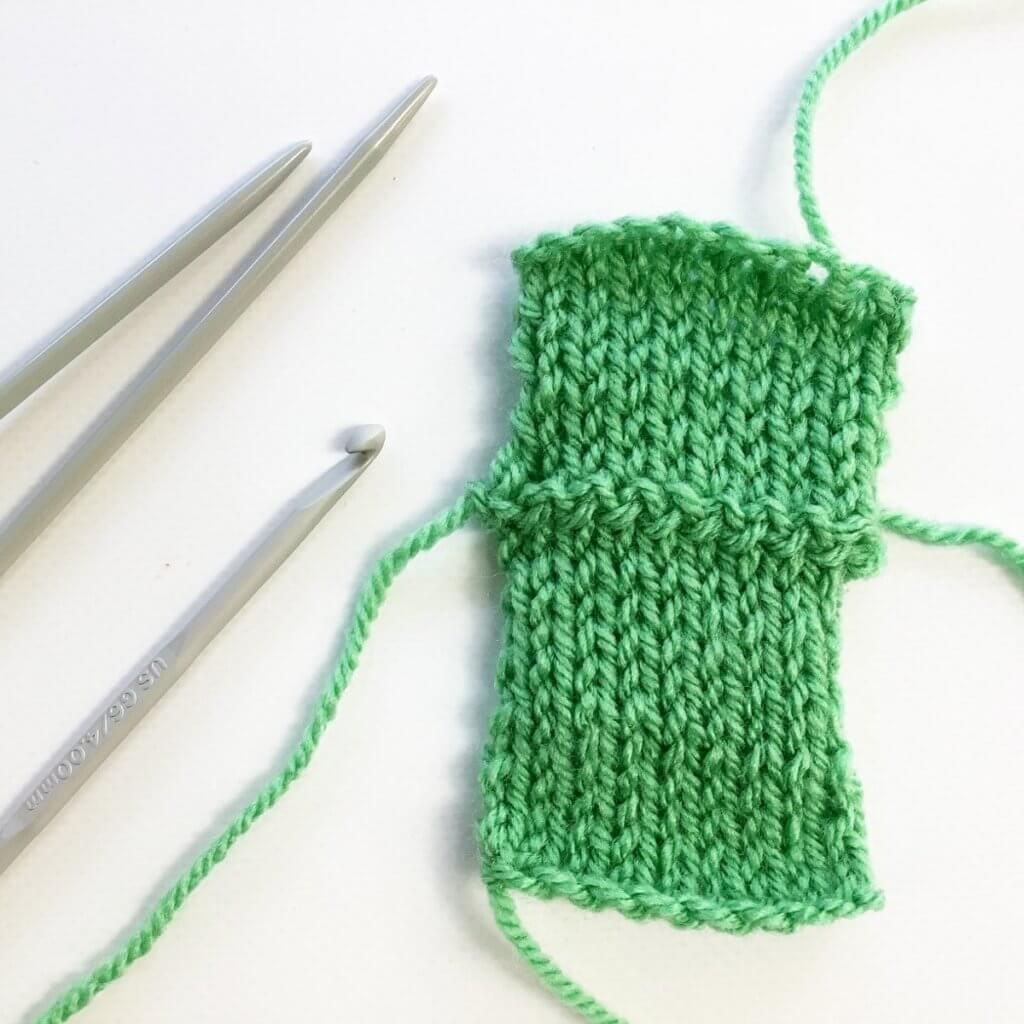
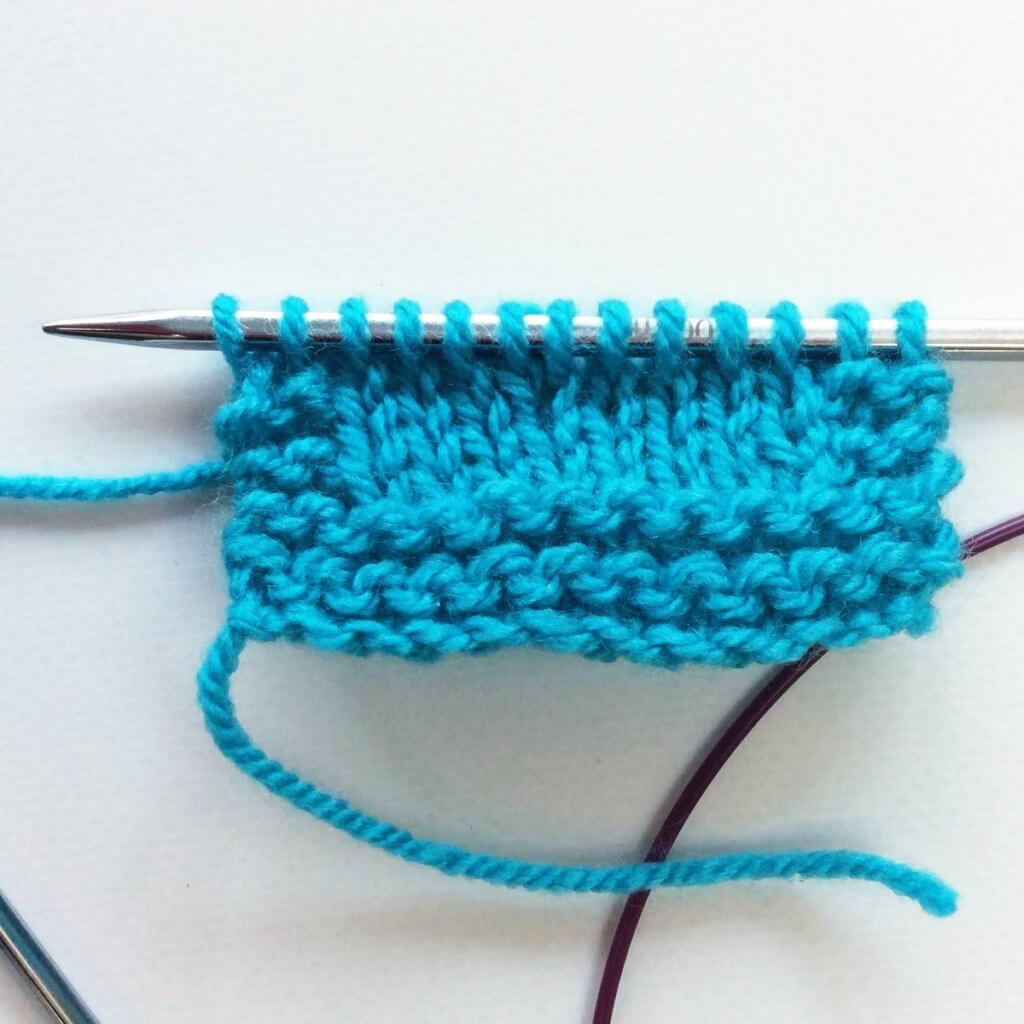
Now you’re ready to continue your knitting!
Thanks to my Patreon supporters for bringing you this freebie! Creating quality patterns and tutorials is a lot of work and resource-intensive. However, I find it important to give you free content like this tutorial. Thanks to the generous support of my Patreon supporters, I can make it happen. Thank you, patrons! Click here to join, or click here to read more about La Visch Designs on Patreon.
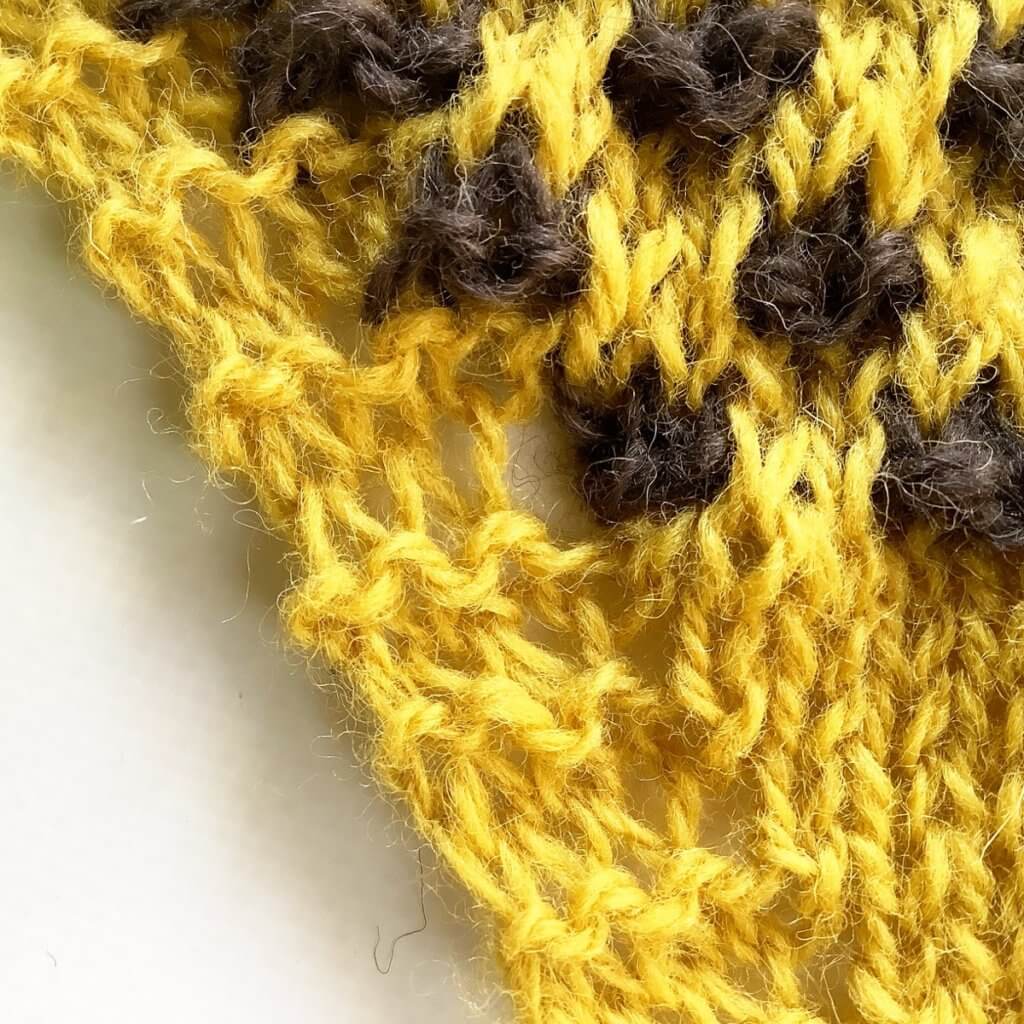
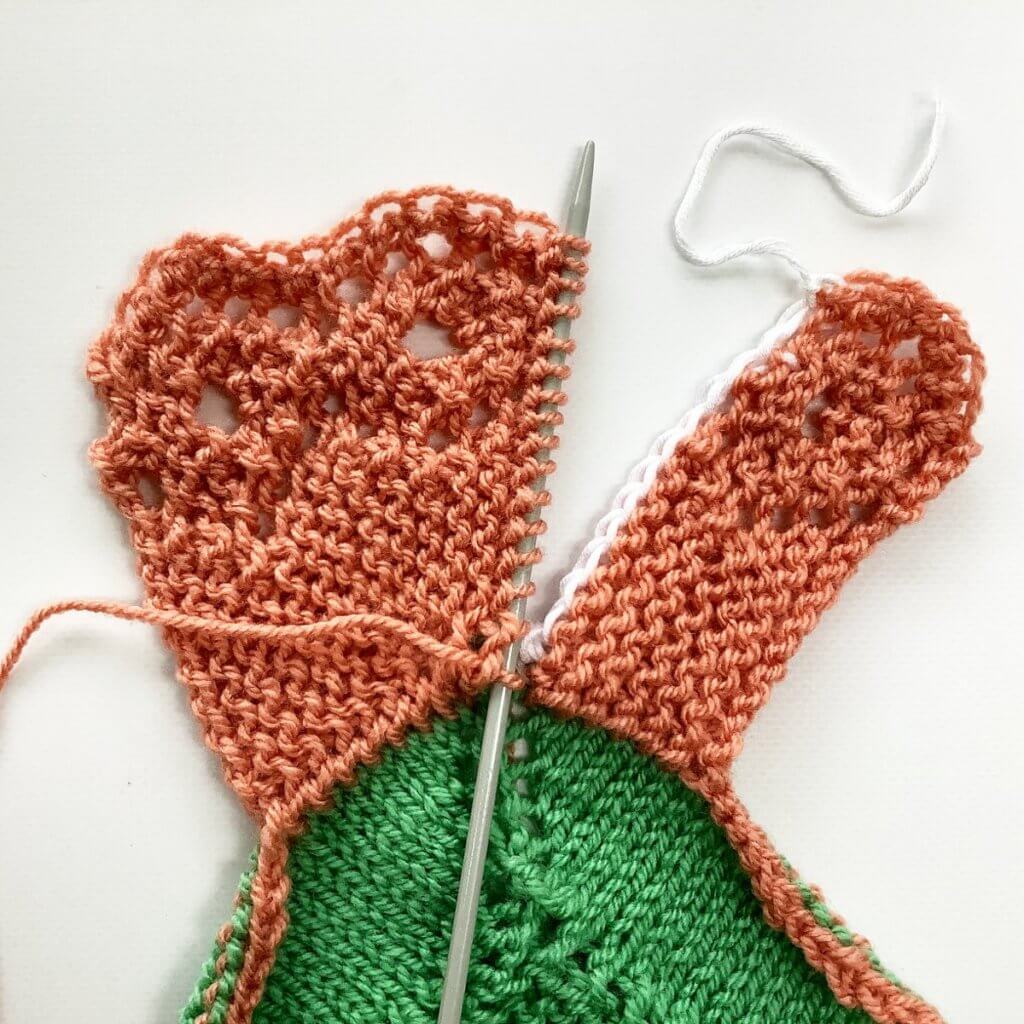
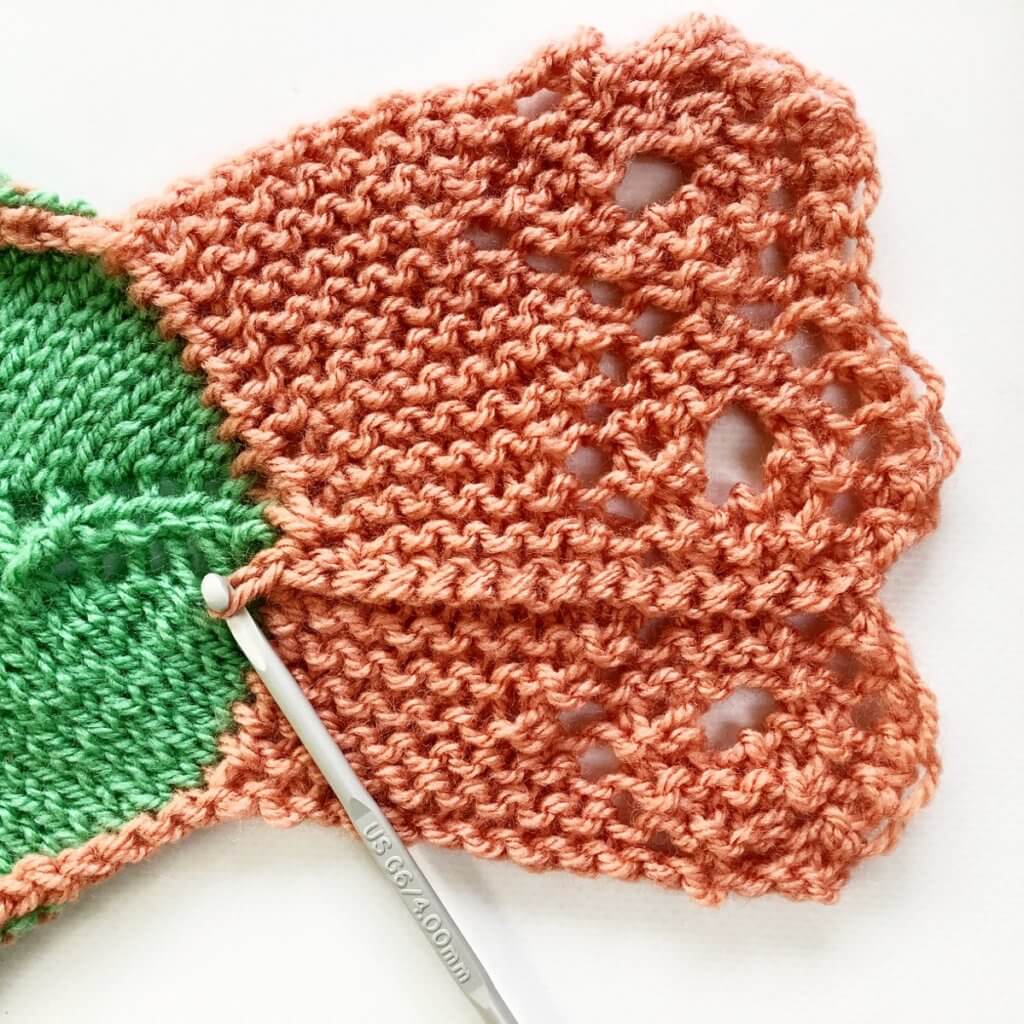
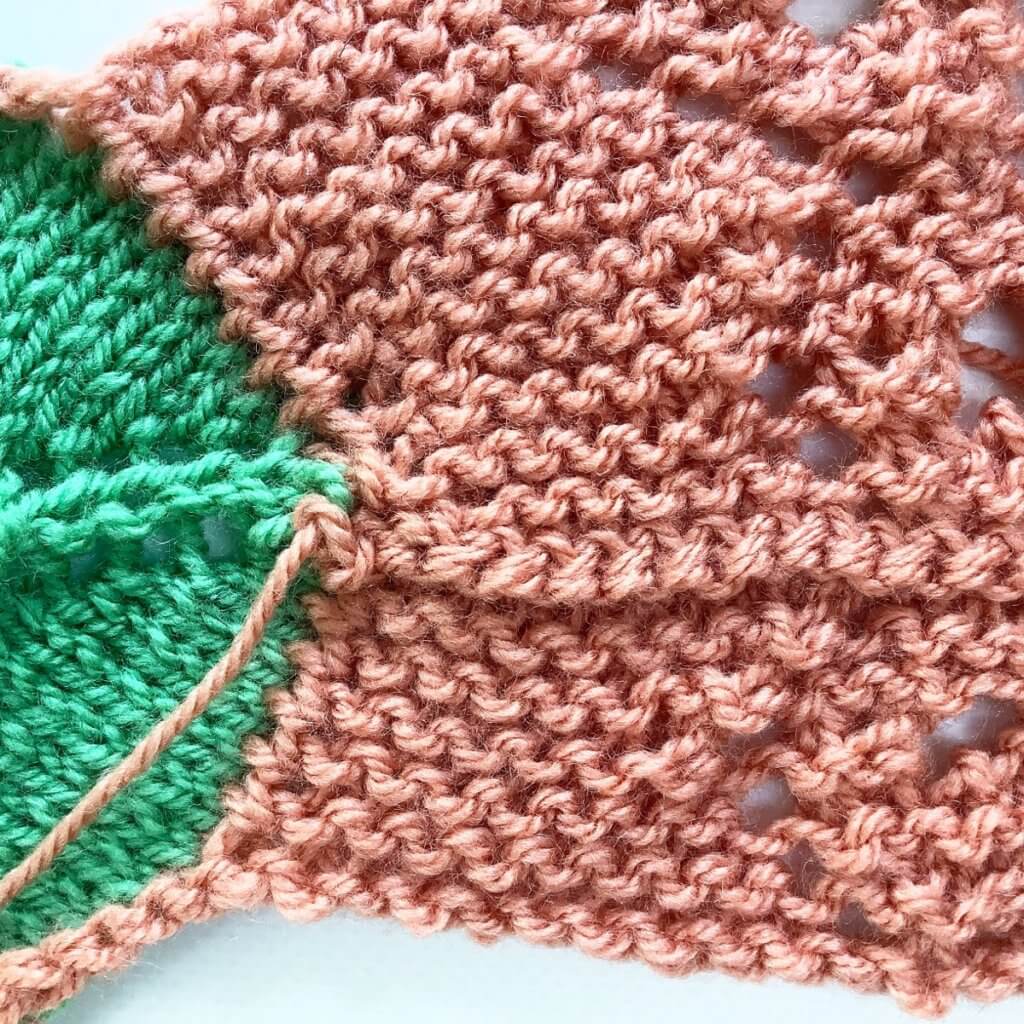
In this new design, I’m using mosaic slip-stitch patterning in the border. The beauty of this type of colorwork is that it is worked with a single color in a single row. In other words: An RS and a WS row are worked in the main color (MC). After working these two rows, the MC is dropped, and an RS and a WS row are worked with the contrast color (CC) yarn while slipping the sts indicated.
However, I didn’t want to use the CC yarn in the garter stitch border of 3 stitches on each side of the shawl. This caused the gaps to happen that you can see at the bottom dot:
So, of course, I had to think of a way to prevent these! I settled on a “wrap & turn” like approach, similar to w&t as in working traditional short-rows. Read on for the step by step how-to!
Materials used
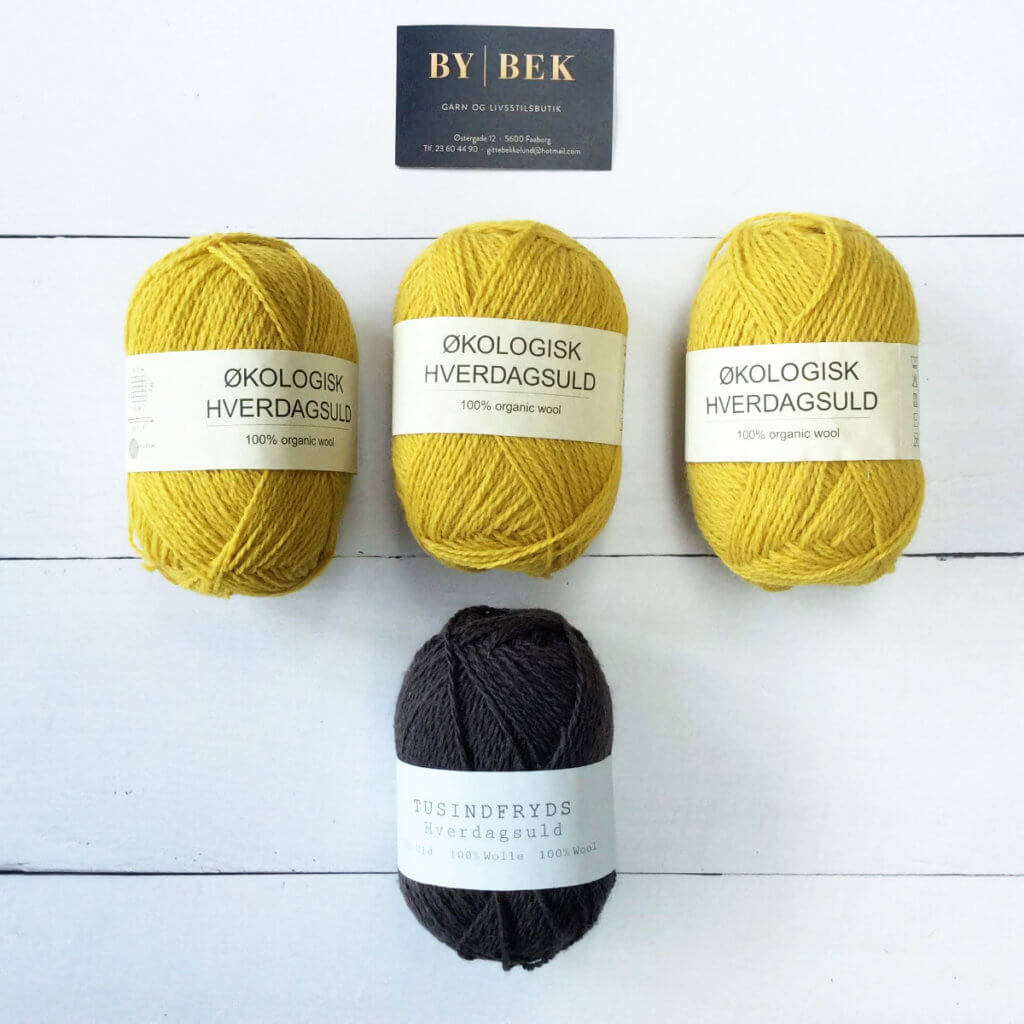
Yarn: The yellow yarn is Økologisk Hverdagsuld (“organic everyday wool”) by Camarose Dk. The brown is HverdagsUld by Tusindfryd. I got these at the lovely yarn store “By Bek” in Fåborg, Denmark when I was there on vacation.
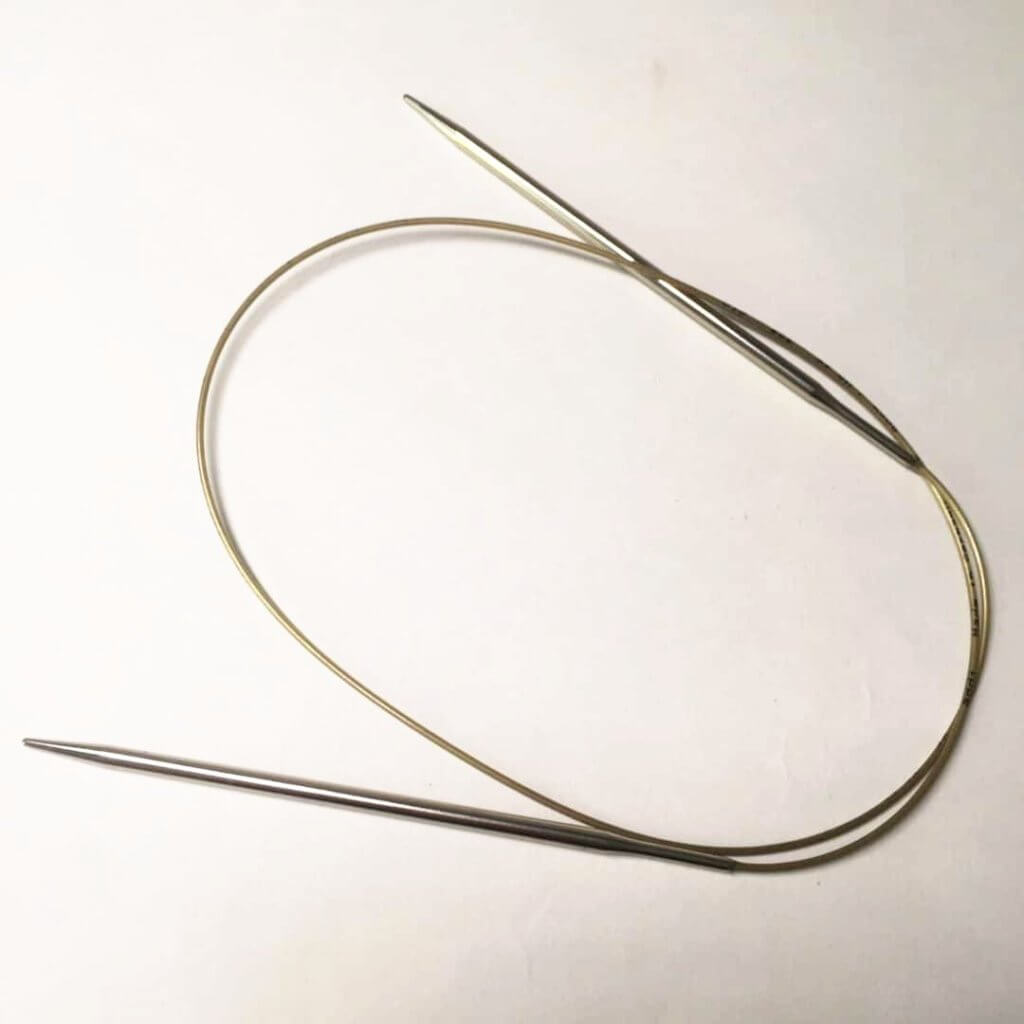
Needles: * Addi Circular Needles, pictured here in the 4 mm (US 6) size, with 80 cm (32 inches) cable.
Preventing gaps on the right step by step
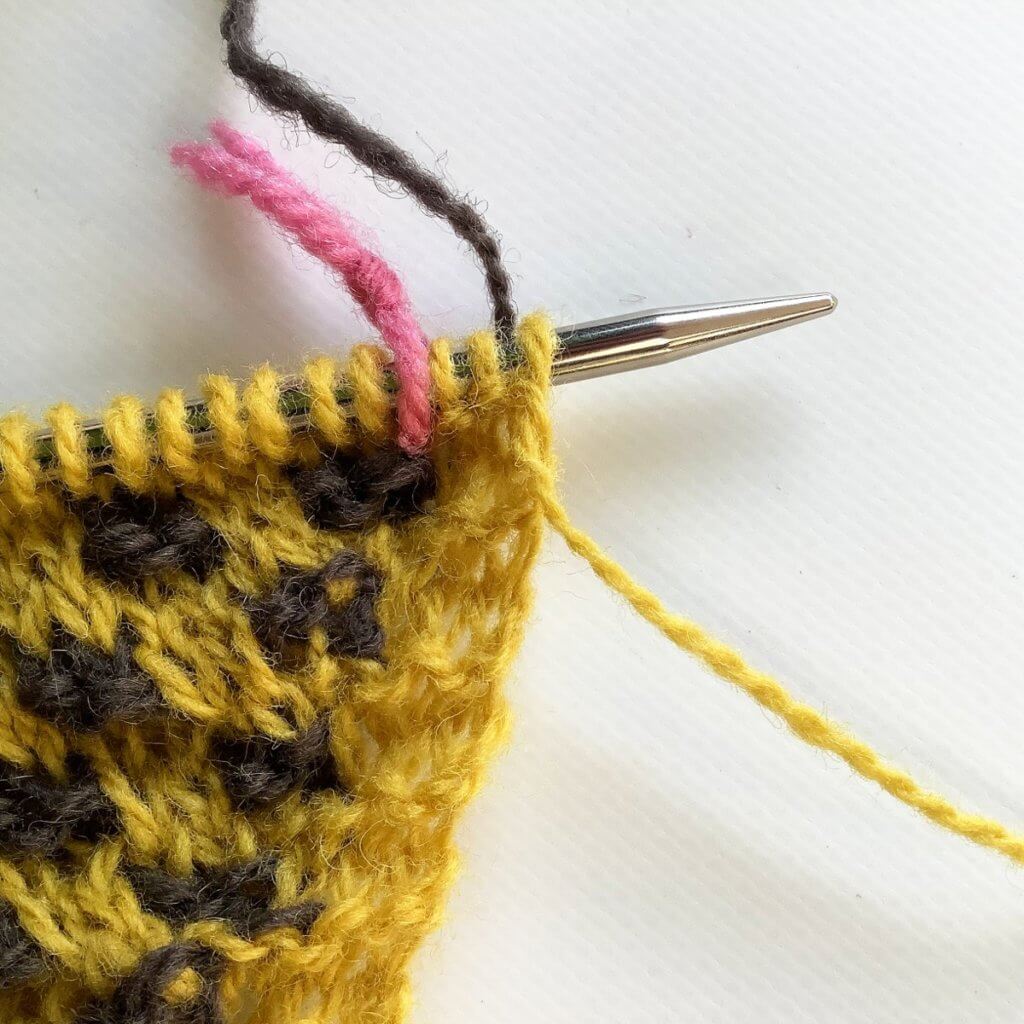
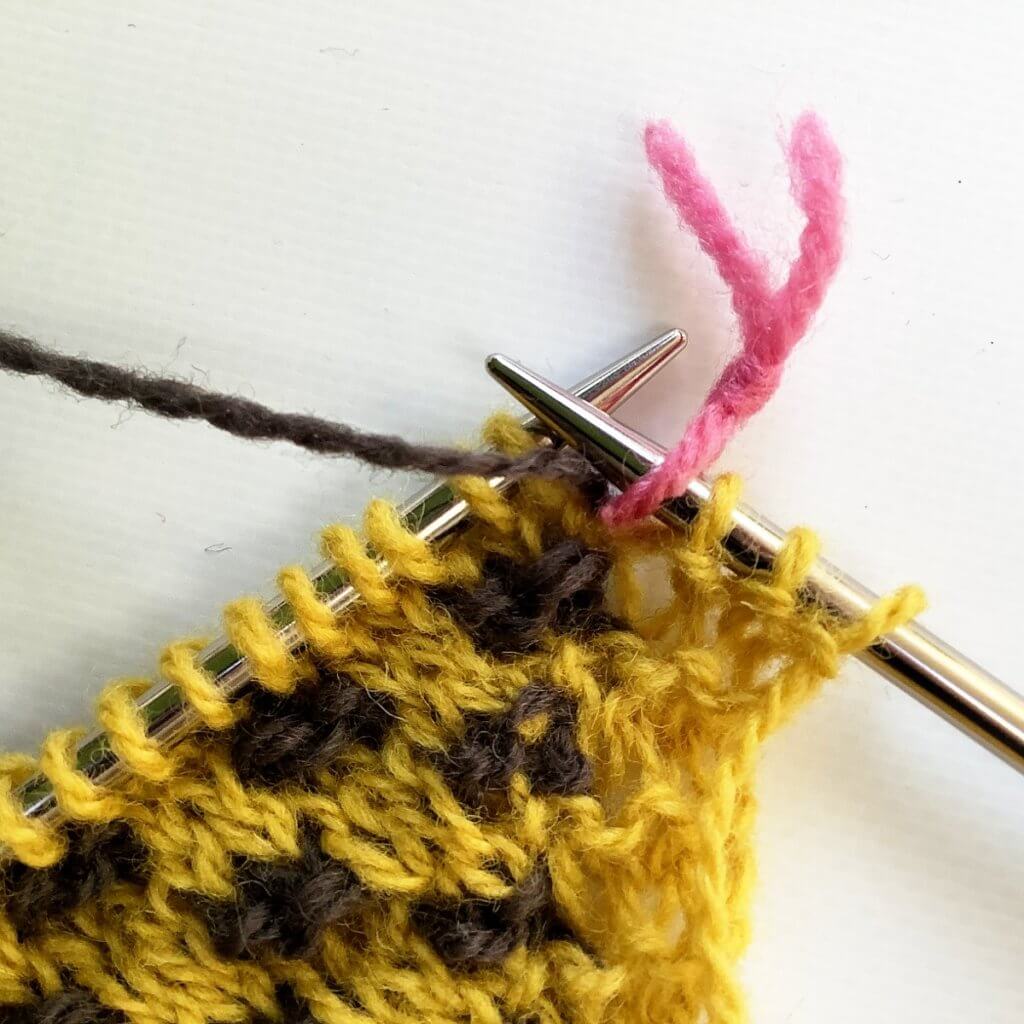
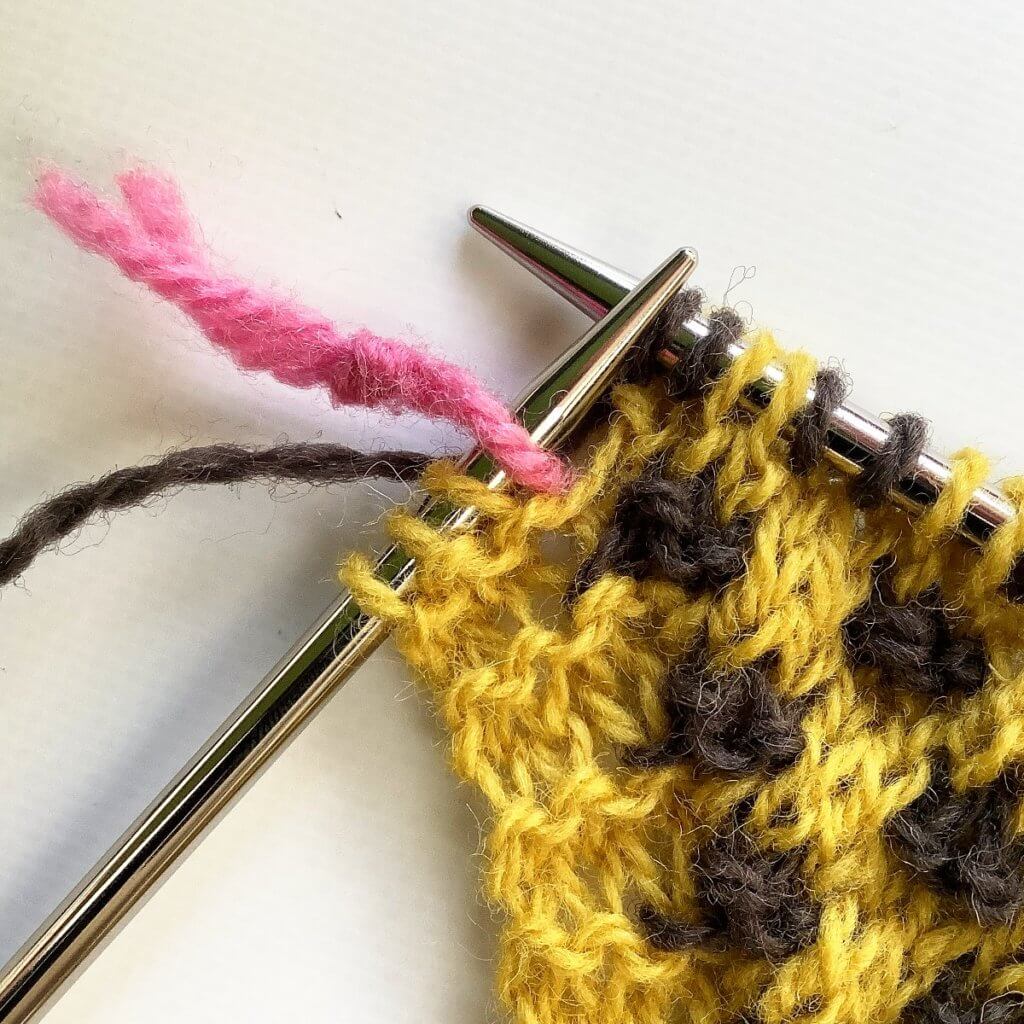
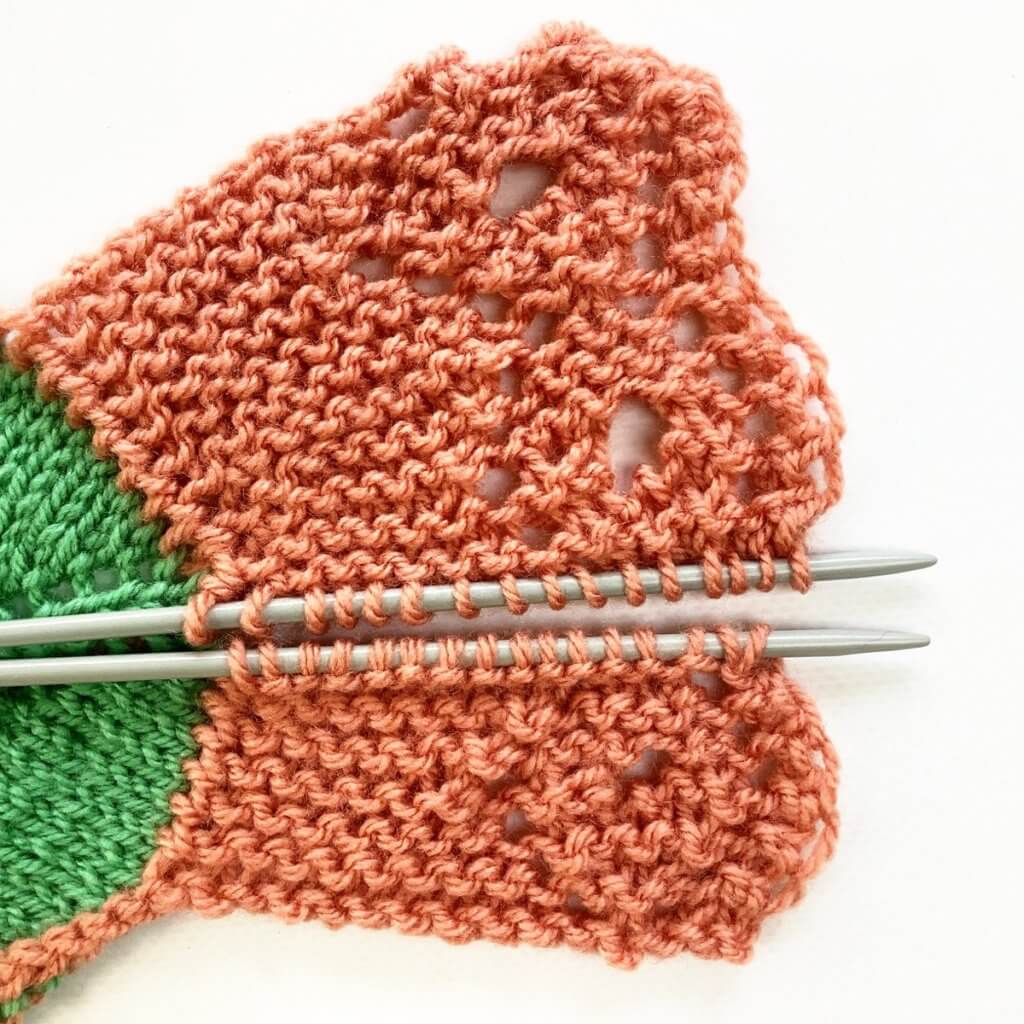
1. In this row, I’m about to start the RS row using the CC yarn. The CC yarn tail is located 3 stitches in from the edge of the work, at the WS of the fabric.
2. First, we have to reach that CC yarn tail. To do so, slip the 3 MC stitches purlwise as well as the stitch marker to the right-hand needle.
3. Next, bring the CC between the needles to the front of the work.
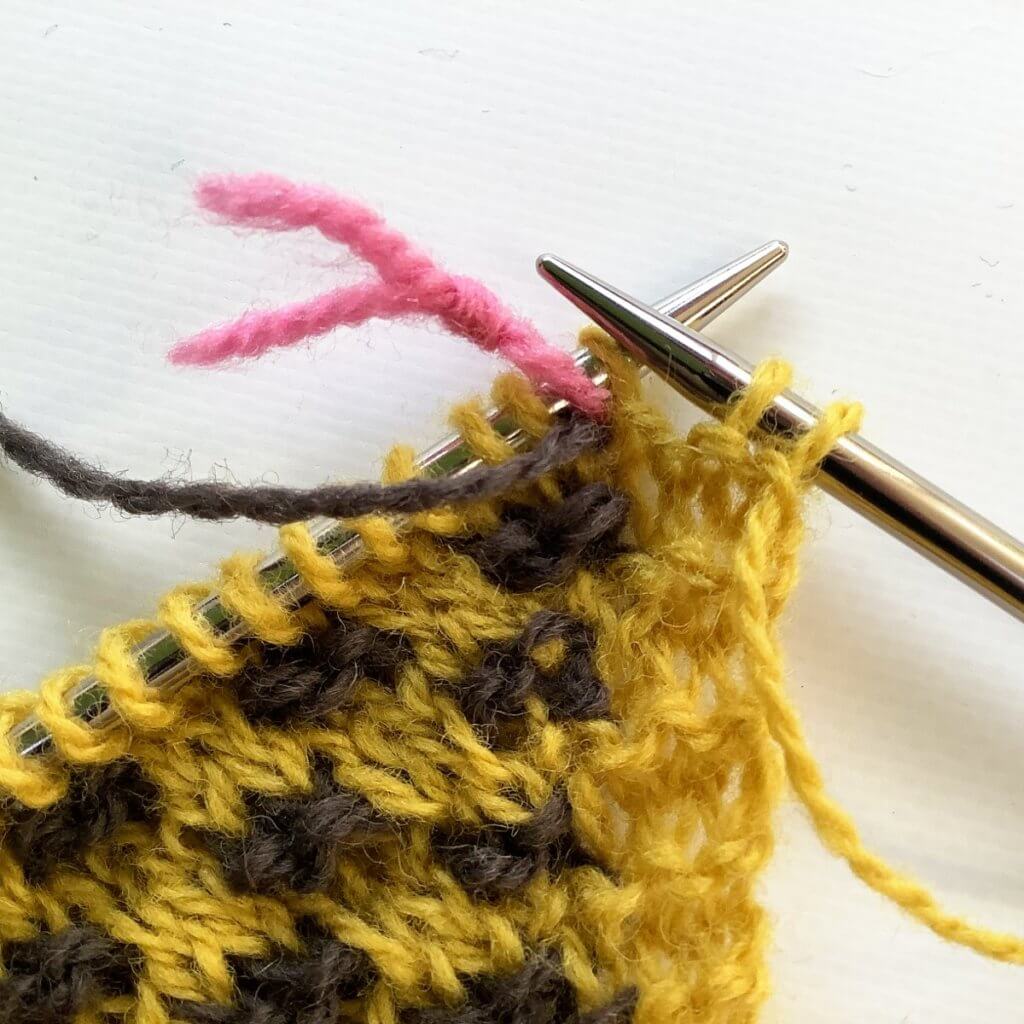
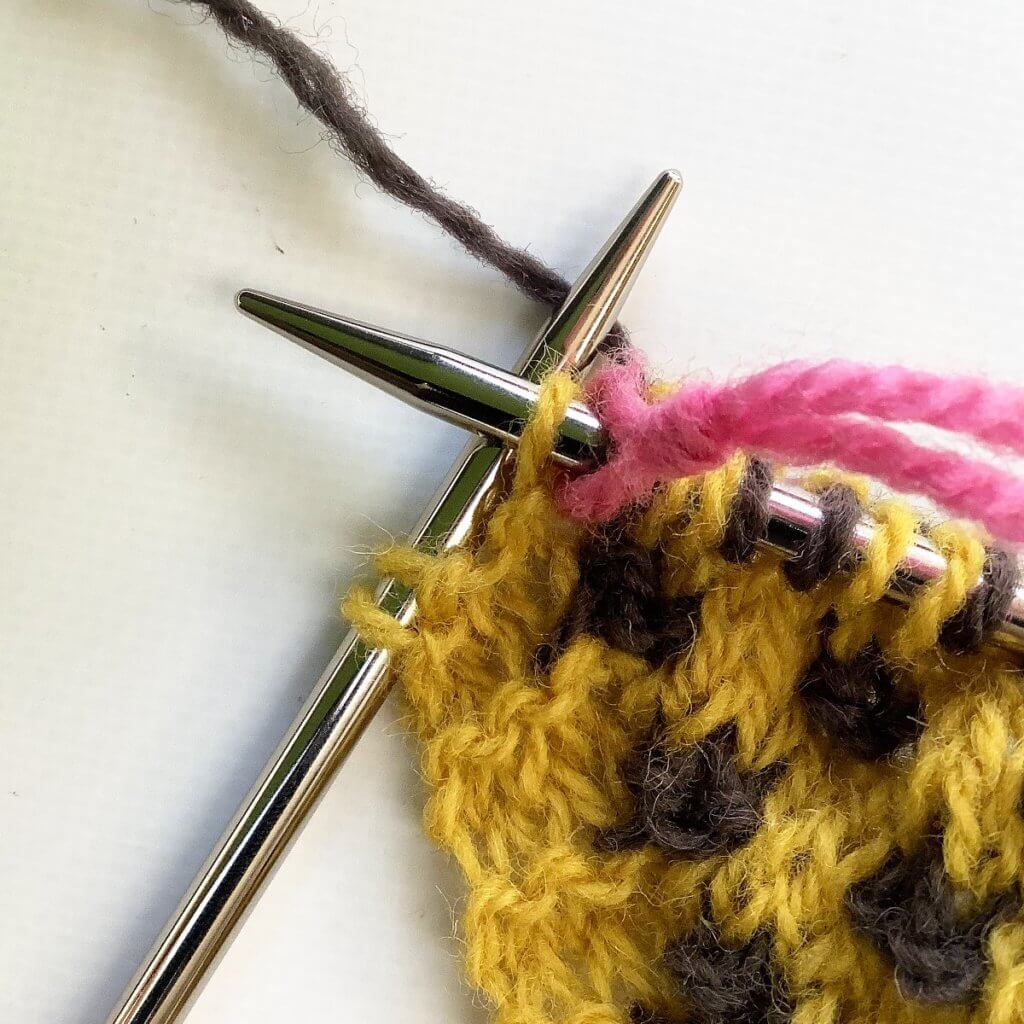
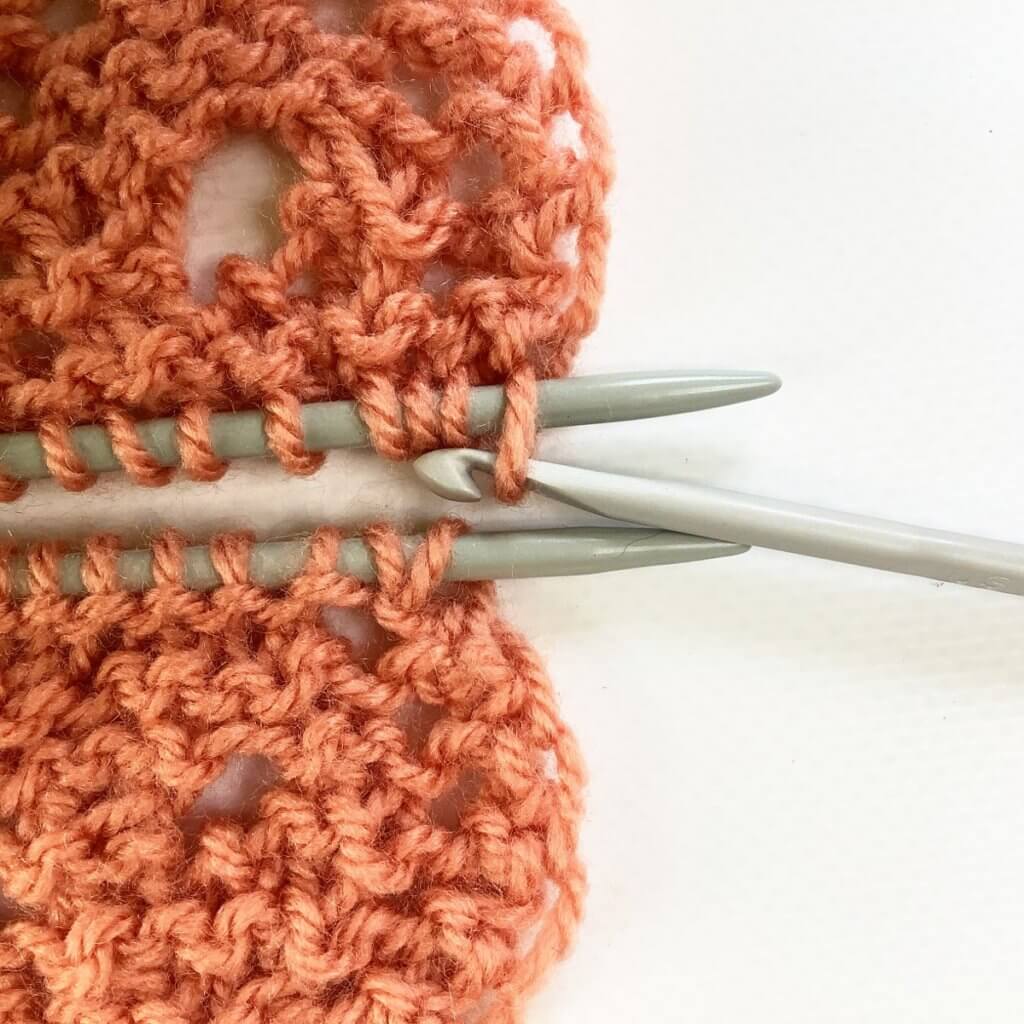
4. Slip the stitch marker and the first of the MC stitches back the left-hand needle.
5. Now move the CC yarn between the needles back again to the WS of the work.
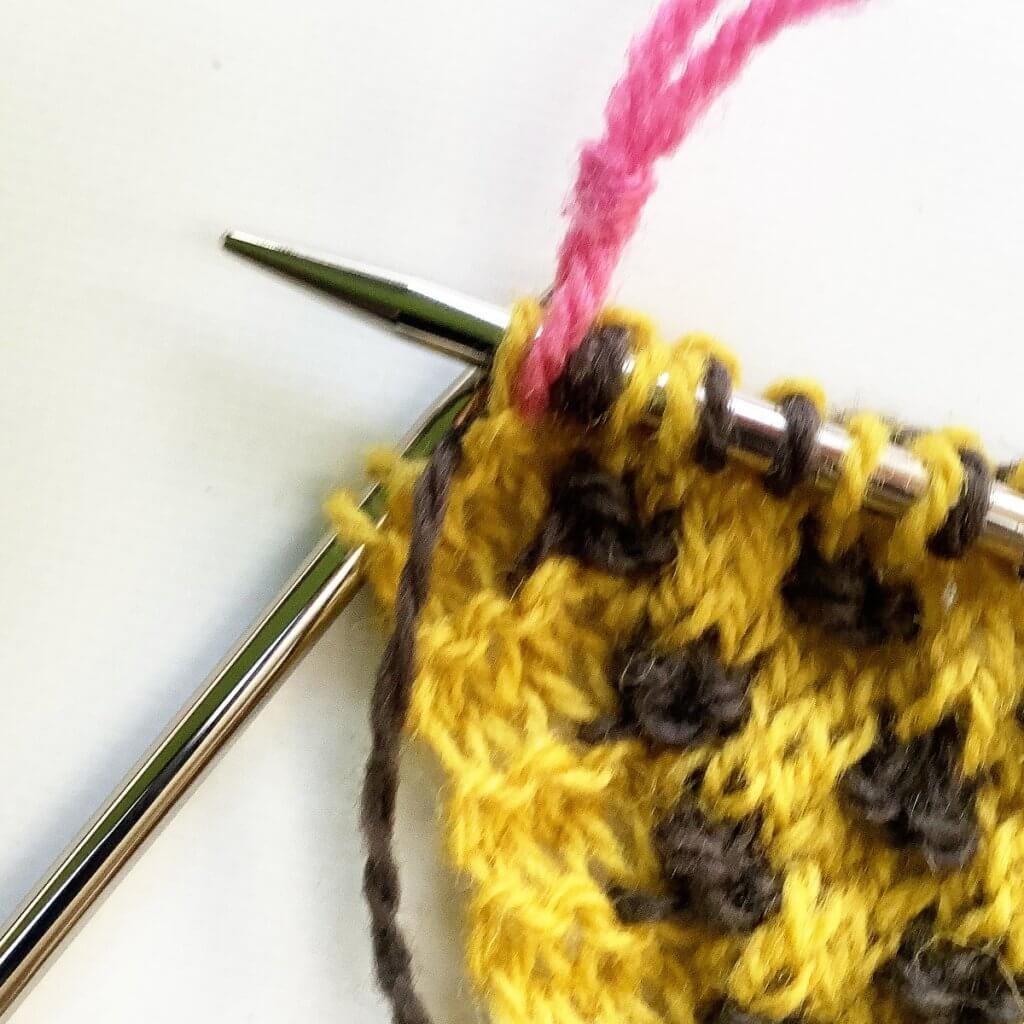
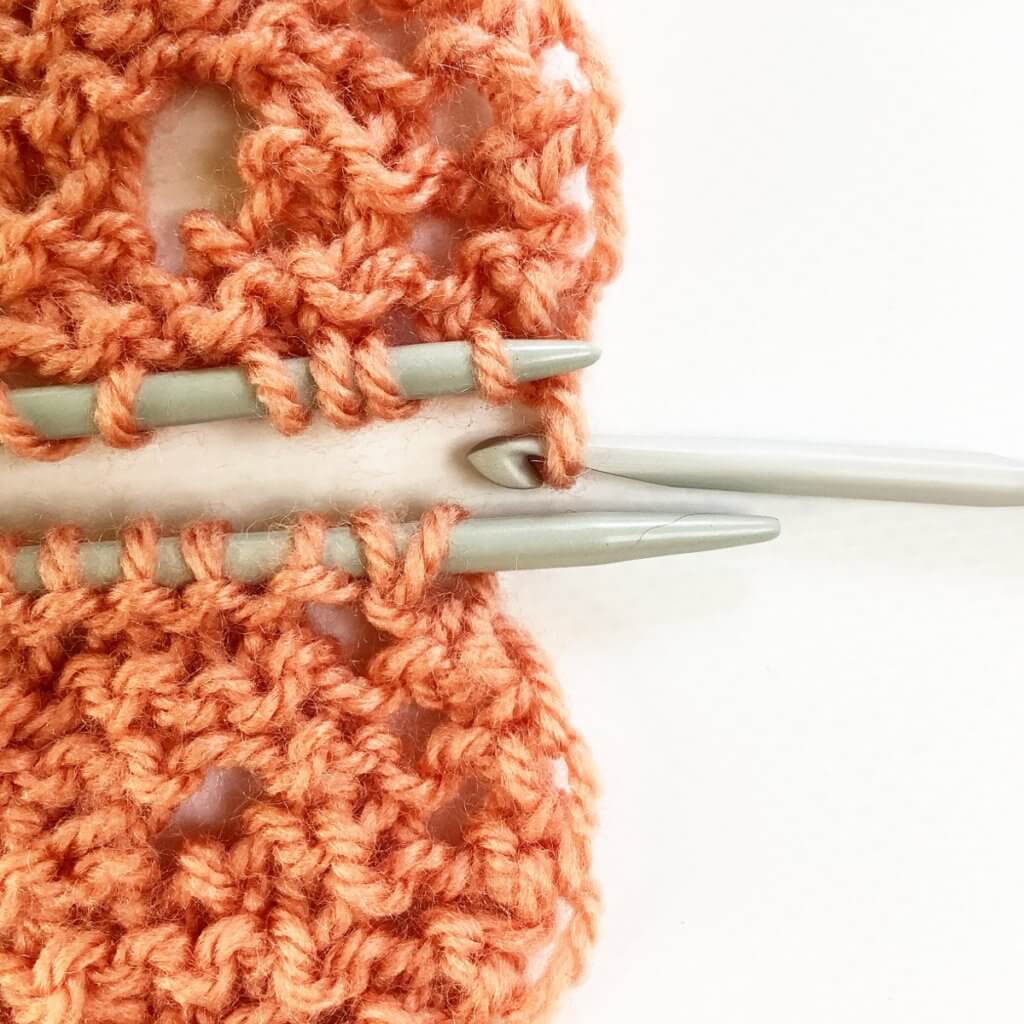
6. Now slip the remaining MC edge stitch and the stitch marker back to the right-hand needle and continue with the instructions in the remainder of the row.
Preventing gaps on the left step by step
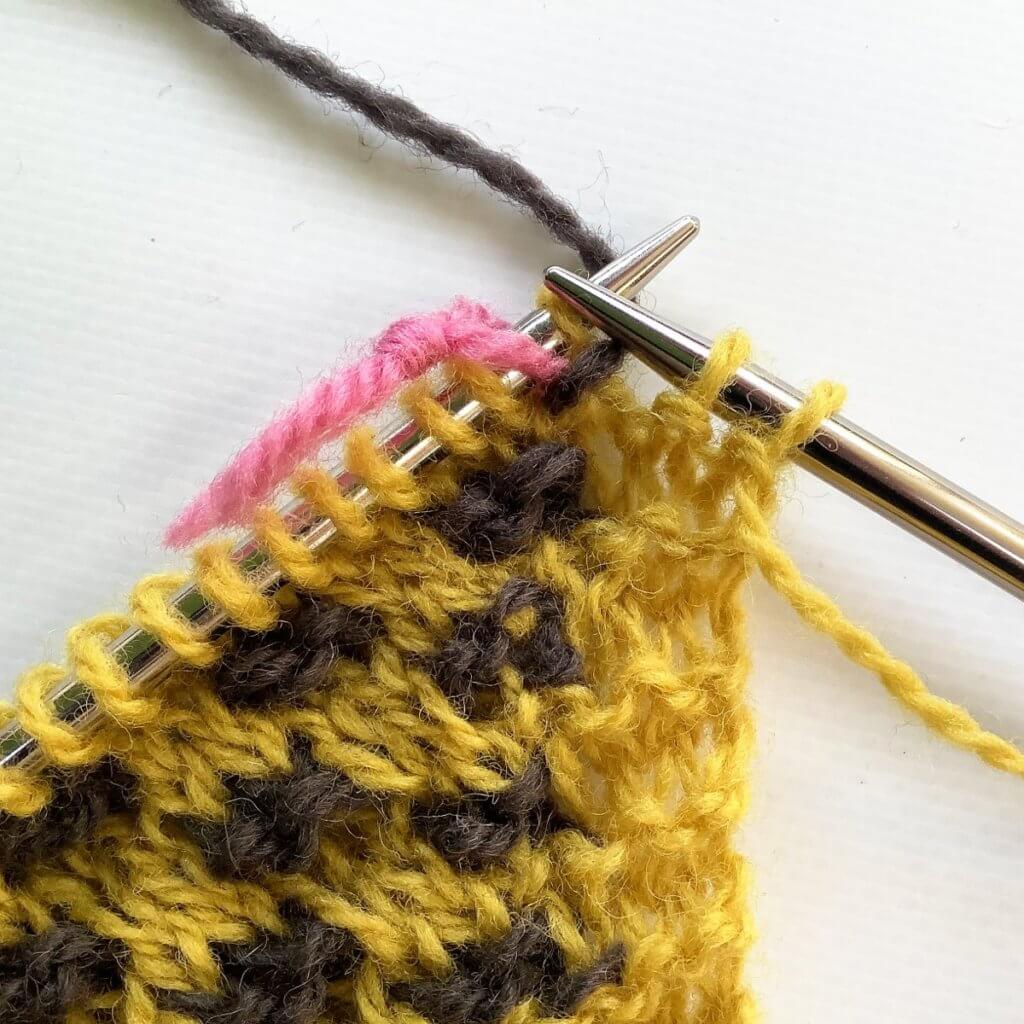
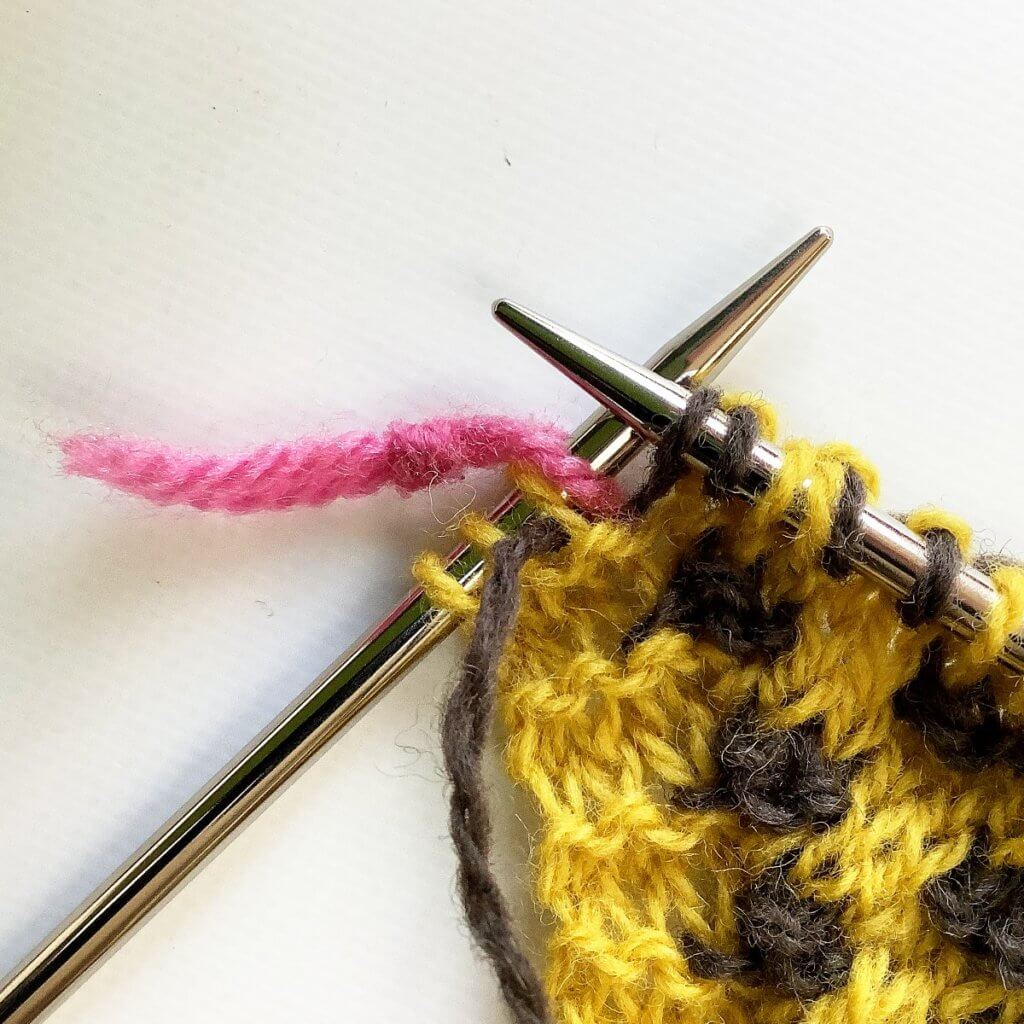
1. In this row, I’m nearing the end of the RS row using the CC yarn. Stop right before the 3 MC edge stitches, the CC yarn tail as at the back of the work at WS.
2. First, we slip both the stitch marker and the first of the MC edge stitches (purlwise!) to the right-hand needle.
3. Next, we bring the CC between the needles to the front of the work. (My apologies that this picture is a tad blurry! Didn’t notice until it was too late to redo).
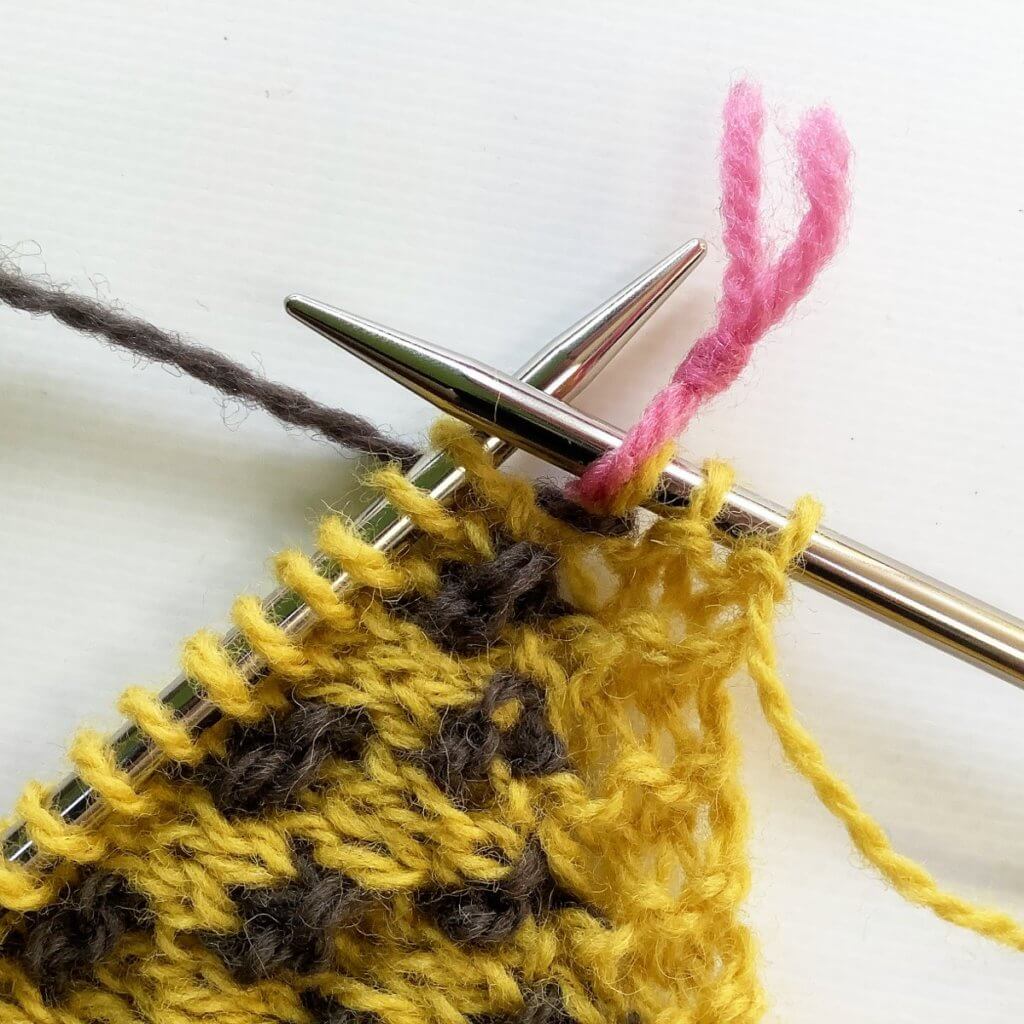
4. Slip the stitch marker and the first of the MC edge stitches back the left-hand needle.
5. Now move the CC yarn between the needles back again to the WS (the back) of the work.
And now you’re ready to continue with the instructions for your pattern for the remainder of the row!
Thanks to my Patreon supporters for bringing you this freebie! Creating quality patterns and tutorials is a lot of work and resource-intensive. However, I find it important to give you free content like this tutorial. Thanks to the generous support of my Patreon supporters, I can make it happen. Thank you, patrons! Click here to join, or click here to read more about La Visch Designs on Patreon.
It can happen just like that: a dropped stitch in the middle of your work! When using a somewhat “sticky” yarn, it is usually a matter of putting the stitch back on the needle and continuing to knit. With a smooth yarn, however, it may be that the stitch ladders down in your work….
Do not panic, though! A dropped stitch really isn’t that hard to fix. Especially when the project is still on the needles and you’re not dealing with patterning and shaping. So, in this tutorial, I’ll show you how to fix a dropped stitch in the middle of a piece of stockinette knitting.
Materials used
Yarn: * Paintbox Yarns Simply DK, a good value, good quality 100% acrylic yarn, here in the color 142 Tea Rose.
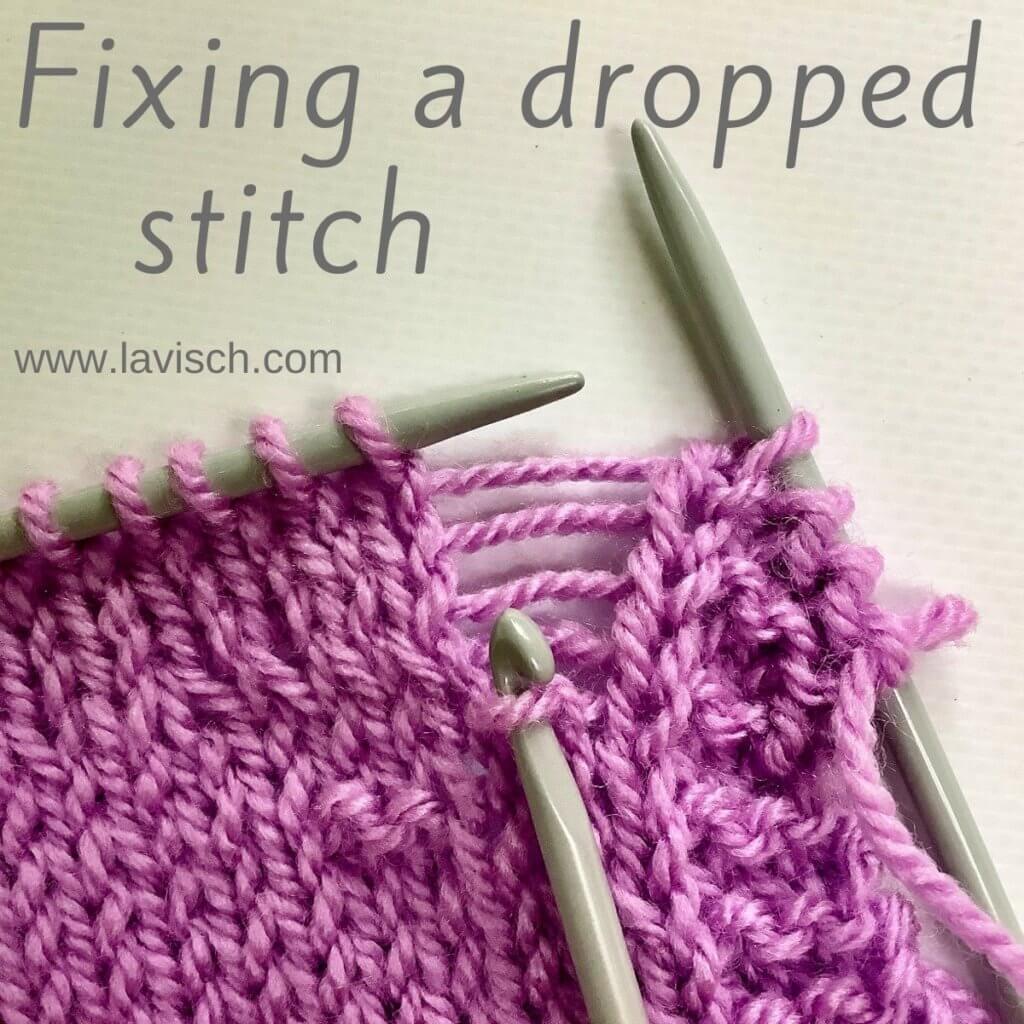
1. First, grab your crochet hook and catch the fallen stitch before it ladders even further down!
2. Take a look at the last stitch that sits correctly in the fabric and the stitch directly below it: Here we have stockinette stitch. This means that we, therefore, insert the crochet hook through the stitch from the front to the back.
3. Next, insert the crochet hook underneath the thread directly above the dropped stitch…
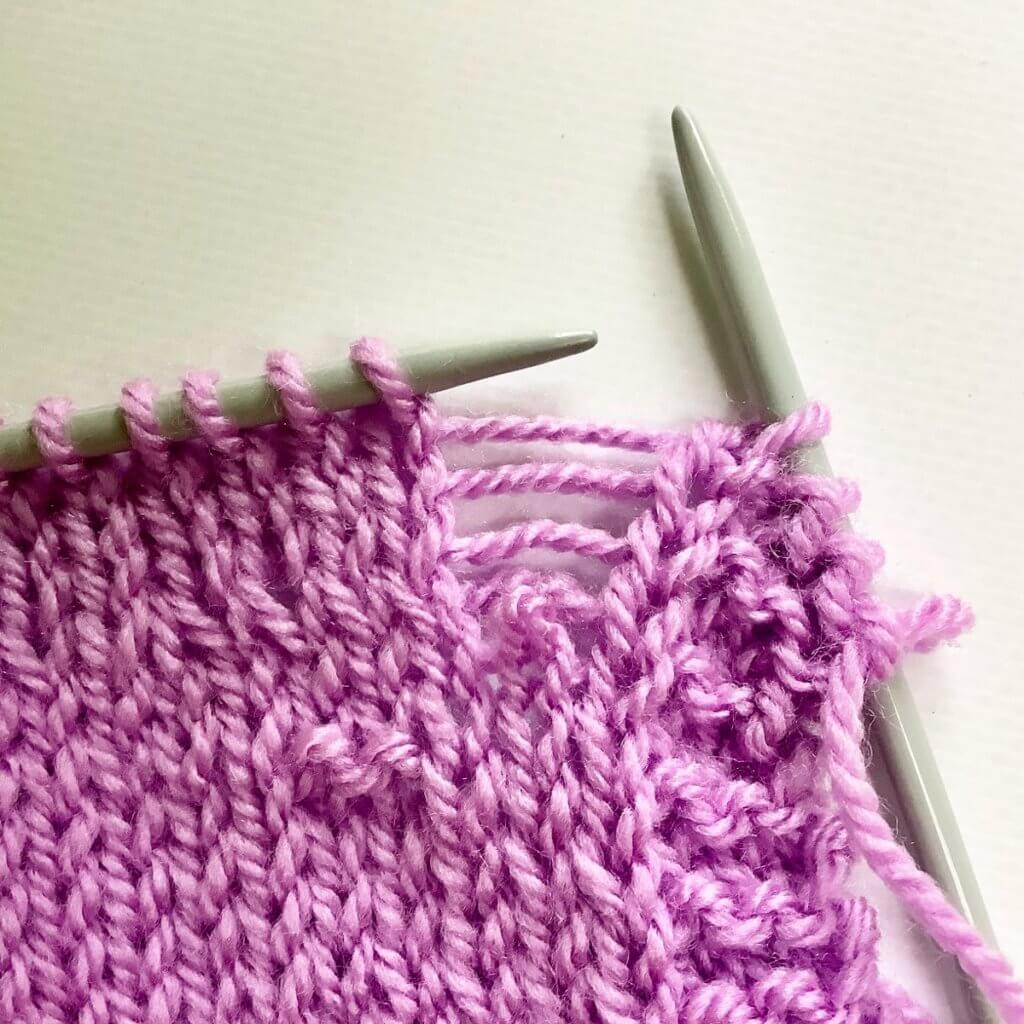
4. … and pull the thread through the loop already on the hook to make a new knit stitch.
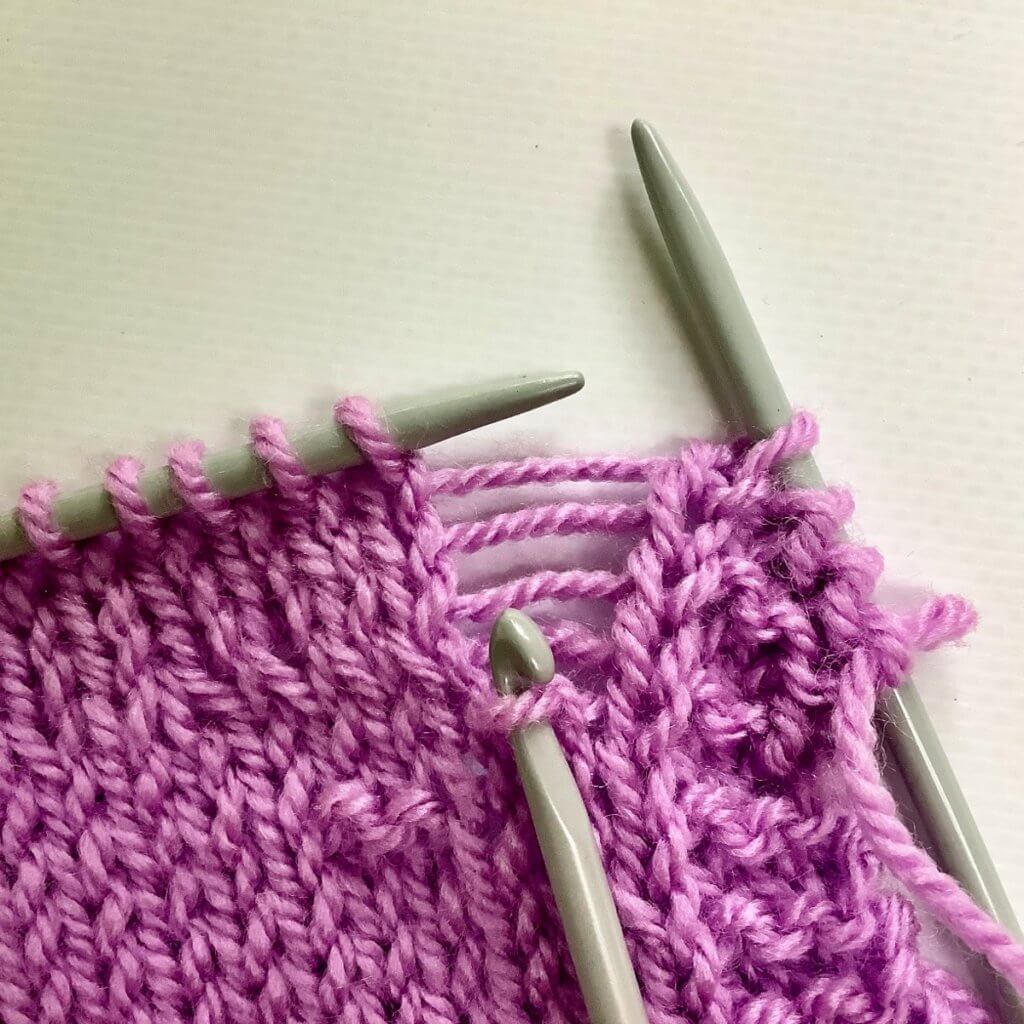
5. Repeat steps 4 and 5 (for stockinette) until you have run out of threads to pull through.
6. Place the stitch back on the knitting needle and continue knitting as if nothing happened!
An that’s all there is to it! Really not that hard, right?
Thanks to my Patreon supporters for bringing you this freebie! Creating quality patterns and tutorials is a lot of work and resource-intensive. However, I find it important to give you free content like this tutorial. Thanks to the generous support of my Patreon supporters, I can make it happen. Thank you, patrons! Click here to join, or click here to read more about La Visch Designs on Patreon.
The purl through the back loop stitch (or ptbl for short) is a variation of the purl stitch. It creates a twisted stitch by slightly turning the stitch while you work it. I’ve used the ptbl in some of my patterns, for example in the Art Deco shawl pattern.
And while it isn’t a hard stitch to work, it can be a tad tricky if you’re not familiar with how to work into that back loop of a stitch. So, for that reason, it’s a good idea to get that straight. If you look at the picture below, you can see that the first stitch on the needle consists of a loop of yarn, straddling the needle. The “leg” facing is what we call the “front loop”. Likewise, the “leg” at the back of the work is the “back loop” one.
Materials used
Yarn: *
Paintbox Yarns Simply DK,
a good value, good quality 100% acrylic yarn, here in the color 125
Spearmint Green.
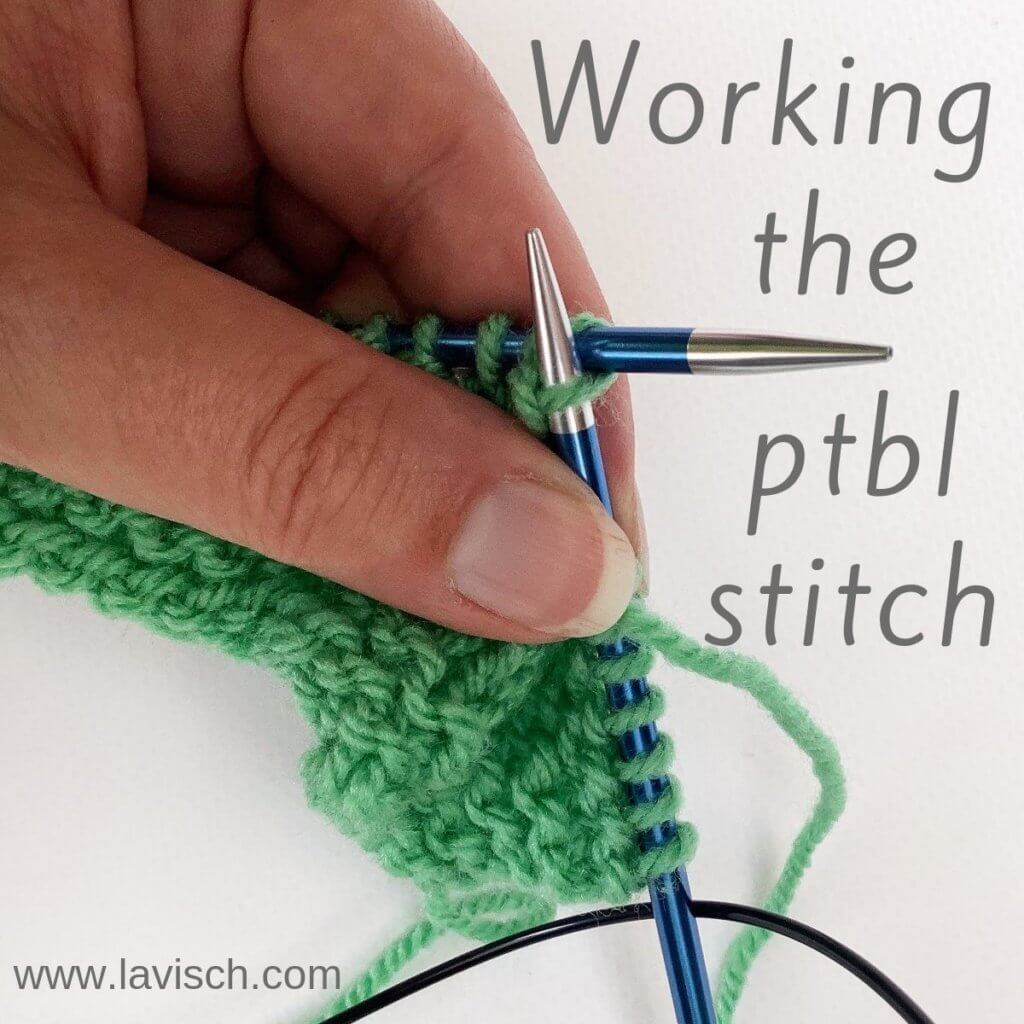
1. First, we have to make sure that the working yarn is at the front of the work since we’ll be working a purl stitch.
2. Next, insert the right-hand needle purlwise into the back leg or loop of the stitch. To do this, it is important to know the difference between knitwise and purlwise when talking about that back loop. To insert the needle knitwise you’d insert the needle away from the tip of the left-hand needle. In the same vein, to insert the needle purlwise you’d insert the needle towards the tip of the left-hand needle!
In the picture below the needles have become a bit twisted due to me holding everything with my left hand and the camera in the other. But if you take another look at the picture with the blue yarn above you can see exactly what I mean!
3. Now wrap the yarn around the needle…
4. … pull it through and slip the resulting stitch from the left-hand needle to complete your ptbl stitch.
And that’s all there is to it! Not that hard, right?
Thanks to my Patreon supporters for bringing you this freebie! Creating quality patterns and tutorials is a lot of work and resource-intensive. However, I find it important to give you free content like this tutorial. Thanks to the generous support of my Patreon supporters, I can make it happen. Thank you, patrons! Click here to join, or click here to read more about La Visch Designs on Patreon.
In one of the designs I’m working on, I’m using a lovely intricate stitch pattern from the Japanese Knitting Stitch Bible by Hitomi Shida. In this particular stitch pattern, a Left Twist stitch is used. So, in this post, I’ll go into the details on how to work this stitch.
The basic characteristic of a Left Twist is that it switches the order of 2 adjoining stitches, one “main stitch” and one “background stitch” to make it appear that the main stitch travels to the left. The background is usually reverse stockinette. The main stitch is usually worked twisted (working the stitch through the back loop) stockinette. This way it pops even more against the background.
The instruction from the Japanese Knitting Stitch Bible for this stitch consists of the following text:
With RN, go behind first st and p
second st without removing it from LN; ktbl first
st and slip both off LN.
Now, I don’t know if you’ve tried this, but following the above instruction didn’t give me anything resembling the picture of the worked left twist. It may be due to where I had my yarn or the fact that I knit weird, who knows? Anyway, I did some more research and found that this type of traveling stitch is also used quite a lot in Bavarian knitting. I also found that there are quite some ways it can be worked. Take for example this one from leethalknits.com, the one described in this Interweave article or the elaborate description of methods by Rox over on Ravelry.
Personally, I found just changing the order of the stitches before actually knitting them (as one would do for cabling without a cable needle) to be easiest. So that’s what I will show you in this tutorial.
Materials used
Yarn: Paintbox Yarns Simply DK, a good value, good quality 100% acrylic yarn, here in the color 125 Spearmint Green.
Needles: KnitPro Zing Fixed Circular Needles. In this tutorial, I used the 4 mm (US 6) size with a cable length of 80 cm (32 inches).
Some words about the swatch
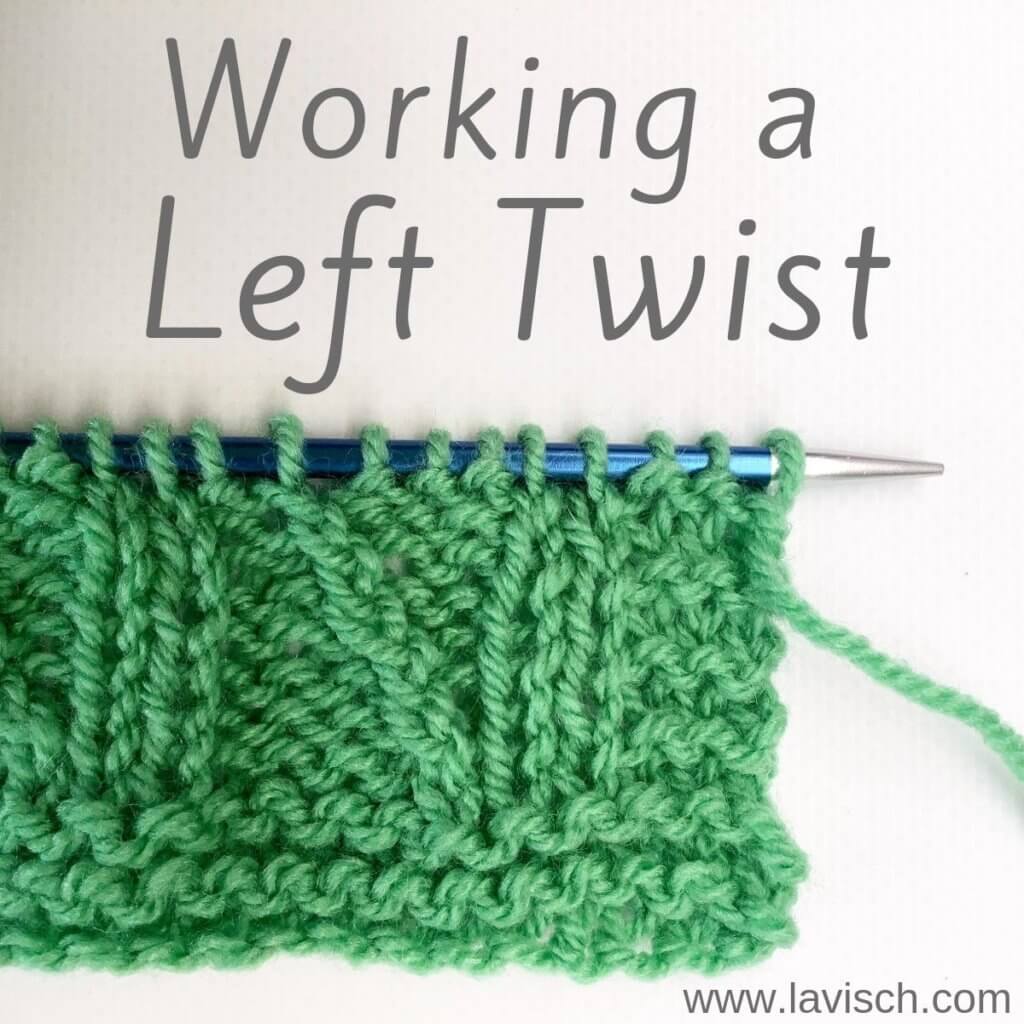
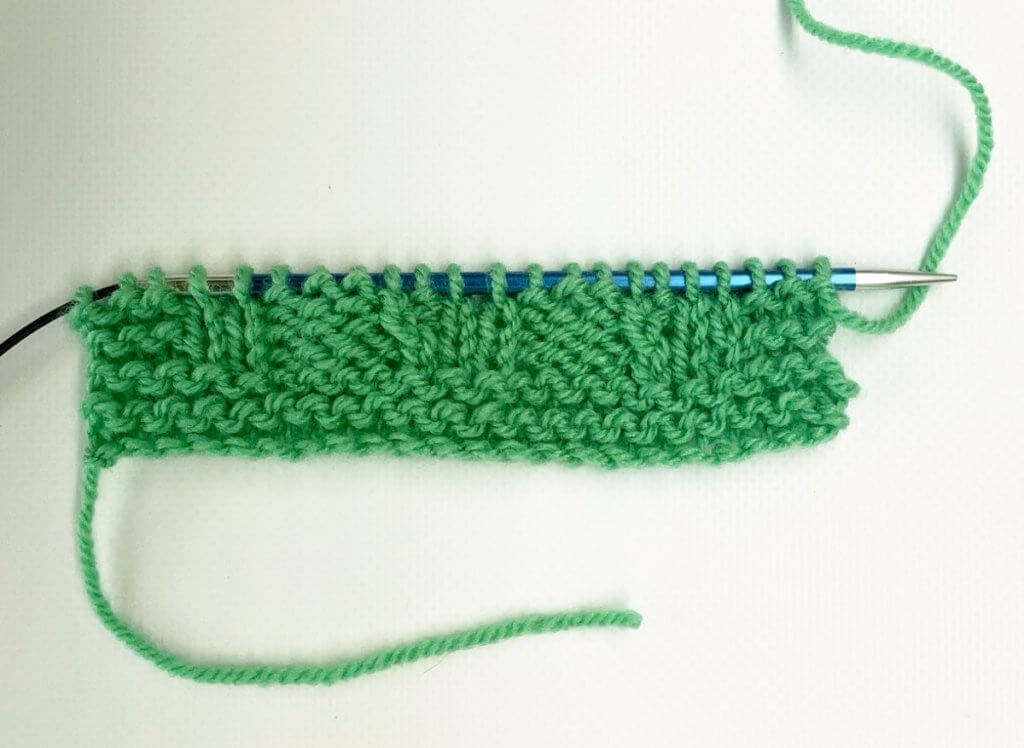
In this swatch, I’ve taken part of the stitch pattern in which I encountered the Left Twist stitch. It consists of a k3, p4 rib in which the left-most knit stitch travels across the purl stitches until it joins the next column of knit stitches. As you can see, I’ve already worked one RS row with a Left twist, as well as it’s accompanying WS row.
Working a Left Twist step by step
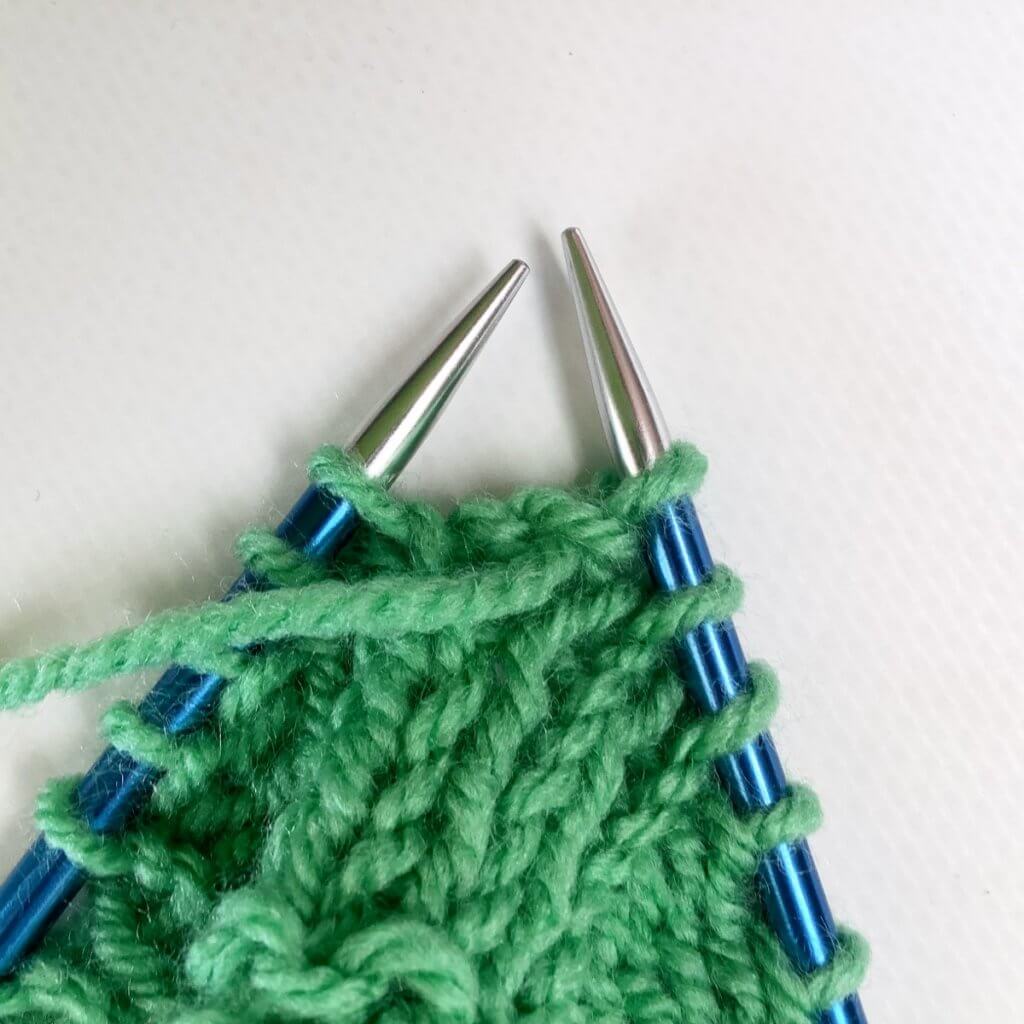
1. The first 2 stitches on the left-hand needle in the picture
below, are the ones we’re going to work the Left Twist over. In other
words: we’re going to switch the order of the knit and the purl
stitch, to make it appear that the knit stitch travels to the left.
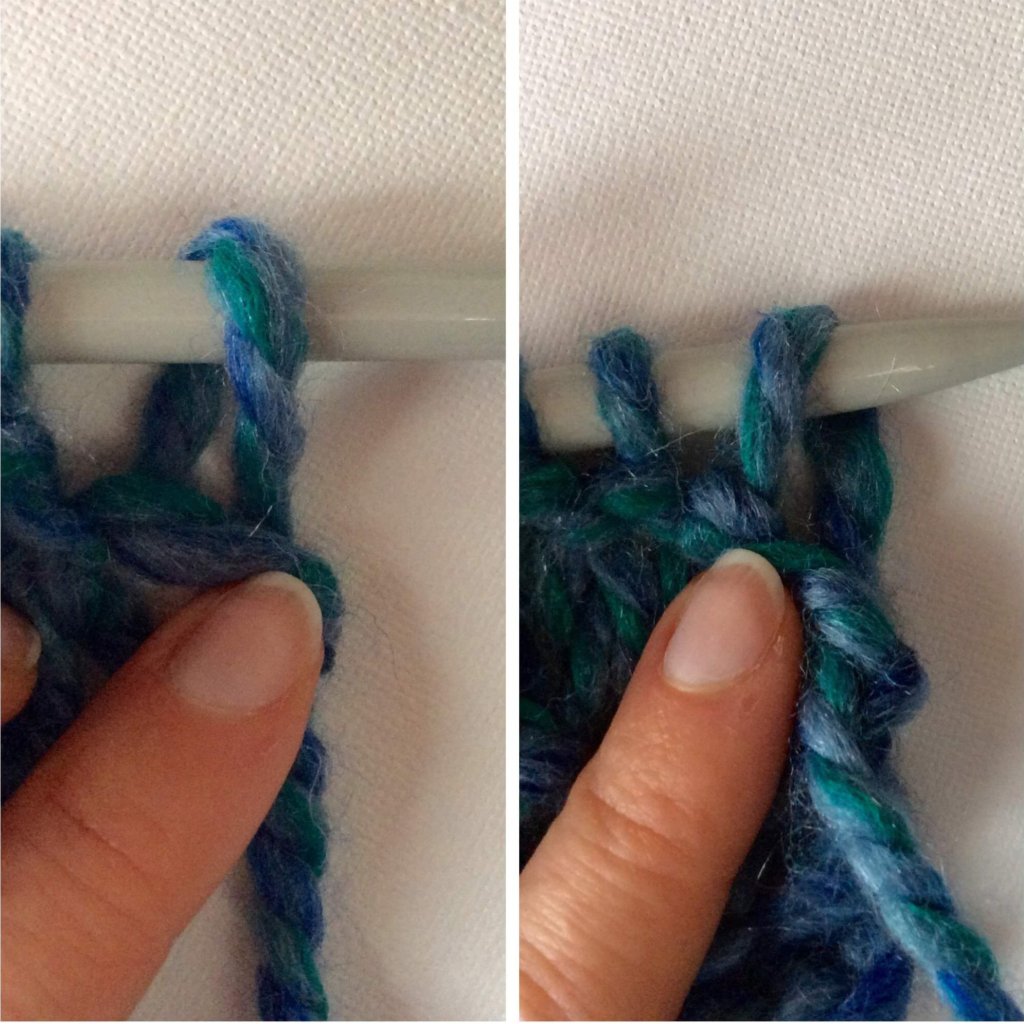
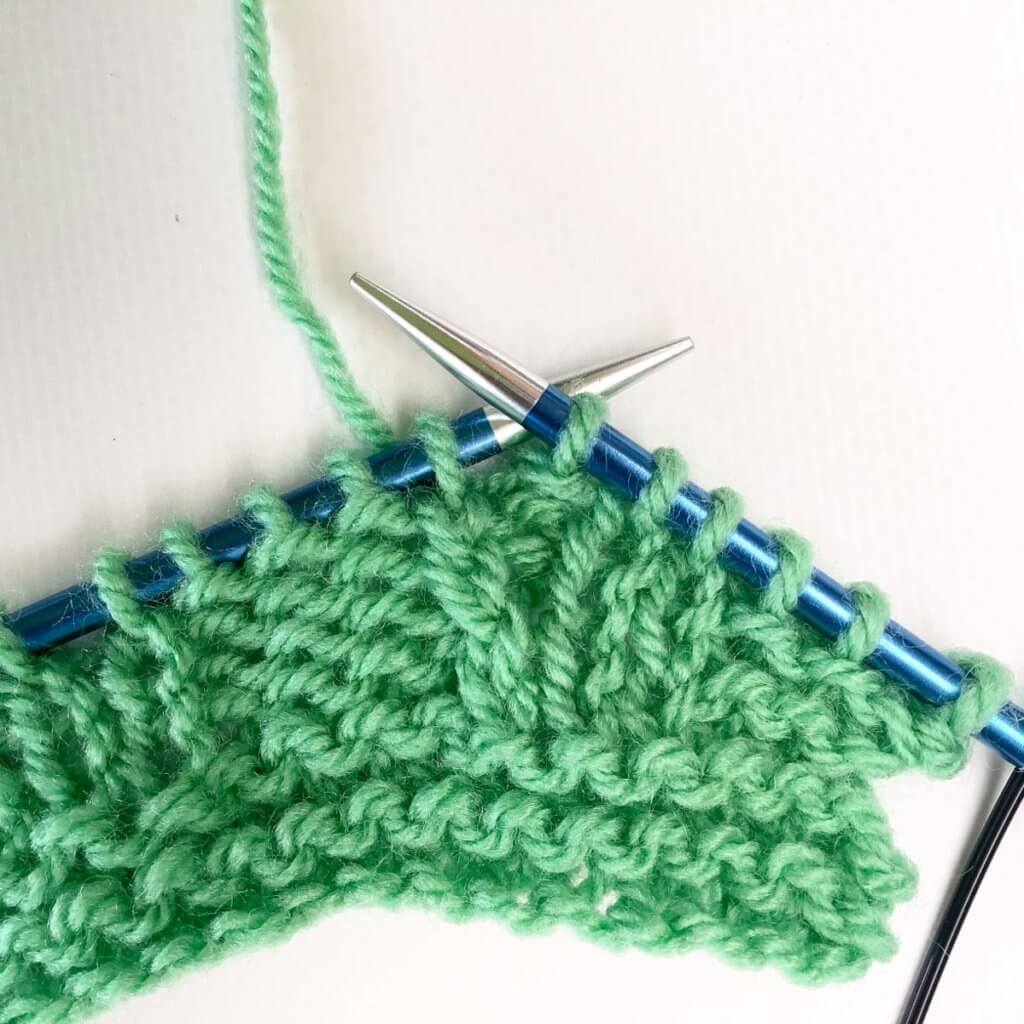
2. First I make sure to move the working yarn to the front of the work since the first stitch to work will be a purl stitch. Next, I grab the yarn directly below the 2 stitches to be switched and pinch down as pictured.
3. Next, I move these stitches off the left-hand needle. Keeping the fabric pinched, makes sure that the stitches won’t ladder down.
4. Then insert the left-hand needle knit wise into the loose stitch on the right to put it back on the needle. Make sure to keep pinching the fabric underneath the other stitch! Especially now we’re placing some stress on the yarn.
5. Now insert the left-hand needle knit wise into the remaining loose stitch and put it back on the needle. This can be somewhat fiddly.
6. Now it’s time to insert your right-hand needle purl wise into the first stitch from the tip of the left-hand needle.
7. Next, wrap your yarn around the needle, pull it through and let the stitch slide of the needle to complete the purl stitch.
8. Next is to work the traveling stitch itself. To make it pop against the background and tighten it up a bit, this stitch is worked through the back loop. So, insert your right-hand needle knit wise into the first stitch from the tip of the left-hand needle.
9. Next, wrap your yarn around the needle, pull it through and let the stitch slide of the needle to complete the twisted knit stitch.
Then what?
On the following wrong side row, work the stitches as they present themselves. In other words: what looks like a knit stitch is knit, what looks like a purl stitch is purled, and the “traveling stitch” itself is purled through the back loop. Below is how it looks after a couple of more rows have been worked. Please note this piece has not been blocked!
Thanks to my Patreon supporters for bringing you this freebie! Creating quality patterns and tutorials is a lot of work and resource-intensive. However, I find it important to give you free content like this tutorial. Thanks to the generous support of my Patreon supporters, I can make it happen. Thank you, patrons! Click here to join, or click here to read more about La Visch Designs on Patreon.
Russian grafting is a method of joining live knitting stitches together. It’s an alternative to the Kitchener stitch and is a quick and easy method for finishing off your knitted piece. In this tutorial, I’ll show you the in’s and outs of using the Russian grafting method to connect 2 pieces of stockinette fabric. Of course, this method has pro’s and cons when compared with the Kitchener stitch, which I’ll go into below.
Pro’s
When using Russian grafting on stockinette, a decorative seam is created on the outside of the work.
No working yarn is necessary, this makes this method, not a “true” grafting method.
When grafting with this method, the stitches of the pieces to be joined align better than with Kitchener stitch grafting. This can be desirable when using patterning.
Con’s
Since Russian grafting is worked by pulling existing stitches through other stitches, there is no way to adjust the tension of the graft.
The seam will be visible if it’s used on a piece of very open lace fabric.
Materials used
Yarn: * Paintbox Yarns Simply DK, a good value, good quality 100% acrylic yarn, here in the color 125 Spearmint Green.
I’ve made 2 little swatches of stockinette and slipped one of those to another knitting needle, making sure the yarn tail is on the left side. Position the needles as pictured. Now we’re ready to start the actual Russian graft!
Set-up
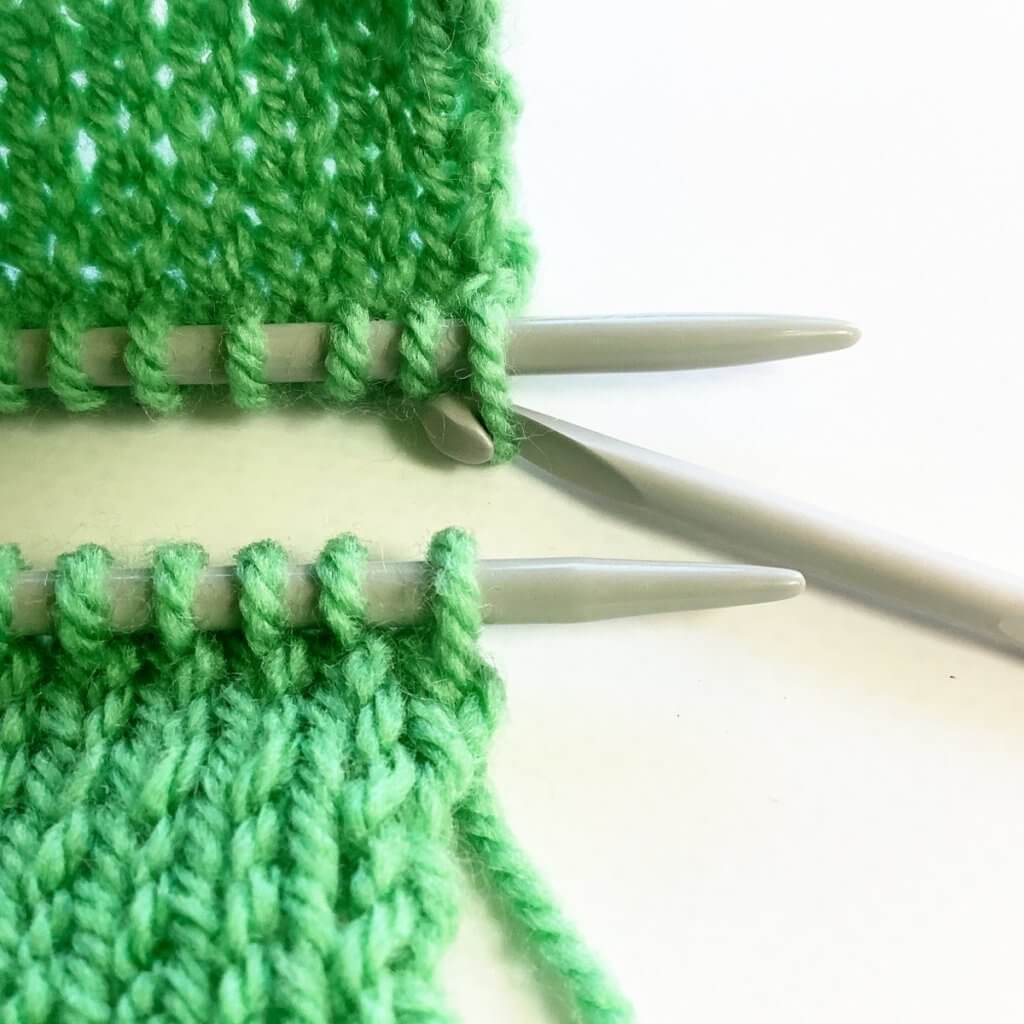
1. Back needle: Insert the crochet hook purlwise through the first stitch on the needle …
2. … and slide it off the needle.
3. Front needle: Insert the crochet hook purlwise through the first stitch on the needle ….
4. … and slide it off the needle.
5. Now pull this second stitch through the first stitch on the hook, so only 1 loop remains on the crochet hook.
Repeat
1. Back needle: Insert the crochet hook knitwise through the first stitch …
2. … and slide it off the needle.
3. Pull this last stitch through the first stitch on the hook, so only 1 loop remains on the crochet hook.
4. Front needle: Insert the crochet hook knitwise through the first stitch …
5. …and slide it off the needle.
6. Pull this last stitch through the first stitch on the hook, so only 1 loop remains on the crochet hook.
Repeat steps 1-6 until all stitches have been worked. At this point you will have 1 stitch remaining on the crochet hook:
To finish the graft, pull the yarn tail through this last stitch to secure it. This was the reason to shuffle the stitches around on one of the swatches, otherwise, we wouldn’t have a yarn tail available.
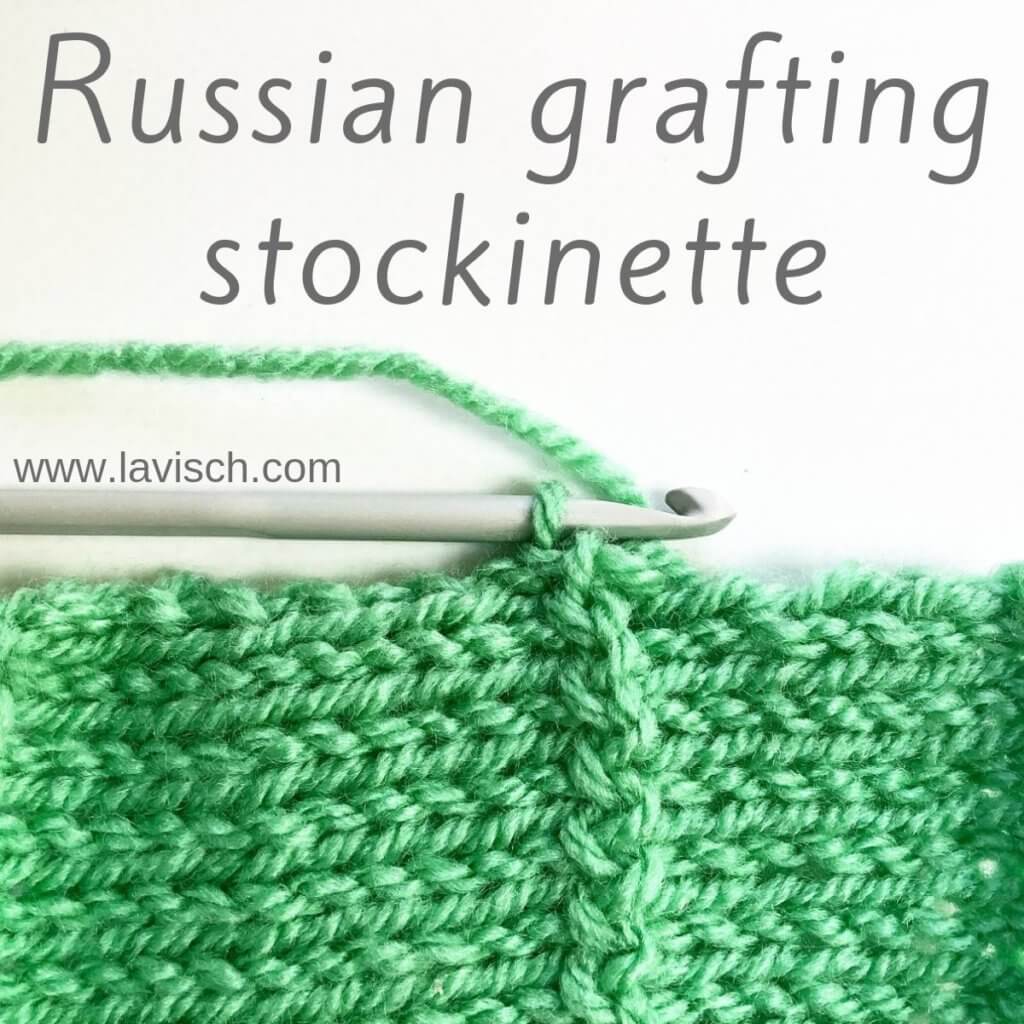
And that’s how Russian grafting on stockinette is done! The seam is very decorative on its own and could be used as a design element instead of a 3-needle bind-off. Think for example when closing the shoulder seams on a bottom-up sweater.
Thanks to my Patreon supporters for bringing you this freebie! Creating quality patterns and tutorials is a lot of work and resource-intensive. However, I find it important to give you free content like this tutorial. Thanks to the generous support of my Patreon supporters, I can make it happen. Thank you, patrons! Click here to join, or click here to read more about La Visch Designs on Patreon.
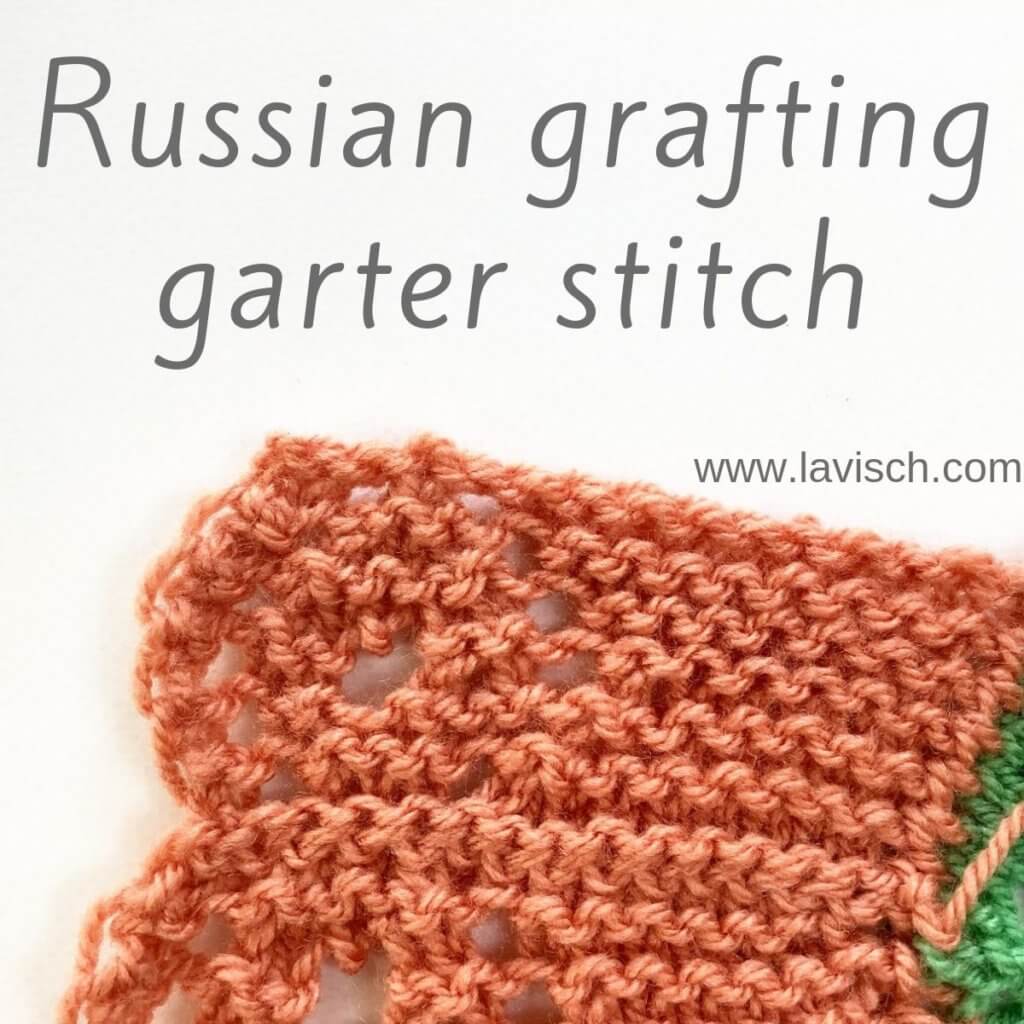
Russian grafting is a method of joining live knitting stitches together. It’s an alternative to the Kitchener stitch and is a quick and easy method for finishing off your knitted piece. In this post, I’ll show you the specifics for Russian grafting garter stitch. Of course, this method has pro’s and cons when compared with the Kitchener stitch, which I’ll go into below.
Pro’s
When used to join garter stitch pieces together, the seam blends in with the garter stitch ridges.
No working yarn is necessary, this makes this method, not a “true” grafting method.
When grafting with this method, the stitches of the pieces to be joined align better than with Kitchener stitch grafting. This can be desirable when using patterning.
Con’s
Since Russian grafting is worked by pulling existing stitches through other stitches, there is no way to adjust the tension of the graft.
The seam will be visible if it’s used on a very open lace fabric, even if it’s garter-stitch-based.
Materials used
Yarn: Paintbox Yarns Simply DK, a good value, good quality 100% acrylic yarn, here in the colors 125 Spearmint Green and 155 Vintage Pink.
A crochet hook in the same size or slightly smaller than your knitting needles. For example, this Pony Aluminum Crochet Hook in size 4 mm.
Russian grafting step-by-step
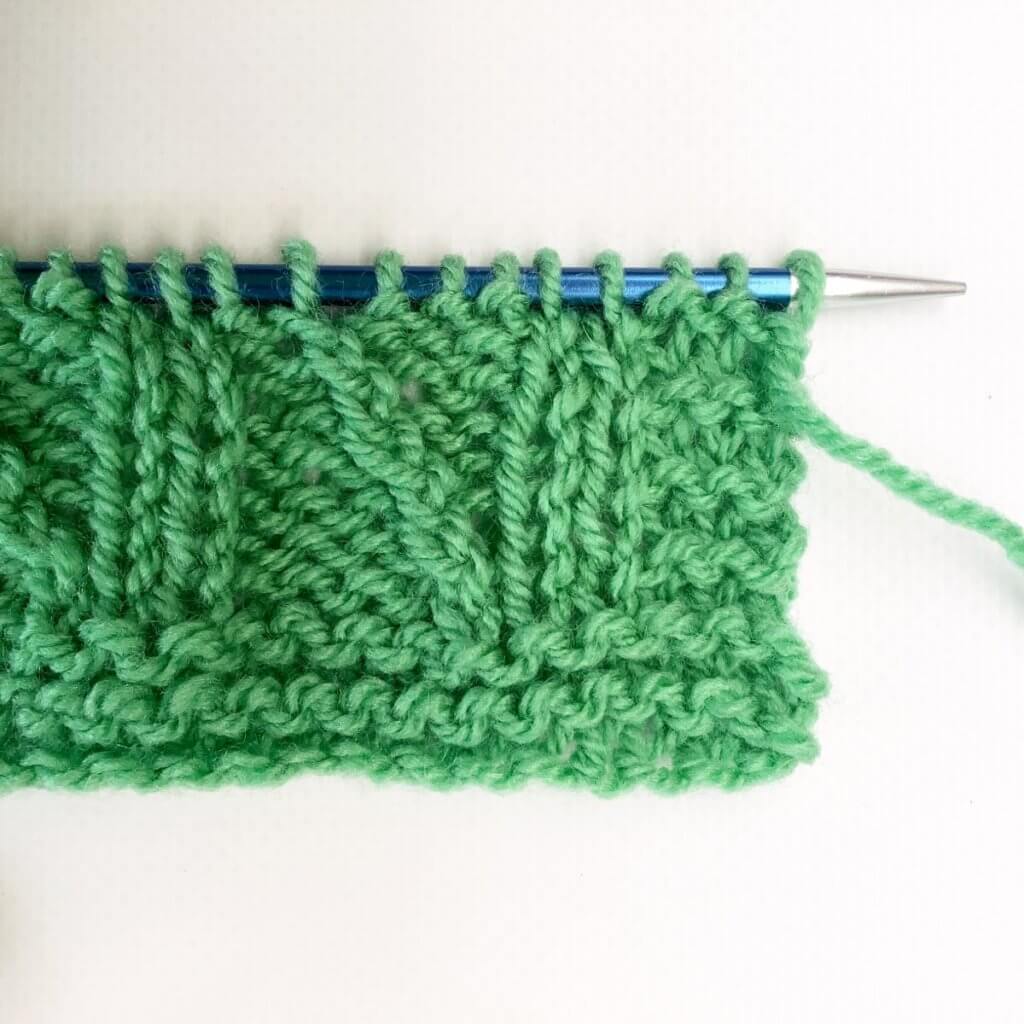
I’ve read that Russian grafting is a seaming technique commonly seen in patterns for traditional Orenburg shawls with garter-stitch-based lace edgings. For this reason, in this tutorial, I’m showing you how it’s done with the help of a swatch of an applied garter stitch lace border. It’s a miniature version of the edging on my Full Fade Hap.
Since I didn’t have the time to knit it all around the center square, I just did the provisional cast-on followed by one repeat on the right in the below picture. On the left, you can see a repeat of the edging plus turning the corner minus the very last row, just as in my Full Fade Hap. The reason I’m omitting this last row is that we otherwise have a row of purl bumps on each needle. When grafted together, this gives a very bulky and visible seam. Without that last row, the grafted seam is much less notable.
Preparation
First is undoing the provisional cast-on on the right piece and placing it on a knitting needle, starting at the body side of the waste yarn. It isn’t visible in this picture, but that’s where the waste yarn chain is, indicating the point where it can be undone easily. Make sure to place the stitches correct (not twisted) on the needle.
Please note that in this example the provisional cast-on was 15 stitches (needed for the lace patterning to start correctly), while there are 16 live stitches on the left (15 from the border and 1 remaining live body stitch). To solve this, I picked up an extra stitch at the shawl body side.
I’ve turned everything 90 degrees clockwise. Make sure the right side is facing, and the yarn tail is on the left side. Now we’re ready to start the actual Russian graft.
Set-up
1. Back needle: Insert the crochet hook purlwise through the first stitch on the needle ….
2. … and slide it off the needle.
3. Front needle: Insert the crochet hook purlwise through the first stitch on the needle and slide it off the needle. This is similar to what you did in steps 1 and 2.
4. Now pull this second stitch through the first stitch on the hook, so only 1 loop remains on the crochet hook.
Repeat
1. Back needle: Insert the crochet hook knitwise through the first stitch and slide it off the needle.
2. Pull this last stitch through the first stitch on the hook, so only 1 loop remains on the crochet hook.
3. Front needle: Insert the crochet hook knitwise through the first stitch and slide it off the needle.
4. Pull this last stitch through the first stitch on the hook, so only 1 loop remains on the crochet hook.
Repeat steps 1-4 until all stitches have been worked. At this point, you will have 1 stitch remaining on the crochet hook:
To finish the graft, pull the yarn tail through this last stitch to secure it. And there you have it! The seam may seem bulky, but that’s mostly because I’ve used relatively thick yarn here. When using fingering weight yarn at a loose gauge, it will blend in nicely in garter stitch!
Thanks to my Patreon supporters for bringing you this freebie! Creating quality patterns and tutorials is a lot of work and resource-intensive. However, I find it important to give you free content like this tutorial. Thanks to the generous support of my Patreon supporters, I can make it happen. Thank you, patrons! Click here to join, or click here to read more about La Visch Designs on Patreon.
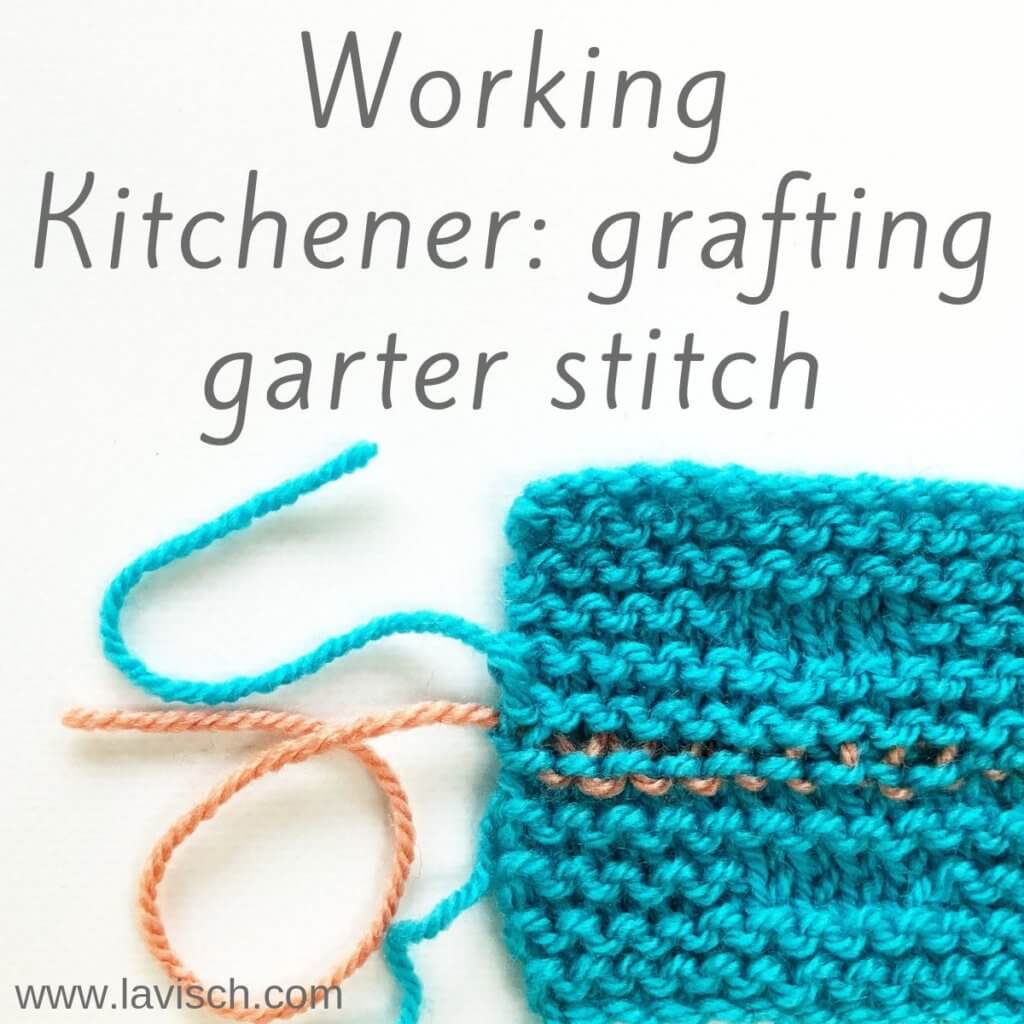
As I already wrote in the stockinette Kitchener tutorial, it seems there are 2 distinct camps: either you love it or you hate it. Kitchener stitch is a method of grafting two sets of live stitches together in an invisible way. It’s often used in a stockinette based fabric to seamlessly close the toes of top-down socks, for example. To do so, the needle is passed through the live stitches of the pieces of knitting to be joined, in a similar manner similar as the direction in which a knitting needle is inserted within a stitch.
And it may surprise you, but working Kitchener stitch is also very well possible in a garter stitch based fabric. The magic trick behind this is that because you’ll be creating an extra row of stitches, one of the garter stitch pieces needs to be one row shorter than the other. In other words: If you have ended one piece with a right side row, you’ll need to end the other piece with a wrong side row!
Materials used
Yarn: * Paintbox Yarns Simply DK, a good value, good quality 100% acrylic yarn, here in the colors 133 Marine Blue for the swatches and 155 Vintage Pink for the Kitchener stitch.
Working Kitchener to graft garter stitch step by step
Set-up
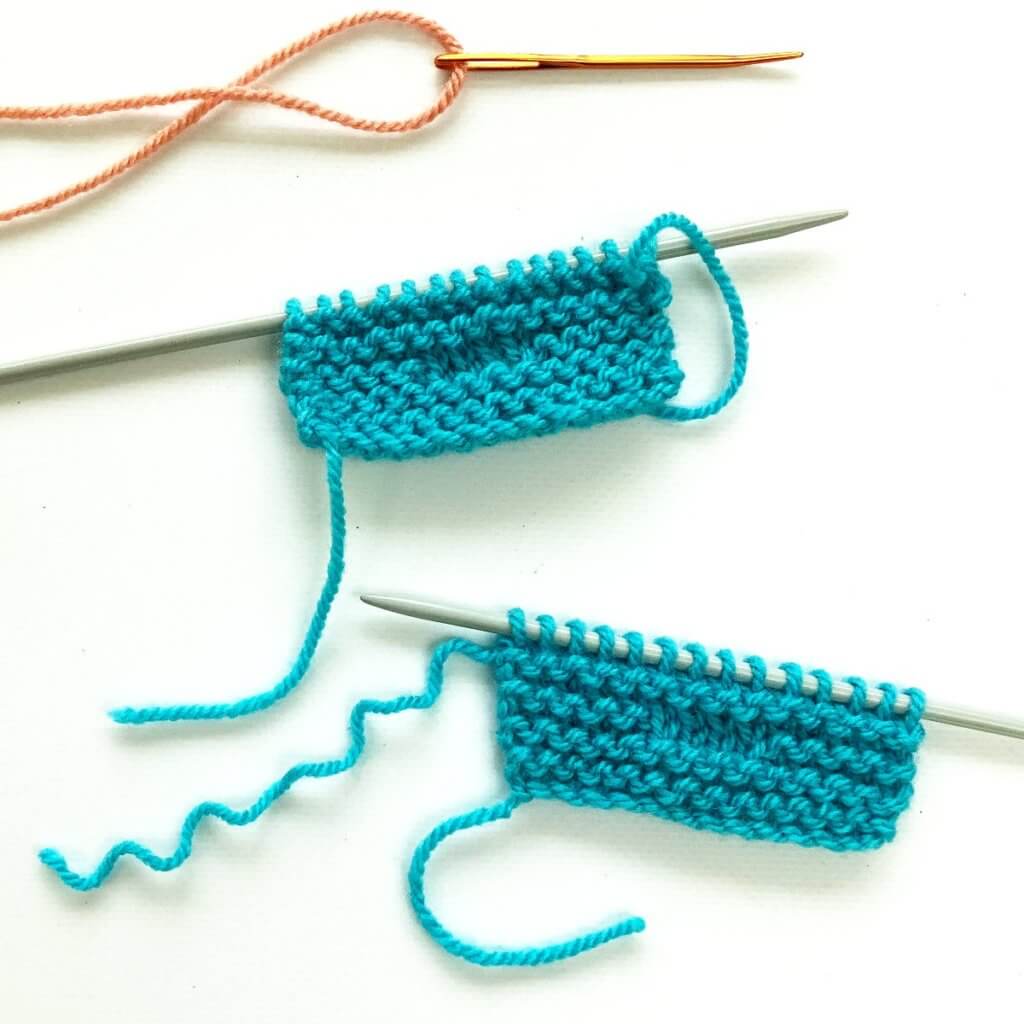
Before we start, we have to make sure that the two pieces of garter stitch fabric that we will be grafting together, each have the same number of stitches.
We also have to make sure that one of the pieces is ended with a right side row and the other on a wrong side row. But how to recognize which is which? Personally, I usually use the knitted-on CO method. This means that once I’m done with casting on my stitches, there are stitches on my right-hand needle, ready for knitting, with the yarn tail on the left side. So, when facing the right side, the yarn tail will always be on the left bottom corner of the work!
You can, of course, also use a removable stitch marker in each piece to indicate the RS. In these swatches, though, I’ve worked a little bit of stockinette to indicate the right side.
1. To start, we hold the two needles containing the live stitches parallel to each other, with the wrong sides of the fabric facing inside and the right sides facing outside. Hold the shorter piece in the back.
2. Take your darning needle and pass it purlwise through the first stitch on the front needle. Pull the yarn through, while leaving the stitch on the needle.
3. Next, thread the darning needle purlwise through the first stitch on the back needle. Again, pull the yarn through, while leaving the stitch on the needle.
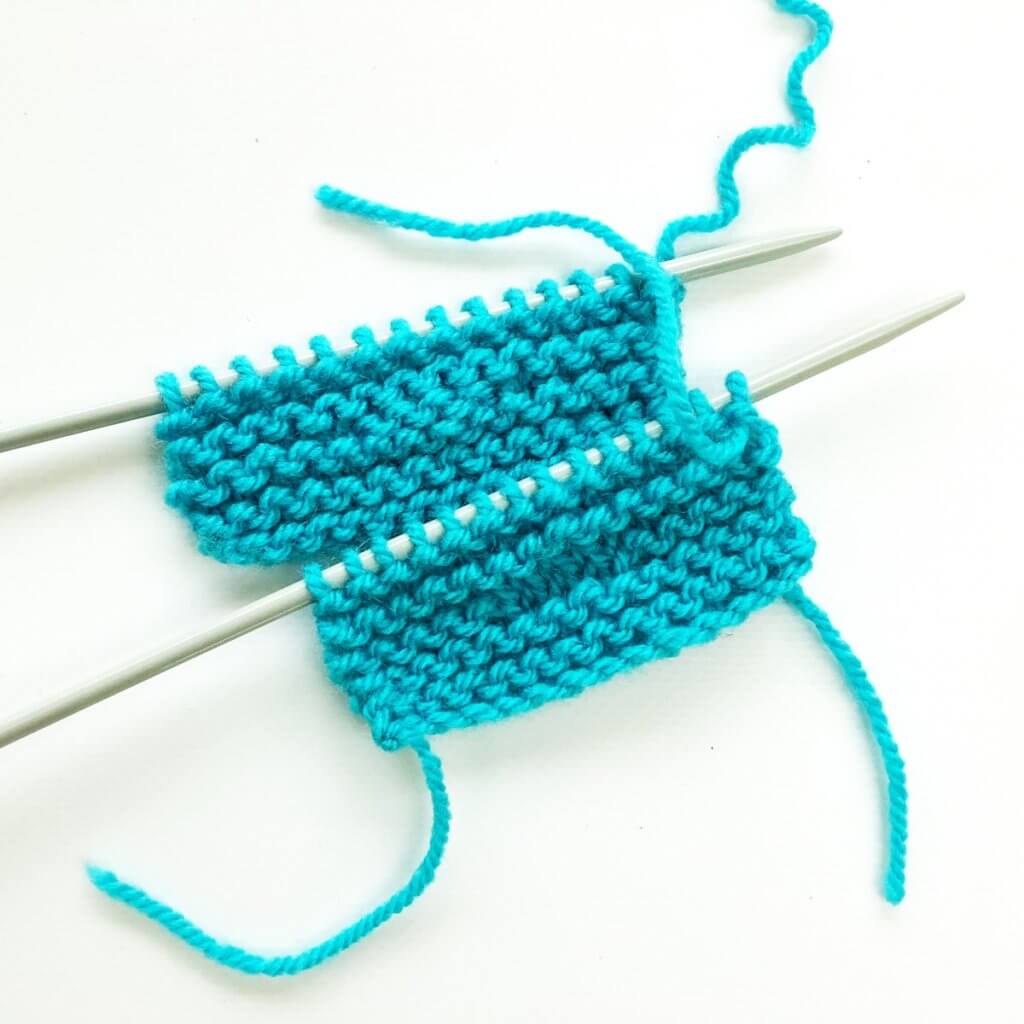
Repeat
1. Front needle: Pass the darning needle knitwise through the first stitch of the front needle. Pull the yarn through and slip the stitch off the needle. The below picture shows how it looks after the stitch has been dropped.
2. Front needle: Next, thread the darning needle purlwise through the second stitch on the front needle. Leave the stitch on the needle and pull the yarn through.
3. Back needle: Pass the darning needle knitwise through the first stitch of the back needle. Pull the yarn through and slip the stitch off the needle. Again, the picture shows how it looks after the stitch has been dropped off.
4. Back needle: Next, thread the darning needle purlwise through the second stitch on the back needle. Leave the stitch on the needle and pull the yarn through. Be careful not to pull your yarn too tightly!
Repeat steps 1 to 4 until only 1 stitch remains on each knitting needle. Take care to gently adjust the tension of the newly made stitches every few stitches to match the fabric of the pieces you’re grafting together.
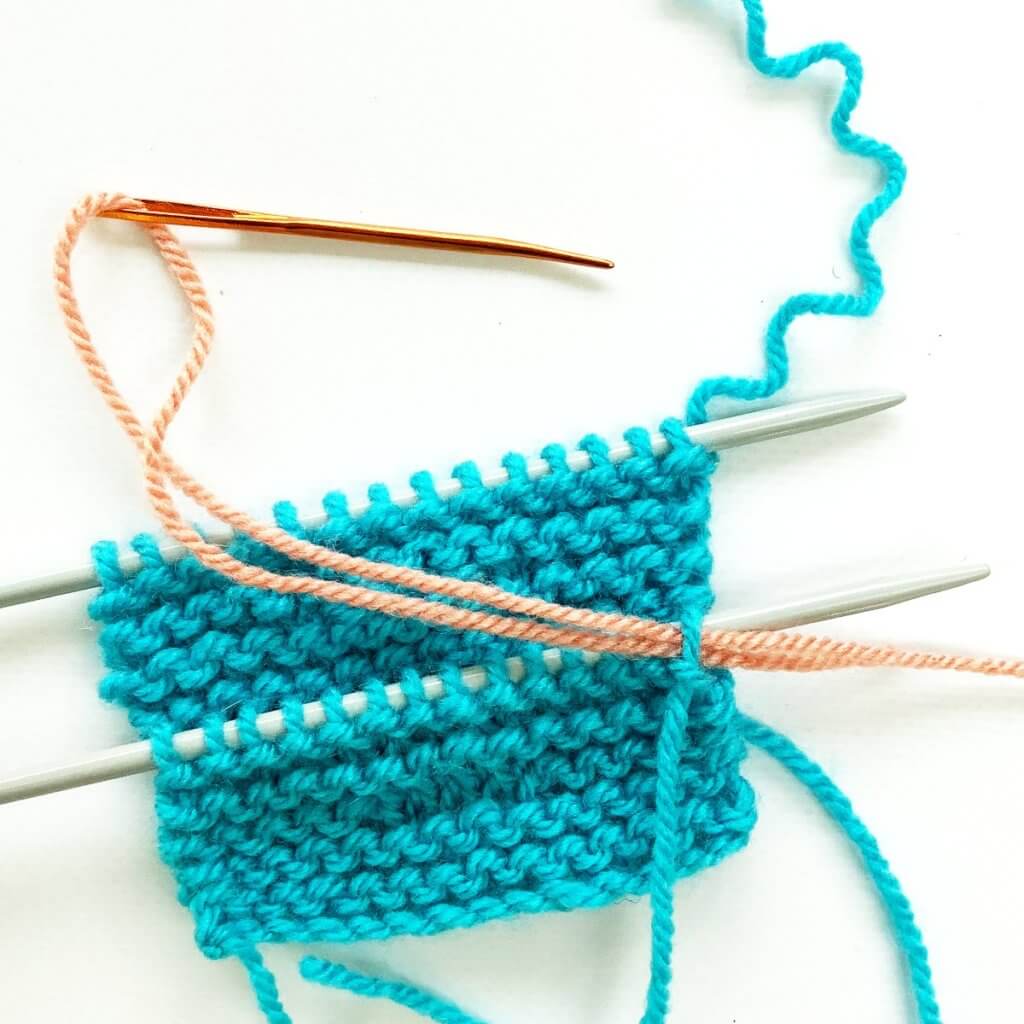
Finishing Kitchener in garter stitch
1. Now insert the darning needle knitwise into the stitch on the front needle and pull the yarn through, dropping the stitch from the needle.
2. To finish, insert the darning needle knitwise into the stitch on the back needle. Pull the yarn through and drop the stitch from the needle.
And that’s how you work Kitchener in garter stitch!
Thanks to my Patreon supporters for bringing you this freebie! Creating quality patterns and tutorials is a lot of work and resource-intensive. However, I find it important to give you free content like this tutorial. Thanks to the generous support of my Patreon supporters, I can make it happen. Thank you, patrons! Click here to join, or click here to read more about La Visch Designs on Patreon.
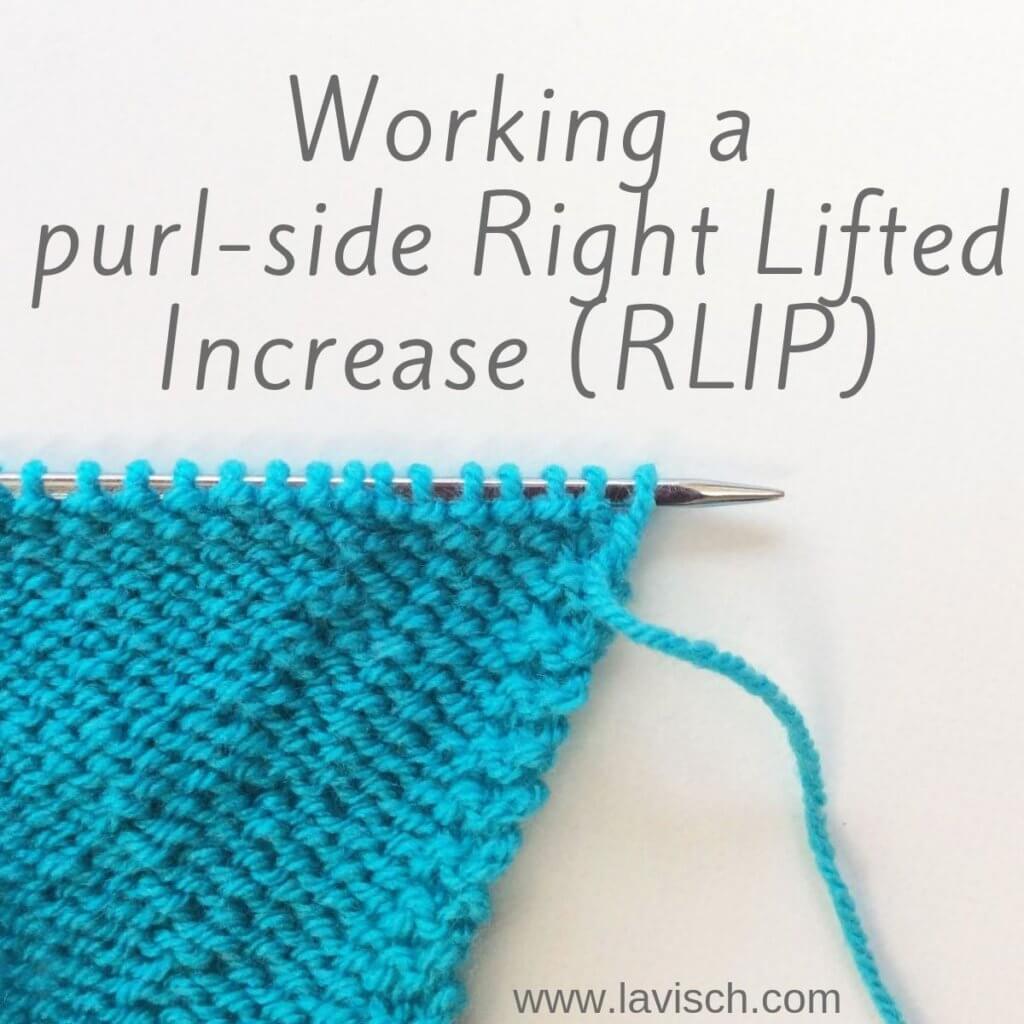
People usually shape knitwear by increasing or decreasing the number of stitches. There are, of course, lots of different versions possible. In this tutorial, I’ll focus on the purl-side right-leaning version of the lifted increase. If you’re looking for the knit-side right-leaning lifted increase, just click here.
What is a lifted increase?
Basically, it’s exactly how it’s called: an increase that you work from a stitch below the one next on the needle. This stitch is lifted to be able to work into it. The purl-side version is called the same as the knit-side version, only with “purl” added after it. Right Lifted Increase (Purl) with the abbreviation RLIP.
Materials used
Yarn: * Paintbox Yarns Simply DK, a good value, good quality 100% acrylic yarn, here in the color Marine Blue.
Working a purl-side Right-Leaning Lifted Increase step by step
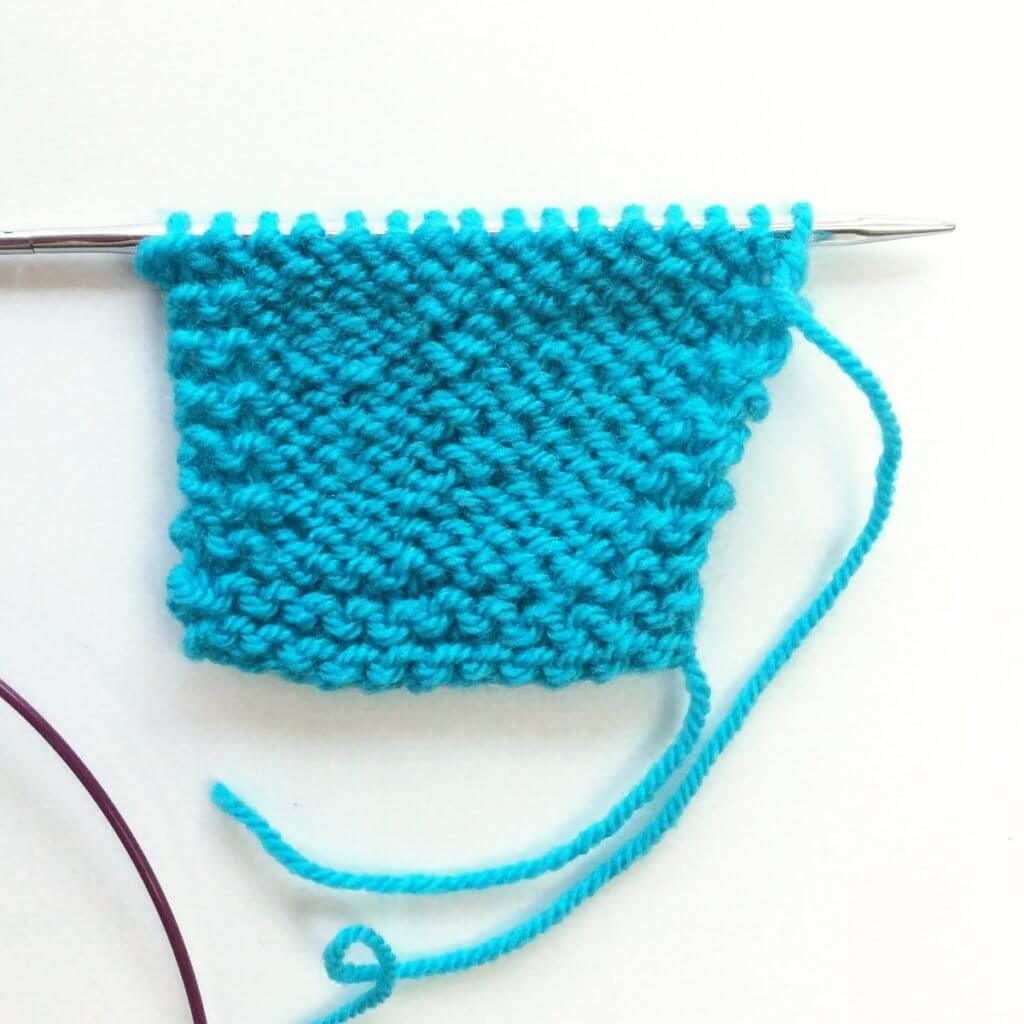
I’ve made a little swatch (continuing the same one from the RLI tutorial!) and will be making the increases 4 sts in from the garter stitch border when viewed from the wrong (purl) side.
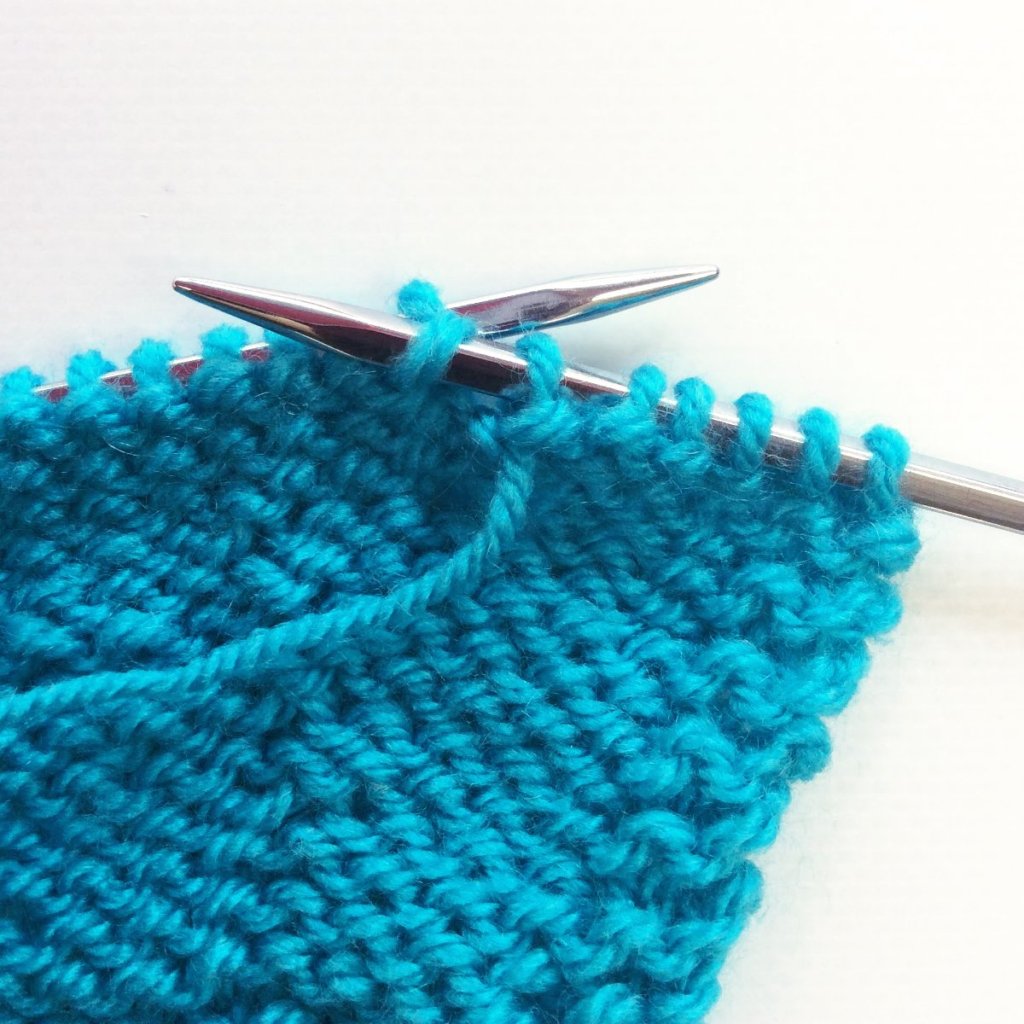
1. To start, insert your right-hand needle from bottom to top into the horizontal purl bump directly below the first stitch on the left-hand needle.
2. Next, place the lifted stitch on the left-hand needle, making sure that you place it non-twisted. In other words: the left leg of the stitch is behind the needle and the right leg is in front.
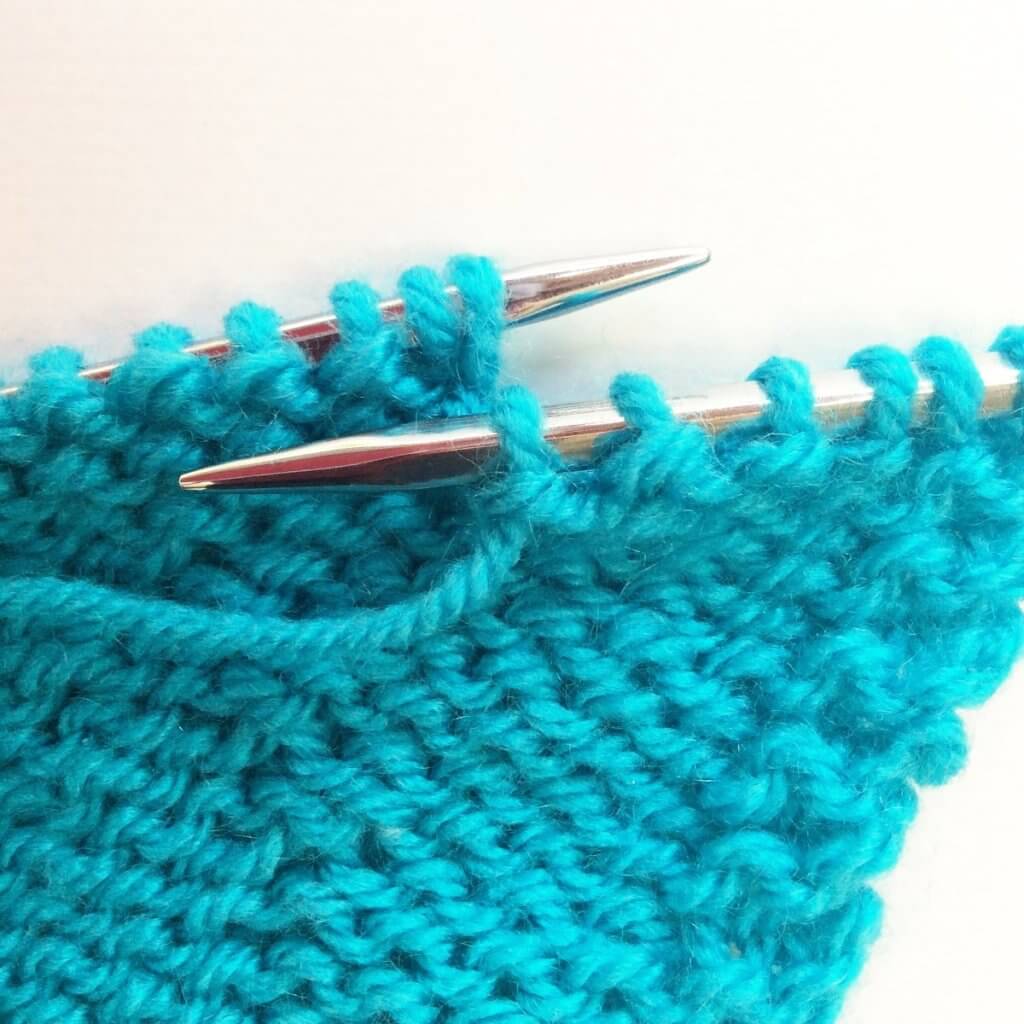
3. Now insert the other needle into the front of the stitch as if to purl….
4. … and complete the stitch by wrapping the yarn around the needle, pulling it through and slipping the worked stitch off the needle as usual. You have now increased one stitch.
5. I worked a couple of more rows, with increases on the WS (purl-side) rows only and 4 sts in from the garter stitch edge. This is how the piece looks:
Let’s turn the piece around
When turning the little swatch around to see how the RS of it looks, I found this:
Turns out that a purl-side Right Lifted Increase gives a rather lovely left-leaning result when viewed from the right side of the fabric. I’ve searched the internet to see if I could find any more information about it, but alas. So this is for now, good to know though!
Thanks to my Patreon supporters for bringing you this freebie! Creating quality patterns and tutorials is a lot of work and resource-intensive. However, I find it important to give you free content like this tutorial. Thanks to the generous support of my Patreon supporters, I can make it happen. Thank you, patrons! Click here to join, or click here to read more about La Visch Designs on Patreon.
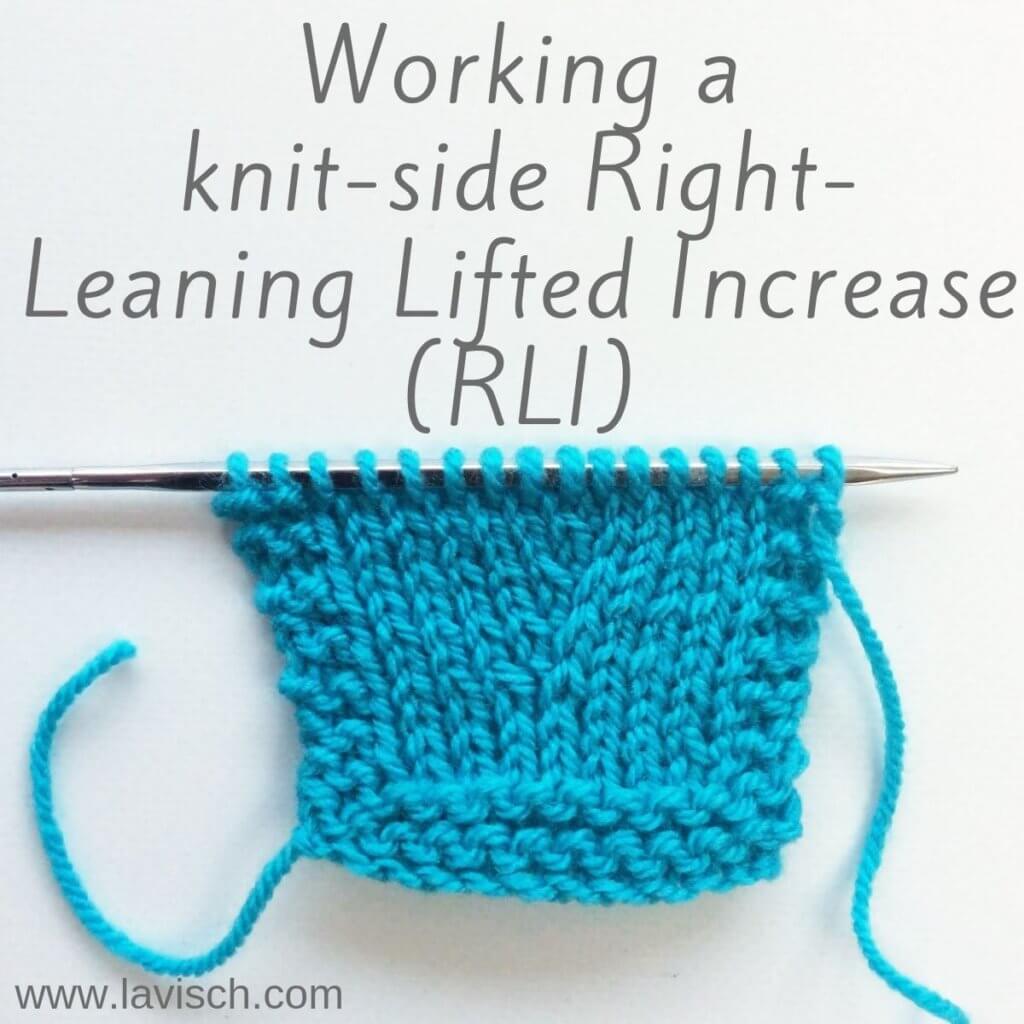
As you know, the ability to shape your knitting project is a valuable one. Without it, it would be pretty hard to make a sweater fit you right and make anything else than rectangles. Shape knitwear by increasing or decreasing the number of stitches. There are, of course, lots of different versions possible. In this tutorial, I’ll focus on the right-leaning version of the lifted increase.
With right-leaning I mean that the increase leans to the right, relative to the surrounding “normal” stitches. There is also a left-leaning version, which I’ll go into another time. Pair them together to symmetrically increase the number of stitches on your project.
What is a lifted increase?
Basically, it’s exactly how it’s called: an increase that is worked from a stitch below the one next on the needle, which is lifted to be able to work into it. There are, of course, both knit and purl versions. The knit-side version of the Right-Leaning Lifted Increase is usually named the somewhat shorter Right Lifted Increase with the abbreviation RLI.
Materials used
Yarn: * Paintbox Yarns Simply DK, a good value, good quality 100% acrylic yarn, here in the color Marine Blue.
Working a knit-side Right-Leaning Lifted Increase step by step
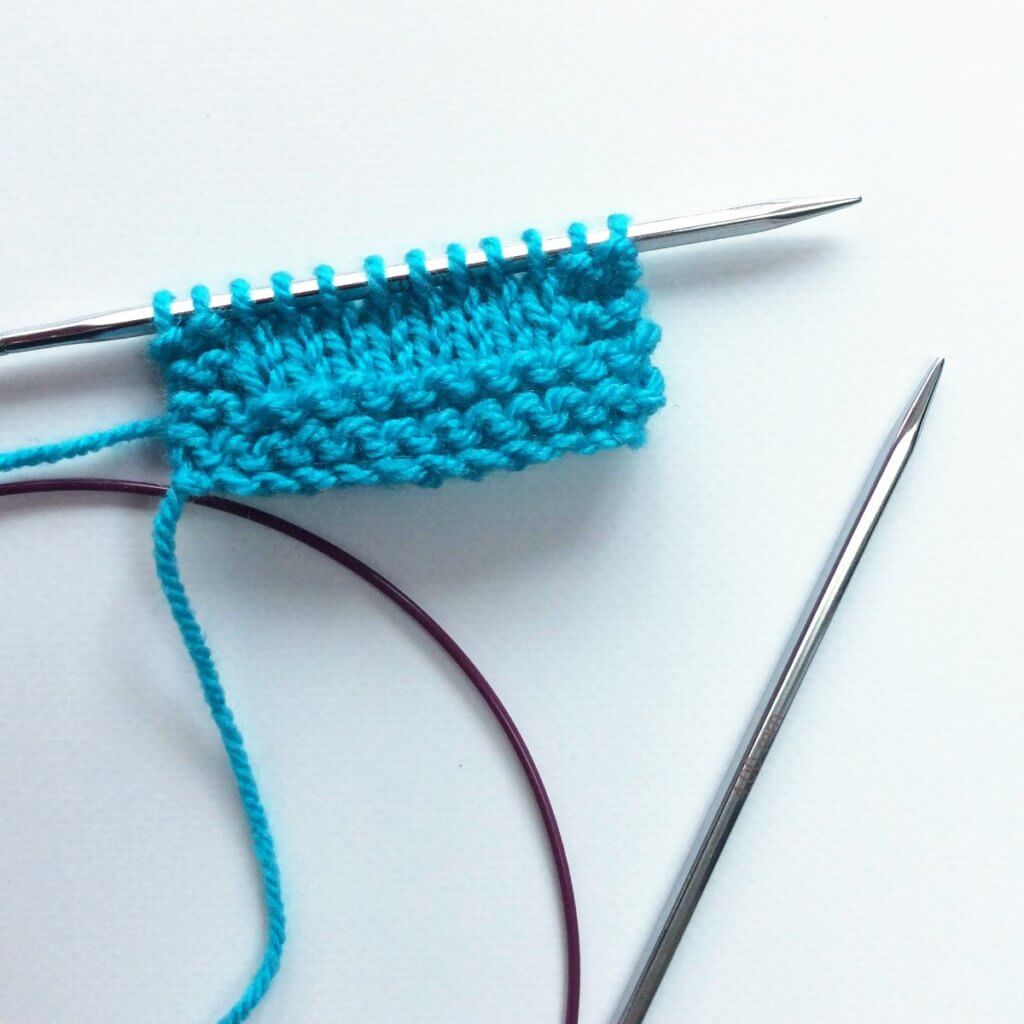
I’ve made a little swatch and will be making the increases 4 sts in from the garter stitch border when viewed from the right (knit) side.
1. To start, insert your right-hand needle from back to front into the right leg of the stitch that is directly below the next stitch on the needle.
2. Next, place the lifted stitch on the left-hand needle…
3. … and insert the other needle into the front of the stitch as if to knit.
4. Complete the stitch by wrapping the yarn around the needle, pulling it through and slipping the worked stitch off the needle as usual. You have now increased one stitch.
5. Next work the rest of the row as usual or according to instructions.
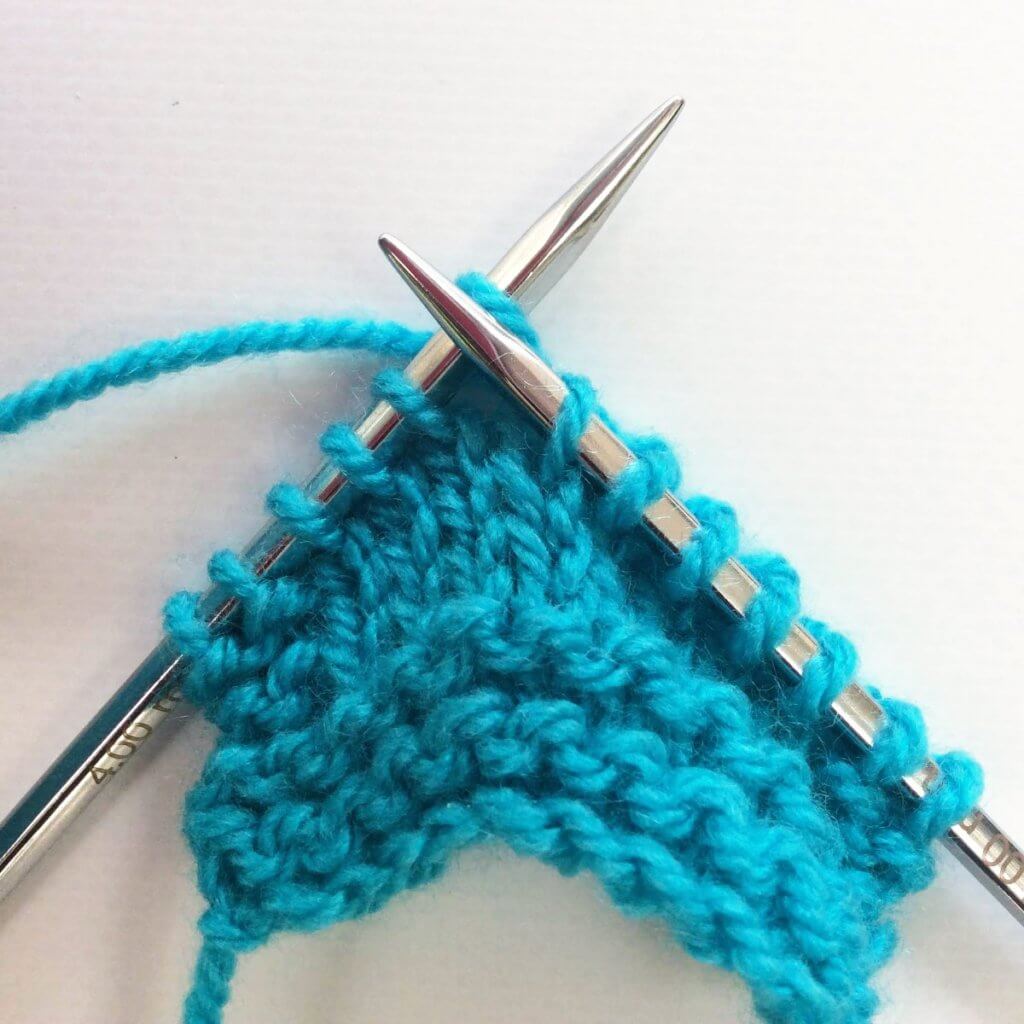
6. After I’ve worked a couple of more rows, with increases on the RS (knit-side) rows only, the piece looks like this:
Pretty neat type of increases, right?!
Thanks to my Patreon supporters for bringing you this freebie! Creating quality patterns and tutorials is a lot of work and resource-intensive. However, I find it important to give you free content like this tutorial. Thanks to the generous support of my Patreon supporters, I can make it happen. Thank you, patrons! Click here to join, or click here to read more about La Visch Designs on Patreon.