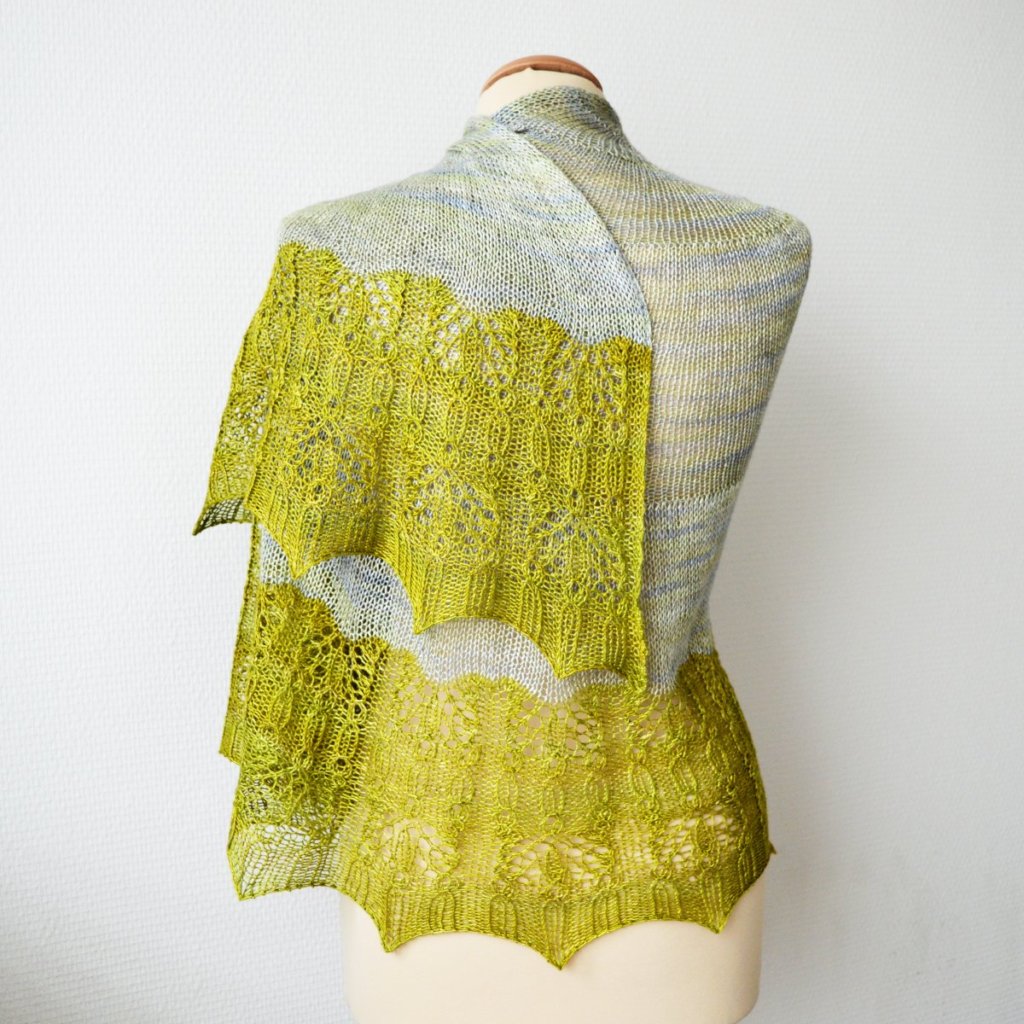
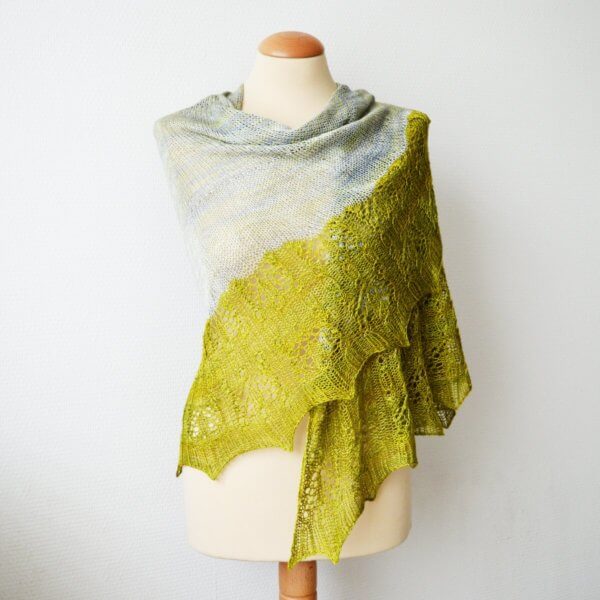
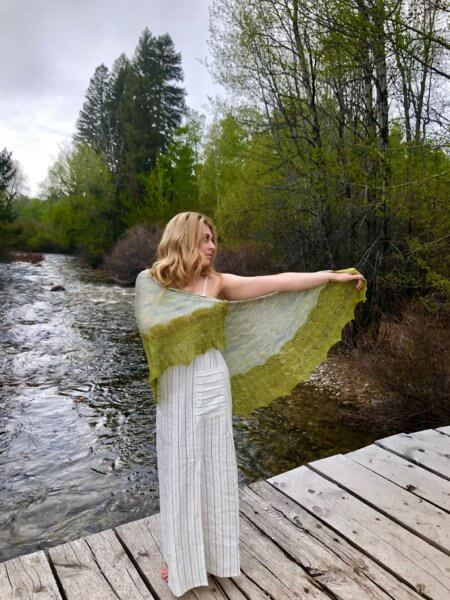
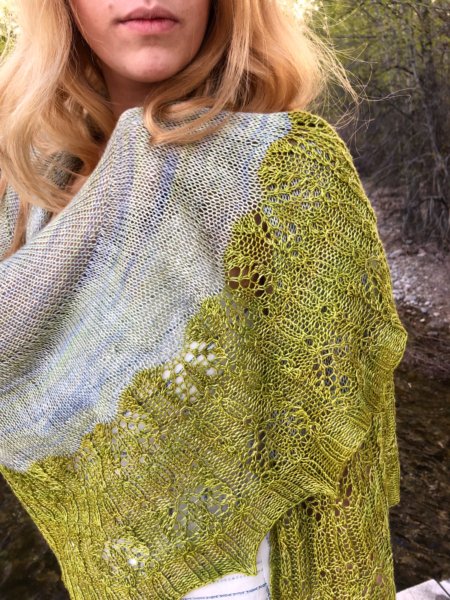
The Ramalina shawl, named for the greenish lichen, was inspired in both construction and coloring by this wonderful part of nature. The plain stockinette body lets the subtle variegation of the silk yarn used really shine.
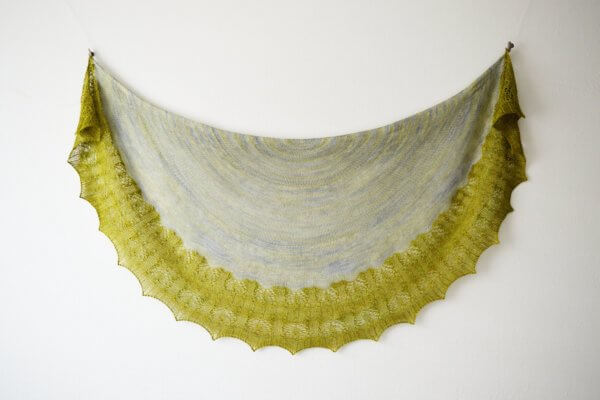
Ramalina is a semi-circle Pi shawl worked from the top-down in one piece, starting at the neck edge with a garter stitch tab. Finish the shawl with a gorgeous lace edging in the contrast color. The instructions for the lace are provided both charted and written out.
Pay what you want: (minimum €6.50)
€
Difficulty level
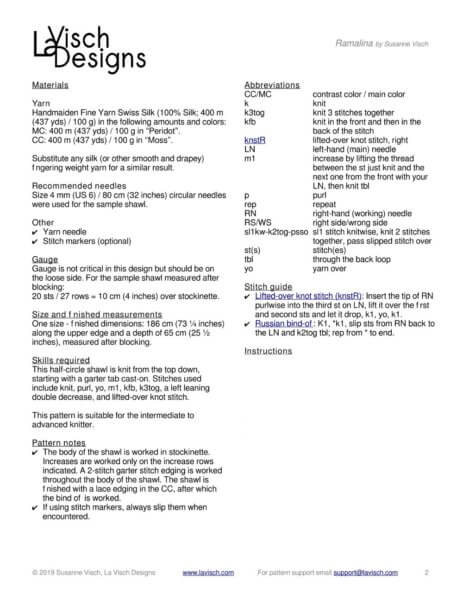
Ramalina is a half-circle shawl, knit from the top down, starting with a garter tab cast-on. Stitches used include knit, purl, yo, m1, kfb, k3tog, a left-leaning double decrease, and lifted-over knot stitch.
This pattern is suitable for the intermediate to advanced knitter.
Sizes and finished measurements
One size – finished dimensions: 186 cm (73 ¼ inches) along the upper edge and a depth of 65 cm (25 ½ inches), measured after blocking.
Pattern details
Gauge: 20 sts / 27 rows = 10 cm (4 inches) over stockinette, measured after blocking. Gauge is, however, not critical in this design.
Pattern languages included: English and Dutch (Dit patroon omvat zowel een Nederlandse als een Engelse versie)
Digital PDF has 4 pages (letter size)
Materials
Yarn: Handmaiden Fine Yarn Swiss Silk (100% Silk; 400 m (437 yds) / 100 g) in the following amounts and colors: MC: 400 m (437 yds) / 100 g in “Peridot” and CC: 400 m (437 yds) / 100 g in “Moss”. This yarn and pattern are also available as a kit from Sweater Sisters! Substitute any silk (or other smooth and drapey) fingering weight yarn for a similar result.
Size 4 mm (US Size 6) 80 cm (32 inches) or longer circular needle.
Yarn needle
Stitch markers to denote repeats of the lace patterning (optional)
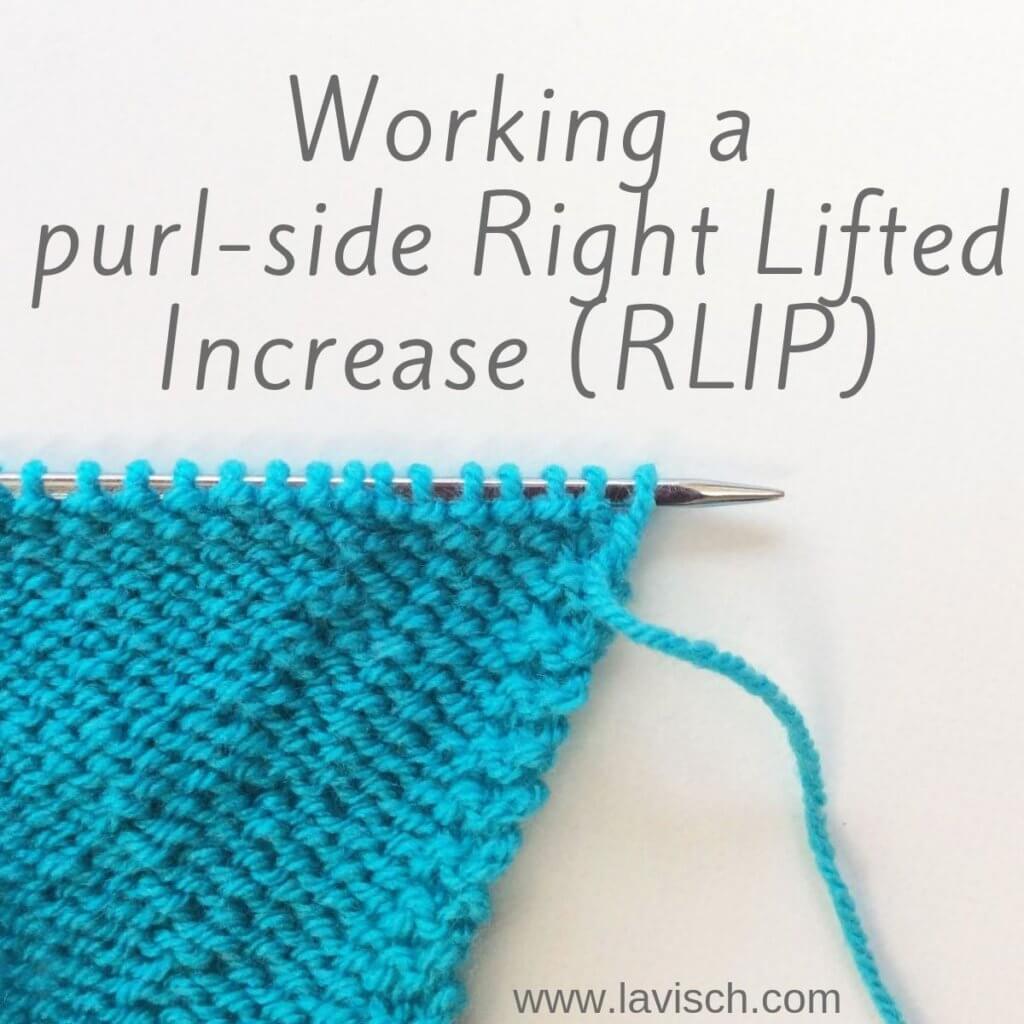
People usually shape knitwear by increasing or decreasing the number of stitches. There are, of course, lots of different versions possible. In this tutorial, I’ll focus on the purl-side right-leaning version of the lifted increase. If you’re looking for the knit-side right-leaning lifted increase, just click here.
What is a lifted increase?
Basically, it’s exactly how it’s called: an increase that you work from a stitch below the one next on the needle. This stitch is lifted to be able to work into it. The purl-side version is called the same as the knit-side version, only with “purl” added after it. Right Lifted Increase (Purl) with the abbreviation RLIP.
Materials used
Yarn: * Paintbox Yarns Simply DK, a good value, good quality 100% acrylic yarn, here in the color Marine Blue.
Working a purl-side Right-Leaning Lifted Increase step by step
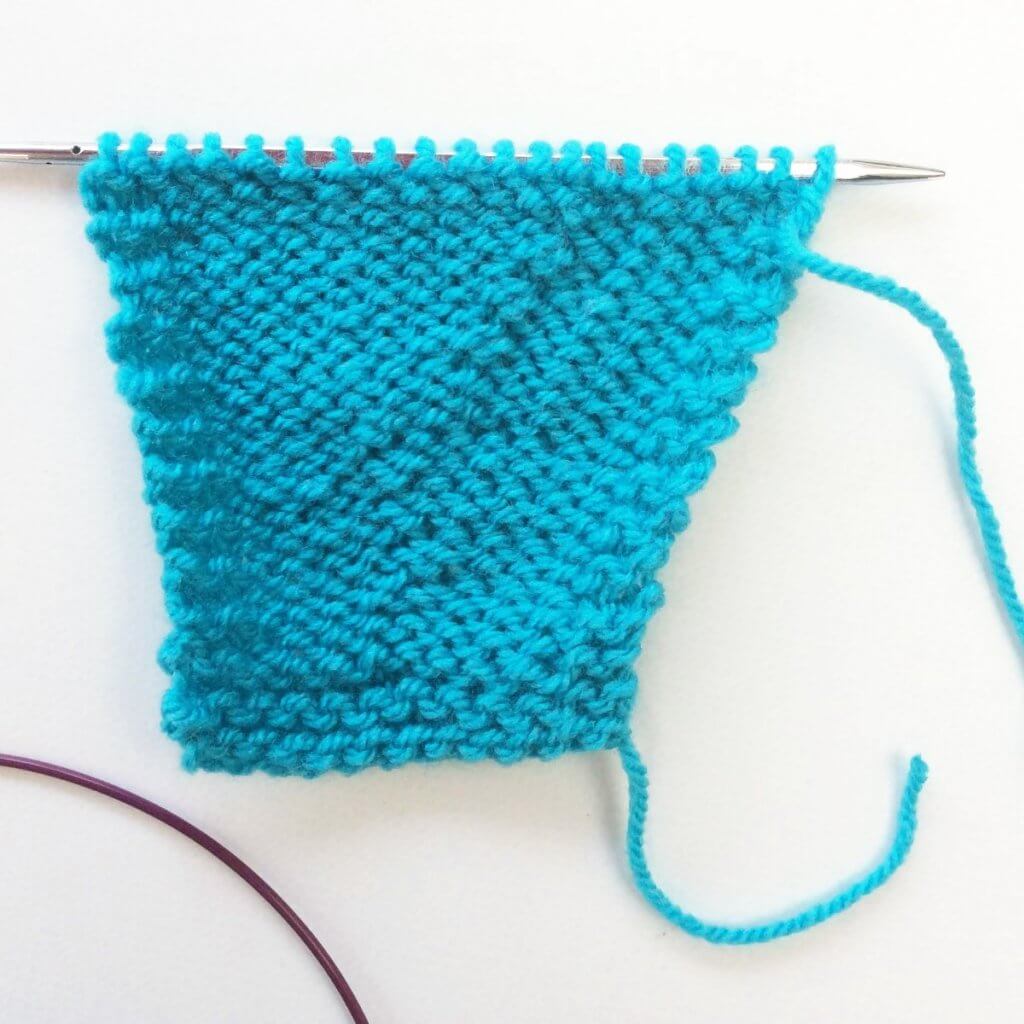
I’ve made a little swatch (continuing the same one from the RLI tutorial!) and will be making the increases 4 sts in from the garter stitch border when viewed from the wrong (purl) side.
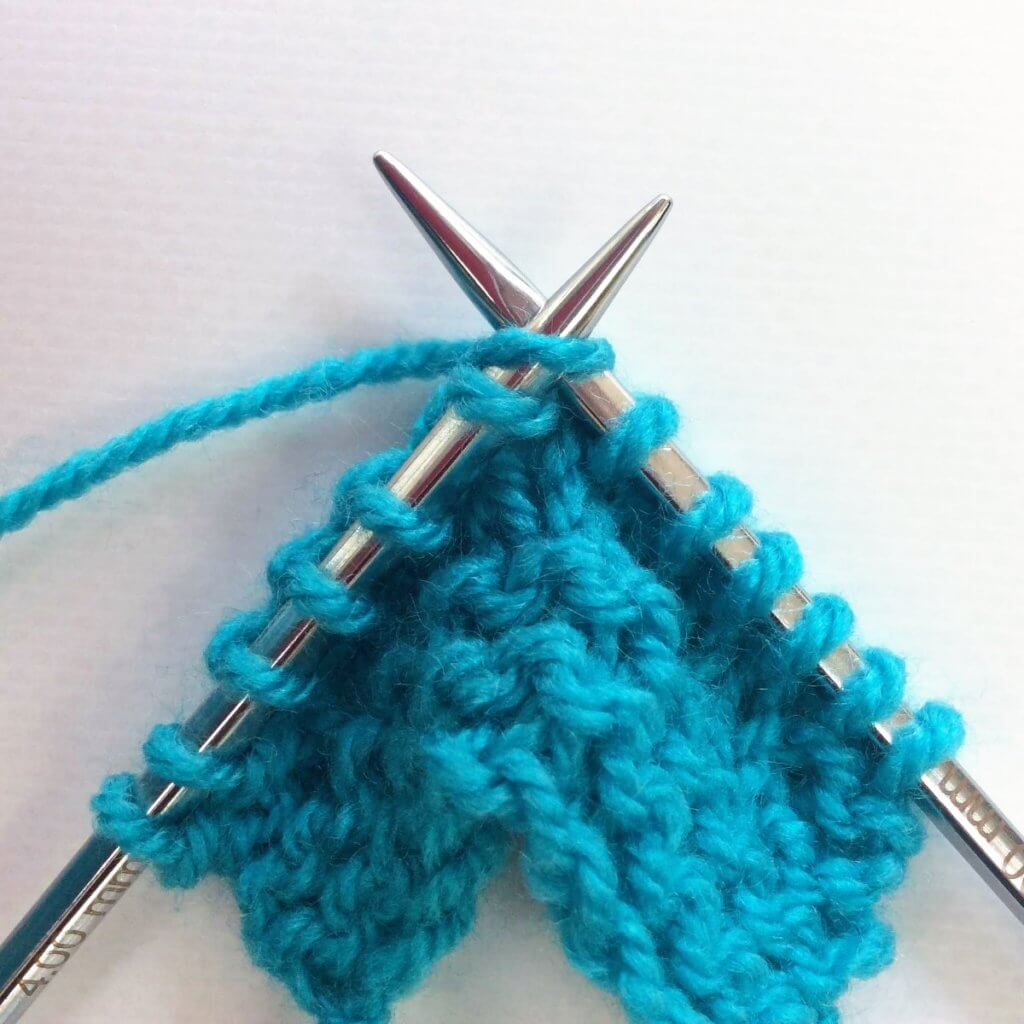
1. To start, insert your right-hand needle from bottom to top into the horizontal purl bump directly below the first stitch on the left-hand needle.
2. Next, place the lifted stitch on the left-hand needle, making sure that you place it non-twisted. In other words: the left leg of the stitch is behind the needle and the right leg is in front.
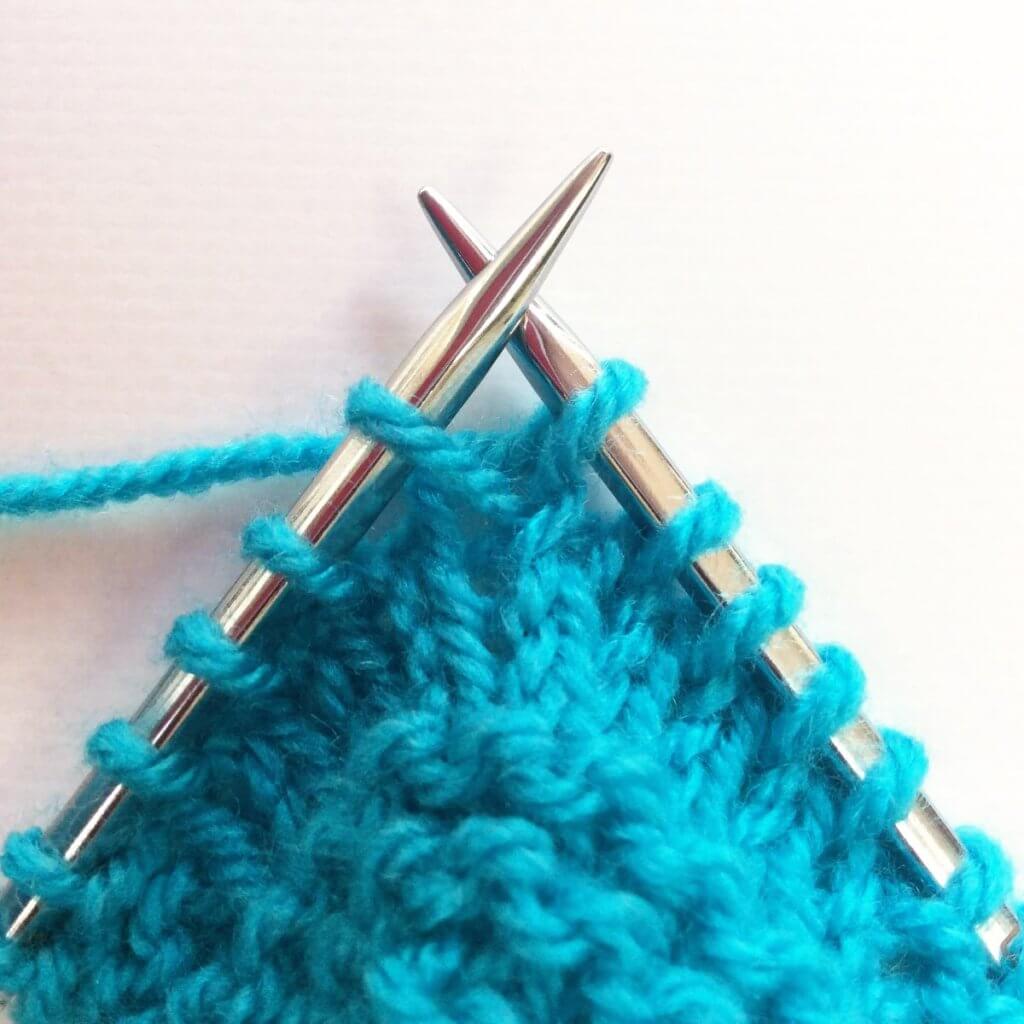
3. Now insert the other needle into the front of the stitch as if to purl….
4. … and complete the stitch by wrapping the yarn around the needle, pulling it through and slipping the worked stitch off the needle as usual. You have now increased one stitch.
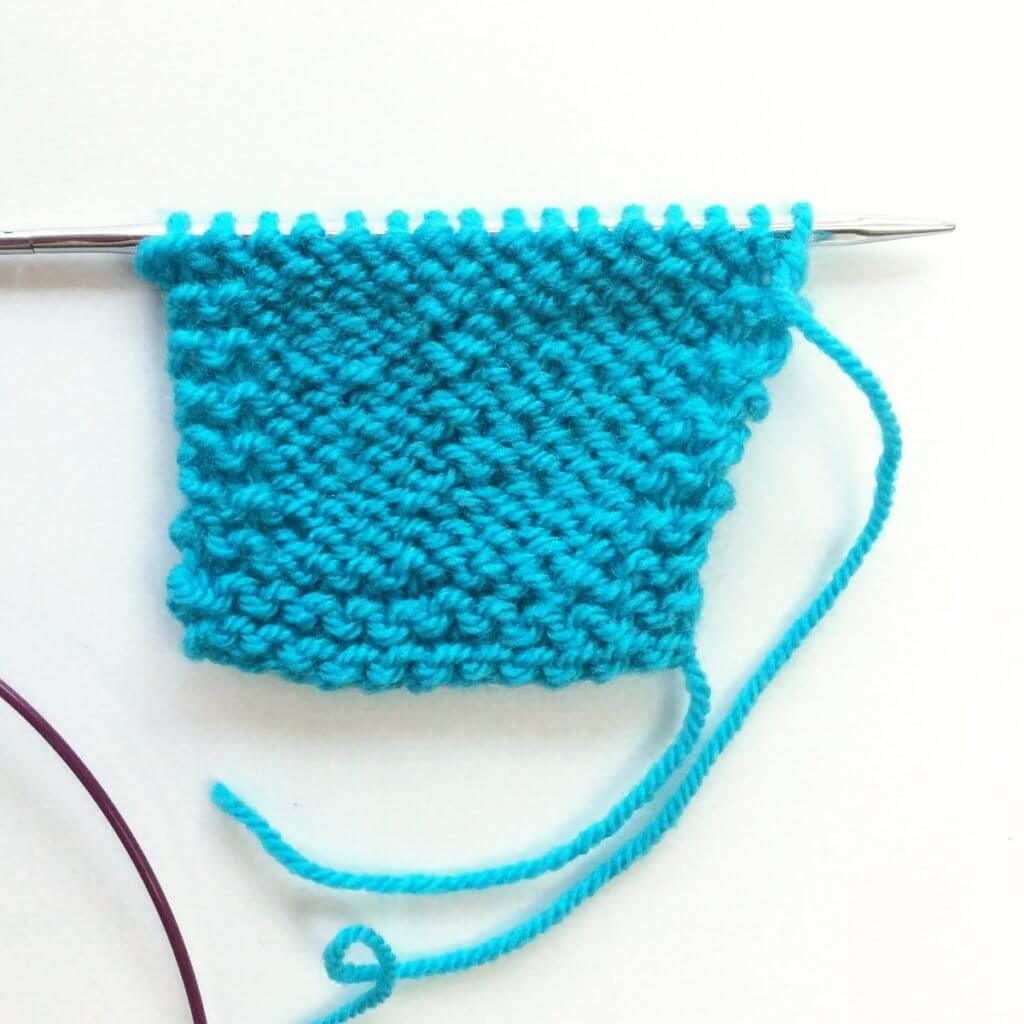
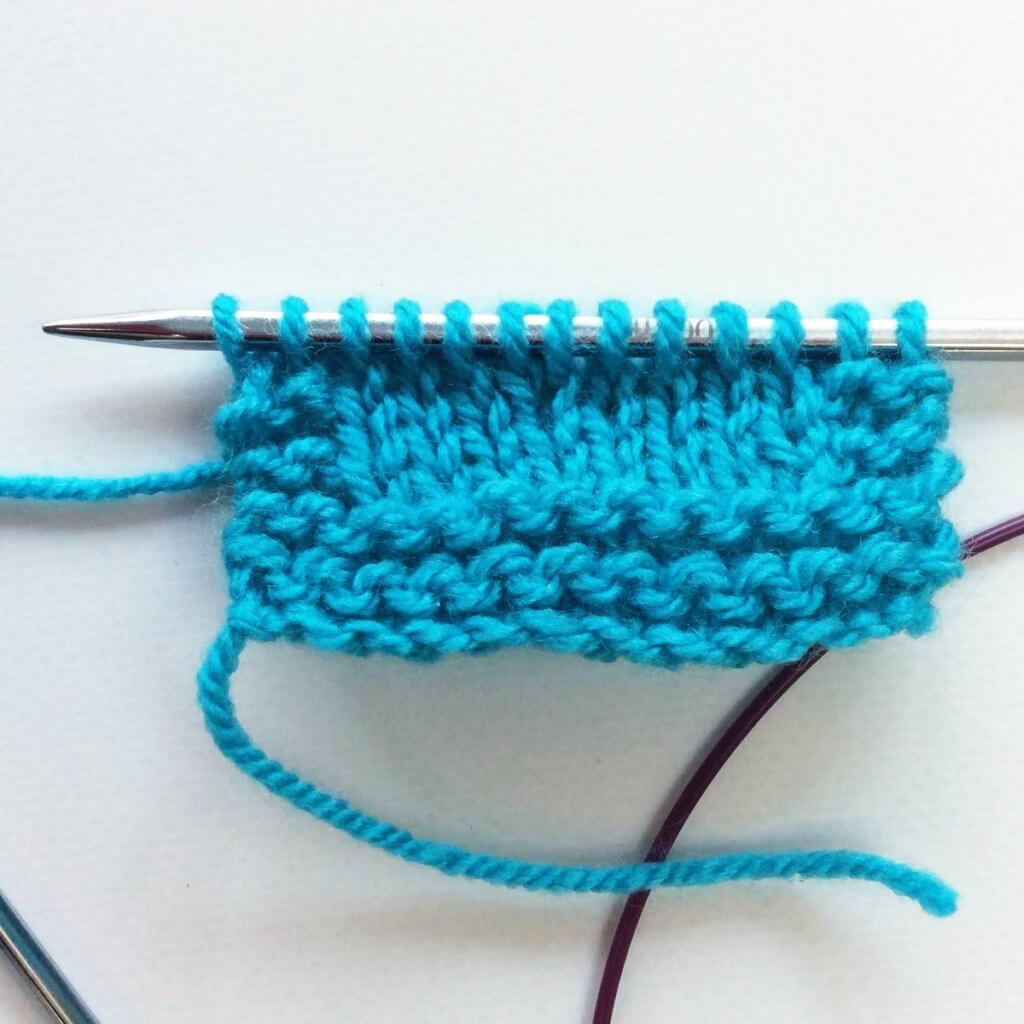
5. I worked a couple of more rows, with increases on the WS (purl-side) rows only and 4 sts in from the garter stitch edge. This is how the piece looks:
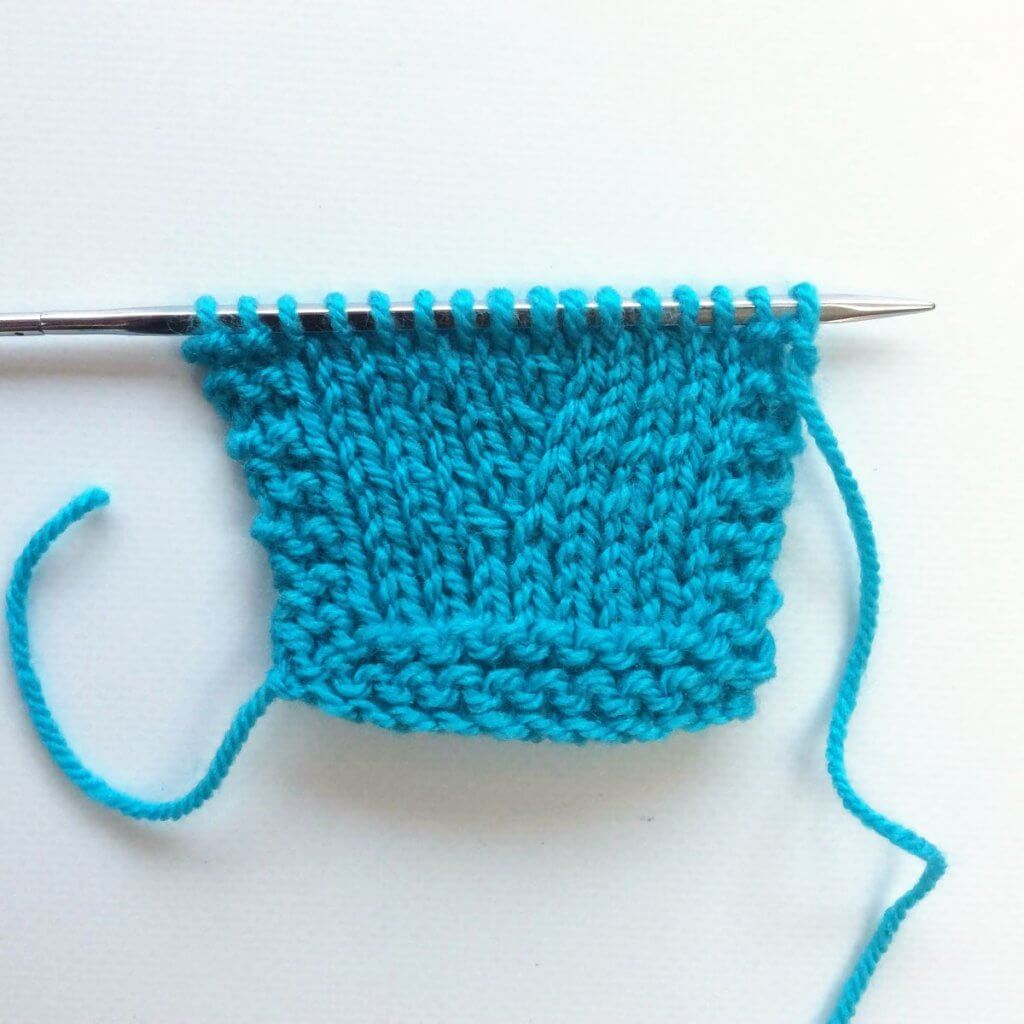
Let’s turn the piece around
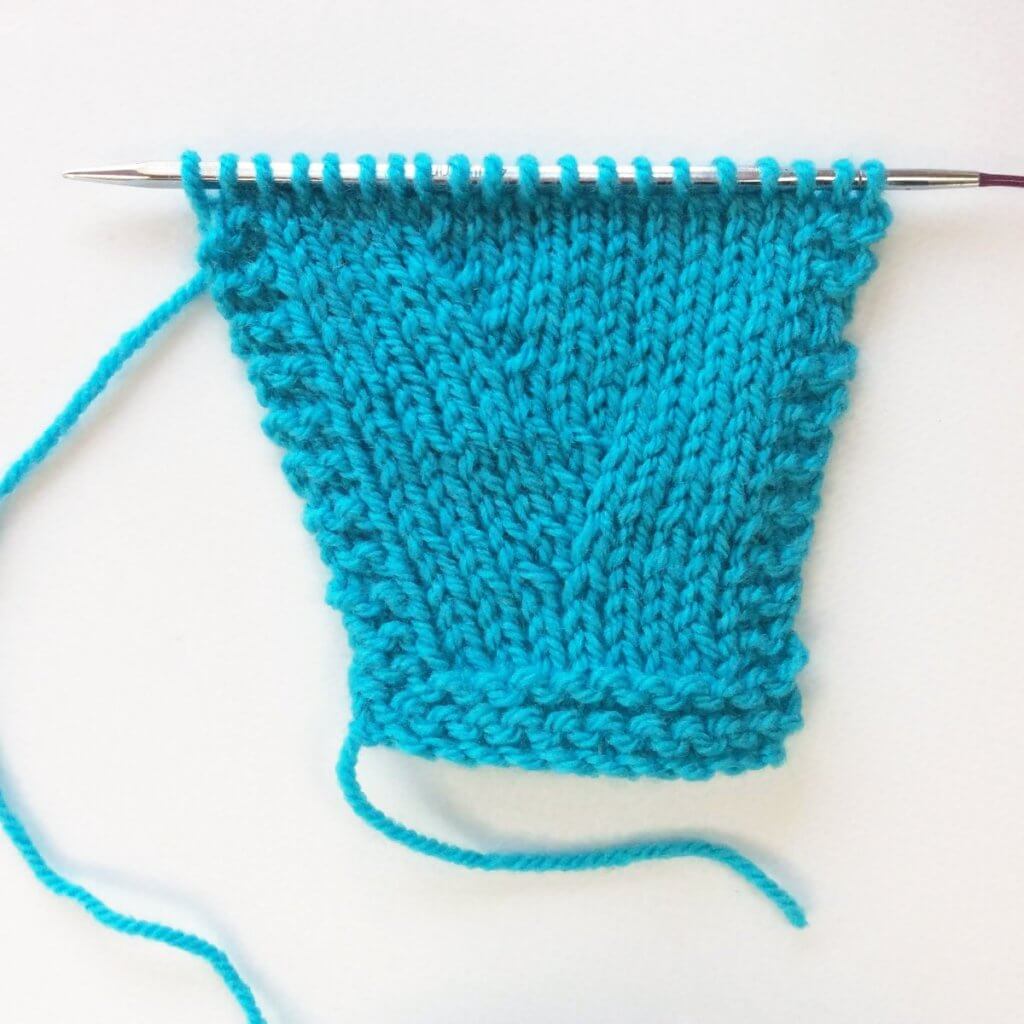
When turning the little swatch around to see how the RS of it looks, I found this:
Turns out that a purl-side Right Lifted Increase gives a rather lovely left-leaning result when viewed from the right side of the fabric. I’ve searched the internet to see if I could find any more information about it, but alas. So this is for now, good to know though!
Thanks to my Patreon supporters for bringing you this freebie! Creating quality patterns and tutorials is a lot of work and resource-intensive. However, I find it important to give you free content like this tutorial. Thanks to the generous support of my Patreon supporters, I can make it happen. Thank you, patrons! Click here to join, or click here to read more about La Visch Designs on Patreon.
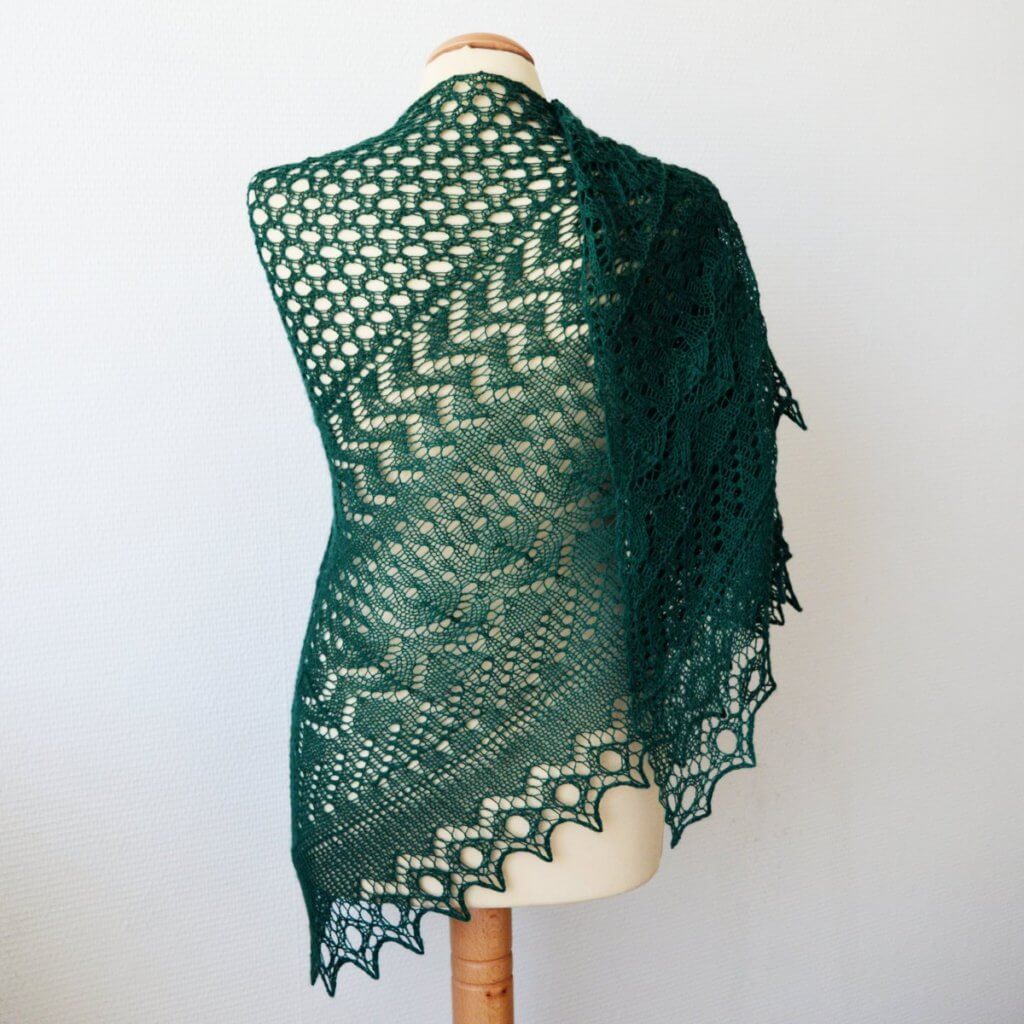
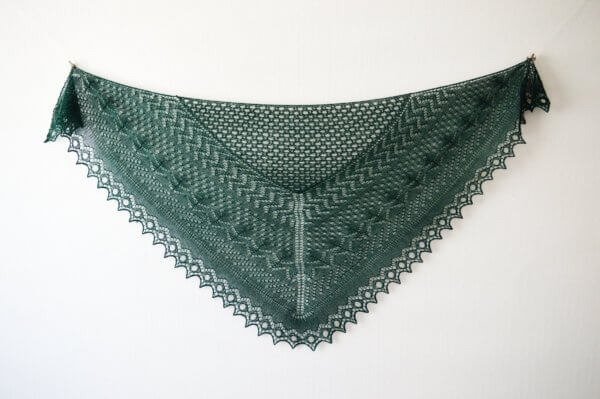
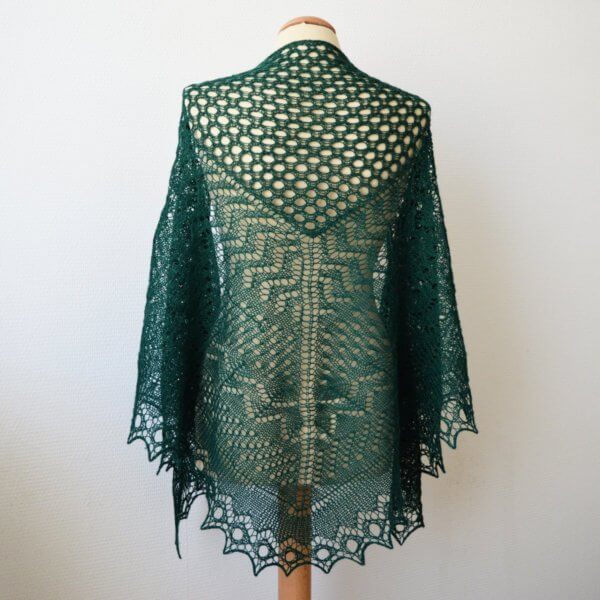
The Half Fade Hap is the smaller, triangular sister of the Full Fade Hap. With its generous size, it makes for a wonderful, cozy shawl. This shawl is made in the tradition of the shawls from the Shetland Isles, making for a very interesting construction.
The Half Fade Hap starts at one corner of the center triangle and increased until big enough. Stitches are picked up along the edges and the stunning border is worked outwards. Each color band in its own lace patterning. The shawl is finished with a gorgeous edging that is knitted on sideways and attached to the live stitches of the border as it is being worked.
The instructions for the lace are provided both charted and written out.
Pay what you want: (minimum €6.50)
€
Difficulty level
This shawl is worked flat back and forth. Techniques used include working a knitted-on edging. Stitches used include knit, purl, yo, k2tog, skp, and various double decreases.
This pattern is suitable for the intermediate to advanced knitter.
Sizes and finished measurements
Finished dimensions of the dark green sample shawl: Wingspan of 192 cm (76 ½ inches) and a depth of 82 cm (32 ¼ inches), measured after blocking.
Pattern details
This shawl pattern is written for a gauge of approx. 25 sts / 30 rows = 10 cm (4 inches) over the center triangle, measured after blocking Gauge is not critical in this design.
Pattern languages included: English and Dutch (Dit patroon omvat zowel een Nederlandse als een Engelse versie)
Digital PDF has 8 pages (letter size)
Yarn
AG2N Hand Dyed Yarns Softy Squishy Fingering 2 (100% Merino; 399 m (436 yds) / 100 g) in the following colors and amounts: C1: 100 m, (109 yds) / 25 g in “Fade 1”, C2: 100 m (109 yds) / 25 g in “Fade 2”, C3: 100 m (109 yds) / 25 g in “Fade 3”, C4: 100 m (109 yds) / 25 g in “Fade 4”, C5: 100 m (109 yds) / 25 g in “Fade 5” and C6: 200 m (218 yds) / 50 g in “Fade 6”.
AG2N Hand Dyed Yarns has dyed several fade sets (with yarn enough for the full hap or 2 half haps), these can be found here.
Substitute
wool fingering weight yarn of comparable thickness, in a fade
sequence for a similar result, or with 742 m (812 yds) / 175 g yarn
in a single color.
Dark
green version: Worked by I. Kooiman in Zettle Treviso (75% Wool, 25%
Nylon; 209 m (229 yds) / 50 g) in green.
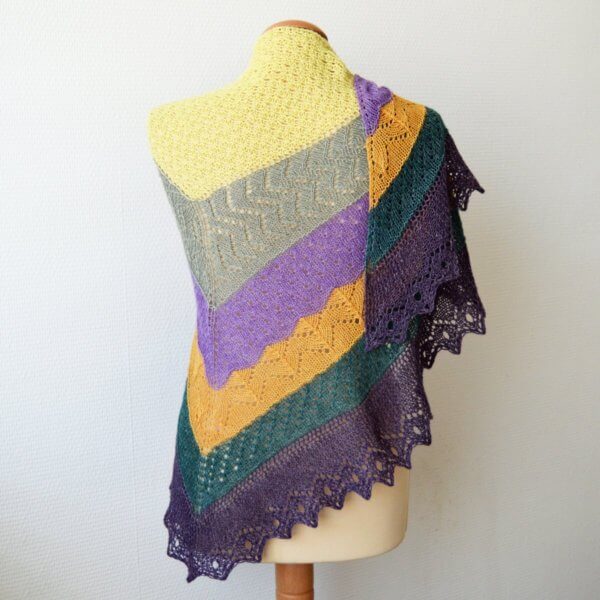
Multicolored
version with the center triangle in yellow: Worked by M. Veldhuijzen
van Zanten in Geilsk 3 ply Bomuld og uld (55% Wool, 45% Cotton; 232 m
(254 yds) / 50 g) in multiple colors.
Materials
Size 4 mm (US Size 6) 80 cm (32 inches) or longer circular needle.
Yarn needle
4 stitch markers to denote the edge and center stitches
Stitch markers to denote repeats of the lace patterning (optional)
As you know, the ability to shape your knitting project is a valuable one. Without it, it would be pretty hard to make a sweater fit you right and make anything else than rectangles. Shape knitwear by increasing or decreasing the number of stitches. There are, of course, lots of different versions possible. In this tutorial, I’ll focus on the right-leaning version of the lifted increase.
With right-leaning I mean that the increase leans to the right, relative to the surrounding “normal” stitches. There is also a left-leaning version, which I’ll go into another time. Pair them together to symmetrically increase the number of stitches on your project.
What is a lifted increase?
Basically, it’s exactly how it’s called: an increase that is worked from a stitch below the one next on the needle, which is lifted to be able to work into it. There are, of course, both knit and purl versions. The knit-side version of the Right-Leaning Lifted Increase is usually named the somewhat shorter Right Lifted Increase with the abbreviation RLI.
Materials used
Yarn: * Paintbox Yarns Simply DK, a good value, good quality 100% acrylic yarn, here in the color Marine Blue.
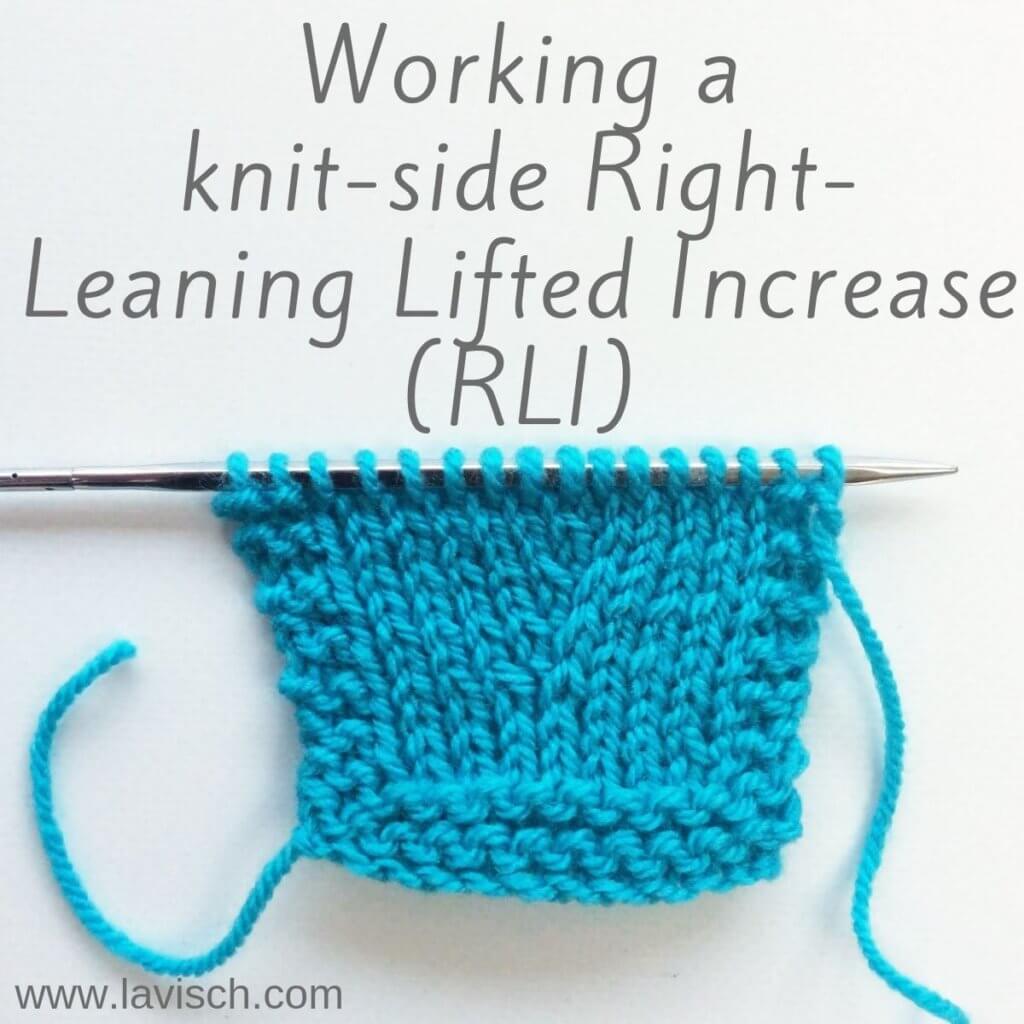
Working a knit-side Right-Leaning Lifted Increase step by step
I’ve made a little swatch and will be making the increases 4 sts in from the garter stitch border when viewed from the right (knit) side.
1. To start, insert your right-hand needle from back to front into the right leg of the stitch that is directly below the next stitch on the needle.
2. Next, place the lifted stitch on the left-hand needle…
3. … and insert the other needle into the front of the stitch as if to knit.
4. Complete the stitch by wrapping the yarn around the needle, pulling it through and slipping the worked stitch off the needle as usual. You have now increased one stitch.
5. Next work the rest of the row as usual or according to instructions.
6. After I’ve worked a couple of more rows, with increases on the RS (knit-side) rows only, the piece looks like this:
Pretty neat type of increases, right?!
Thanks to my Patreon supporters for bringing you this freebie! Creating quality patterns and tutorials is a lot of work and resource-intensive. However, I find it important to give you free content like this tutorial. Thanks to the generous support of my Patreon supporters, I can make it happen. Thank you, patrons! Click here to join, or click here to read more about La Visch Designs on Patreon.
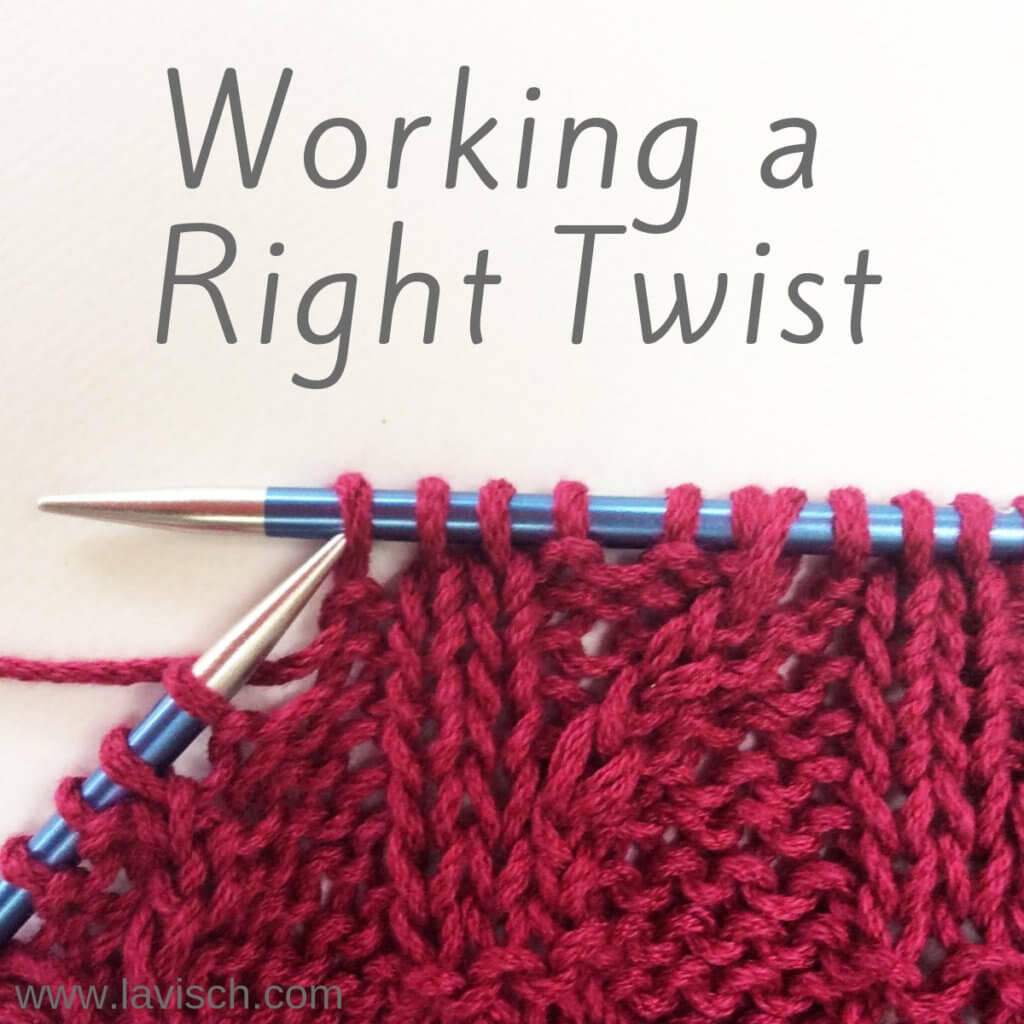
In one of the designs I’m working on, I’m using a lovely intricate stitch pattern from the Japanese Knitting Stitch Bible by Hitomi Shida. In this particular stitch pattern, a Right Twist stitch is used. So, in this post, I’ll go into the details on how to work this stitch.
The basic characteristic of a Right Twist, is that it switches the order of 2 adjoining stitches, one “main stitch” and one “background stitch” to make it appear that the main stitch travels to the right. The background is usually reverse stockinette. The main stitch is usually worked twisted (working the stitch through the back loop) stockinette. This way it pops even more against the background.
The instruction from the Japanese Knitting Stitch Bible for this stitch consists of the following text:
With RN, go in front of first st and ktbl second st without removing it from LN; p first st and slip both off LN.
Materials used
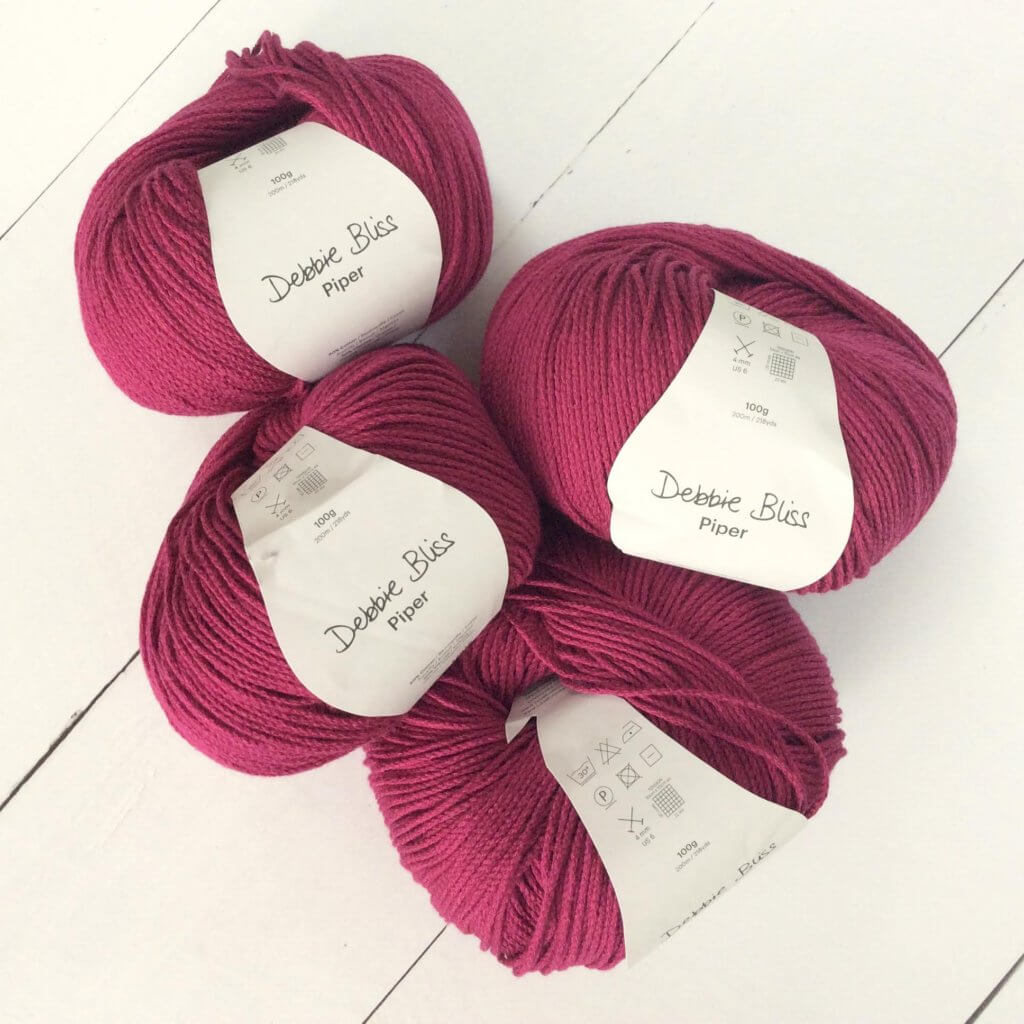
Yarn: Debbie Bliss “Piper” in Magenta. It’s a yarn with a composition of 50% cotton and 50% viscose. It has a great stitch definition, perfect for trying out those intricate Japanese stitch patterns.
Needles: KnitPro Zing Fixed Circular Needles. In this tutorial, I used the 4 mm (US 6) size with a cable length of 80 cm (32 inches).
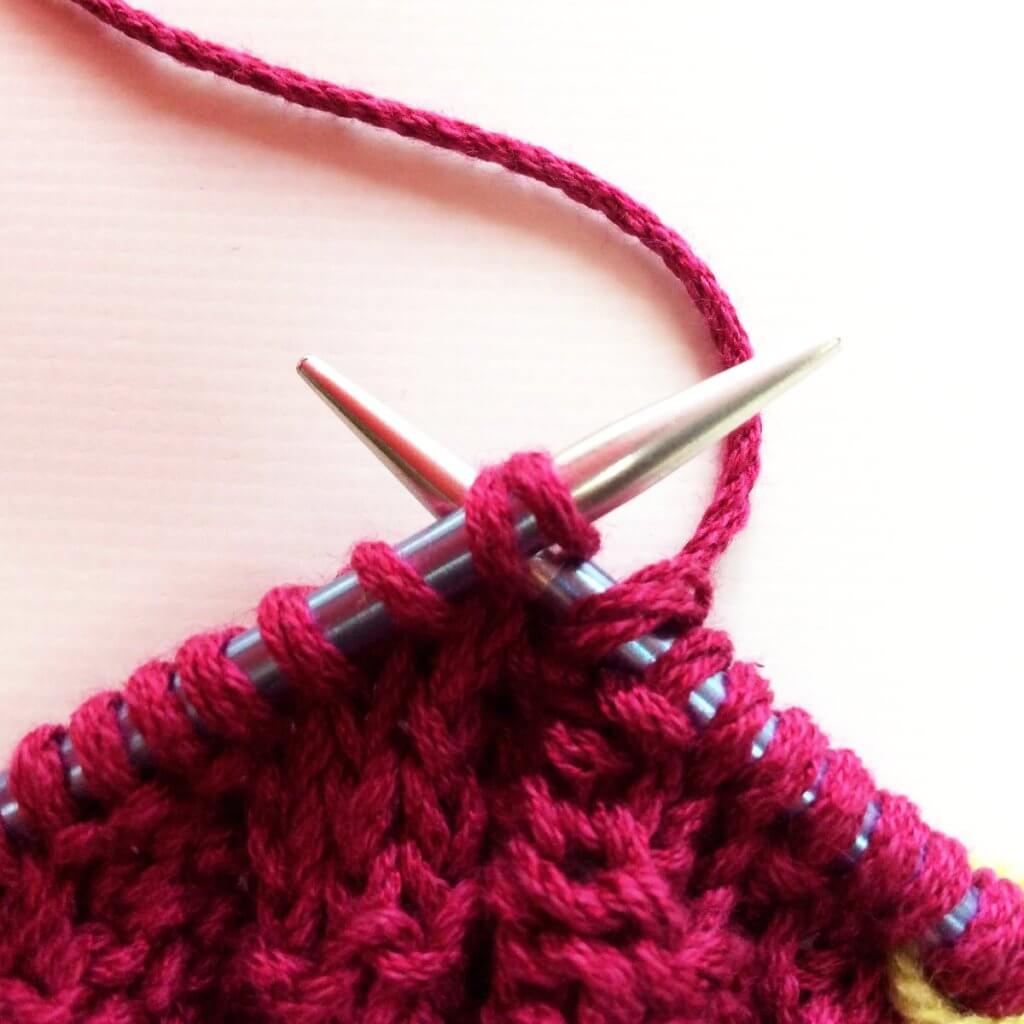
Working a Right Twist step by step
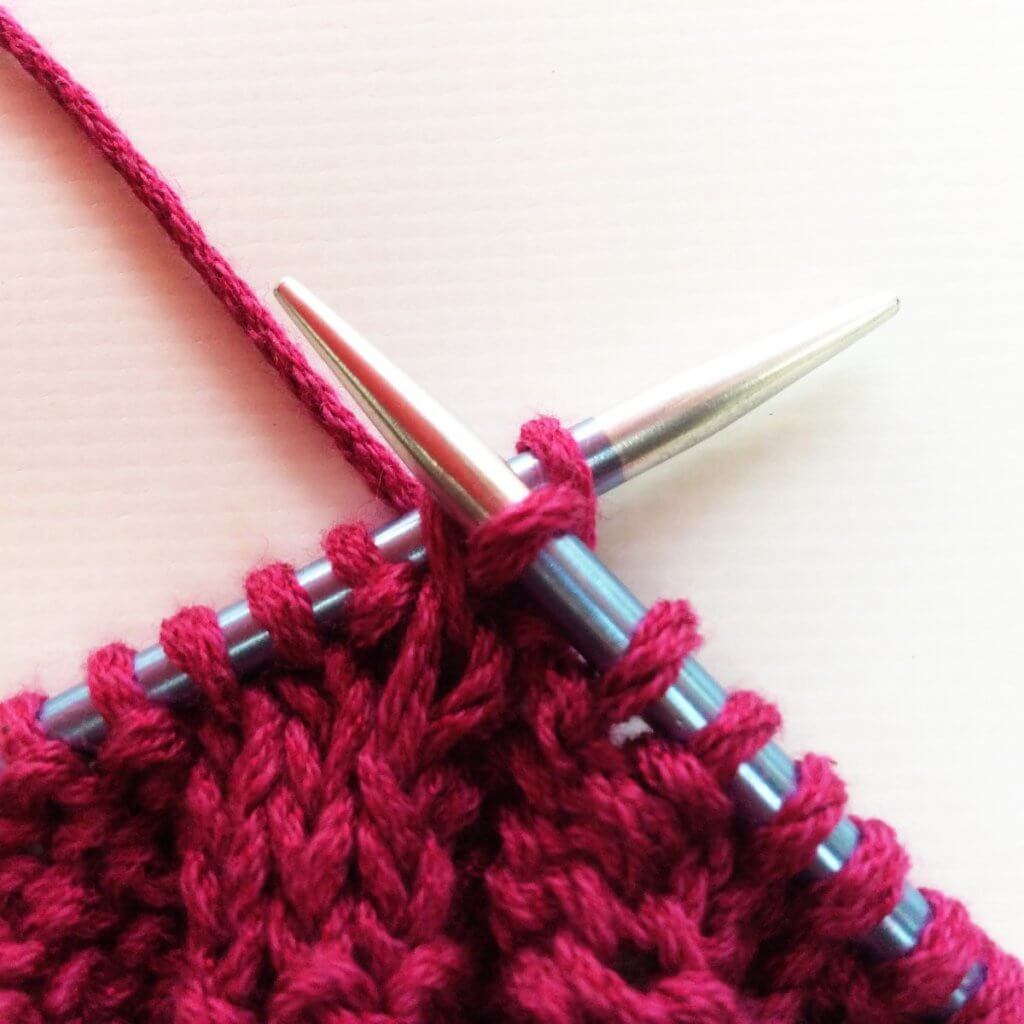
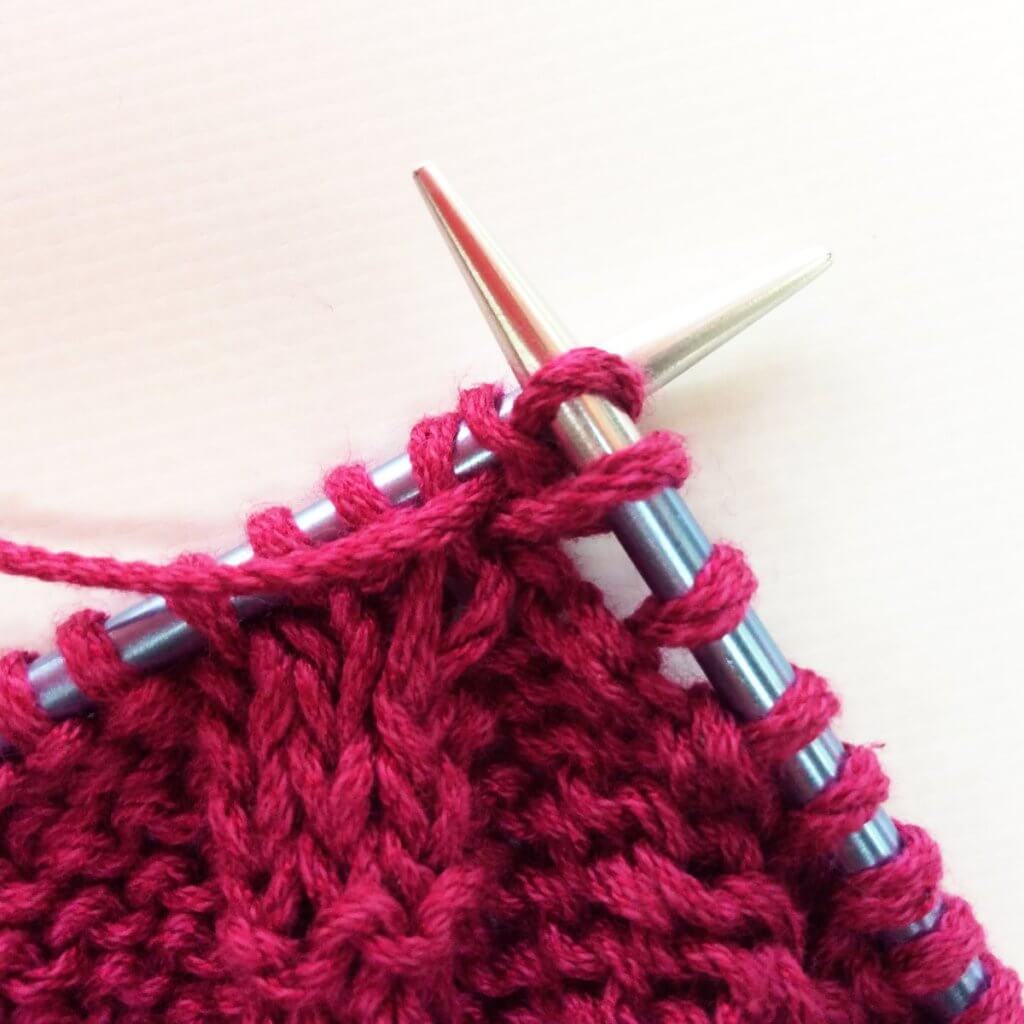
1. The first 2 stitches on the left-hand needle in the picture below, are the ones we’re going to work the Right Twist over. In other words: we’re going to switch the order of the knit and the purl stitch, to make it appear that the knit stitch travels to the right.
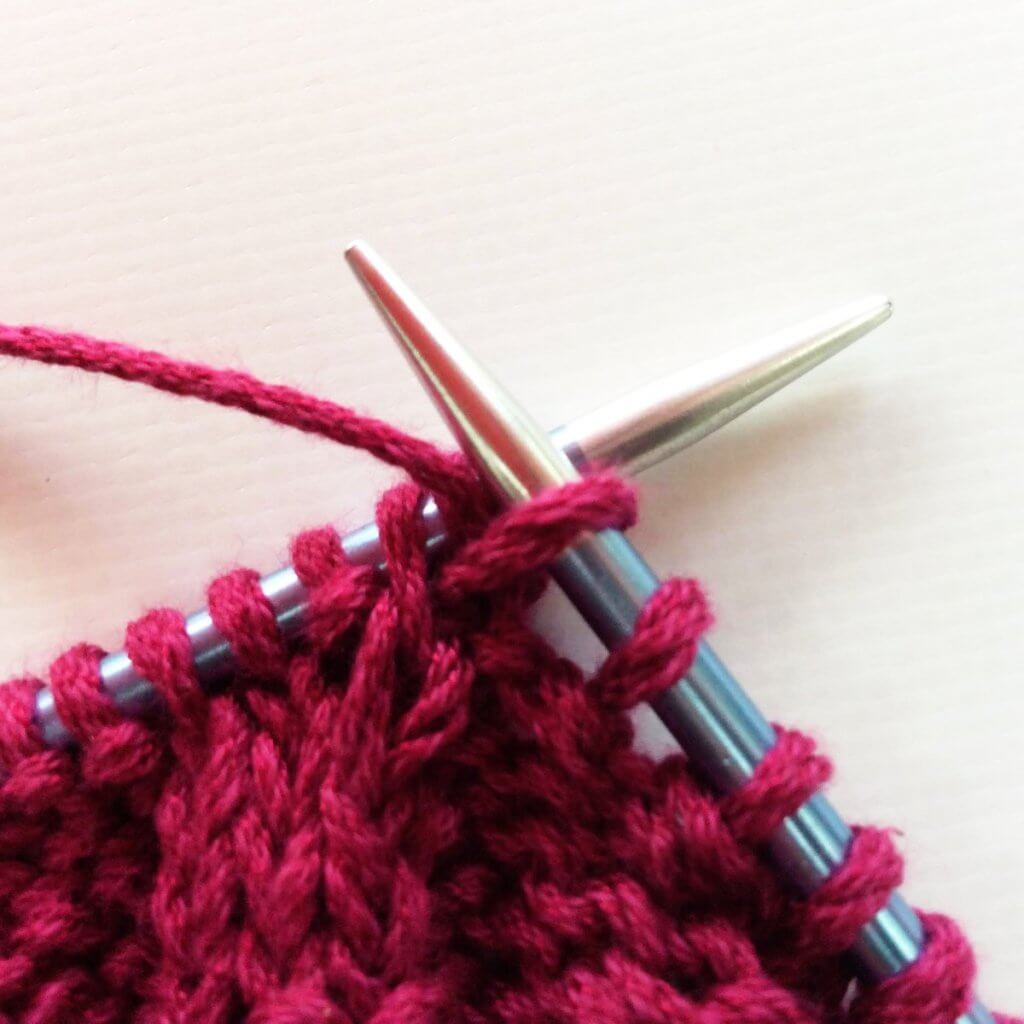
2. To start, insert your right-hand needle knit wise into the back loop of the second stitch from the tip of the left-hand needle to work a twisted knit stitch. The yarn is at the back of the work.
3. Wrap your yarn around the needle…
4. ….and pull it through the stitch.
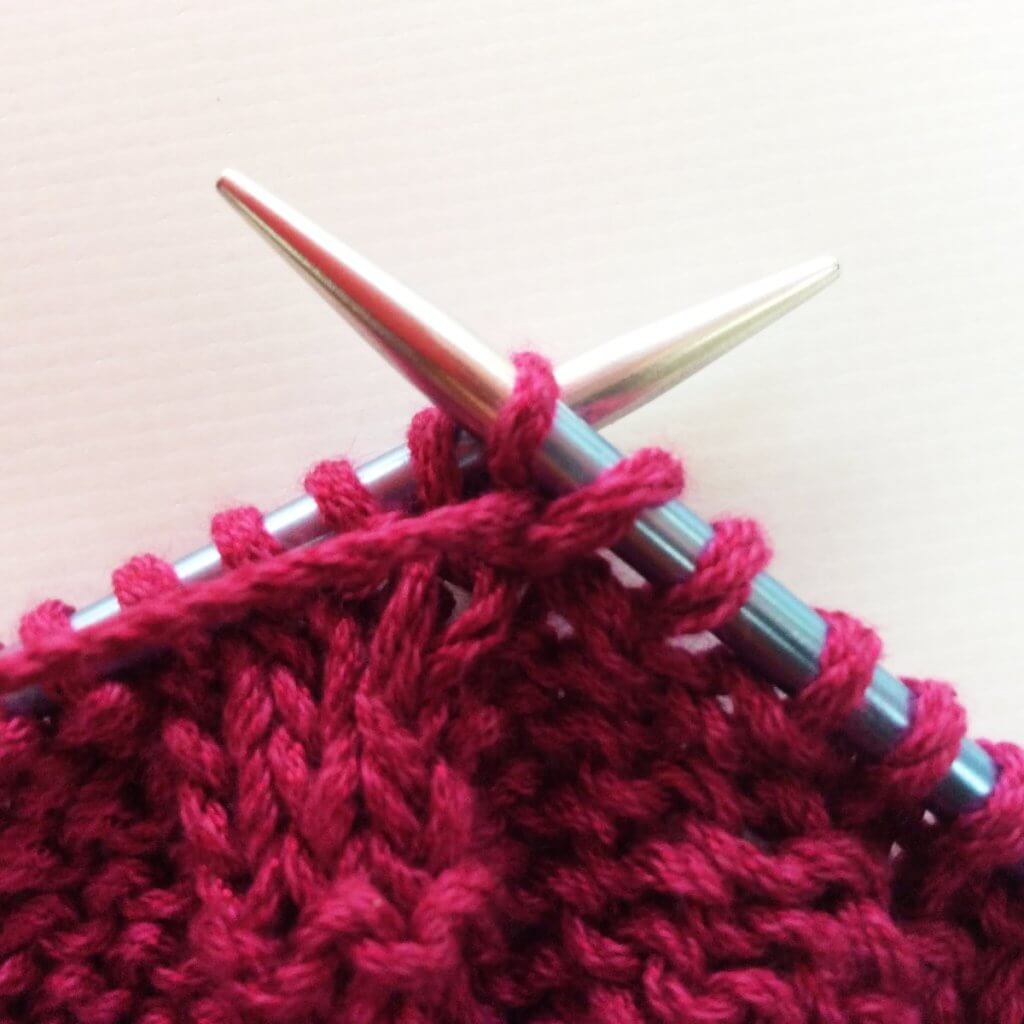
5. Next we’re going to work the first stitch we skipped before. Since that is a purl stitch we first have to move the working yarn to the front of the work.
6. Now it’s time to insert your right-hand needle purl wise into the first stitch from the tip of the left-hand needle.
7. Wrap your yarn around the needle…
8. … and pull it through the stitch.
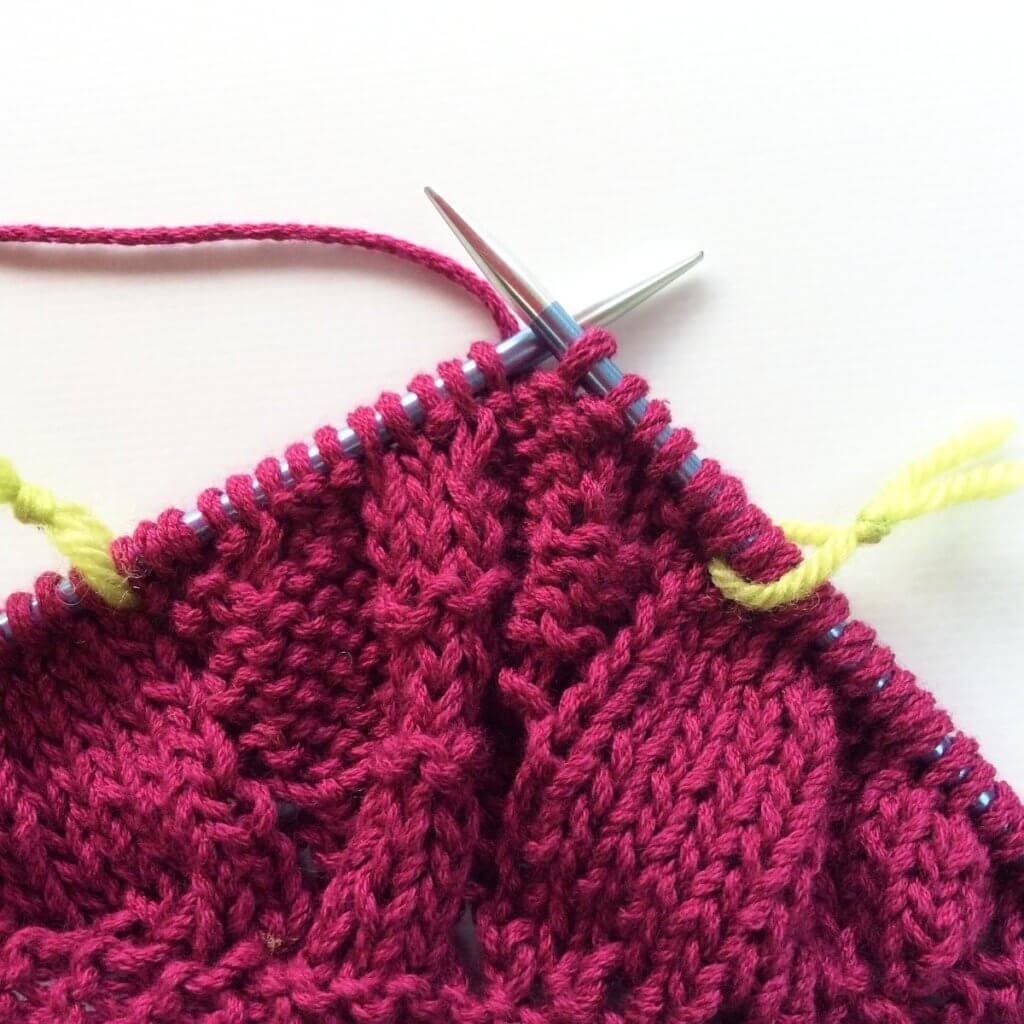
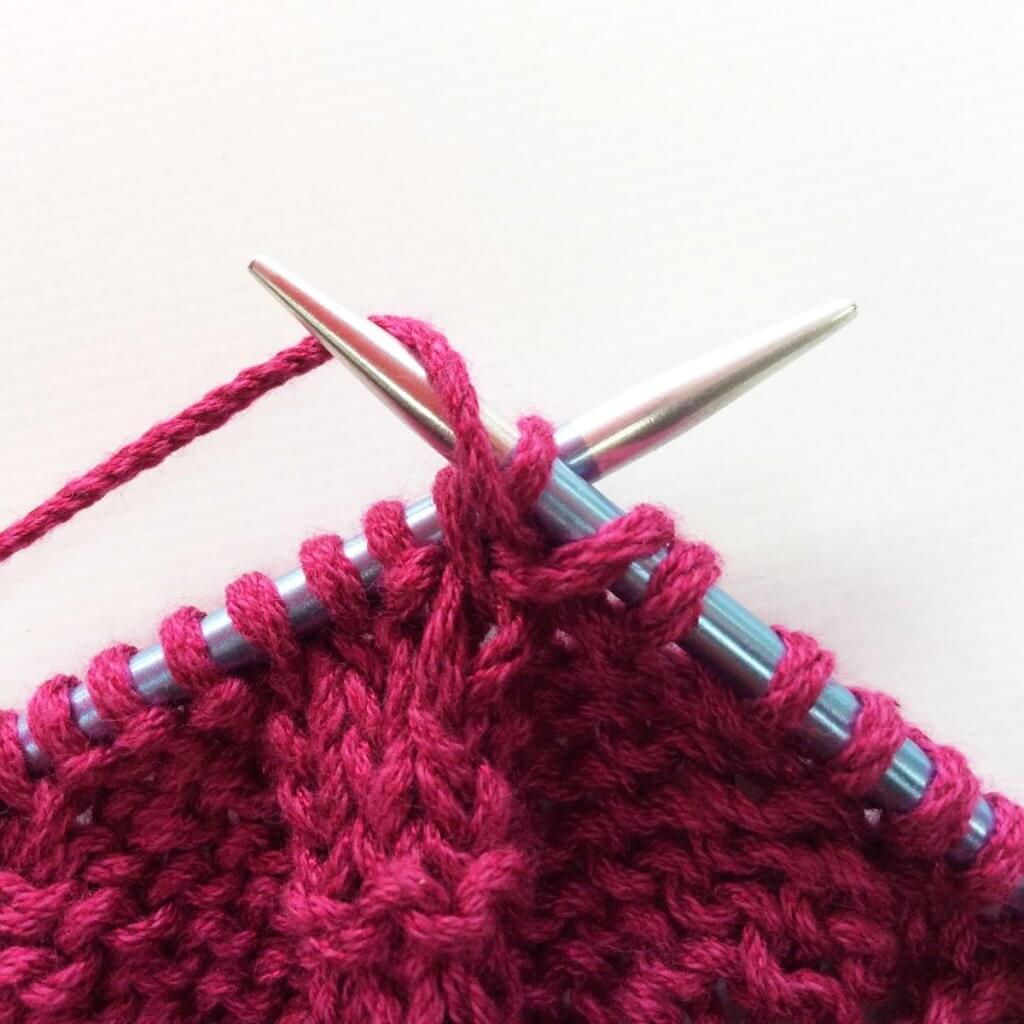
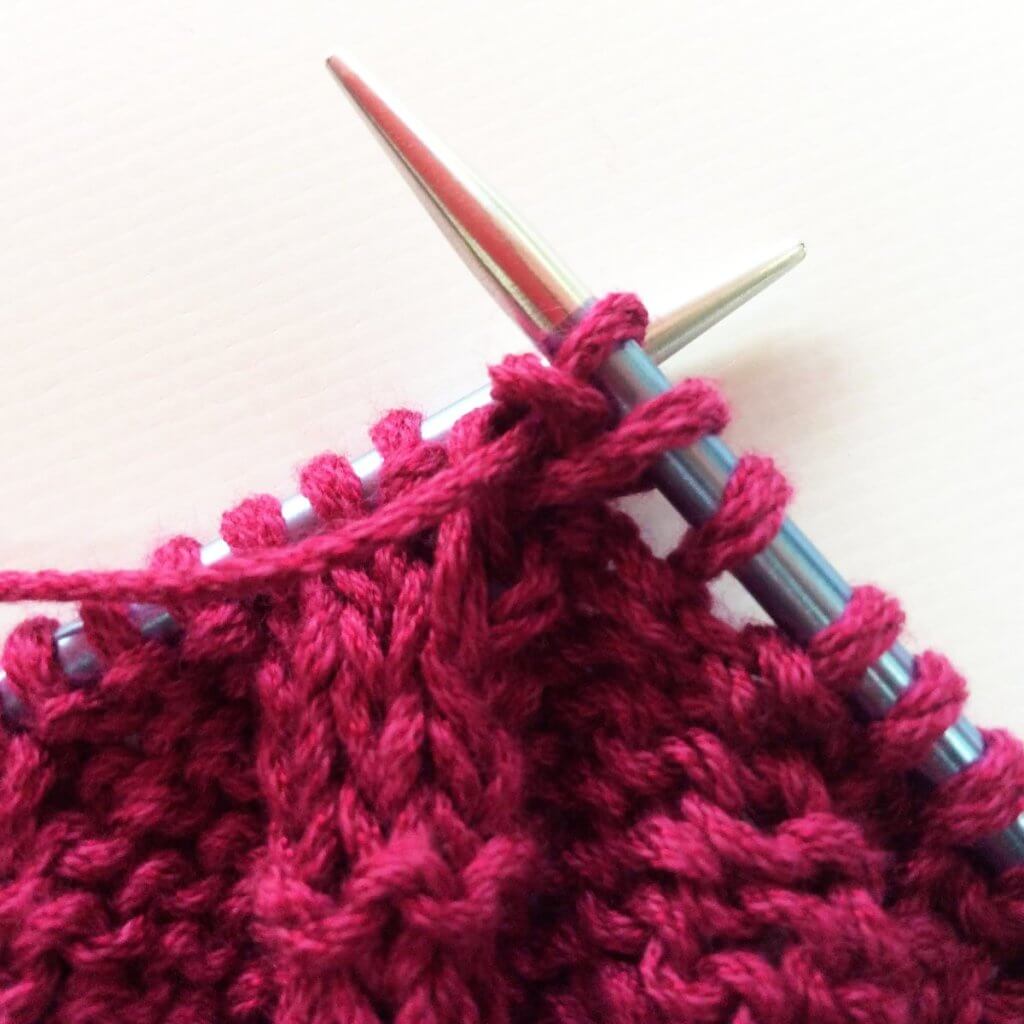
9. Now both stitches are worked, slip them from the left-hand needle to complete your Right Twist stitch!
On the following wrong side row, work the stitches as they present themselves. In other words: what looks like a knit stitch is knit, what looks like a purl stitch is purled, and the “traveling stitch” is purled through the back loop. Below is how it looks after a couple of more rows have been worked.
And that’s it! In a new tutorial I’ll go into how to work a Left Twist stitch, stay tuned!
Thanks to my Patreon supporters for bringing you this freebie! Creating quality patterns and tutorials is a lot of work and resource-intensive. However, I find it important to give you free content like this tutorial. Thanks to the generous support of my Patreon supporters, I can make it happen. Thank you, patrons! Click here to join, or click here to read more about La Visch Designs on Patreon.
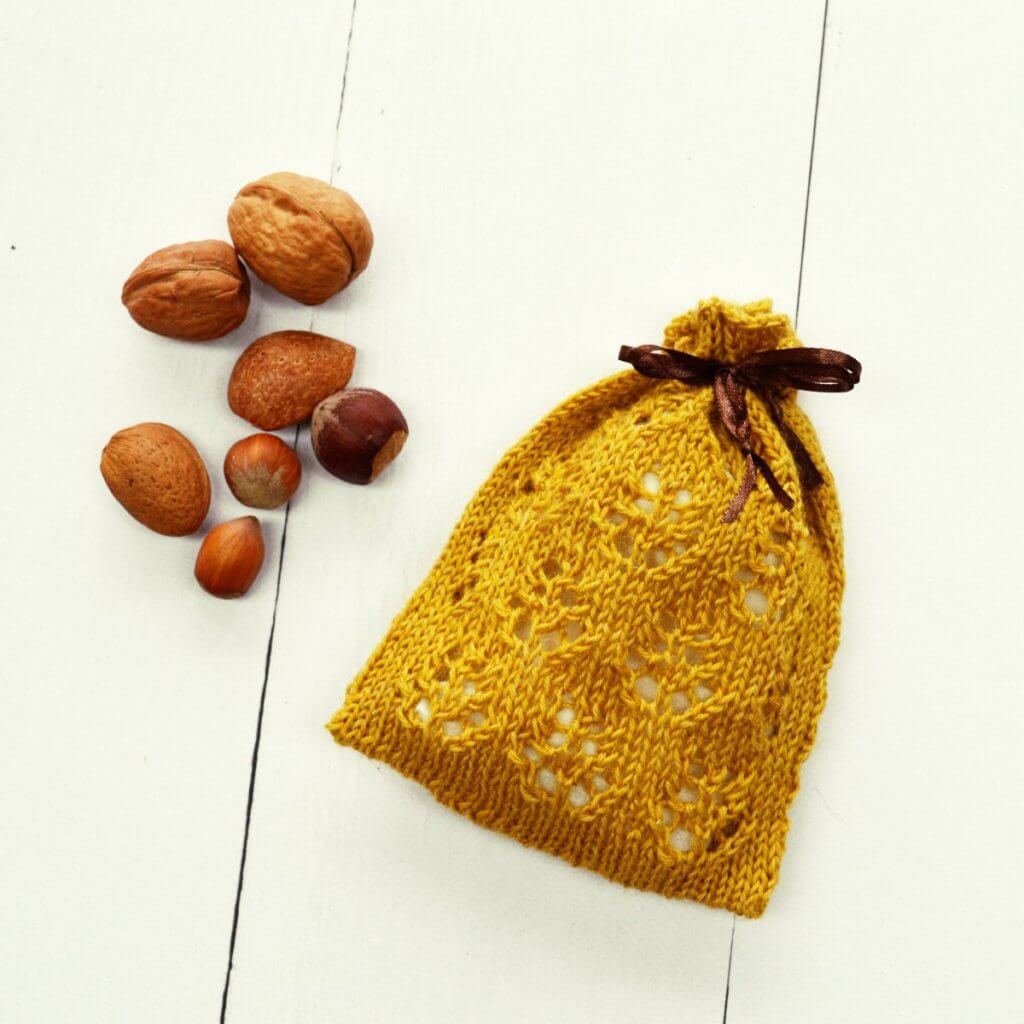
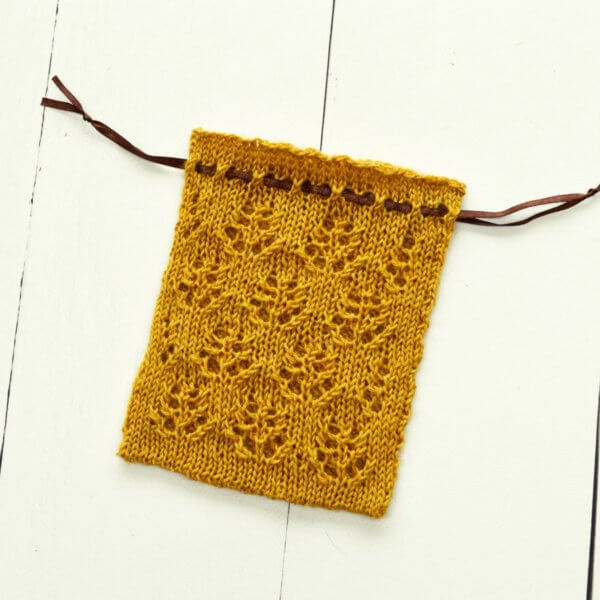
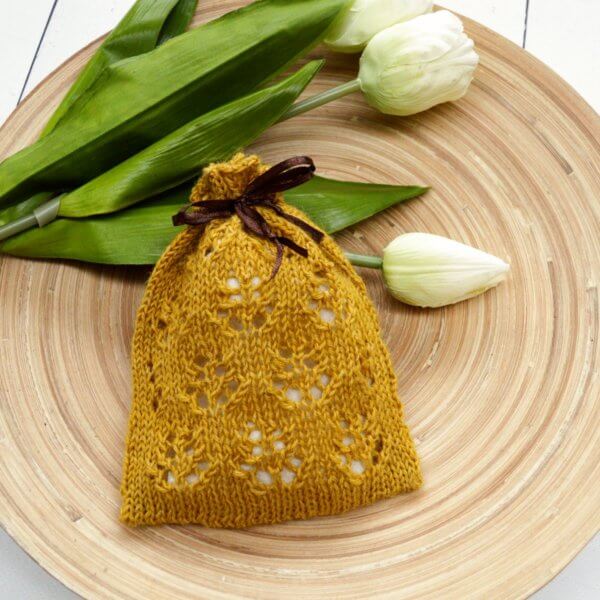
This little sachet bag is simple, sweet and very quick to knit. Perfect to keep a piece of soap, lavender or jewelry. This pattern features Pine Cone Lace and includes two sizes of sachets. This pattern only requires a small amount of fingering weight yarn, so it is perfect for stash busting! It also makes a lovely gift.
The sachet is worked in the round from the bottom up beginning with Judy’s Magic Cast On. The instructions for the lace are provided both charted and written out.
Pay what you want: (minimum €4.30)
€
Difficulty level
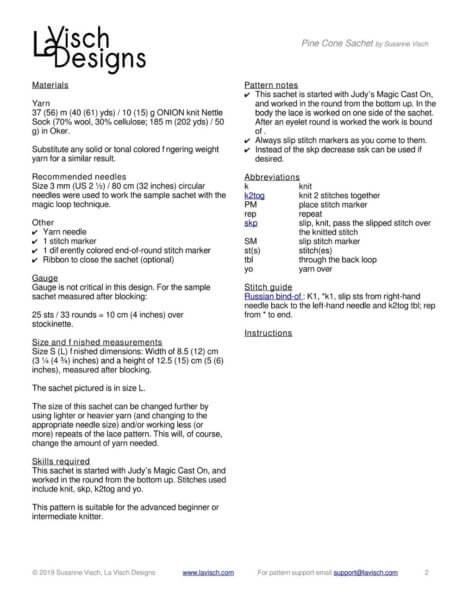
The Pine Cone sachet is started with Judy’s Magic Cast On and worked in the round from the bottom up. Stitches used include knit, skp, k2tog and yo.
This pattern is suitable for the advanced beginner or intermediate knitter.
Sizes and finished measurements
Size S (L) finished dimensions: Width of 8.5 (12) cm (3 ¼ (4 ¾) inches) and a height of 12.5 (15) cm (5 (6) inches), measured after blocking. The sachet pictured is in size L.
Pattern details
Gauge: Approx. 25 sts / 33 rounds = 10 cm (4 inches) over stockinette, after blocking. Gauge is not critical in this design.
Pattern languages included: English and Dutch (Dit patroon omvat zowel een Nederlandse als een Engelse versie)
Digital PDF has 3 pages (letter size)
Materials
Yarn: 37 (56) m (40 (61) yds) / 10 (15) g ONION knit Nettle Sock (70% wool, 30% cellulose; 185 m (202 yds) / 50 g) in Oker. Substitute any solid or tonal colored fingering weight yarn for a similar result.
Size 3 mm (US 2 ½) / 80 cm (32 inches) circular needles were used to work the sample Pine Cone sachet with the magic loop technique.
Yarn needle
1 stitch marker
1 differently colored end-of-round stitch marker
Ribbon to close the sachet (optional)
Do you prefer working in the round from the top down? Take a look at the Snowflake sachet!
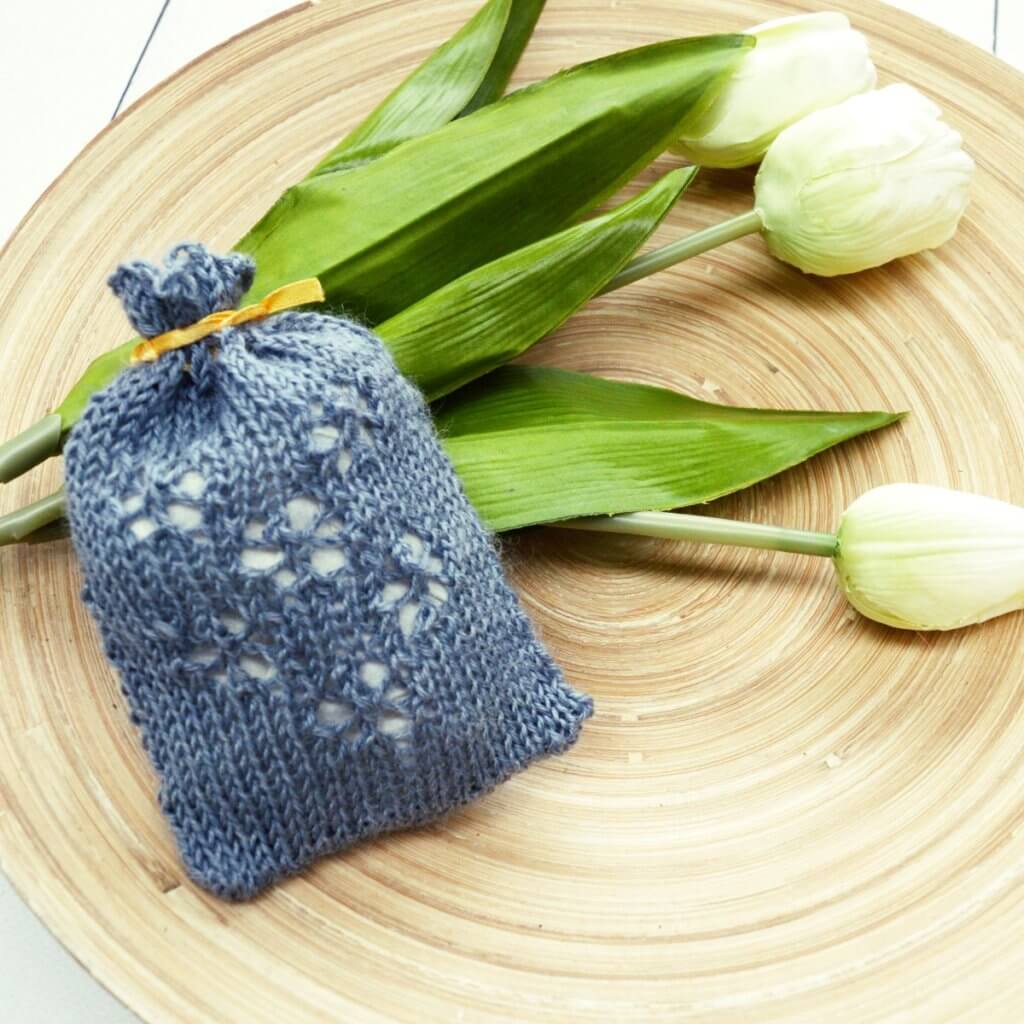
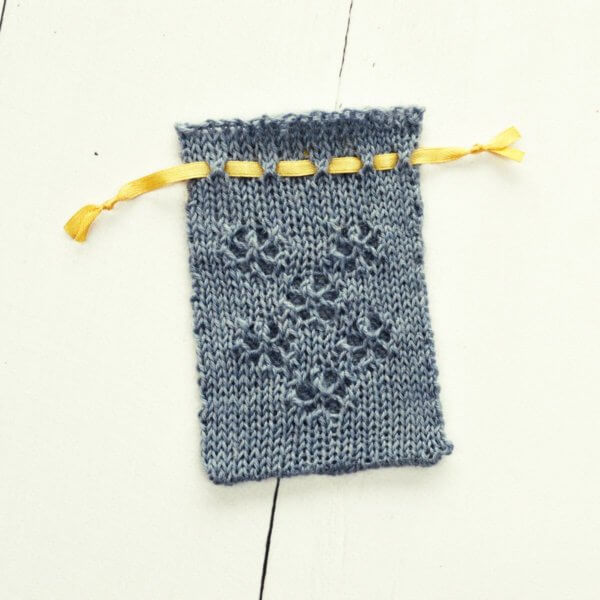
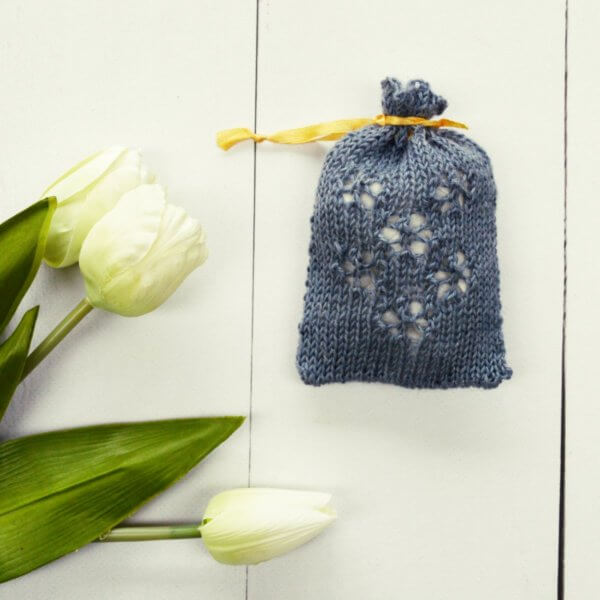
This
little sachet bag is simple, sweet and very quick to knit. Perfect to
keep a piece of soap, lavender
or jewelry. This pattern features Snowflake Lace and includes two
sizes of sachets. Only a small amount of fingering weight yarn is
needed, so it is perfect for stash busting! It also makes a lovely
gift.
The
sachet is worked in the round from the top down. The bottom is closed
using a three-needle bind
off. The instructions for the lace are provided both charted and
written out.
Pay what you want: (minimum €4.30)
€
Difficulty level
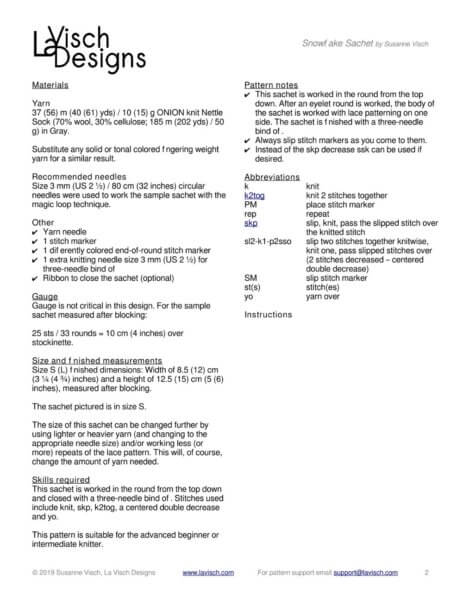
The Snowflake sachet is worked in the round from the top down and closed with a three-needle bind off. Stitches used include knit, skp, k2tog, a centered double decrease and yo.
This pattern is suitable for the advanced beginner or intermediate knitter.
Sizes and finished measurements
Size
S (L) finished
dimensions: Width
of 8.5 (12)
cm (3 ¼ (4 ¾) inches)
and a height
of 12.5 (15)
cm (5 (6) inches),
measured after blocking. The
sachet pictured is in
size
S.
Pattern details
The Snowflake sachet pattern is written for a gauge of approx. 25 sts / 33 rounds = 10 cm (4 inches) over stockinette, after blocking. Gauge is not critical in this design.
Pattern languages included: English and Dutch (Dit patroon omvat zowel een Nederlandse als een Engelse versie)
Digital PDF has 3 pages (letter size)
Materials
Yarn: 37 (56) m (40 (61) yds) / 10 (15) g ONION knit Nettle Sock (70% wool, 30% cellulose; 185 m (202 yds) / 50 g) in Gray. Substitute any solid or tonal colored fingering weight yarn for a similar result.
Size 3 mm (US 2 ½) / 80 cm (32 inches) circular needles were used to work the sample sachet with the magic loop technique.
Yarn needle
1 stitch marker
1 differently colored end-of-round stitch marker
1 extra knitting needle size 3 mm (US 2 ½) for three-needle bind off
Ribbon to close the sachet (optional)
Do you prefer working in the round from the bottom up? Take a look at the Pine Cone sachet!
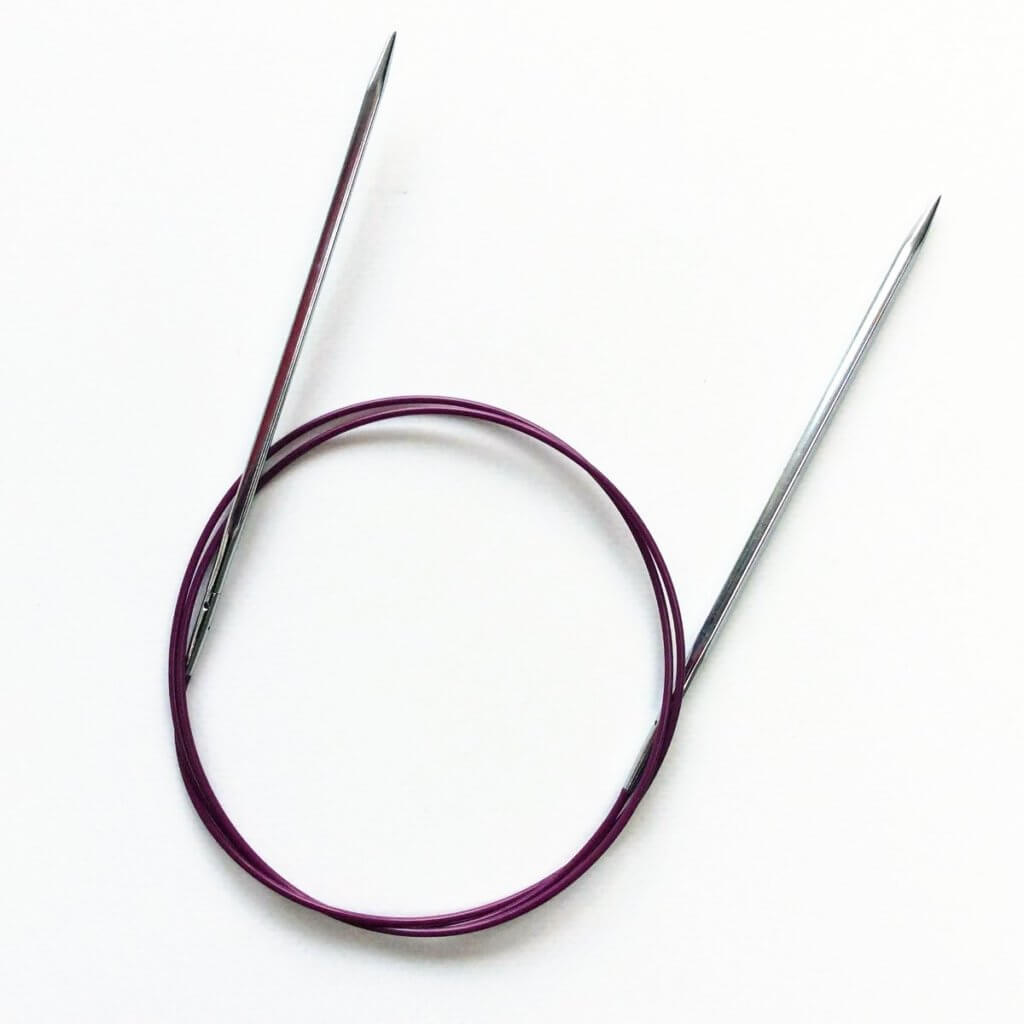
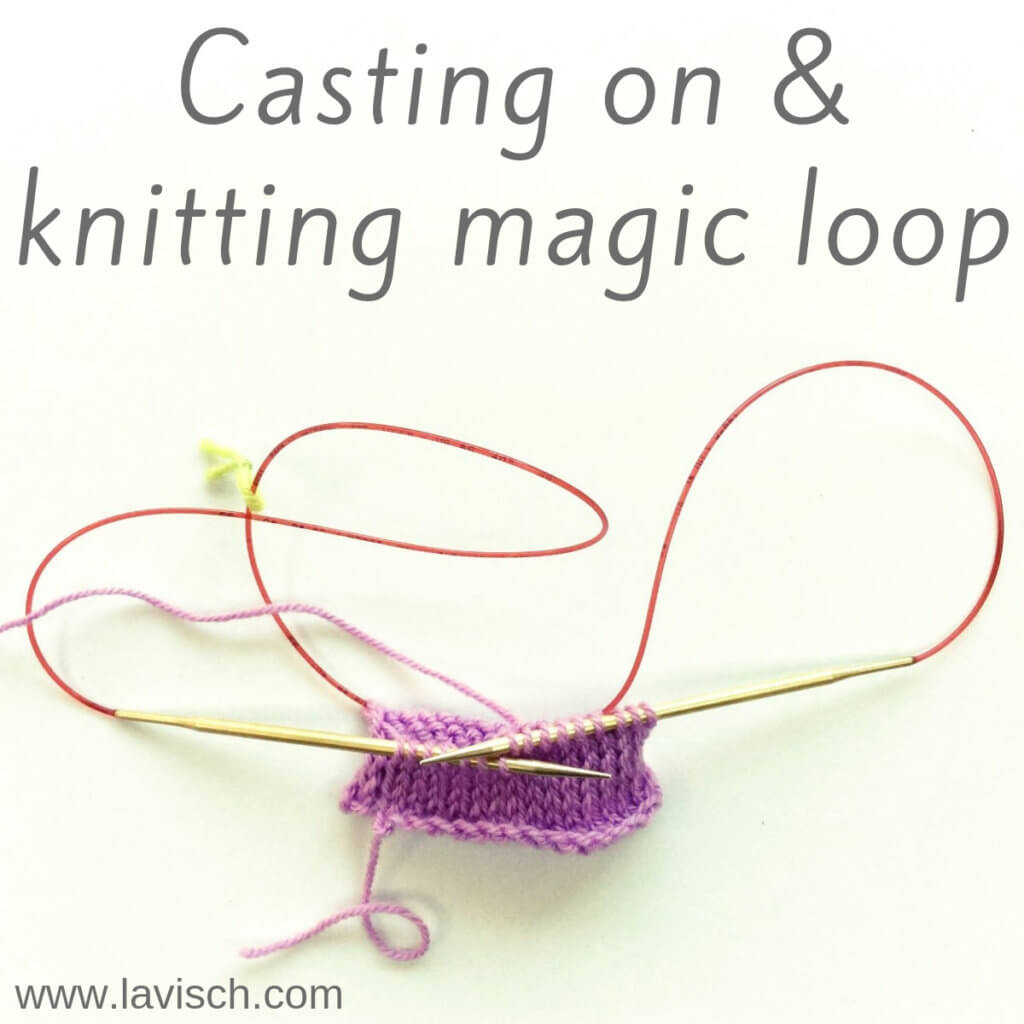
When working in the round with lots of stitches, using a circular and just going round and round and round is a relatively easy thing to do. It’s however, a different case when working in the round on a project with a small circumference. With small circumference knitting, it usually just doesn’t work in a circular needle, because the needles and the cables are just too long to accommodate the limited number of stitches.
What exactly is magic loop knitting?
The short description is, that with this method, you pull out a loop of cable of your circular needle to divide your stitches. This is usually done into two equal parts. Once the stitches are divided, you can use the free needle tip to knit across half of the stitches. Next, the project is rotated and the needle pulled through to work the remaining stitches.
Materials used
Yarn: Paintbox Yarns Simply DK, a good value, good quality 100% acrylic yarn, here in the colors 142 Tea Rose.
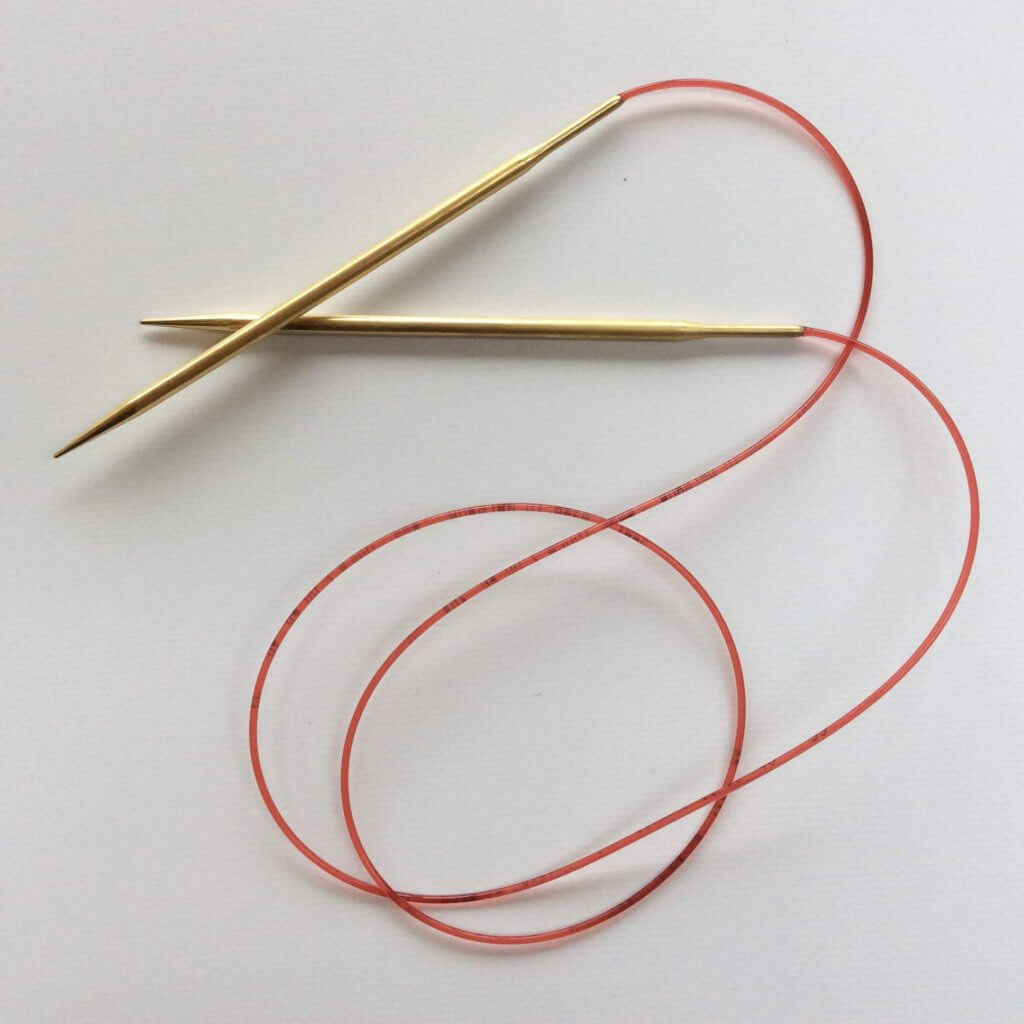
Needles: Addi Lace Circular Needles, in this tutorial I used the 4 mm (US 6) size with a cable length of 100 cm (40 inches). I would like to advise using at least a cable length of 80 cm (32 inches) to facilitate magic loop knitting.
Magic loop knitting step by step
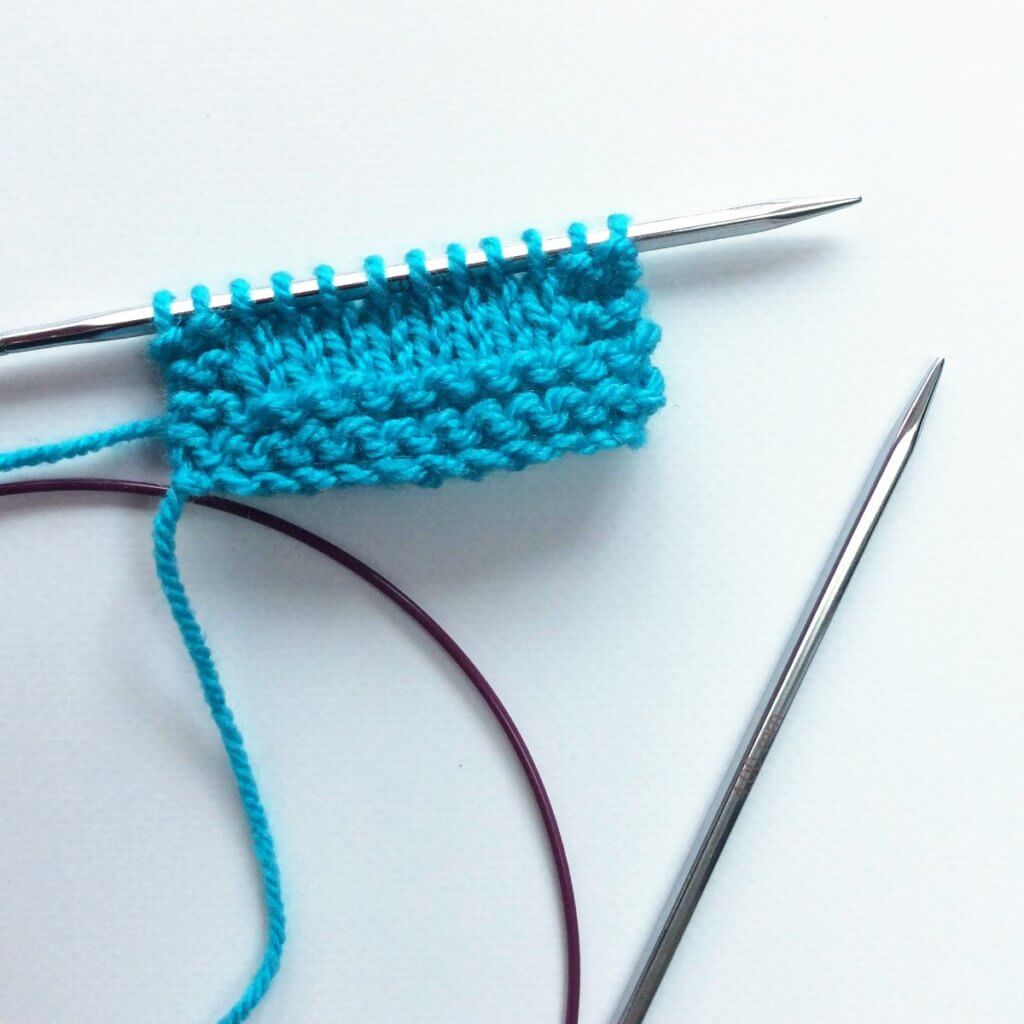
1. Begin by casting on the required number of stitches for your project. I used the cable or knitted-on cast on in this example. Once this is done, you can continue to the next step. However, doing so directly increases the odds that the cast-on twists around the needle, resulting in a twist in your work when joined in the round. To avoid this, I usually just knit the first “round” of the pattern flat. So, that’s what I also did here!
2. Next, lay the work down on a table in front of you in such a way, that the working yarn is on the right. Make sure that the cast-on edge is not twisted around the needle.
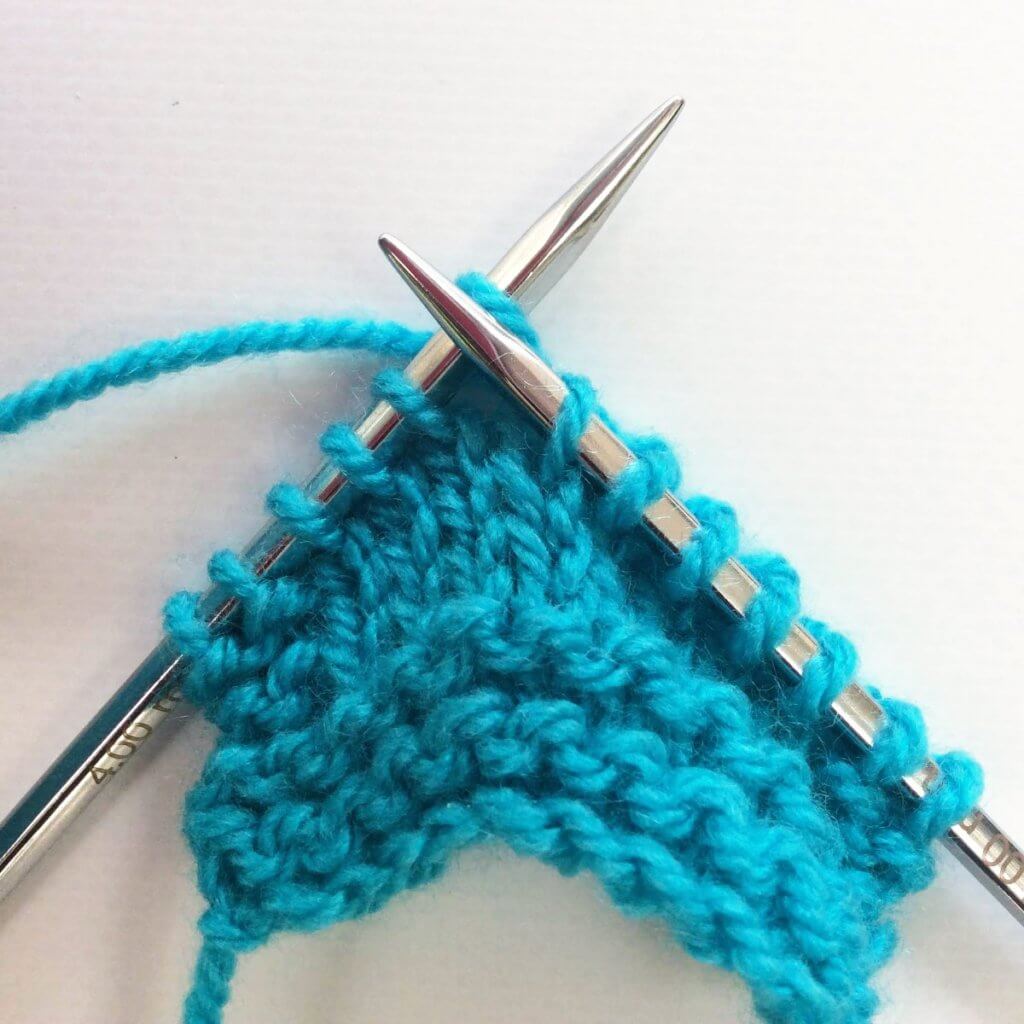
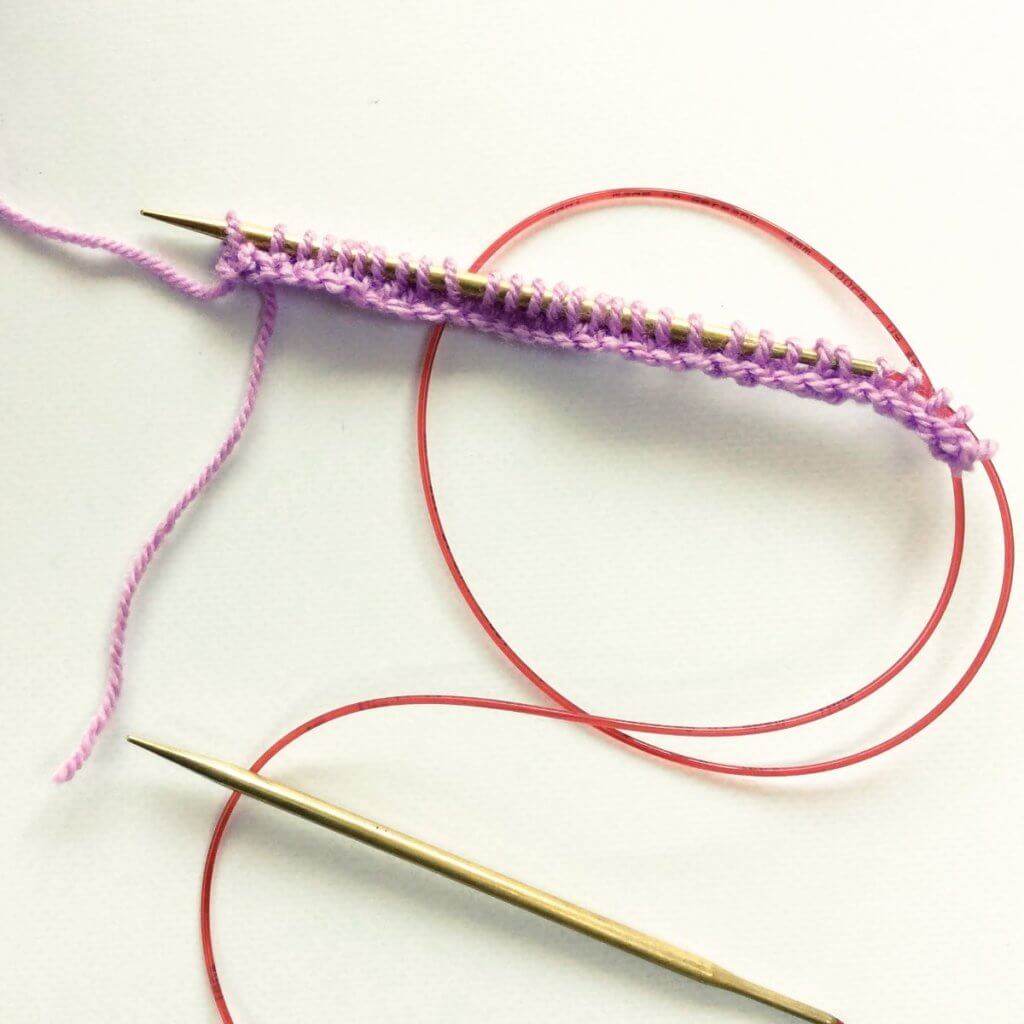
3. Now, move the stitches to the center of the cable and find the middle point in the stitches. If working with an odd number of stitches, no worries: this won’t make that big of a difference. Gently bend your cable and bring it up between the center stitches.
4. Next, pull the cable gently to reposition both sets of stitches on the needles as pictured, instead of on the cable. Make sure the working yarn is near the tip of the needle at the back, in between both needles. For working the first stitch, make sure it runs up between the needle tips for knitting, and for purling that it runs down.
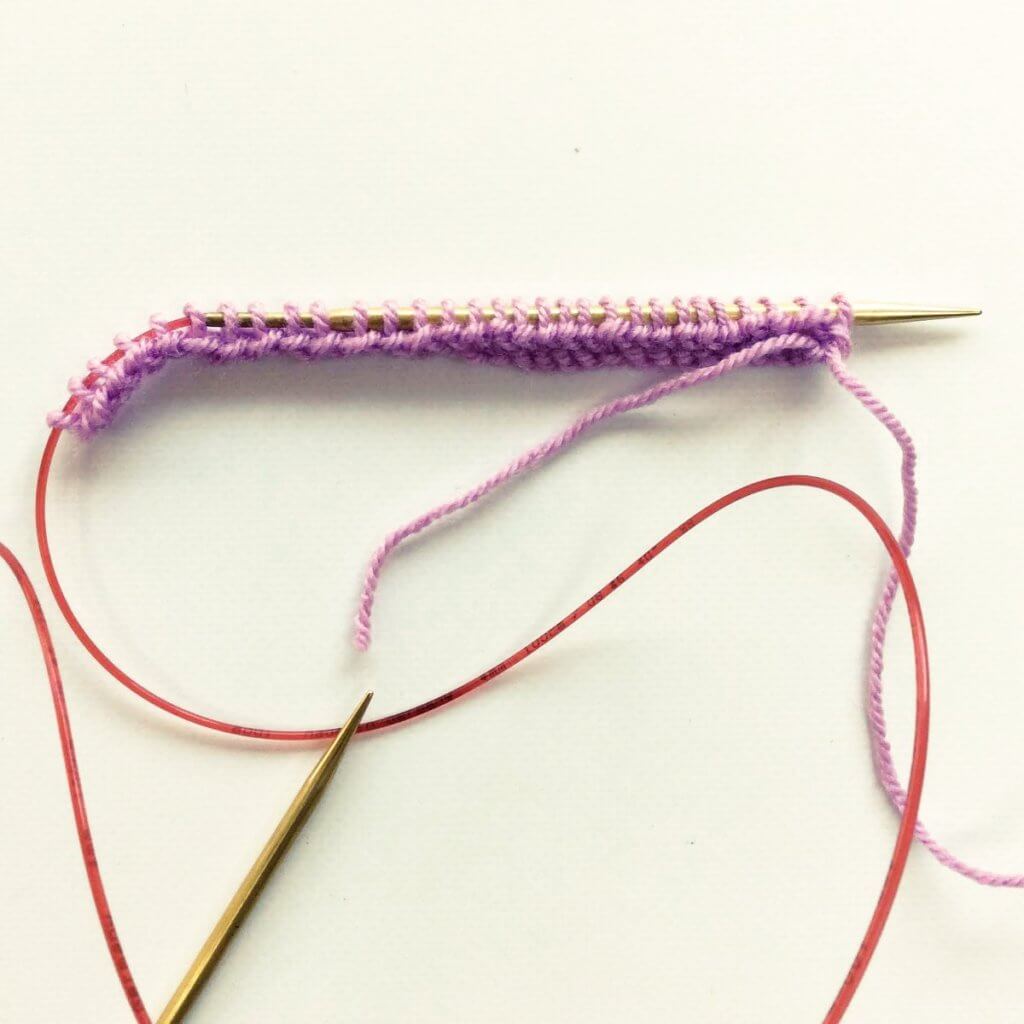
5. To join in the round and to start knitting, grab the needle tip that is at the back and pull it out so the stitches on it slide to the cable. Now is also the time to put a “beginning (or end) of round” stitch marker on this needle tip. This needle tip becomes your right-hand or working needle.
6. Now you’re ready to work your way across the stitches on the left-hand or main needle. Especially with the first few rounds, you can encounter a “gap” at the spot you joined in the round. You can help avoid this by connecting both sides of this gap with a removable stitch marker. It also helps to tighten up the second stitch you work on each needle.
7. Once you worked across these stitches, it will look something like this:
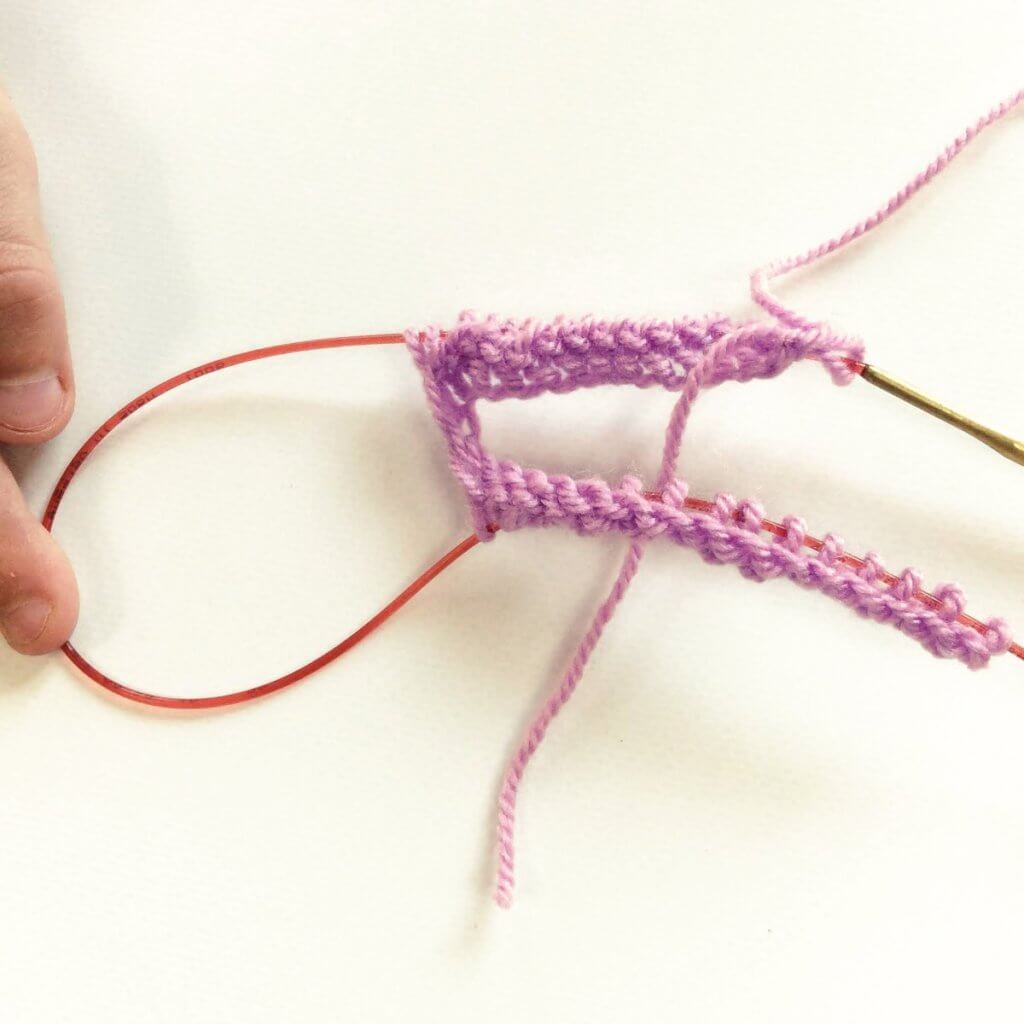
8. Next, turn your work so that the working yarn is on the right again and the former back needle is now in the front.
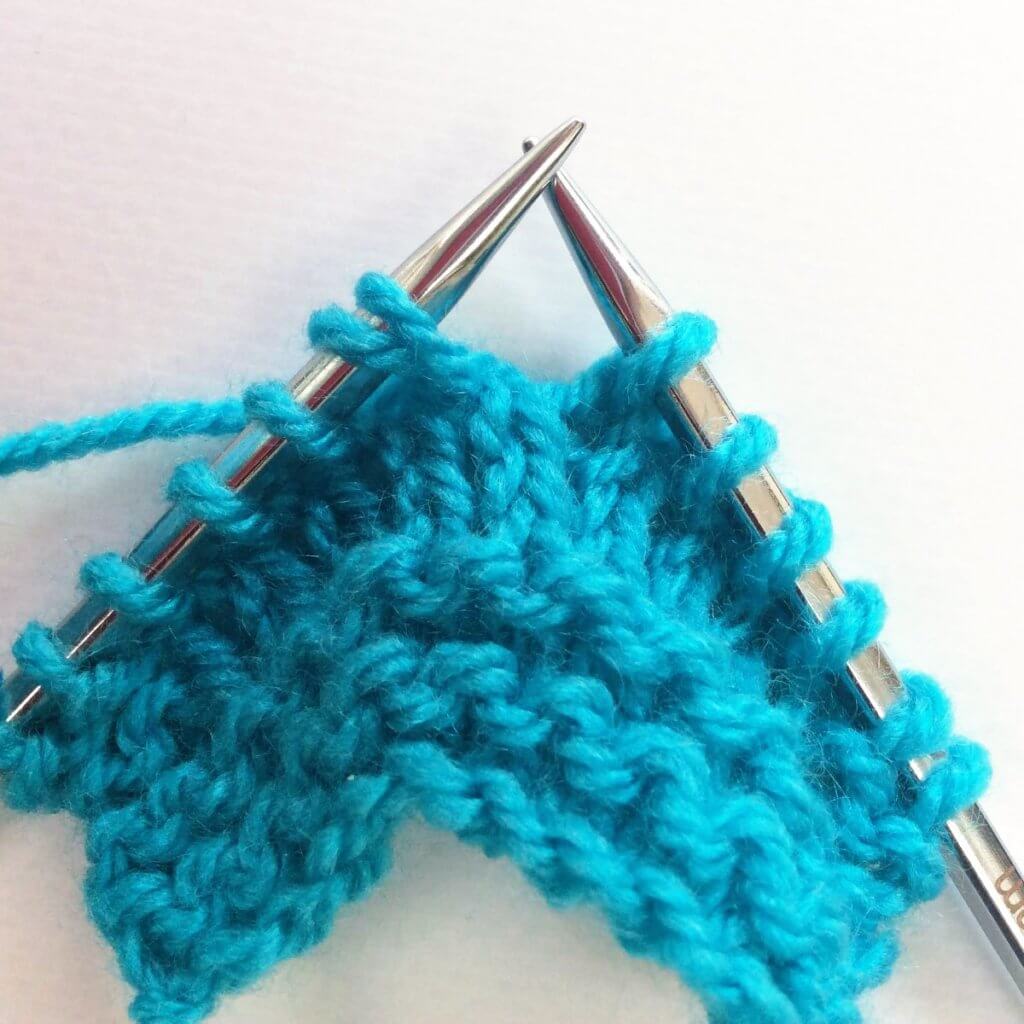
9. To be able to use the needle that is now in the front as your main (left-hand) needle, we first have to pull the cable connected to the needle tip. This way the stitches slide from the cable onto the needle tip.
10. Again pull out the other (back) needle so that the stitches rest on the cable and the tip can be used as your working (right-hand) needle and work across all the stitches on the main (left-hand) needle.
11. Continue steps 6 to 10 for each round as described in your pattern.
And that’s all there is to it!
After a couple of rounds the work will look something like this:
Knitting a “round” flat before joining in the round, as I described in step 1? Don’t forget to use the yarn tail to sew it closed when finishing your project.
But what about laddering?
Laddering is nothing
more than that the stitches are pulling apart a little, if it happens
it’s usually where you switch from one needle to the other. As
described with step 6, it really cuts down on laddering if you
tighten the second stitch when working the stitches on each needle.
The material of the cable of your circulars, however, also has a great influence. The stiffer the cable the more resistant it will be to being fold in half to accommodate magic loop knitting. This means that with a very stiff cable it will actively push apart the stitches on the ends of both needles. The same issue may happen if you’re using a circular needle that is too short. I like my circs to be at least 80 cm / 32 inches. Do try out for yourself what length hits the sweet spot for you!
Thanks to my Patreon supporters for bringing you this freebie! Creating quality patterns and tutorials is a lot of work and resource-intensive. However, I find it important to give you free content like this tutorial. Thanks to the generous support of my Patreon supporters, I can make it happen. Thank you, patrons! Click here to join, or click here to read more about La Visch Designs on Patreon.
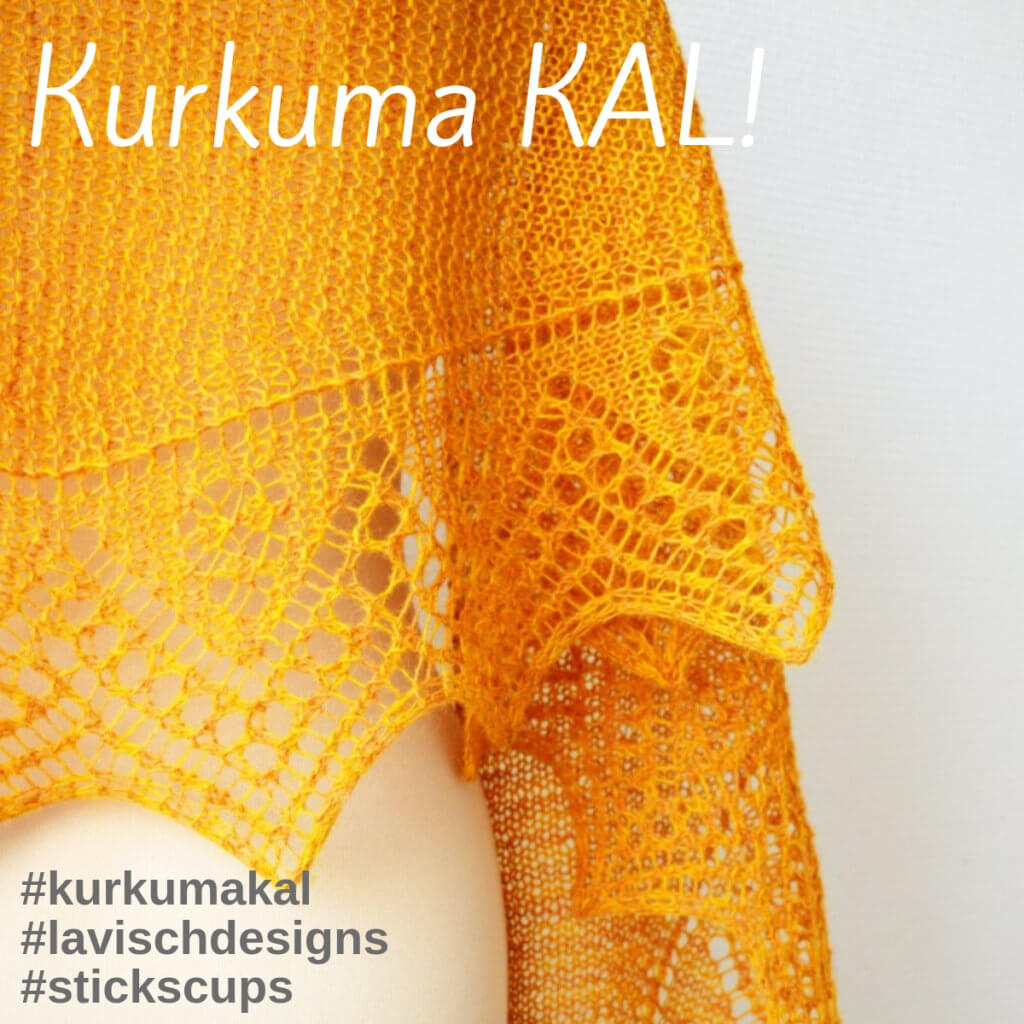
My LYS Sticks & Cups and I are organizing a Knit-A-Long for my latest shawl design Kurkuma. It’s very spicy and so much fun, so join the Kurkuma KAL!
We cast on Thursday 11 April during the Cast-On Party at the Sticks & Cups store in Utrecht. Also, I’ll be there with a bunch of my designs, so if you want to take a closer look at some of my shawls and try them on, this is your chance! Can’t make it to the party? No worries! Get your kit before the 11th and post a picture using the #kurkumakal #stickscups and #lavischdesigns hashtags!
The pattern is available through this website, but if you can also get it at the shop in a kit. Visit Sticks & Cups on Instagram or Facebook to see some of the yarn combinations Lili has prepared.
Prizes!
Of course, there will also be prizes! The prize drawing is on May 18th during the Beltane Yarn Festival at the Sticks & Cups store in Utrecht. There will be 2 prize drawings, both to be held on May 18th:
The first drawing is for all who join by getting a kit at Sticks & Cups: You get a number when you buy your kit at the shop with which you are entered in the prize drawing. Prizes consist of yarn and your pick of a La Visch Designs pattern of choice.
The second drawing is for all who love to join the KAL but don’t have the option to visit Sticks & Cups for a kit. On May the 18th I will select my 3 favorite pictures tagged with #kurkumakal & #lavischdesigns. Each of the 3 winners may select a La Visch Designs pattern of choice that will be gifted to you. Both (pictures of) WIP’s and FO’s count, so share pretty pictures on Instagram and Facebook as often as you like! During the KAL I will repost some of the pictures that catch my eye.
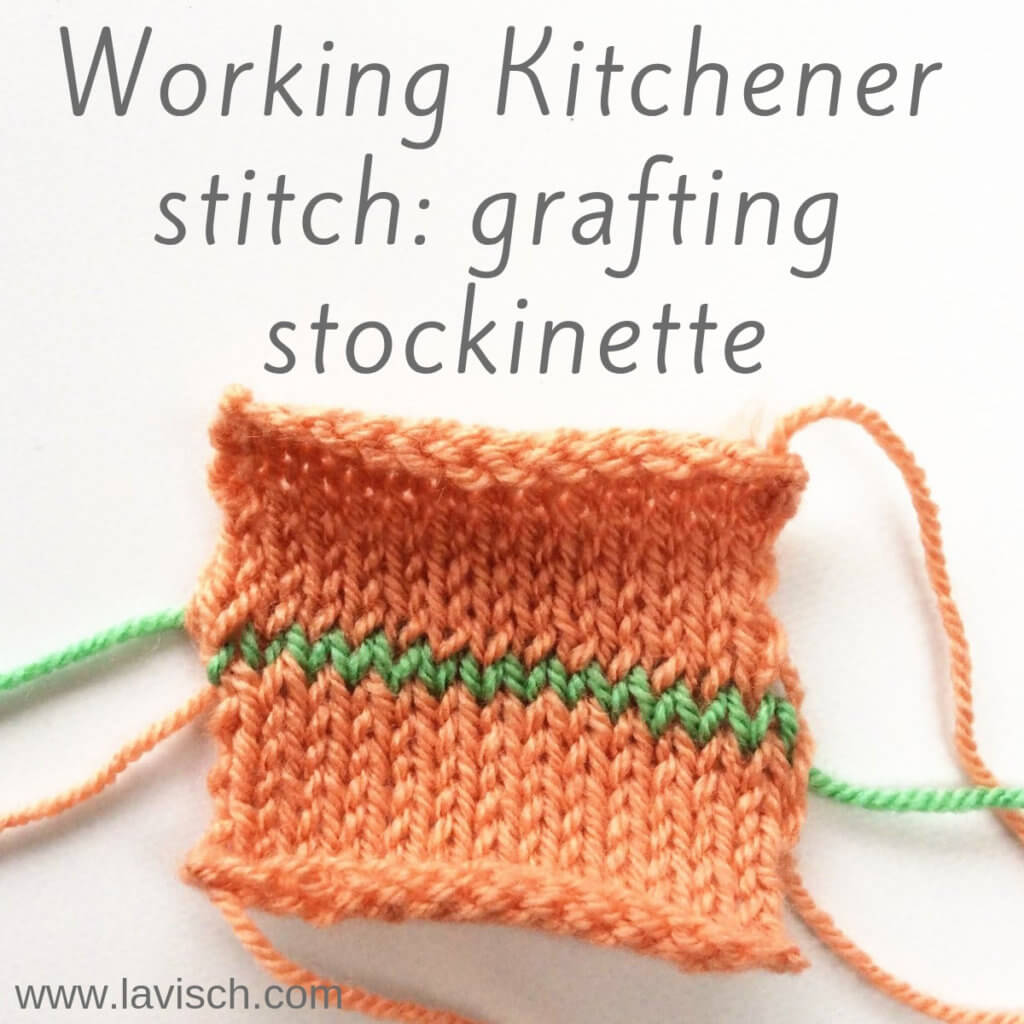
It seems there are 2 distinct camps when it concerns the Kitchener stitch: either you love it or you hate it. Personally, I don’t really understand the hubbub around this technique, it’s a very useful one in certain situations. One just has to know how to do it. And that’s where this tutorial comes in!
But first: what is Kitchener stitch? It’s a method of grafting two sets of live stitches together in an invisible way. It’s often used to seamlessly close the toes of top-down socks, for example. The “seam”, so to speak, is really a new row of stitches that you create using a yarn needle. To do so, the needle is passed through the live stitches of the pieces of knitting to be joined, in a similar manner similar as the direction in which a knitting needle is inserted within a stitch. This can be purlwise or knitwise.
Materials used
Yarn: Paintbox Yarns Simply DK, a good value, good quality 100% acrylic yarn, here in the colors 155 Vintage Pink for the swatches and 125 Spearmint Green for the Kitchener stitch.
Darning needle: Hiya Hiya Darn It Yarn Needle, or any other tapestry needle, threaded with yarn.
Working Kitchener stitch to graft stockinette step by step
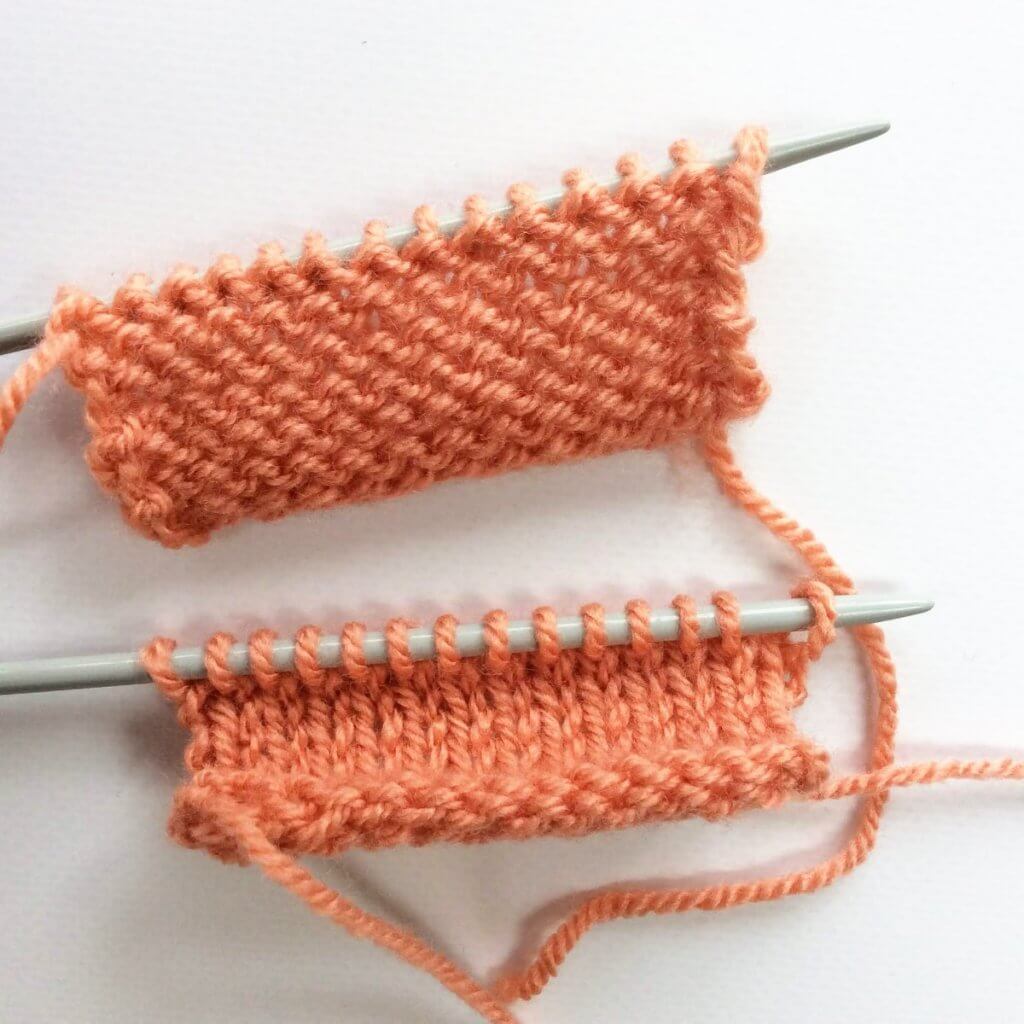
Before we start, we have to make sure that the two pieces of stockinette fabric that we will be grafting together, each have the same number of stitches.
Set-up
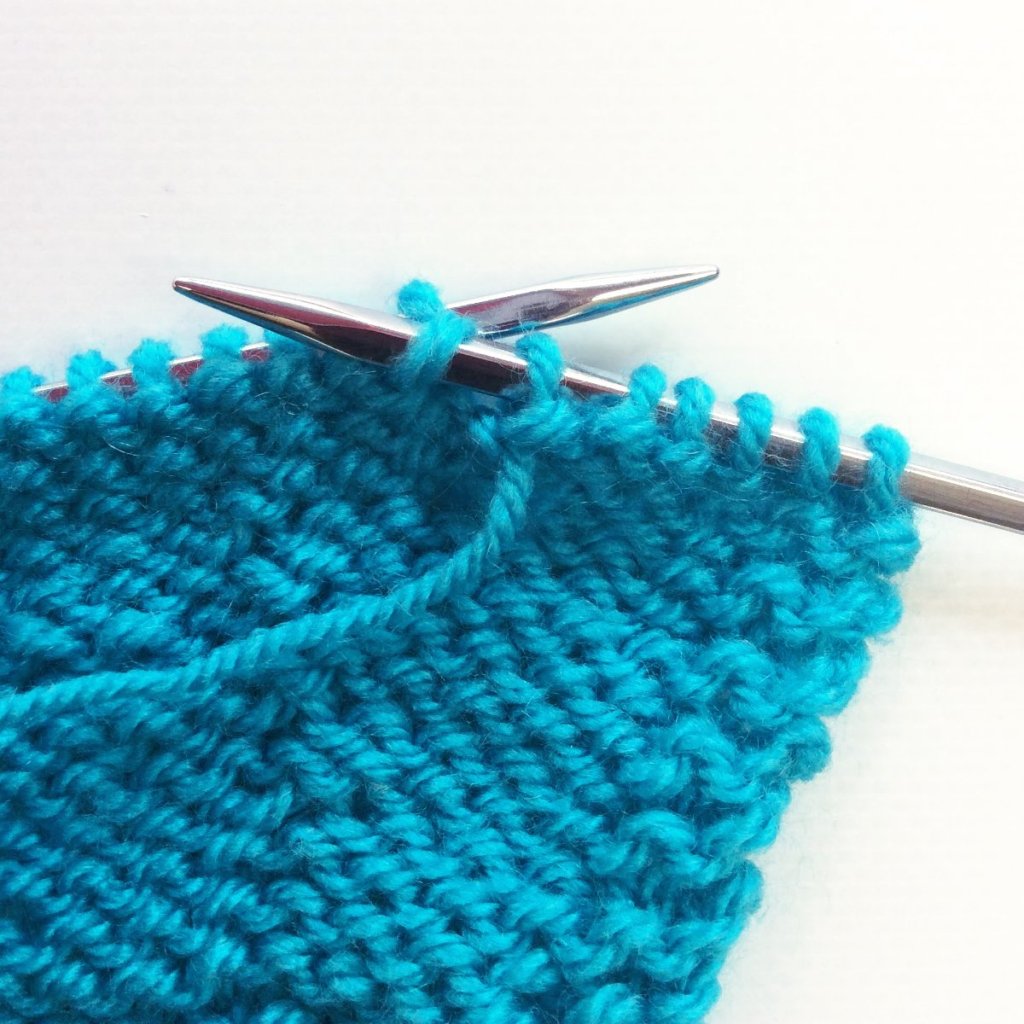
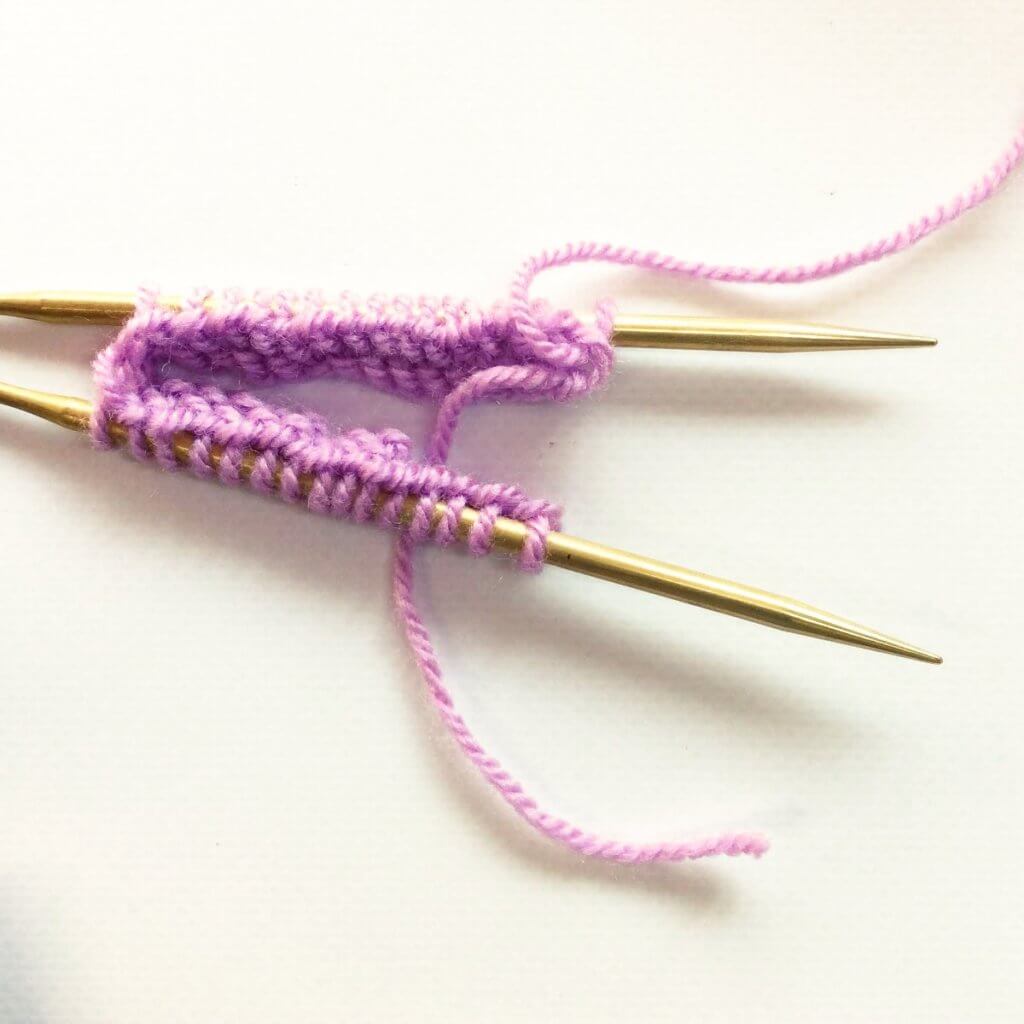
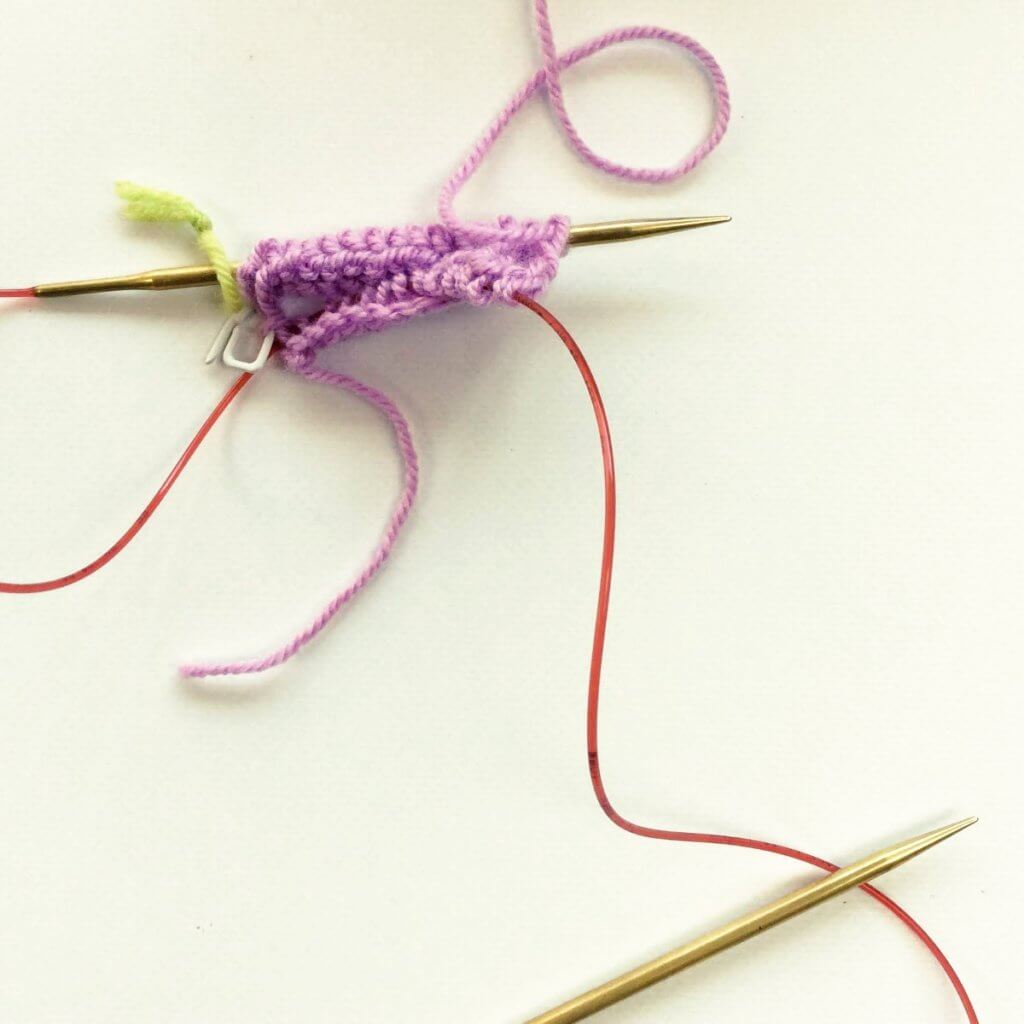
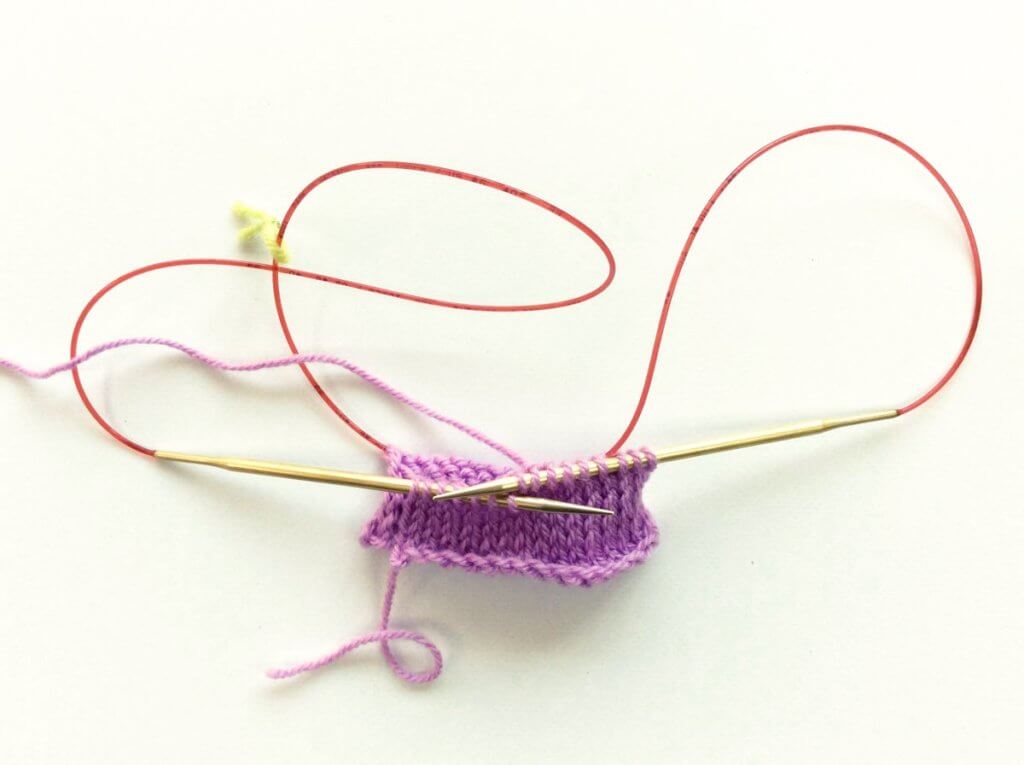
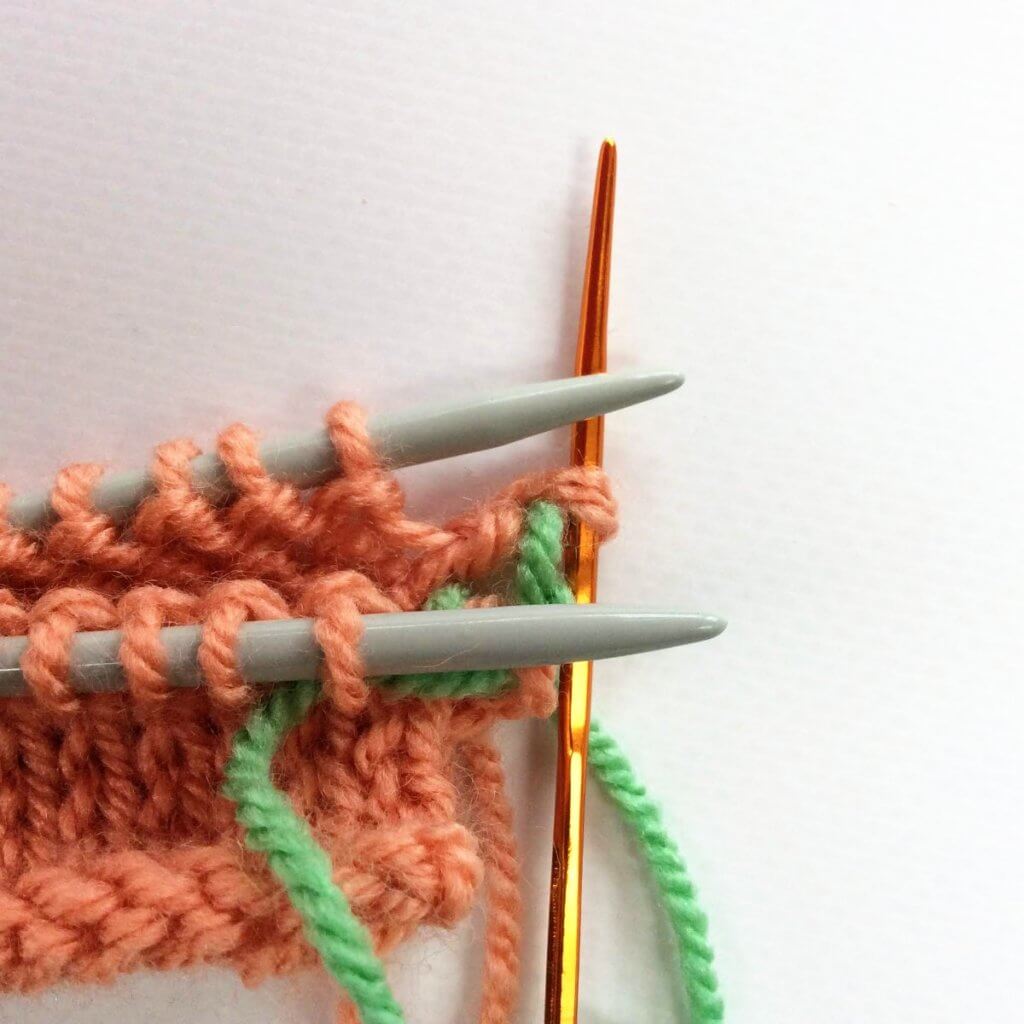
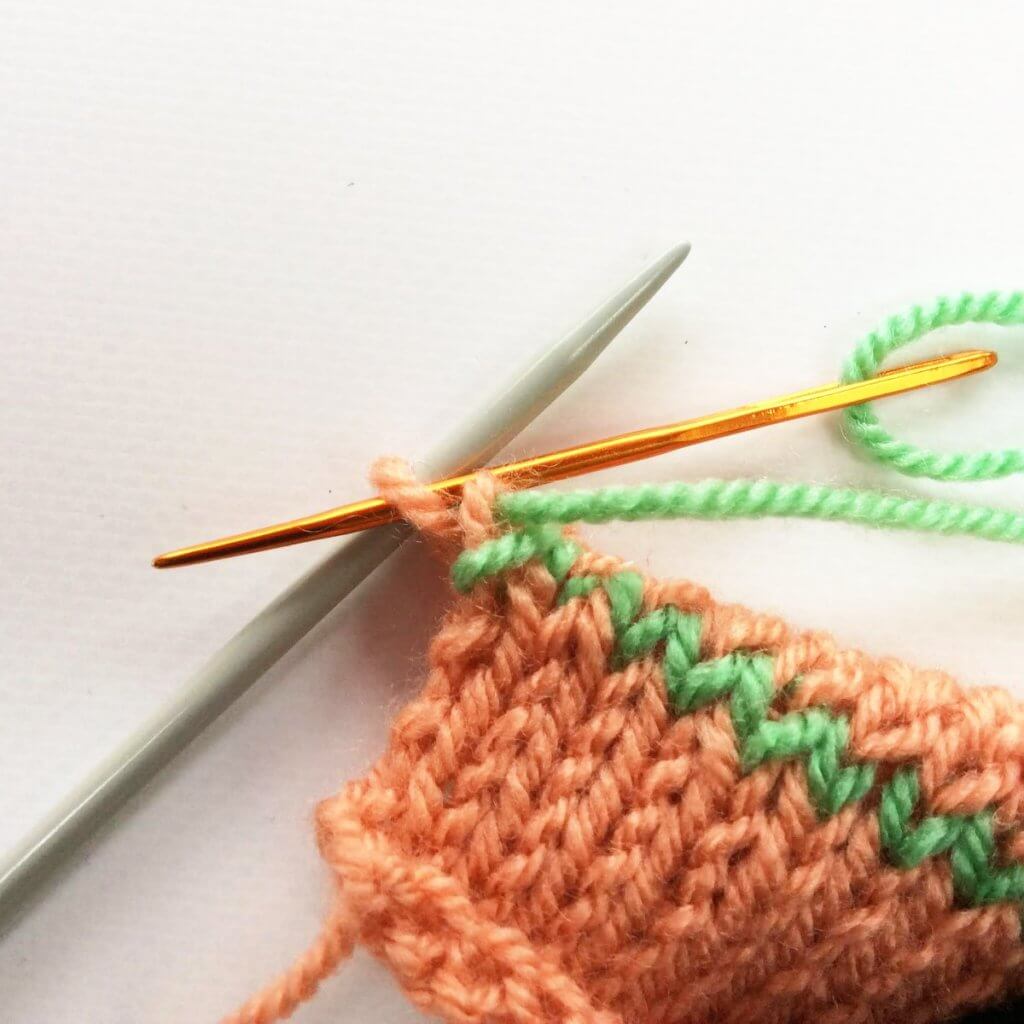
1. To start, we hold the two needles containing the live stitches parallel to each other, with the wrong sides of the fabric facing inside and the right sides facing outside.
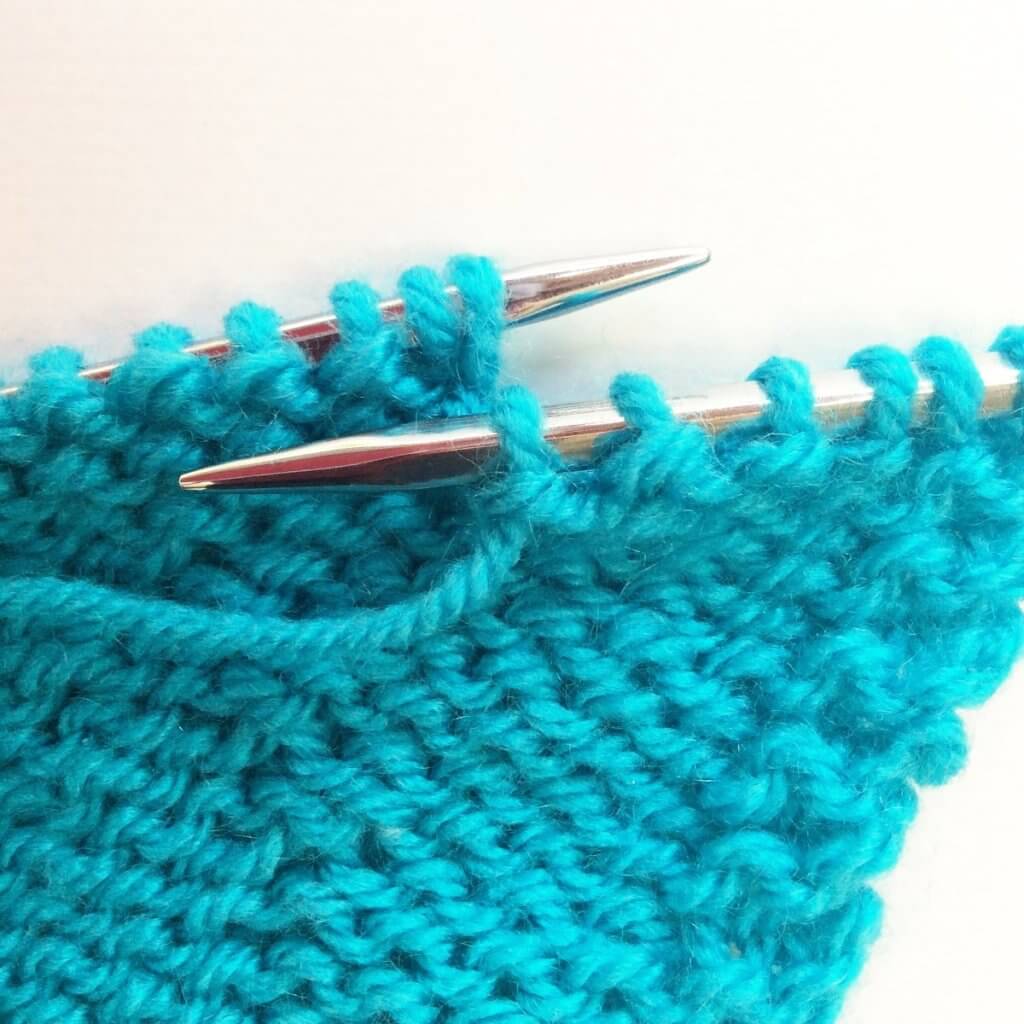
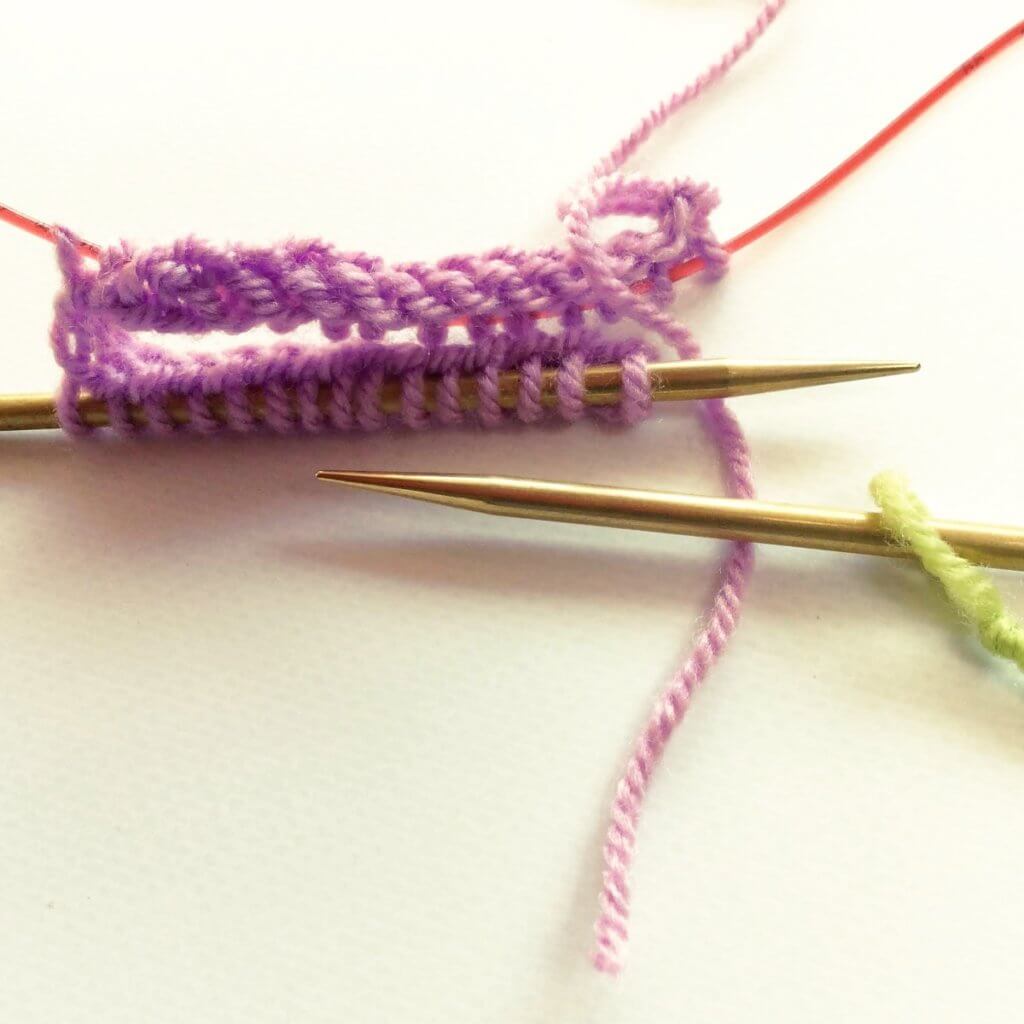
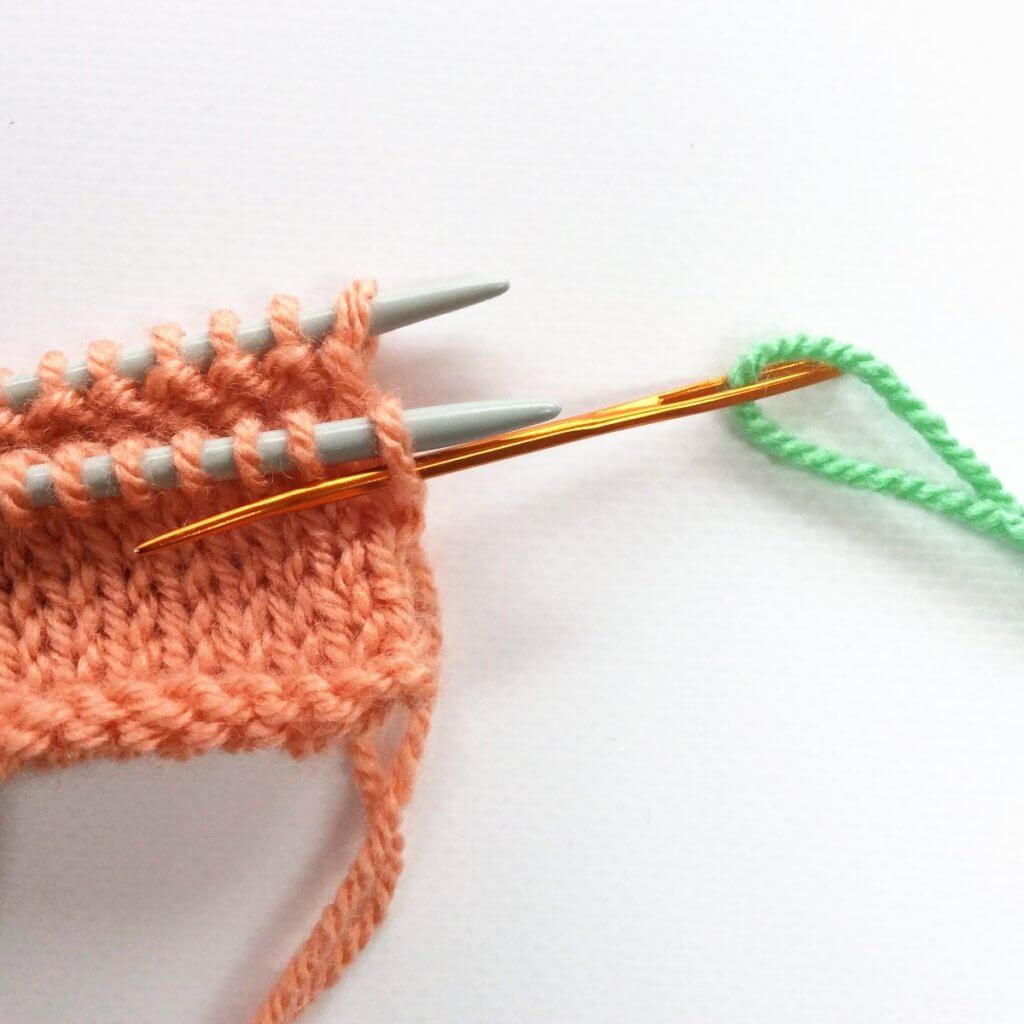
2. Take your darning needle and pass it purl-wise through the first stitch on the front needle. Pull the yarn through, while leaving the stitch on the needle.
3. Next, thread the darning needle knit-wise through the first stitch on the back needle. Again, pull the yarn through, while leaving the stitch on the needle.
Repeat
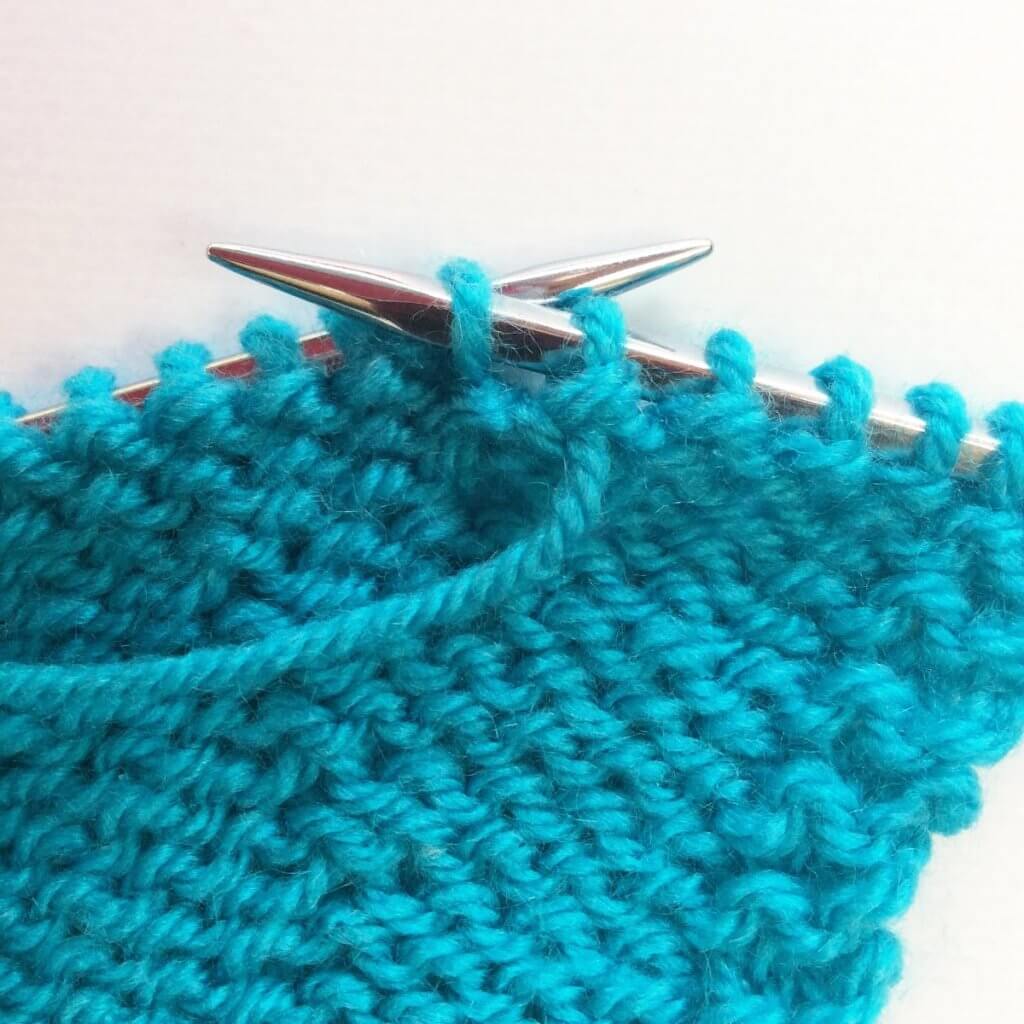
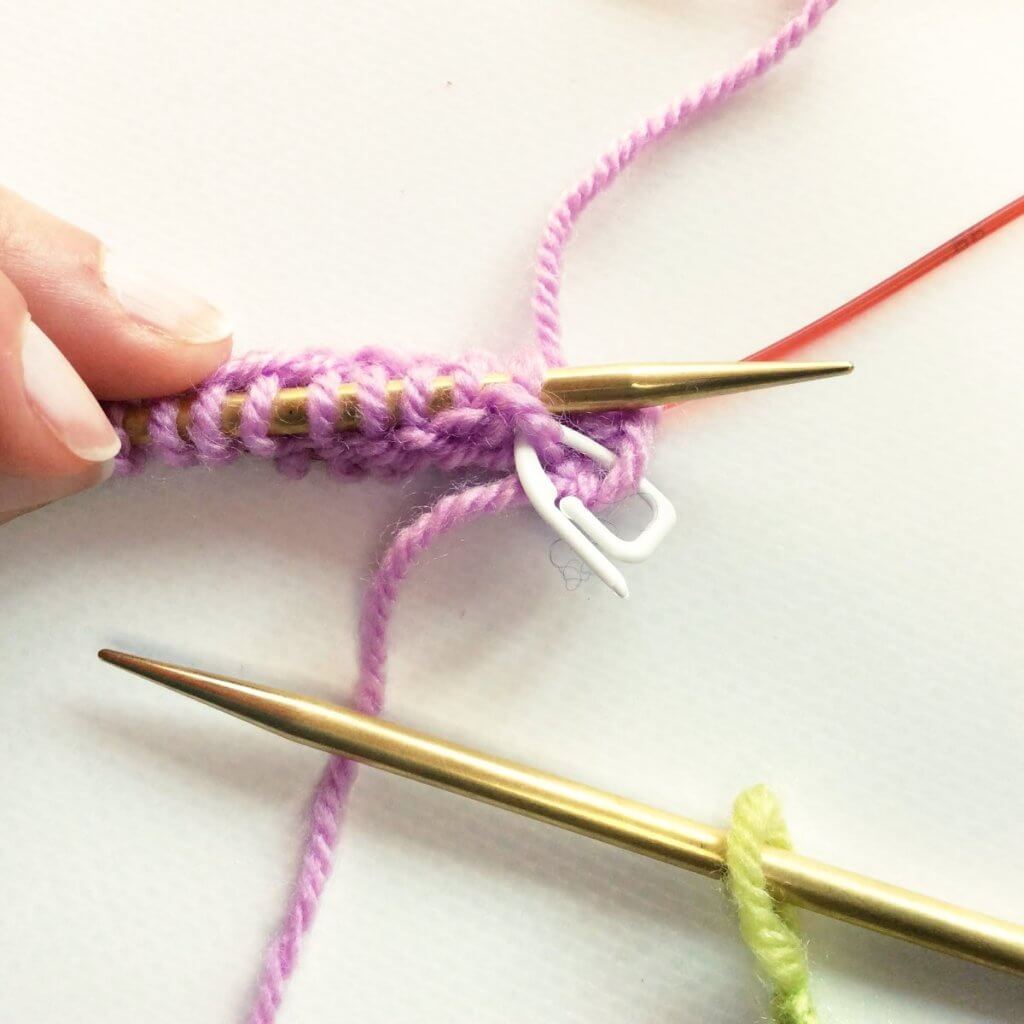
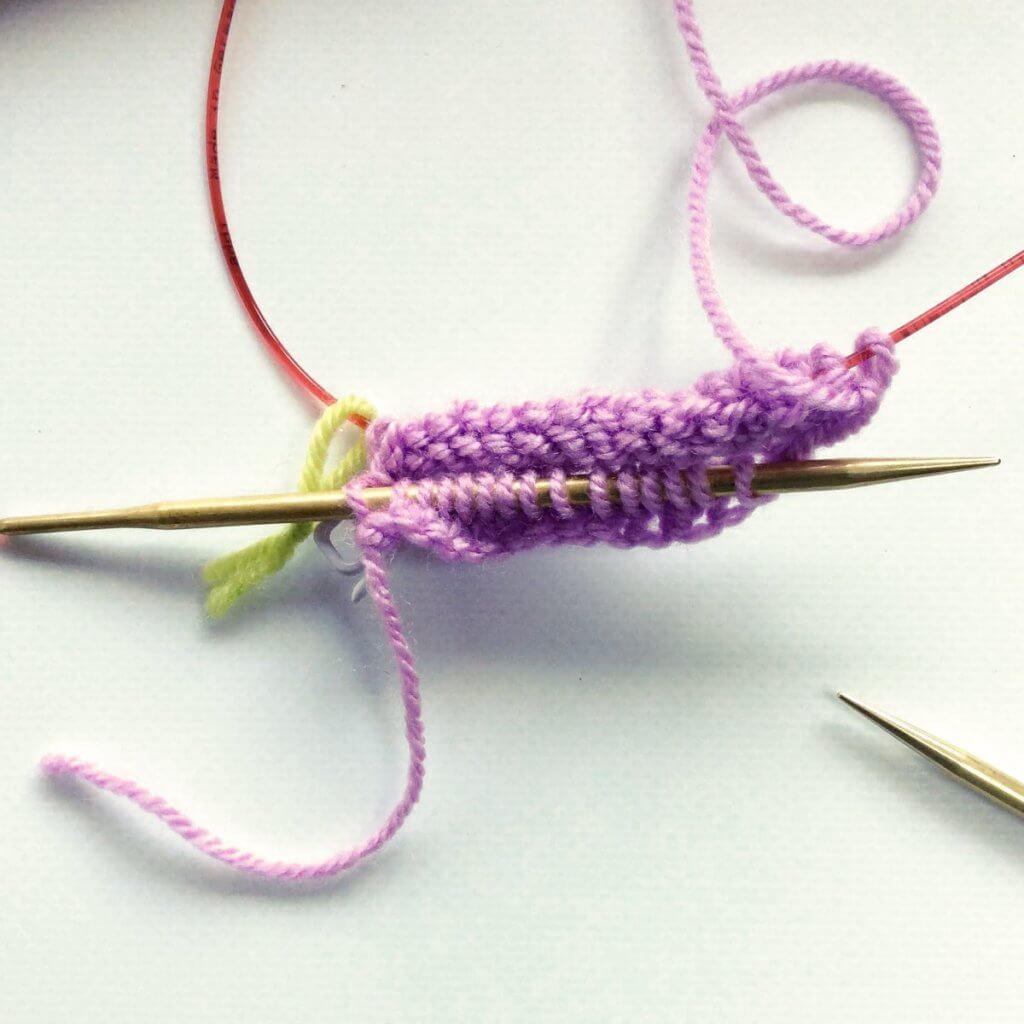
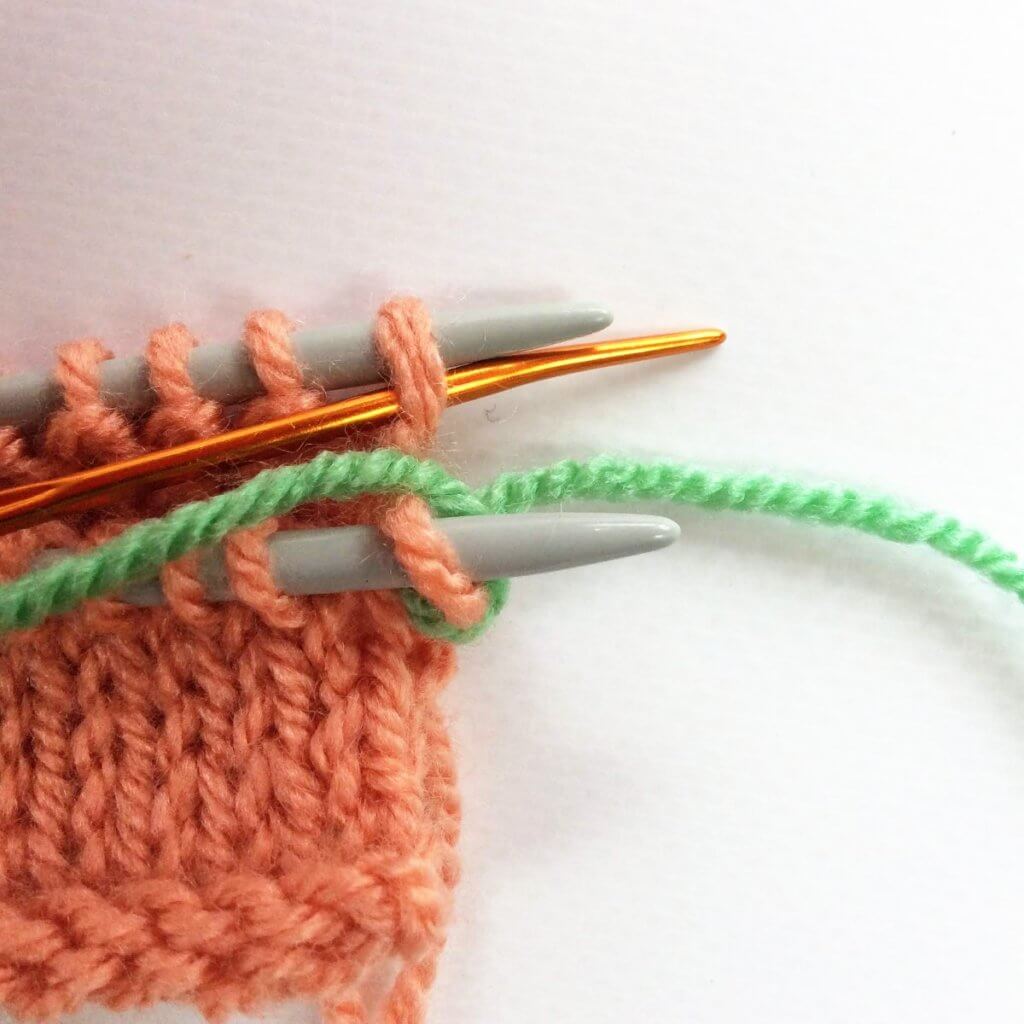
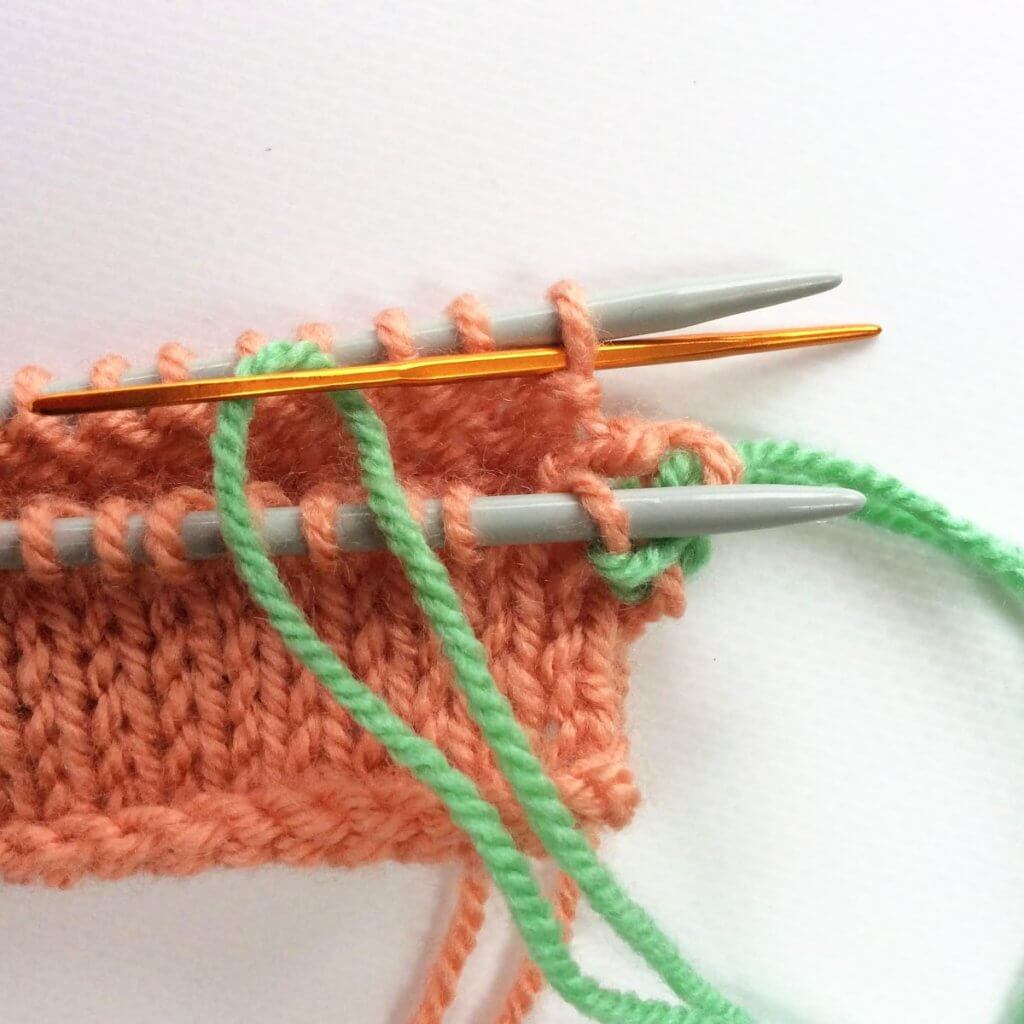
1. Front needle: Pass the darning needle knit-wise through the first stitch of the front needle. Pull the yarn through and slip the stitch off the needle. The below picture shows how it looks after the stitch has been dropped.
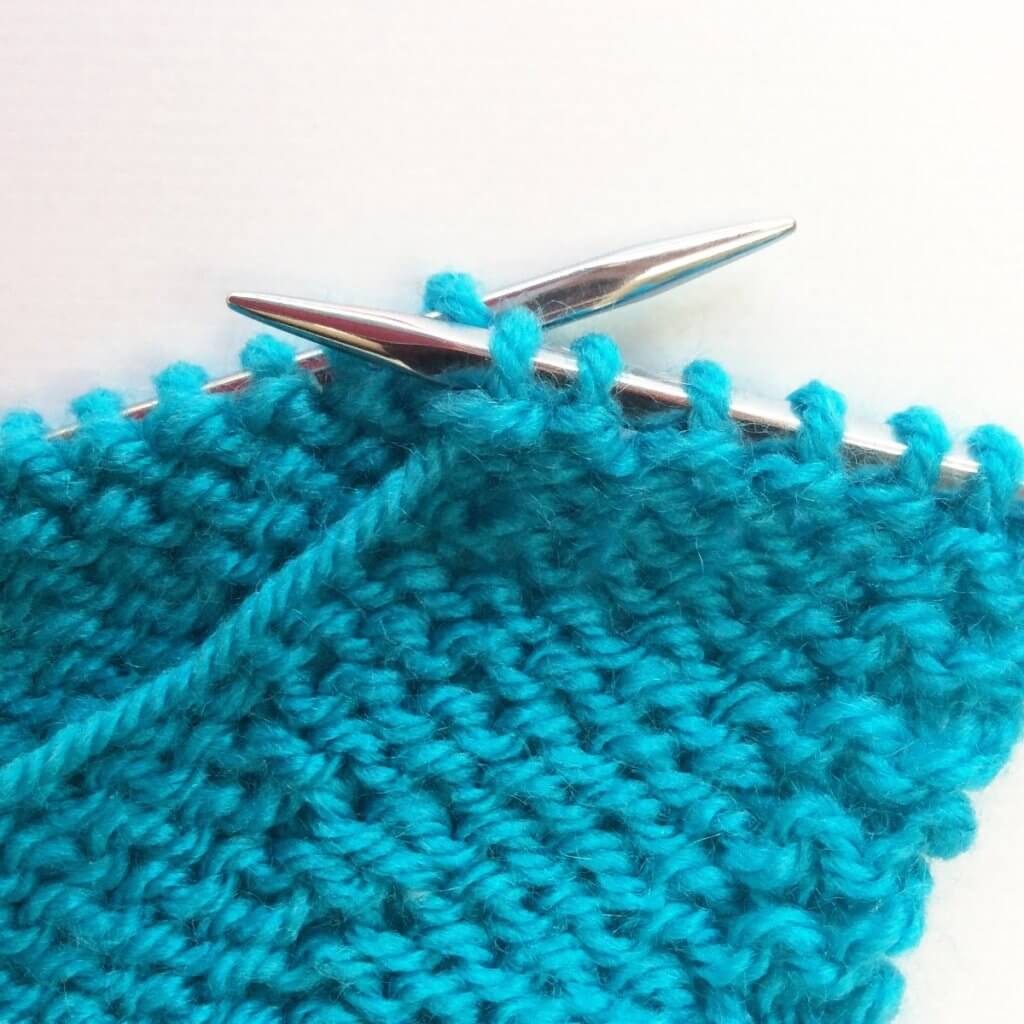
2. Front needle: Next, thread the darning needle purl-wise through the second stitch on the front needle. Leave the stitch on the needle and pull the yarn through.
3. Back needle: Pass the darning needle purl-wise through the first stitch of the back needle. Pull the yarn through and slip the stitch off the needle. Again, the picture shows how it looks after the stitch has been dropped off.
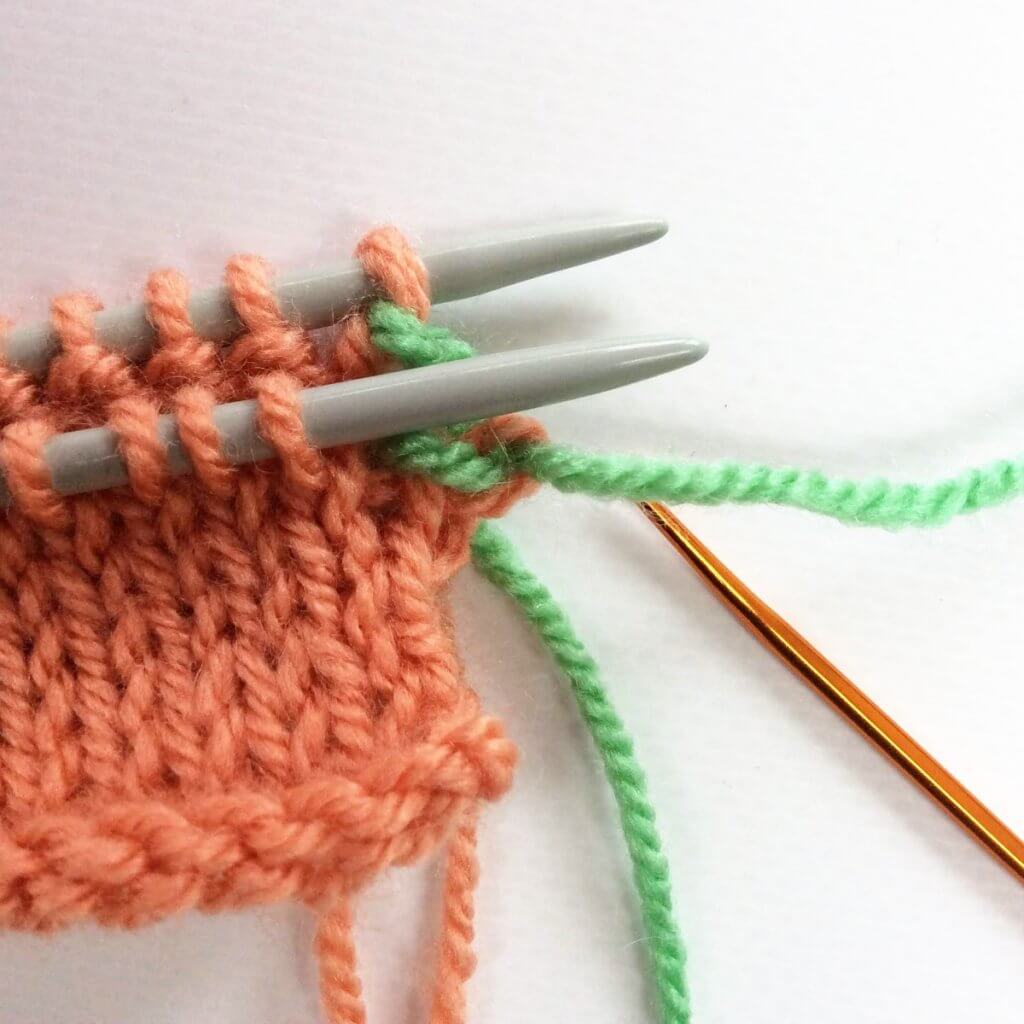
4. Back needle: Next, thread the darning needle knit-wise through the second stitch on the back needle. Leave the stitch on the needle and pull the yarn through. Gently adjust the tension of the newly made stitches to match the fabric of the pieces you’re grafting together. Be careful not to pull your yarn too tightly!
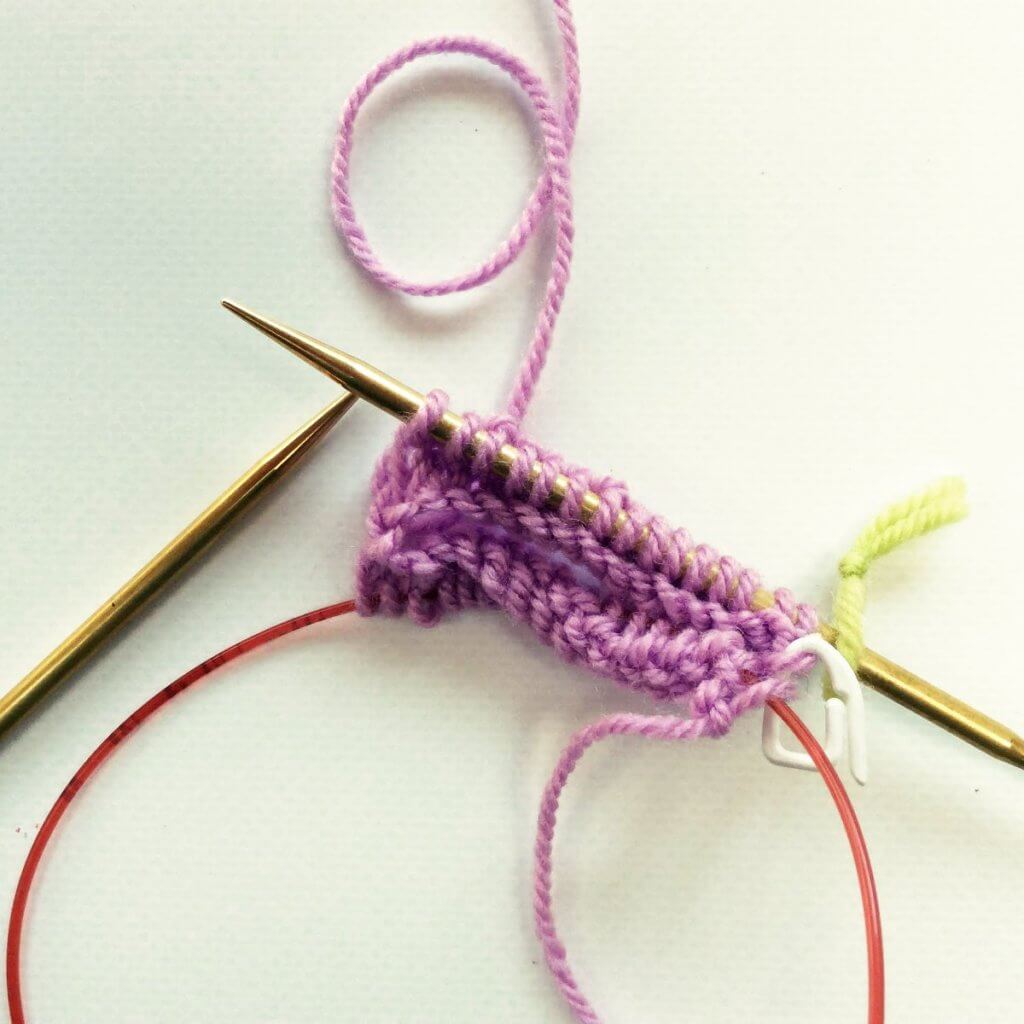
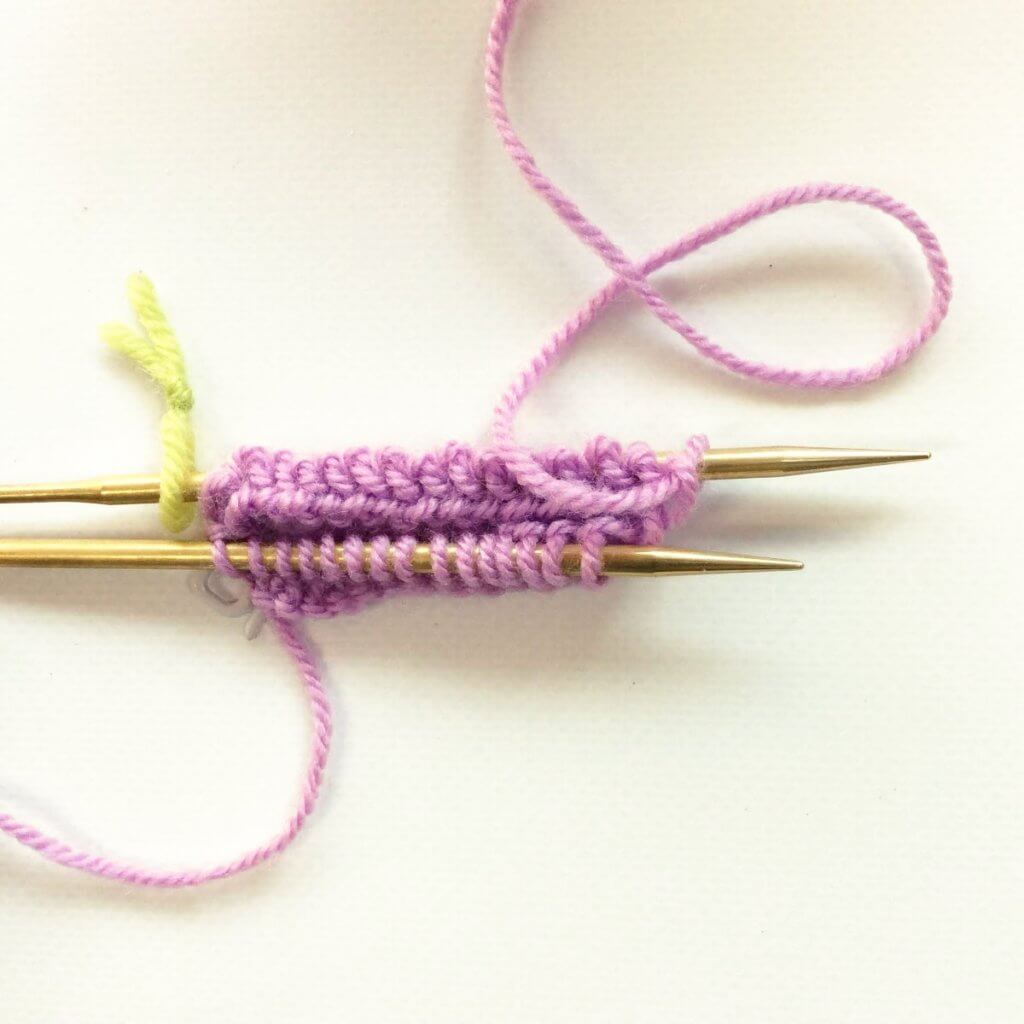
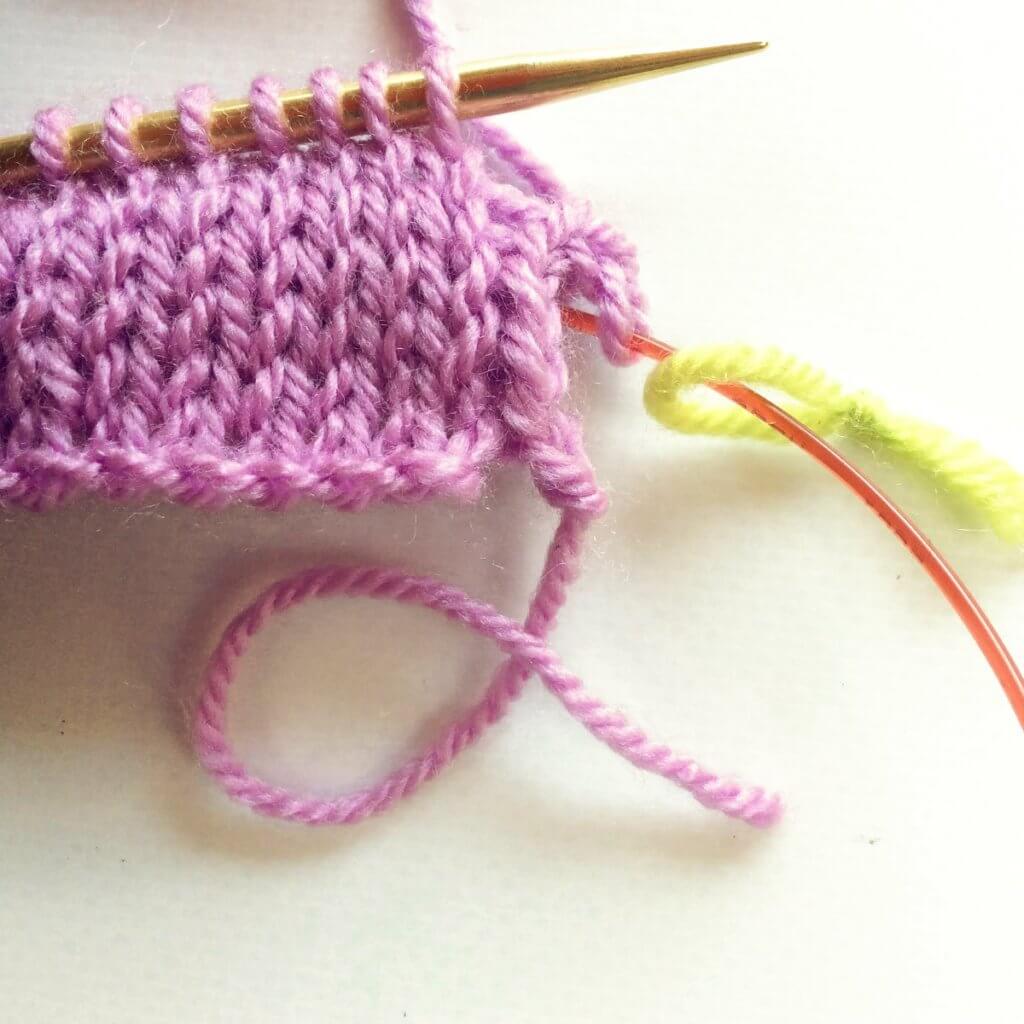
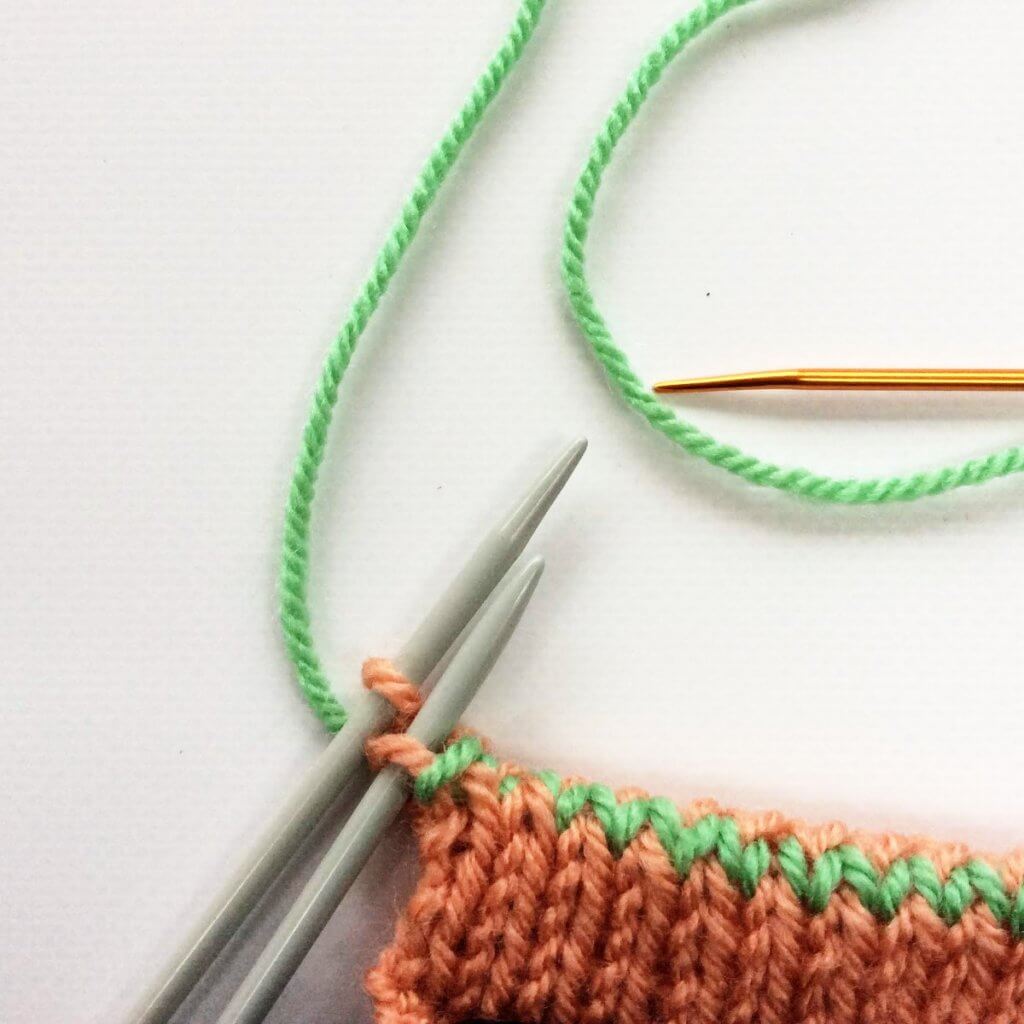
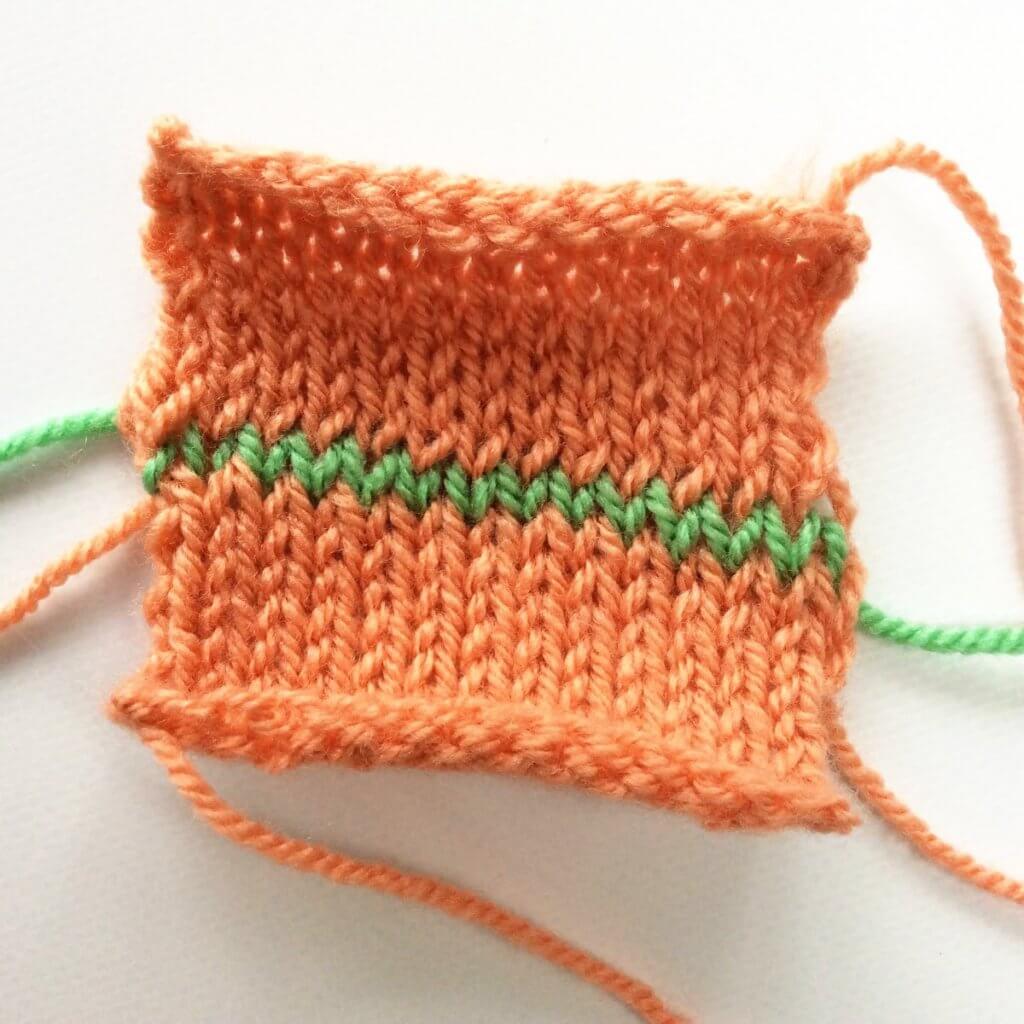
Repeat steps 1 to 4 until only 1 stitch remains on each knitting needle. This is how it then looks:
Finishing
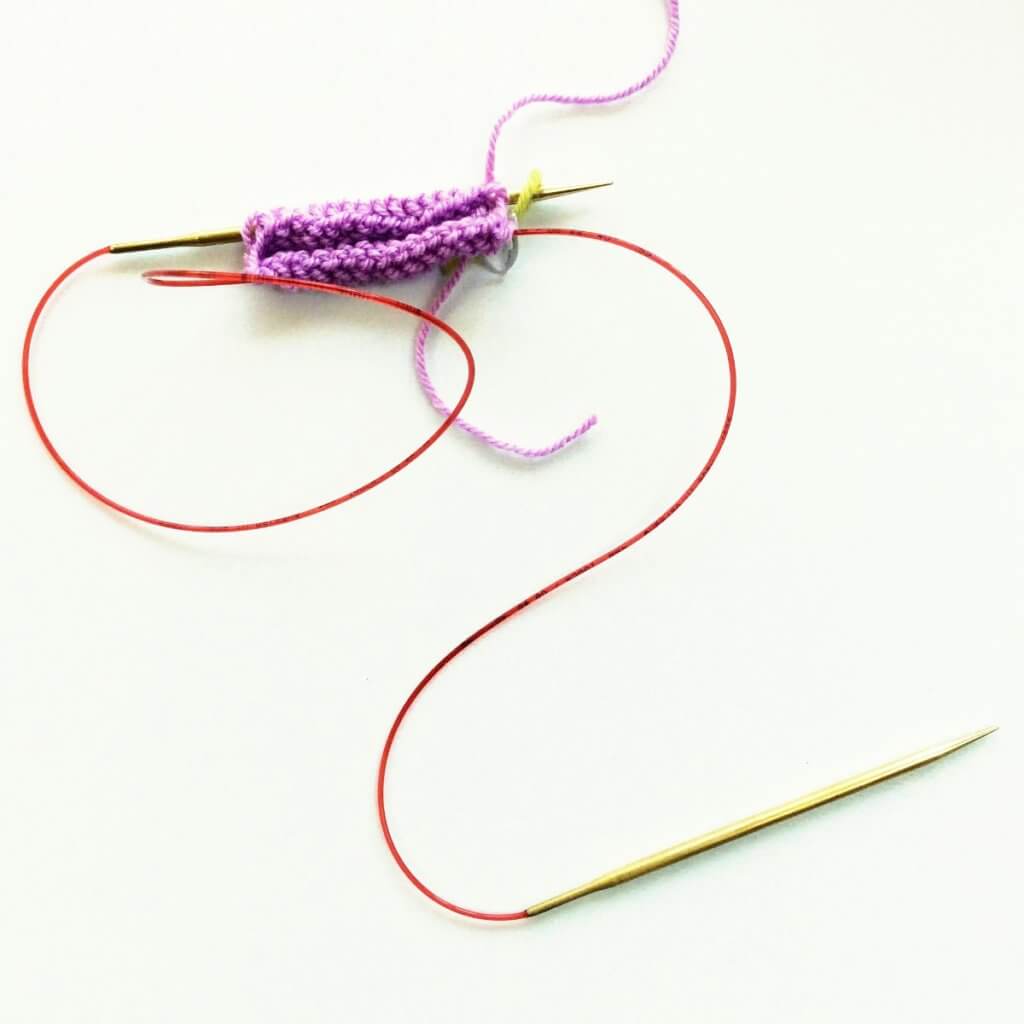
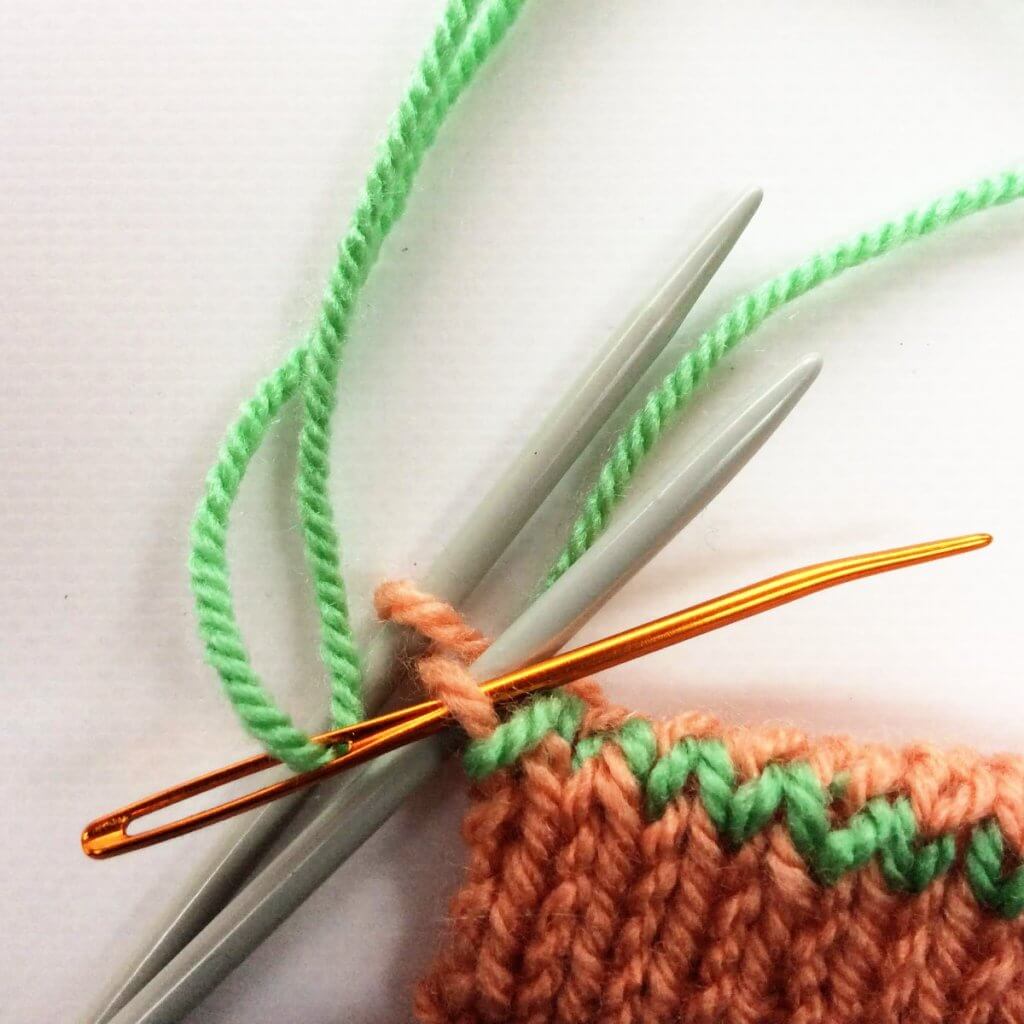
1. Now insert the darning needle knit-wise into the first stitch on the front needle and pull the yarn through, dropping the stitch from the needle.
2. To finish, insert the darning needle purl-wise into the first stitch on the back needle. Pull the yarn through and drop the stitch from the needle.
And that’s it! Pretty seamless, isn’t it? The only reason it can be seen as clearly as it is in this example is that I used a contrasting yarn.
Points of attention
If the tension of the new connecting row of stitches is not right yet, you can use the tip of your darning needle to further adjust. Just start at the right edge of the work, where grafting began, and gently pull the various stitches to adjust the tension until it matches the tension of the joined pieces. Also, when moving from front to back needle and vice versa, make sure to pass the working yarn and darning needle underneath the knitting needles, not above them.
Many people use a little rhyme to help remember the various steps that are to be repeated. It goes like this:
Front: Knit off –(knit first stitch on front needle, drop stitch off) Front: Purl on – (purl next stitch on front needle, leave stitch on) Back: Purl off – (purl first stitch on back needle, drop stitch off) Back: Knit on – (knit next stitch on back needle, leave stitch on)
Thanks to my Patreon supporters for bringing you this freebie! Creating quality patterns and tutorials is a lot of work and resource-intensive. However, I find it important to give you free content like this tutorial. Thanks to the generous support of my Patreon supporters, I can make it happen. Thank you, patrons! Click here to join, or click here to read more about La Visch Designs on Patreon.