dyeing wool with onion skins
I read that onion skins, both the red and the yellow variety can be used to dye wool or other protein based fibers pretty well. I’m very curious on the colors this will give and have therefore spent the last couple of months saving onion skins. I want to try out dyeing wool with onion skins!
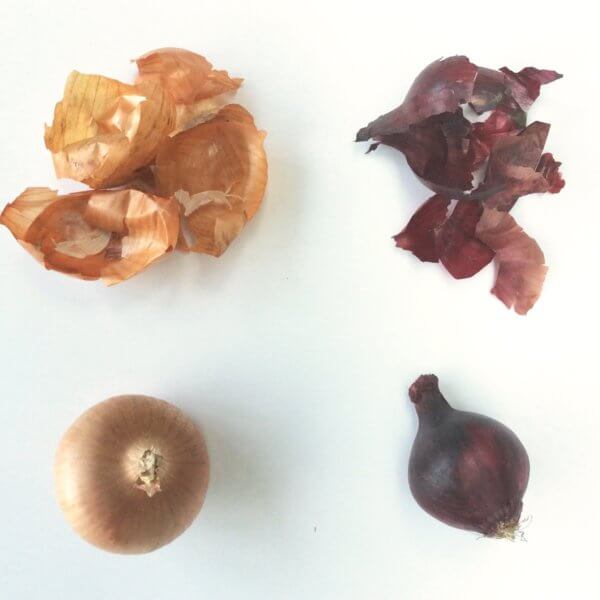
Gathering yellow onion skins proved to be not that much of a problem. Red ones, on the other hand, were, because we appear not to be that much into eating red onions. Anyway, onion skins were saved and I’m ready to tell and show you what I did!
Materials
Collecting the required materials is obviously an important step. In my experiment, I wanted to use yellow and red onion skins in separate dye baths to see what differences in color that would yield. To make this possible I collected the papery, outer skins of the onions. I stored these in two separate paper bags, one for each color. It’s important to store the skins in a breathing container, otherwise, any moisture still in the skins may cause everything to mold.
Also, mordanting also has an impact on the resulting color, so in each dye bath, I wanted to have 1 mordanted and 1 non-mordanted skein of yarn.
To make this possible I used the following materials:
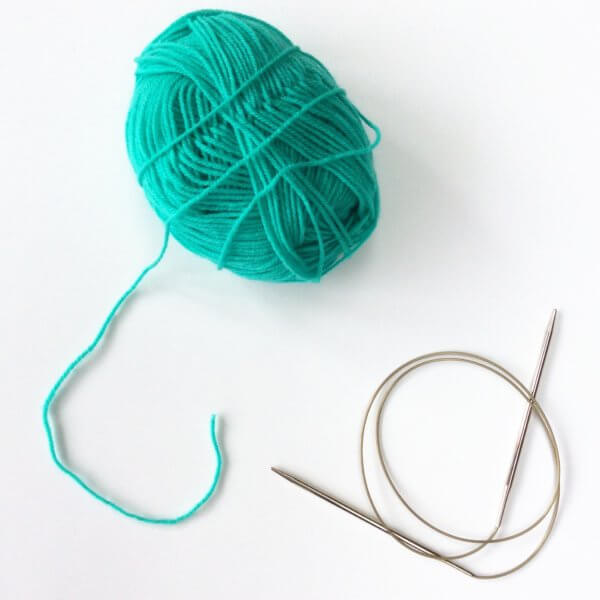
- Wool yarn, 4 balls of 50 g each
- Pieces of waste yarn to tie up the wool into skeins
- Detergent (without enzymes)
- 33 g yellow onion skins (for dyeing 100 g of wool)
- 33 g red onion skins (for dyeing 100 g of wool)
- A mordant, I used my leftover mordanting solution from my madder dye experiment
- 2 stainless steel pots
- A sieve
- Rubber gloves, stainless steel spoons
- Water
- A way to heat the pots, I just used my stove

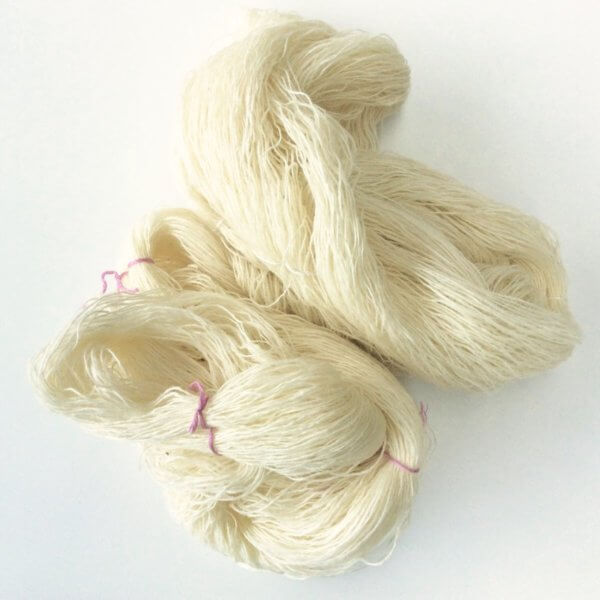
a. Washing the wool
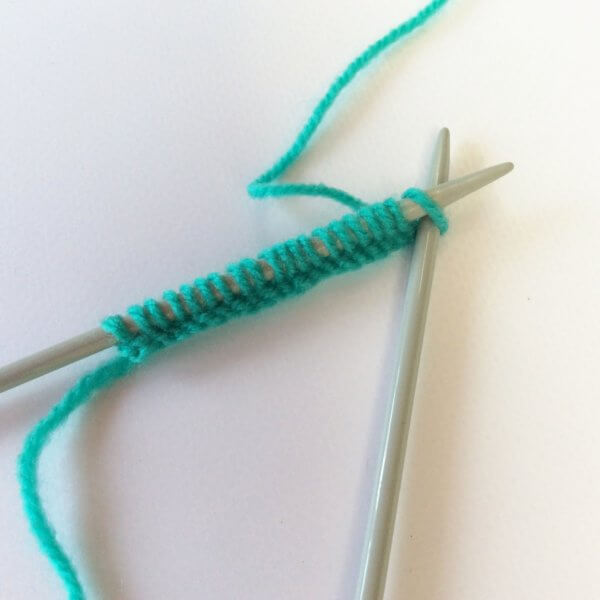
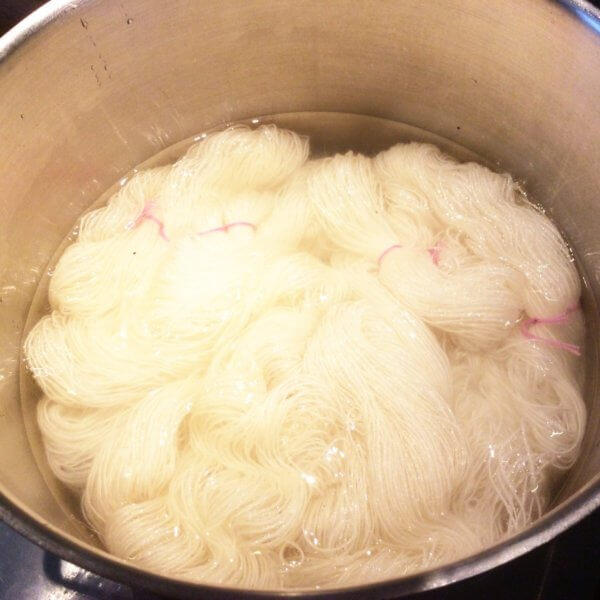
First as explained in this post I skeined up the yarn and washed it to remove any lanolin, spin oil or other debris still present on the yarn.
b. Mordanting
Mordanting of the wool is usually required with natural dyeing to ensure that the wool fibers are all opened up so that the dye can penetrate into the fiber. With onion skin dyeing this is however not really needed. Mordanting does have an impact on the resulting color though.
This is the reason I mordanted 2 of my 4 skeins of wool with an alum mordant. As written above, I used the leftover mordanting solution from my madder dye experiment. This time though, I didn’t leave it overnight at room temperature, but let it simmer on the stove for an hour.
c. Preparing the dye baths
1. An important step in dyeing wool with onion skins is of course preparing the dye baths. For each of the dye baths, I put 33 g of onion skins in the pot together with 2 L of water. This I let simmer on the stove for an hour.
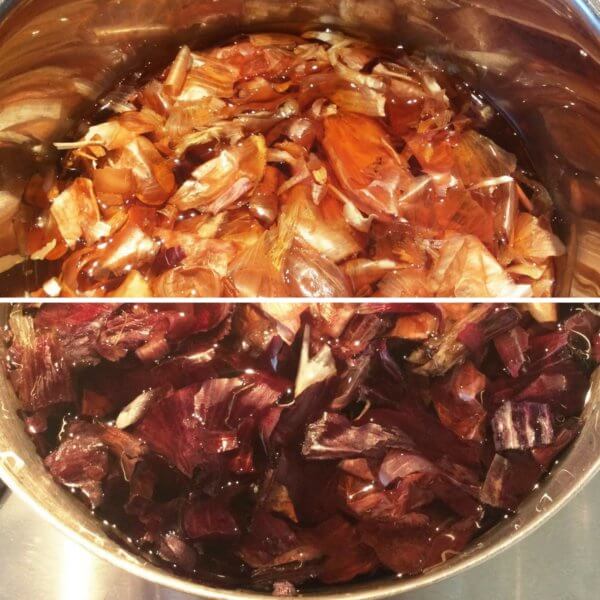
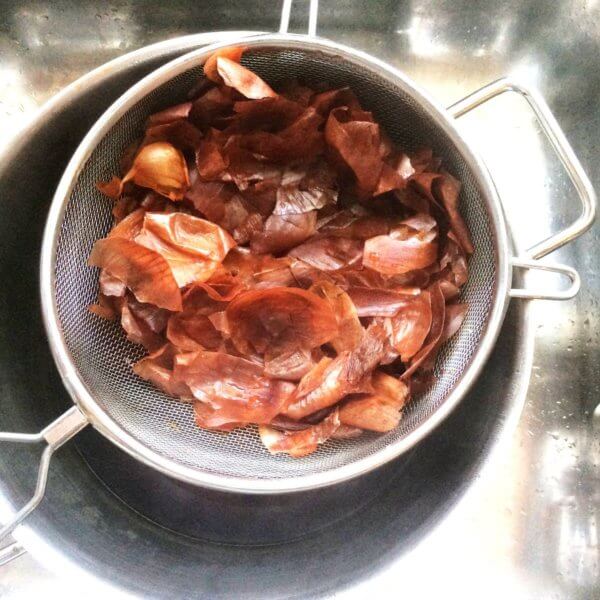
2. After the full hour had passed, I used the sieve to separate the onion skins from the dye bath. The colored liquid was then returned to the pot, minus the onion skins.
3. Here you see a picture of the resulting dyeing solutions. It’s a tad hard to see because it’s just so dark, but the yellow onion one is a dark orange. The red onion skin dye is a dark red.
d. Dyeing the yarn
4. In the case your yarn has dried before getting to this step, you have to soak it first in water again. In wet wool, dye distributes itself much more uniformly. About half an hour of soaking is usually enough. If the wool is still slightly wet, you can skip to the next step of this tutorial.
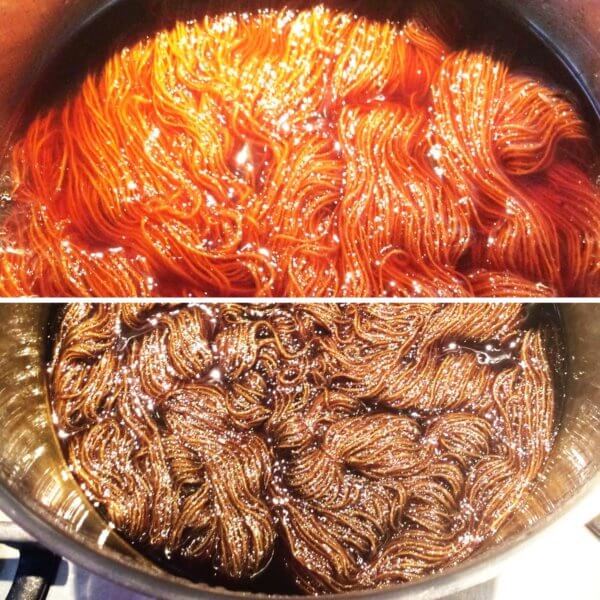
5. In each of the dye baths, I have put a skein of mordanted wool as well as a non-mordanted one. I made sure to completely submerge all wool. The picture below shows the yellow onion bath on top and the red onion skin one on the bottom half.
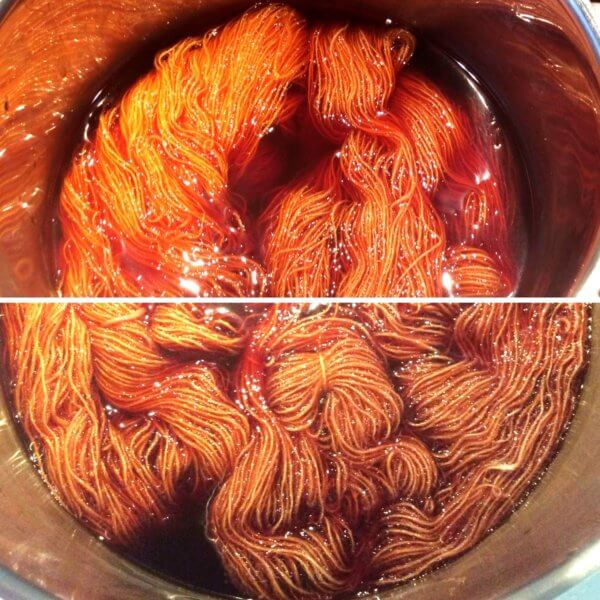
6. I let the wool simmer for about an hour in the dye bath. Next, I let it cool down in the dye bath overnight. The picture below shows how the wool looked next morning. Do you see how dark the red onion skin dye bath and the yarn in it (bottom part of the picture) has become?
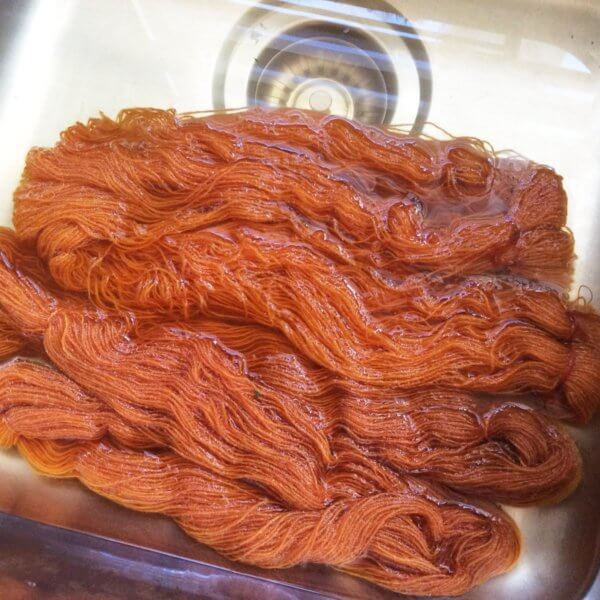
7. Rinse the wool off with lukewarm water. Rinse as long as necessary until the water runs clear. Remember to put on rubber gloves, if you do not want to stain your hands! In this picture, only the yellow onion skin dyed yarn is shown.
8. Then you can squeeze the water out of the dyed wool and hang to dry.
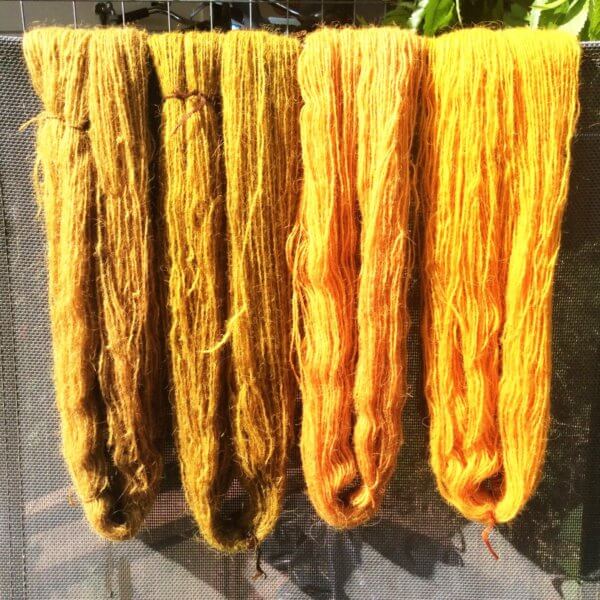
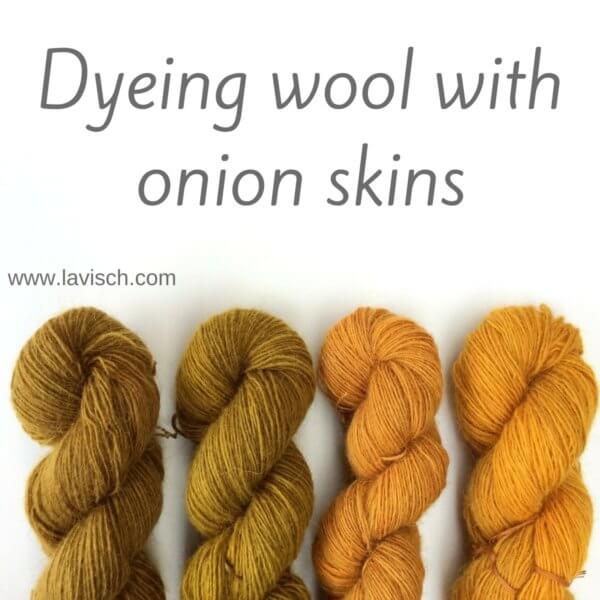
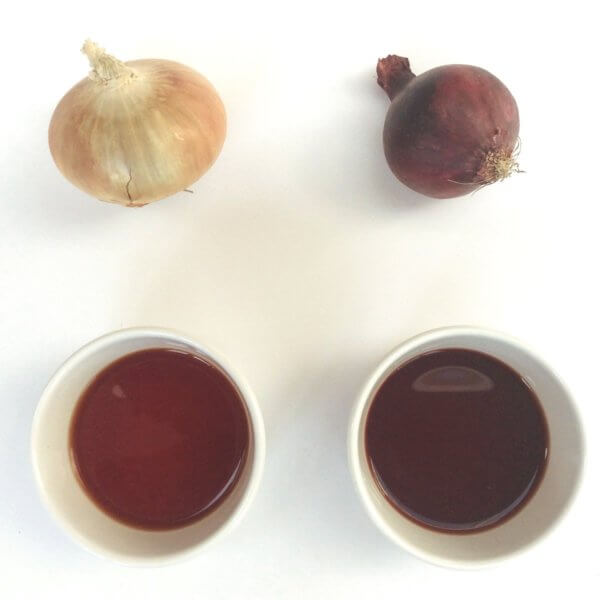
And this is my result from dyeing wool with onion skins, after the skeins of yarn have completely dried:
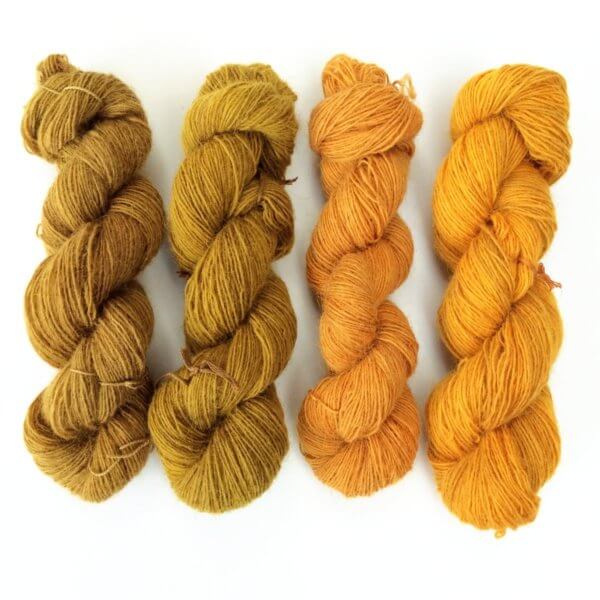
From left to right: red onion skins on non-mordanted wool, red onion skins on mordanted wool, yellow onion skins on non-mordanted wool and on the far right yellow onion skins on mordanted wool.
The mordanted colors are more bright than the non-mordanted ones. It really surprised me though, that red onion skins give green yarn!
dyeing wool with onion skins Read More »