There are many ways to join one piece of yarn to another. Think, for example, of the braided join or the Russian join. However, if you have a feltable yarn, in other words: an animal fiber capable of felting (non-superwash!), the felted join gives a truly invisible connection. This also means that this way of joining a new yarn can be used at any place in your project, mid-row really won’t make a difference in how the finished piece looks.
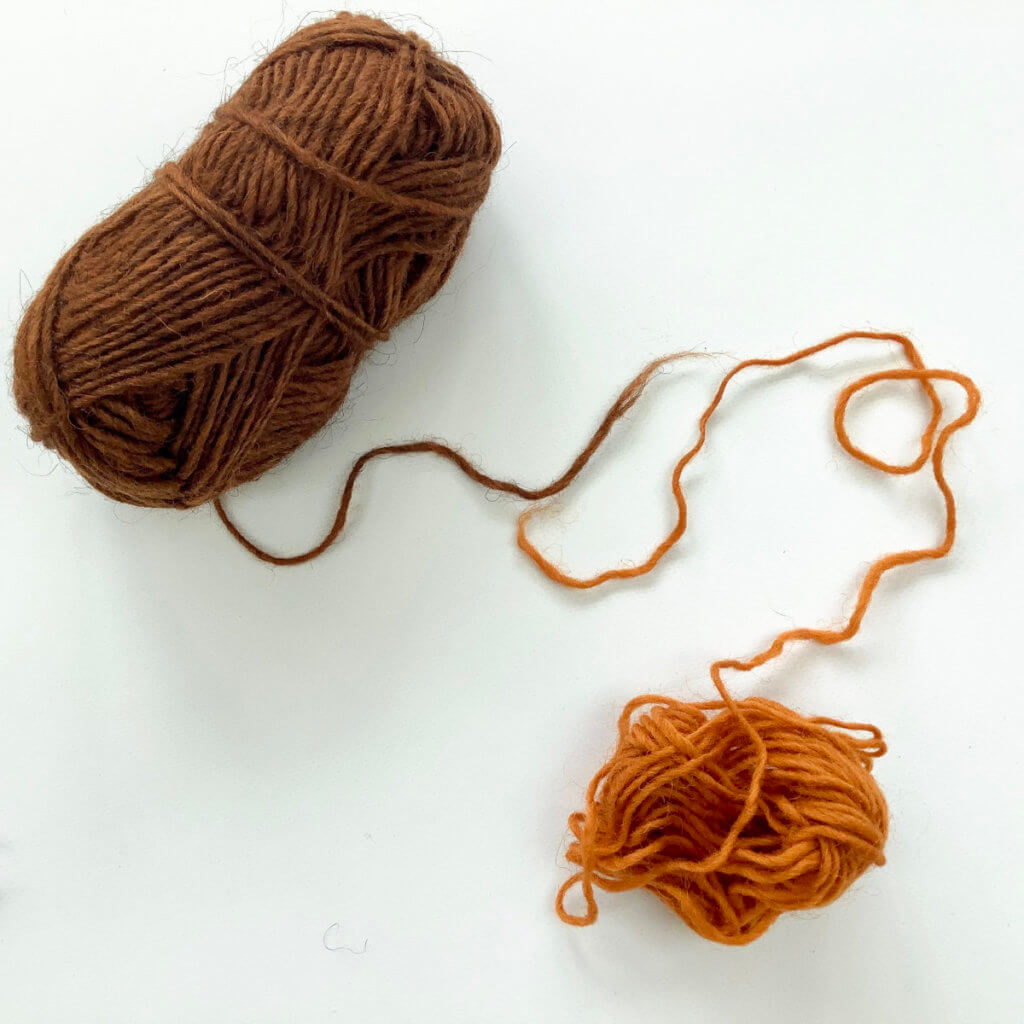
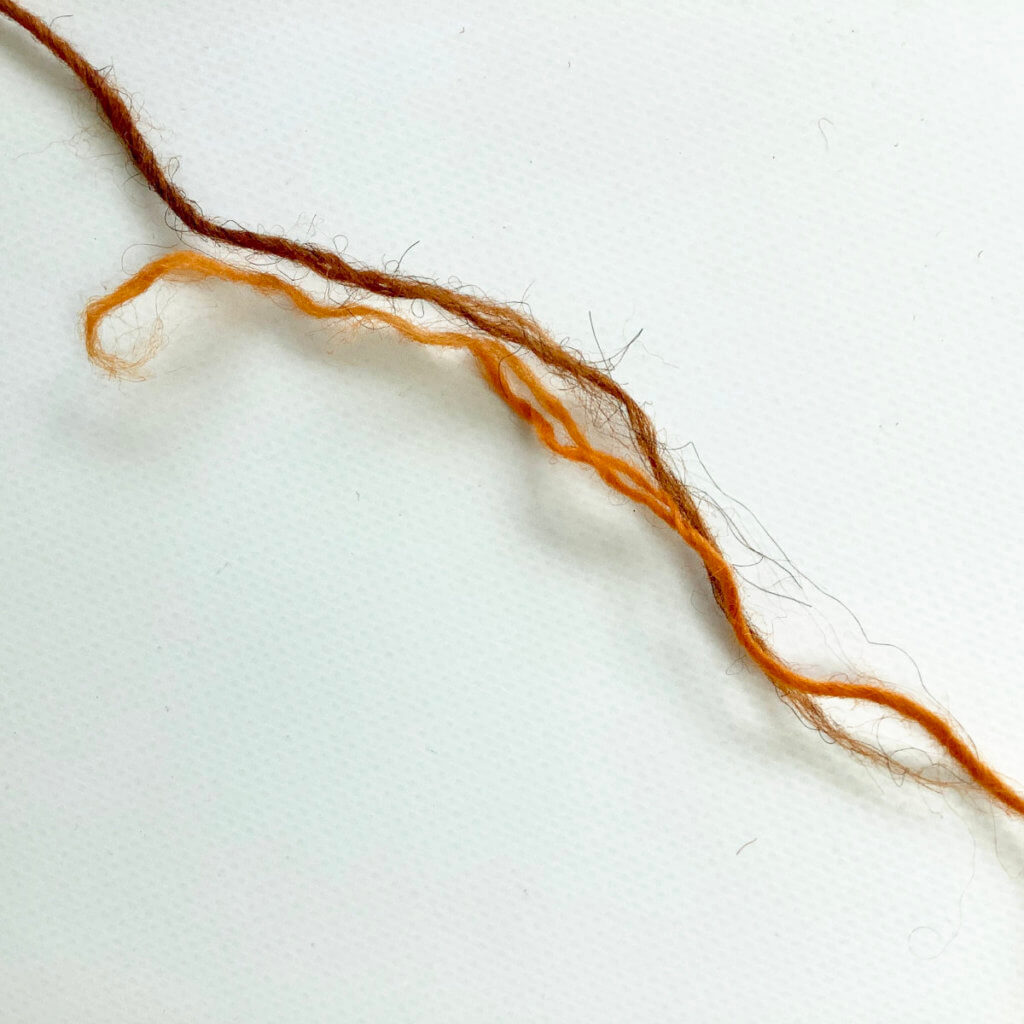
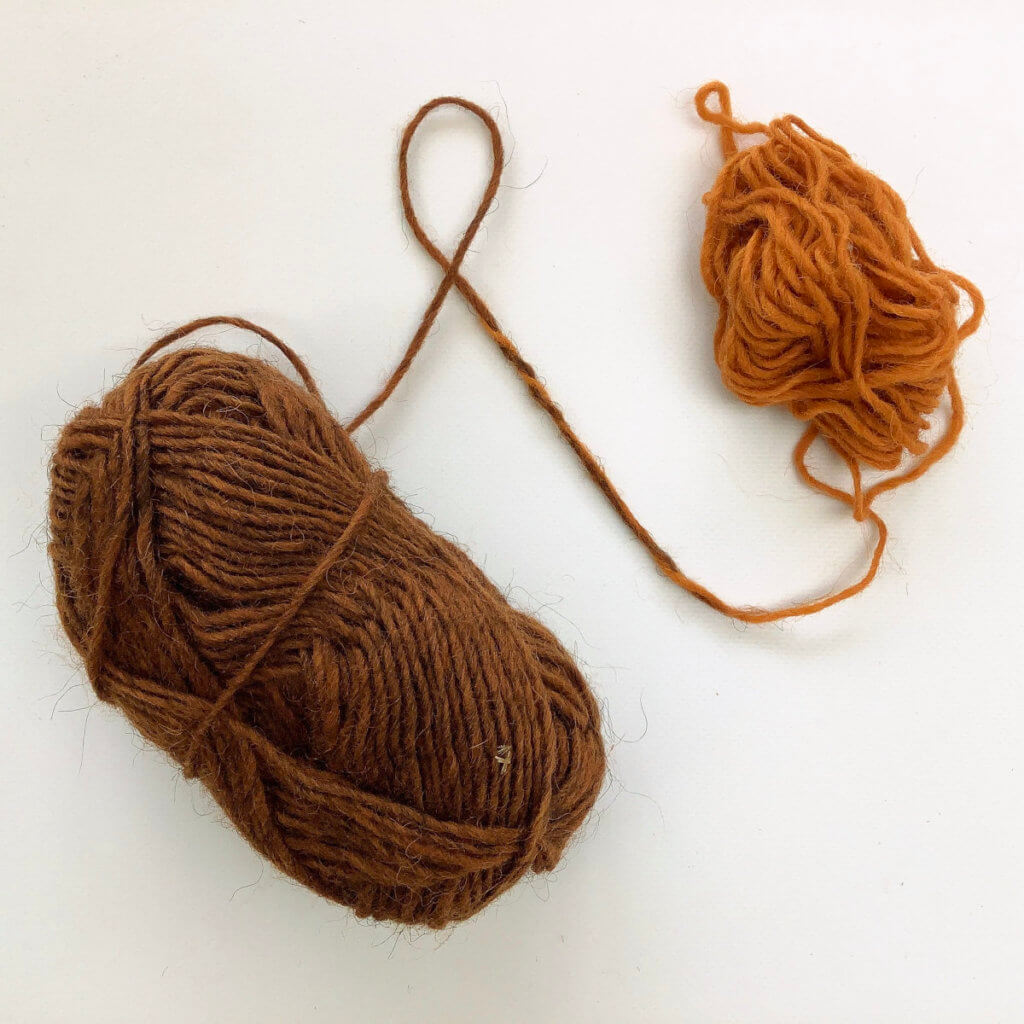
This type of join literally felts the fibers together, thus making the join indistinguishable from the non-join parts of the yarn. I mean, if I hadn’t used 2 different colors of yarn in the picture above, it really wouldn’t have been visible where one ball ends and the other starts.
Felting occurs when friction is applied to the wet fibers. Of course, there are more things that influence and can induce felting, but for this join, this is the one that matters. One can go to the sink and get some water there to wet the ends of the yarn to connect, but often people go for an easier source of moisture. This is where the alternate name of this join comes from: the “Spit Splice”.
Working a felted join step by step
1. First take your 2 pieces of feltable yarn. Often this will be the yarn tail coming from your knitting or crochet project and the yarn from the new ball to attach. The yarn I’n using here is Ístex Léttlopi, a nice aran weight yarn, made form 100% Icelandic wool.
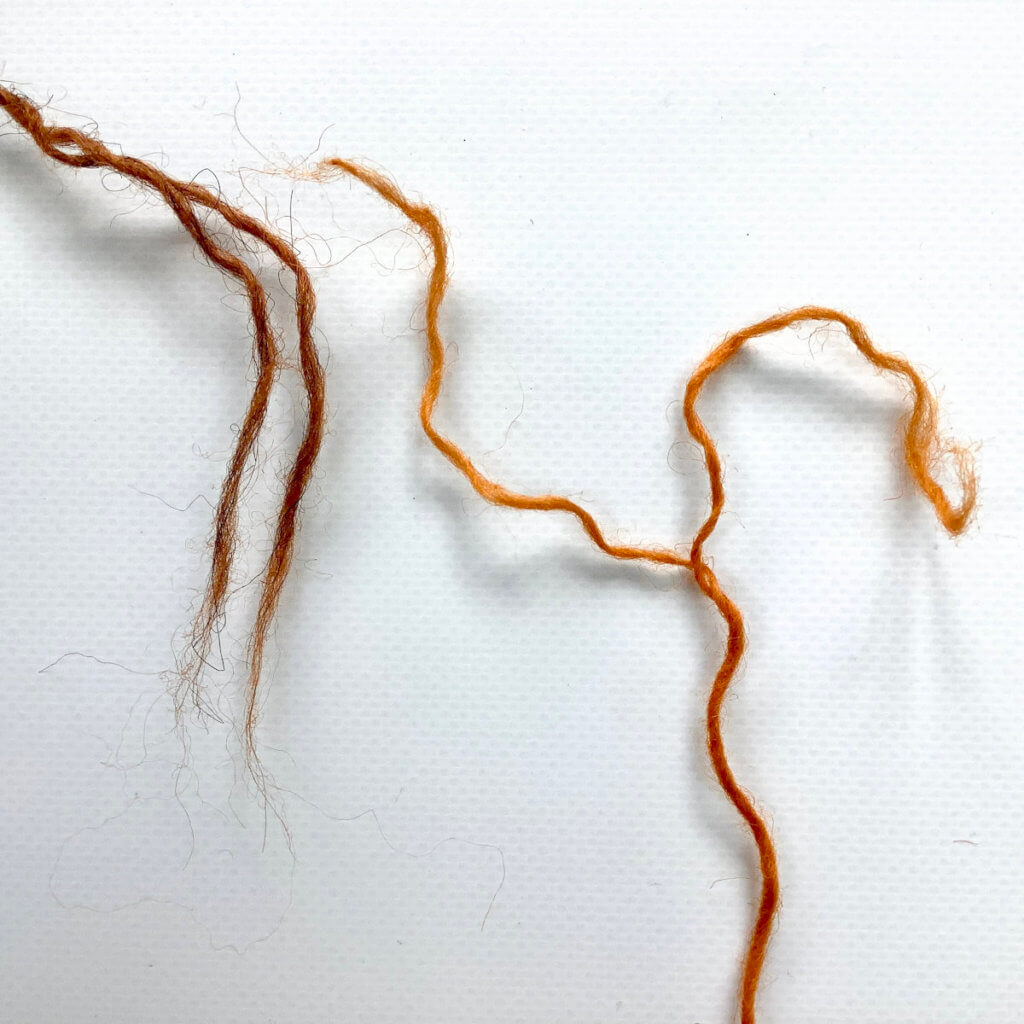
2. Next, tease the ends of both pieces of yarn apart a bit. This can be in the various plies as pictured here. Or, in case of a single ply yarn, just fan out the fibers over a length of approx. 5-7.5 cm / 2-3 inches.
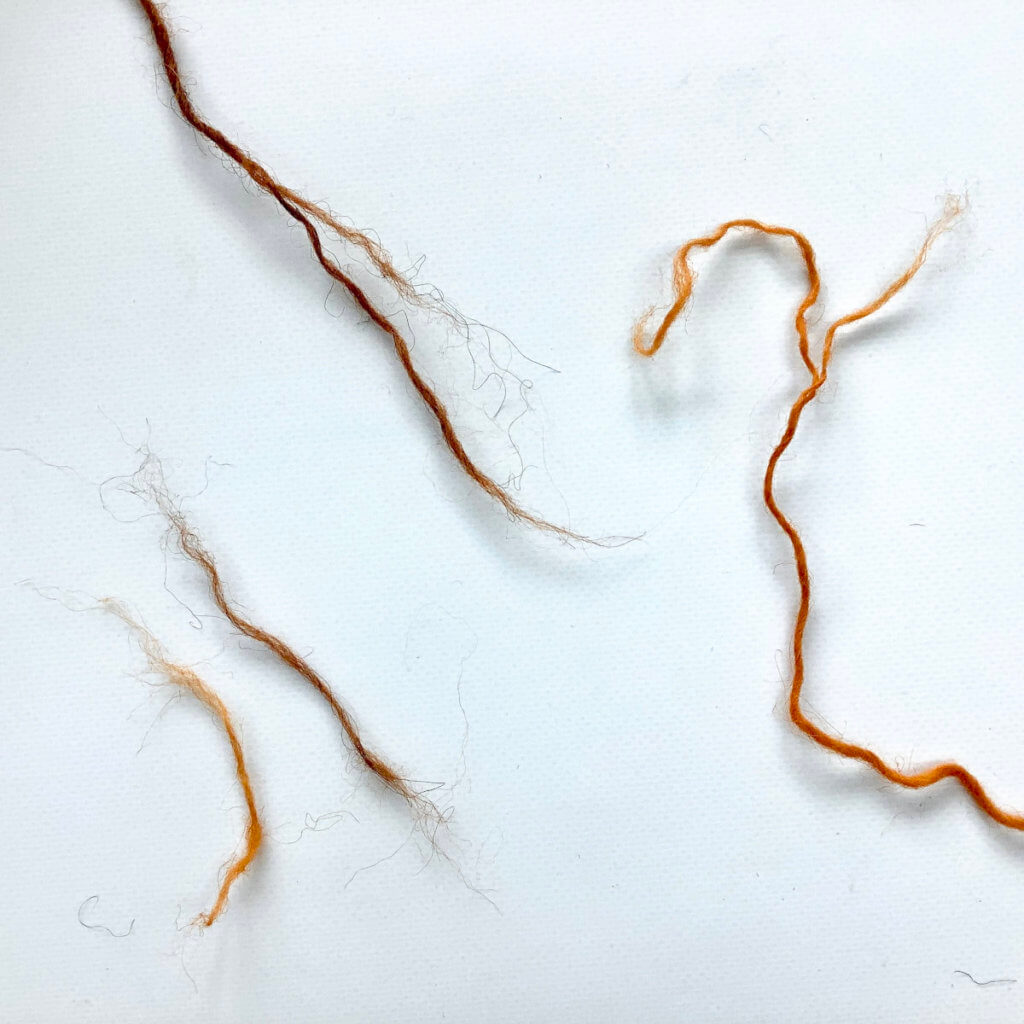
3. After this, I removed one of the plies at each end of the yarn, again over a length of approx. 5-7.5 cm / 2-3 inches. This way the join will be less bulky and blend in better with the rest of the yarn.
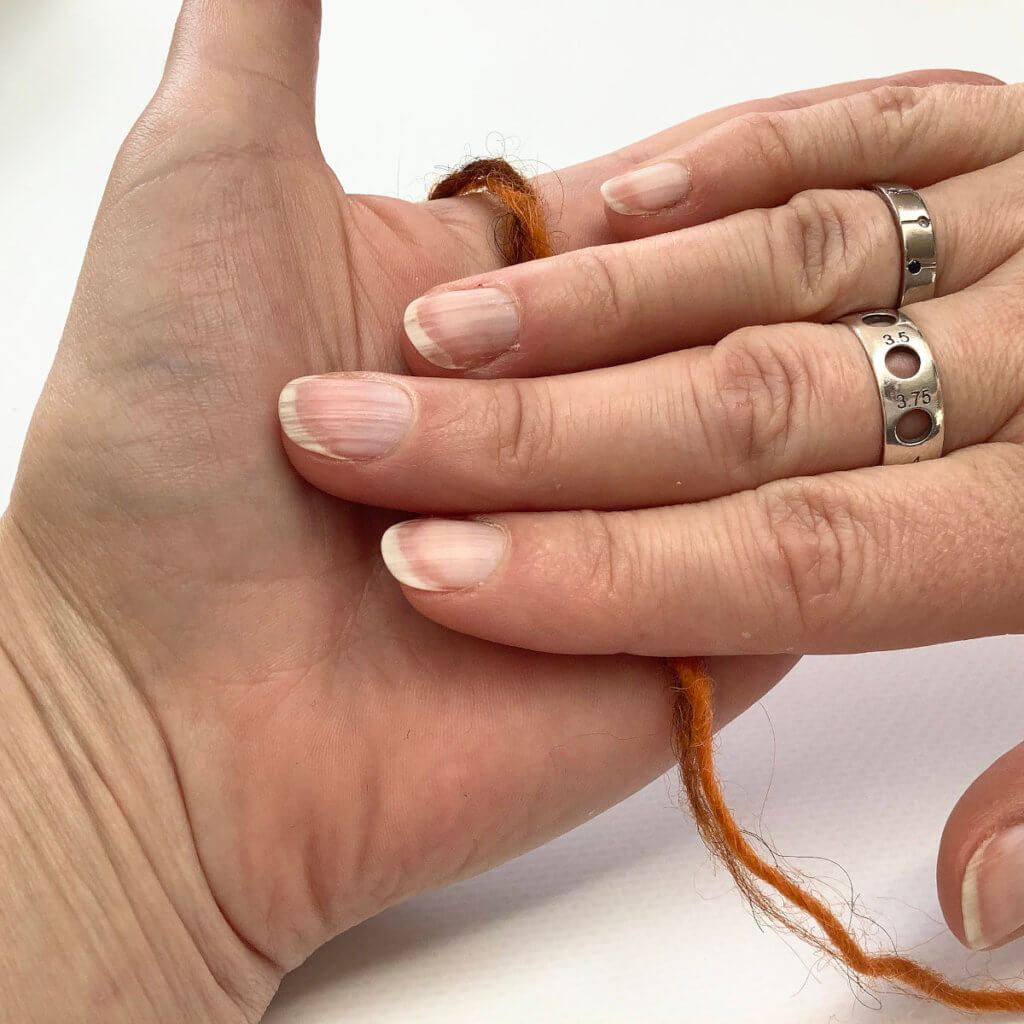
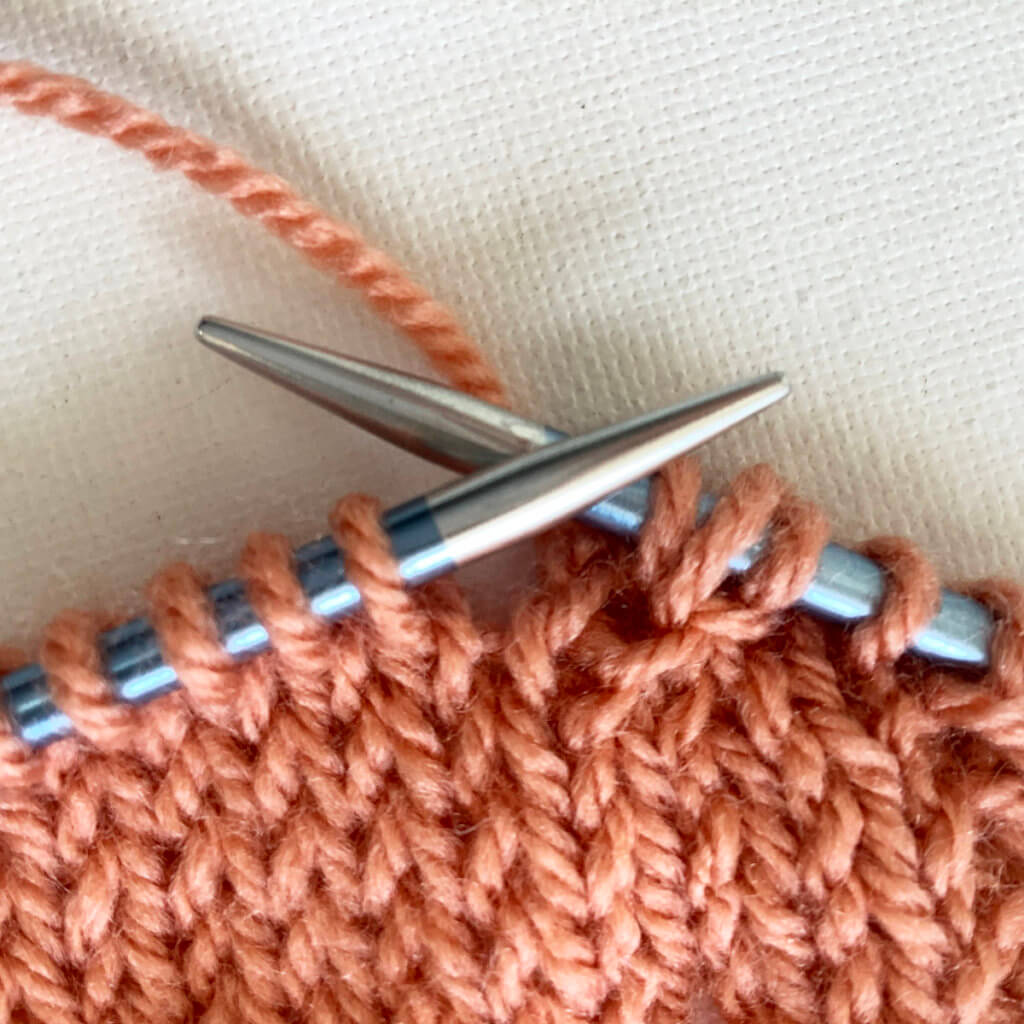
4. Next, I place the 2 yarn ends next to each other in such a way that they overlap for about 5-7.5 cm / 2-3 inches. Now it’s time to wet the yarn where it overlaps in any way you please.
5. Now comes the fun bit: rub the overlapping pieces of wet yarn vigorously between your hands for a bit. On a side note, see that ring on my middle finger? It’s a gauge ring (the metric version) by Malojos. The best knitting accessory gift I’ve gotten myself to date!
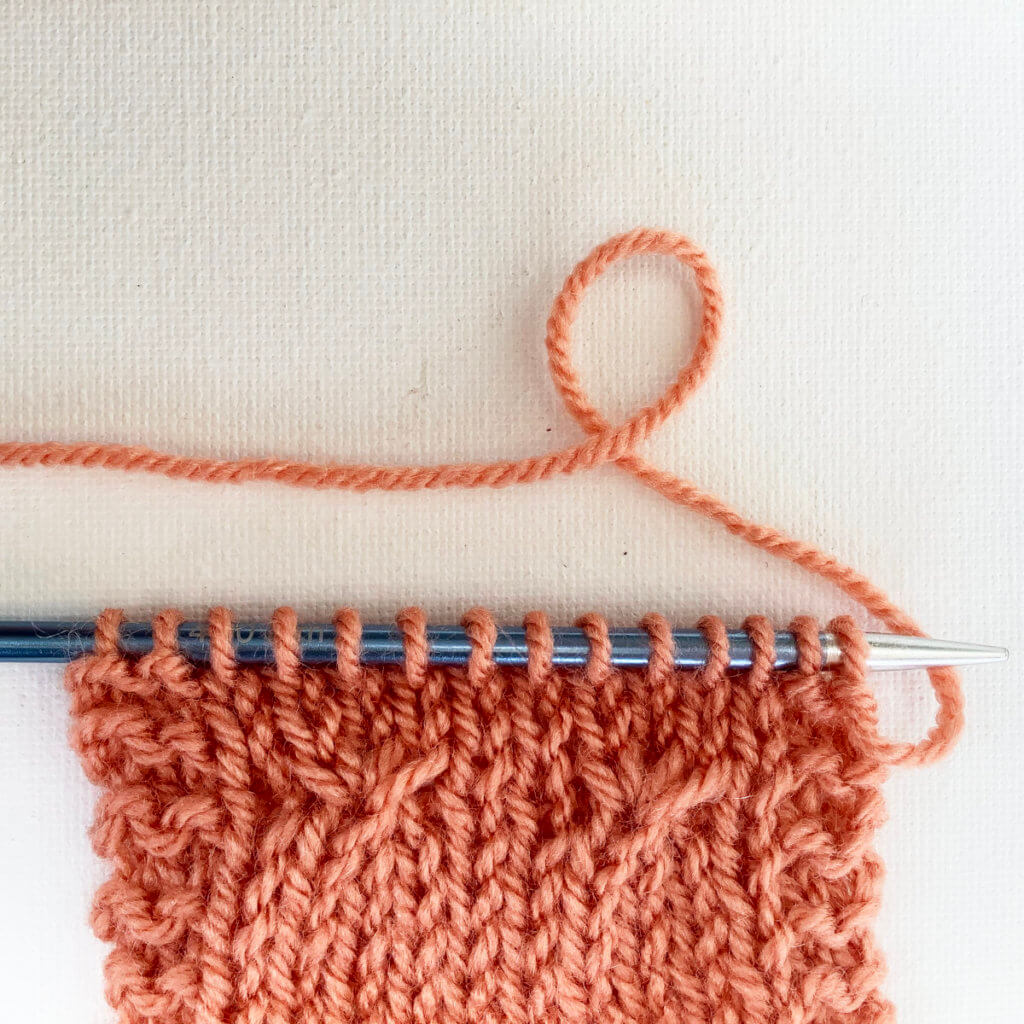
6. And there you have it: a felted join!
Thanks to my Patreon supporters for bringing you this freebie! Creating quality patterns and tutorials is a lot of work and resource-intensive. However, I find it important to give you free content like this tutorial. Thanks to the generous support of my Patreon supporters, I can make it happen. Thank you, patrons! Click here to join, or click here to read more about La Visch Designs on Patreon.
Many knitting patterns contain shaping or patterning. The latter may be lace, cables, knit/purl patterning, color work or a combination of these. These instructions may be written out completely. But, especially with more complex patterning, this can become a veritable wall of text pretty soon.
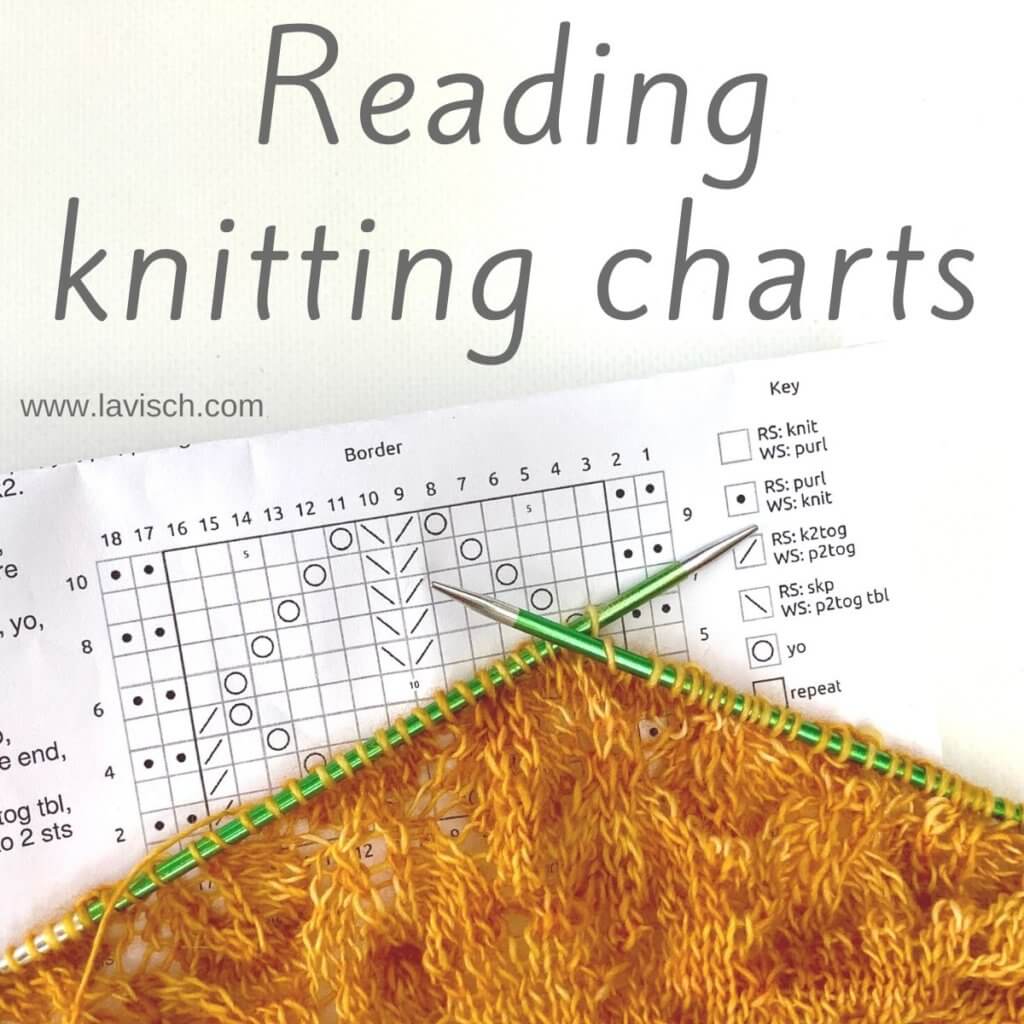
Enter charts! A knitting chart is a compact visual representation of the knitting project shown from the right (or front) side. Each box on a chart represents a stitch, and every chart includes a legend explaining what to do for each symbol included. My patterns always contain both charted and written out instructions, because there just are differences in how people parse information best. That said, charts can be intimidating if you don’t quite know how to read them.
So, in this tutorial I’ll tell you all about it, for both knitting flat and knitting in the round.
Where to start reading knitting charts?
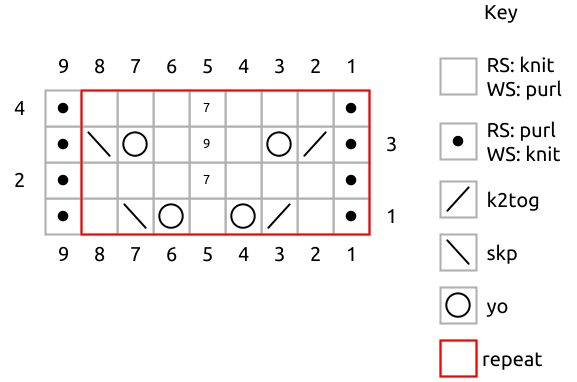
Yes, there are differences in reading charts for knitting flat back and forth and for knitting in the round. There are, however, more commonalities than differences. I’ll show you, using the chart for my (free!) Autumn Leaves Shawl pattern.
As you can see, there are numbers at the top and at the bottom. These represent the stitches that are to be worked horizontally. Also, there are numbers at the sides of the chart, these indicate the rows or rounds to be worked. Since this is a chart for flat knitting, the numbers are alternated on the right and left side of the chart.
The rule of thumb is always to begin reading your chart at the box marked “1” for both stitch and row indication. In this chart that’s in the lower right corner. Then, proceed going left to the stitch marked “2” in the same row etc until you’ve finished the row.
Since this is a chart for flat knitting, after we’ve finished the row we have to turn the work. Next is row number 2, this one is to be worked from the left to the right. If you have your knitting in front of you, it really makes sense. You’re working the back (the wrong side) of the work, but looking at the chart from the front, so the chart is to be worked backwards when compared with the previous row.
If you’re working in the round, all vertical numbers will only be on one side of the chart. See for an example the chart above. And since every round is worked with the right side showing (towards you), you just move up vertically and work the second round from the bottom from right to left as you did for the first round.
Decoding the symbols
As I told you above, every chart includes a legend. The legend is very important, because it defines the stitches or colors that correspond with the stitches on the chart. Quite good to know when trying reading knitting charts! Also, do make sure to closely examine the legend before you begin knitting. There may be different meanings to certain symbols in the particular chart, than you’re used to.
In the leafy border chart posted above, there are 2 stitches for which the symbols have a different meaning on the wrong side and right side of the fabric. In this example, a blank box is knitted on the right side (odd rows) and purled on the wrong side (even rows). Boxes containing a black dot are purled on the right side (odd rows) and knitted on the wrong side (even rows).
The other stitches used, also have their wrong side equivalents. They are, however, not mentioned in the chart because they are not used on wrong side rows. This makes the chart “cleaner”.
Another symbol you may encounter is the gray “no stitch” box. These may be used in a chart to make the charted representation more clear. When you encounter one, just ignore and skip it in the chart. It does not represent a stitch to be worked on your needle. As a matter of fact, the leafy border chart also had some of these stitches on the left side of the chart. I just hid them to make the chart look more clean and save toner/ink for folks wanting to print it.
Repeats
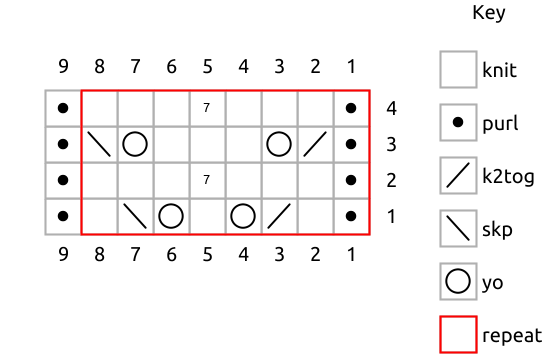
Many patterns feature a repeat. This is a section of patterning that is to be repeated both horizontally and vertically. Repeats are typically indicated by a box or frame in a contrasting color. In the example below a red frame is used.
In this chart, stitches 1-8 are to be repeated until 1 stitch before the end of the row. After that stitch number 9 is worked. When working repeats, it may be useful to place a marker between the repeats. This helps you keep your place and makes it easier to identify and correct mistakes. Once all 4 rows in the repeat are worked, they can be repeated too if the pattern asks for it.
Reading your knitting = reading your chart
Remember that I said that a knitting chart is a compact visual representation of the knitting project shown from the right side? Let’s put both the chart and the resulting piece of knitting next to each other:
Unfortunately, I don’t have a picture of the knitted leaf detail in the same orientation as the chart. So, trust me when I say that the leaf pictured above, was started at it’s upper right corner. The stitches that were bound off in row 18, can be seen in the lower left corner of the shawl edge.
Do you see that the elements in the chart are very recognizable in the resulting knitting? Take for example the rows with “yo, k1, yo”, in the knitted leaf they form the very recognizable “midrib” and “veins” of the leaf. Similarly, the centered double decrease in row 17 forms the apex of the leaf.
In other words: once you get more comfortable in reading your knitting, this will also enable you to see at a glance where you are in the pattern (chart) and whether any mistakes are made. If there are any errors, this will usually be noticed because things don’t “look” right, don’t line up correctly or because there are not enough stitches to work the chart.
And that’s how to go about reading knitting charts!
Thanks to my Patreon supporters for bringing you this freebie! Creating quality patterns and tutorials is a lot of work and resource-intensive. However, I find it important to give you free content like this tutorial. Thanks to the generous support of my Patreon supporters, I can make it happen. Thank you, patrons! Click here to join, or click here to read more about La Visch Designs on Patreon.
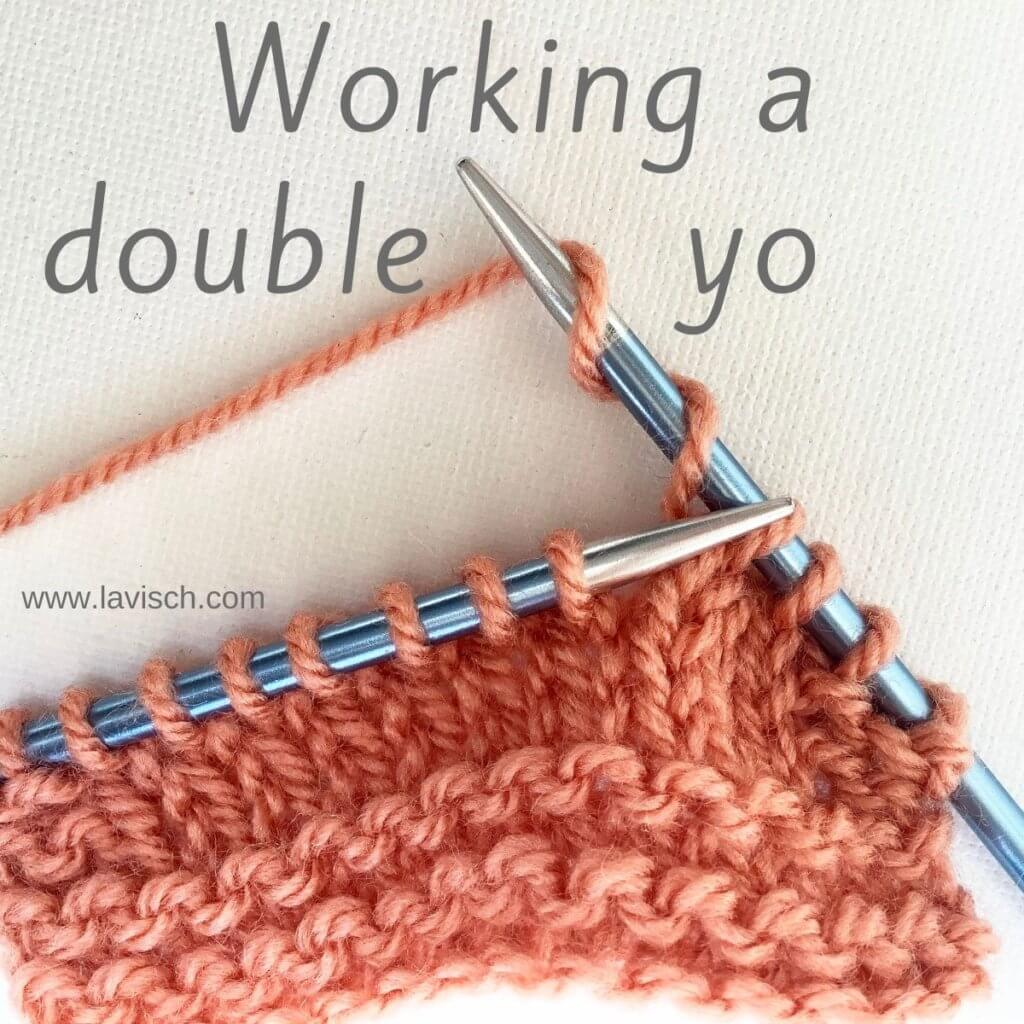
A yarn over (abbreviated as “yo”) is a simple way to increase stitches and deliberately make a little hole in your knitting. I wrote all about it in this tutorial. A double yarn over is exactly what it seems to be: a yarn over that creates two new stitches instead of a single one as with a regular yarn over. And yes, the hole that it creates when using this stitch in lace is bigger as well. In patterns, it’s sometimes referred to as “yarn over twice”.
This tutorial will give you step-by-step instructions on how to work the “double yarn over” increase.
Materials used
Yarn: * Paintbox Yarns Simply DK, a good value, good quality 100% acrylic yarn, here in the color 155 Vintage Pink.
For this tutorial I made a little swatch in stockinette, with garter stitch borders to prevent it from curling.
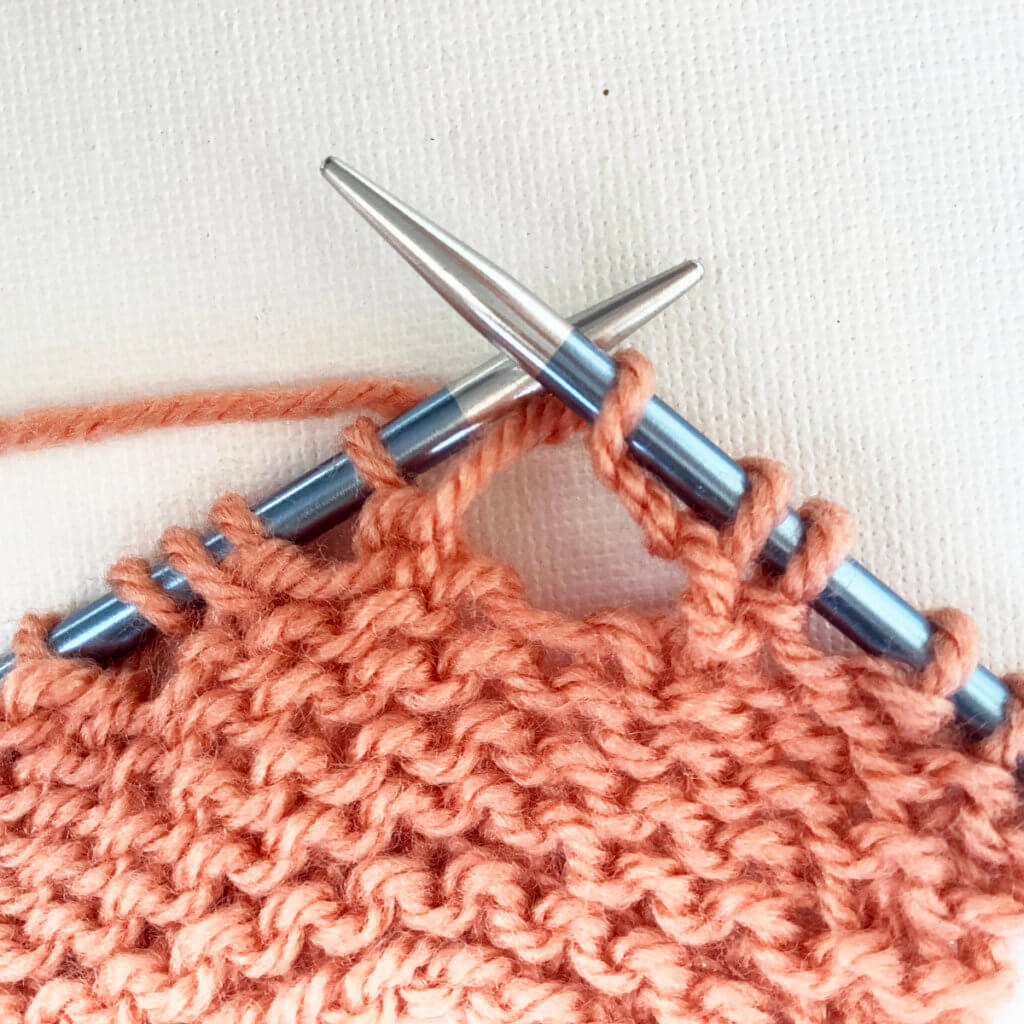
1. First, work your way across the row until you’ve reached the point where you want to make the increase. In this case, I will be making the double yo increase 2 sts in from each of the garter stitch borders. But, I don’t want to increase the total number of stitches on my needles. This means that for every double yo worked, there should also be 2 stitches decreased. In this example I’ll be working a k2tog before the double yo and an skp after it.
2. In the below picture I’ve worked the k2tog decrease.
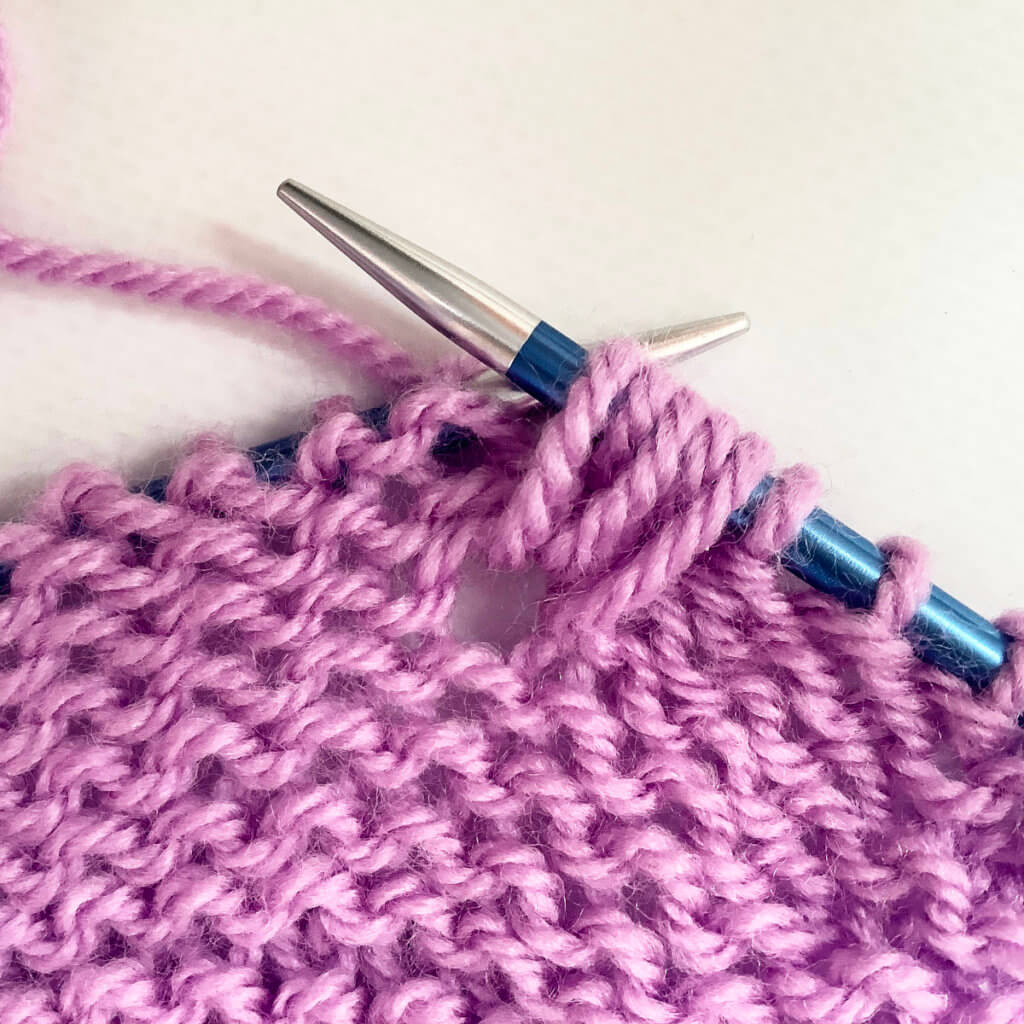
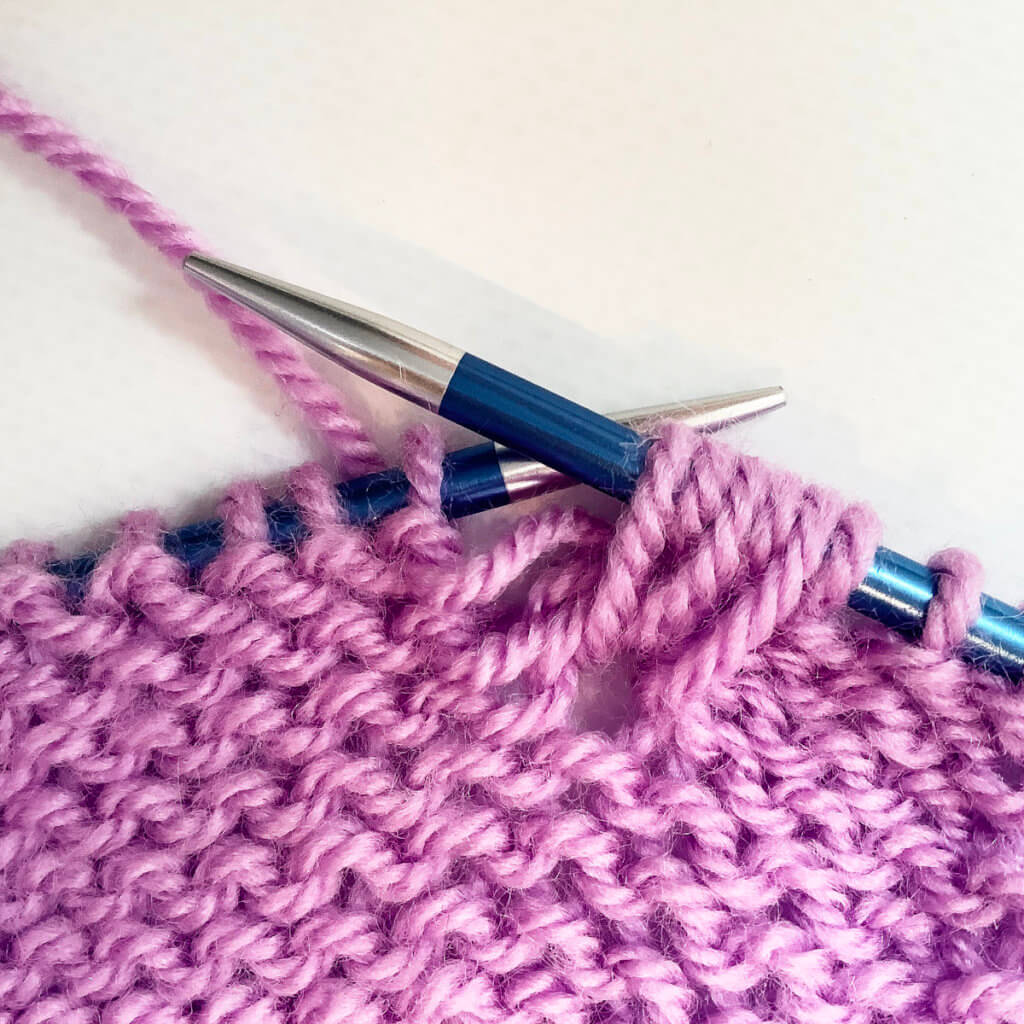
3. To make the double yo, wrap the yarn around the right-hand needle twice. To do so, do the following twice: move the working yarn from the back to the front between the needles and then over the right-hand needle back to the back of the work.
4. In the following picture I worked the skp decrease directly after the double yo.
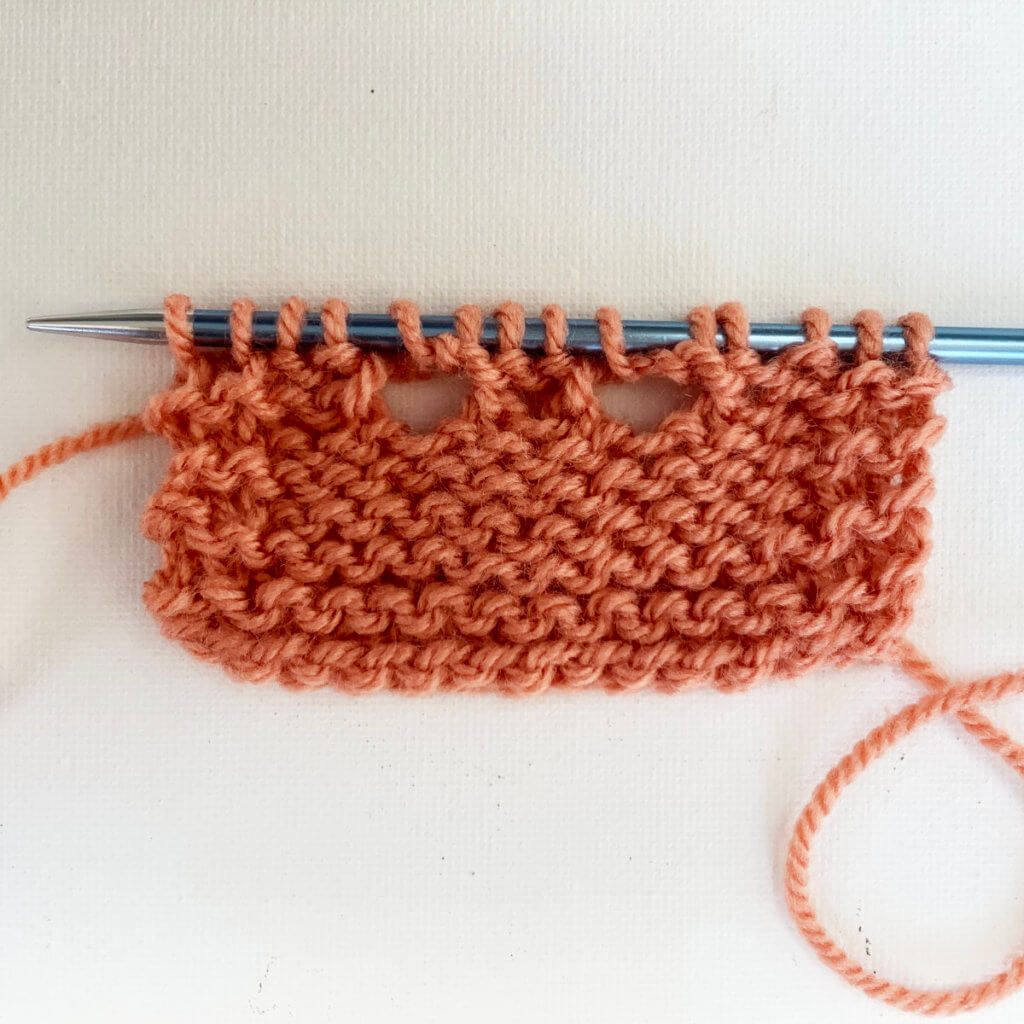
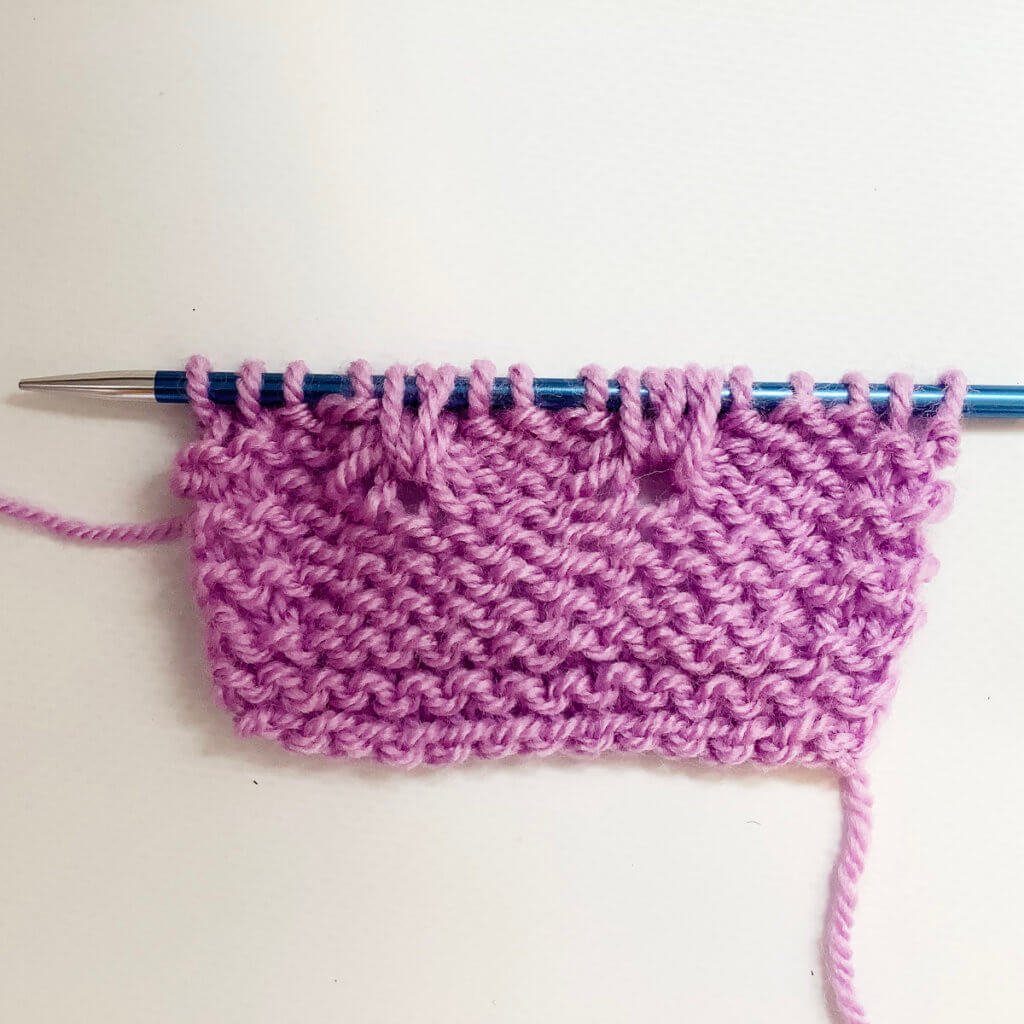
5. This is how it looks after working the entire row, with one more repeat of steps 2-4:
The wrong side steps of working a double yo
6. Now we’re going to work the wrong side of the fabric. This is where the magic for making a double yarn over really happens. First, work to the point where you encounter the double yo loop.
7. The trick with working the double yo on the wrong side row, is to work both a knit and a purl stitch into the double yarn over loop. Both are needed to allow the second stitch to remain a separate one. The order, however, doesn’t matter. I prefer to start with a purl stitch when working stockinette, because that takes out the counting: just purl along until you encounter a double yarn over loop, then work a knit stitch as your second stitch into the loop. In the picture below, I just worked the purl stitch and moved that part of the loop off my left-hand needle.
8. Next, I worked a knit stitch into the second part of the double yarn over loop:
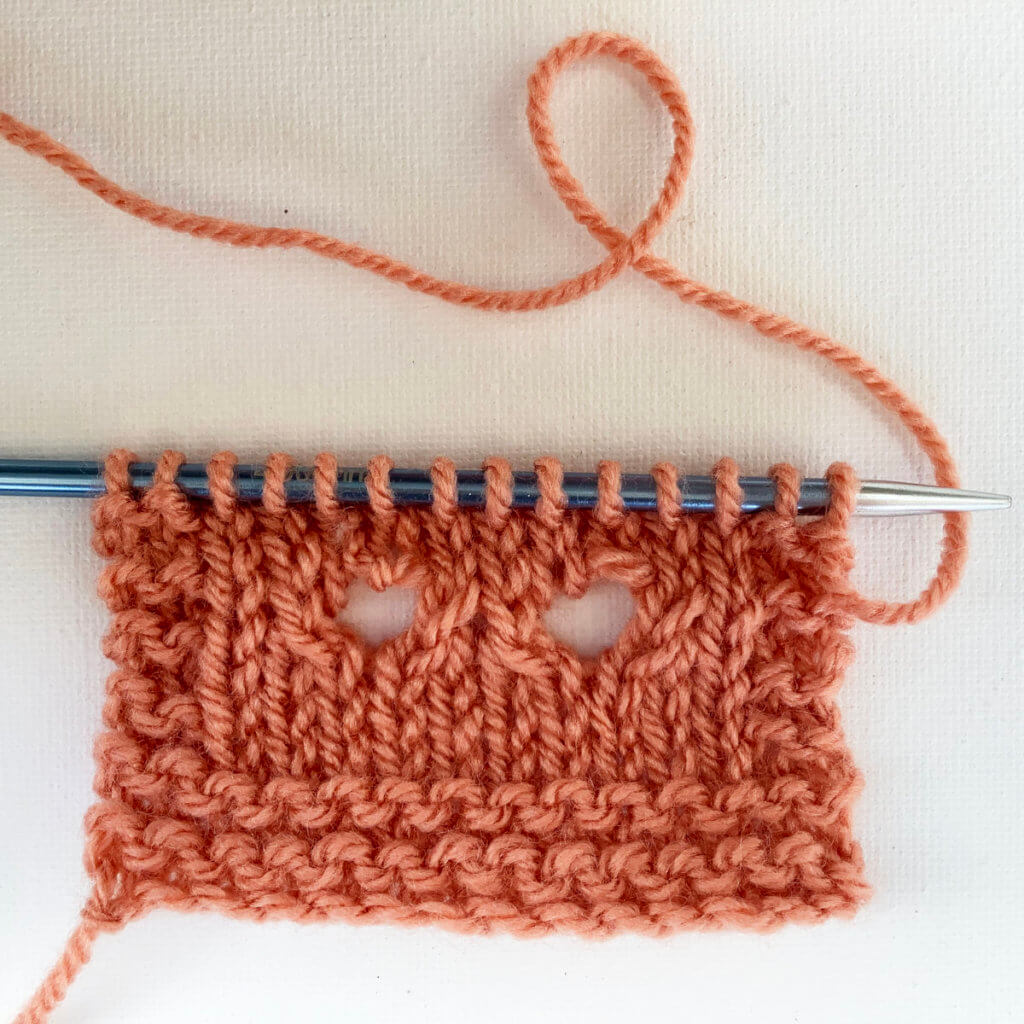
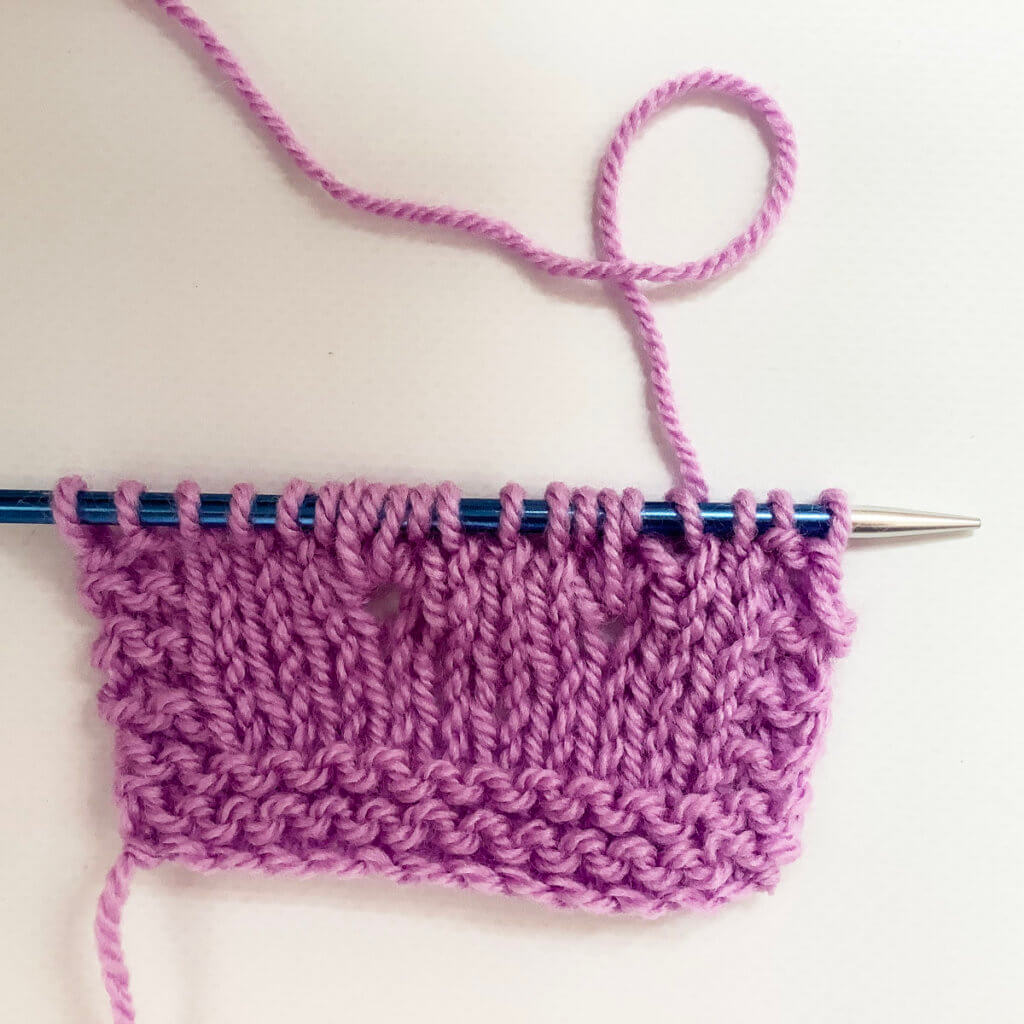
9. This is how it looks after the complete WS row has been worked:
10. In the below picture a few more rows in stockinette have been worked. Do you see there are 2 columns of knit stitches above each double yo?
Thanks to my Patreon supporters for bringing you this freebie! Creating quality patterns and tutorials is a lot of work and resource-intensive. However, I find it important to give you free content like this tutorial. Thanks to the generous support of my Patreon supporters, I can make it happen. Thank you, patrons! Click here to join, or click here to read more about La Visch Designs on Patreon.
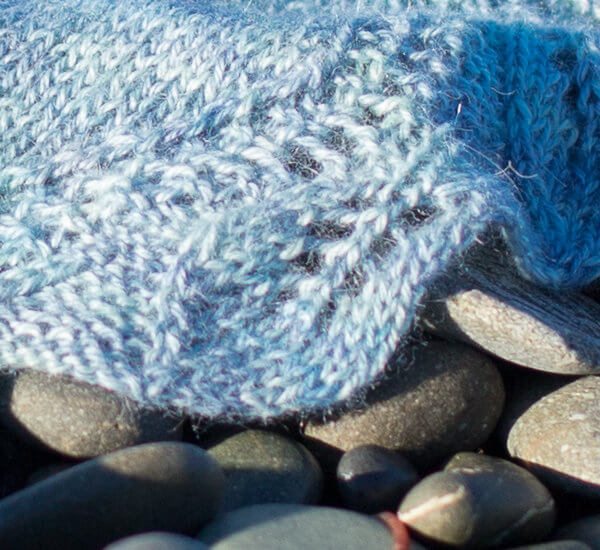
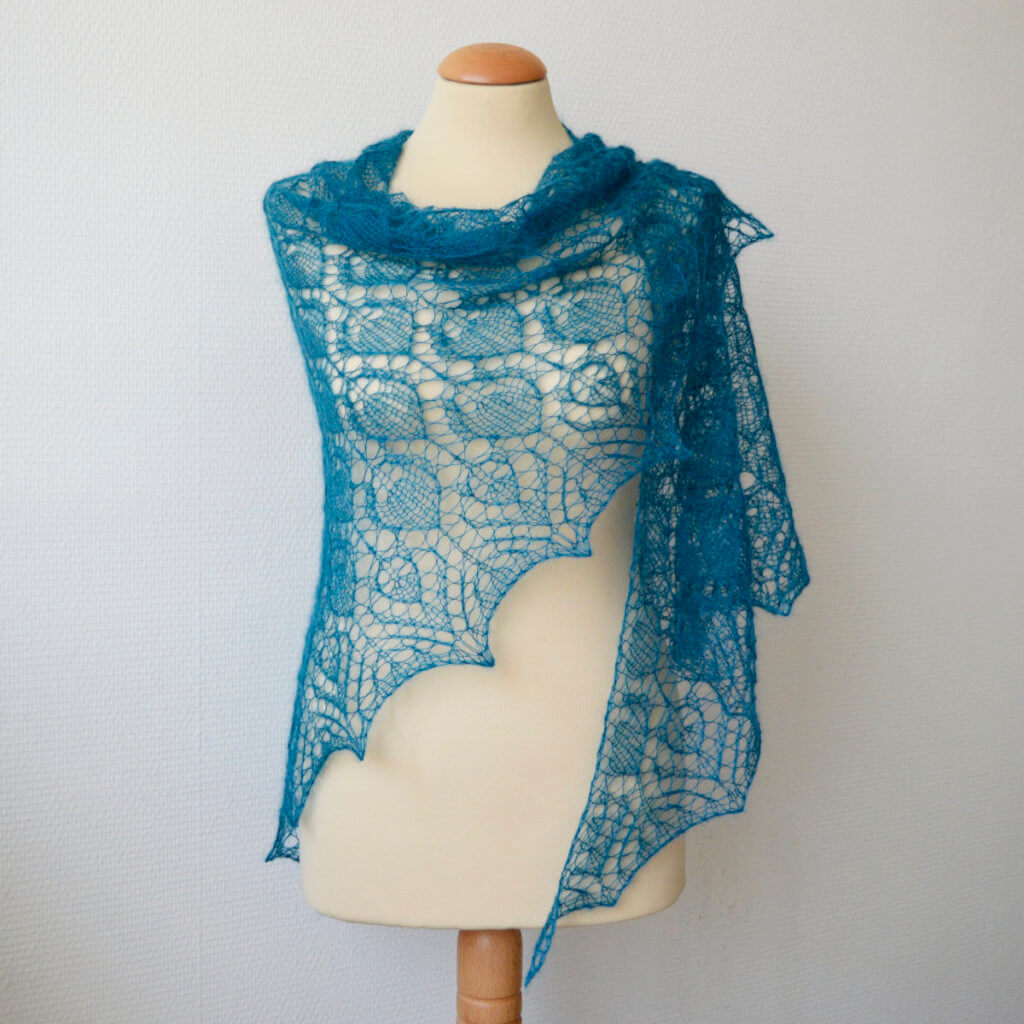
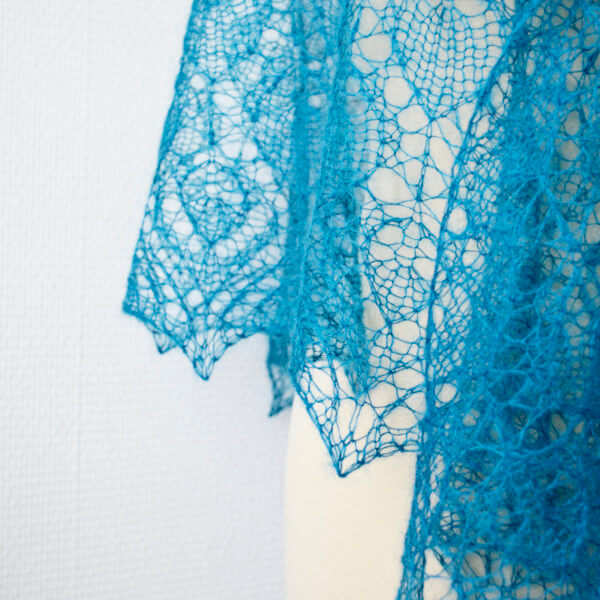
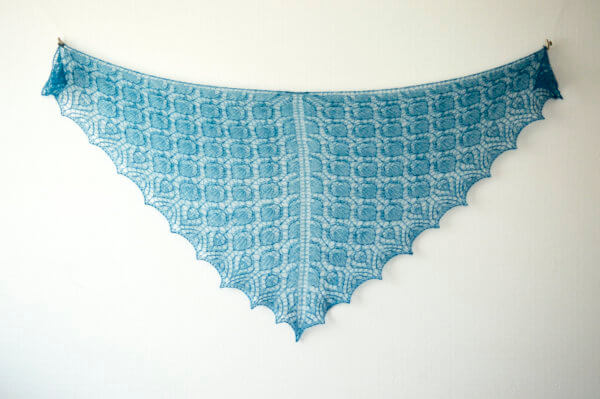
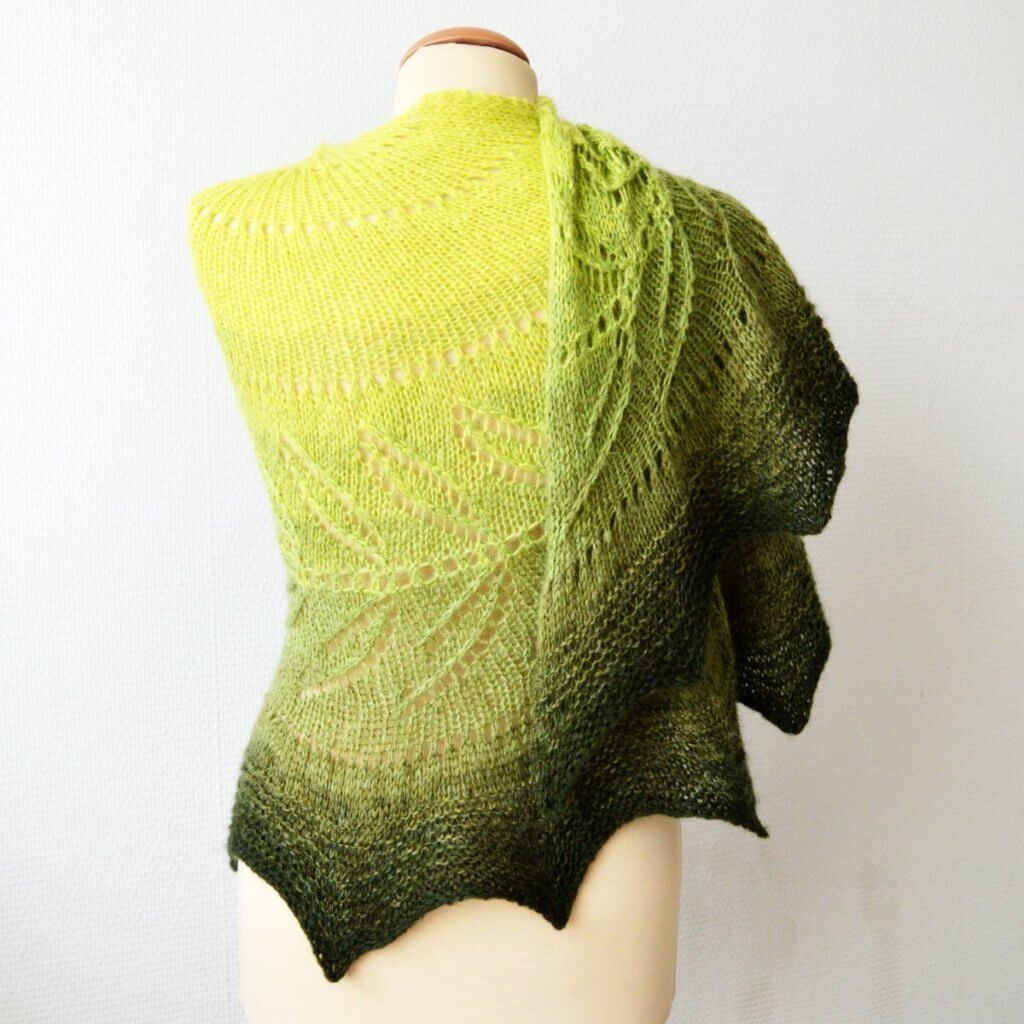
You know that gorgeous blue-green that male ducks have? That is what this lovely lace-weight mohair yarn reminded me off. What better way to show it off than with all-over lace? Of course, the Blue Duck shawl can also be knit in fingering-weight yarns; just adjust the needle size a bit!
The Blue Duck shawl is knitted in lace patterning from the top-down in one piece, starting at the neck edge with a garter tab. The instructions are, of course, provided charted and written out.
Pay what you want: (minimum €6.50)
€
Difficulty level
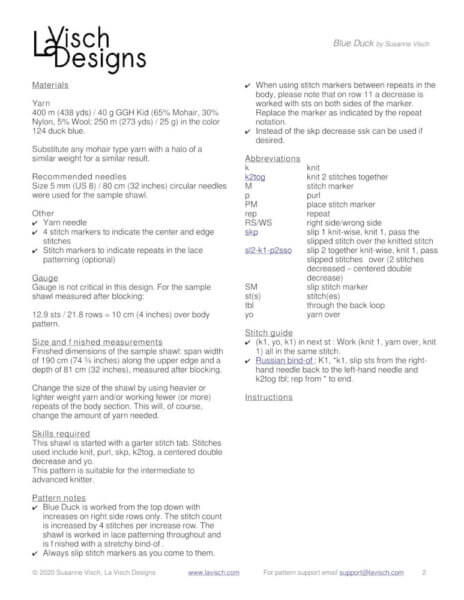
Knit this triangle-shaped shawl from the top-down, starting with a garter tab cast-on. Stitches used include knit, purl, k2tog, skp, yo, double yo, and a centered double decrease. Therefor, this pattern is suitable for the intermediate to advanced knitter.
Sizes and finished measurements
Finished dimensions of the sample shawl: span width of 190 cm (74 ¾ inches) along the upper edge and a depth of 81 cm (32 inches), measured after blocking.
Change the size of the shawl by using heavier or lighter weight yarn and/or working fewer (or more) repeats of the body section. This will, of course, change the amount of yarn needed.
Pattern details
Gauge: approx. 12.9 sts / 21.8 rows = 10 cm (4 inches) over body pattern, measured after blocking.
Pattern languages included: English and Dutch (Dit patroon omvat zowel een Nederlandse als een Engelse versie)
Digital PDF has 5 pages (letter size)
Materials
Yarn: 400 m (438 yds) / 40 g GGH Kid (65% Mohair, 30% Nylon, 5% Wool; 250 m (273 yds) / 25 g) in the color 124 duck blue. Substitute any mohair type yarn with a halo of a similar weight for a similar result.
Size 5 mm (US 8) / 80 cm (32 inches) circular needles.
Yarn needle.
4 stitch markers to indicate the center stitch and the edge stitches.
Stitch markers to indicate repeats in the lace patterning (optional).
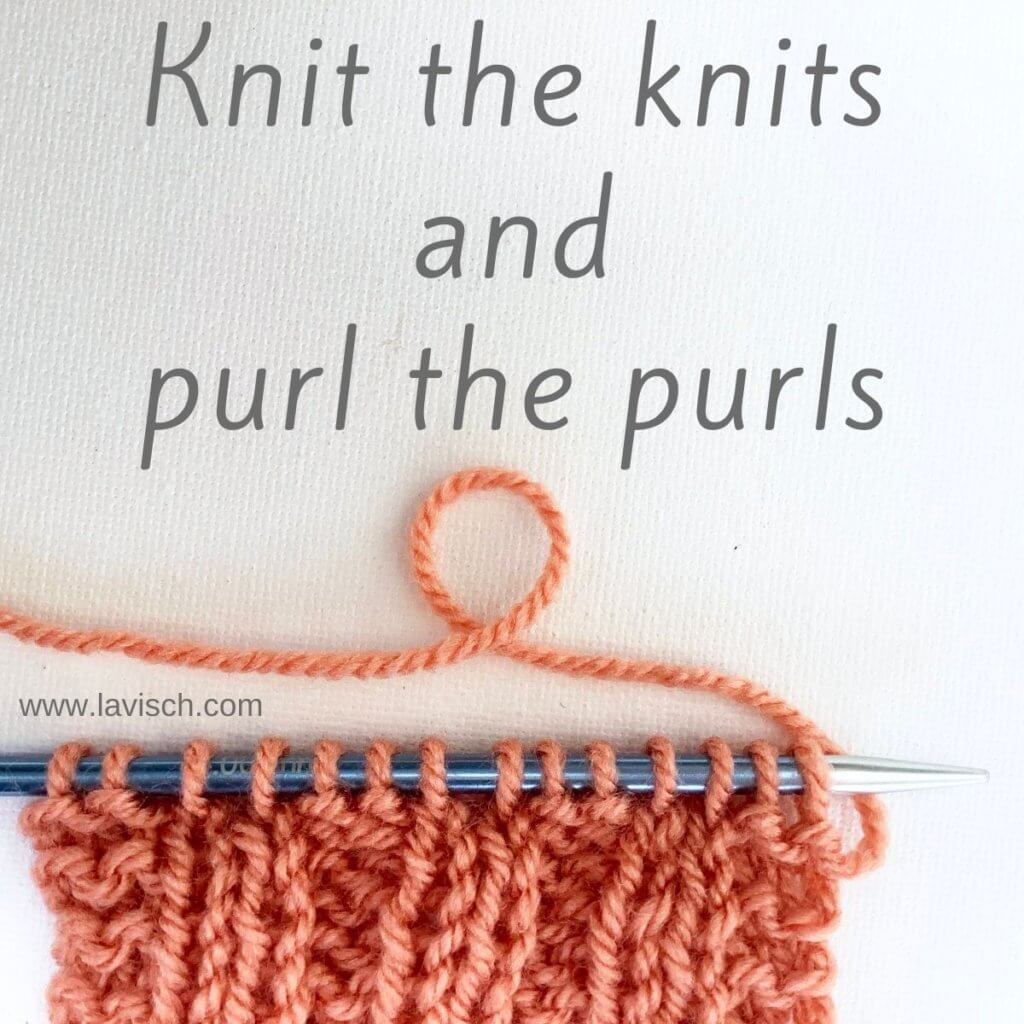
Sometimes in patterns you may encounter the phrase “knit the knits, and purl the purls”. Besides the abbreviated versions of this, you may also encounter “work the stitches as they appear”. Especially if you’re a new knitter, it may be confusing what is exactly meant with this. No stress though! In this tutorial I’ll tell you all about it.
What it all comes down to, is being able to “read” your knitting. If you can correctly determine whether a certain stitch on your needle is a knit or a purl stitch, the instruction tells you exactly what to do next:
When you identify a knit stitch, it is to be knitted.
If you identify a purl stitch it is to be purled.
The important thing here is to remember is this: You only have to look at what the stitches look like on the left-hand needle while you’re working the new row or round. This can be confusing. What looks as a knit stitch on one side of the fabric, looks like a purl stitch on the other side. Ignore the side of the fabric facing away from you and focus only on the side facing you.
Below I’ll show you how to go about identifying your stitches, with the help of a swatch in 2×2 rib. (Ribbing formed by repeating (k2, p2) across your piece.)
Materials used
Yarn: * Paintbox Yarns Simply DK, a good value, good quality 100% acrylic yarn, here in the color 155 Vintage Pink.
In the picture above the next 2 stitches on the left-hand needle are knit stitches. Do you see how they form little V-shapes? Therefore, if the first stitch on the left-hand needle has a V hugging the base of it, then it is a knit stitch and you knit it.
Identifying a purl stitch
In this picture the next 2 stitches on the left-hand needle are purl stitches. The characteristic to identify it, is the little horizontal bar or bump just below where the stitch joins the needle. Therefore, if the first stitch on the left-hand needle has a horizontal bar hugging the base of it, then it is a purl stitch and you are to purl it.
And that’s all there is to “knit the knits and purl the purls”!
Thanks to my Patreon supporters for bringing you this freebie! Creating quality patterns and tutorials is a lot of work and resource-intensive. However, I find it important to give you free content like this tutorial. Thanks to the generous support of my Patreon supporters, I can make it happen. Thank you, patrons! Click here to join, or click here to read more about La Visch Designs on Patreon.
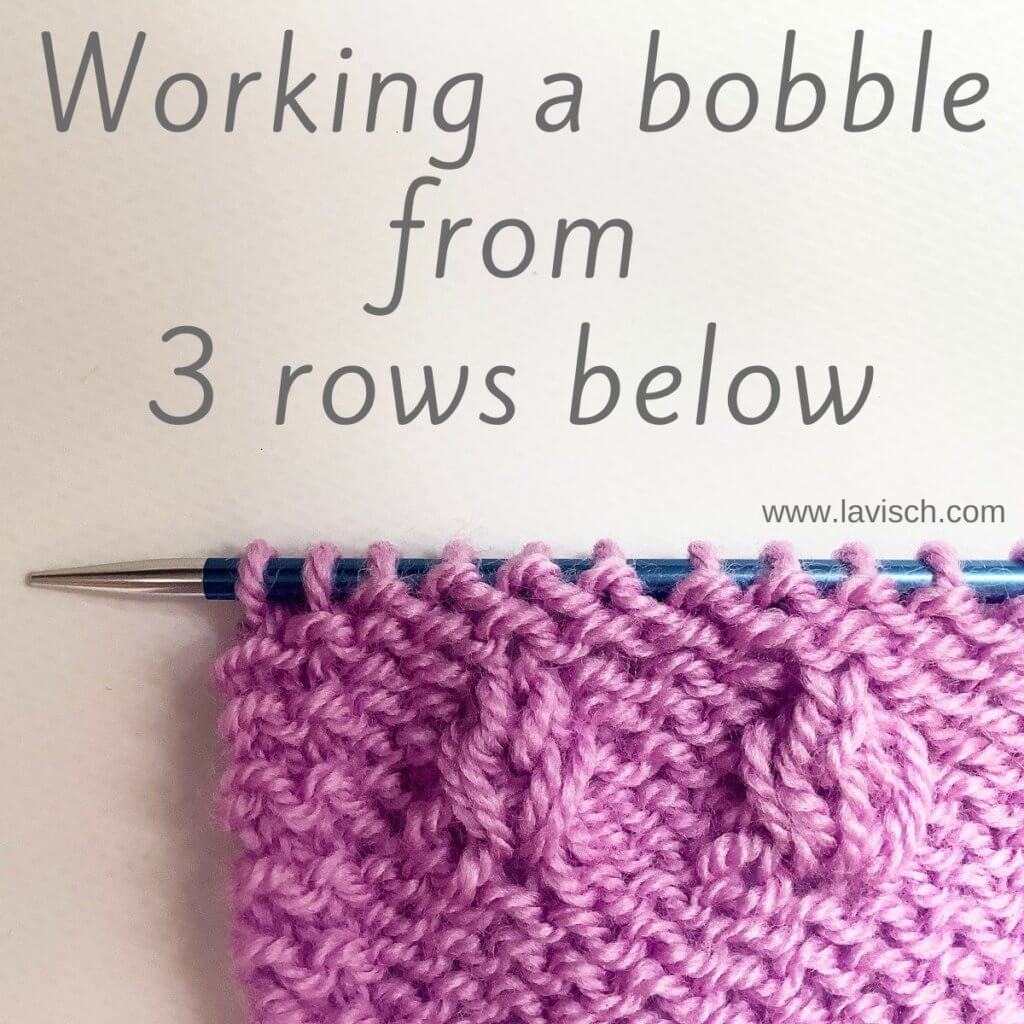
Bobbles are a lovely way to add texture to a knitting project. I’ve used them myself to add interest to an otherwise rather plain stockinette shawl body in my Moerbei shawl. They’re also rather popular as an extra design element on cabled sweaters.
In the basis a bobble is nothing more than a single stitch that is increased to a collection of stitches (usually 3, 5, or 7 stitches), worked back and forth and then decreased back again to a single stitch. There are, however, many ways to go about this.
In this tutorial I’m focusing on a specific kind of bobble that is described in the Japanese Knitting Stitch Bible by Hitomi Shida. It’s worked in stockinette stitch on a background of reverse stockinette by working in a stitch 3 rows down. Read on for more details!
Materials used
Yarn: Paintbox Yarns Simply DK, a good value, good quality 100% acrylic yarn, here in the color 142 Tea Rose.
Needles: KnitPro Zing Fixed Circular Needles. In this tutorial, I used the 4 mm (US 6) size with a cable length of 80 cm (32 inches).
Working a bobble from 3 rows below step by step
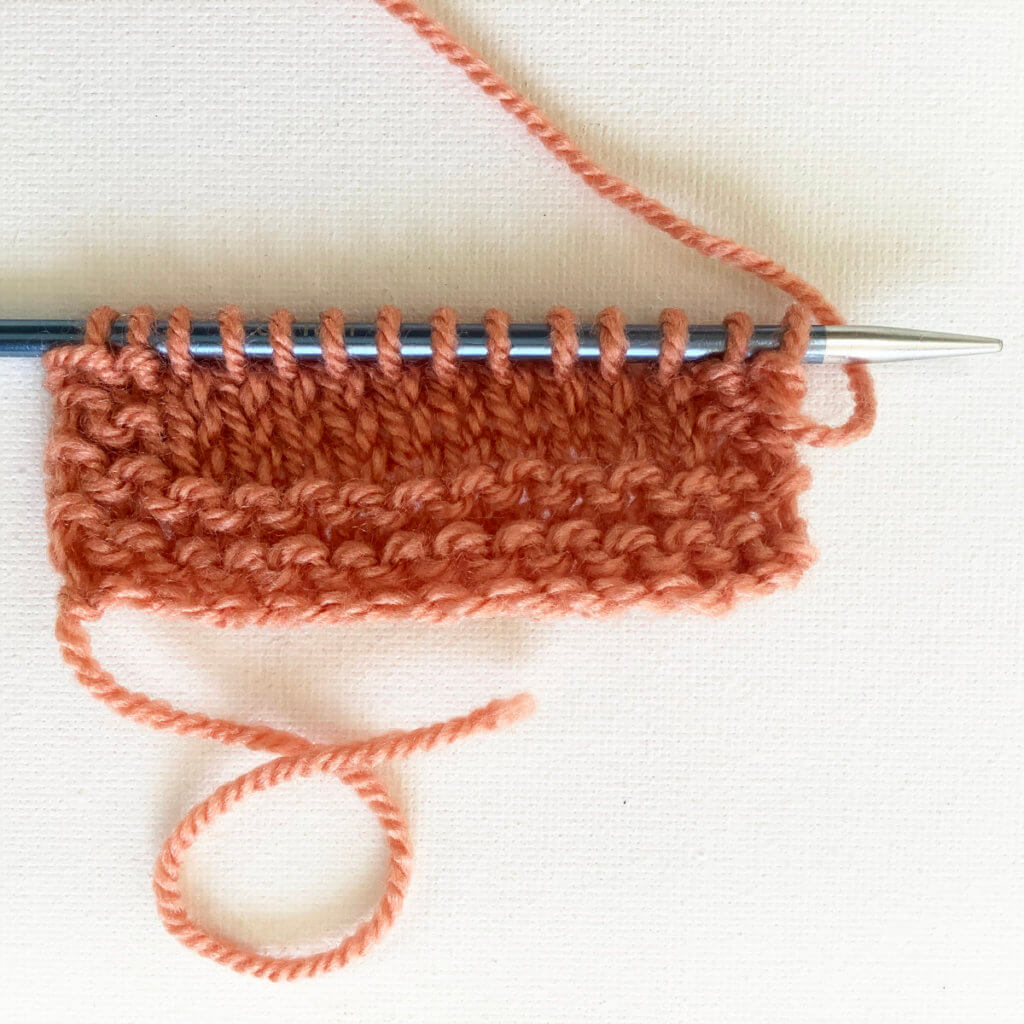
1. First, work in your piece of knitting to the point where you want to make the bobble. Remember, this bobble is worked on a background of reverse stockinette, so the purl side is the right side of the work.
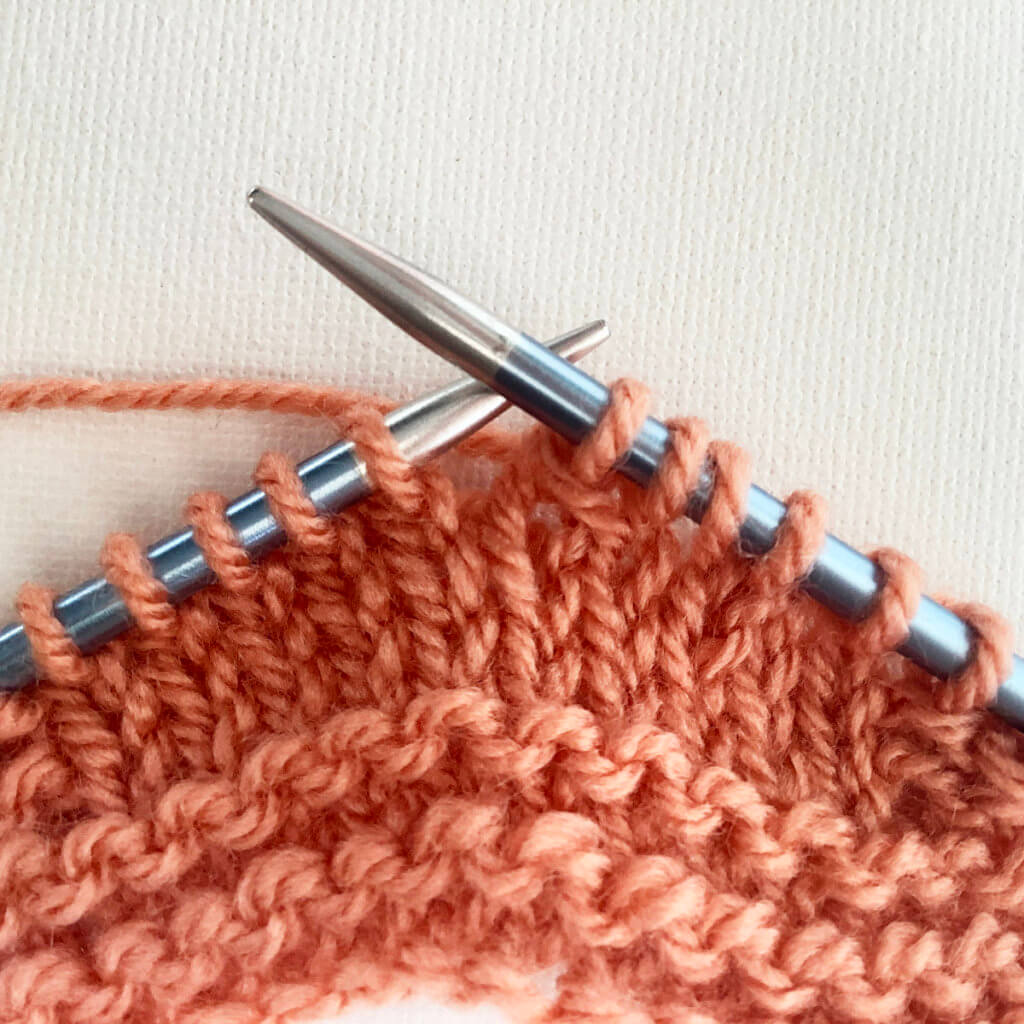
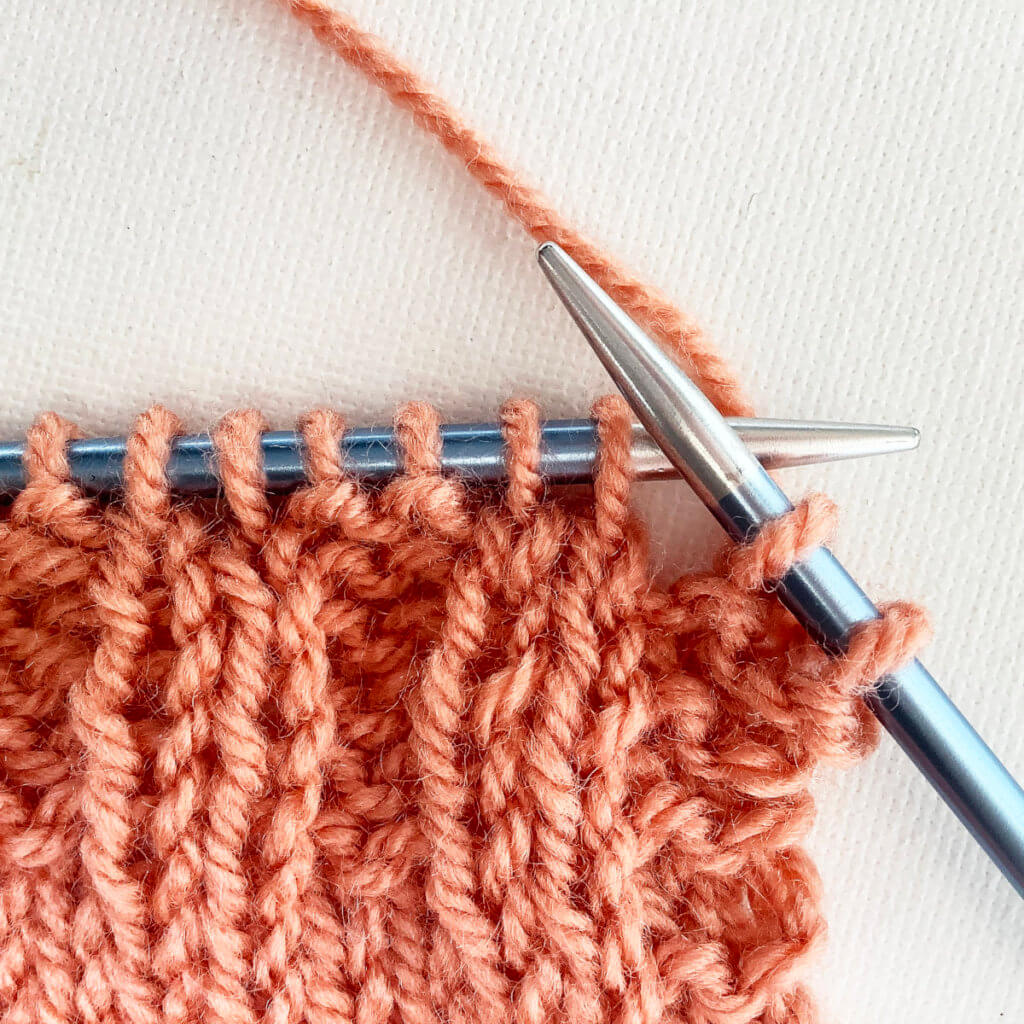
2. Next we have to insert the right-hand needle into the center of the stitch, 3 rows down from the next stitch on the needle. I’ve indicated it with the yarn needle.
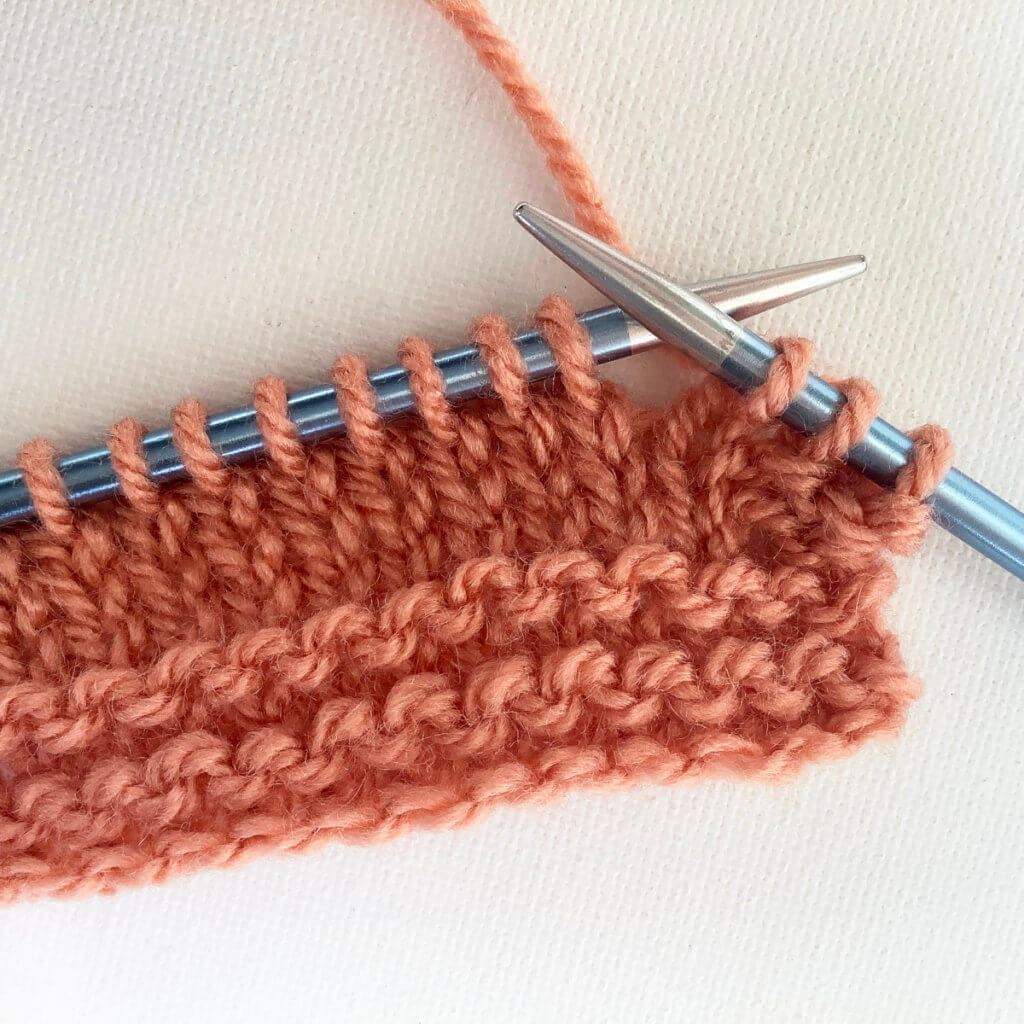
3. Move the working yarn to the back of the work (we’re working the bobble itself in stockinette, not in reverse stockinette!) ….
4. … and insert the right-hand needle right through the stitch to the back of the work!
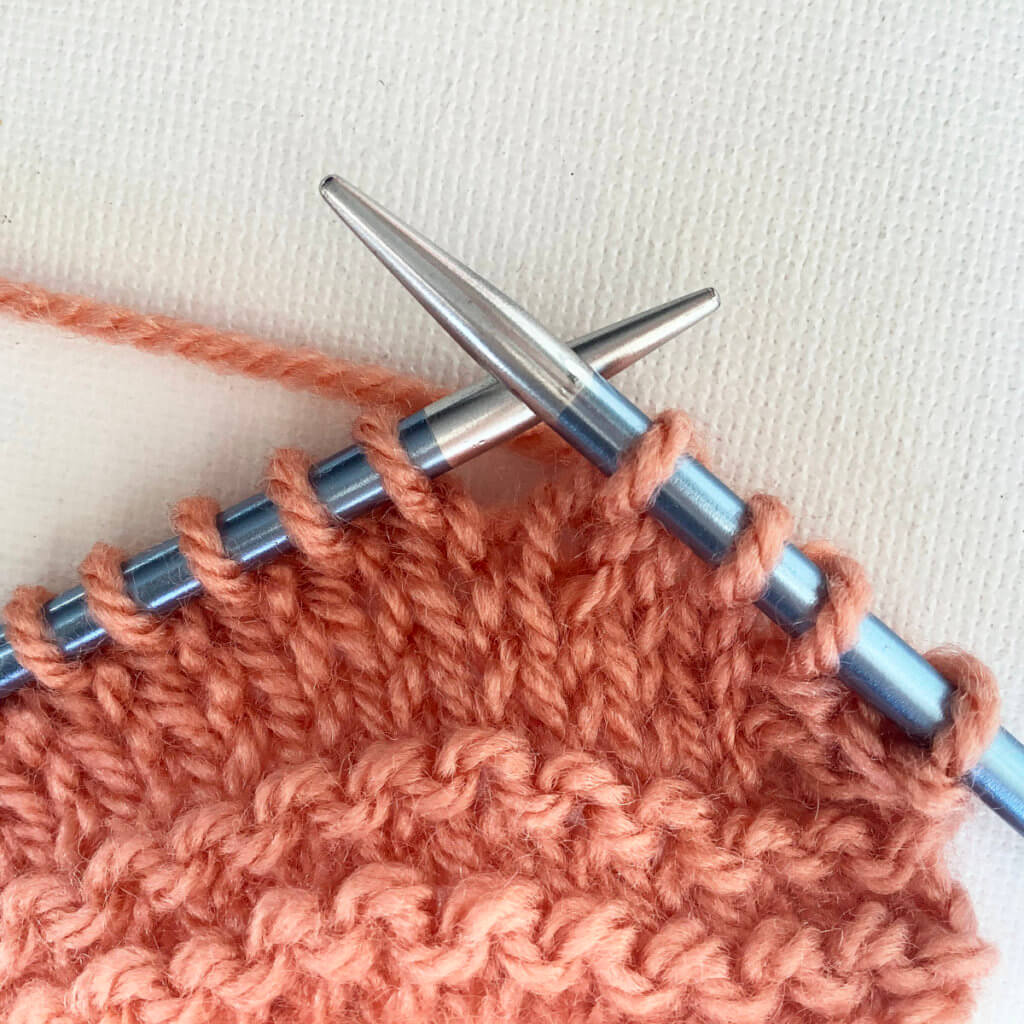
5. Now wrap the yarn around the needle and pull up a loop through the fabric.
6. Wrap the yarn around the needle to form a yarn over.
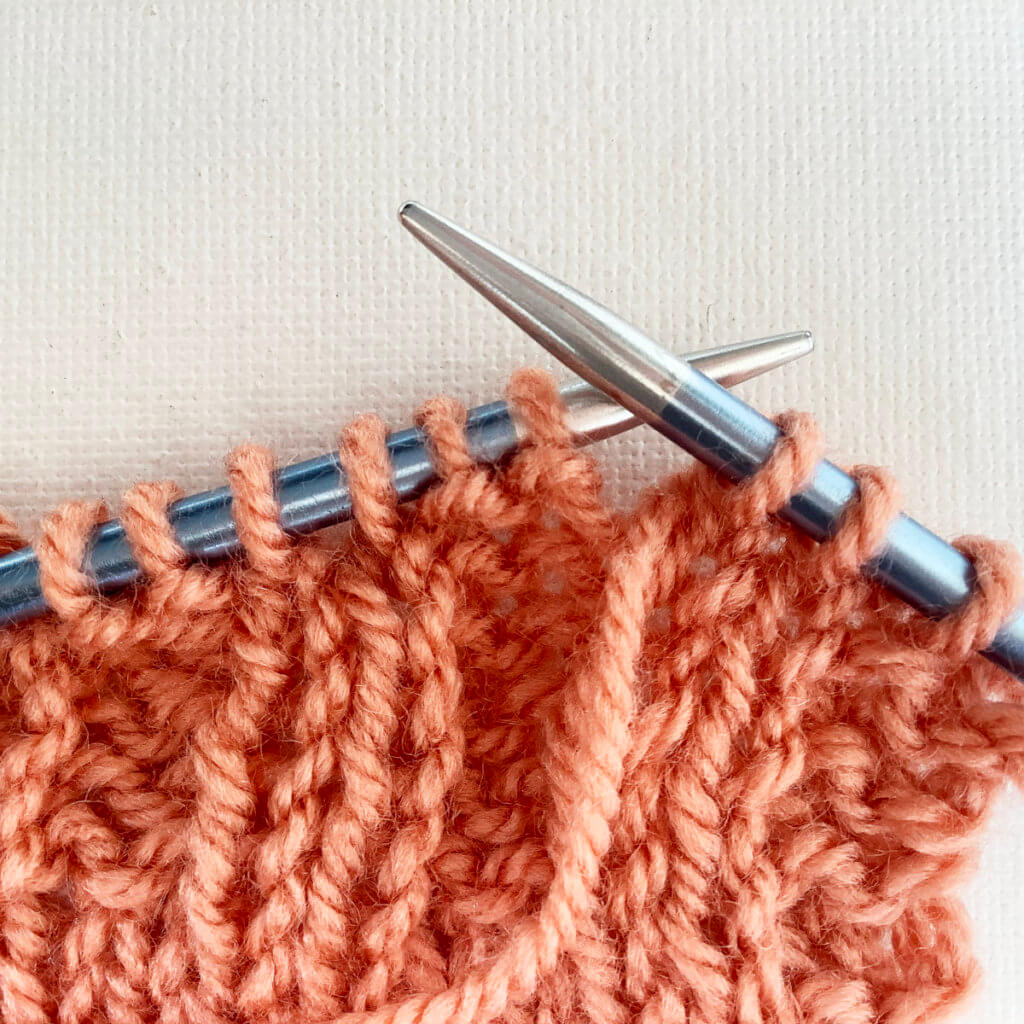
7. Repeat steps 4 and 5 once to make a 3 stitch bobble, or repeat steps 4 to 6 followed by steps 4 and 5 once again for a 5 stitch bobble. Pictured below is how it looks after working these steps for a 5 stitch bobble.
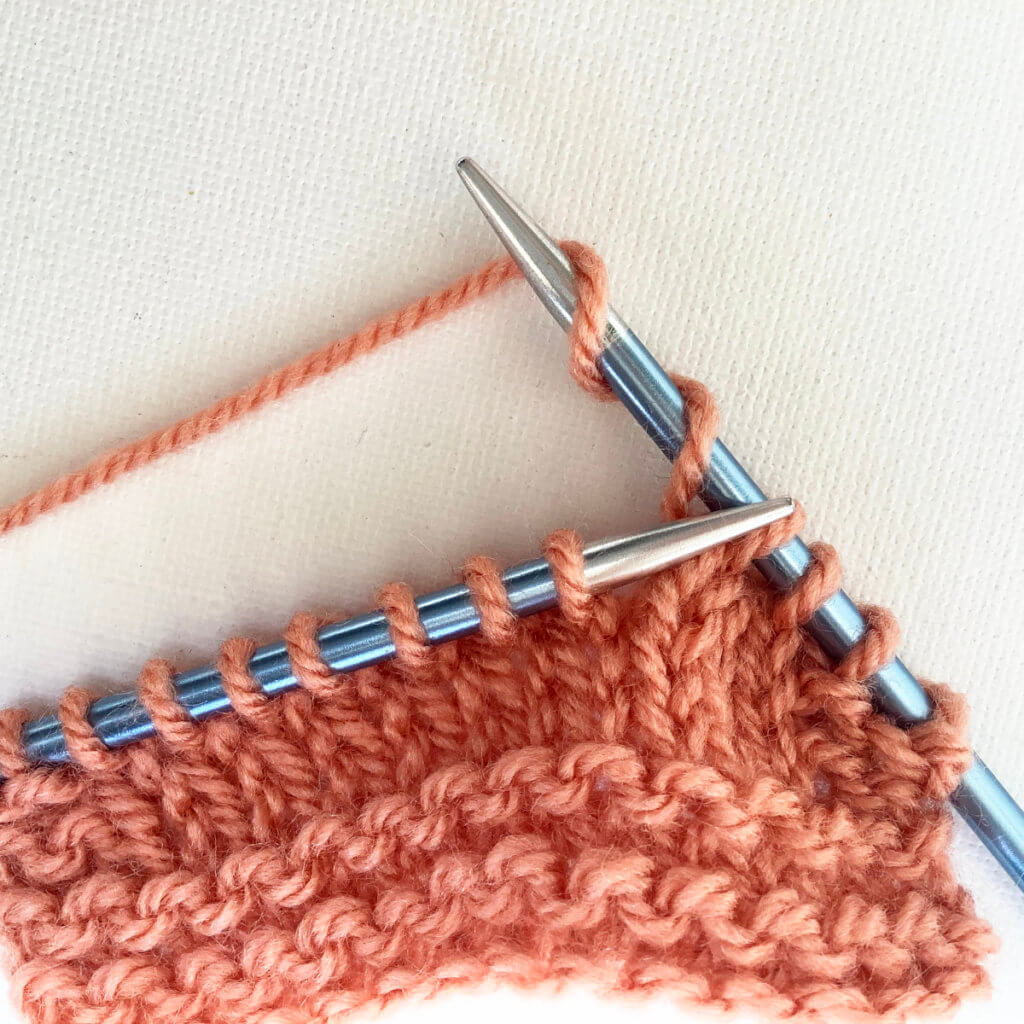
8. Next, drop the next stitch on the left-hand needle. It won’t ladder down below the bobble, because the stitch is secured by pulling the yarn through the fabric in the steps above.
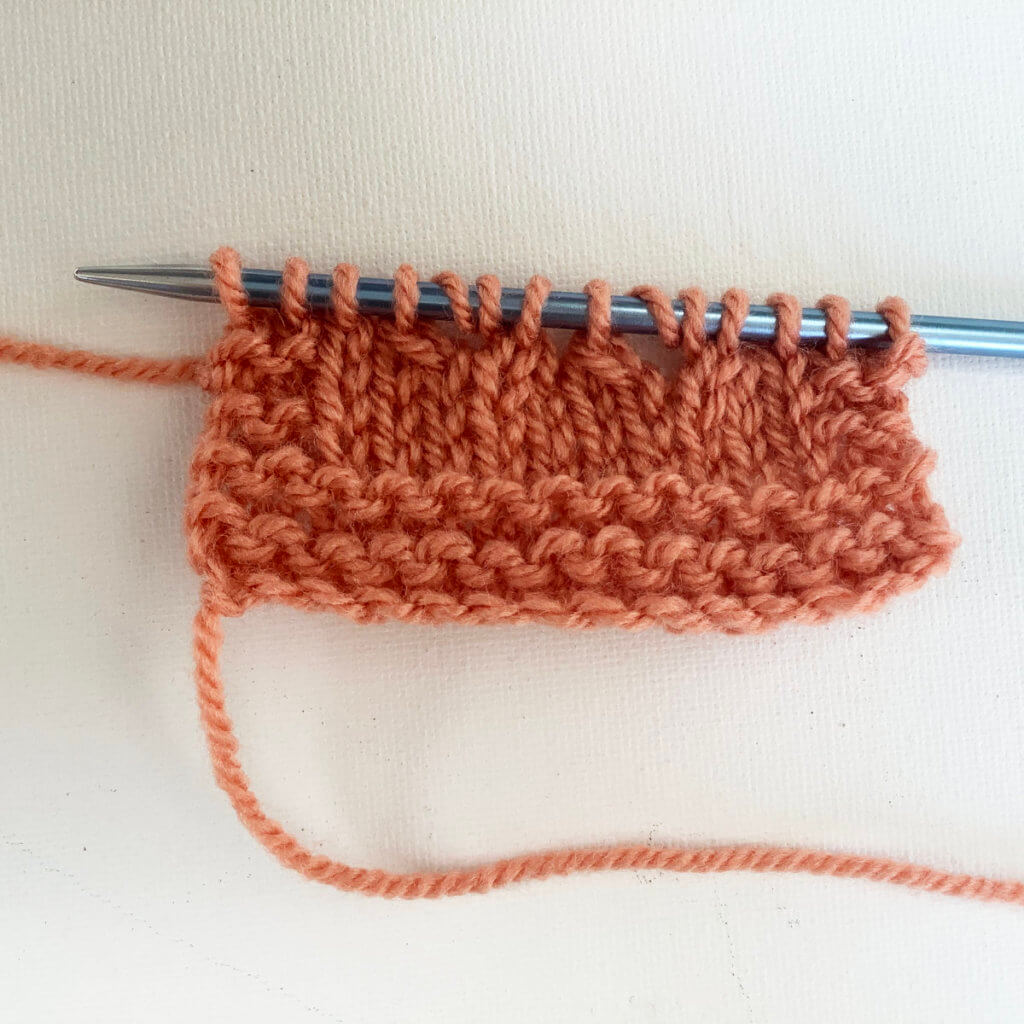
9. Now work in pattern to the end of the row. You can see in the picture below, that I worked a 5 stitch bobble on the right and a 3 stitch bobble on the left.
Onwards to the next row
10. Turn the work and again work in pattern (knit) until you reach the bobble loops. Those we work in purl, because we’re looking at the wrong side of the work here.
11. This is how it looks after working this row. You can see the bobble stitches more easily now, because they are purled.
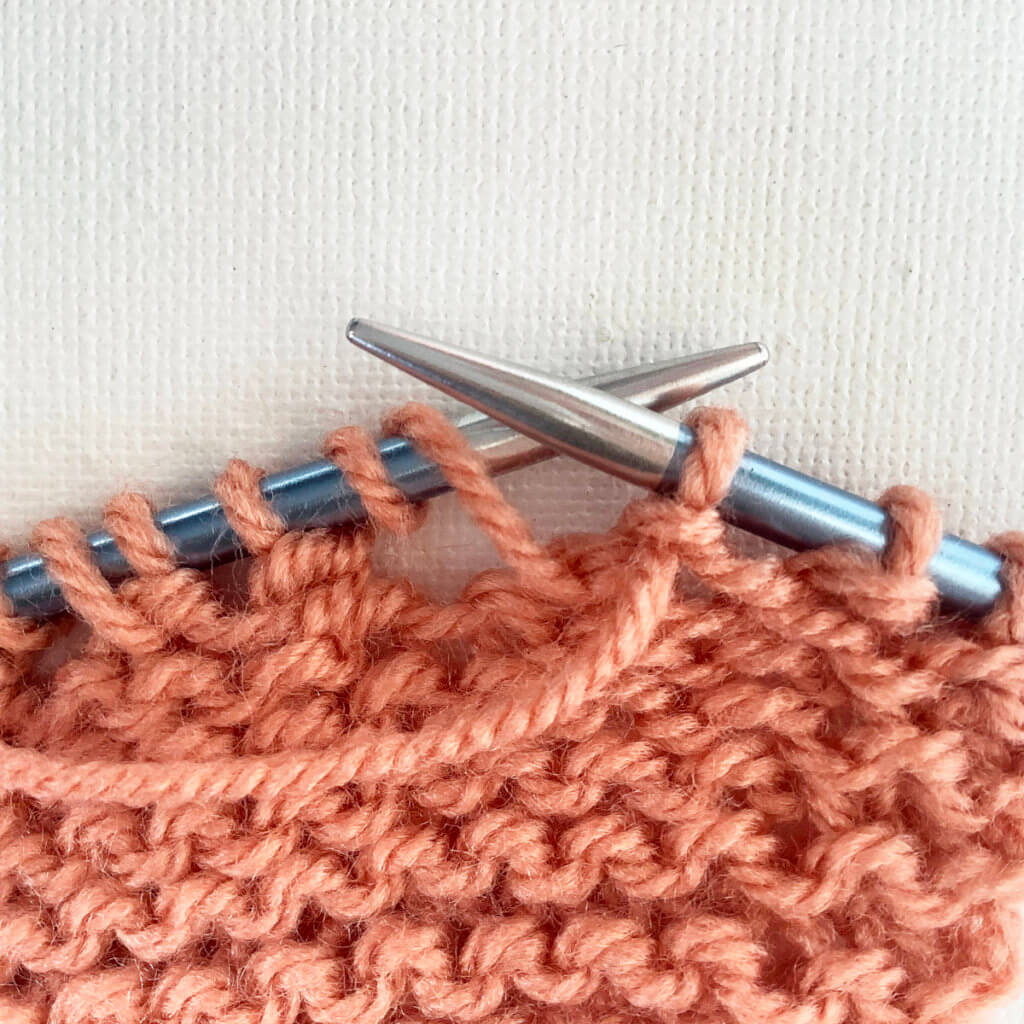
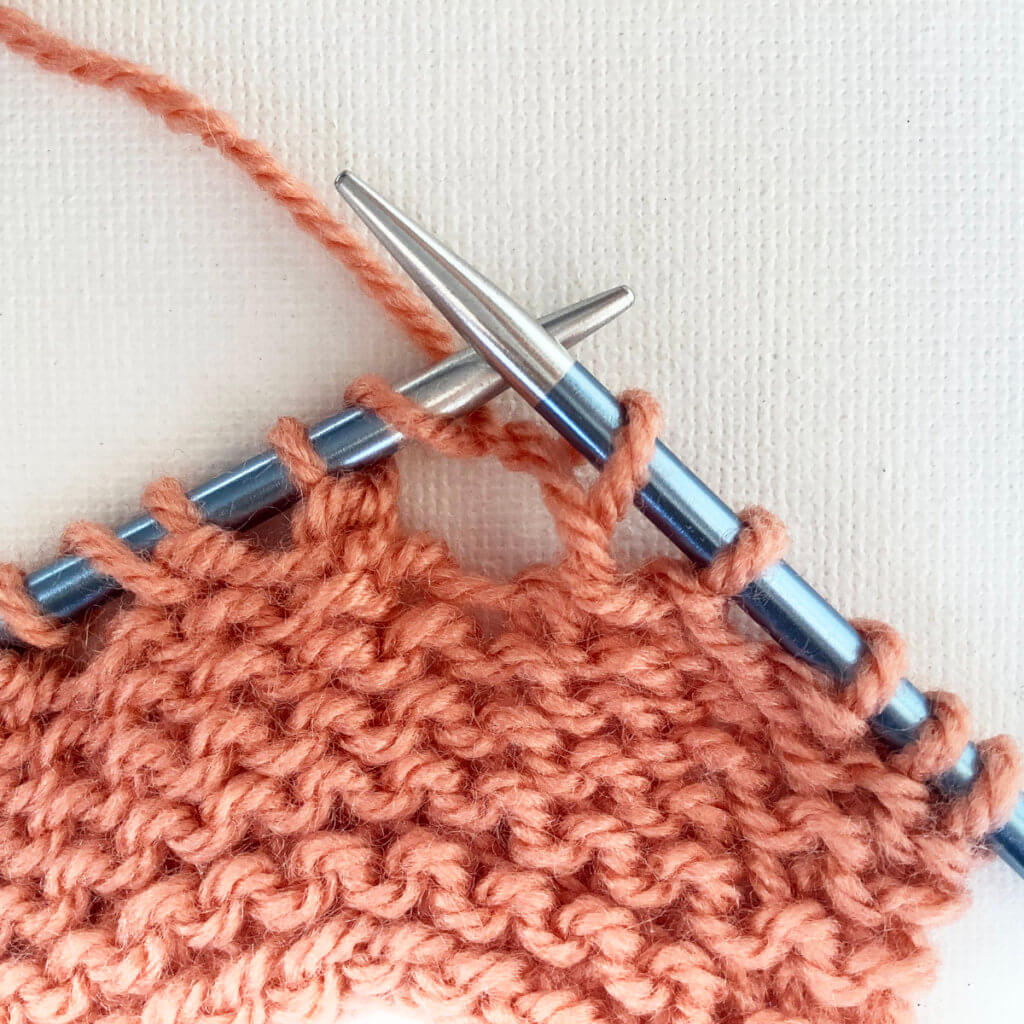
12. Again work in pattern to the bobble stitches. Now we have to decrease these 5 stitches back to 1 stitch. To do so, I have slipped the first 3 stitches together knit wise to the right-hand needle, worked a k2tog, and then passed the 3 slipped stitches over the result of the k2tog. This is the result of that decrease:
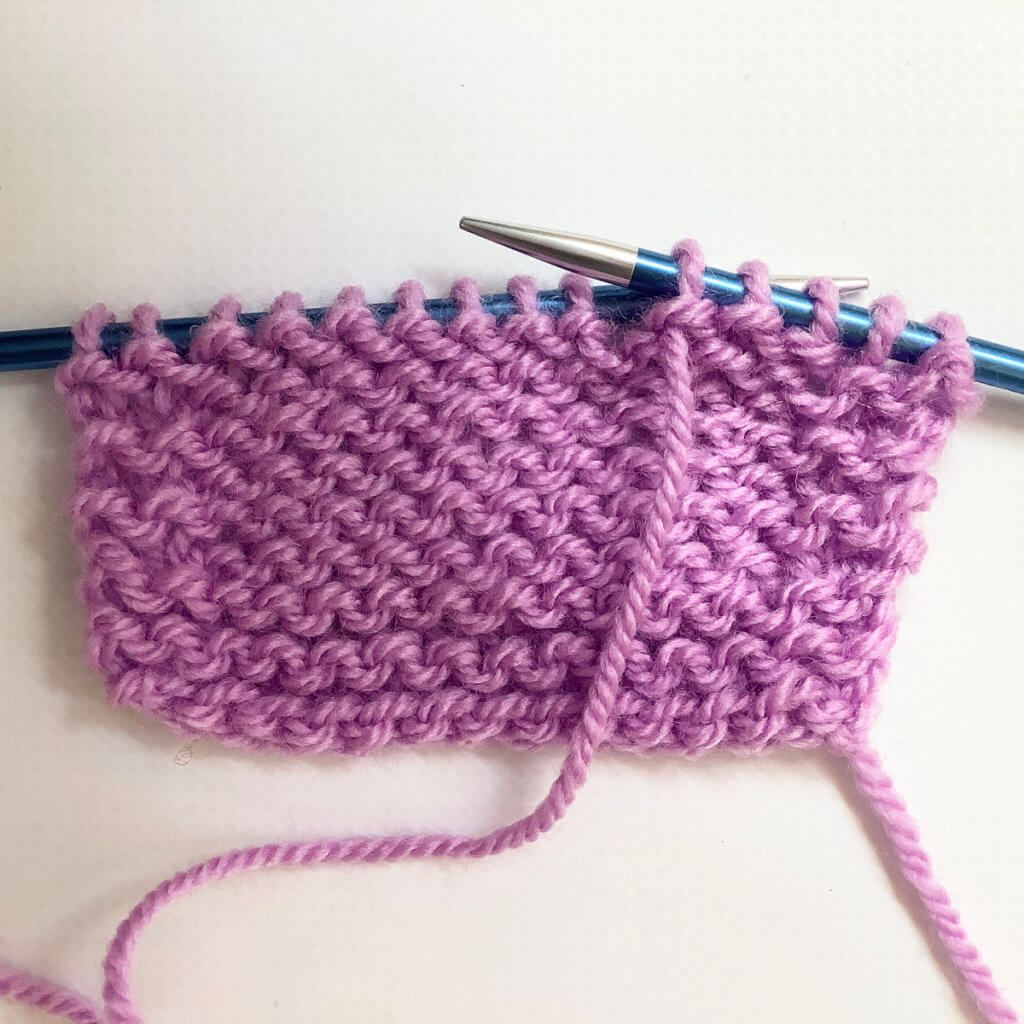
15. And this is how these bobbles look after 2 more rows in reverse stockinette have been worked. See how much fatter the 5 stitch bobble is when compared with the other one? You can, of course, work even fatter bobbles this way. Just repeat steps 4-6 twice or thrice instead of only once.
And this how to do it!
Found this tutorial useful? Tag me with @la_visch on Instagram or @lavischdesigns on Facebook if you’ve used it in a project!
Thanks to my Patreon supporters for bringing you this freebie! Creating quality patterns and tutorials is a lot of work and resource-intensive. However, I find it important to give you free content like this tutorial. Thanks to the generous support of my Patreon supporters, I can make it happen. Thank you, patrons! Click here to join, or click here to read more about La Visch Designs on Patreon.
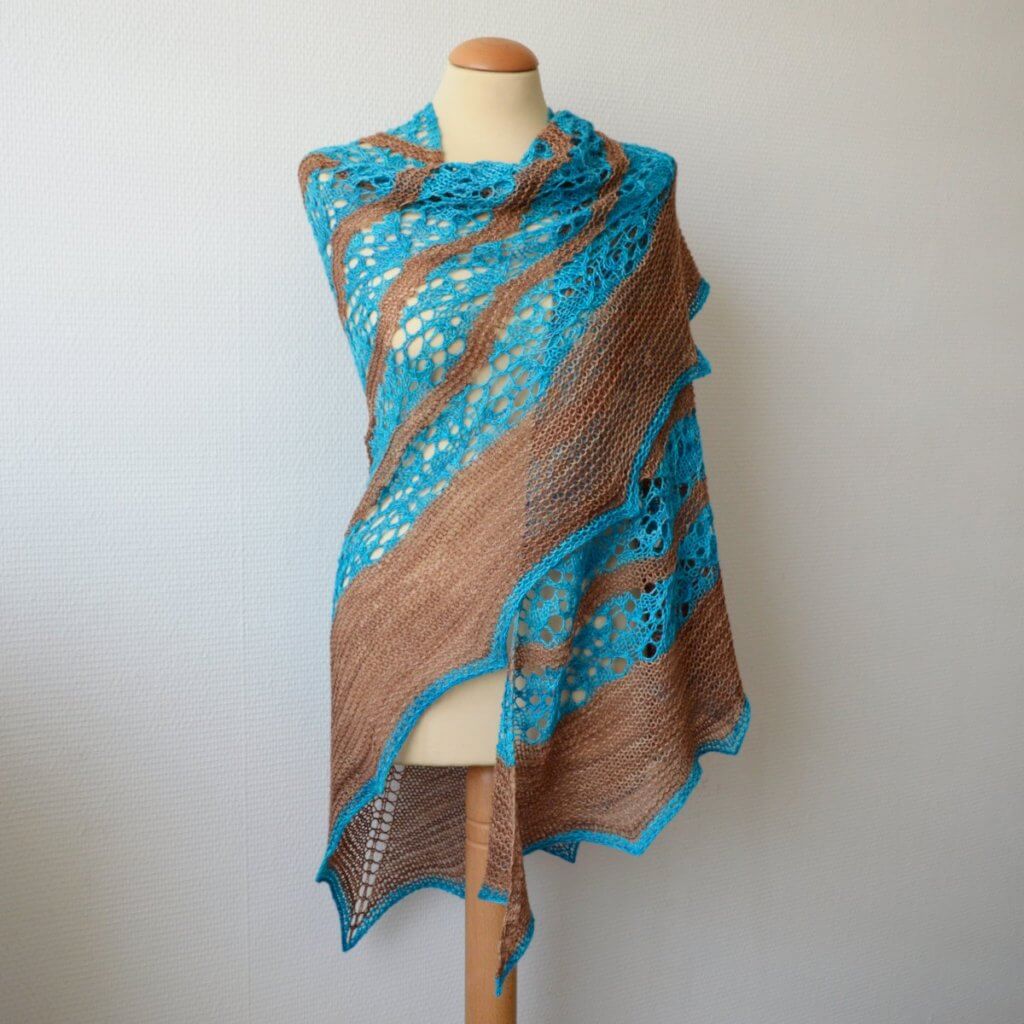
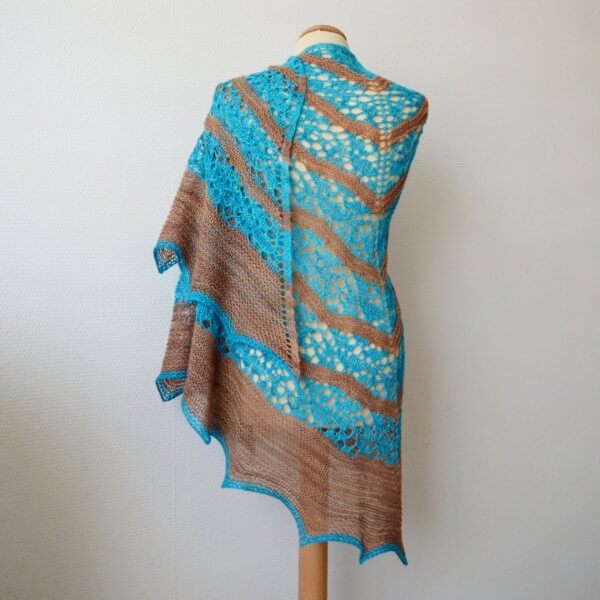
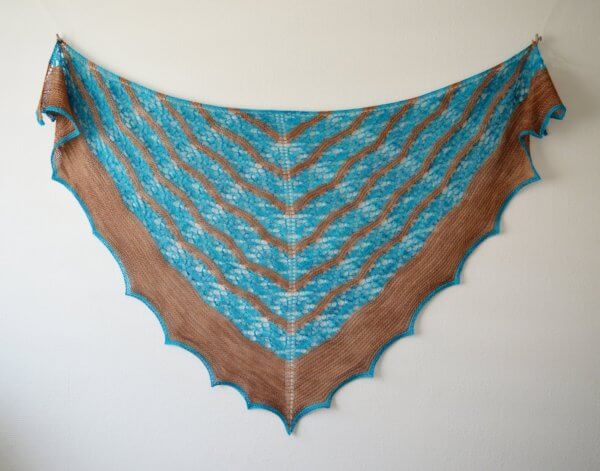
The Ribbon Turquoise shawl is not only named for the wavy ribbons of brown and turquoise shown. The name also refers to how the semi-precious stone is cut. Turquoise forms in veins of various widths within the surrounding rock. It’s called “ribbon turquoise” when the stone is cut to show the mother rock as the main feature with the original vein or ribbon of turquoise running through it as an accent.
Ribbon Turquoise is a triangle shawl worked from the top-down in one piece, starting at the neck with a garter stitch tab. The instructions for the lace are provided both charted and written out.
One size – finished dimensions: 205 cm (80 ¾ inches) along the upper edge and a depth of 100 cm (39 ½ inches), measured after blocking.
Change the size of the shawl by using heavier or lighter weight yarn and/or working fewer (or more) repeats of the body patterning or the garter stitch edging. This will, of course, change the amount of yarn needed.
Pattern details
Gauge: approx. 12 sts / 21 rows = 10 cm (4 inches) over garter stitch, after blocking.
Pattern languages included: English and Dutch (Dit patroon omvat zowel een Nederlandse als een Engelse versie)
Digital PDF has 5 pages in the English version and 6 pages in the Dutch version (letter size)
Materials
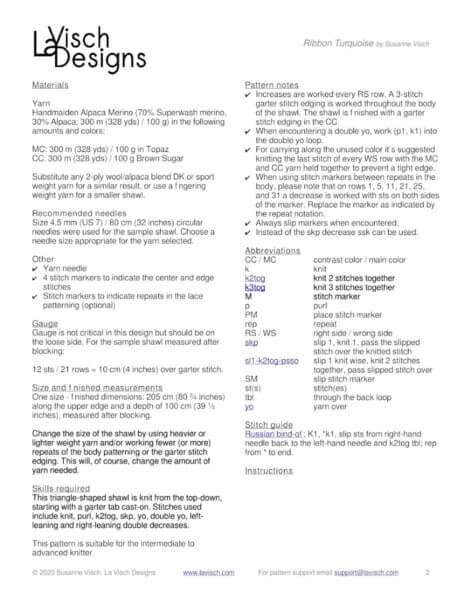
Yarn: Handmaiden Alpaca Merino (70% Superwash merino, 30% Alpaca; 300 m (328 yds) / 100 g) in the following amounts and colors: MC: 300 m (328 yds) / 100 g in Topaz and CC: 300 m (328 yds) / 100 g Brown Sugar. This yarn and pattern are also available as a kit from Sweater Sisters! Substitute any 2-ply wool/alpaca blend DK or sport weight yarn for a similar result, or use a fingering weight yarn for a smaller shawl.
Sample shawl: size 4.5 mm (US 7) / 80 cm (32 inches) circular needles. Choose a needle size appropriate for the yarn selected.
Yarn needle.
4 stitch markers to indicate the center stitch and the edge stitches.
Stitch markers to indicate repeats in the lace patterning (optional).
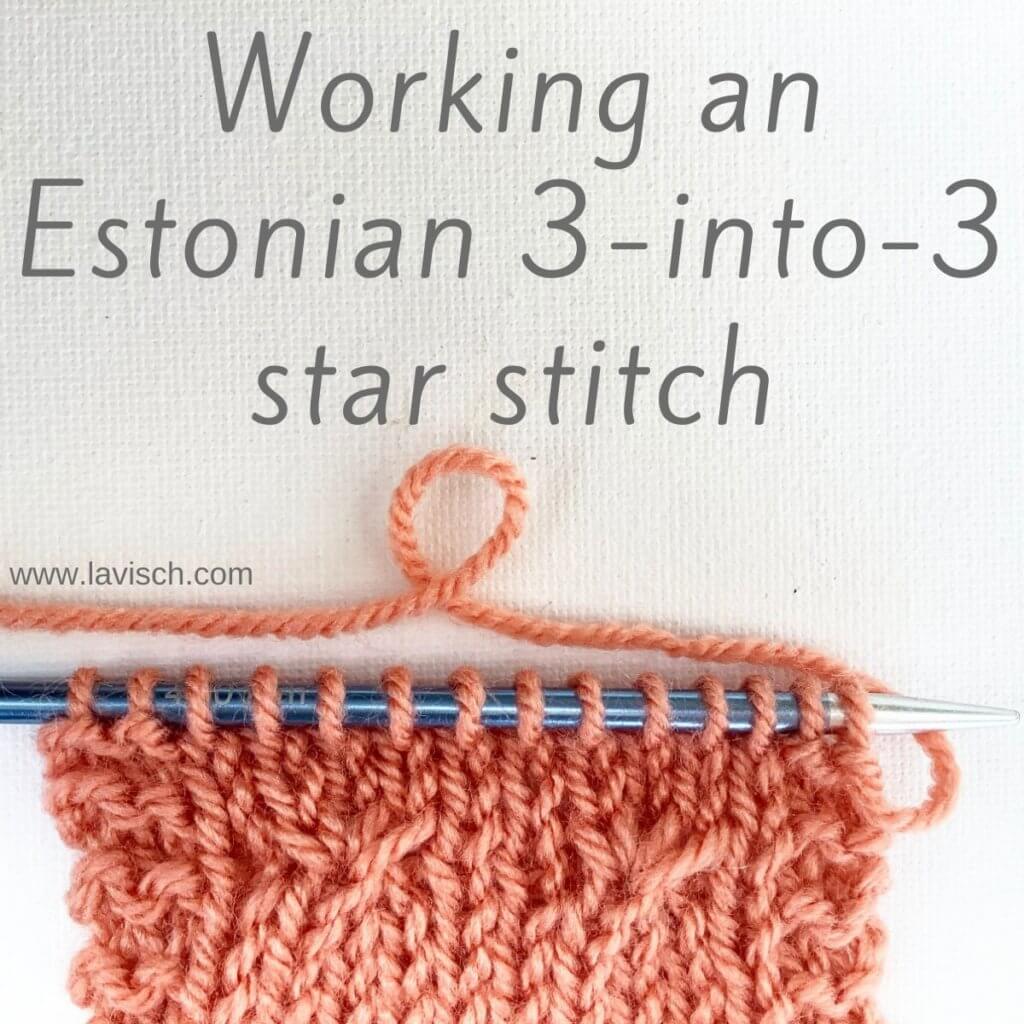
Estonian knitting, especially the lace knitting, is quite a bit different from other types of lace knitting. This is in a large part due to combination of openwork and texture that is the most prominent feature of Estonian lace knitting. You may have heard of the book * Pitsilised Koekirjad by Leili Riemann, for those interested in Estonian lace knitting, it’s a true treasure trove!
Anyway, often-used design elements include nupps and gathers. Another type of stitch that’s often used is the star stitch. This is the generic name for the type of stitch where interesting patterns are created by making 3 stitches out of 3; or 5 stitches out of 5 and then purling all stitches on the next row.
It’s also possible to decrease or increase stitches this way, by, for example, making 3 stitches out of 5, or 9 out of 5. Increasing with the star technique can be used to start flower-like lace shapes by first increasing 5 stitches to 9 (or 11) and over the next couple of rows gently decreasing the extra stitches away again.
Focus of this tutorial
In this tutorial I will focus on a basic 3-into-3 star stitch on a stockinette background. A 3-into-3 star stitch is made by knitting 3 stitches together without dropping stitches from left-hand needle; yarn over, knit the same 3 stitches together again before dropping it all from the left-hand needle.
When worked in the yarn-needle combination shown here, the results will be a nicely textured fabric. When worked with relatively large needles for the yarn chosen, a more lacy effect will be the result.
Materials used
Yarn: * Paintbox Yarns Simply DK, a good value, good quality 100% acrylic yarn, here in the color 155 Vintage Pink.
Working an Estonian 3-into-3 star stitch step by step
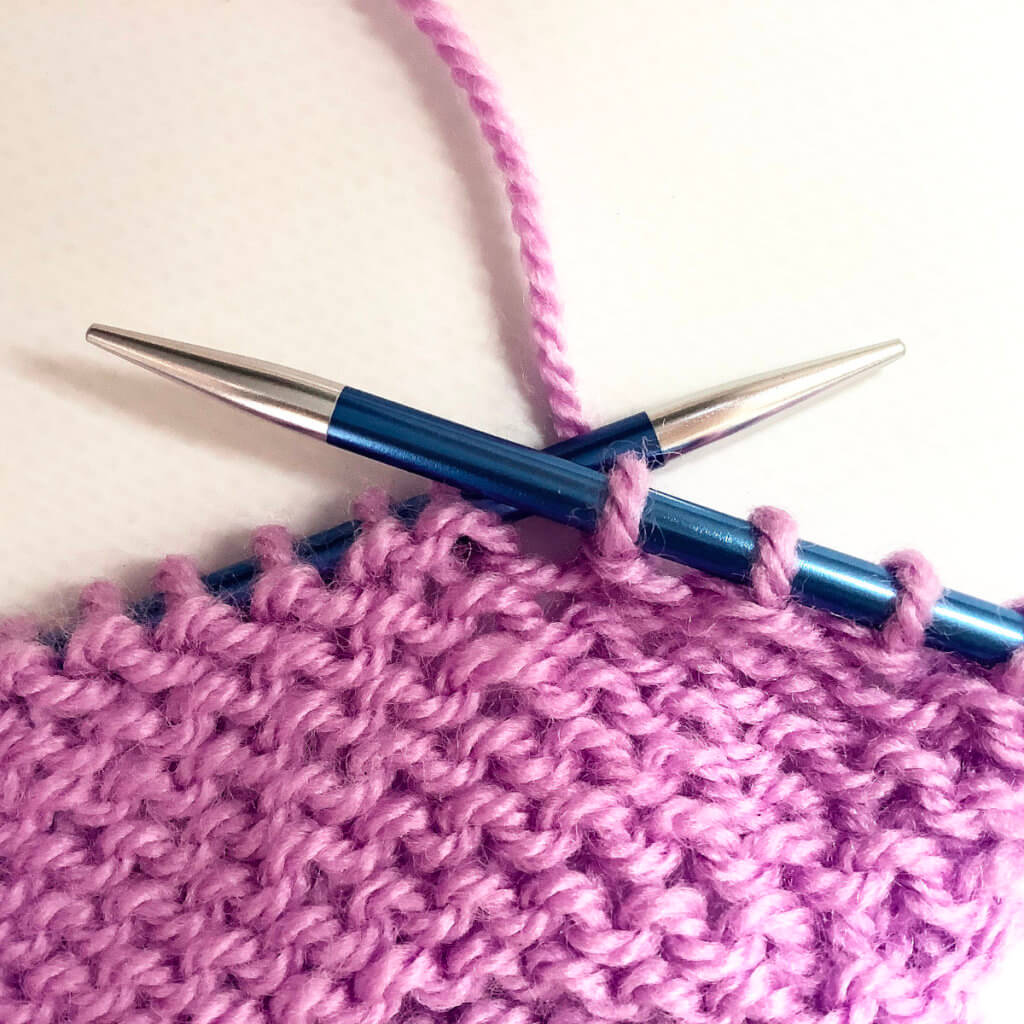
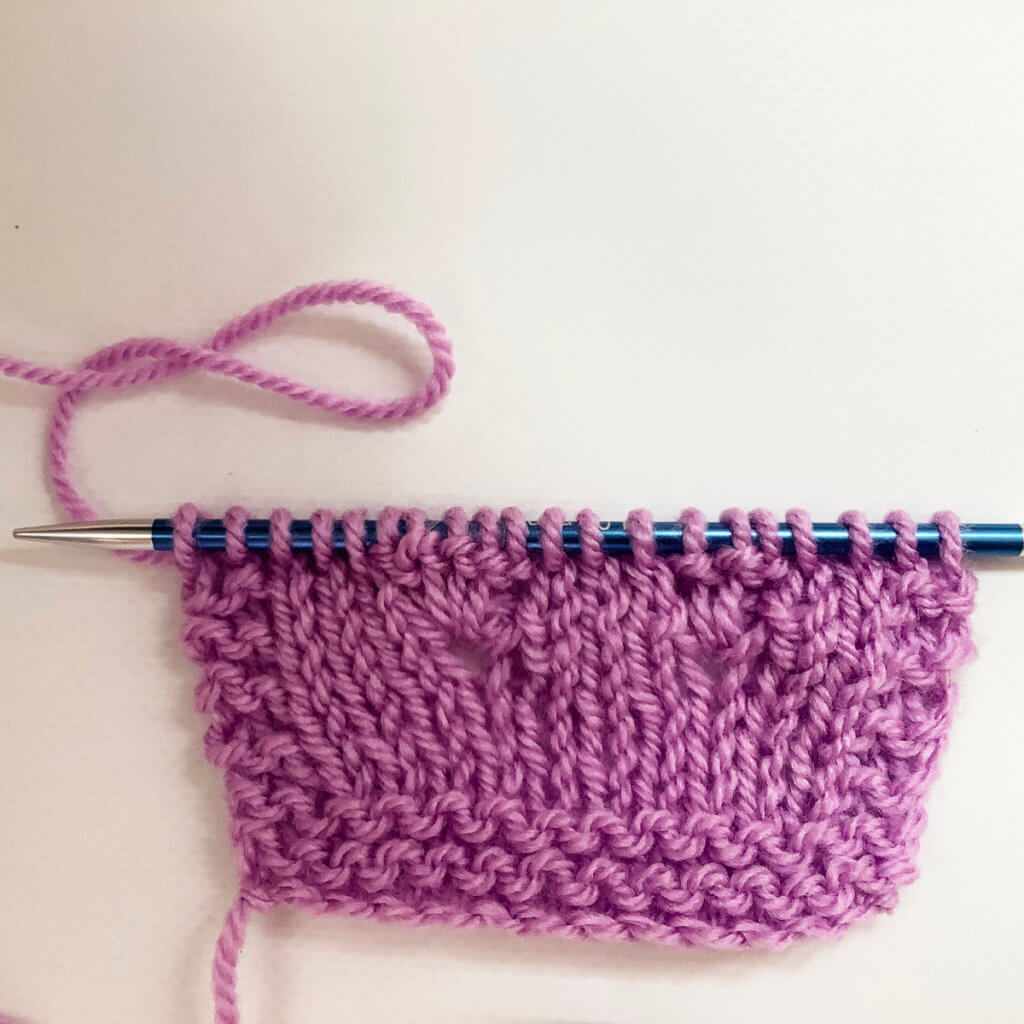
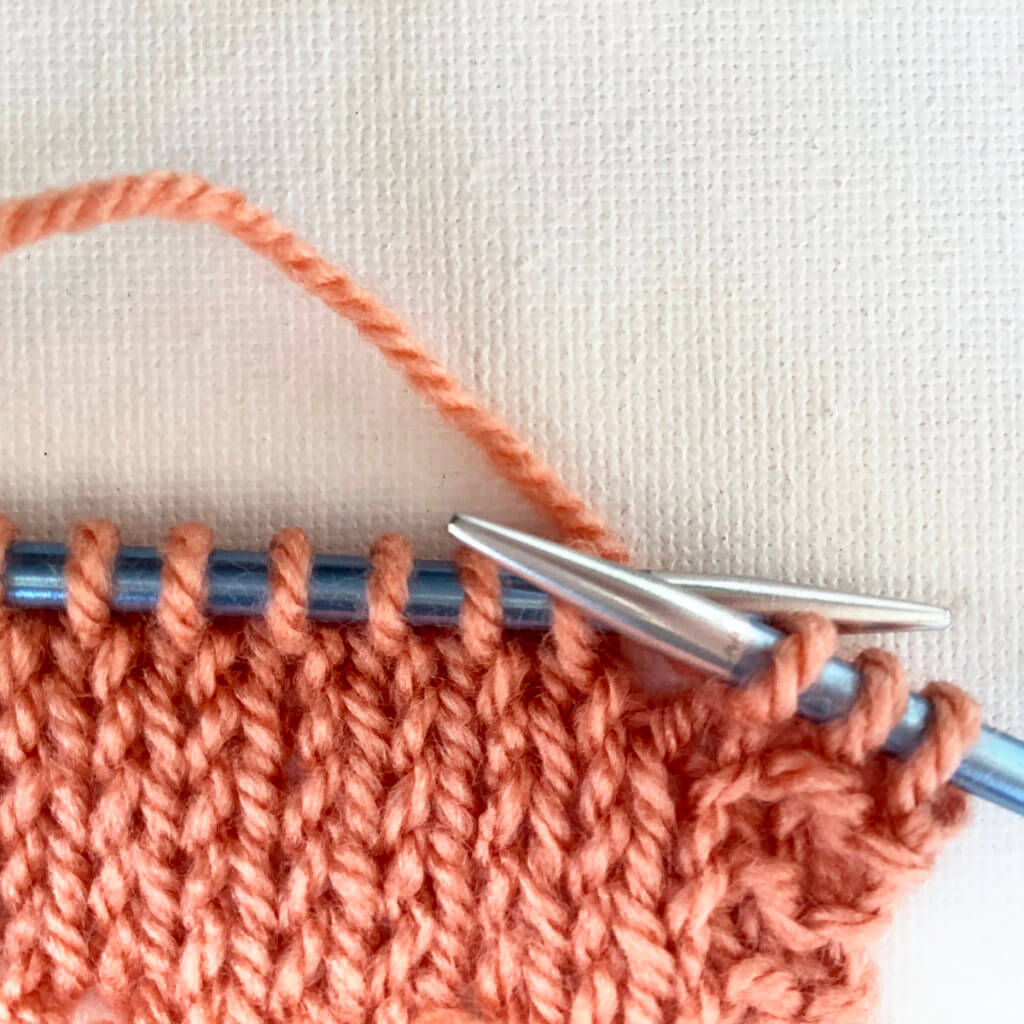
1. First, work your way across the row until you’ve reached the point where you want to make the star stitch.
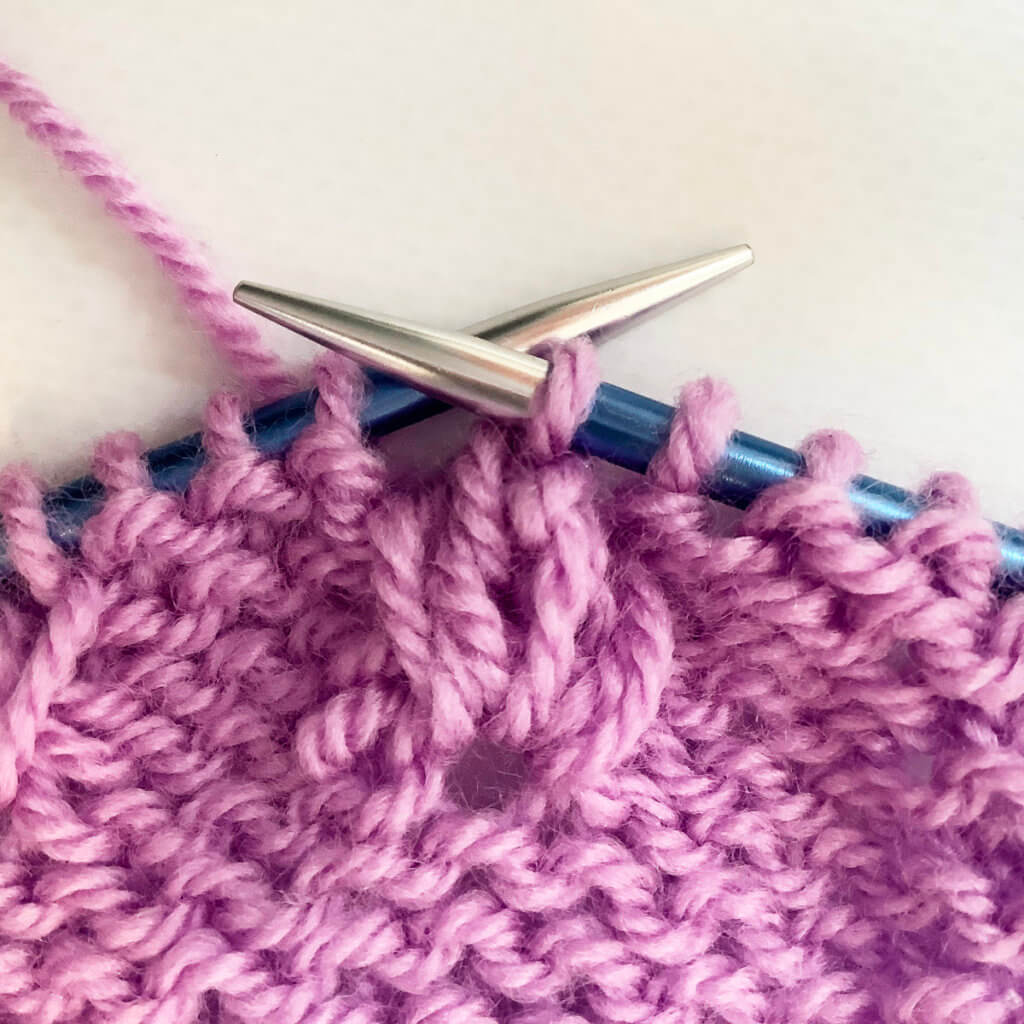
2. Next, insert the tip of the right-hand needle into the first 3 stitches at the same time as if to knit.
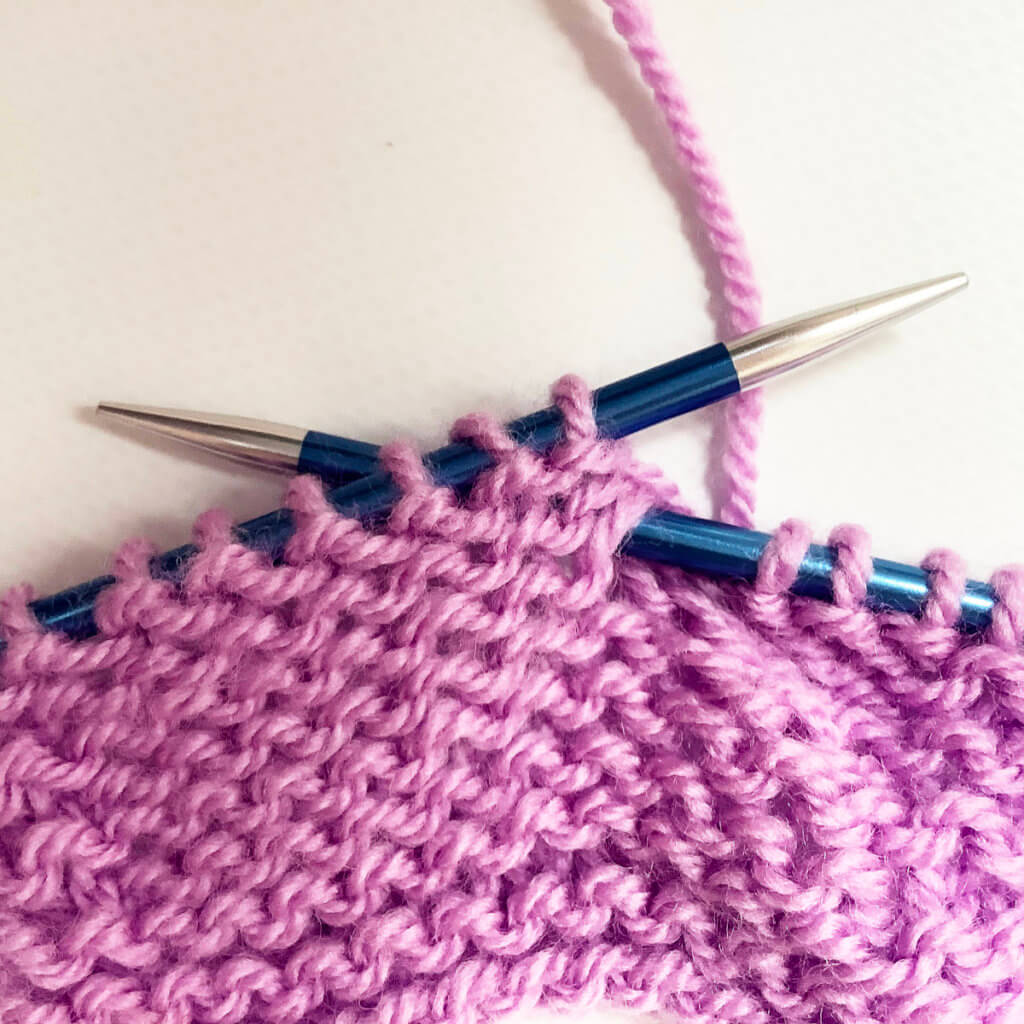
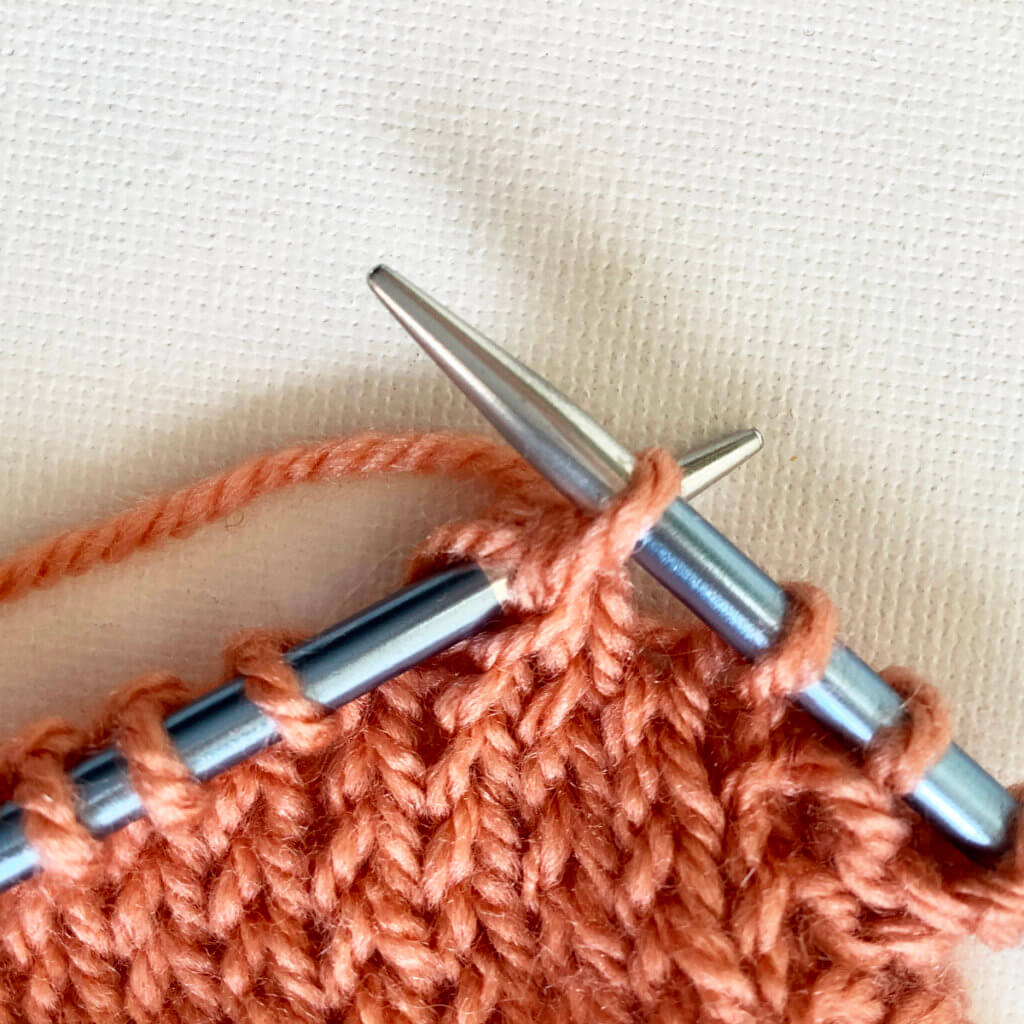
3. Wrap the yarn around the needle and pull it through the stitches you inserted the right-hand needle in. Don’t drop the stitches off the left-hand needle yet!
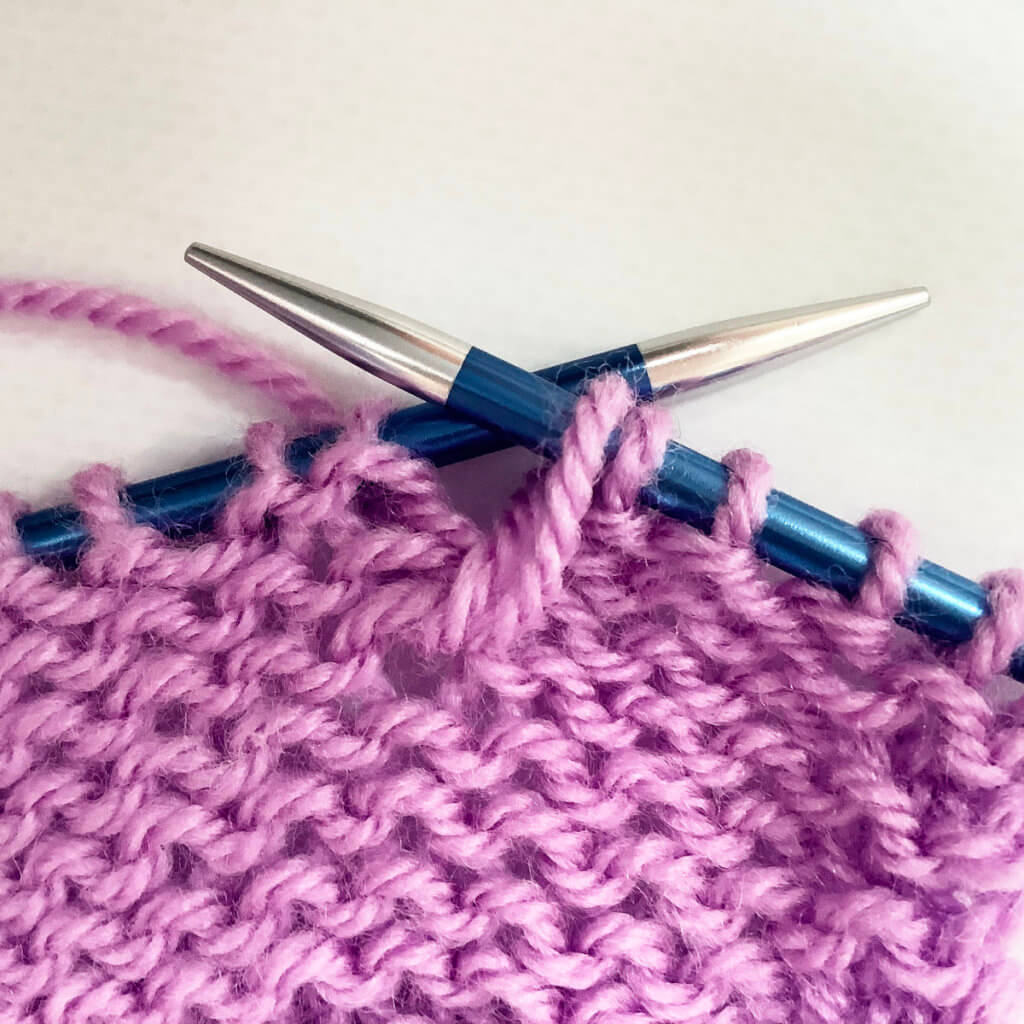
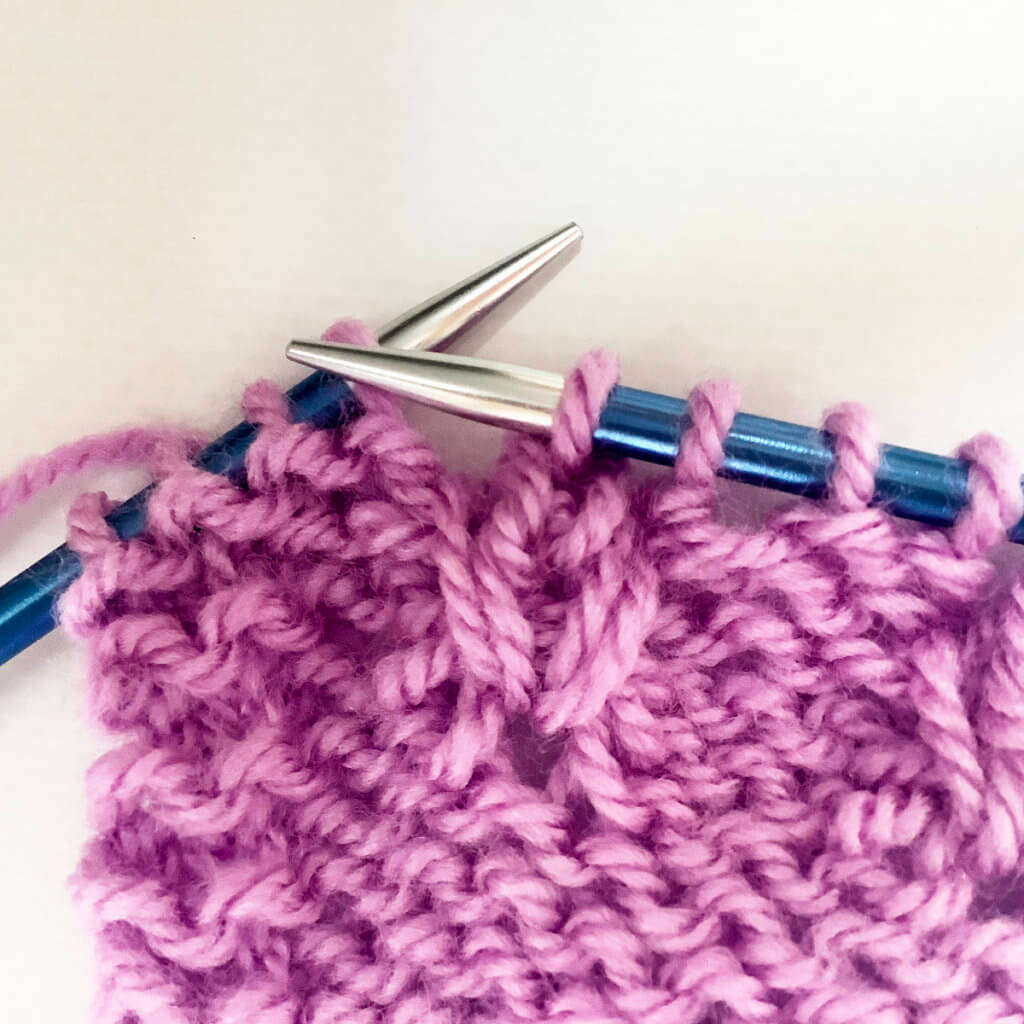
4. Wrap the yarn around the right-hand needle to form a yarn over.
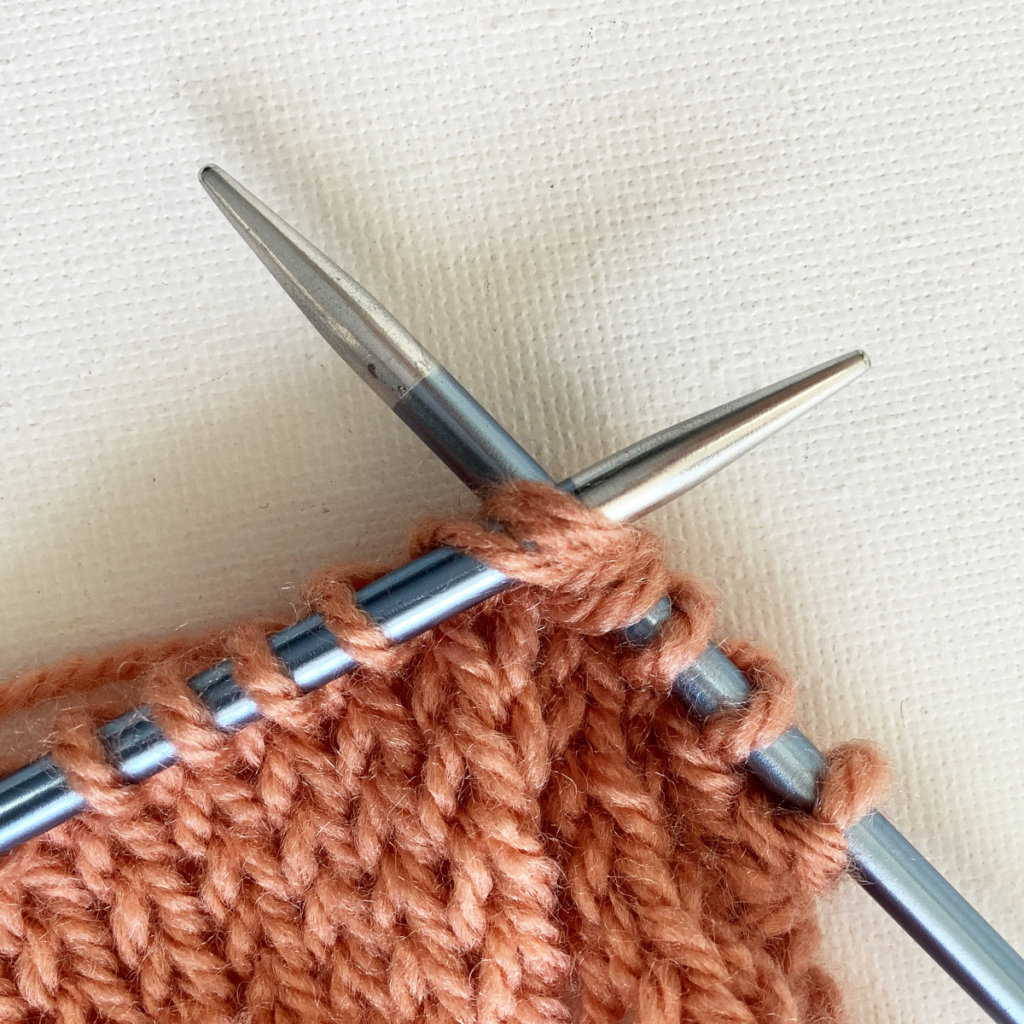
5. Again, insert the tip of the right-hand needle into the 3 stitches at the same time as if to knit.
6. Again, wrap the yarn around the needle and pull it through the stitches you inserted the right-hand needle in.
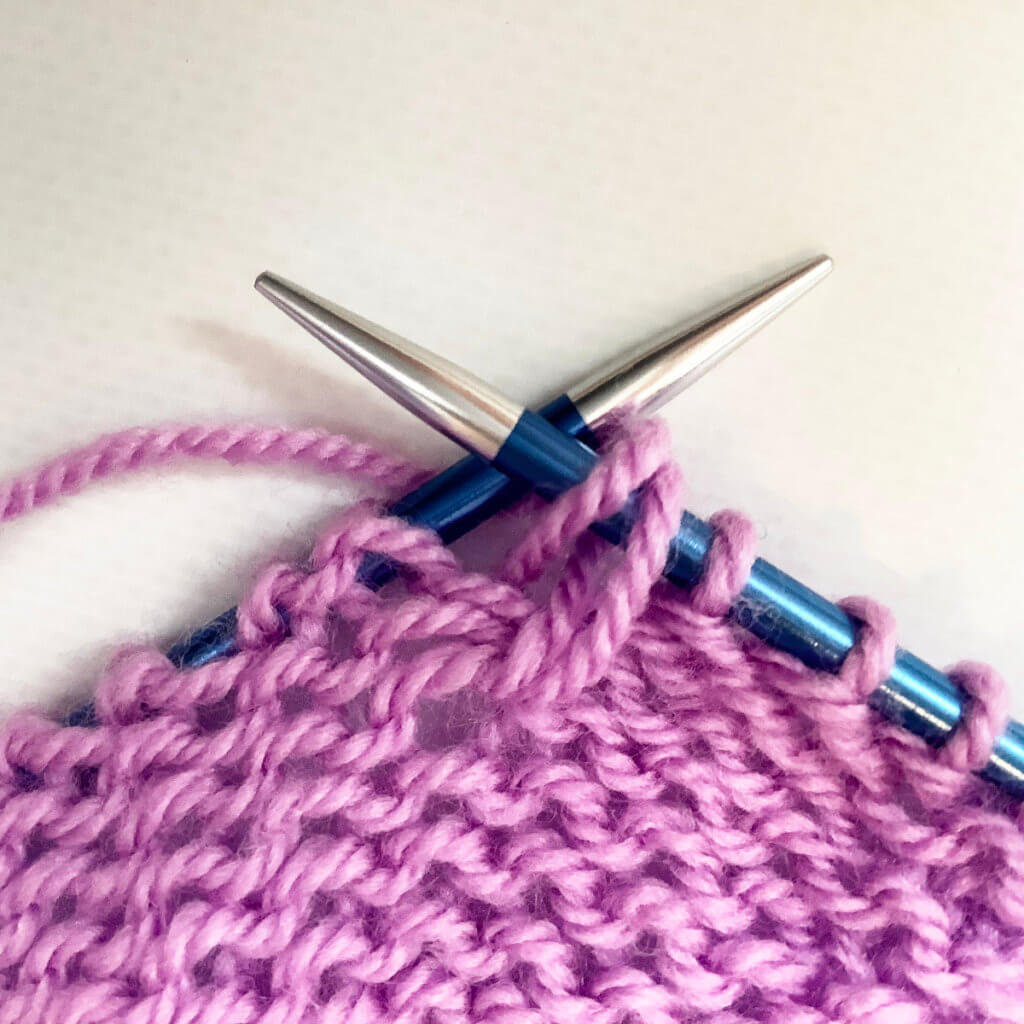
7. Now you can drop the stitches off the left-hand needle to finish the star stitch.
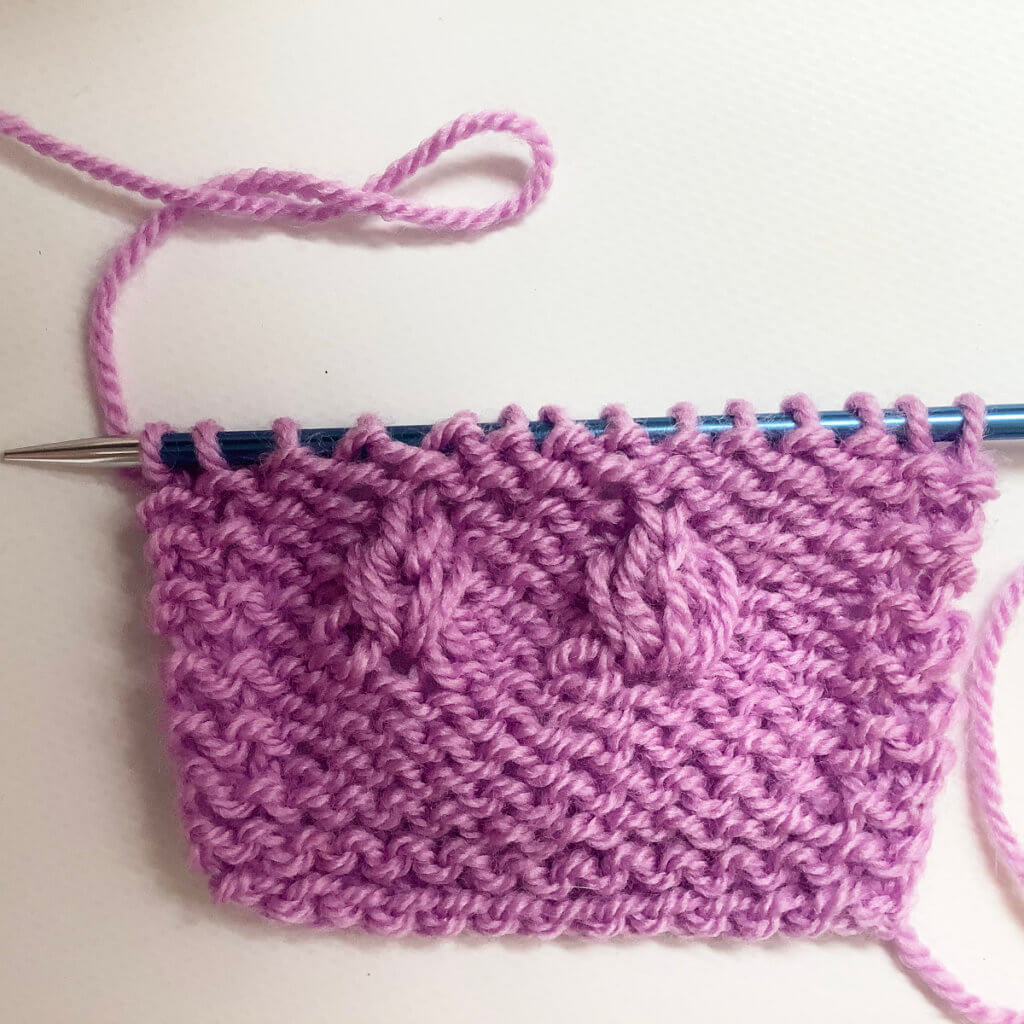
And this is how it looks after 3 more rows in stockinette have been worked, with 2 star stitches in a single row. Pretty, isn’t it?!
Thanks to my Patreon supporters for bringing you this freebie! Creating quality patterns and tutorials is a lot of work and resource-intensive. However, I find it important to give you free content like this tutorial. Thanks to the generous support of my Patreon supporters, I can make it happen. Thank you, patrons! Click here to join, or click here to read more about La Visch Designs on Patreon.
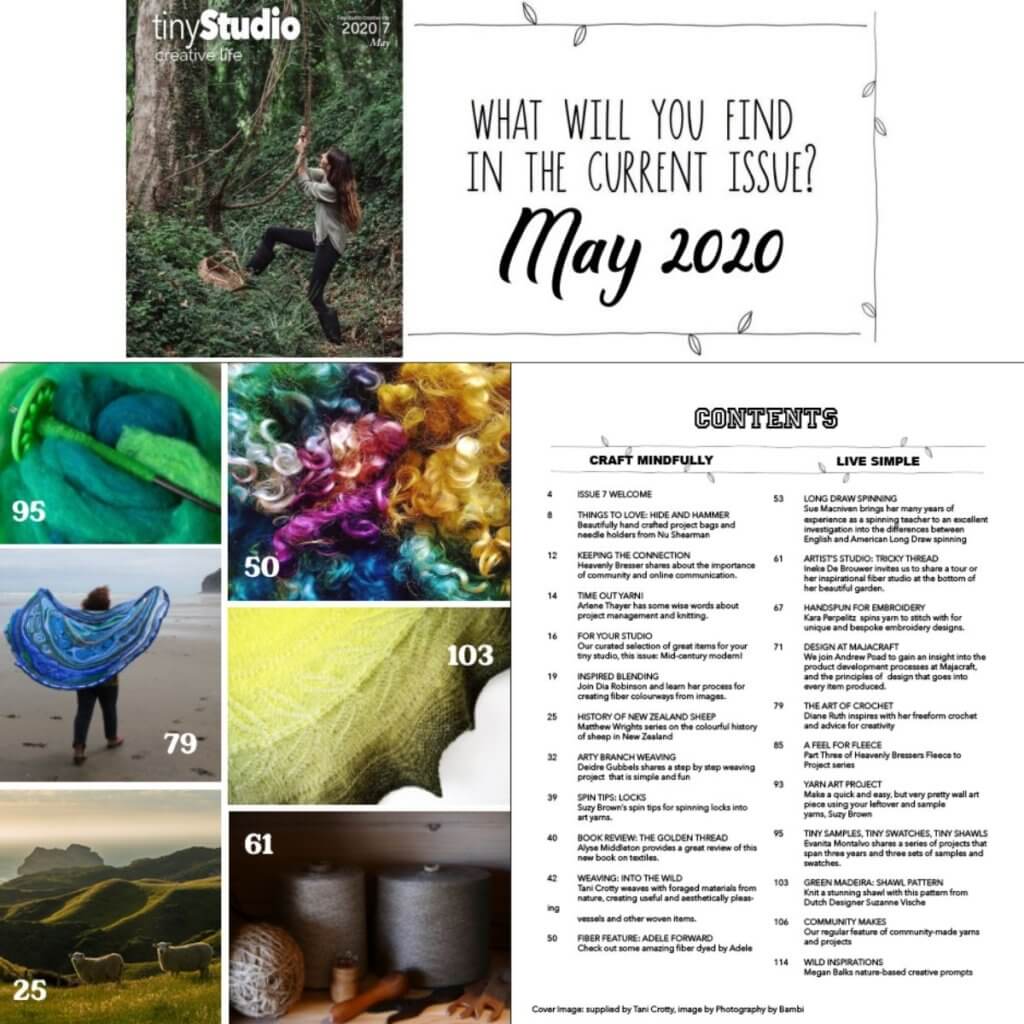
I don’t know if you’re familiar with it, so I’ll just tell you. It’s a quarterly digital publication, with rich content like embedded videos, and slideable galleries of eye candy. It focuses on mindfulness, freedom from stress and clutter, and a conscious approach to fiber crafts. tinyStudio Creative Life is not just a magazine for spinners and fiber artists. There is also the tinyStudio TV video podcast. This gives hands on demonstrations of techniques, interviews with contributors, etc. to enrich and enhance the content of each issue. Below you can find the table of contents of this issue:
The underlying focus of this issue is celebration of design and inspiration, which sometimes comes from ‘time out’! This can mean different things to different people. For some, time out is aimed at taking a complete break from a difficult or challenging project. We sometimes talk of putting our knitting “in time out because it is not behaving!”
Other times it can mean taking “time out” for ourselves, to find inspiration and relaxation. This, in turn, that allows our creativity to replenish and flow again when we return. Which ever way you look at it, this issue has plenty to offer.
To get your copy of this issue of tinyStudio Creative Life, visit this link. Not sure yet whether you’d like it? Visit this page to download the free anniversary issue of tinyStudio magazine, and see all the rich content each and every issue provides.
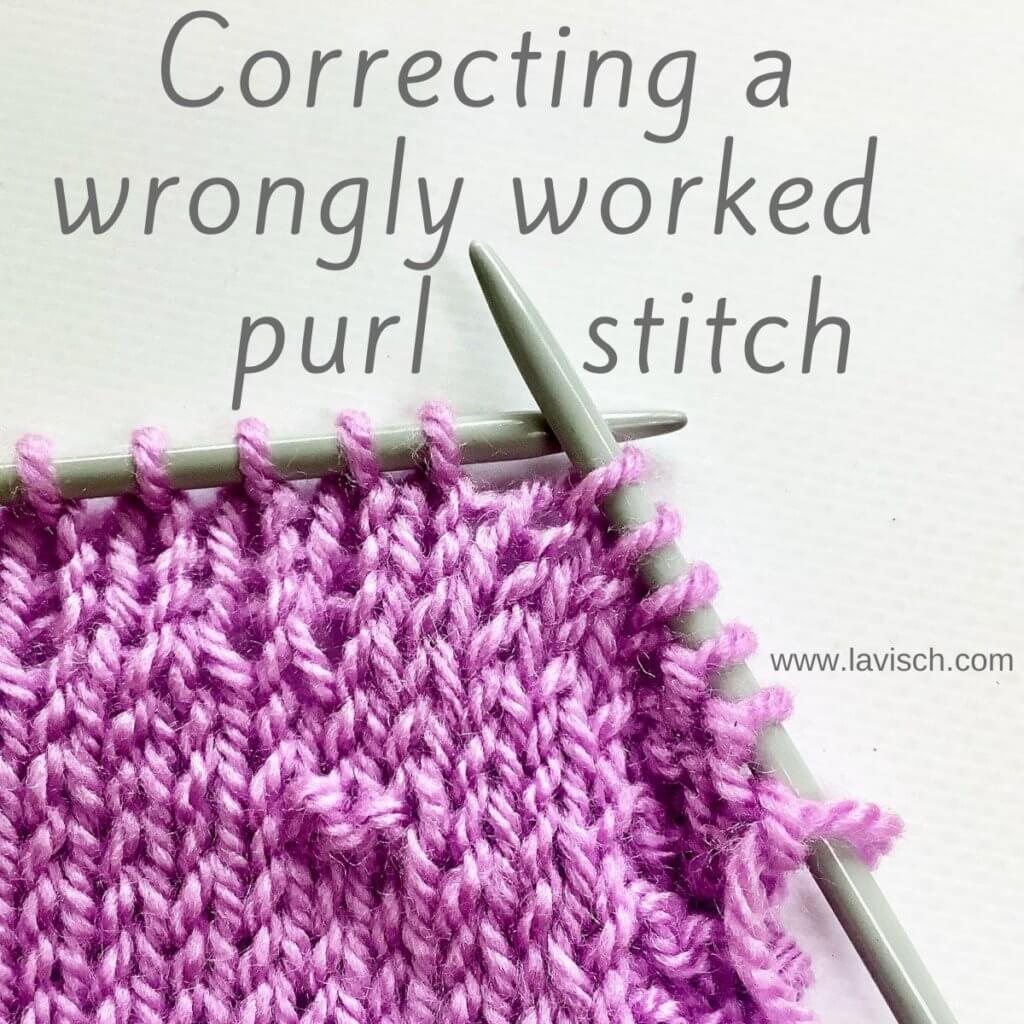
If you’ve ever worked some sort of patterning in your knitting, you know it can happen easily: a short distraction. And when your attention is somewhere else a purl stitch is worked instead of knit stitch, or vice versa. It may even be that you won’t notice it until several more rows or rounds have been worked.
Personally, I have a very big aversion against ripping out my work, just because I made a little mistake a couple of rows back. I mean, it certainly is an option, but I consider it to be more of a last resort type of option.
So, in this tutorial I’ll show you how to deal with a wrongly worked purl stitch that should have been a knit stitch.
Materials used
Yarn: * Paintbox Yarns Simply DK, a good value, good quality 100% acrylic yarn, here in the color 142 Tea Rose.
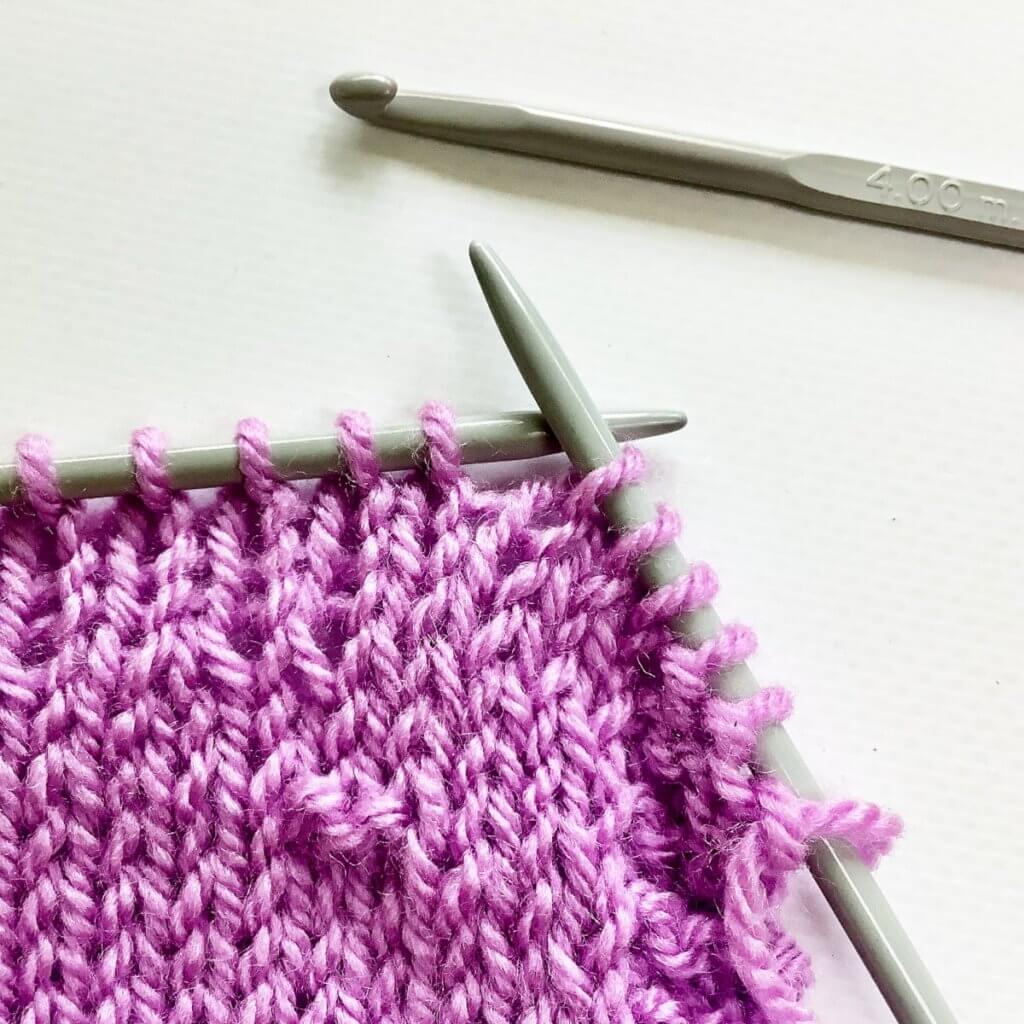
In this example, 2 stitches next to each other are purled instead of knitted in the stockinette fabric. Since there are only 2, I correct them one by one and not at the same time.
1. First, slip the stitches purl-wise from the left-hand needle to the right-hand needle, until you reach the first wrong stitch.
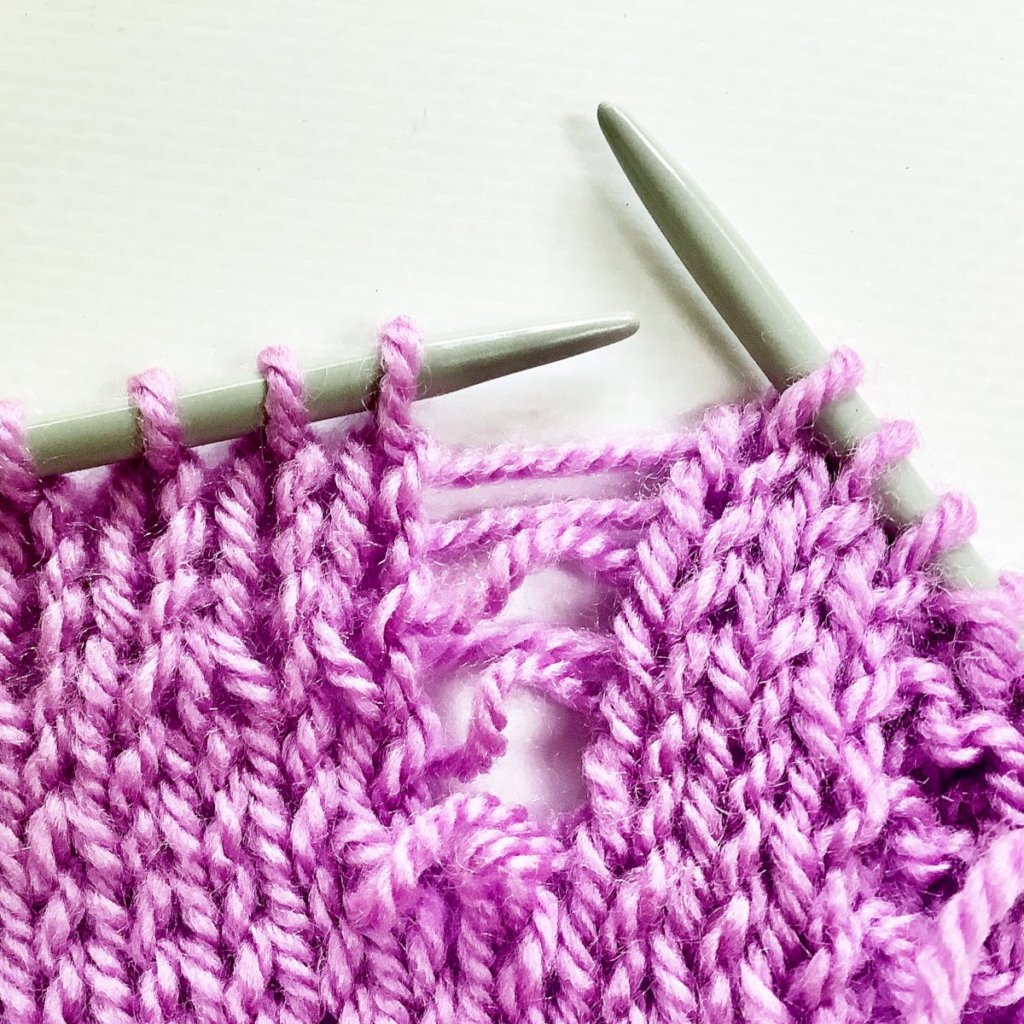
2. Drop this stitch and ladder down up to and including the purl stitch.
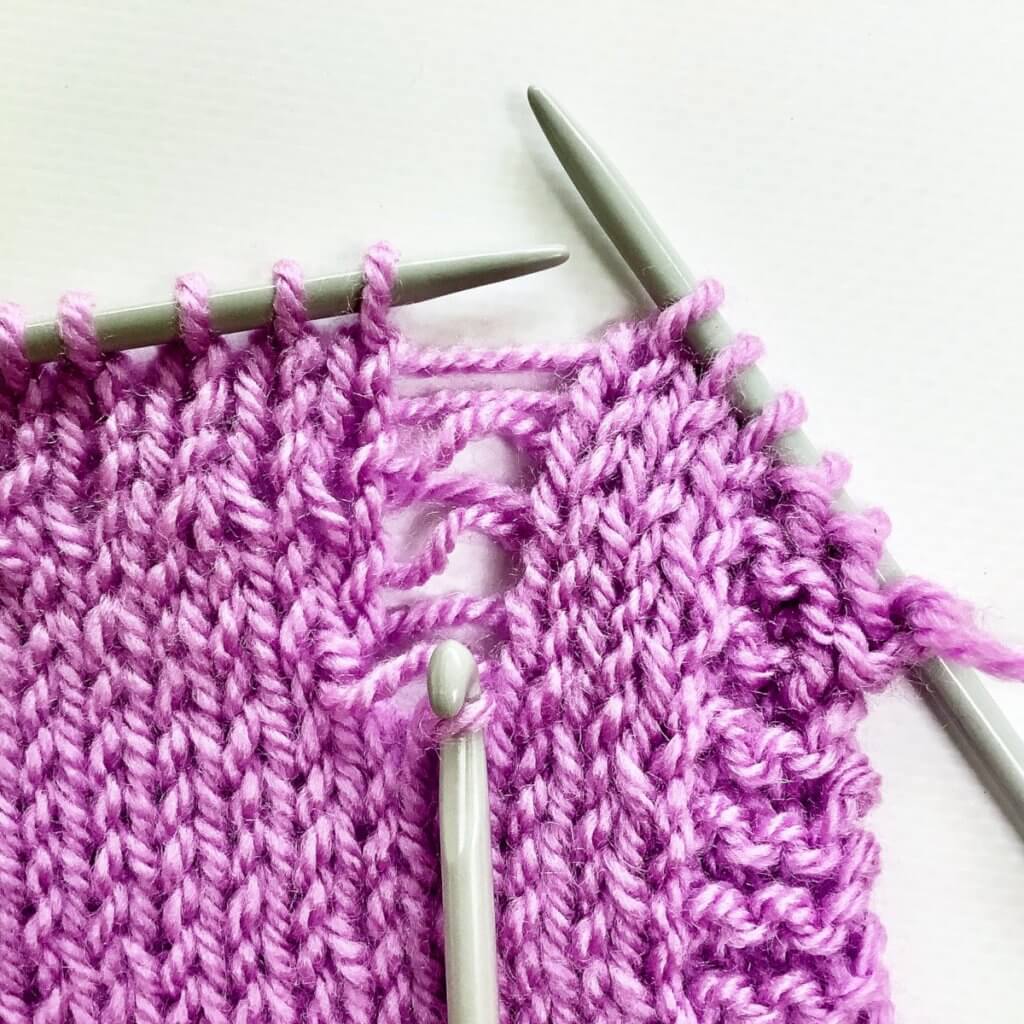
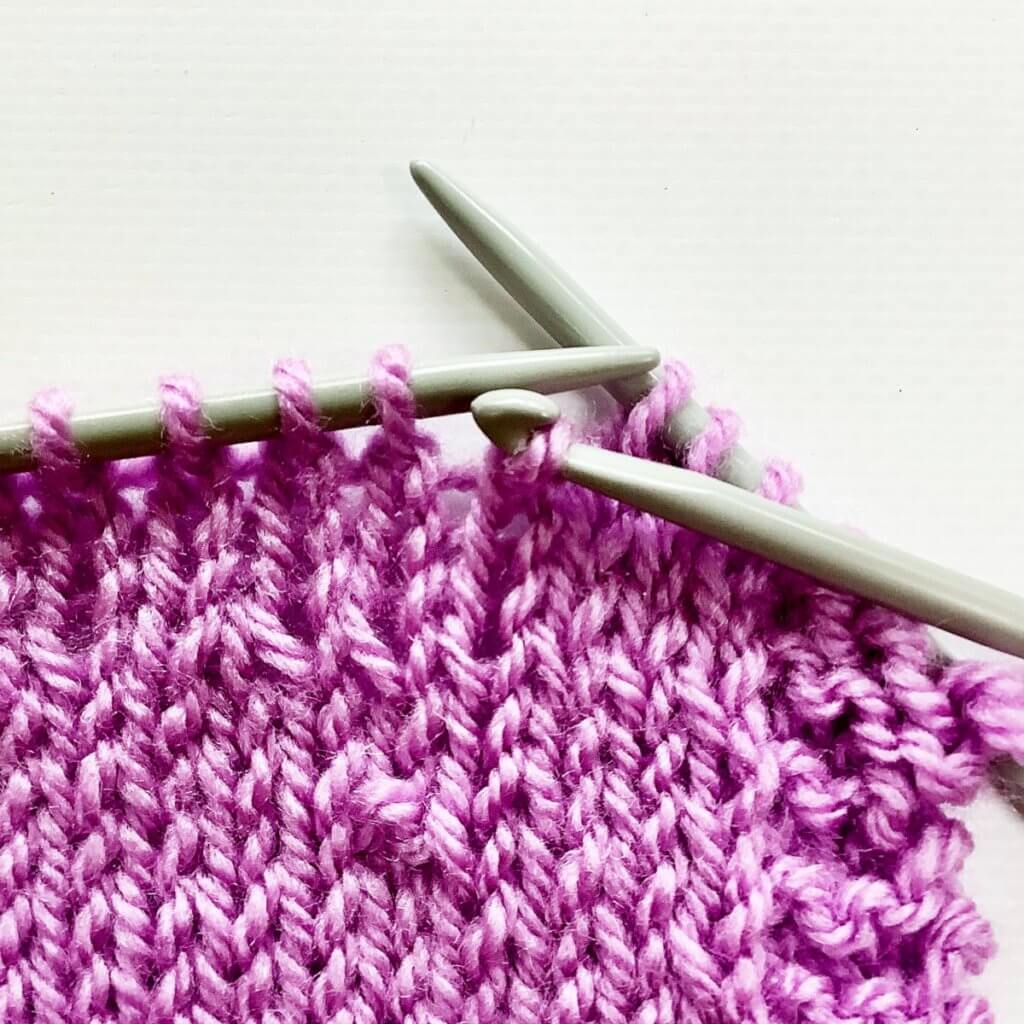
3. Since we want to create stockinette stitch fabric, we now insert the crochet hook through the correct stitch directly below the laddered-down purl stitch from the front to the back.
4. Next, ladder your way up again by inserting the crochet hook underneath the horizontal thread directly above the hook, and pulling the thread through the loop already on the hook to make a new knit stitch. Repeat this until all horizontal threads have been worked. After this you can place the stitch back unto the knitting needle.
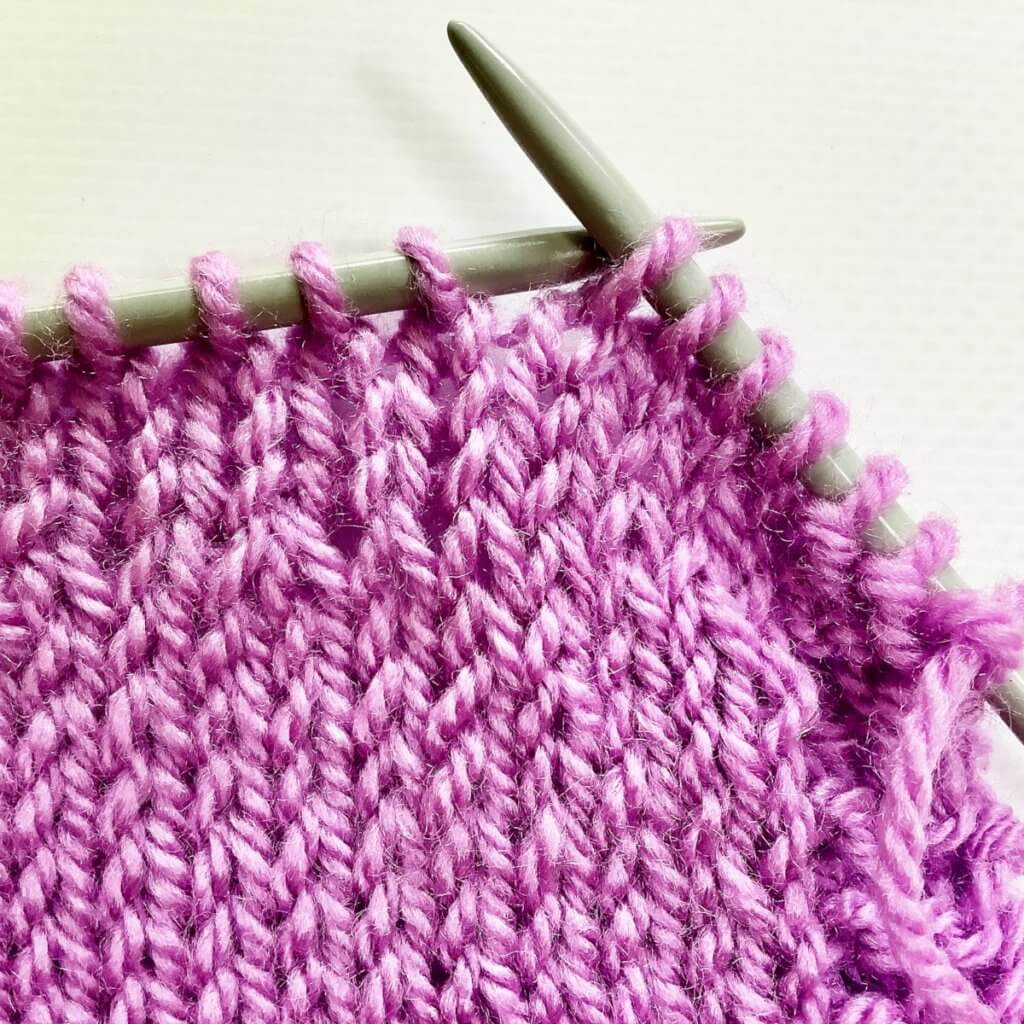
5. Next, repeat steps 1 to 4 for the next wrongly worked purl stitch. The result should look something like this:
But what if I need to fix a knit into a purl?
Good question! Well, as you know the wrong side of a knit stitch is a purl stitch and vice versa. So, the easiest way to fix the reverse situation as pictured in this tutorial, is to just turn your work so the wrong side is facing! This way you’ve got the exact situation as pictured here.
If you do want to ladder up a purl stitch, do the following:
1. To start, move the next horizontal thread directly above the stitch from the back to the front of the work.
2. Next, insert the crochet hook into the stitch from the back to the front, grab the loose thread and pull it through the stitch on the hook.
Thanks to my Patreon supporters for bringing you this freebie! Creating quality patterns and tutorials is a lot of work and resource-intensive. However, I find it important to give you free content like this tutorial. Thanks to the generous support of my Patreon supporters, I can make it happen. Thank you, patrons! Click here to join, or click here to read more about La Visch Designs on Patreon.