fuyu persimmon
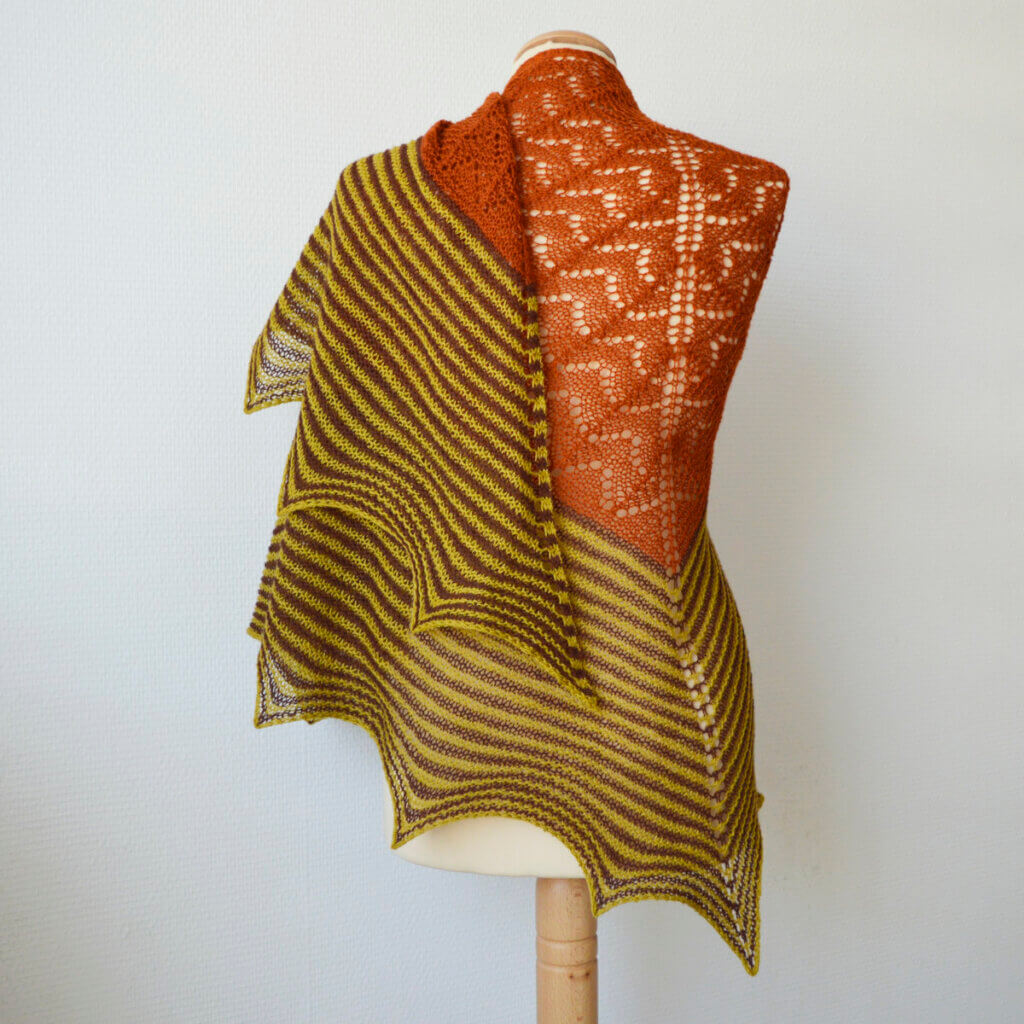
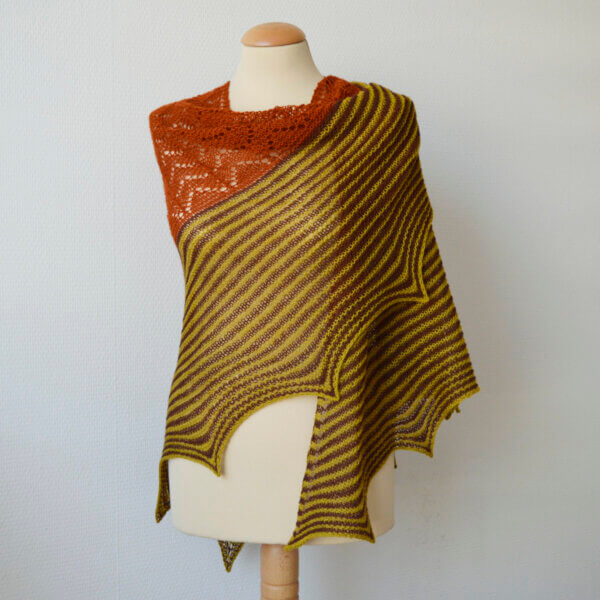
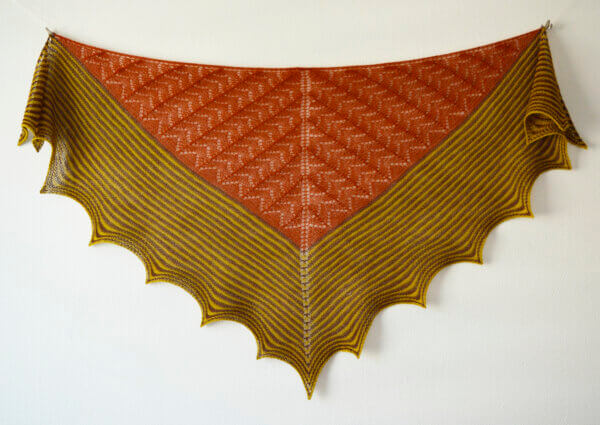
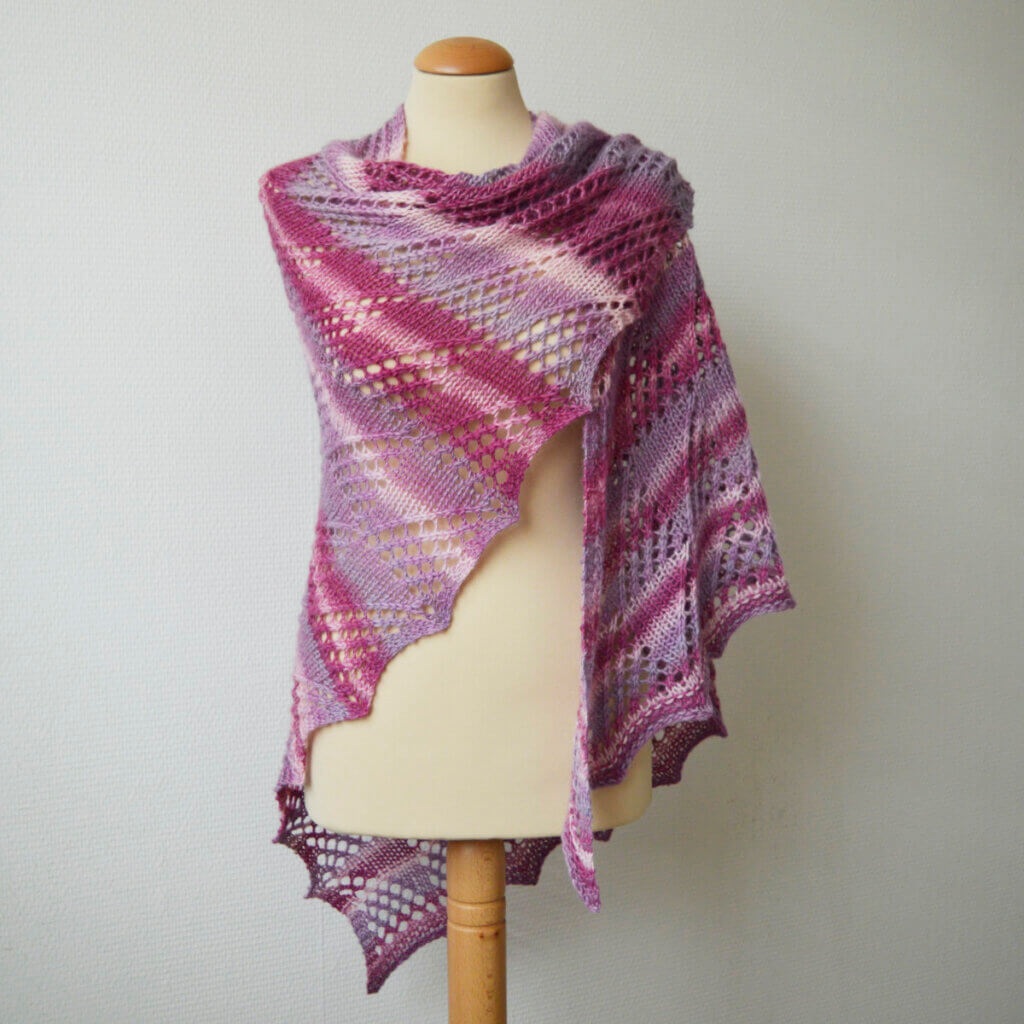
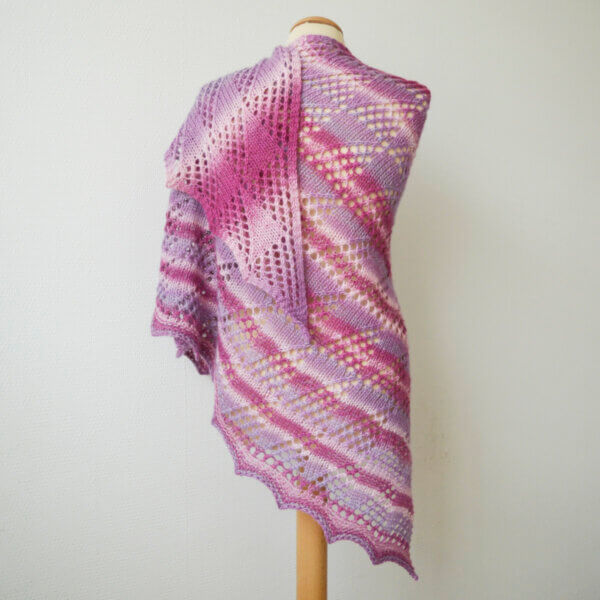
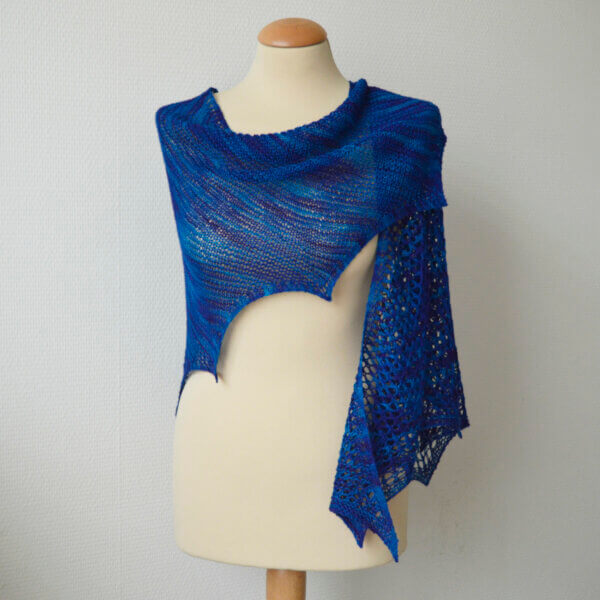
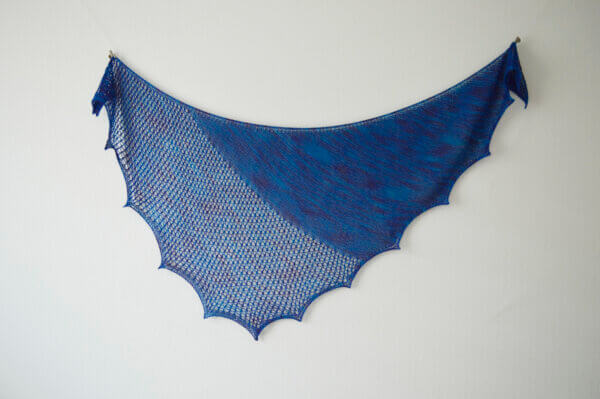
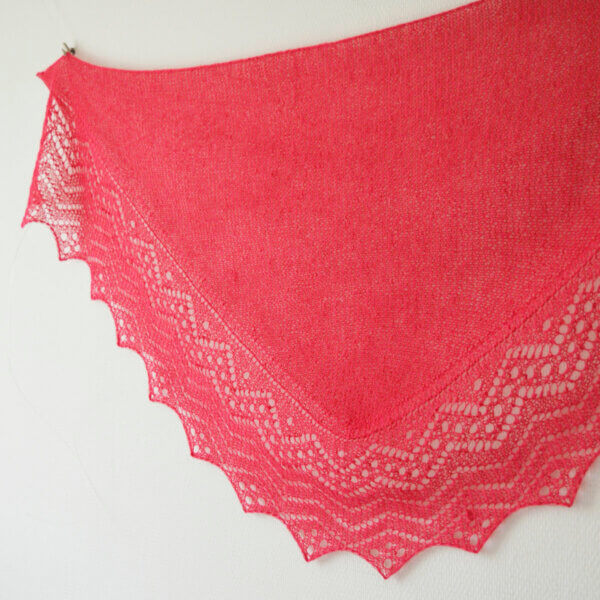
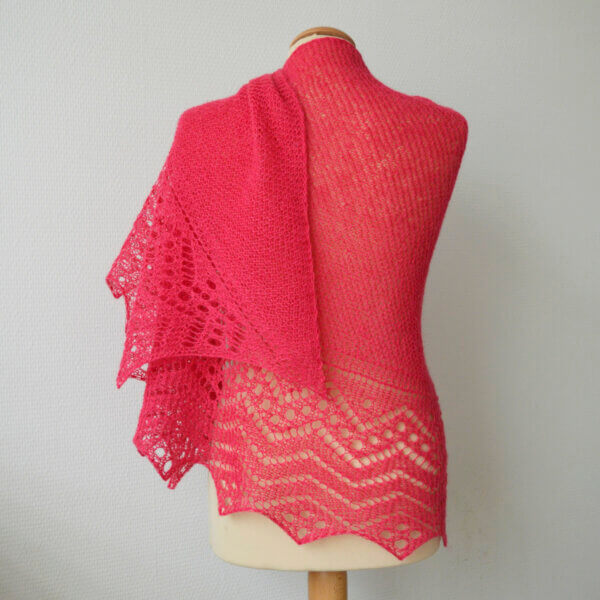
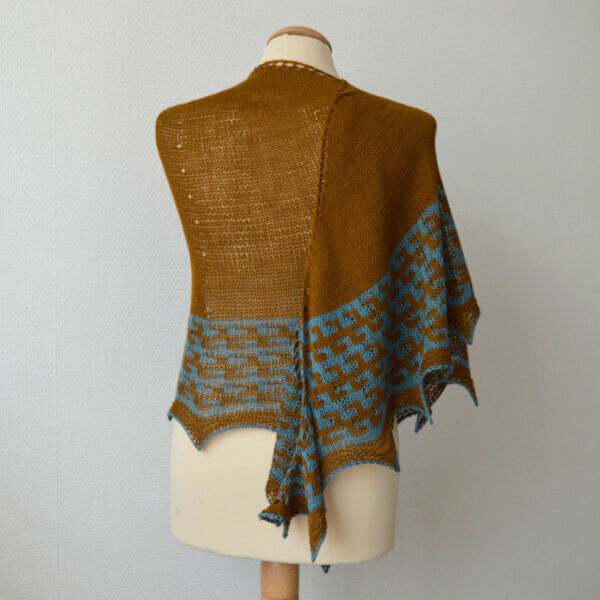
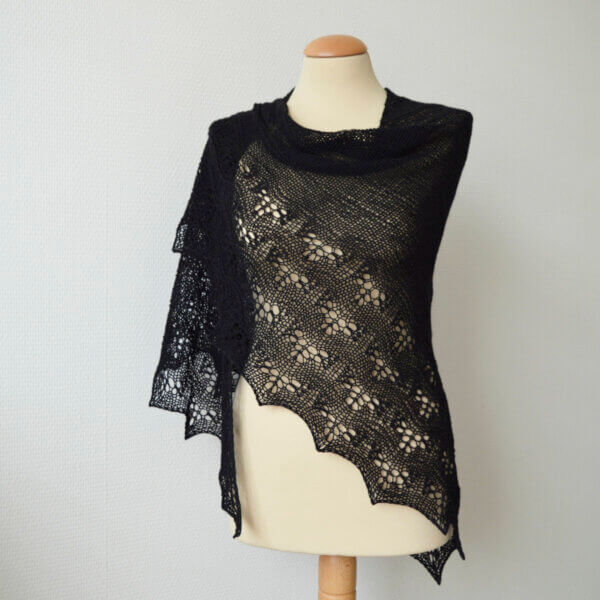
Like the Fuyu persimmon fruit this shawl is named after, it’s fruity and succulent and suitable for a wide range of occasions. In this shawl, a delightful garter stitch based lace body is paired with a striped garter stitch border. The design is very flexible, therefore I’ve included modification ideas in the pattern.
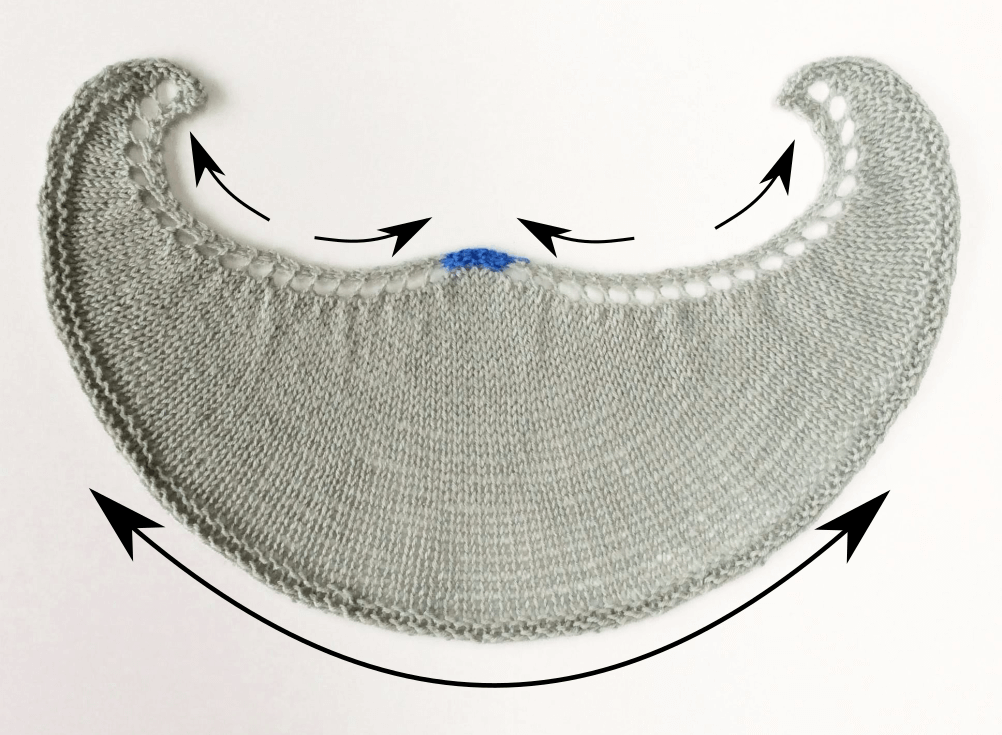
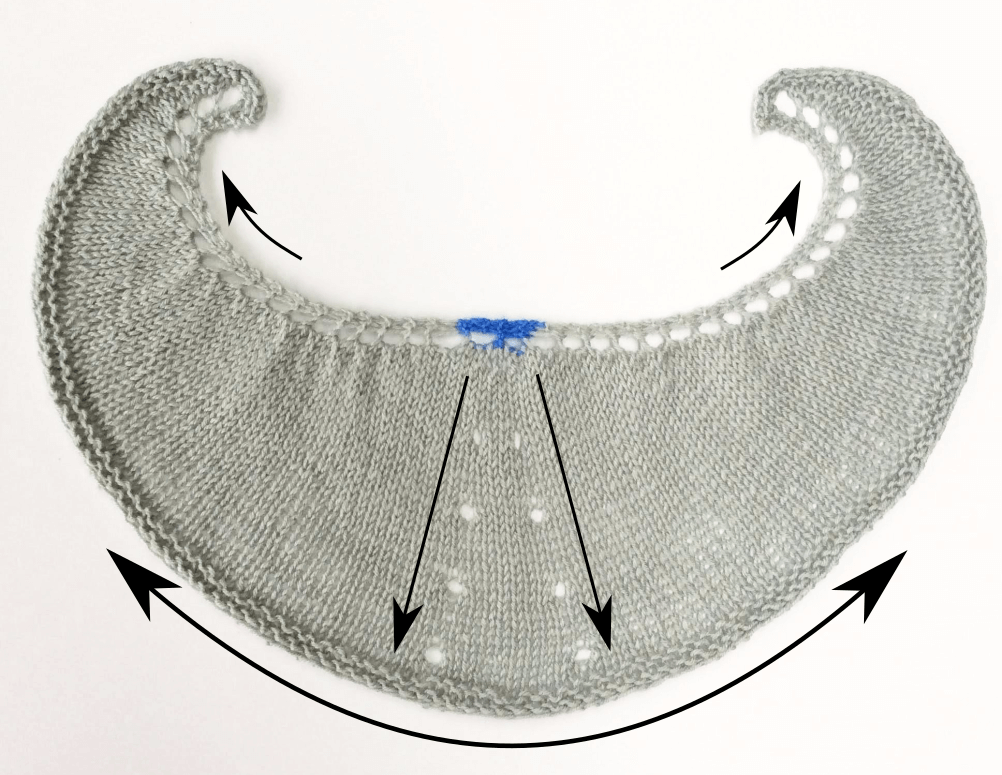
This shawl is knit from the top-down in one piece, starting at the neck edge with a garter tab. The instructions for the body patterning are both charted and written out.
Pay what you want: (minimum €6.95)

Difficulty level
This shawl is worked from the top-down, starting with a garter tab cast on. Stitches used include knit, k2tog, k3tog, yo, m1l, and m1r increases.
This pattern is therefor suitable for the intermediate knitter.
Sizes and finished measurements
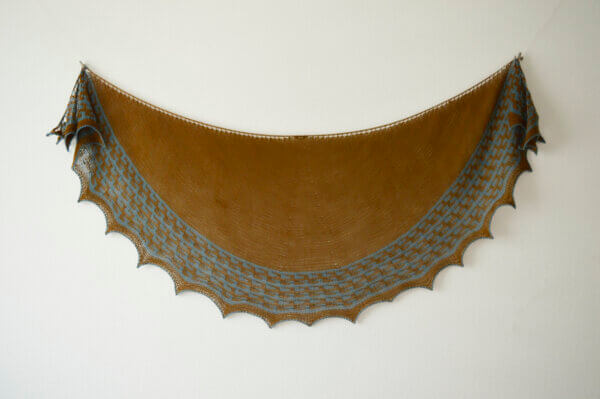
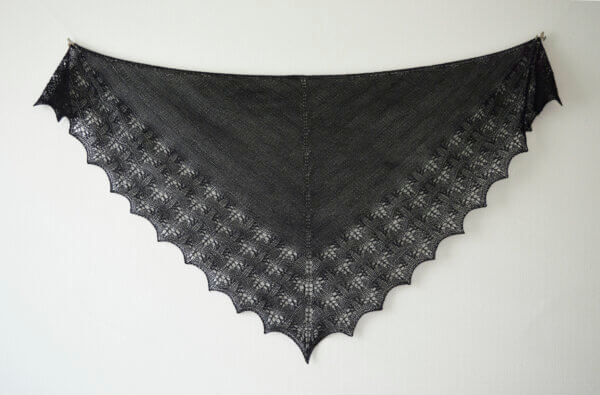
Finished dimensions of the sample shawl: Span width of 186 cm (73 ¼ inches) measured along the upper edge, and a depth of 89 cm (35 inches), measured after blocking.
Change the size of this shawl by using lighter or heavier yarn and/or working fewer (or more) repeats of the various sections of the shawl. This will, of course, change the amount of yarn needed.
Pattern details
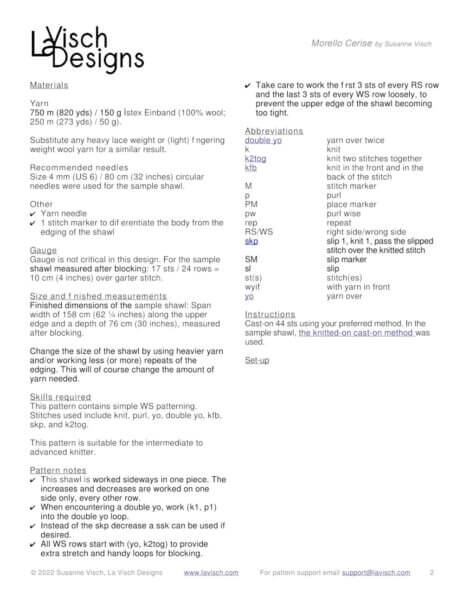
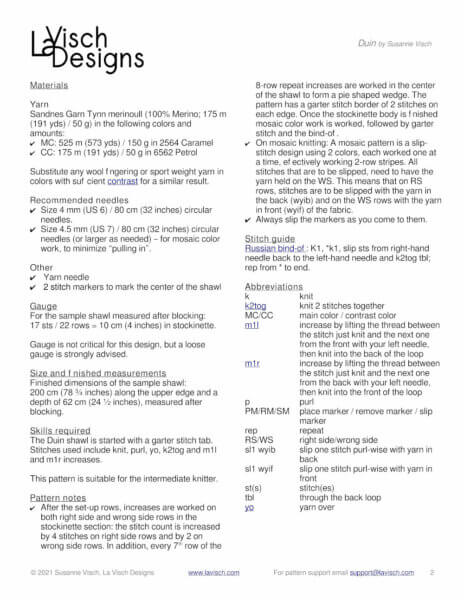
- Gauge: Approx. 15.4 sts / 24.5 rows = 10 cm (4 inches) over body pattern, measured after blocking. Gauge is not critical in this design, but should give you a fabric that you like with the yarn used.
- Pattern languages included: English.
- Digital PDF has 5 pages (letter size)
Materials
- Yarn: Cascade Yarns ® Cascade 220® Fingering (100% wool; 250 m (273 yds) / 50 g) in the following colors and quantities (substitute a 2-ply wool (light) fingering to sport weight yarn in solid or tonal colorways for a similar result):
- C1: 250 m (273 yds) / 50 g) in 2414 Ginger
- C2: 250 m (273 yds) / 50 g) in 8686 Brown
- C3: 250 m (273 yds) / 50 g) in 9566 Olive Oil
- Size 4 mm (US 6) / 80 cm (32 inches) circular needles, choose needles appropriate for the yarn chosen.
- 4 stitch markers to indicate the center stitch and the edge stitches
- Stitch markers to indicate the repeats of the patterning (optional)
- Yarn needle