tutorial

tutorial

tutorial – pick-up & knit from garter stitch

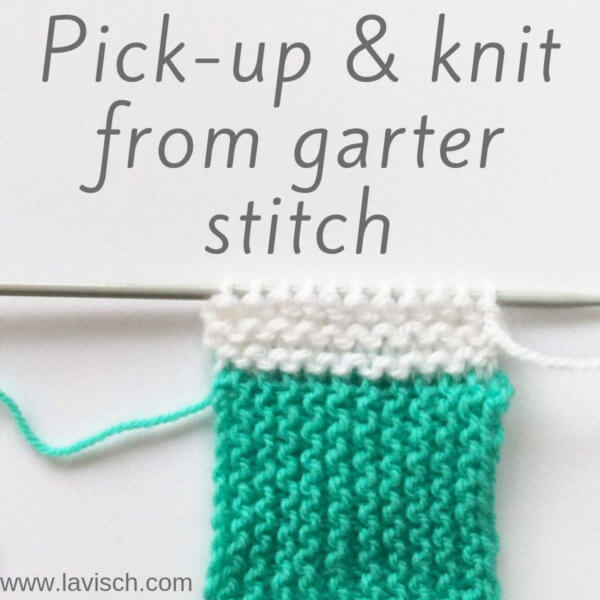
Tutorial pick-up & knit from garter stitch - by La Visch Designs

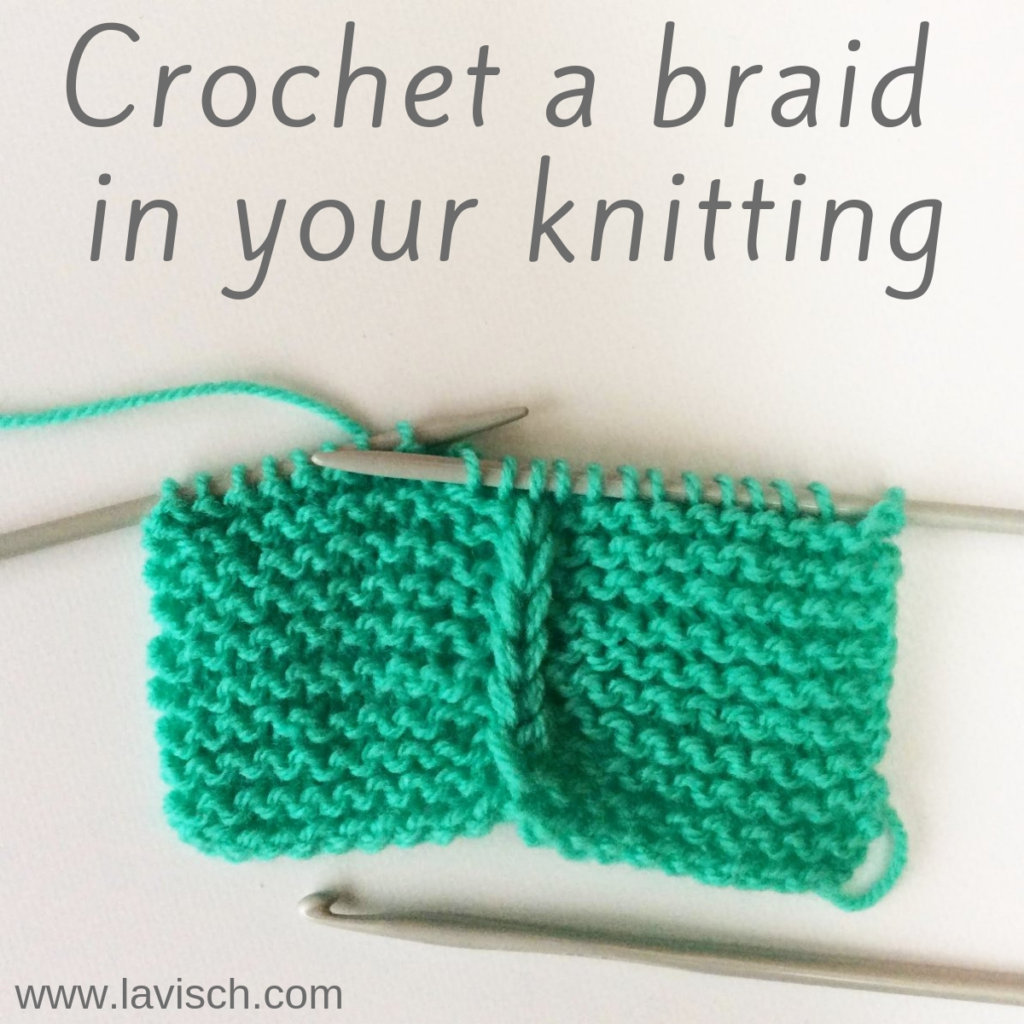
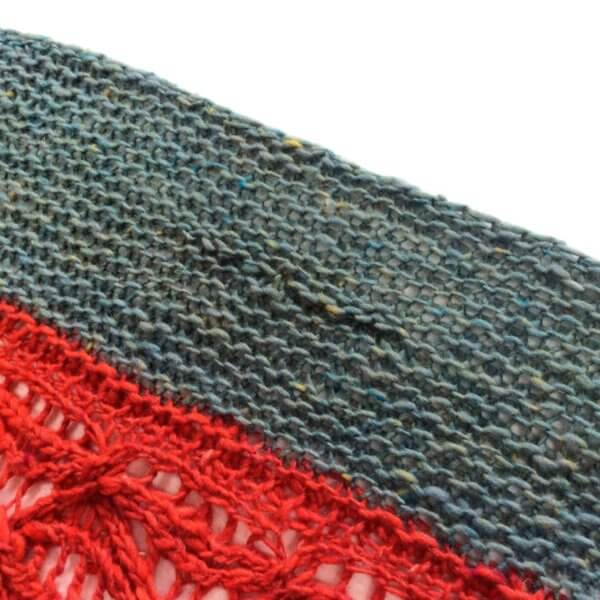
In my Sirac stole design a center panel in a Cable & Lace pattern is worked first, after which stitches are picked up and knit on the long sides of the panel. After this, the rest of the pattern can be worked perpendicular to the Cable & Lace panel. One of my testers (hi Marilyn!) mentioned that it would be a good idea to dedicate a photo tutorial to the technique used for that. So here we are!

Of course, there are many ways to accomplish this. In this tutorial, I’m focusing on “pick-up and knit” from a garter stitch piece, worked without a chain stitch selvage. Such a selvage is pretty neat for picking-up stitches, but it also makes the selvage tighter than may be preferable. In such cases, it’s good to know how to pick-up & knit stitches from a regular garter stitch edge.

The difference between “pick-up” and “pick-up & knit”

It may be confusing what exactly the difference is between just “pick-up” and “pick-up & knit”. I mean, both have some picking-up action going on. The main difference is, that with just “pick-up” stitches of the piece already worked are placed on the knitting needle without introducing new yarn.

With “pick-up and knit”, new yarn is pulled through the piece already worked and the loops are placed on a knitting needle. These new loops are the new stitches from which the rest of the piece is worked.

Pick-up & knit from garter stitch step-by-step

In this example, I’m using a contrasting yarn for the pickup & knit part, to make it easier for you to see what exactly I’m doing and where.

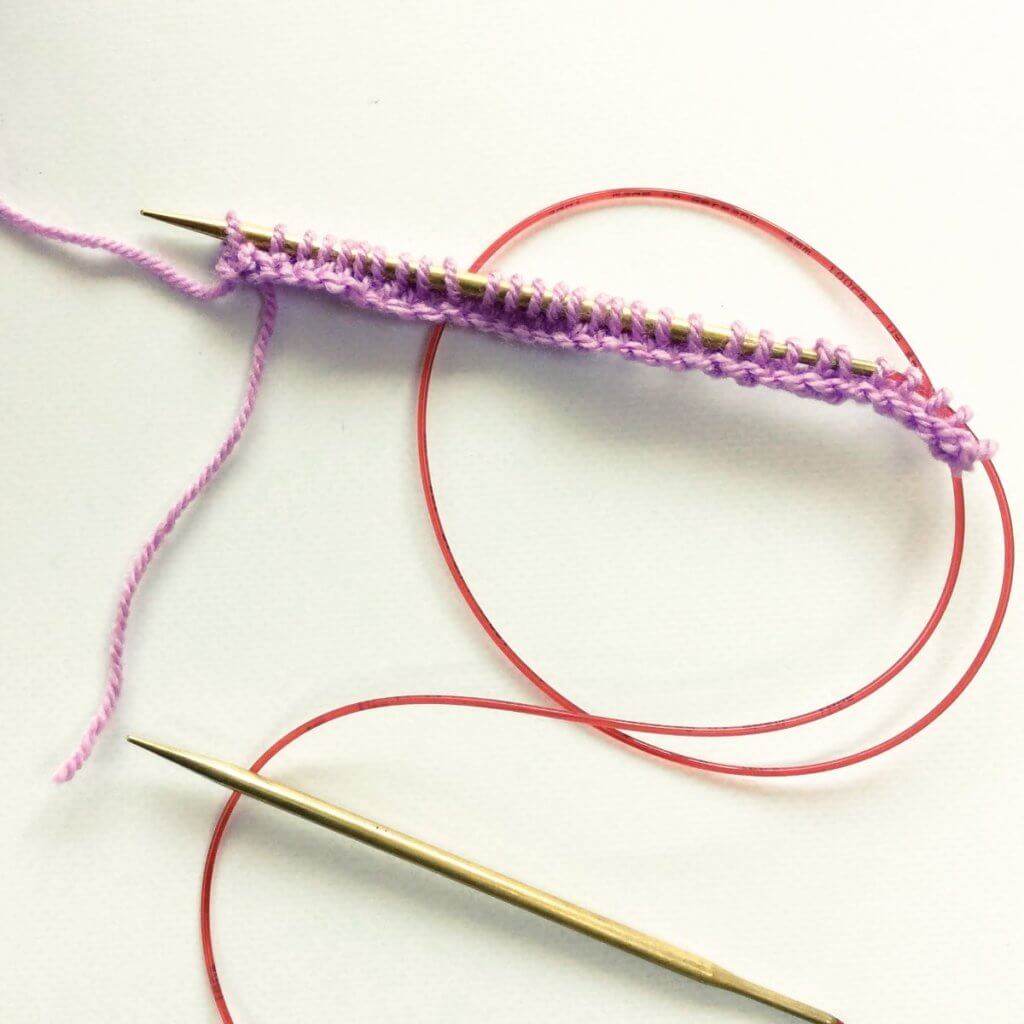
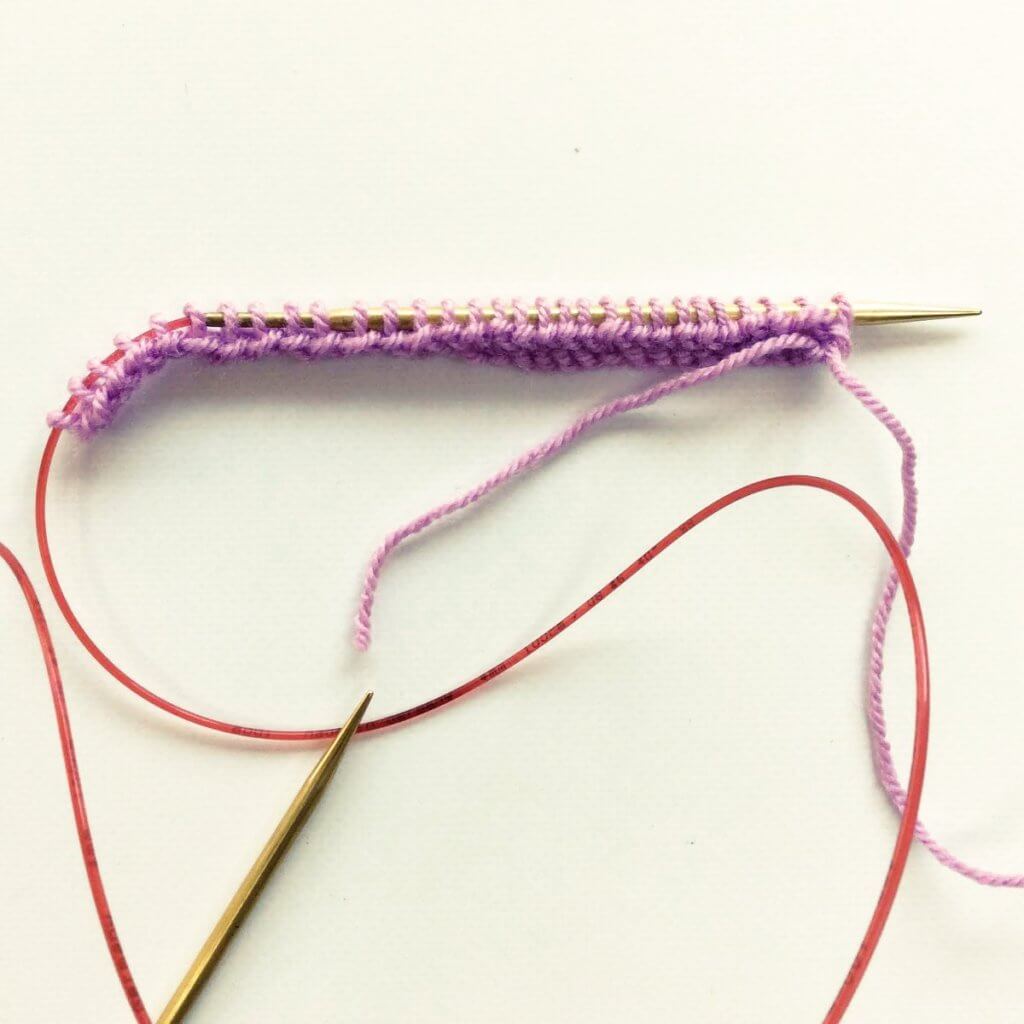
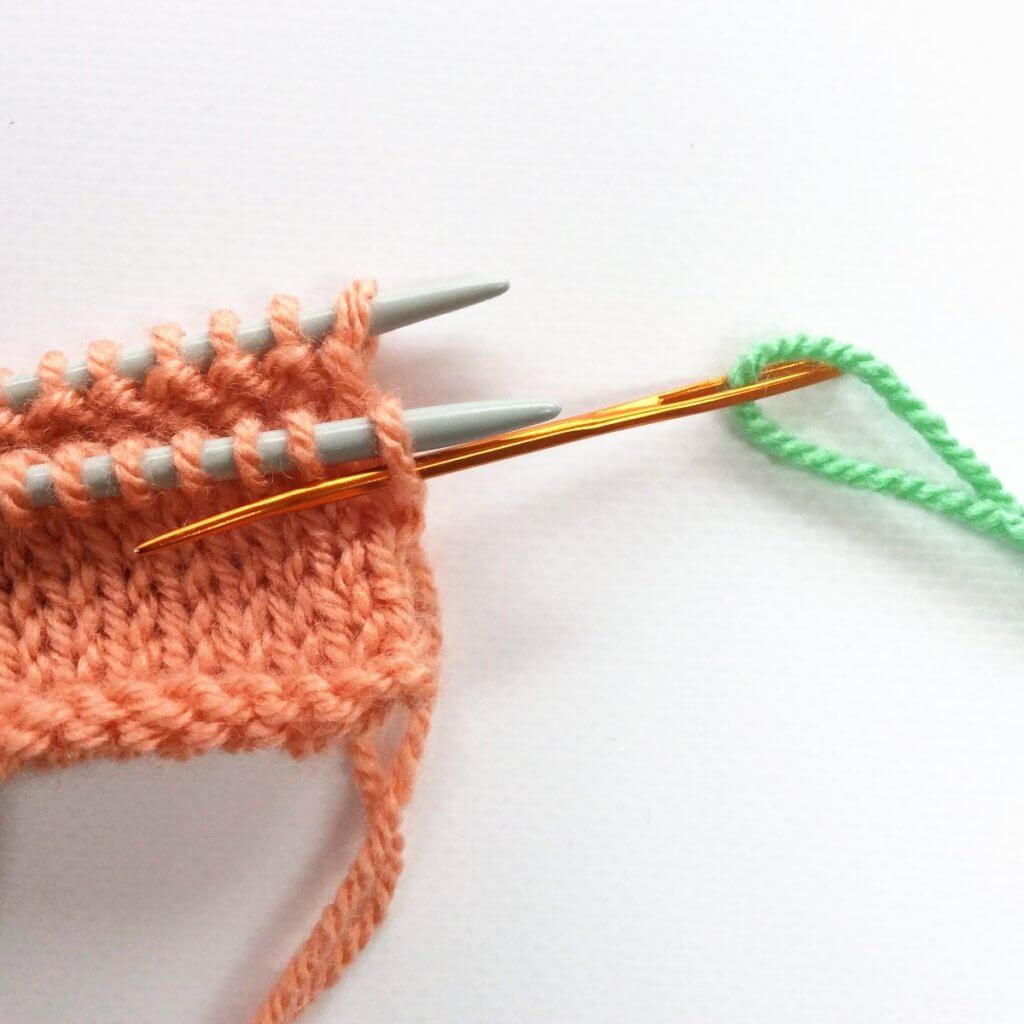
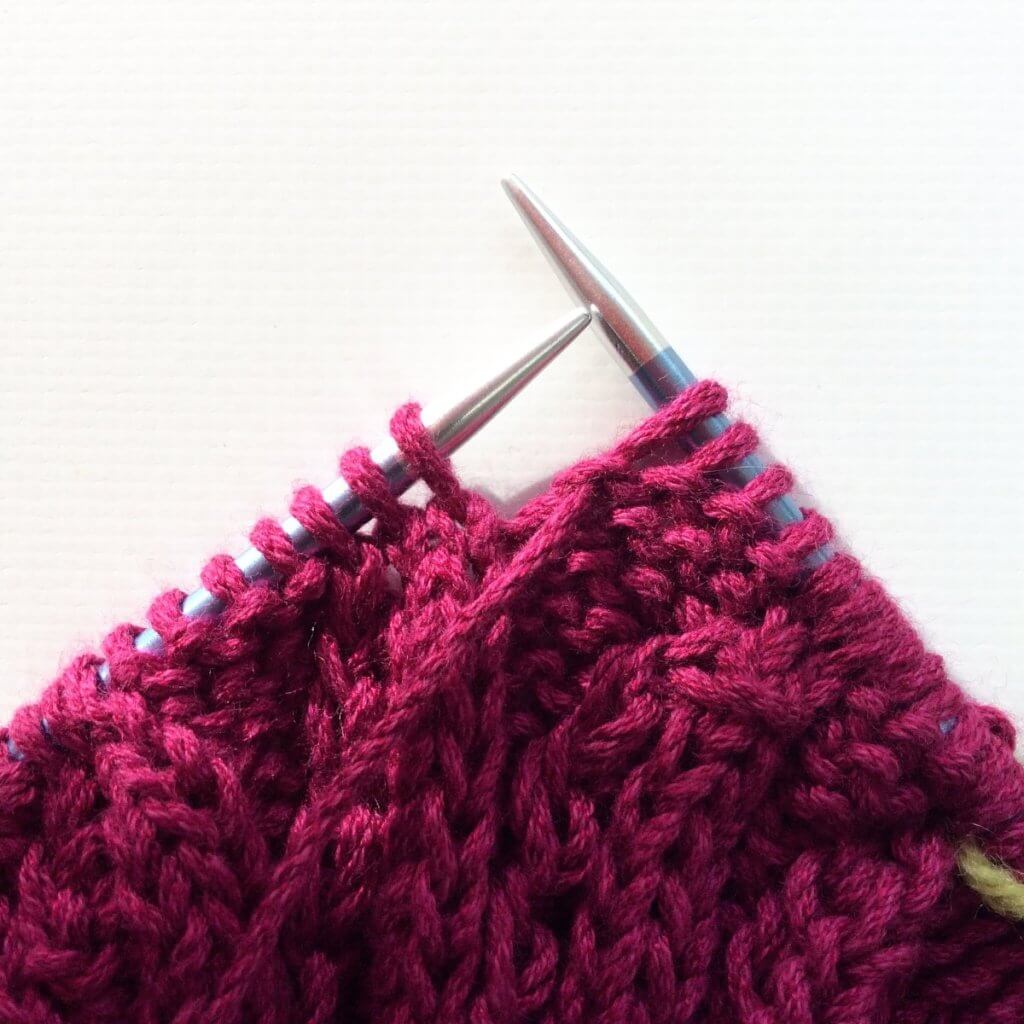
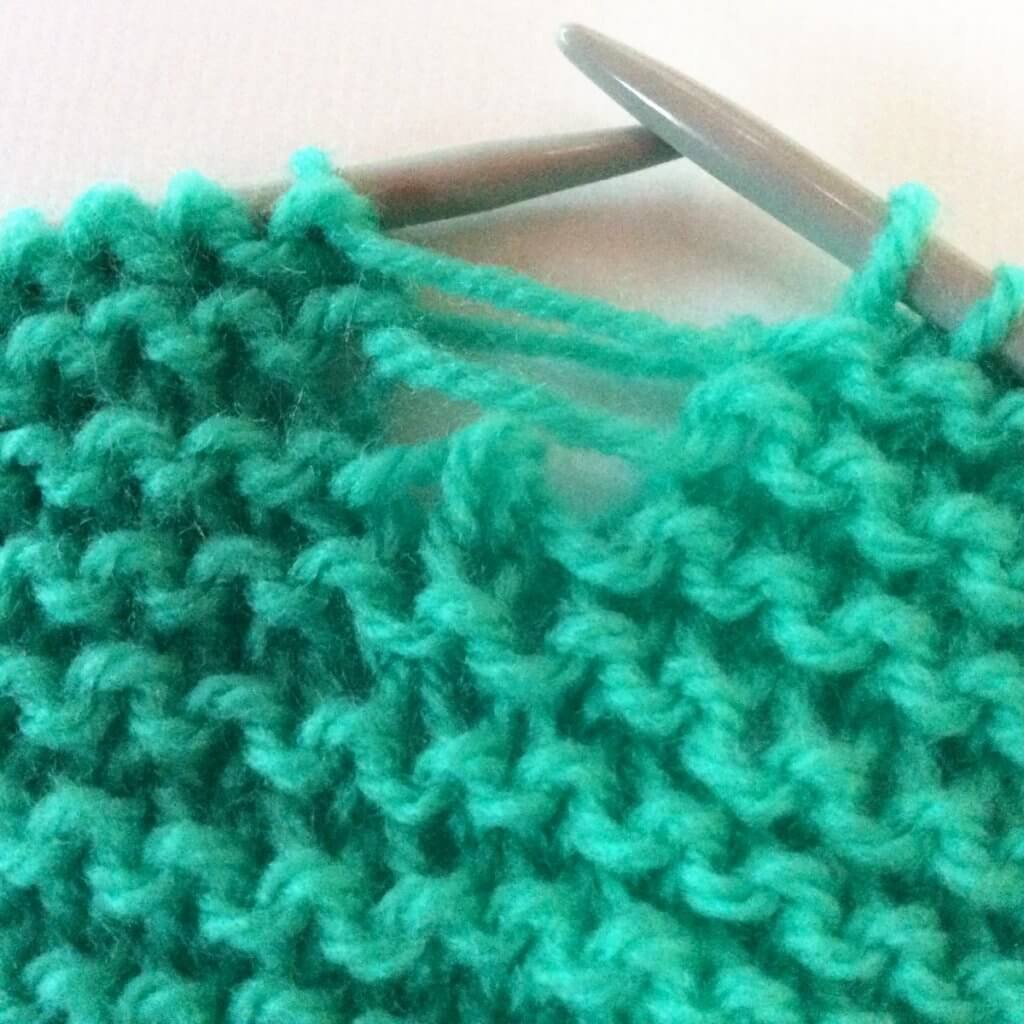
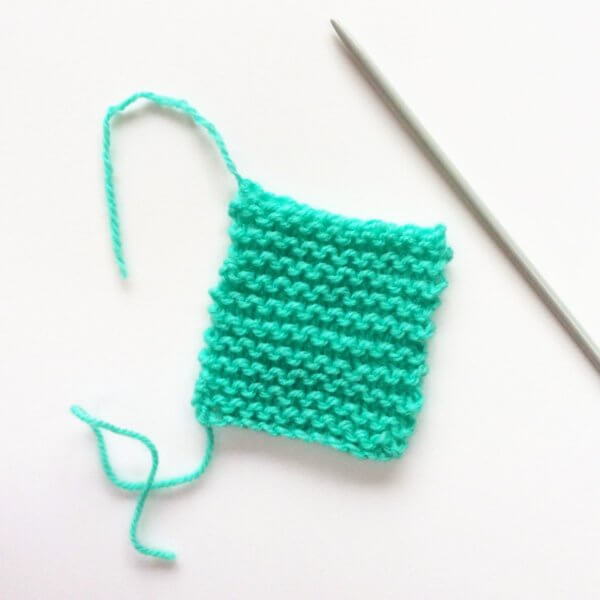
1. We start with a piece of knitting worked completely in garter stitch, turned sideways with the RS facing. And yes, plain garter stitch does not really have a RS and WS, but it can have when there is patterning on a background of garter stitch.

Tutorial pick-up & knit from garter stitch - by La Visch Designs

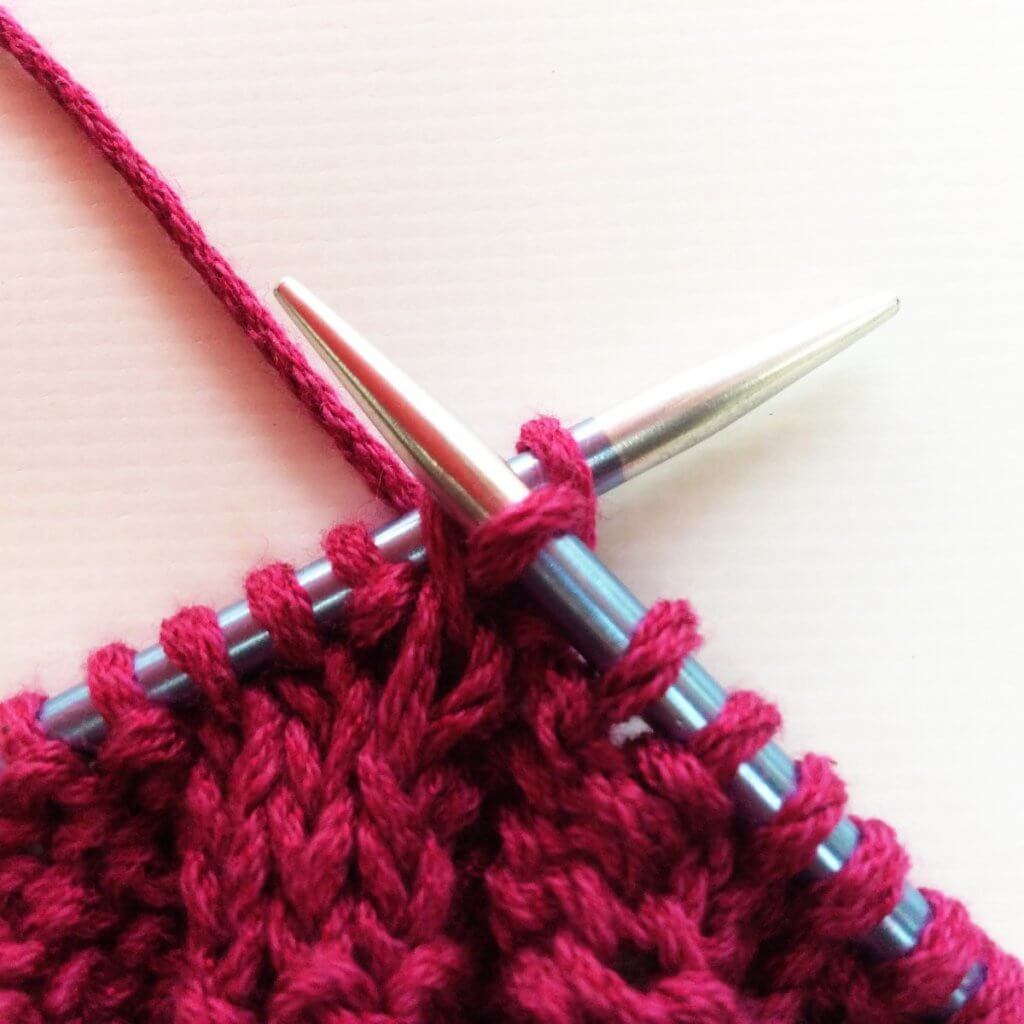
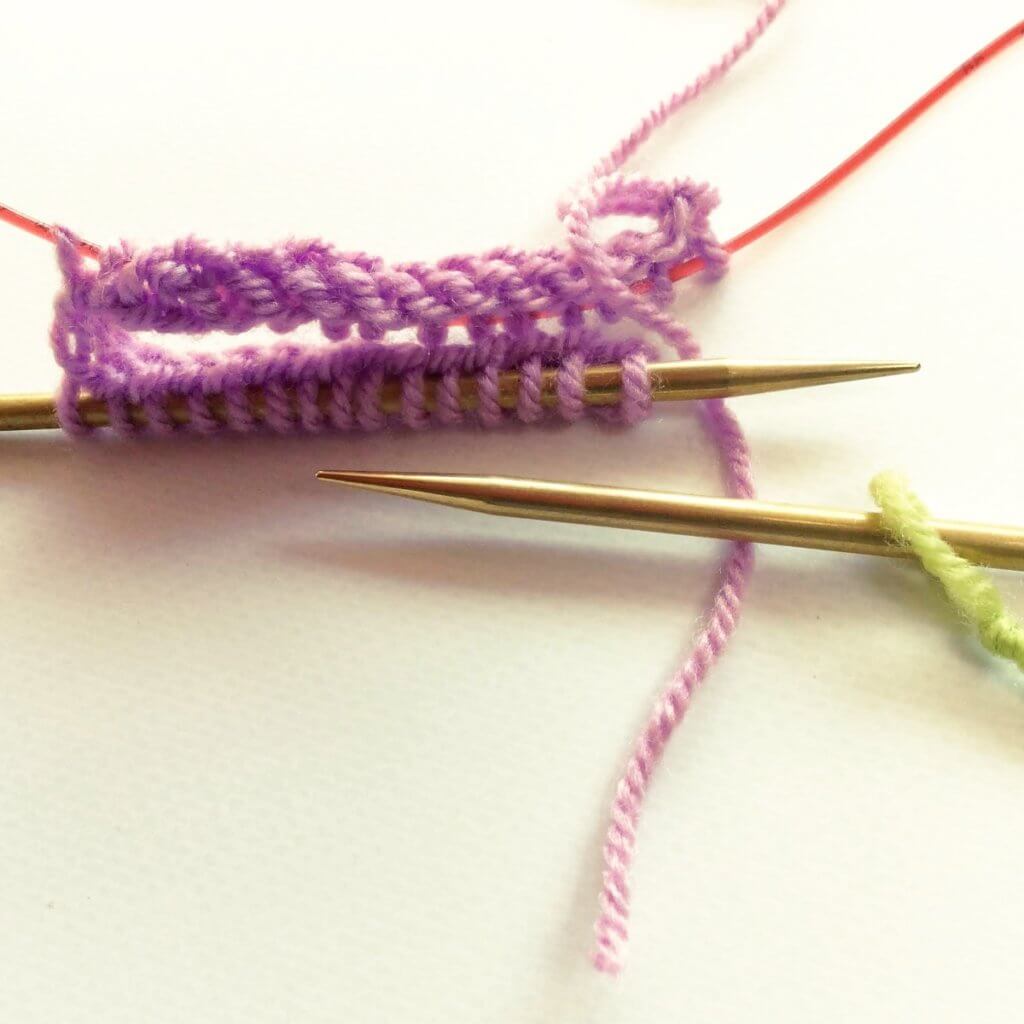
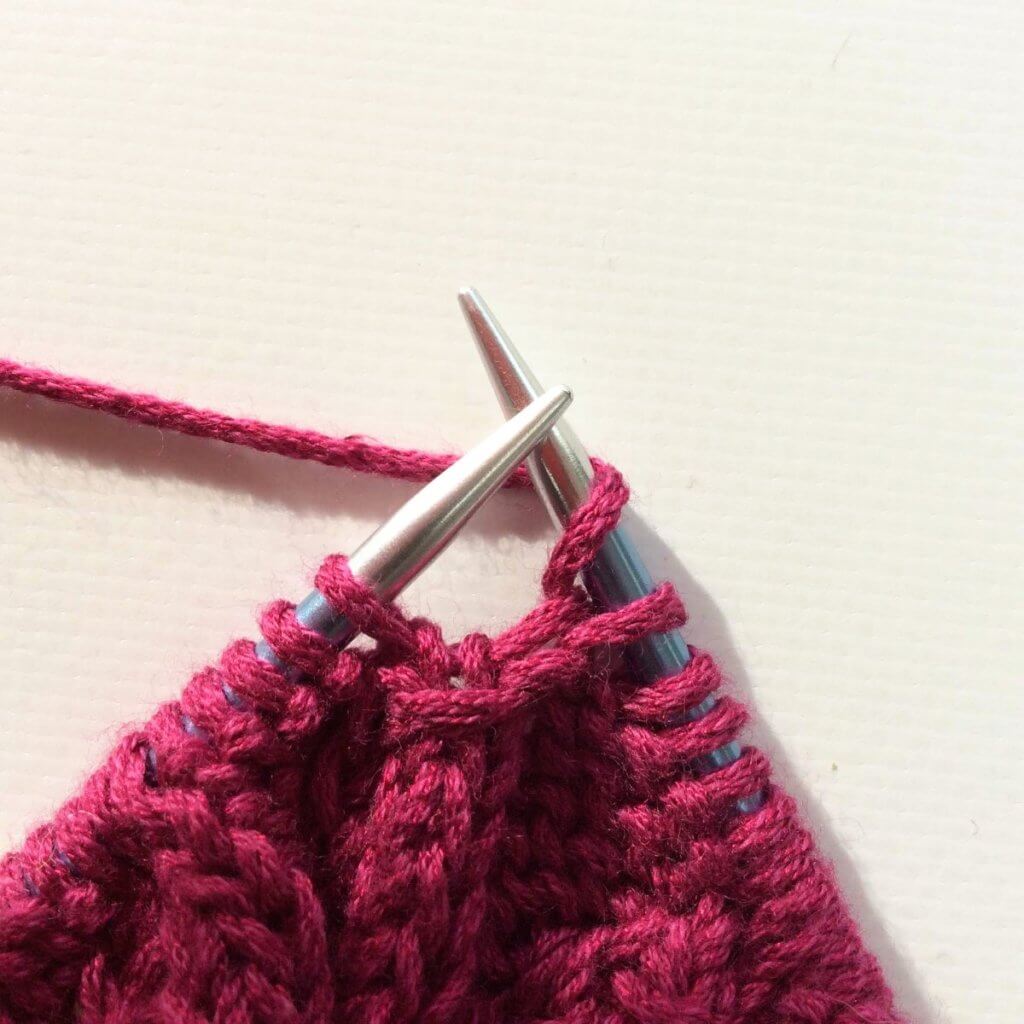
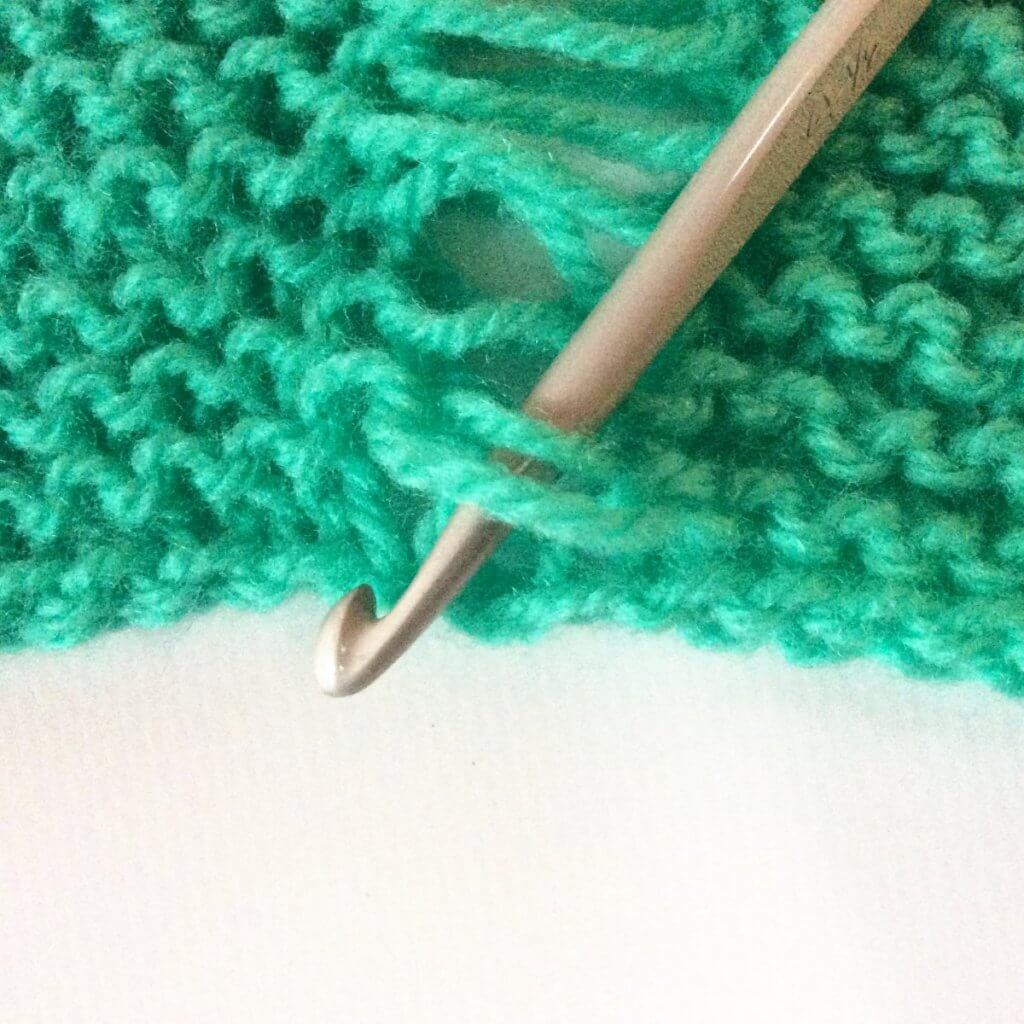
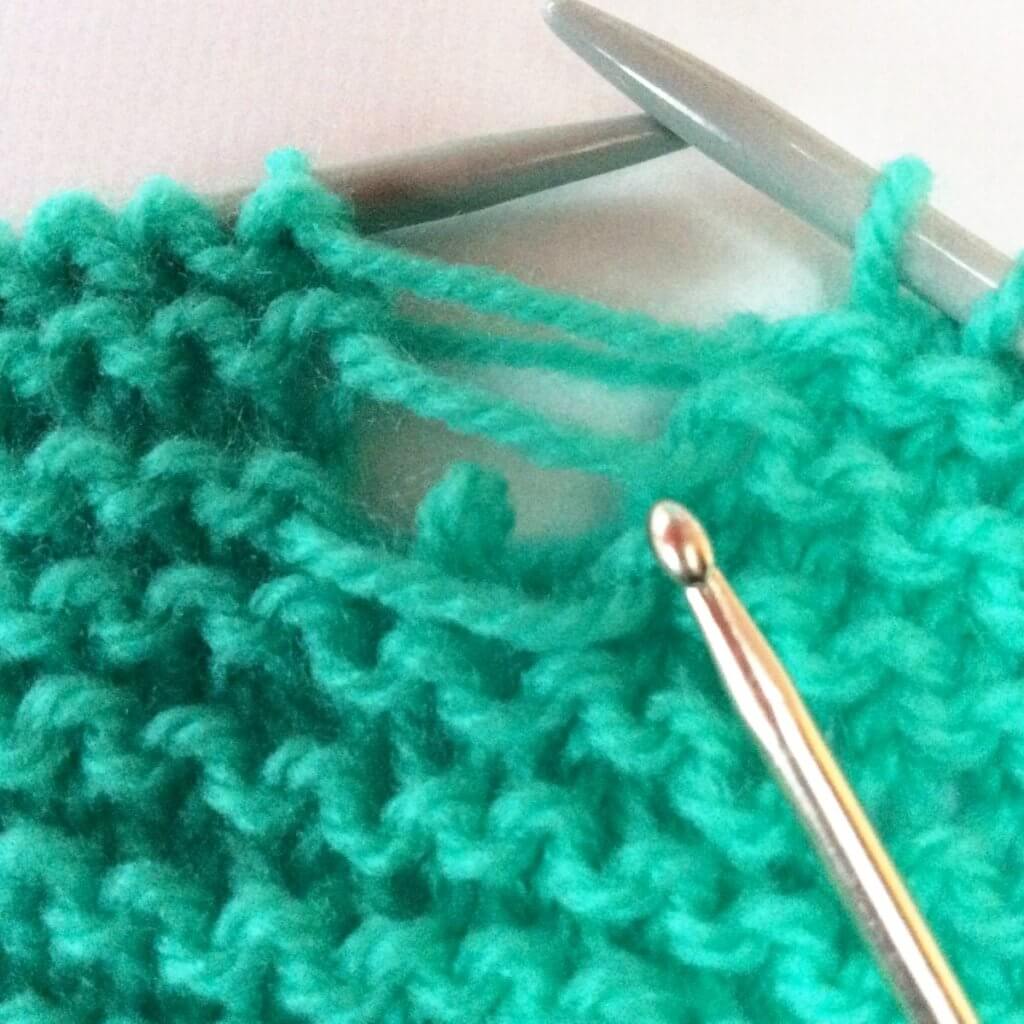
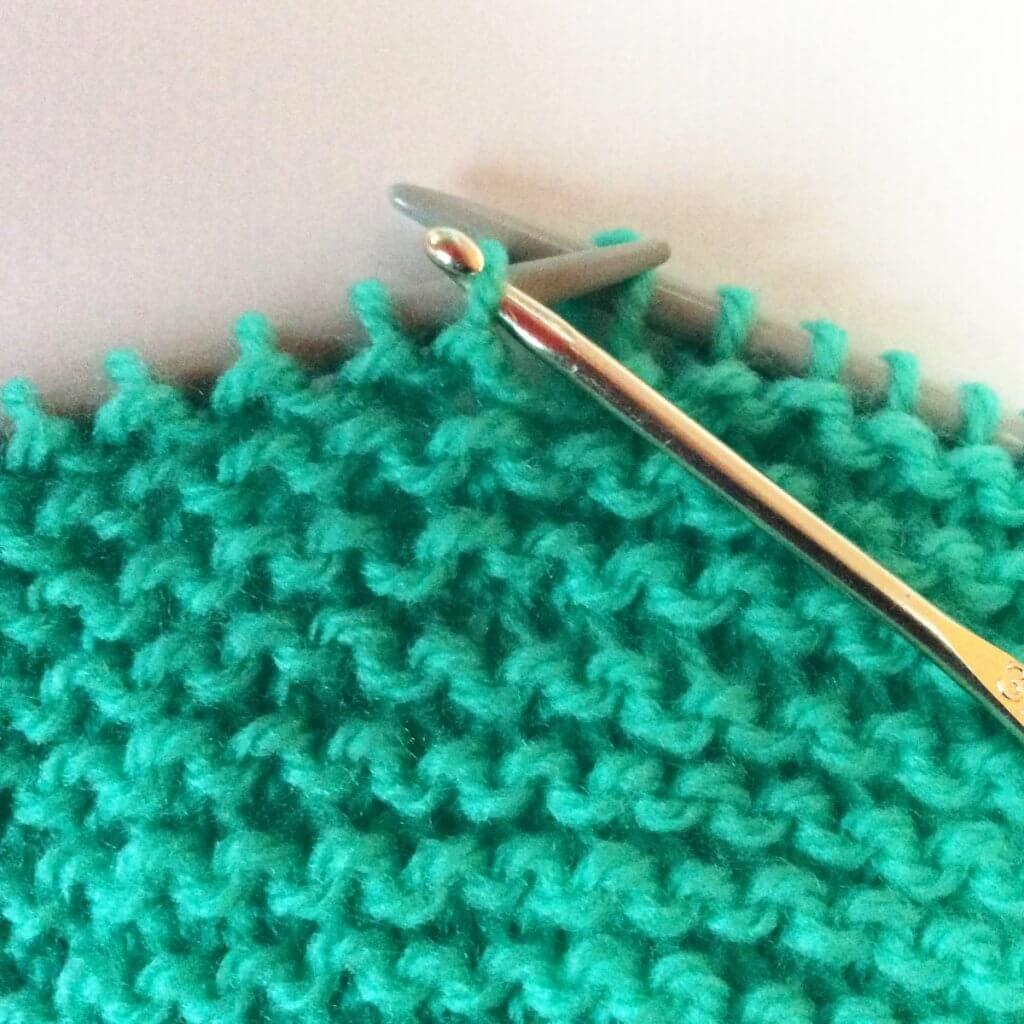
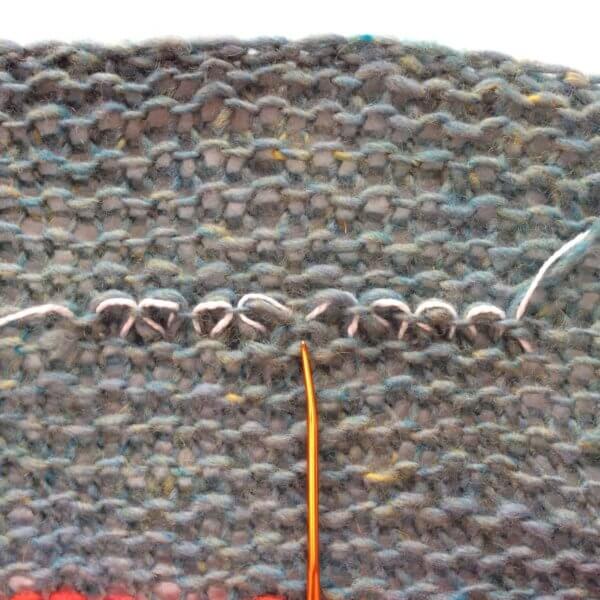
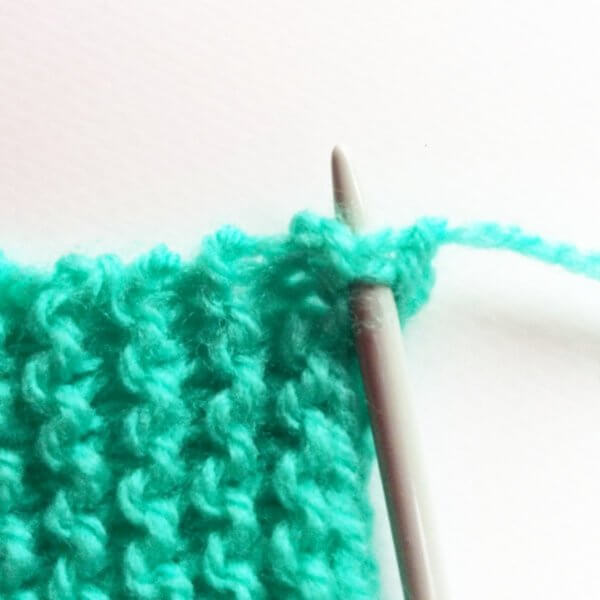
2. Insert your needle (or crochet hook if you find that easier!), from front to back, between the garter stitch ridges, between the last and second-to-last columns of stitches. In other words: in between the ridges and 1 stitch in from the edge.

Tutorial pick-up & knit from garter stitch - by La Visch Designs

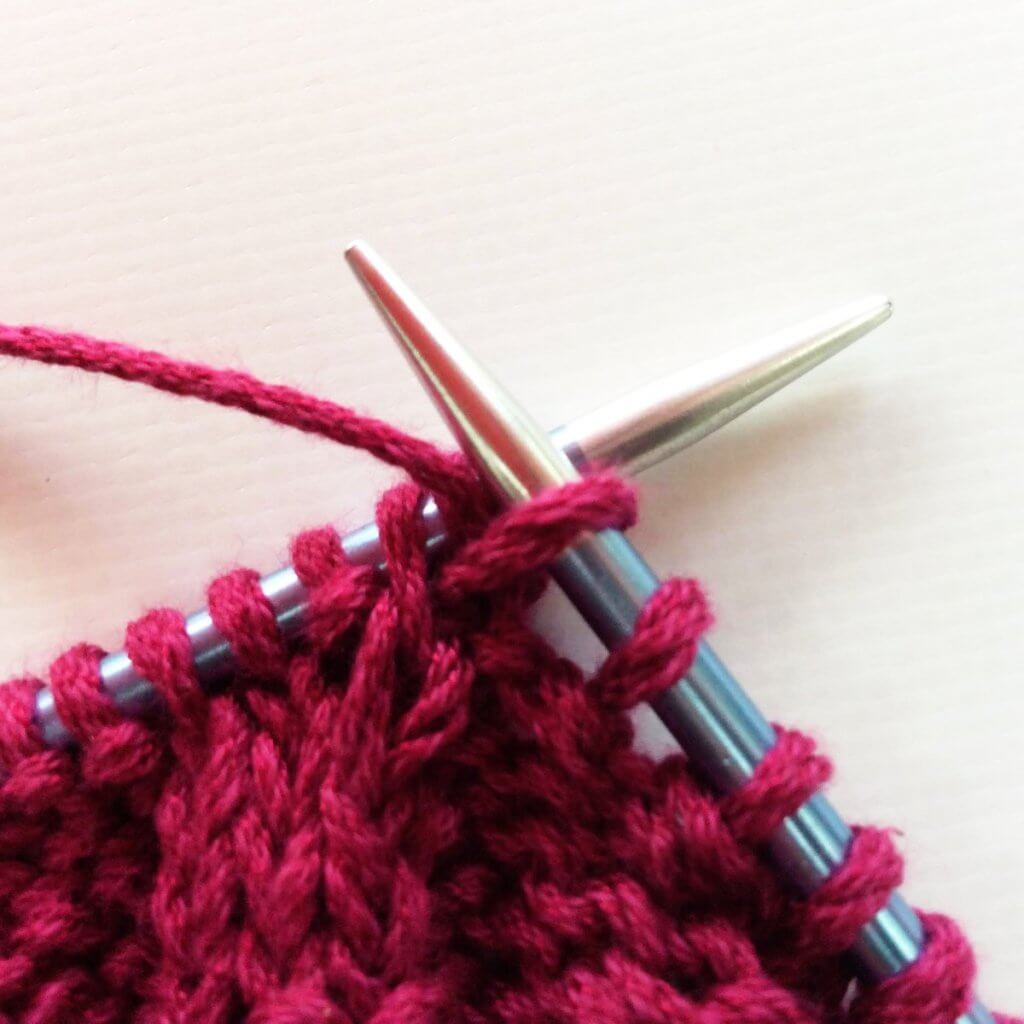
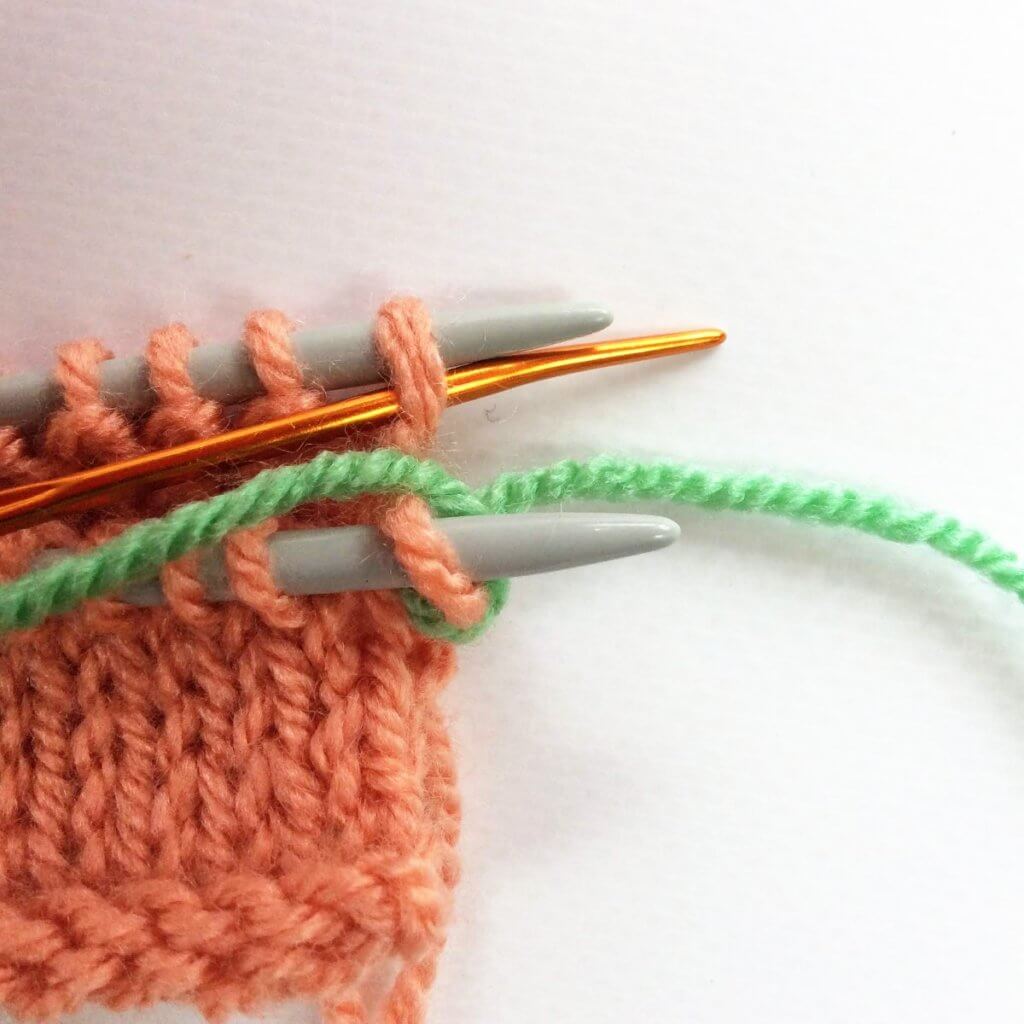
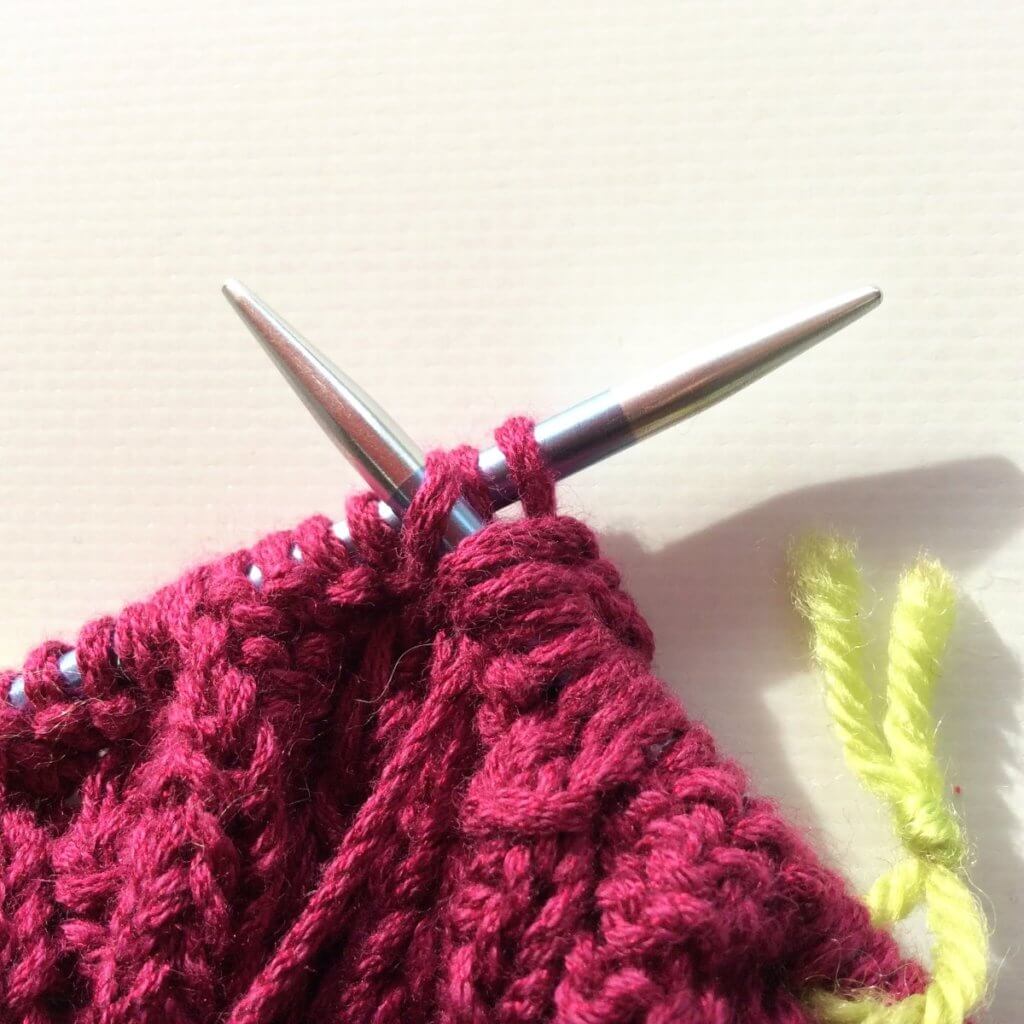
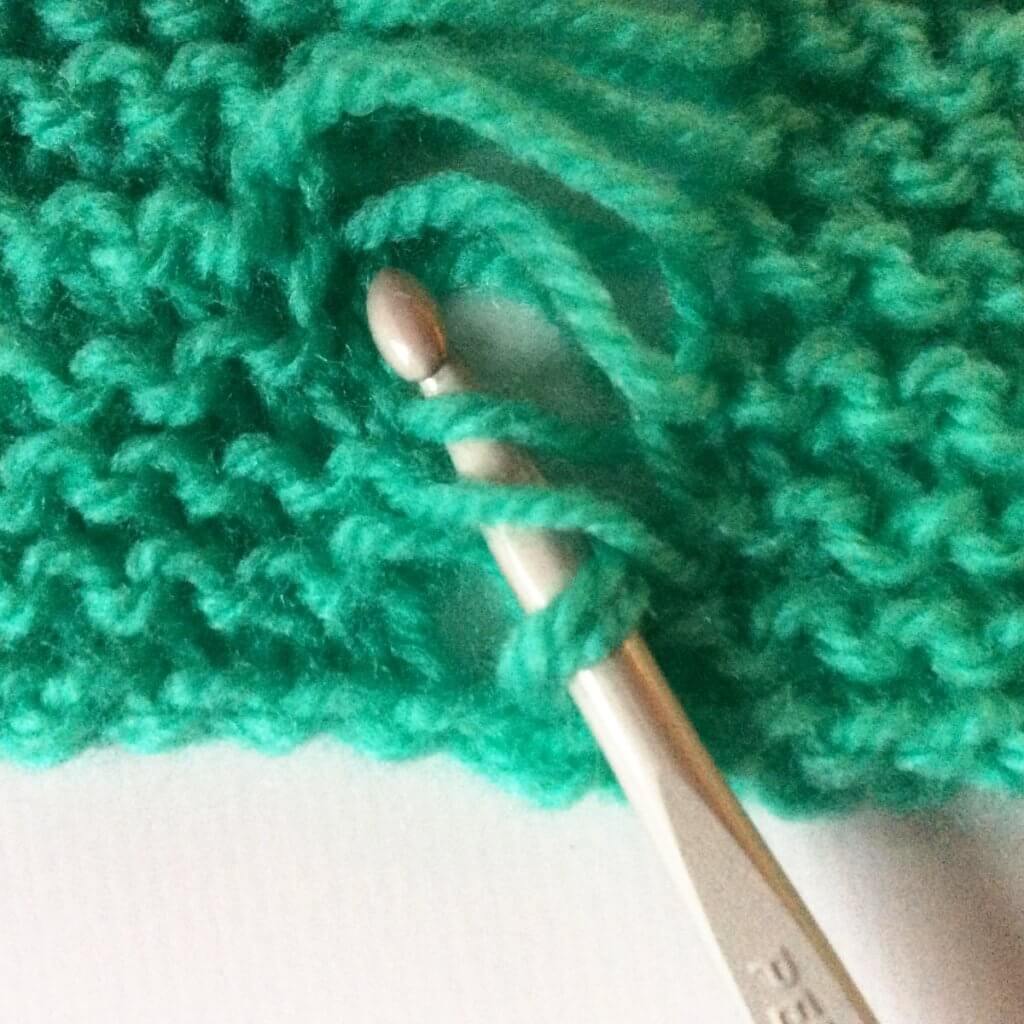
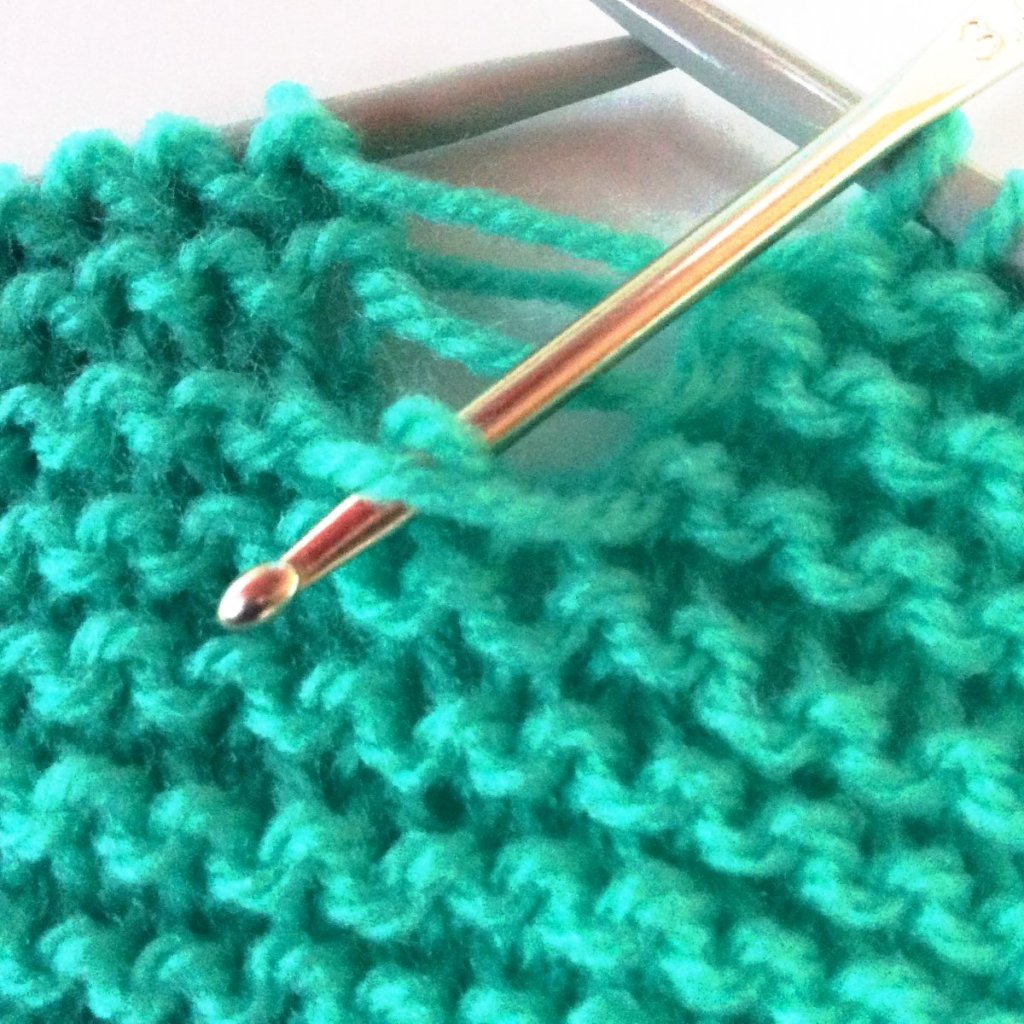
3. Wrap your yarn around the needle or crochet hook…

Tutorial pick-up & knit from garter stitch - by La Visch Designs

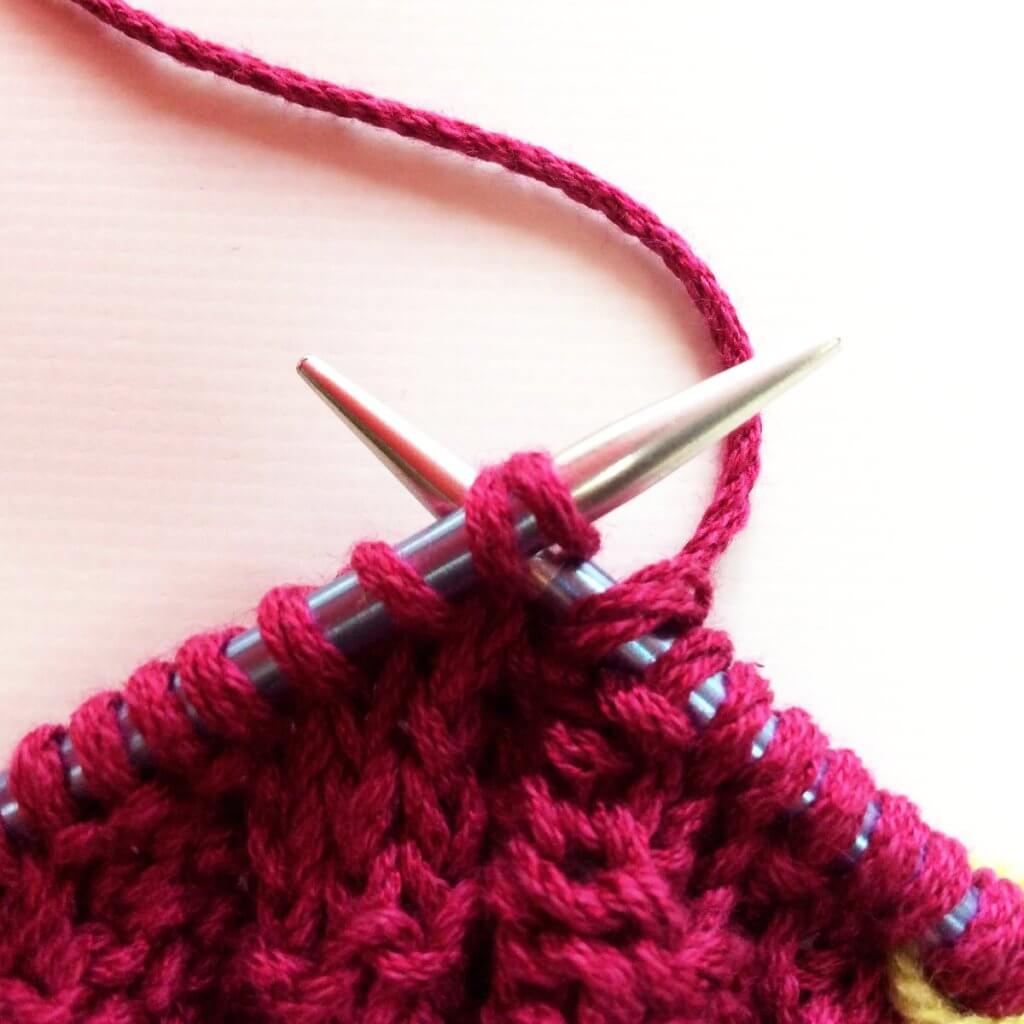
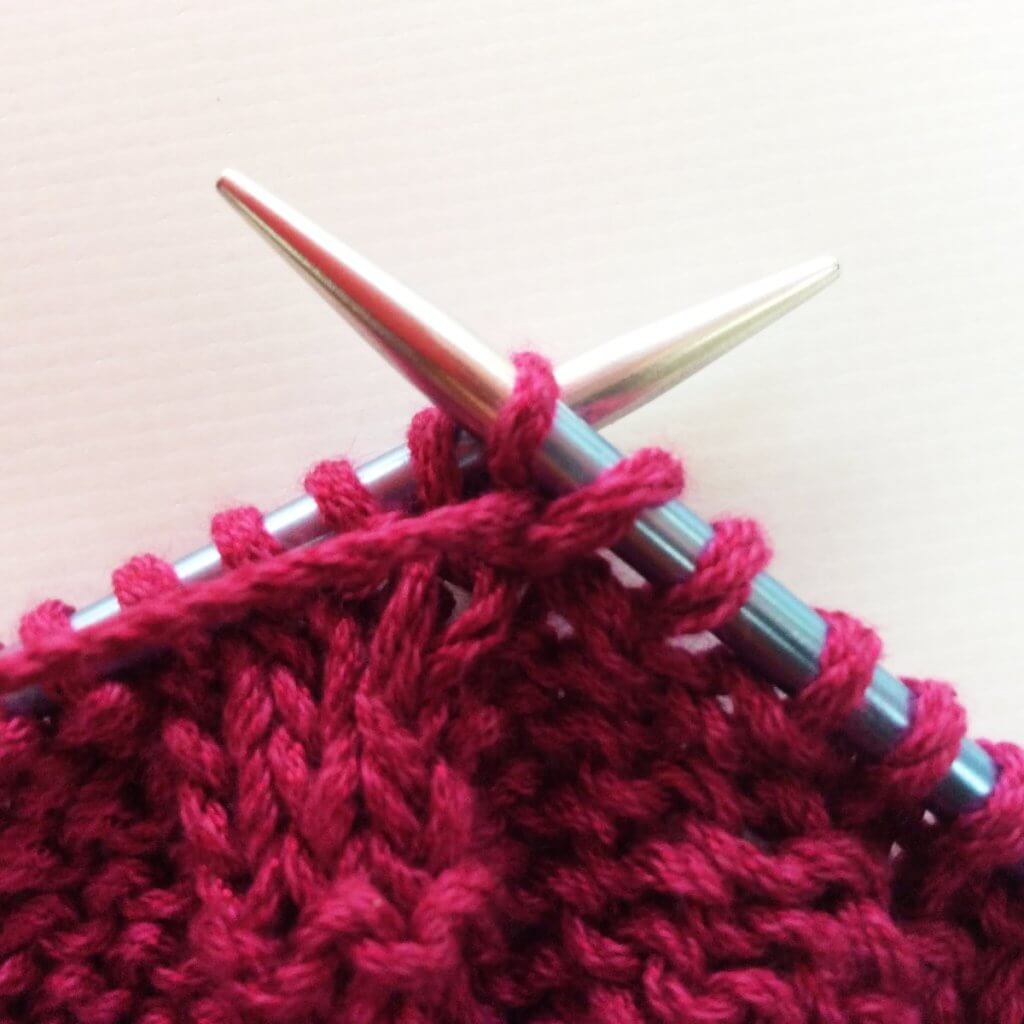
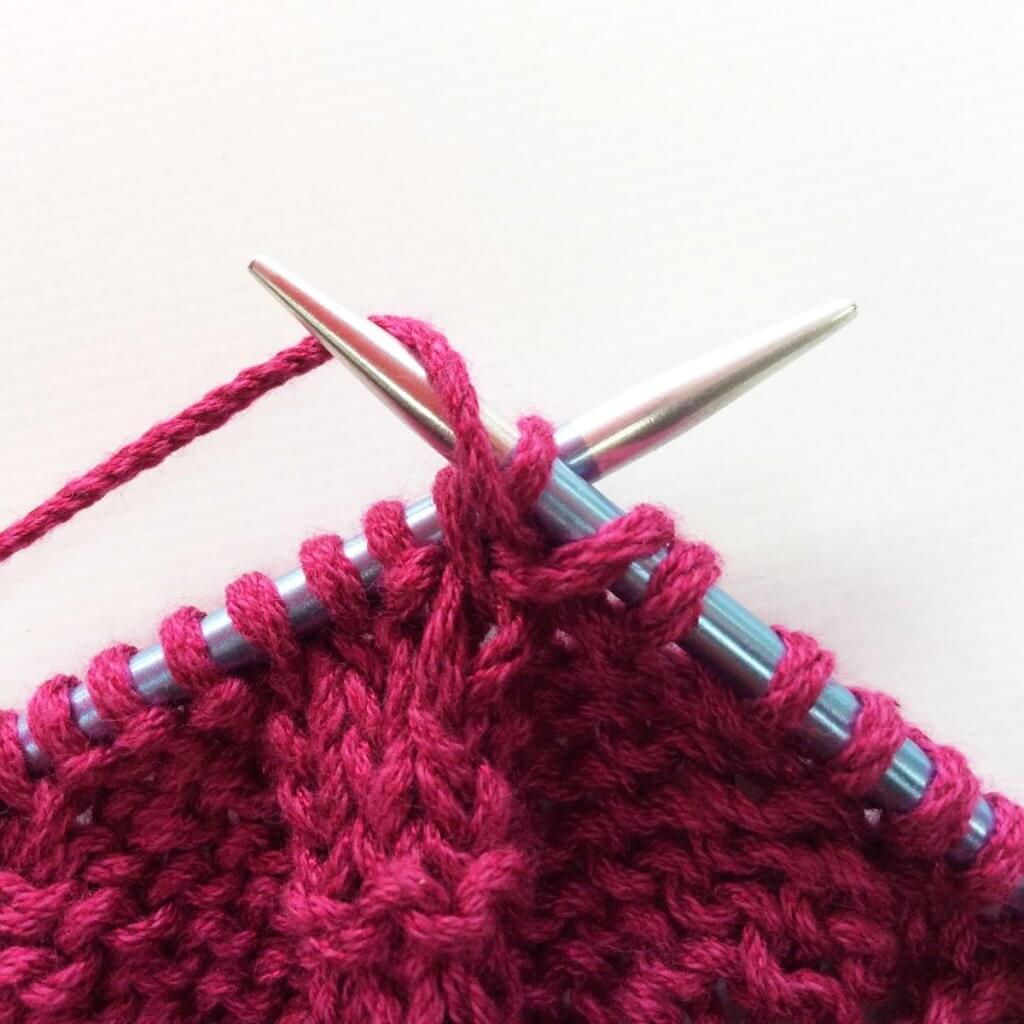
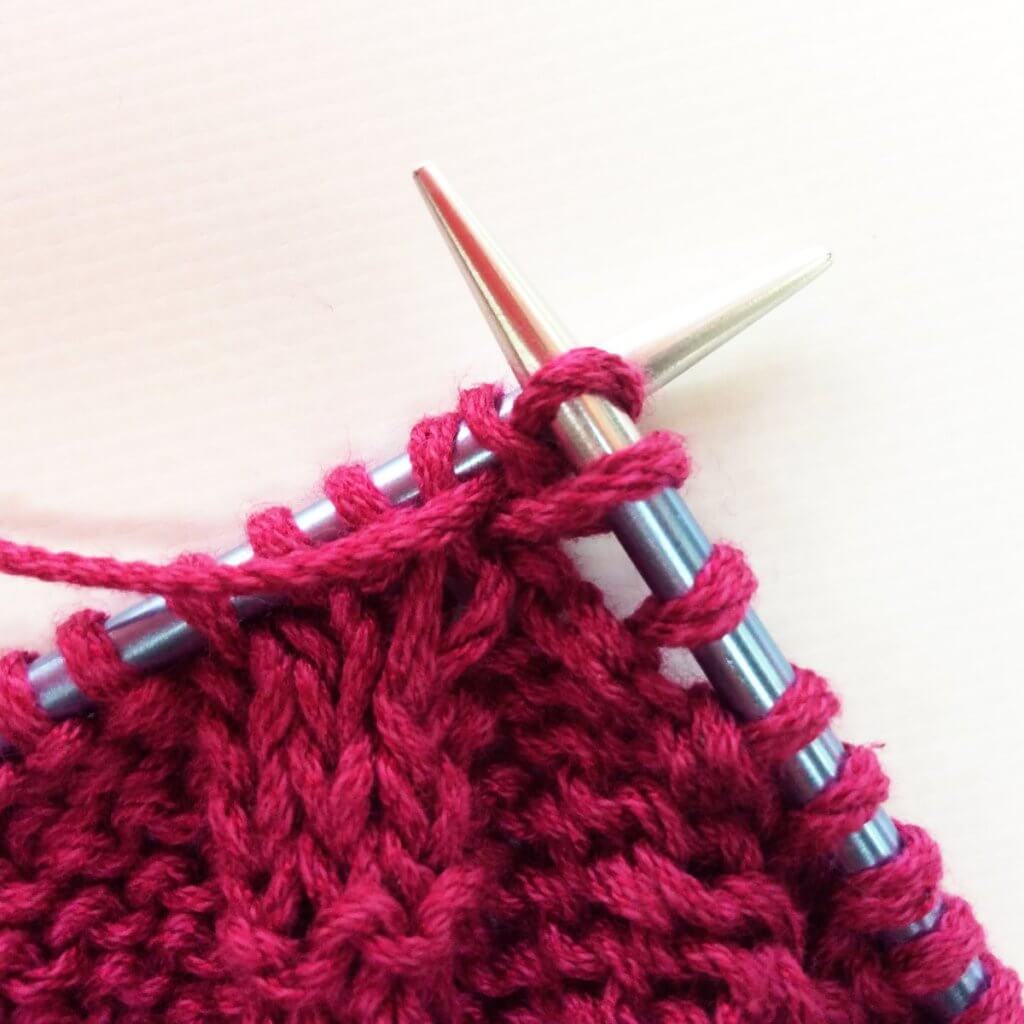
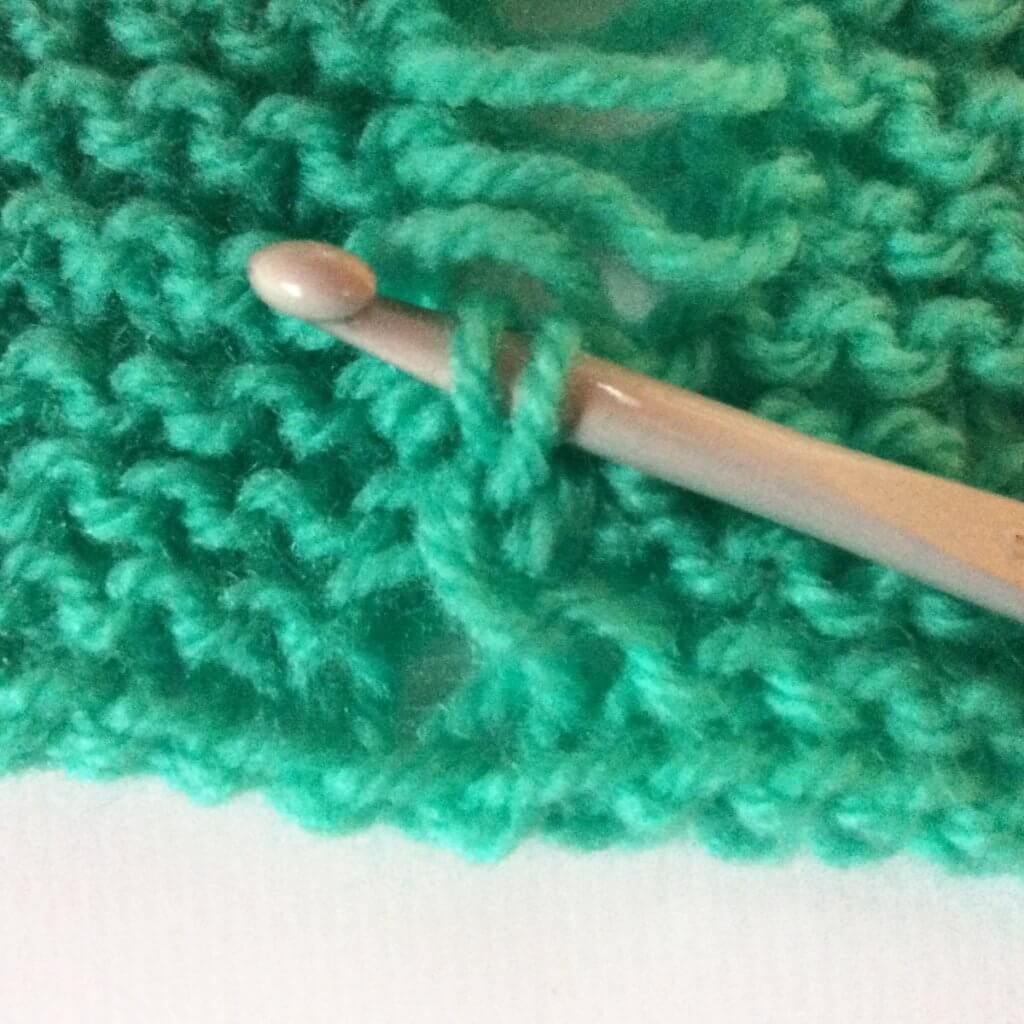
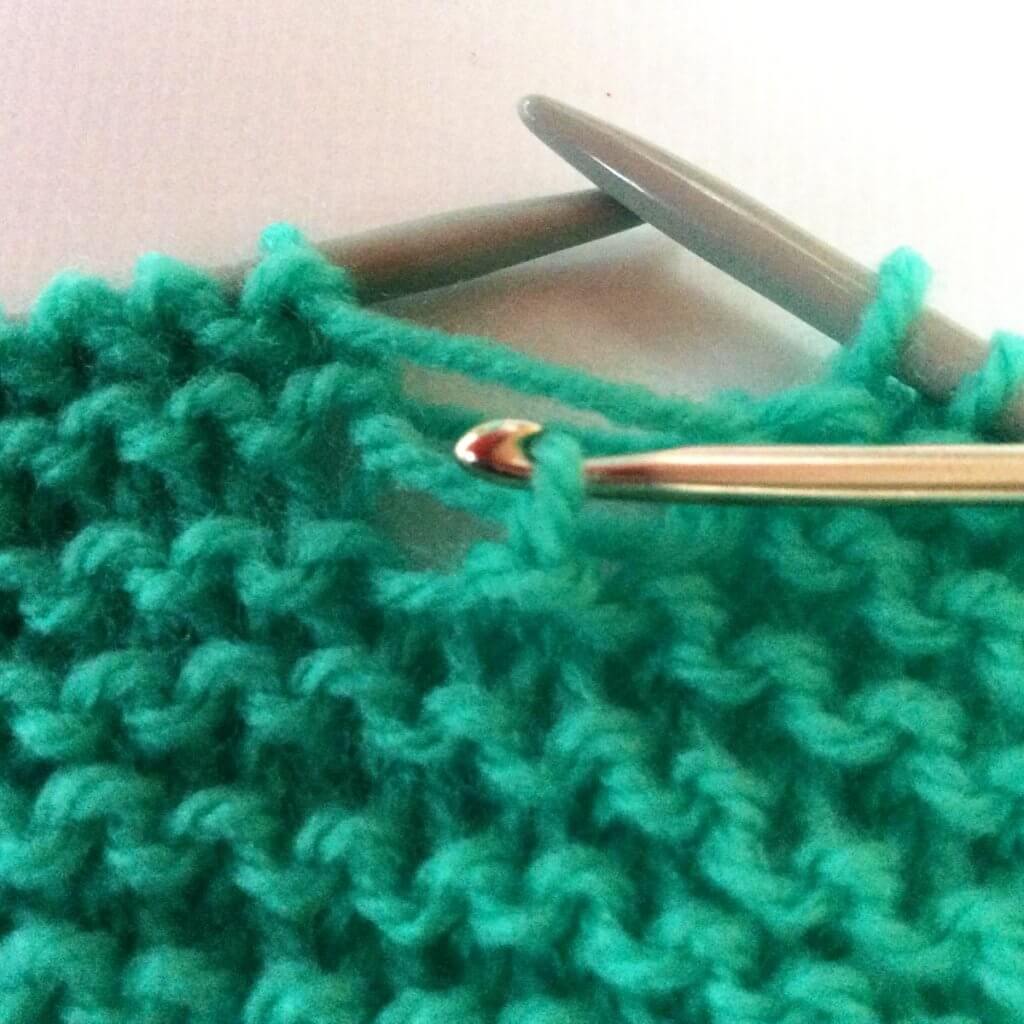
4. …and pull the loop of yarn through the work and place it on the needle.

Tutorial pick-up & knit from garter stitch - by La Visch Designs

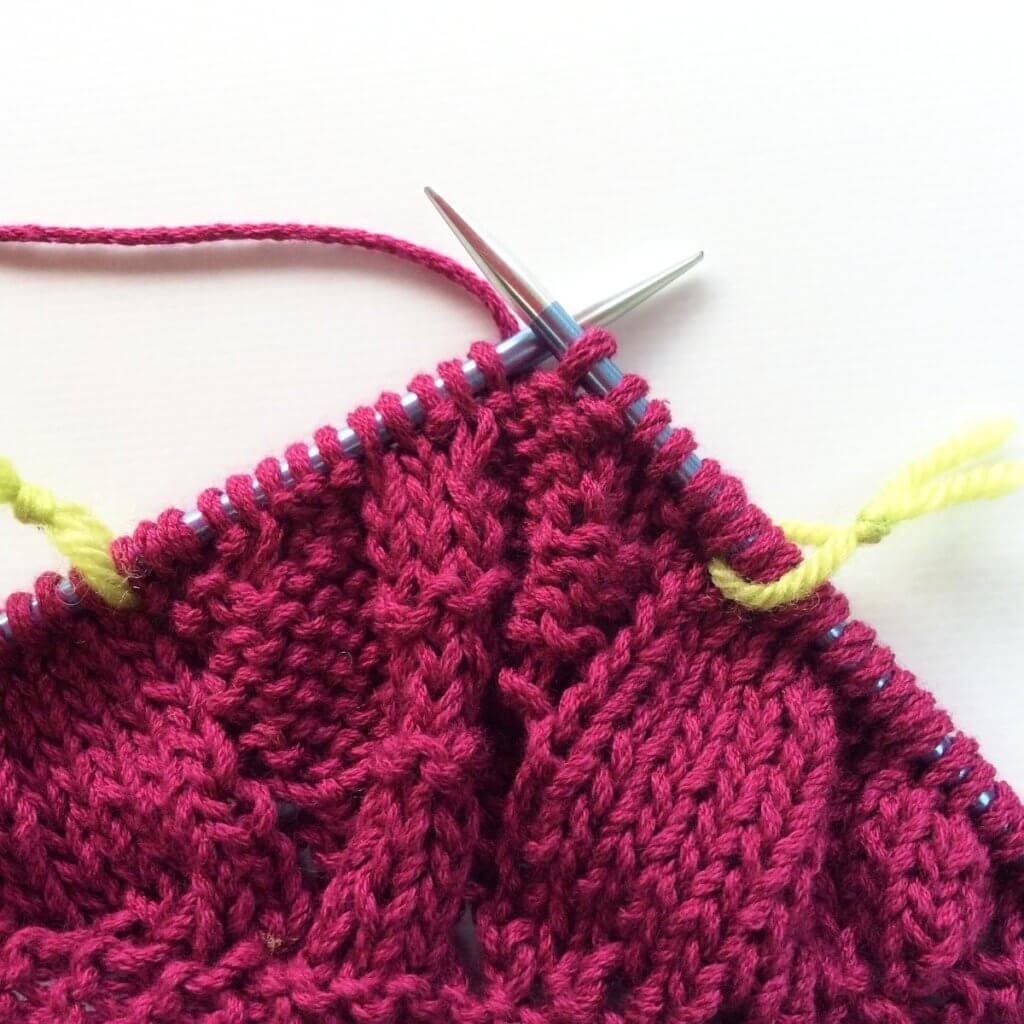
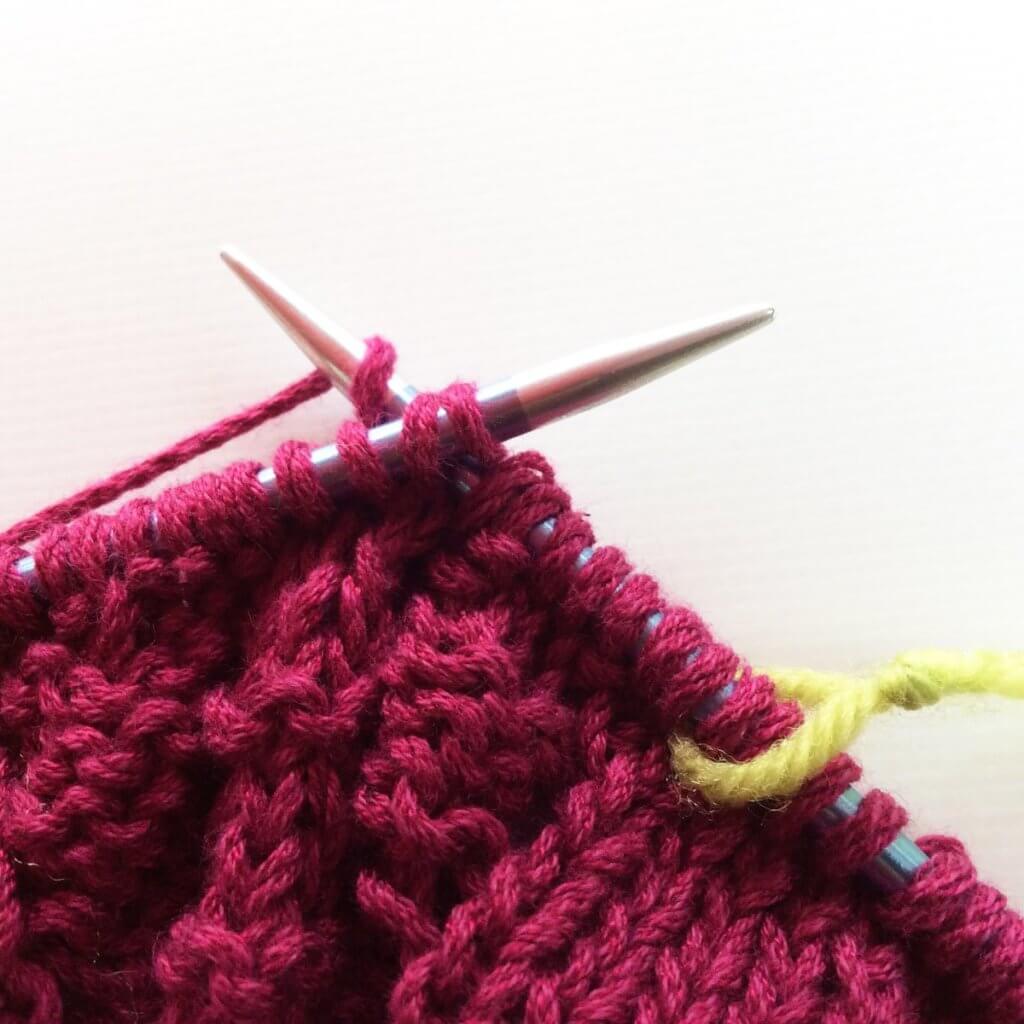
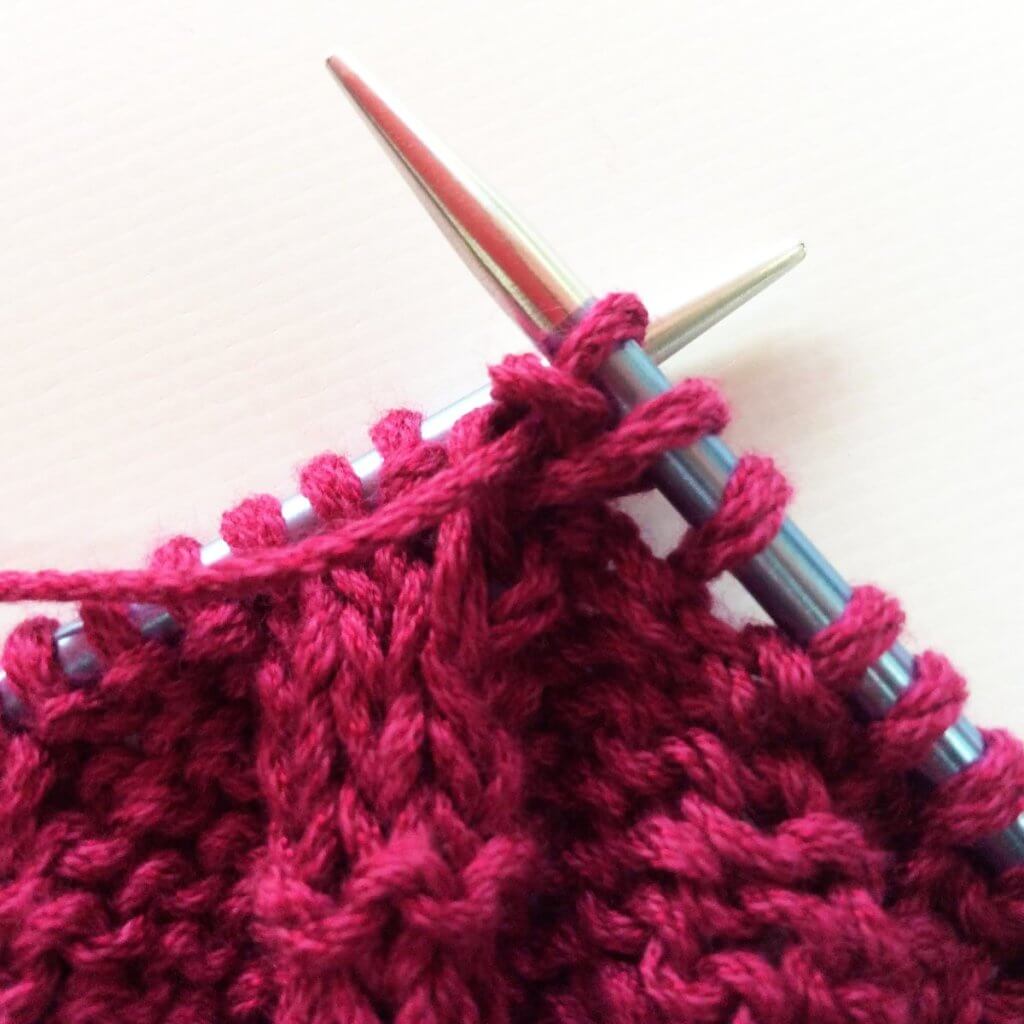
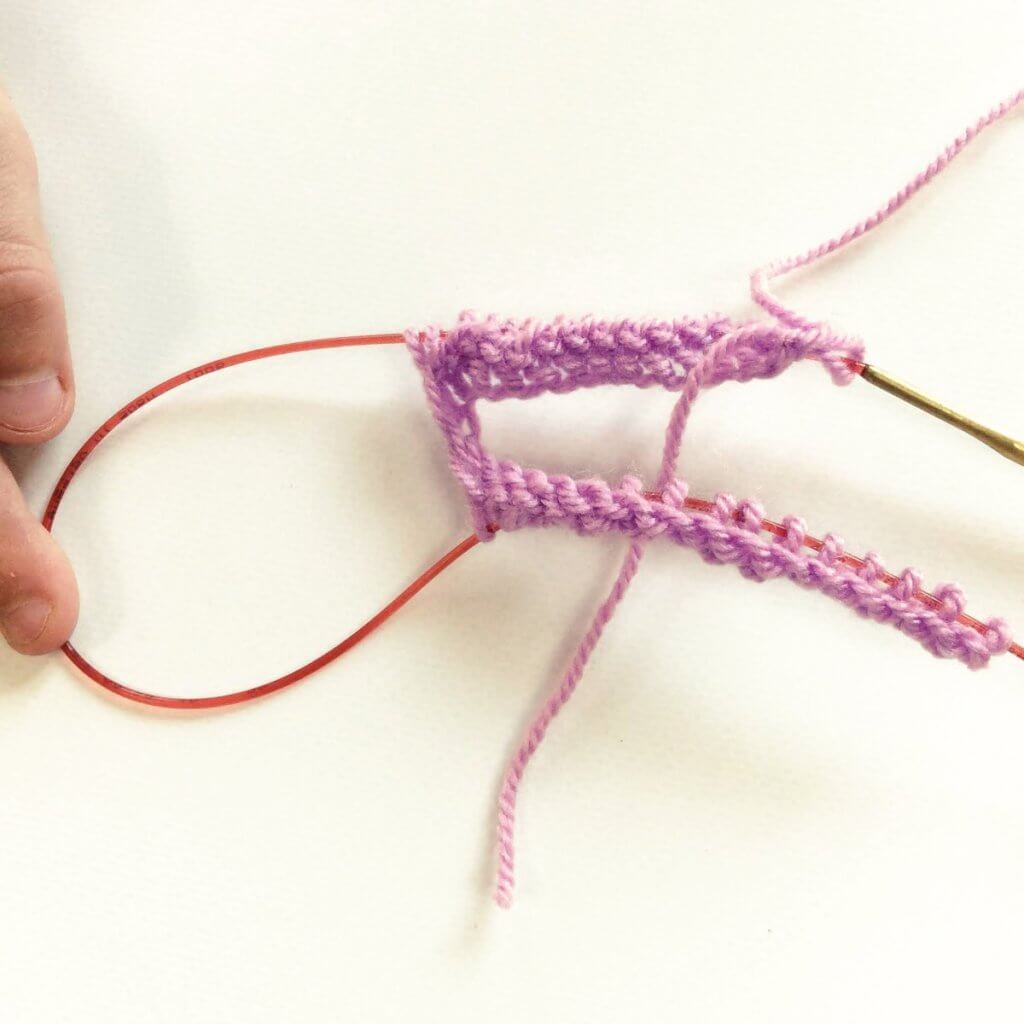
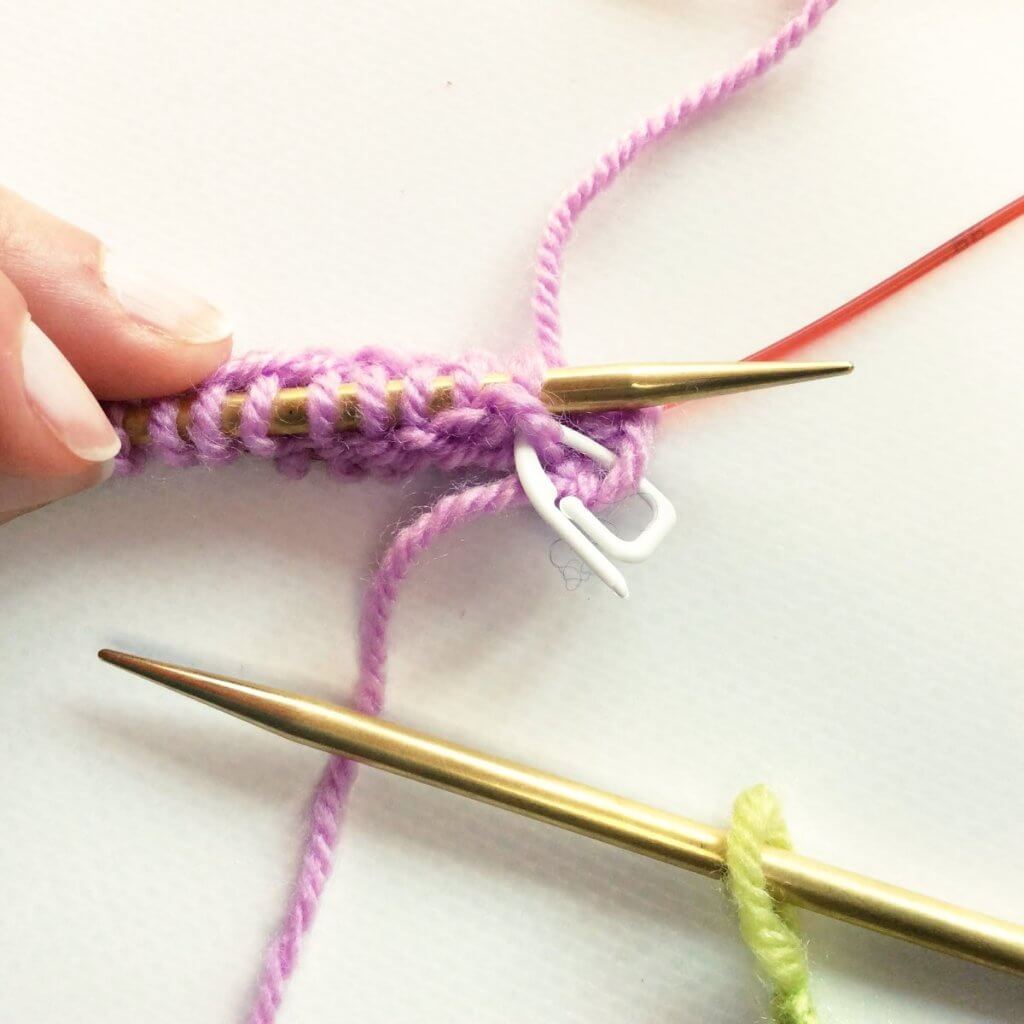
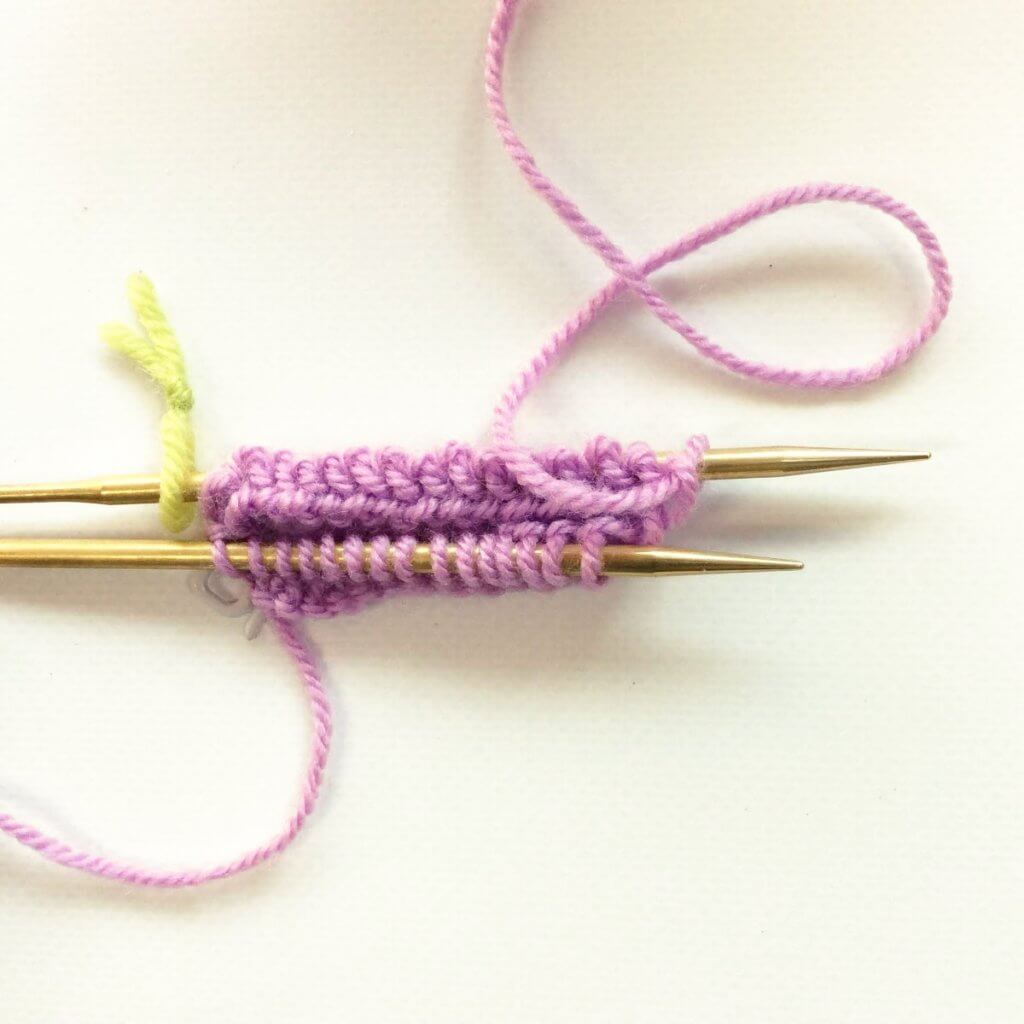
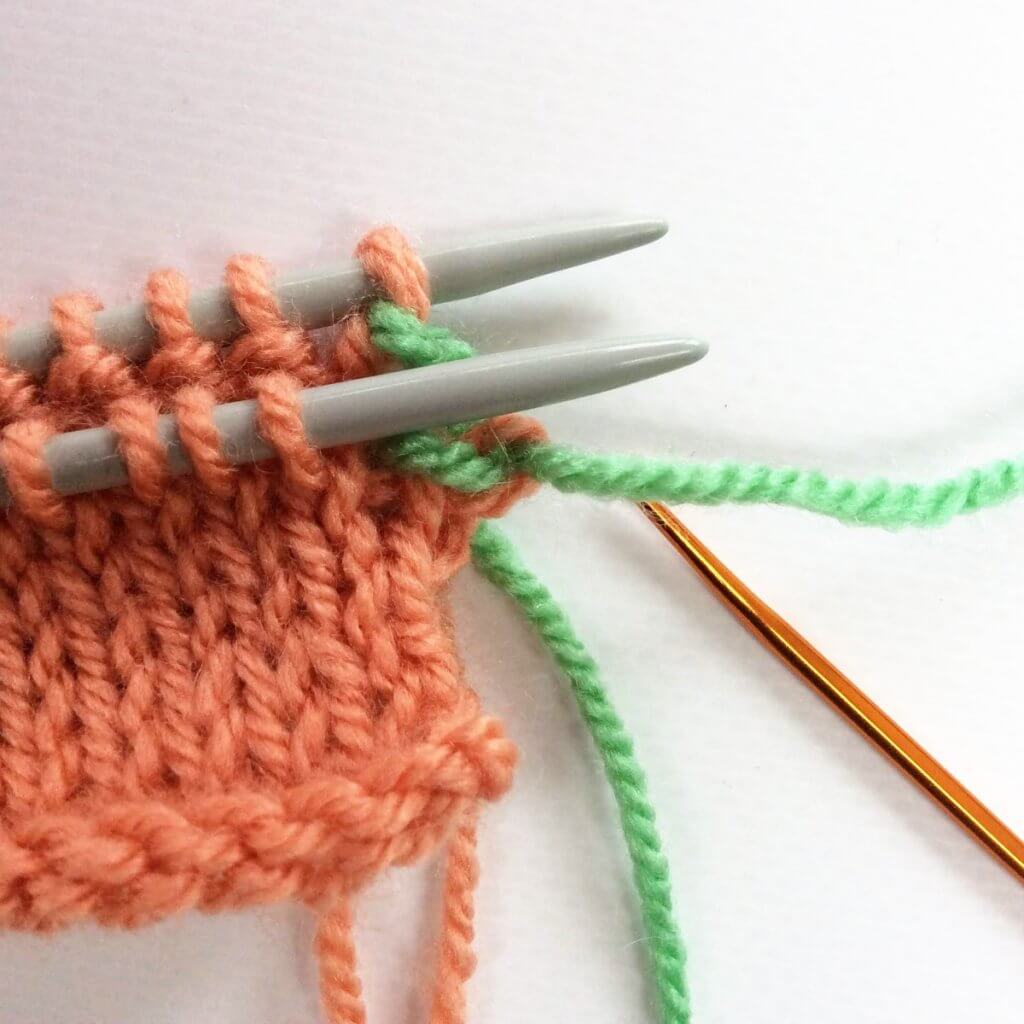
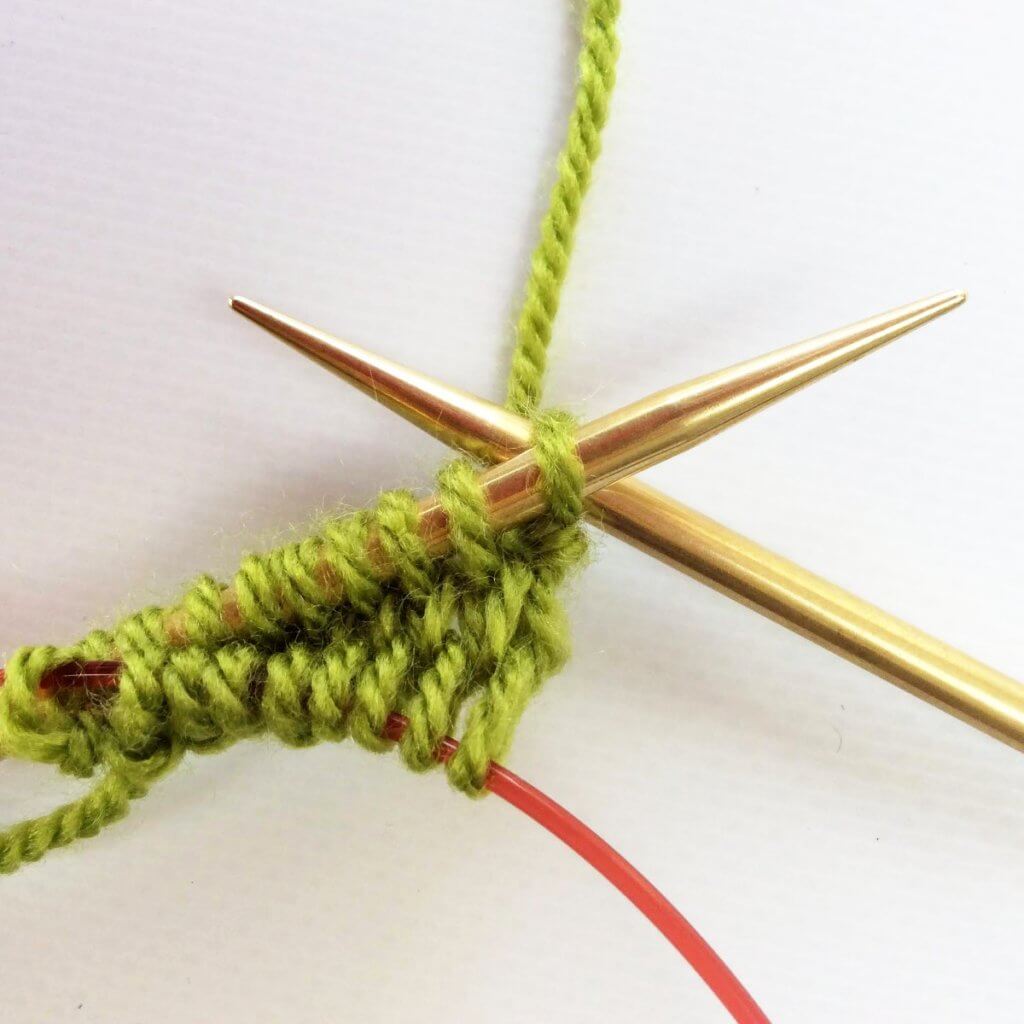
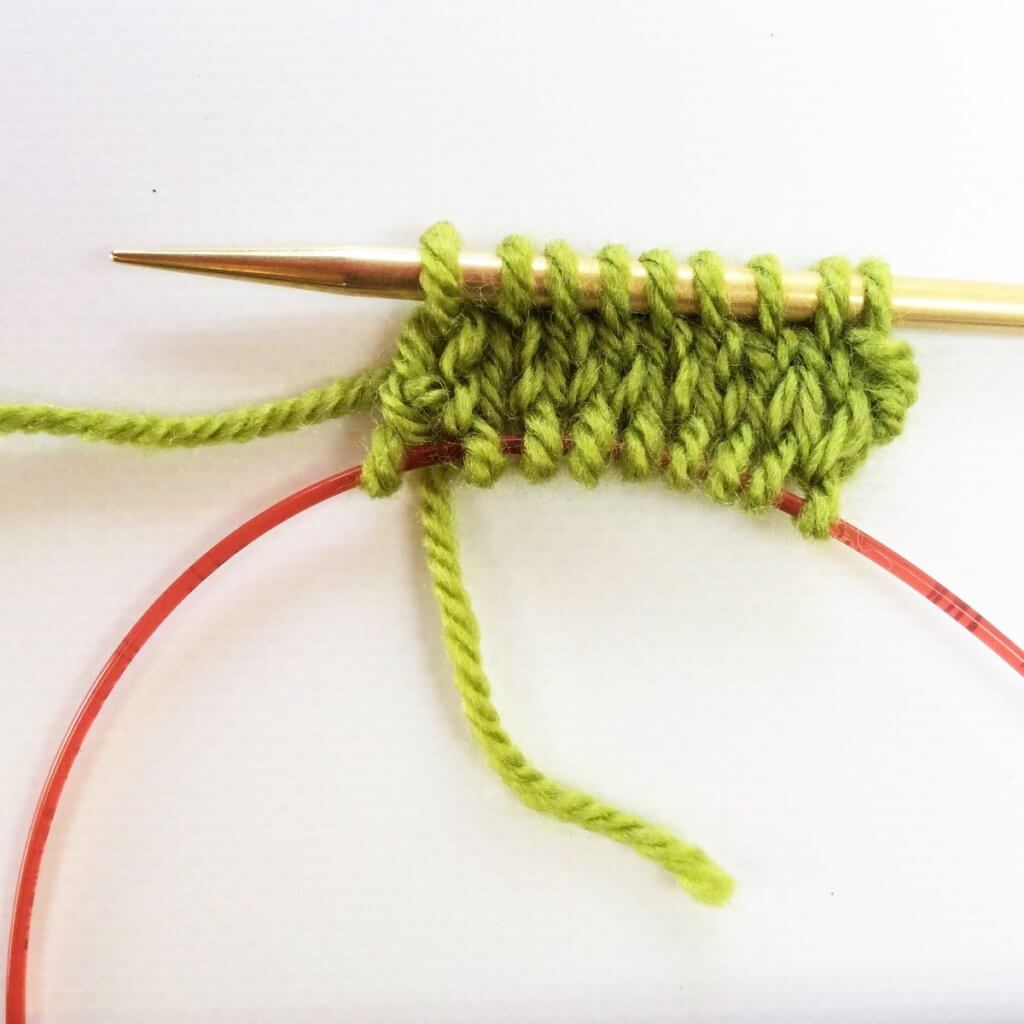
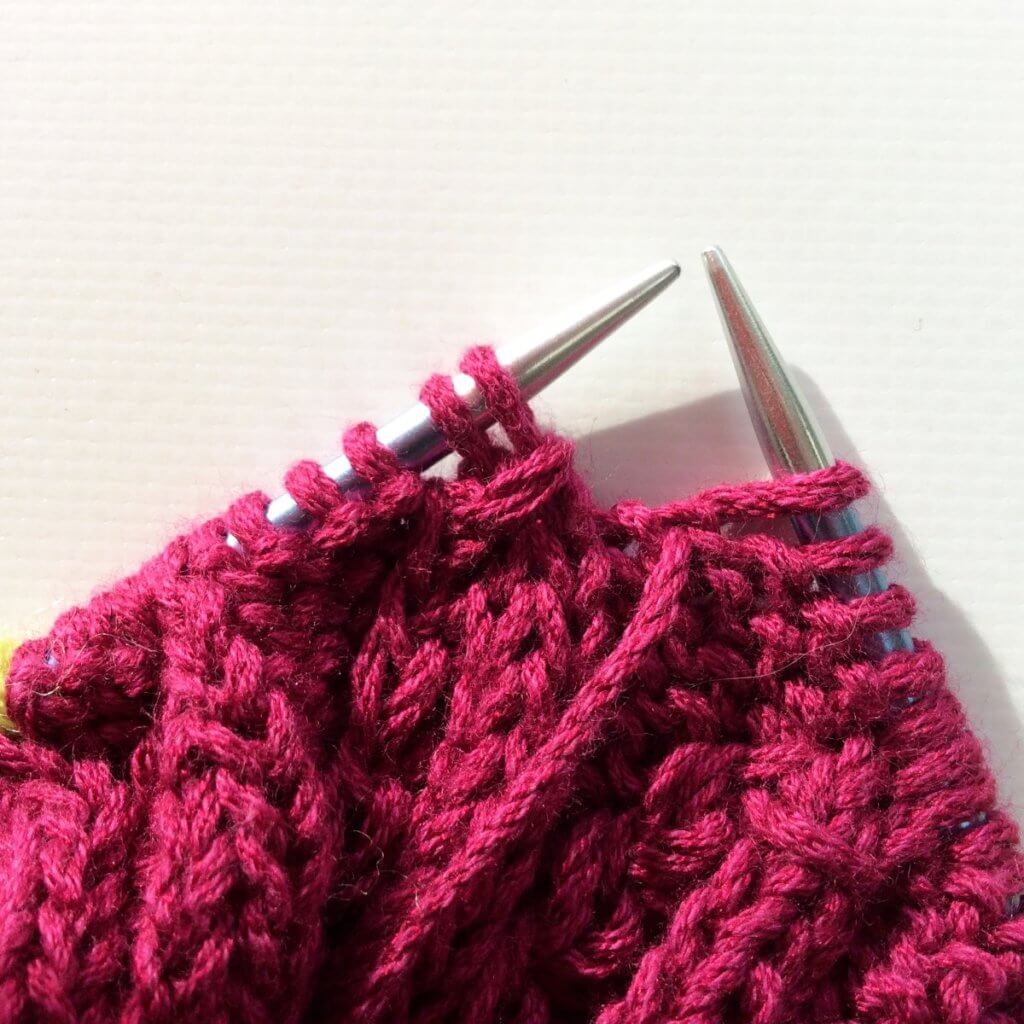
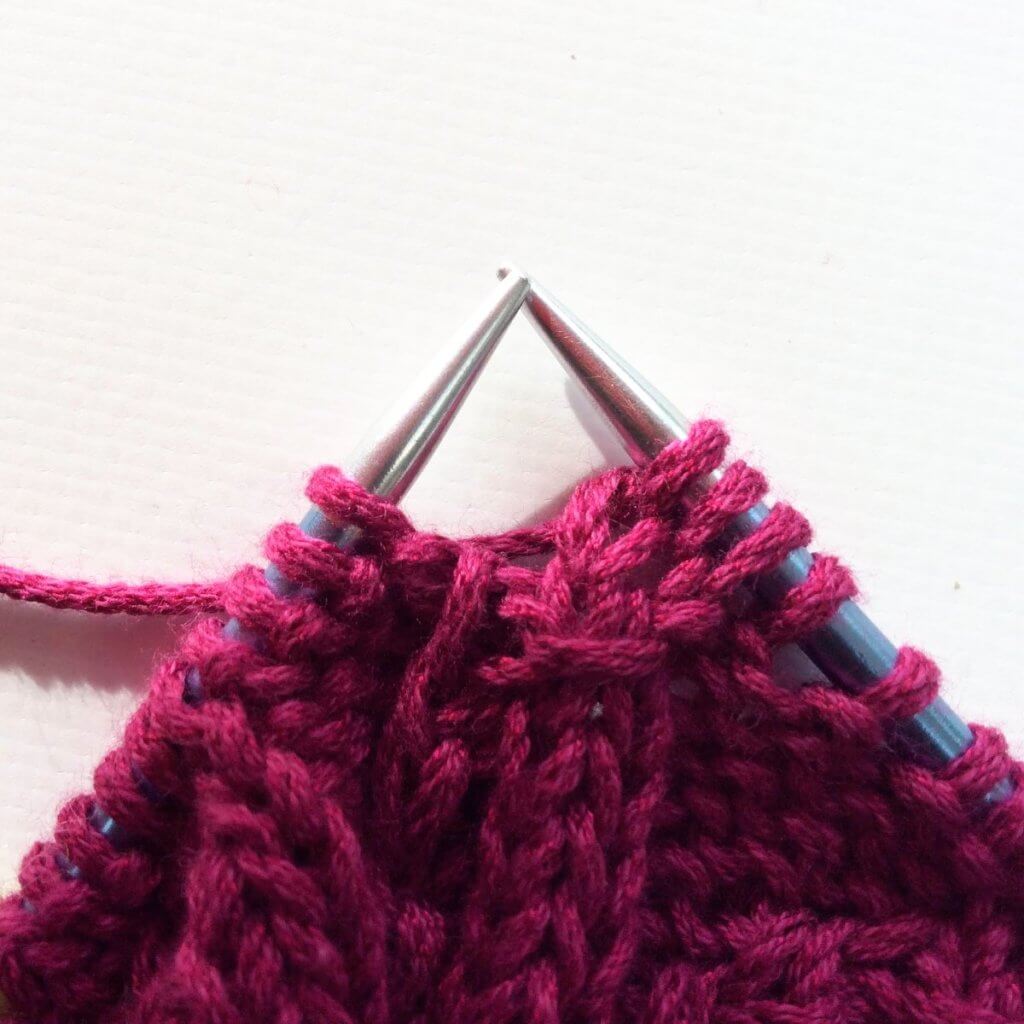
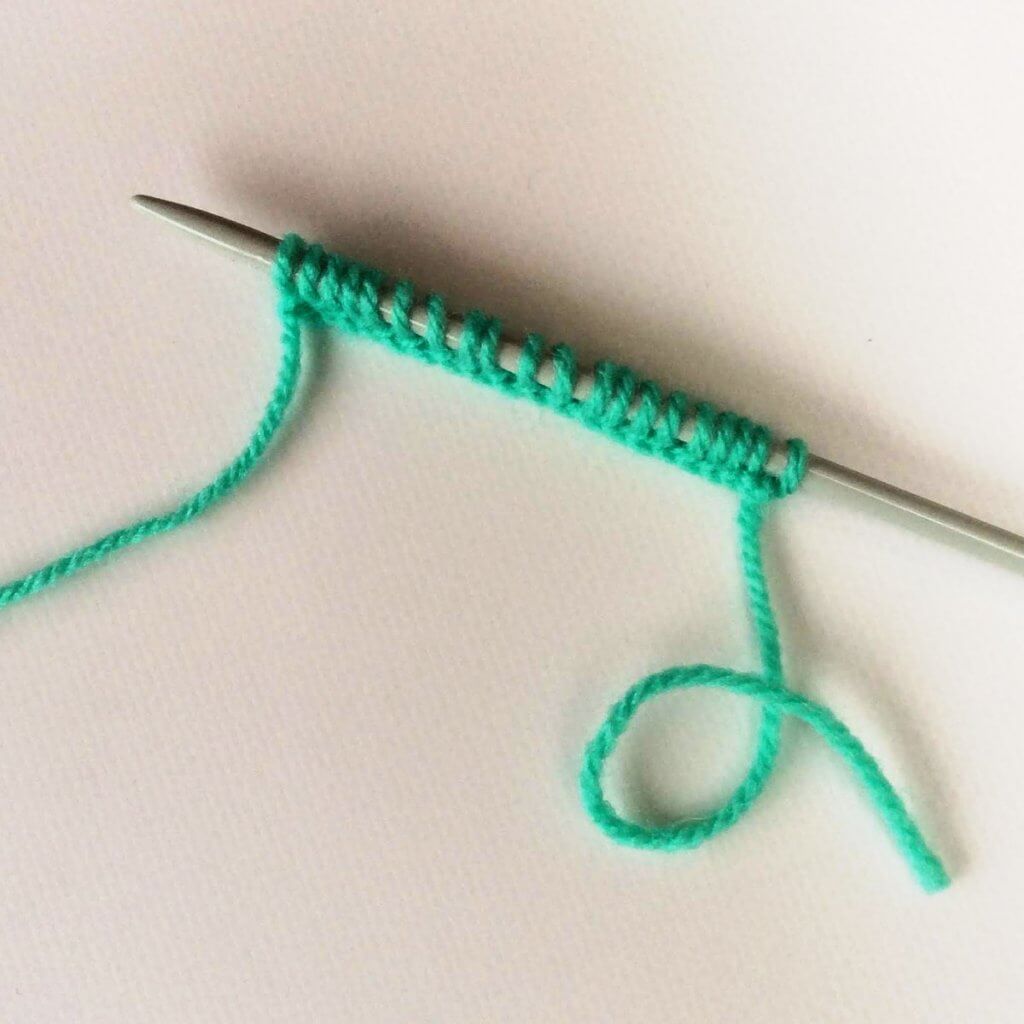
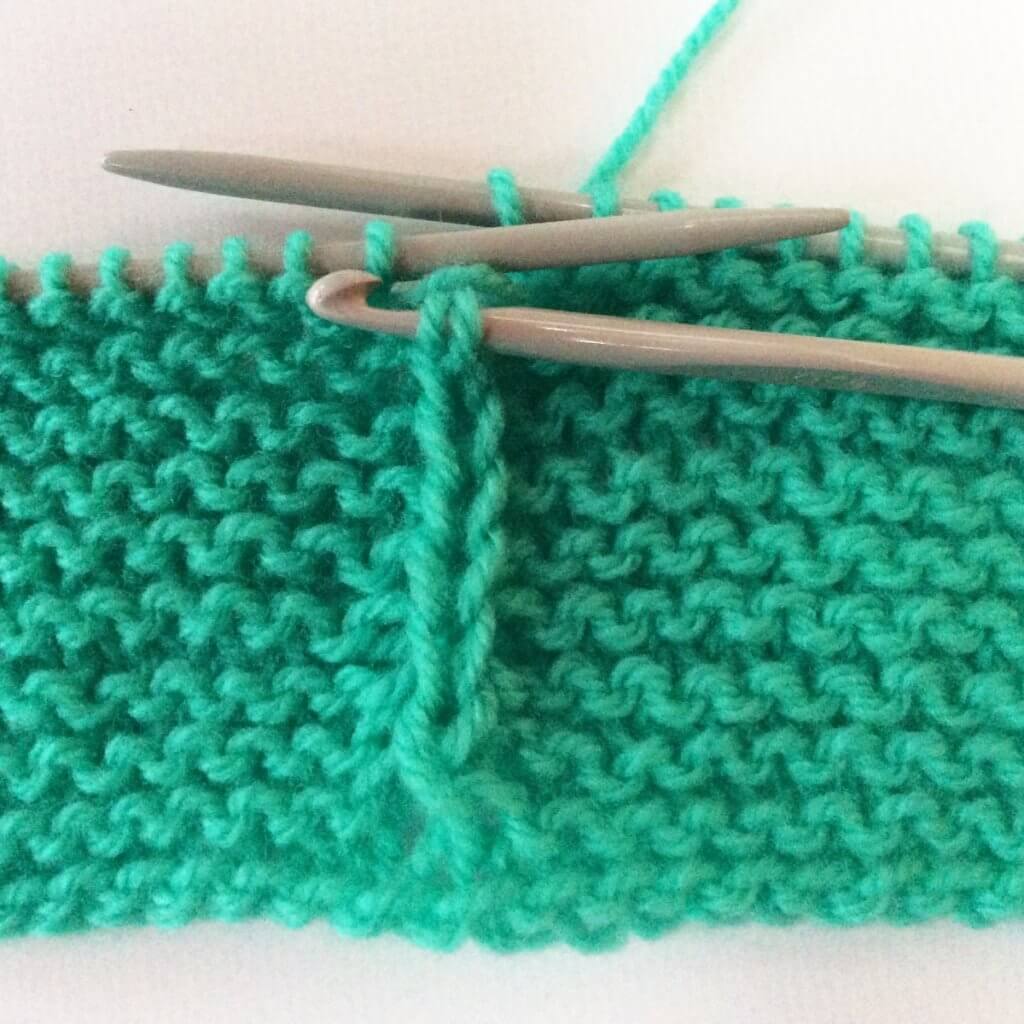
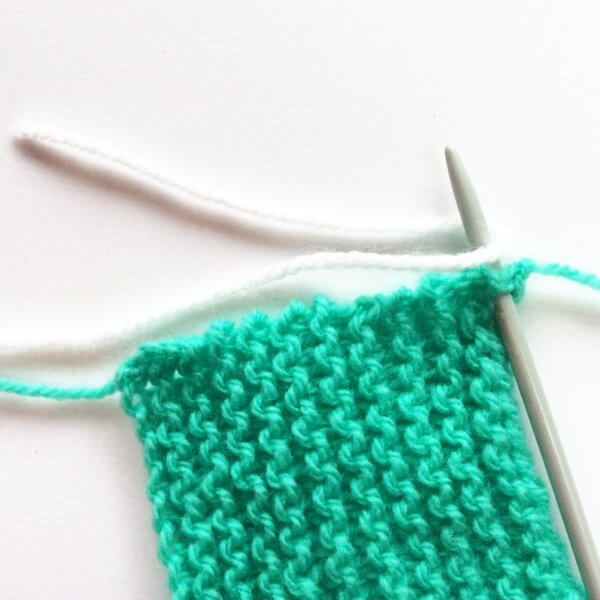
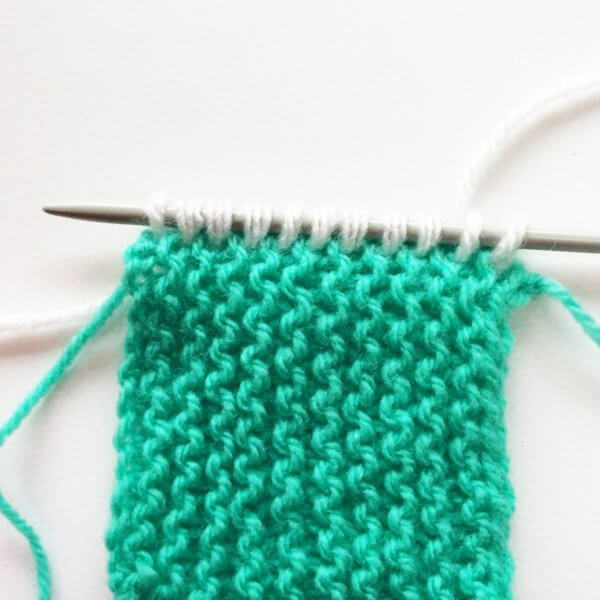
5. Repeat steps 2-4, picking up 1 stitch per garter stitch ridge until all ridges have been worked. The result looks like this from the RS:

Tutorial pick-up & knit from garter stitch - by La Visch Designs

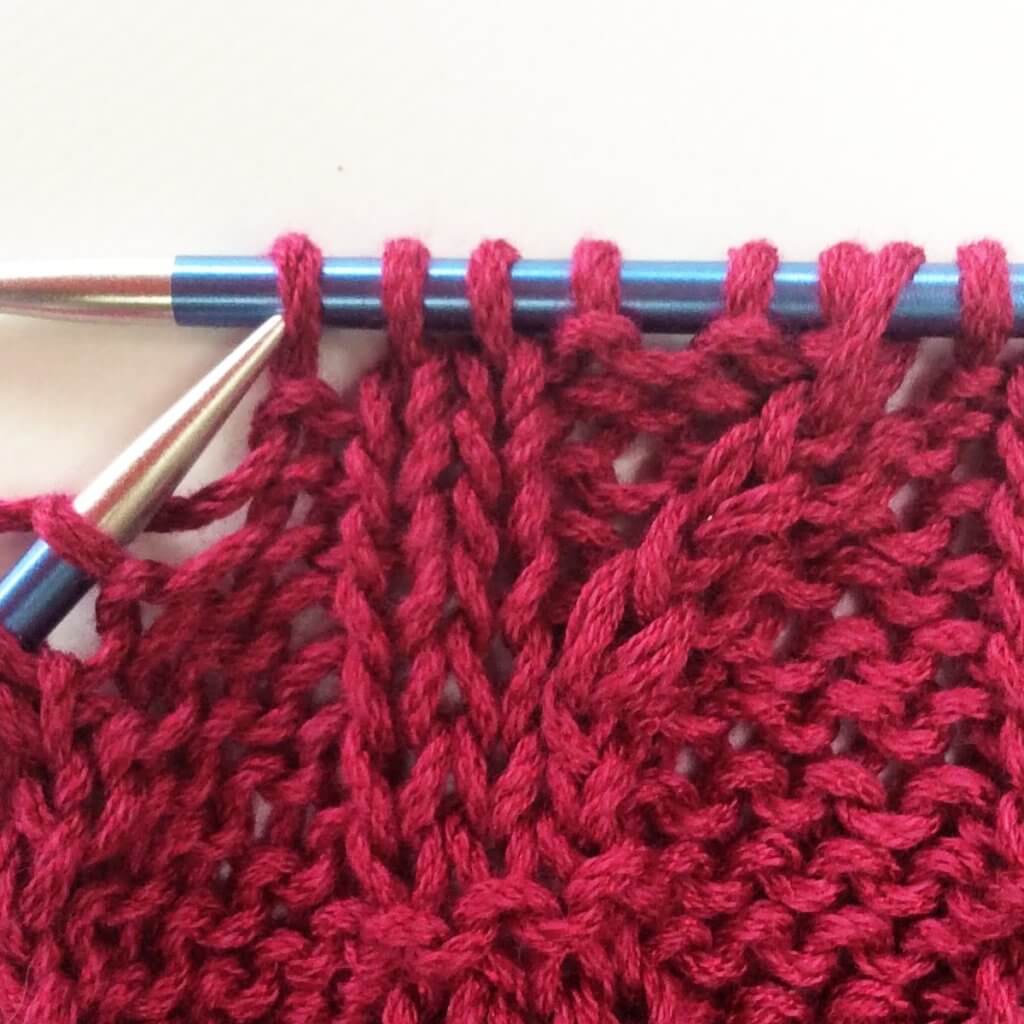
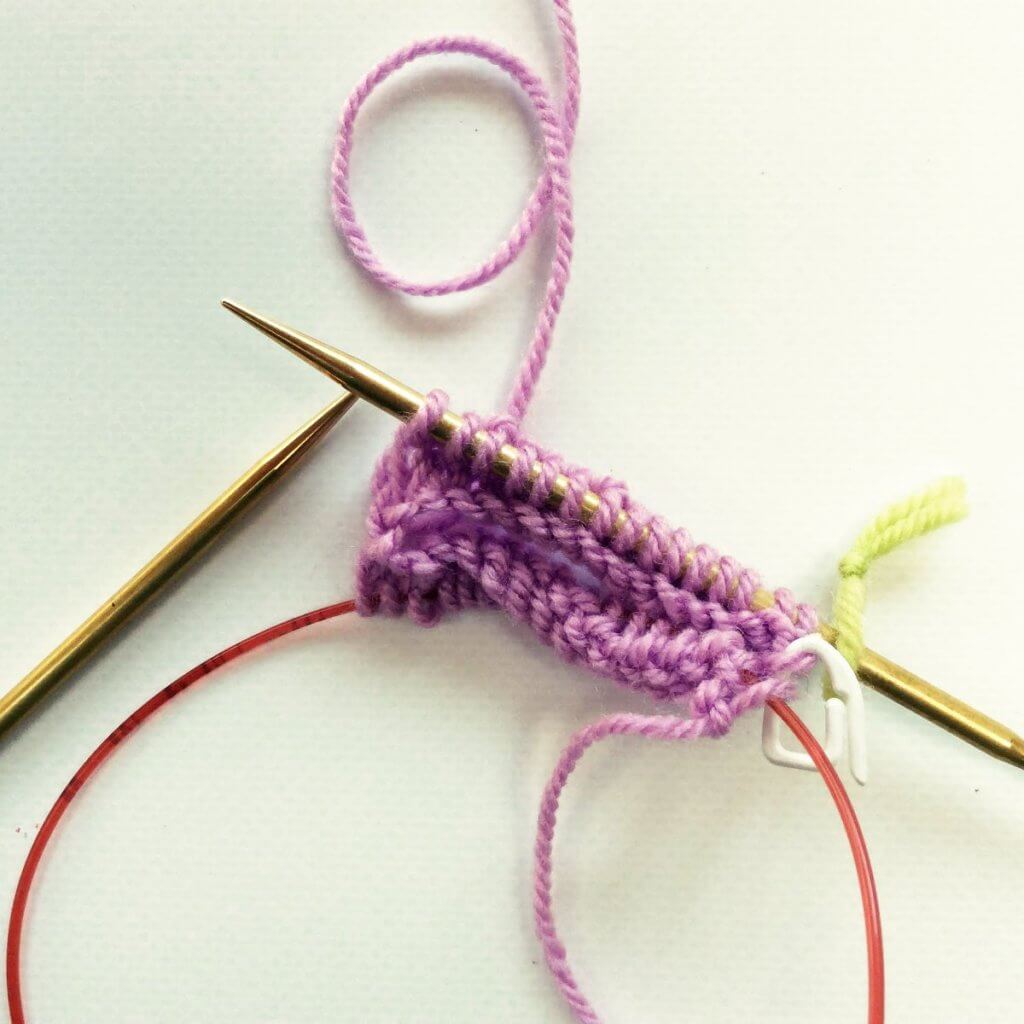
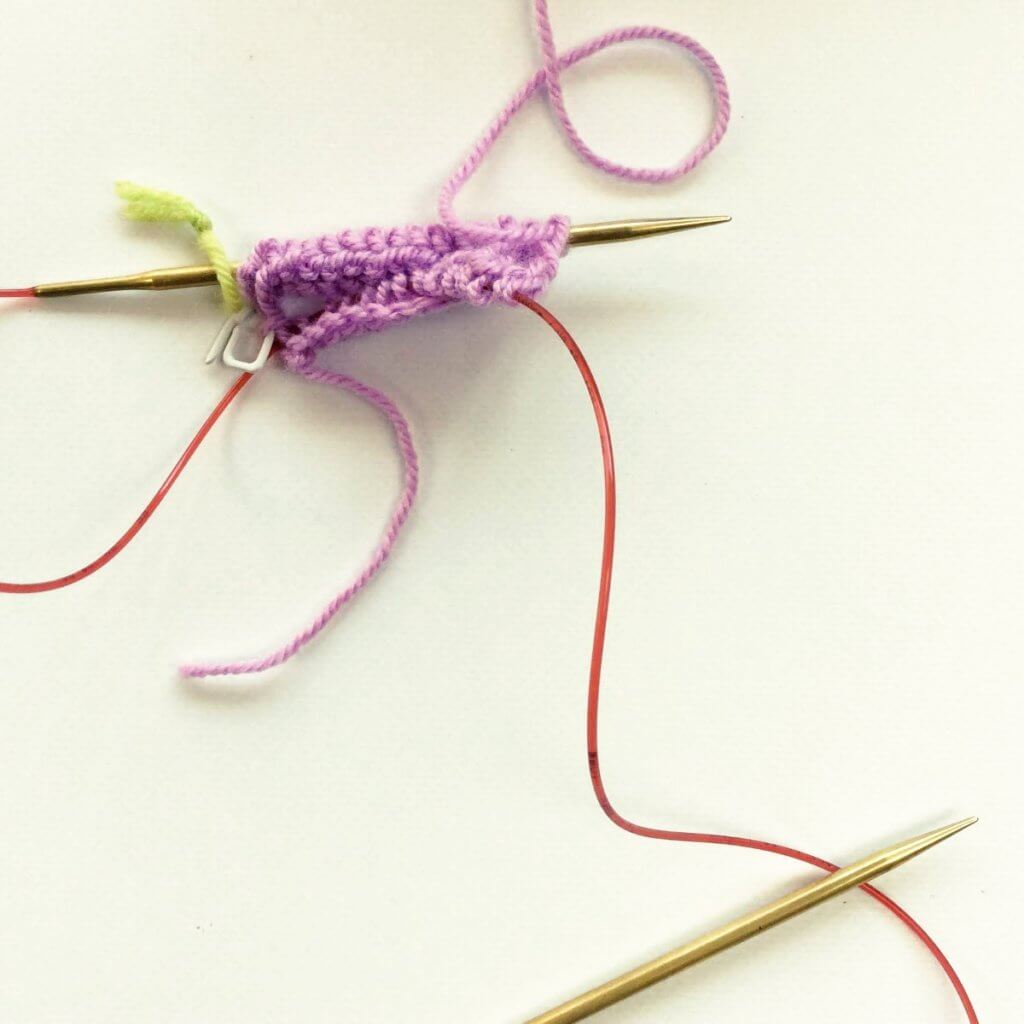
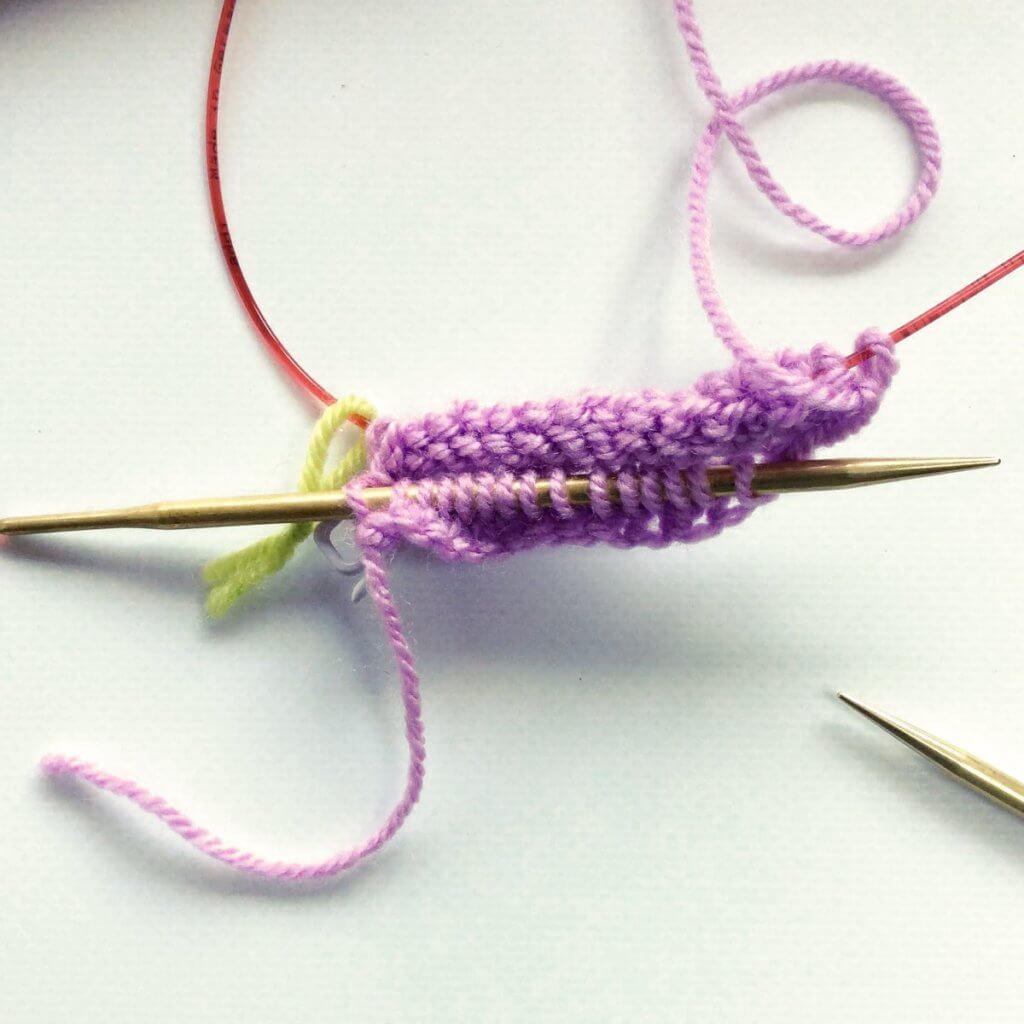
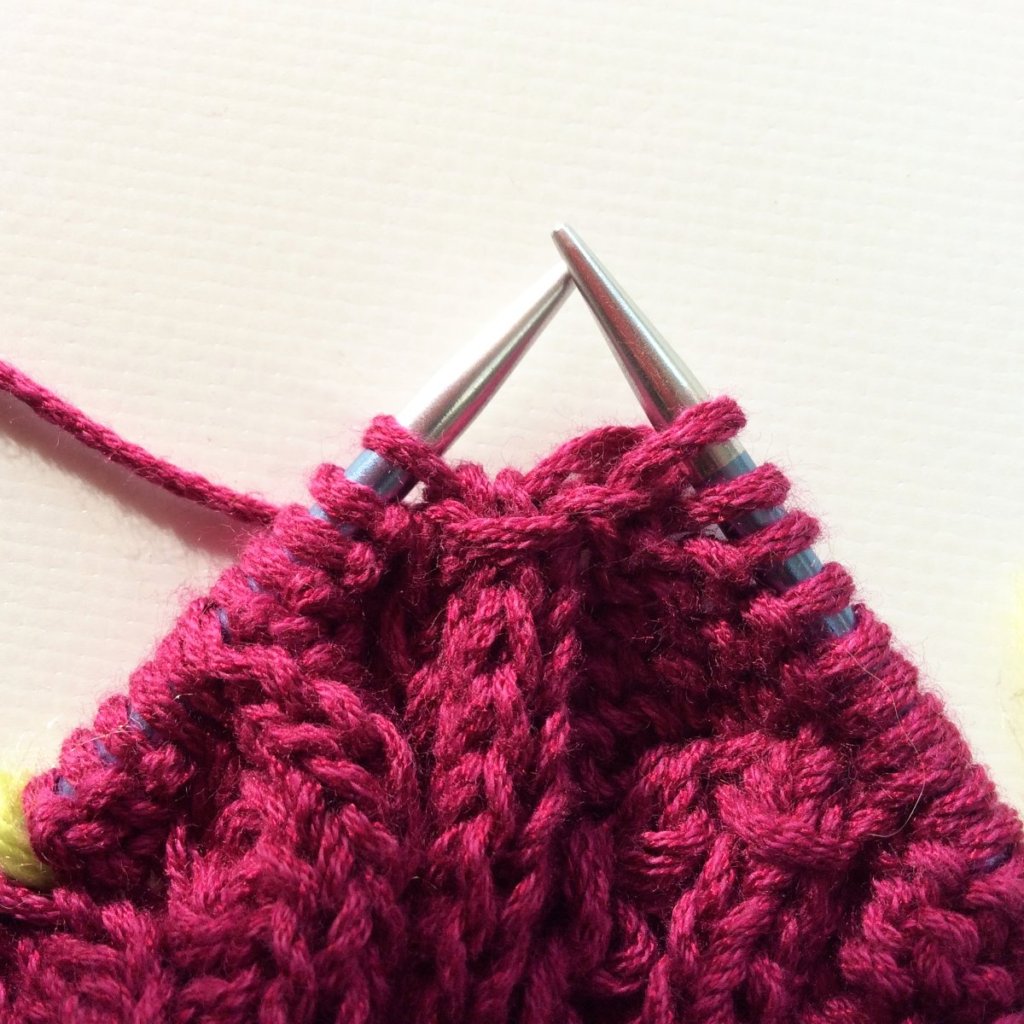
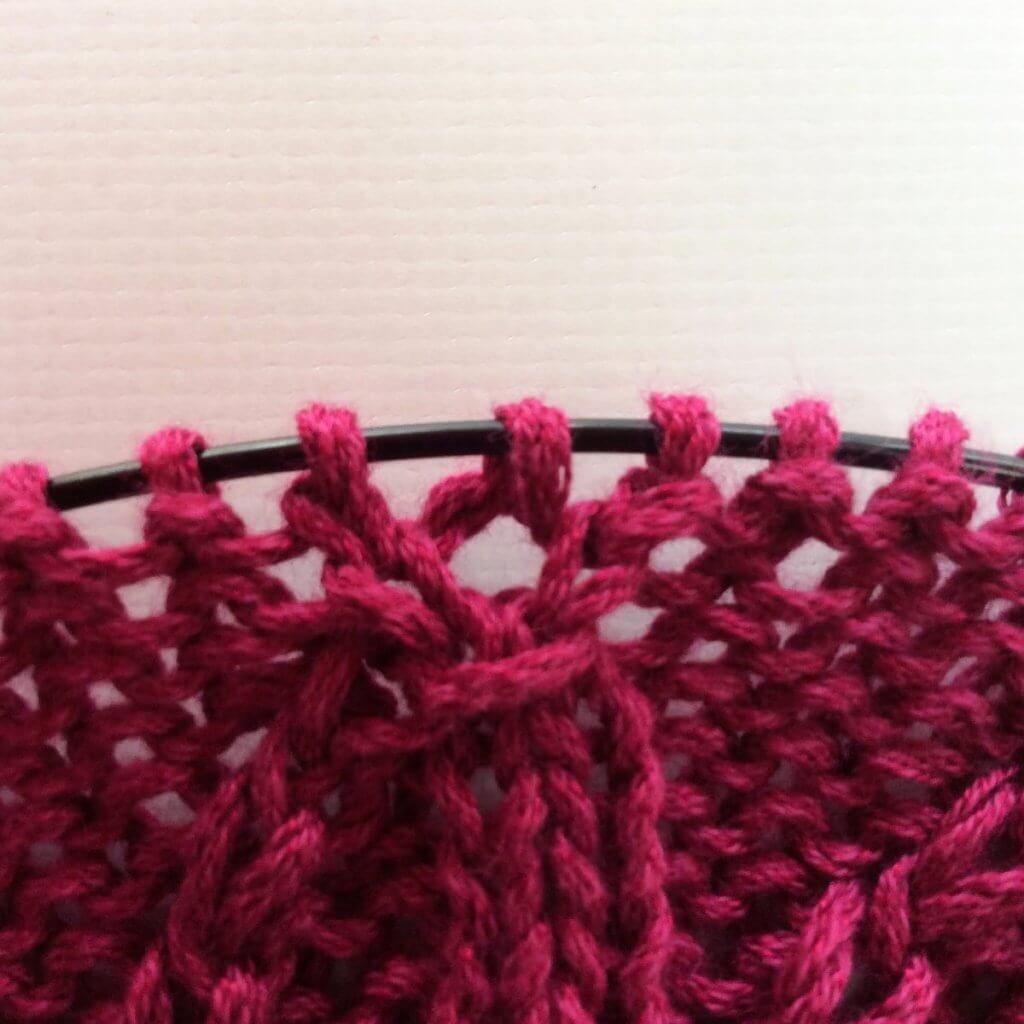
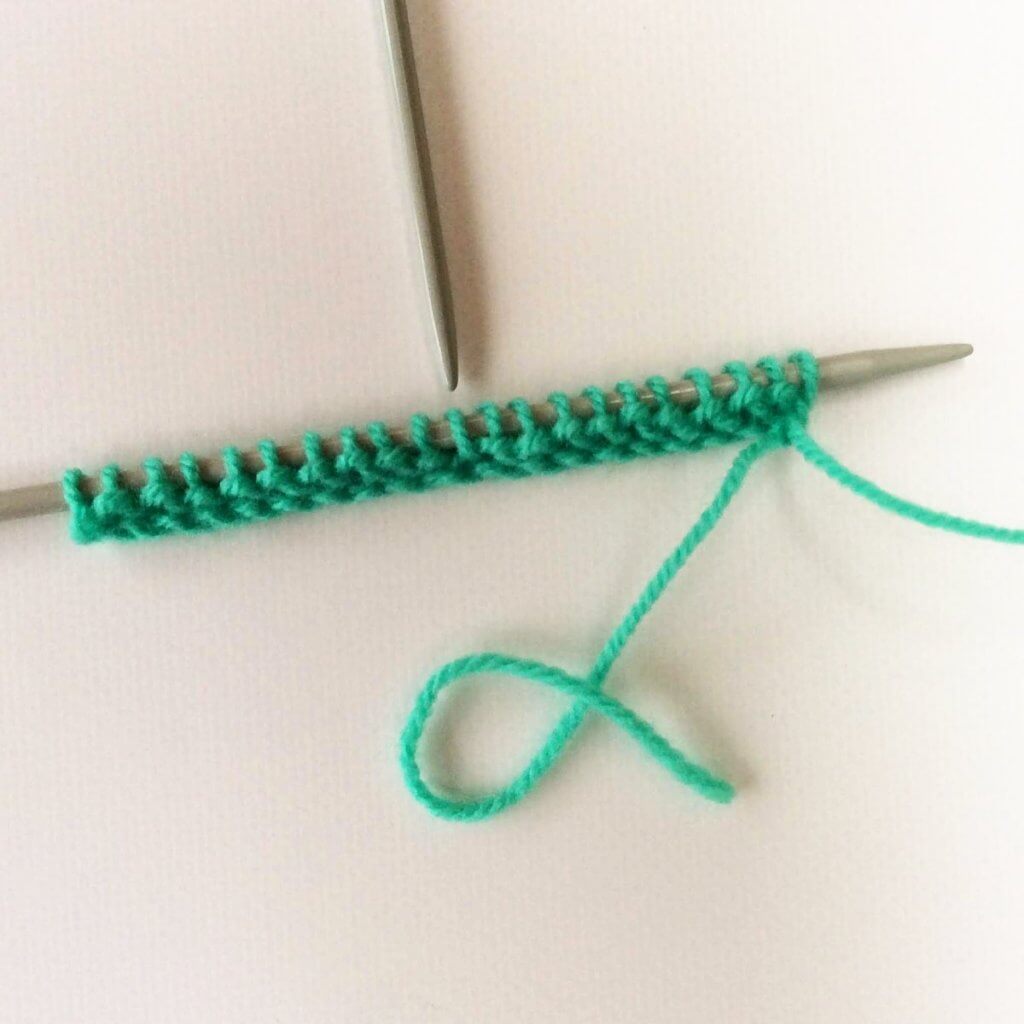
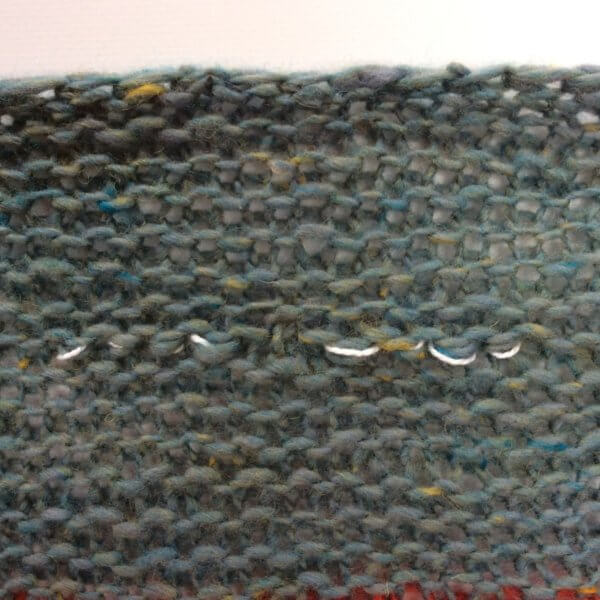
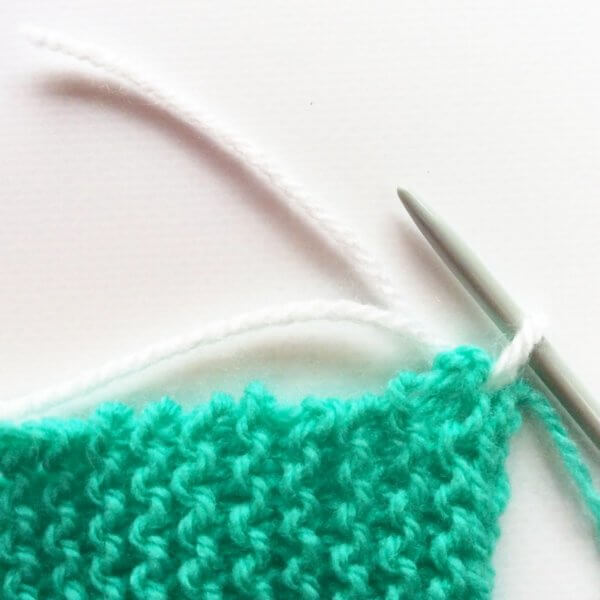
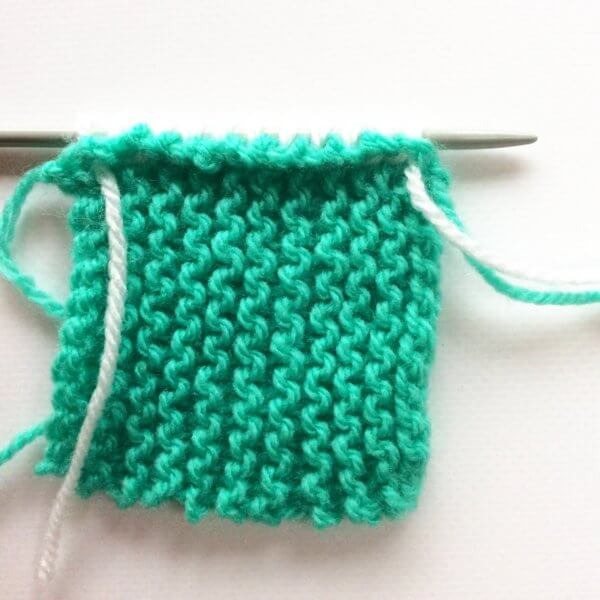
This is how it looks from the WS:

Tutorial pick-up & knit from garter stitch - by La Visch Designs

Next, you can start knitting according to your pattern. Take care, though, to see whether the stitches are positioned normal or twisted. The stitch mount has a potential impact on your project!

Stitch mount

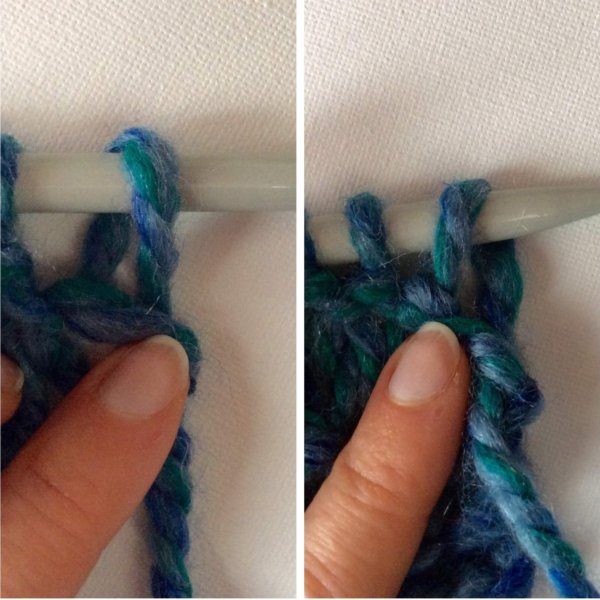
Stitches have a left and right leg. The way they are positioned on the needle impacts the look of the stitches when knit. In the picture below on the left, you can see the regular orientation with the right leg in front of the needle. On the left there is a twisted stitch: the left leg of the stitch is in front of the needle. This is no problem though: Just knit (or purl) the twisted stitch through the back loop to untwist the stitch mount.

Making a crochet provisional cast-on - a tutorial by La Visch Designs

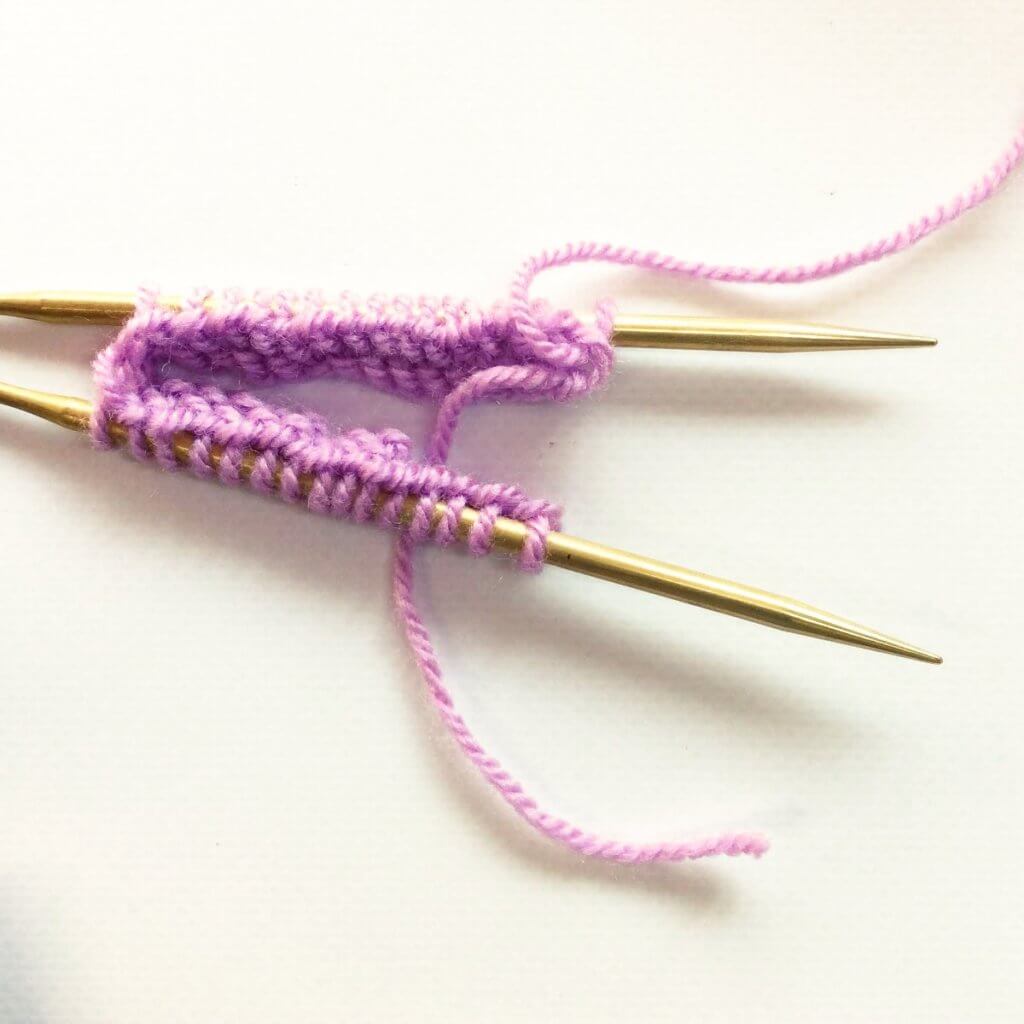
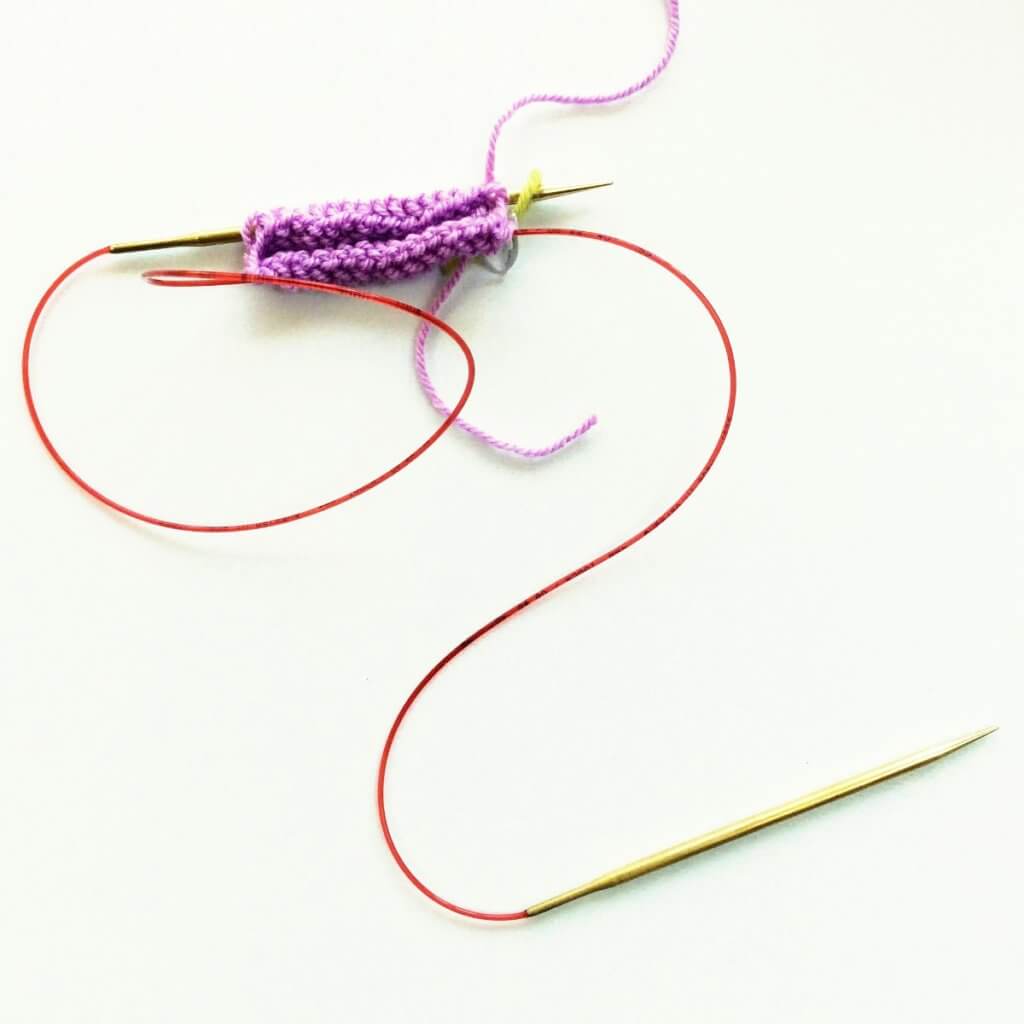
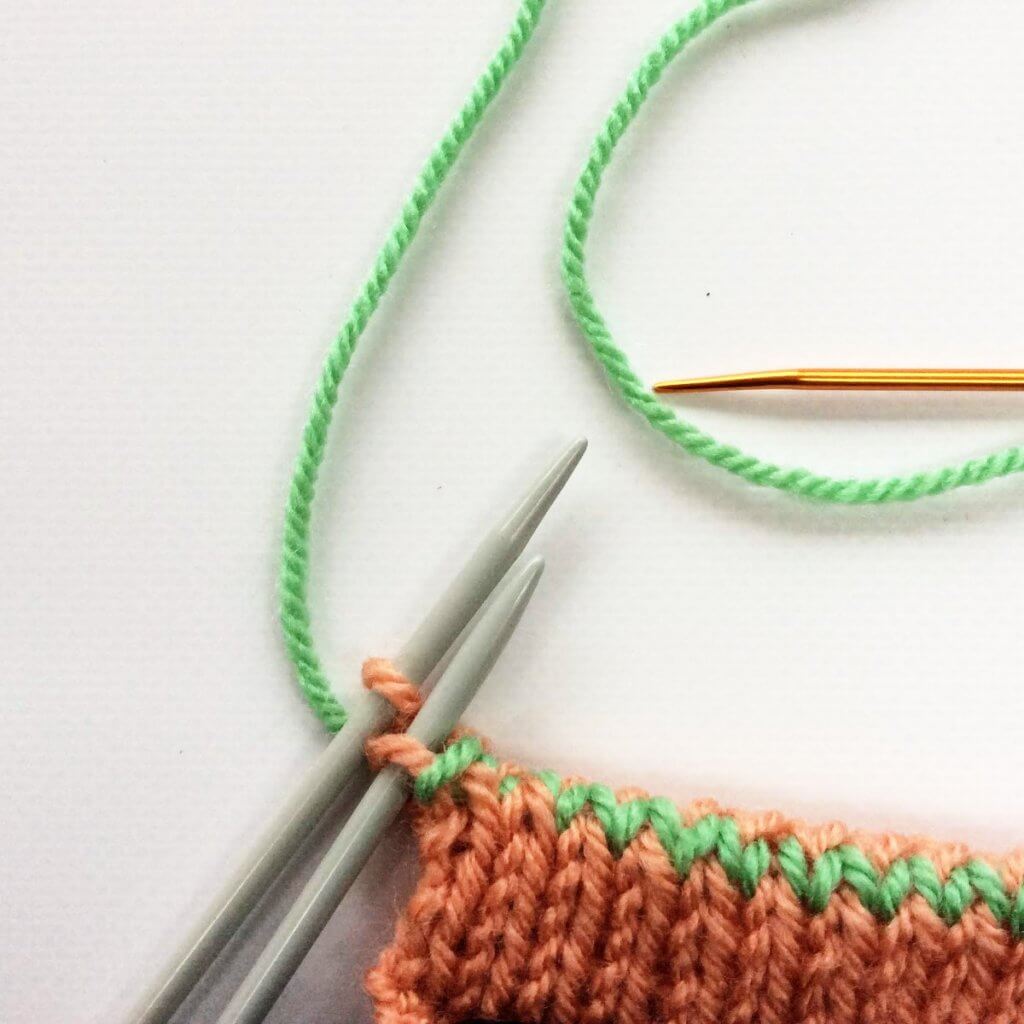
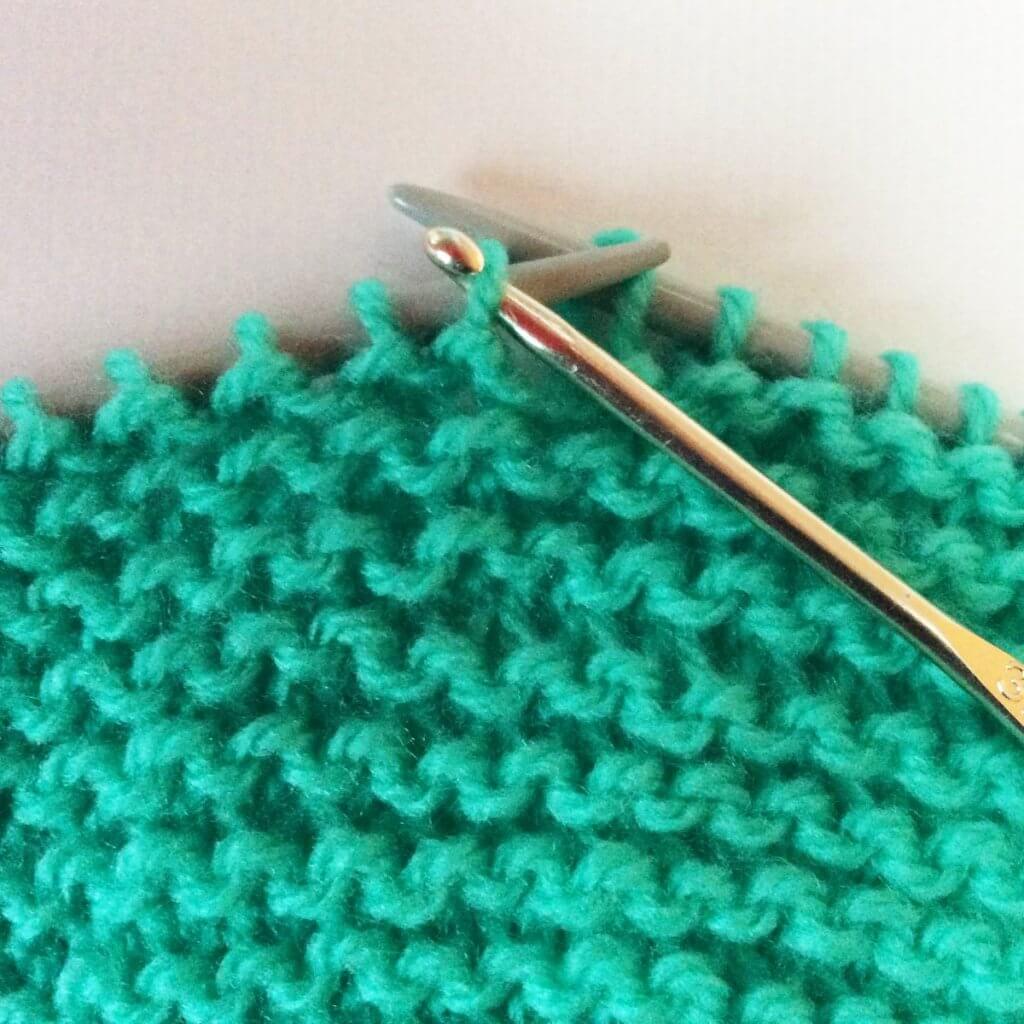
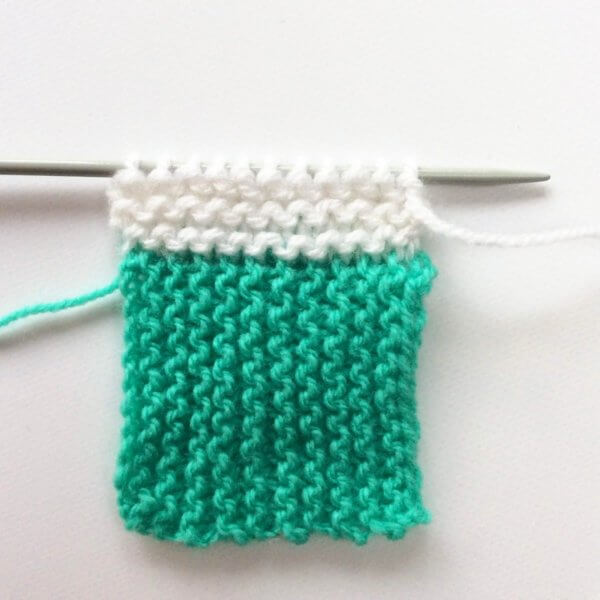
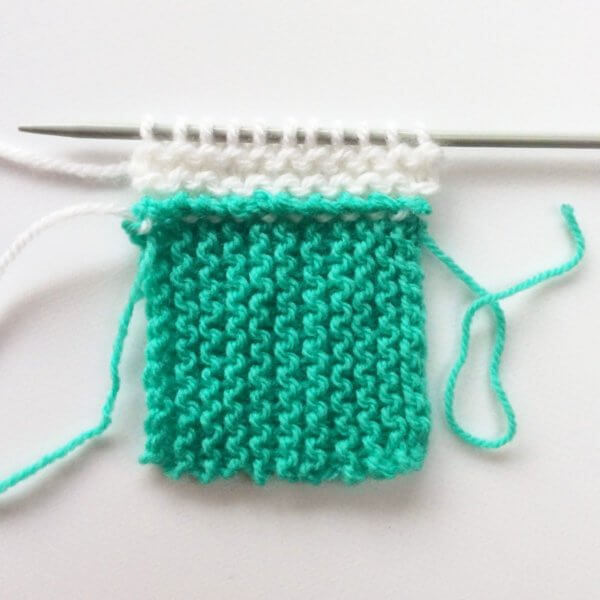
And here how it looks with some more rows worked from the RS:

Tutorial pick-up & knit from garter stitch - by La Visch Designs

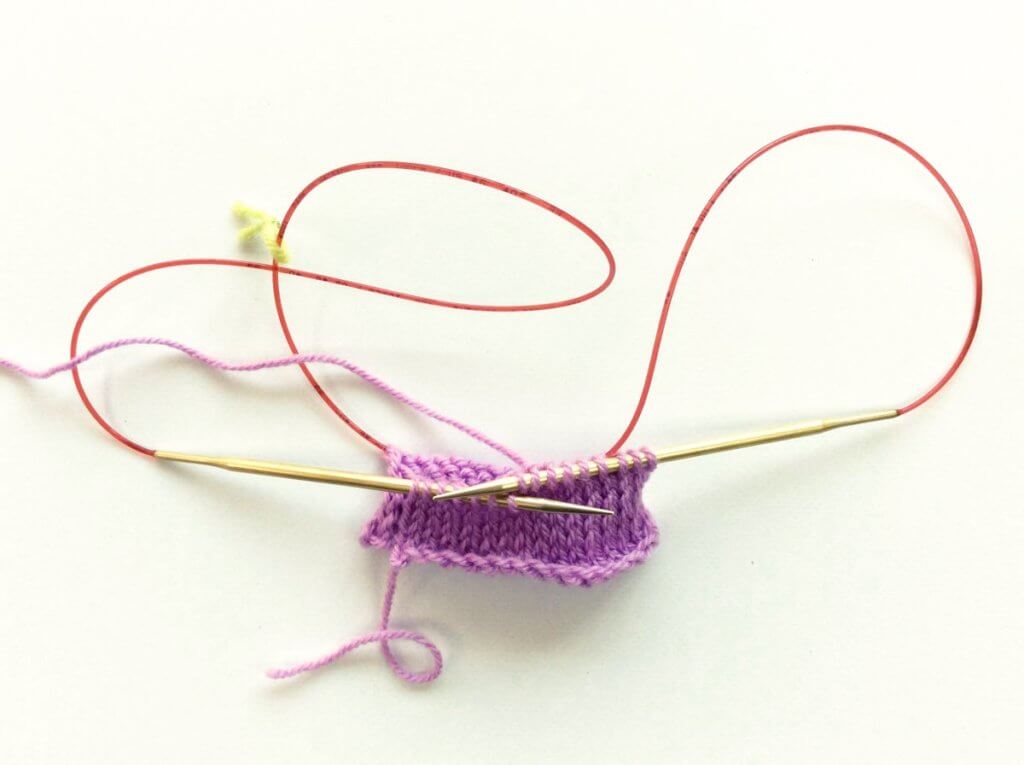
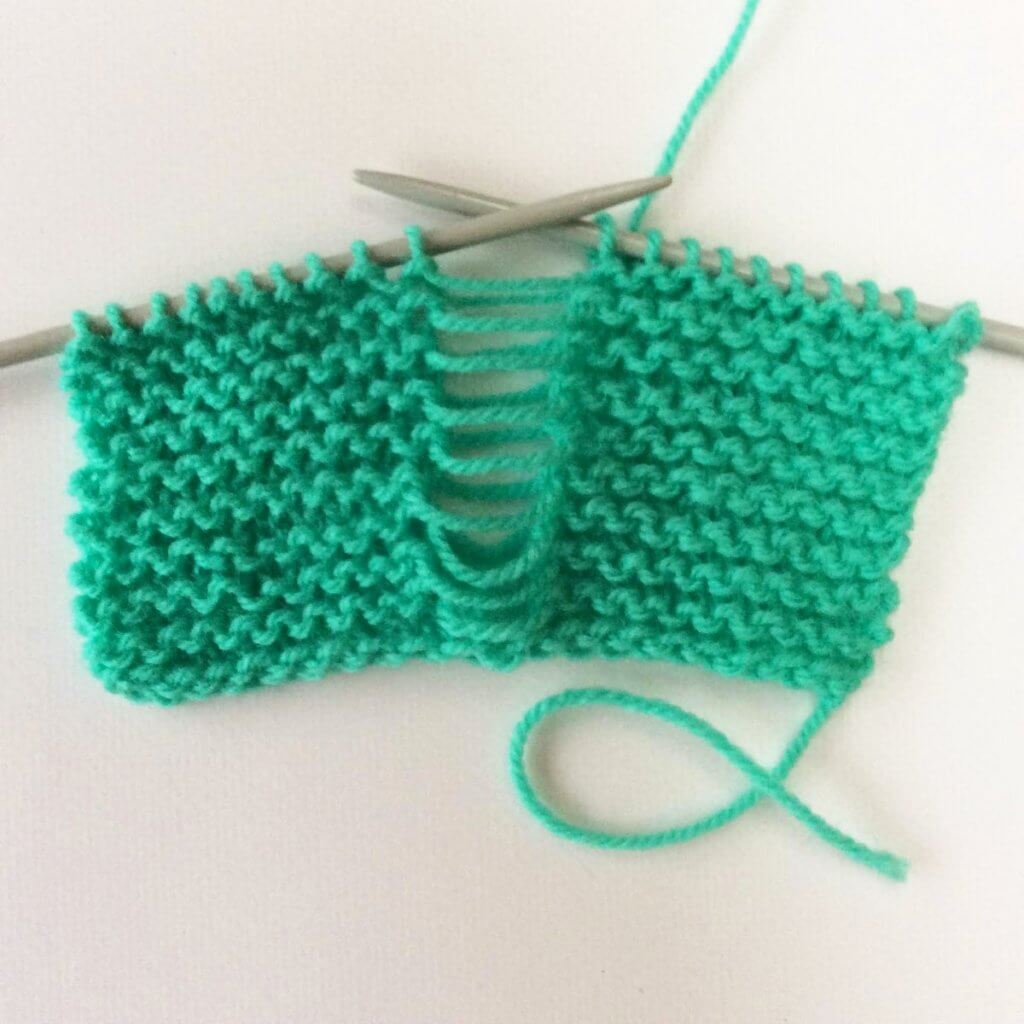
And from the WS:

Tutorial pick-up & knit from garter stitch - by La Visch Designs

The white part looks a tad wider than the “body” of the piece because I used a slightly heavier weight yarn!

Patreon logo

Thanks to my Patreon supporters for bringing you this freebie! Creating quality patterns and tutorials is a lot of work and resource-intensive. However, I find it important to give you free content like this tutorial. Thanks to the generous support of my Patreon supporters, I can make it happen. Thank you, patrons! Click here to join, or click here to read more about La Visch Designs on Patreon.

tutorial – pick-up & knit from garter stitch Read More »

tutorial – knitting colorwork tips

Colorwork tips - a tutorial by La Visch Designs

Knitting color work besides giving a gorgeous result is also a lot of fun. I must admit I haven’t gone beyond knitting color work with 2 colors yet, at this point in time. Doing that though, I have come across some things that make it easier to do and get a lovely result. And, of course, I love to share these color work tips with you!

1. Picking your colors

Perhaps you’ve already noticed it with previous projects: sometimes when colors seem to go perfectly with each other, the result is just disappointing when combined. One possible reason for this is that the colors don’t have enough contrast between them. But how to make sure there is enough contrast? Read on this tutorial!

Contrast in color work - a tutorial by La Visch Designs

2. Start with a small project

Handling multiple strands of yarn at the same time while following a chart can be pretty daunting if you’ve never done so before. My advice would, therefore, be to start with a smallish project and limit yourself to only 2 colors. Think for example of a hat, like the Pijl hat pictured below.  This way you can find out how to hold your yarn etc. without adding an extreme tangle to the mix that even more colors of yarn could potentially bring.

Pijl hat

3. Managing floats

The pieces of yarn running at the inside of a color work project knitted in the round are called “floats”: the lengths of yarn not being knitted and simply carried along the back.  Because they run at the inside circumference of the project, there is a risk of them getting too short and tight. This, in turn, will lead to puckering in the finished item. The solution is luckily a very easy one: just turn your knitting inside-out so the floats are on the outside circumference while knitting! This will usually give enough slack in the floats to avoid puckering. This is, by the way, a pic of my Bloem hat while in progress.

Color work tips - by La Visch Designs

4. Gauge

Most knitters find that when knitting color work their gauge ends up much tighter (more stitches per 10 cm / 4 inches) than when knitting in a single color with that particular yarn/needle combination. This is because the floats lack the elasticity of regular knitting stitches. This may mean that a color work hat, sweater or sock turns out much smaller than expected.  It’s therefor a good idea to either start with a smallish part of the project like a sleeve (for a big project like a sweater) or swatch. Don’t forget to swatch in the round though, because this is usually different from the gauge when worked flat.

5. Fixing mistakes

Let’s face it: mistakes will probably be made. I know I do! With some, you can just tink back (= knitting backward, in other words: stitch for stitch un-knitting what you did). In that case, make sure to wind back your yarn on the separate balls to avoid it all tangling up. It’s also possible to find a bit in your color work that didn’t quite go according to the chart, way back or even after binding off. In that case, there are several options. You can, of course, consider it a design element. If it bothers you too much, don’t be hesitant to fix it for the eye by embroidering over it using the duplicate stitch technique. And I’ve got a tutorial for that!

duplicate stitch_4

There you have it: several color work tips to help you with working lovely color work projects!

Patreon logo

Thanks to my Patreon supporters for bringing you this freebie! Creating quality patterns and tutorials is a lot of work and resource-intensive. However, I find it important to give you free content like this tutorial. Thanks to the generous support of my Patreon supporters, I can make it happen. Thank you, patrons! Click here to join, or click here to read more about La Visch Designs on Patreon.

tutorial – knitting colorwork tips Read More »

tutorial – circular cast-on

Circular cast-on - a tutorial by La Visch Designs

Casting-on for knitting in the round is usually a rather fiddly business. The circular cast-on method in this tutorial, unfortunately, isn’t any different in that respect. Still, when wanting the cast-on for a project knitted flat and in the round, this method gives a very nice and invisible start.

I think it’s ideal for things like top-down hats, center-out blankets or shawls, and the like. It’s pretty similar to the idea of starting a project with a magic ring in crochet. A big plus is that the ring can be tightened to close up the starting hole, once you’re well underway and past that fiddly starting stage.

In this tutorial I used a circular needle in the magic loop way, but (of course) double pointed needles (dpn’s) can also be used for the small-circumference start.

Materials

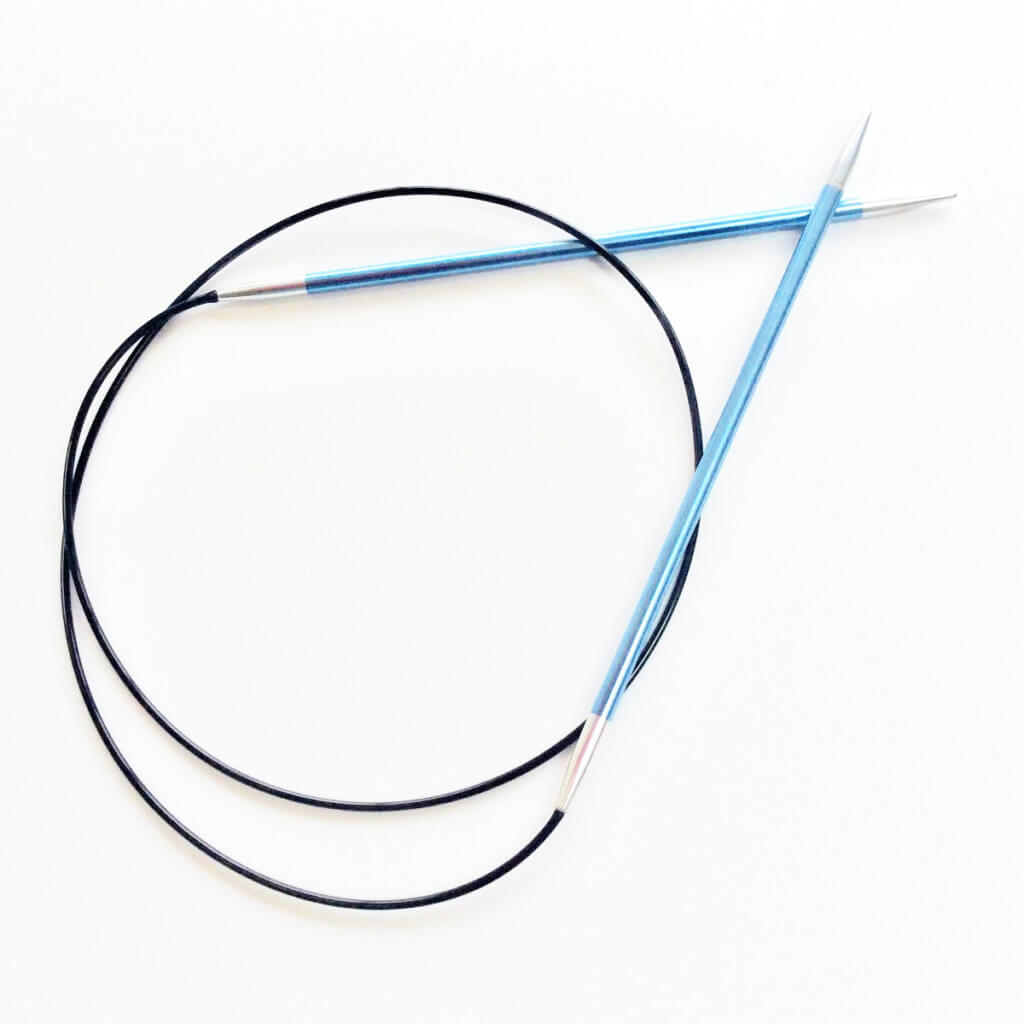
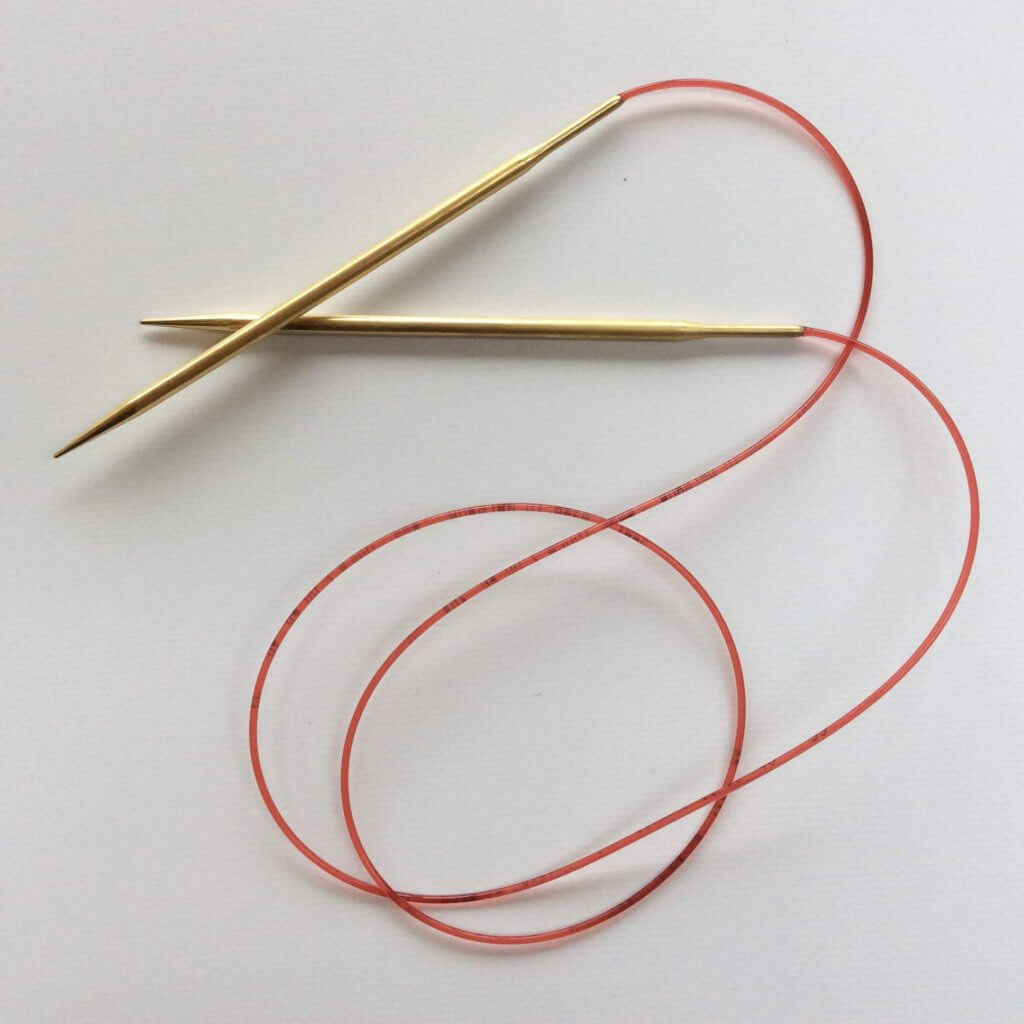
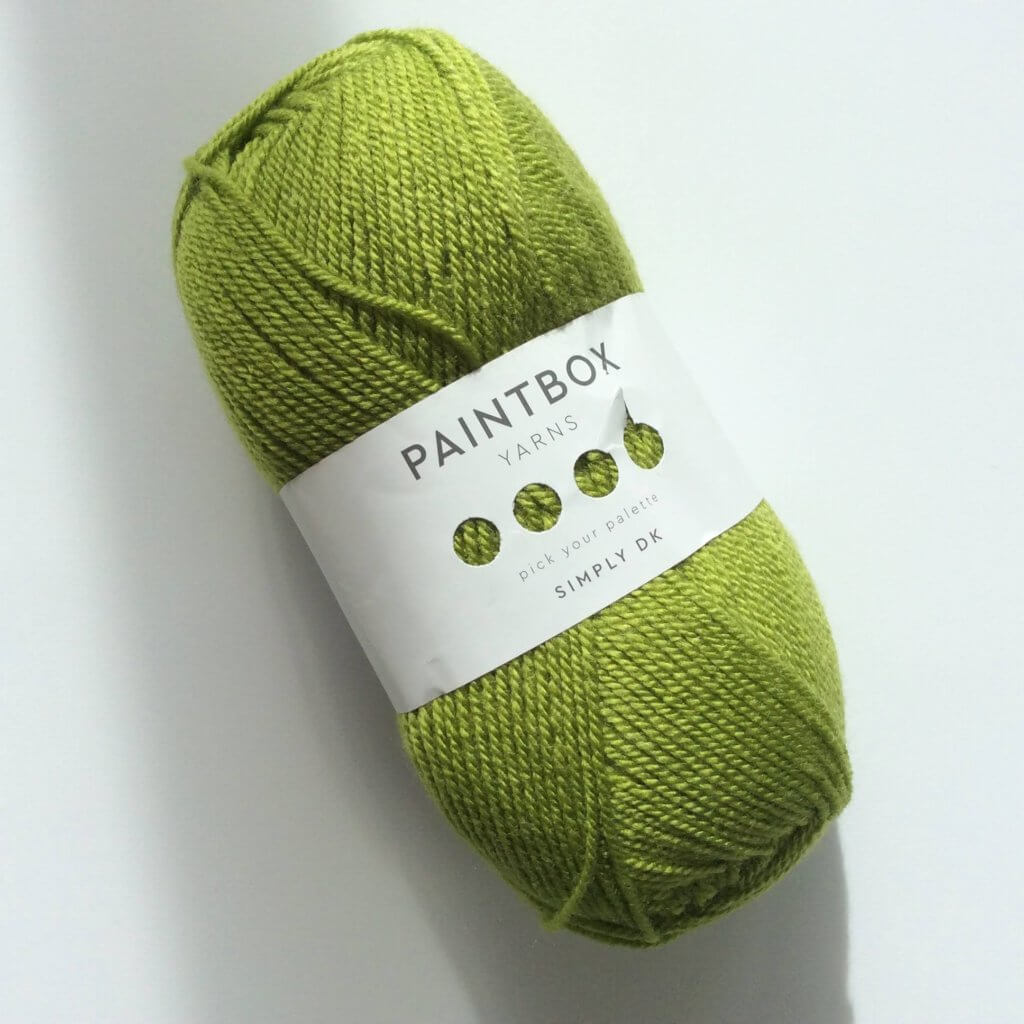
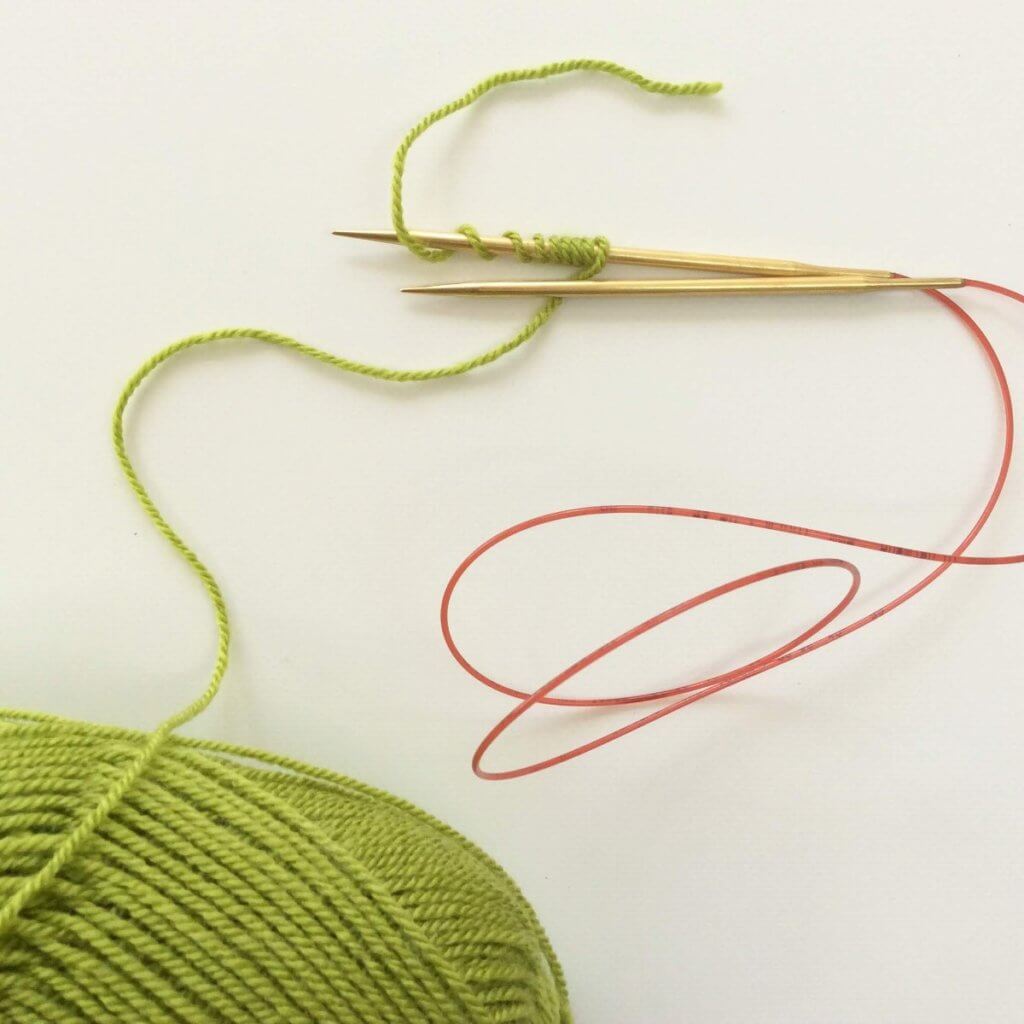
Besides yarn and circular knitting needles (or dpn’s), it’s also a good idea to use stitch markers to denote the corner stitches. I didn’t use them in this tutorial and it shows in the end result! If using circular needles, make sure the cable is long enough to do magic loop. In my experience, 80 cm / 32 inches or longer is needed for that.

Circular cast-on - a tutorial by La Visch Designs

The circular cast-on step-by-step

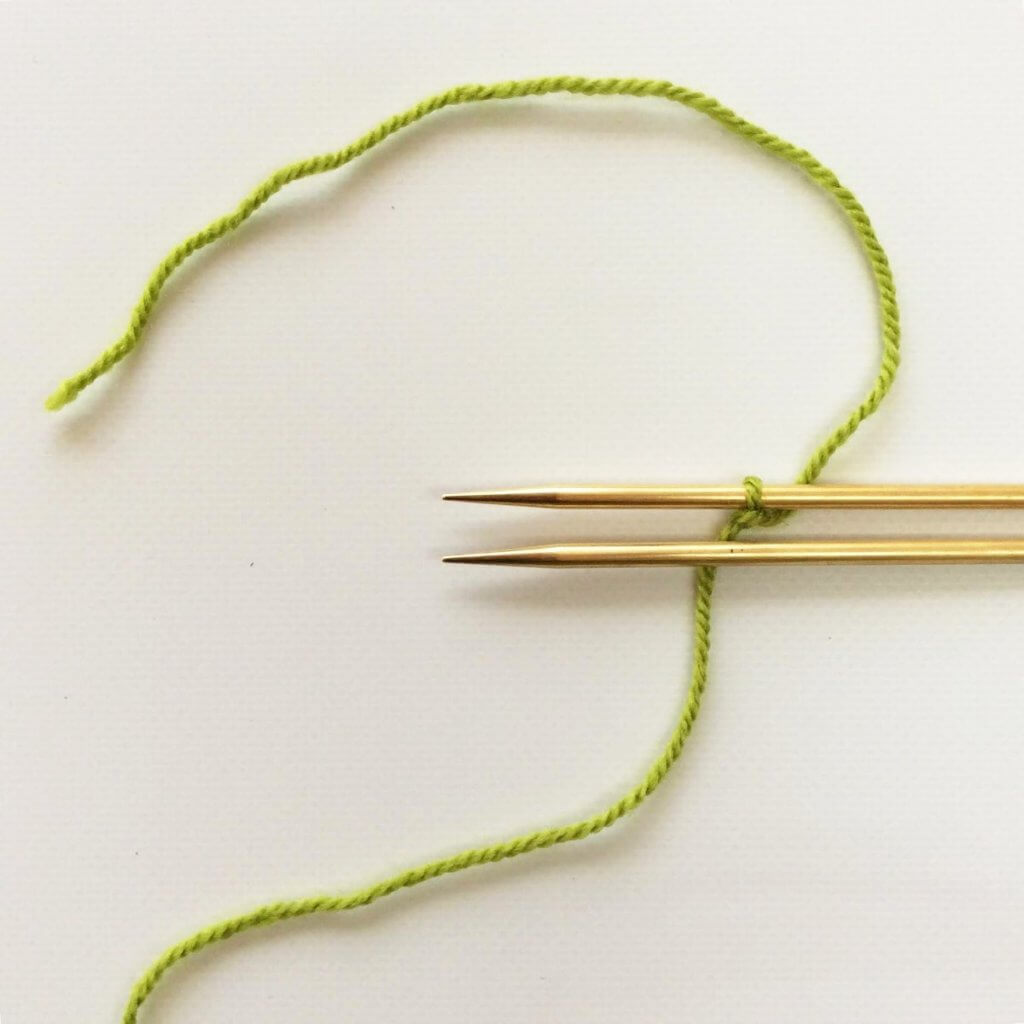
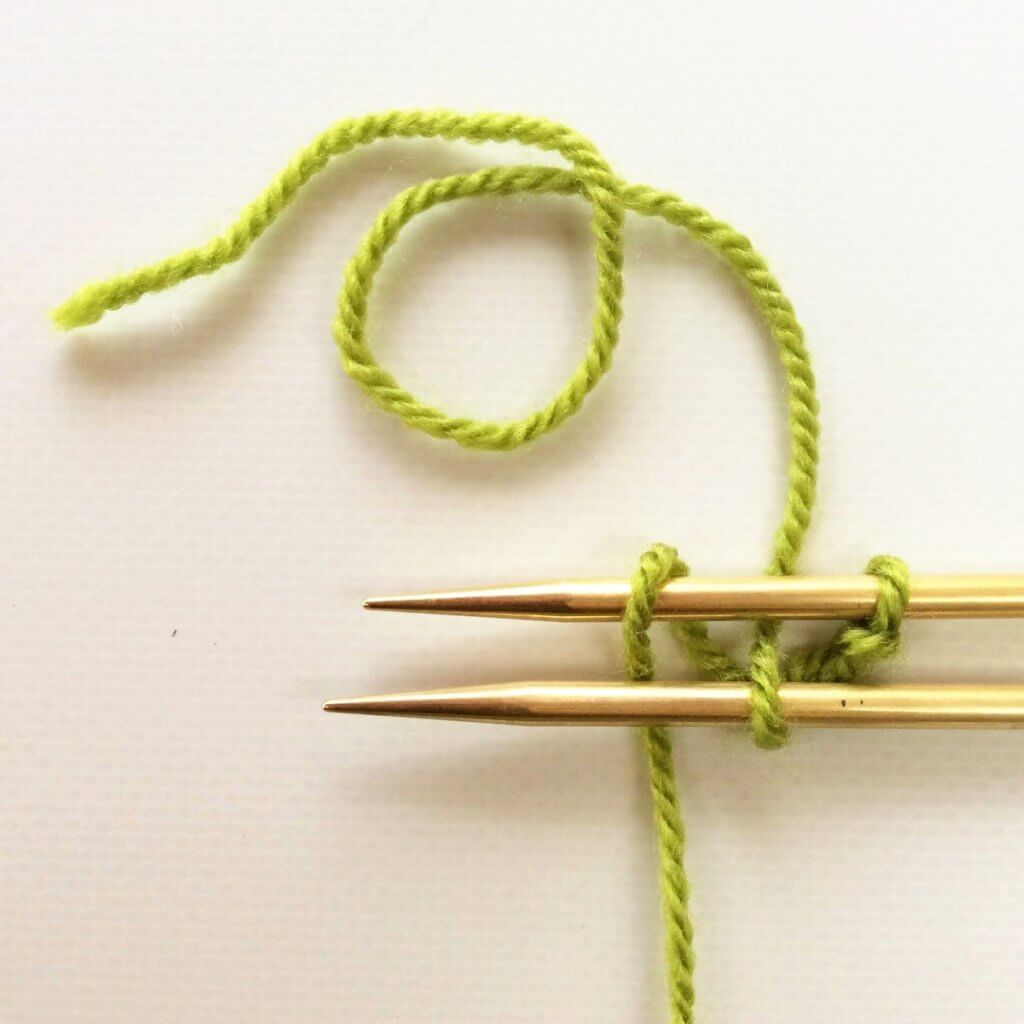
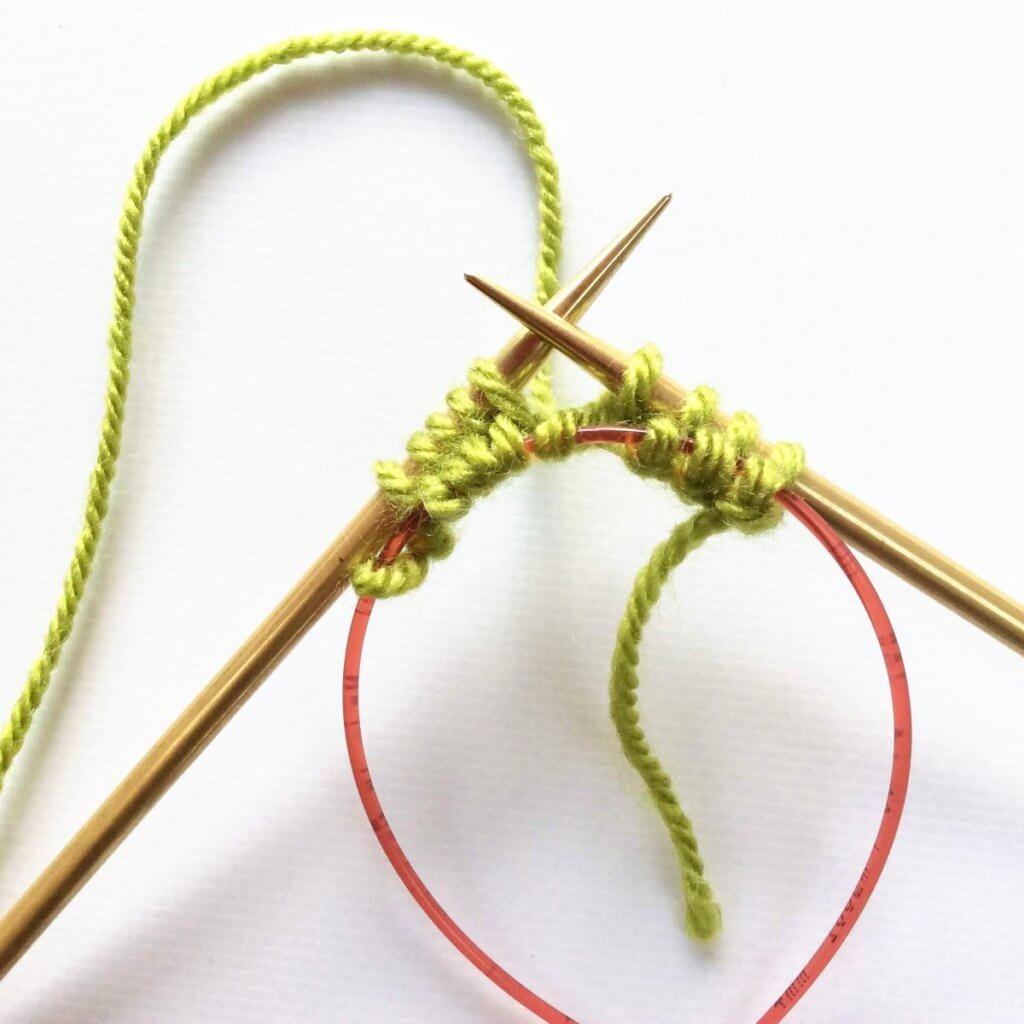
1. Make an overhand knot in your yarn as shown below in the picture.

Circular cast-on - a tutorial by La Visch Designs

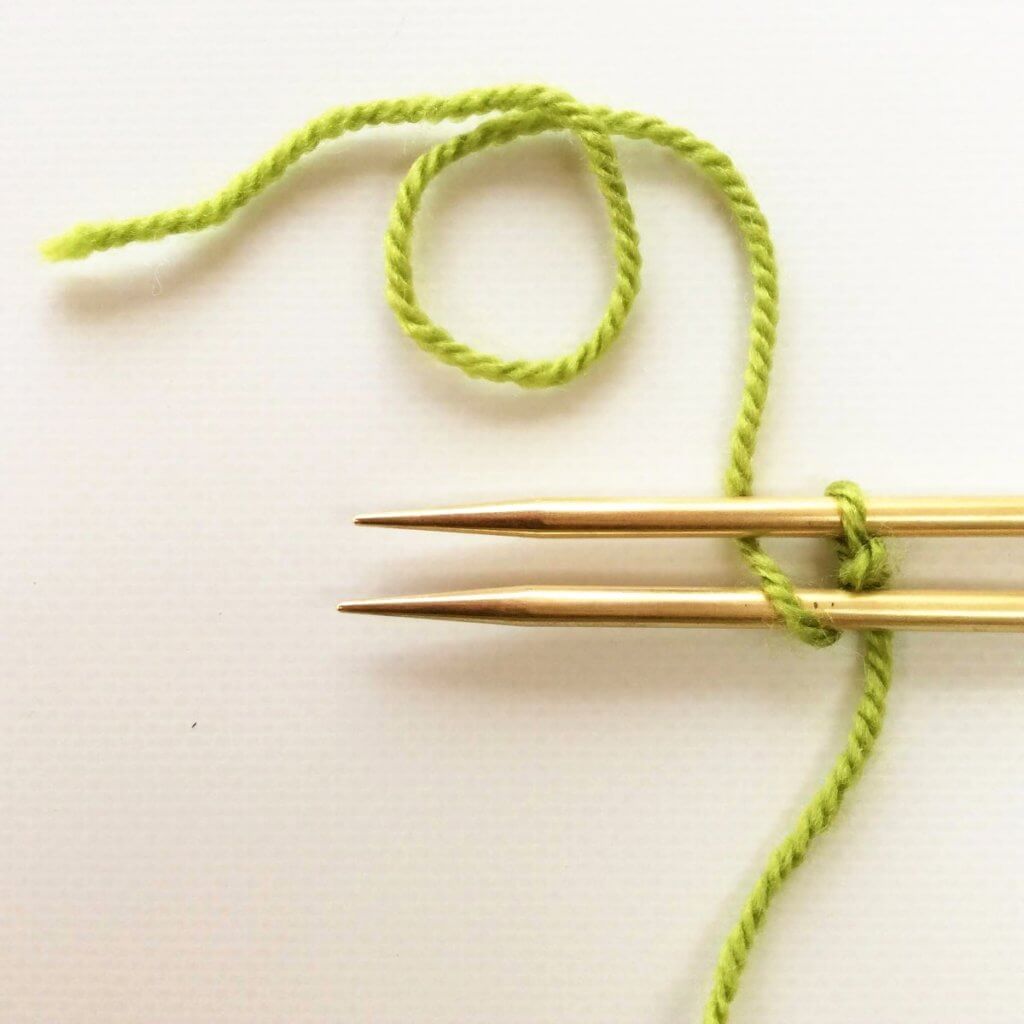
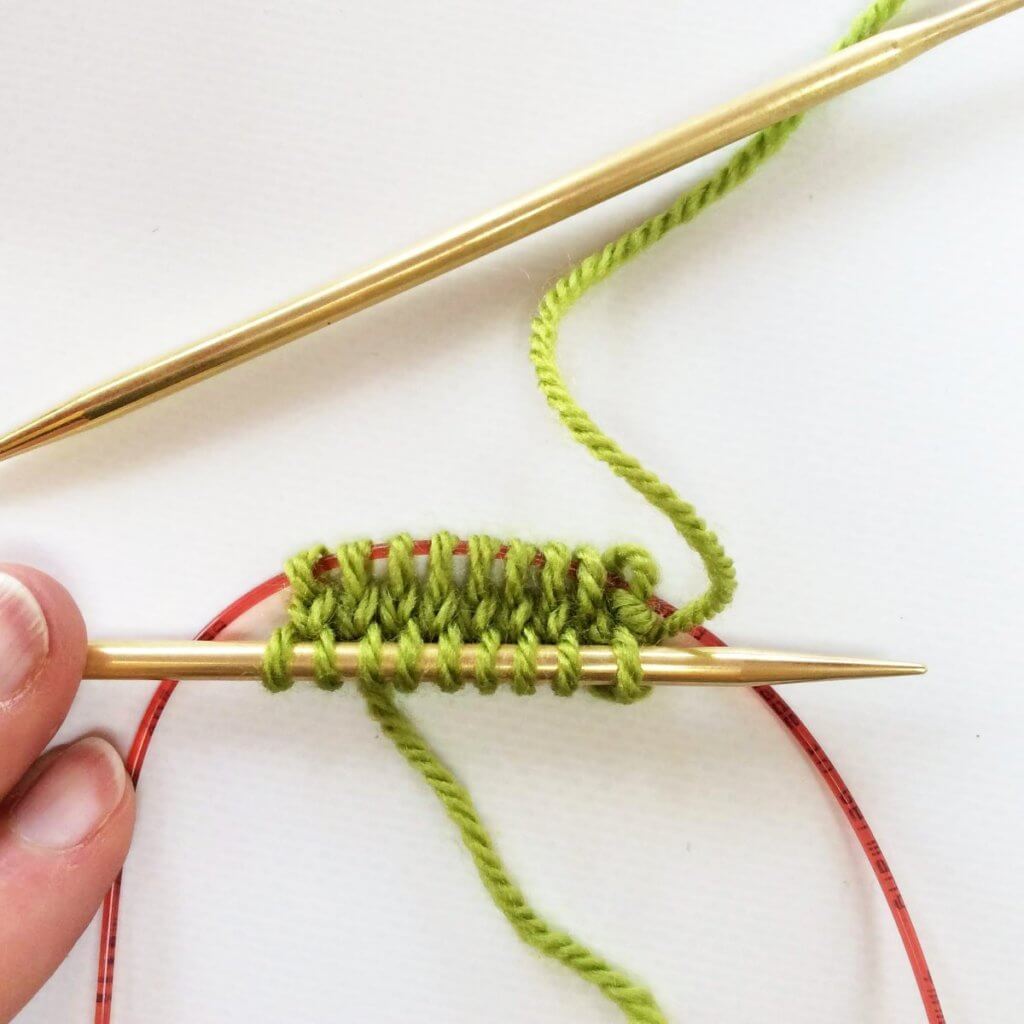
2. Next, position your knitting needle as shown underneath the strand of your that goes to the ball of yarn.

Circular cast-on - a tutorial by La Visch Designs

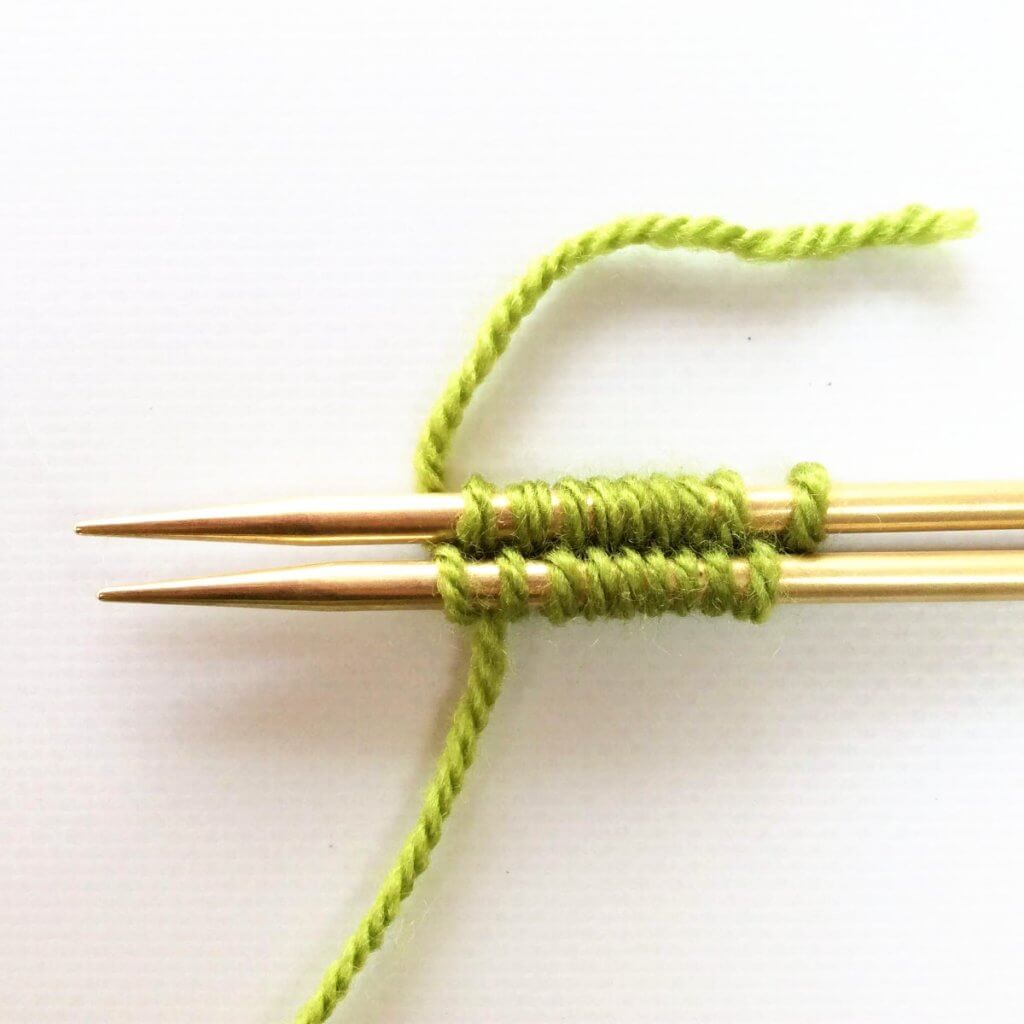
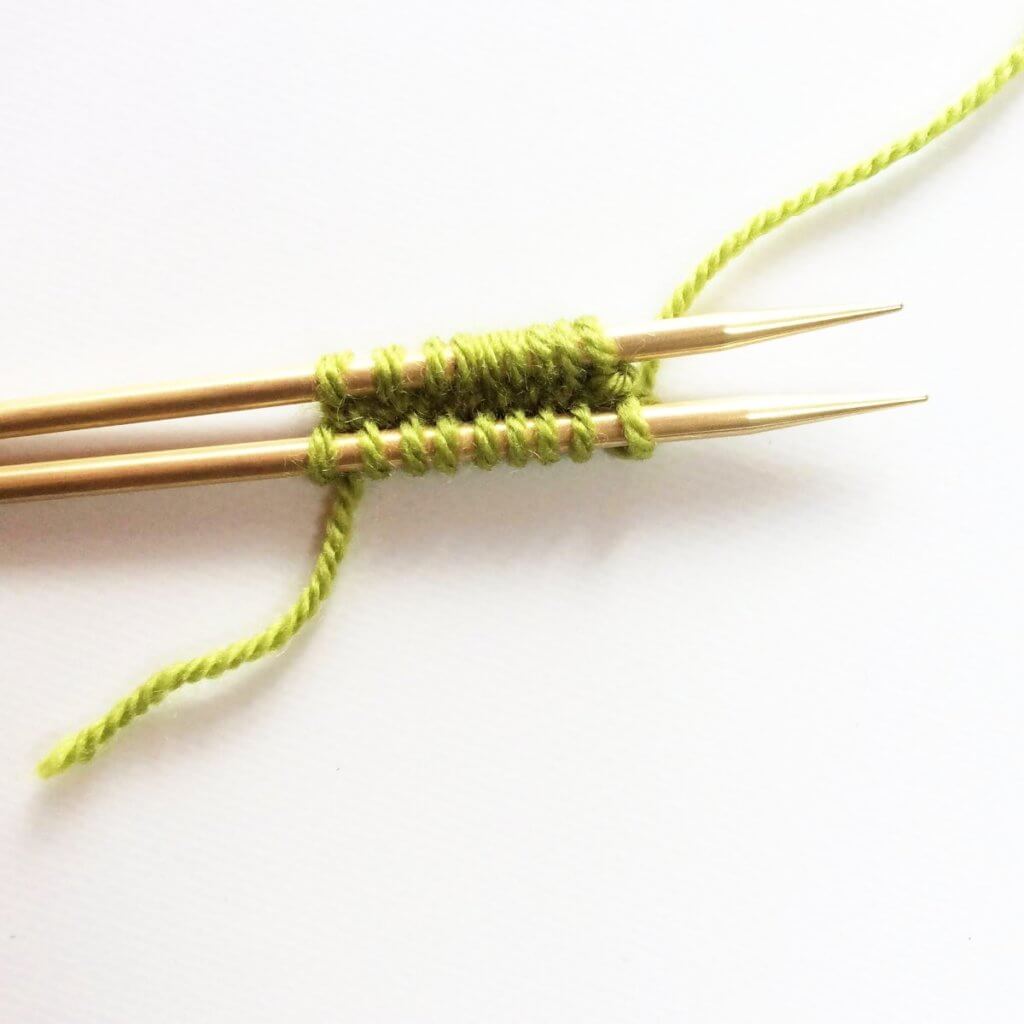
3. Now insert the needle in the circle of yarn, yarn over and pull the loop through the circle. This makes a new stitch as shown below.

Circular cast-on - a tutorial by La Visch Designs

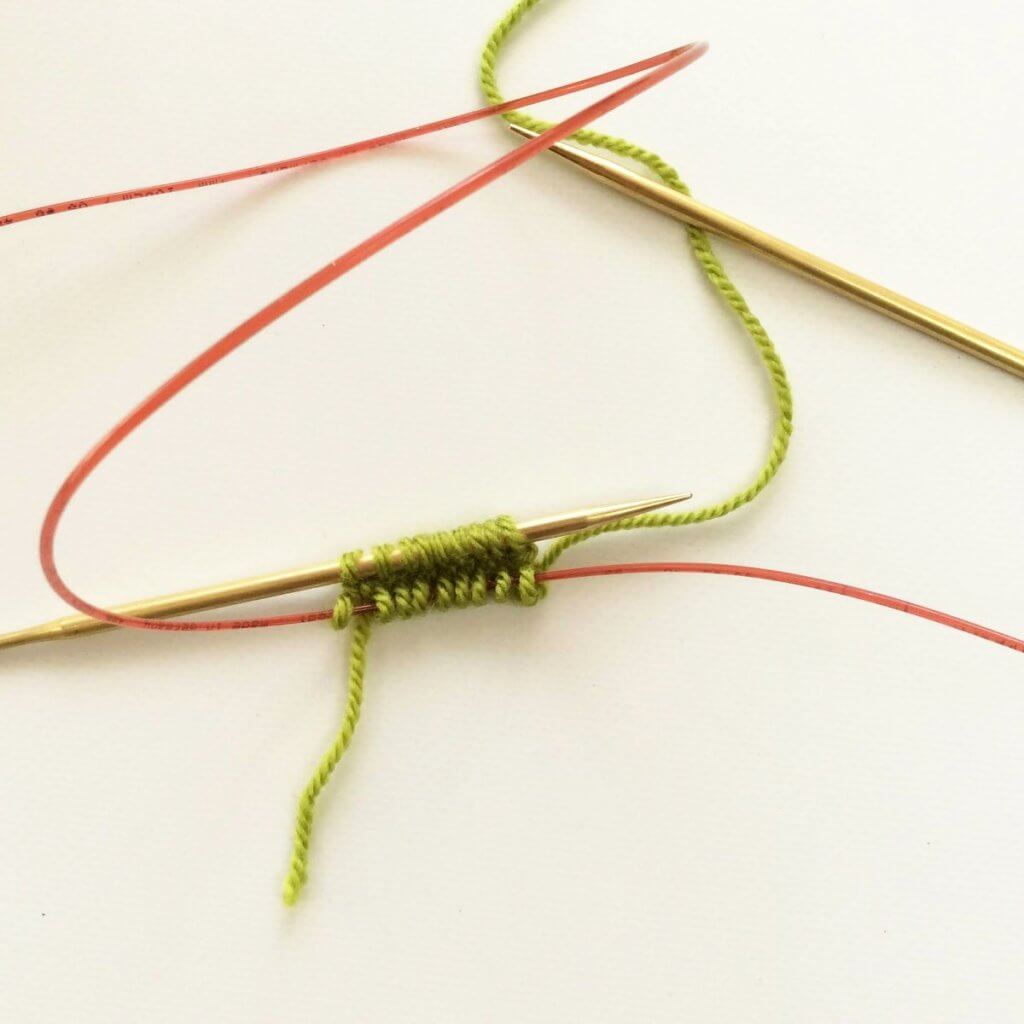
4. Now, yarn over again…

Circular cast-on - a tutorial by La Visch Designs

5. …. and (as in step 3) again insert the needle in the circle of yarn, yarn over and pull the loop through the circle. This makes a new stitch as shown below.

Circular cast-on - a tutorial by La Visch Designs

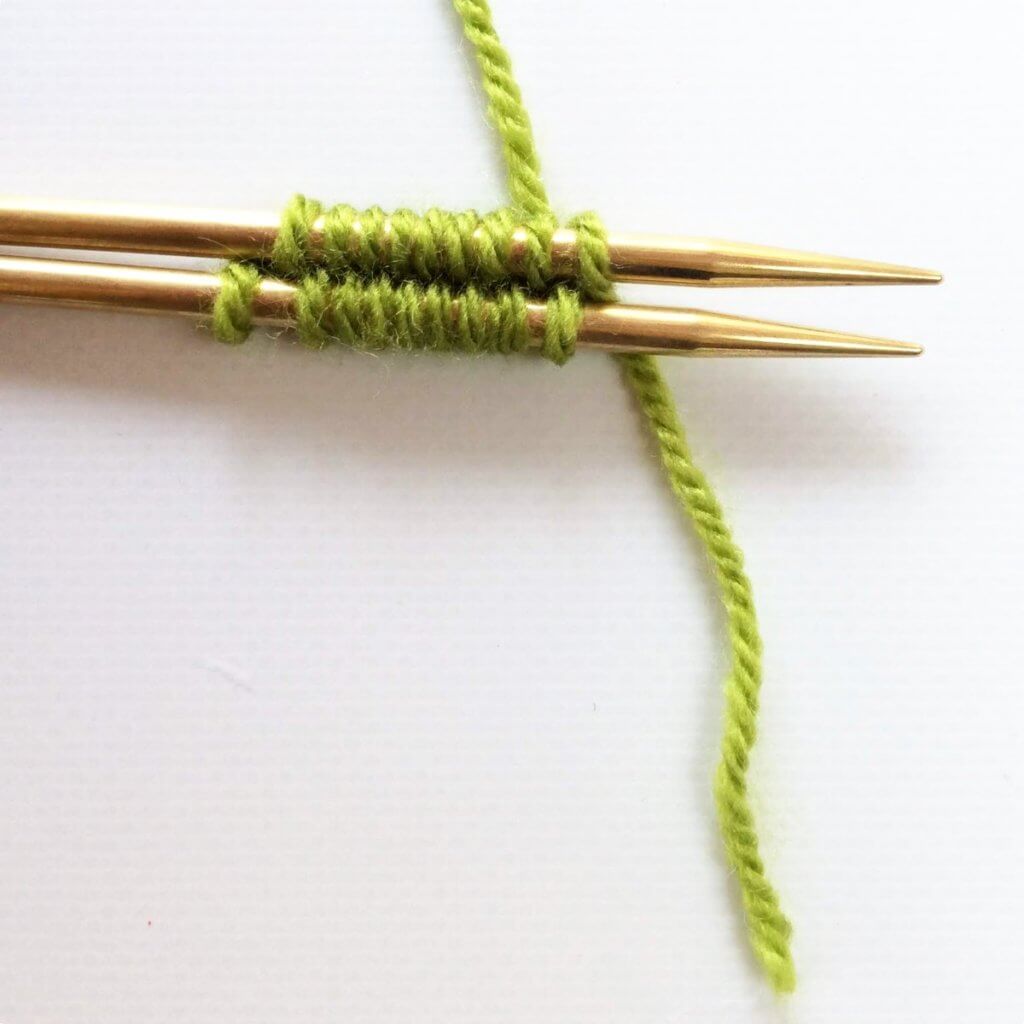
6. Repeat steps 3 and 4 as often as needed. In this example, I repeated another 2 times to get to a total of 8 stitches on my needle.

Circular cast-on - a tutorial by La Visch Designs

7. Now you can pull on the yarn tail to tighten up the cast-on circle. Don’t worry if it loosens up, later on, you can always tighten it again.

Circular cast-on - a tutorial by La Visch Designs

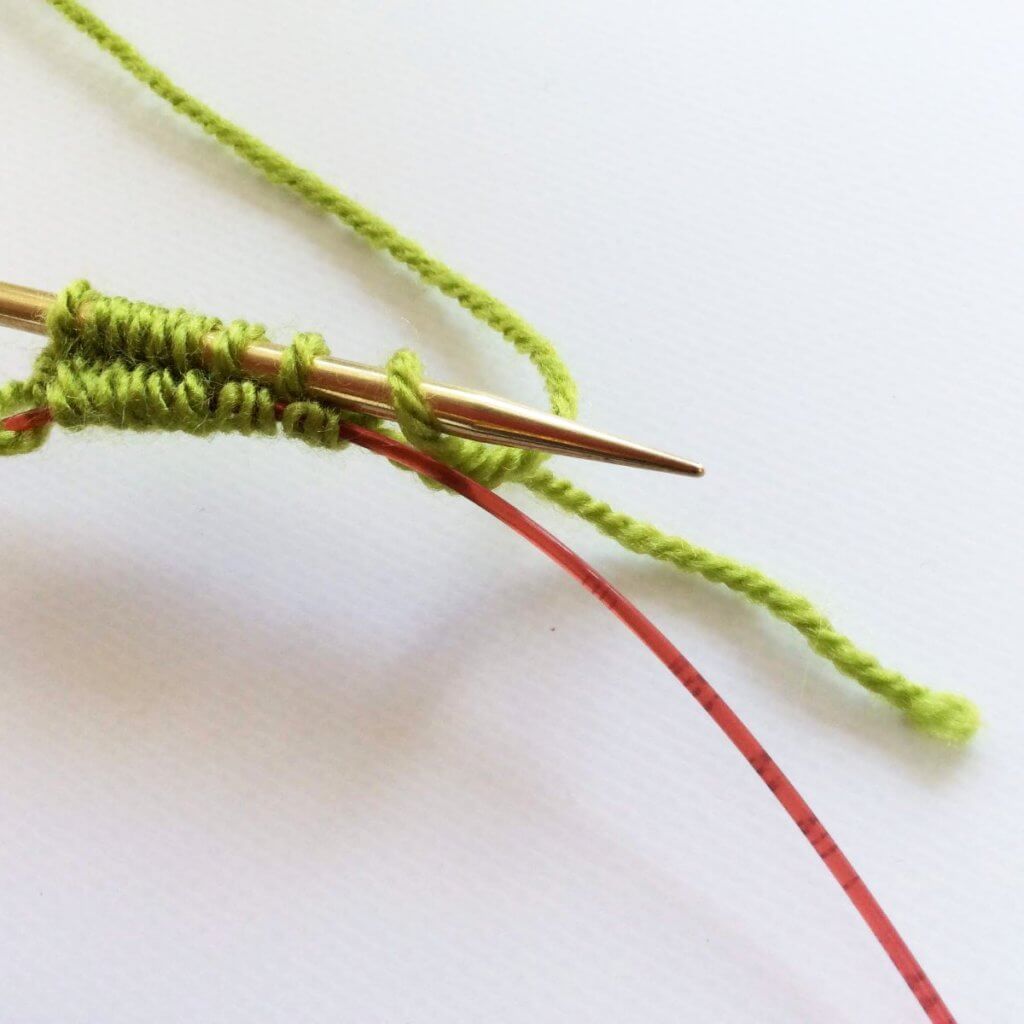
8. And now you can start knitting according to your pattern! This may also be a good time to insert any stitch markers needed, for the correct placement of the increases. In this example, I didn’t, which shows in the wonky placement of the yarn overs in the picture below. Still, the cast-on itself in the center can be seen pretty well, so there it is!

Circular cast-on - a tutorial by La Visch Designs
Patreon logo

Thanks to my Patreon supporters for bringing you this freebie! Creating quality patterns and tutorials is a lot of work and resource-intensive. However, I find it important to give you free content like this tutorial. Thanks to the generous support of my Patreon supporters, I can make it happen. Thank you, patrons! Click here to join, or click here to read more about La Visch Designs on Patreon.

tutorial – circular cast-on Read More »

tutorial – knitting the k2tog decrease

Knitting the k2tog decrease - a tutorial by La Visch Designs

In my previous post, I showed you how to work the left-leaning skp decrease. In this one, I will tell you all about the matching right-leaning decrease, the one abbreviated with “k2tog”. This stands for “knit 2 stitches together”. It’s a very easy and very common way to reduce the number of stitches in your project and make it narrower.

Below you can find how to work this decrease, so get your materials and follow along! I’m starting with the same swatch I used in my previous tutorial on the m1bl increase.

Knitting the k2tog decrease - a tutorial by La Visch Designs

Knitting the right-leaning k2tog decrease step by step

1. First, take your project and work to the spot indicated in your pattern, where the decrease is supposed to be made. I’m making the decrease 3 stitches in, counted from the garter stitch edging on the left side of the swatch. However, because the decrease itself uses 2 stitches I have to stop to do the decrease 5 stitches from the left-side edging.

Knitting the k2tog decrease - a tutorial by La Visch Designs

2. Next, insert the tip of the right-hand needle into the first 2 stitches at the same time as if to knit.

Knitting the k2tog decrease - a tutorial by La Visch Designs

3. Wrap the yarn around the needle…

Knitting the k2tog decrease - a tutorial by La Visch Designs

4. ..pull it through the stitches you inserted the right-hand needle in…

Knitting the k2tog decrease - a tutorial by La Visch Designs

5. …and slip the original stitches of the left-hand needle.

Knitting the k2tog decrease - a tutorial by La Visch Designs

And this is how to work the k2tog decrease! The result in stockinette is shown below. In this small swatch, there are three decrease rows worked every other row, at a distance of 2 stitches from the garter stitch edge.

Knitting the k2tog decrease - a tutorial by La Visch Designs

tutorial – knitting the k2tog decrease Read More »

tutorial – knitting the skp decrease

Knitting the skp decrease - a tutorial by La Visch Designs

To make shaping in your knitting possible, knowing how to decrease the number of stitches on your needles is quite important. In this post, I’m going to show you how to work the left-leaning decrease that is abbreviated with “skp”. Skp stands for “slip 1, knit 1, pass the slipped stitch over the knitted stitch”.

There are, of course, also other left-leaning decreases. Take for example the “slip slip knit” (ssk) decrease. And yes, the result is quite similar to that of the skp, but I find the latter personally much easier to work. That’s the reason I usually include the skp decrease in my patterns and add a note that instead, an ssk can be used if desired.

Below you can find how this decrease is worked, so get your materials and follow along! I’m starting with the same swatch I used in my previous tutorial on the m1bl increase.

Knitting the skp decrease - a tutorial by La Visch Designs

Knitting the left-leaning skp decrease step by step

1. First, take your project and work to the spot indicated in your pattern, where you want to make the decrease. In my case, that’s 3 stitches in from the garter stitch edging on the right side of the swatch.

Knitting the skp decrease - a tutorial by La Visch Designs

2. Next, insert the tip of the right-hand needle into the first stitch as if to knit…. (It is, of course, possible to insert the needle as if to purl, but this will twist the stitch mount and will make the decrease look like a twisted stitch.).

Knitting the skp decrease - a tutorial by La Visch Designs

3. … and slip it onto the right-hand needle without actually knitting it.

Knitting the skp decrease - a tutorial by La Visch Designs

4. Next, we are going to knit the second stitch. To do so, we start with inserting the right-hand needle into the first stitch on the other needle as shown below.

Knitting the skp decrease - a tutorial by La Visch Designs

5. Wrap the yarn around the needle…

Knitting the skp decrease - a tutorial by La Visch Designs

6. ..pull it through the stitch you inserted the right-hand needle in…

Knitting the skp decrease - a tutorial by La Visch Designs

7. …and slip the original stitch off the left-hand needle.

Knitting the skp decrease - a tutorial by La Visch Designs

8. Next, insert the left-hand needle into the second stitch counted from the tip of the right-hand needle…

Knitting the skp decrease - a tutorial by La Visch Designs

9. And pull it over the first stitch from the tip on the right-hand needle to complete the decrease. Do you see how it slants to the left?

Knitting the skp decrease - a tutorial by La Visch Designs

And this is how to work the skp decrease! The result in stockinette is shown below. In this example, there are three decrease rows worked every other row, at a distance of 2 stitches from the garter stitch edge.

Knitting the skp decrease - a tutorial by La Visch Designs

The decreases in this particular swatch look a bit wibbly/wobbly but in my experience that mostly disappears after blocking. In lace, however, I don’t notice it at all after blocking.

tutorial – knitting the skp decrease Read More »

tutorial – knitting the m1bl increase

Knitting the m1bl increase - by La Visch Designs

As you know, there are many options to work increases in knitting. Take for example the various m1 increases. A disadvantage of the regular m1 increase is, however, that it’s worked into the horizontal strand between two stitches in the row below. This causes the knitting to become tighter when they’re stacked over multiples rows. Especially when working in stripes or garter stitch, this can cause the lines to become distorted.

And that is where the m1bl increase comes in. The m1bl increase is also known as “Make 1 with Backward Loop” or the “Backward loop increase”. And when worked correctly it’s almost invisible! This is due to the fact that it doesn’t use yarn from the row below, but is given its own amount to be formed. Also, the m1bl increase can be used to either increase mid-row or cast-on stitches at the end of the row. The m1bl is basically the same as the thumb method of casting on, also known as the “single cast-on”, “e-wrap cast-on” or the “backward loop cast-on”.

Directional increase

The m1bl increase is a directional increase. This means there is both a left-leaning and a right-leaning version, which mirror each other when used together. This can be very useful in projects where paired increased are needed and it may be visually pleasing to be symmetrical. Think for example of both sides of a top-down triangle shawls spine, or bust shaping in a garment.

Sometimes there is no indication of a direction given in the pattern, usually denoted by plain “m1bl”. If that is the case, you can choose which version you like best, or easiest to make. Often I don’t bother using both versions of the m1bl increase. I mean, it’s so invisible on its own!

In my patterns you can find the following description for the m1bl increase:
Make 1 with a backward loop (m1bl): With your thumb, make a backward loop with the working yarn over the right-hand needle and pull to tighten.

Below you can find how this increase is worked.

Knitting the left-leaning m1bl increase step by step

1. Take your working yarn and loop it as shown in the picture below, with the yarn going to the project in front.

Knitting the m1bl increase - by La Visch Designs

2. Next, insert the tip of the right needle from back to front through the loop.

Knitting the m1bl increase - by La Visch Designs

3. Pull the yarn snugly around the needle.

Knitting the m1bl increase - by La Visch Designs

4. On next row when you come to the loop added, purl (as shown here for stockinette) or knit (for garter stitch) as usual.

Knitting the m1bl increase - by La Visch Designs

Knitting the right-leaning m1bl increase step by step

1. Take your working yarn and loop it as shown in the picture below, with the yarn going to the project in the back.

Knitting the m1bl increase - by La Visch Designs

2. Next, insert the tip of the right needle from front to back through the loop.

Knitting the m1bl increase - by La Visch Designs

3. Pull the yarn snugly around the needle.

Knitting the m1bl increase - by La Visch Designs

4. On next row when you come to the loop added, purl (as shown here for stockinette) or knit (for garter stitch) as usual.

Knitting the m1bl increase - by La Visch Designs

The results

And this is how knitting both right- and left-leaning versions of the m1bl increase are worked! The result in stockinette is shown below, with the right-leaning version on the right of the swatch and the left-leaning one on the left. In this small swatch, there are three increase rows worked every other row, at a distance of 3 stitches from the garter stitch edge.

Knitting the m1bl increase - by La Visch Designs

As you can see in the below picture, the increases are fairly invisible in reverse stockinette. The same holds true in garter stitch!

Knitting the m1bl increase - by La Visch Designs

tutorial – knitting the m1bl increase Read More »

tutorial – making a slipknot

making a slipknot - by La Visch Designs

I know, it seems so basic: making a slipknot to start casting on your knitting project. But that’s only because once you know how to do it, it’s easy! And yes, I know it’s possible to start casting on without a slipknot, and that it’s sometimes to be preferred because it doesn’t give that extra knot on your cast-on edge. But that’s not the point here.

Most of the times I still start my knitting projects with a slipknot, even though I know how to do it without. I guess I just like that sturdy start of my cast-on edge! In this post, I’m going to show you how to do make a slipknot around a knitting needle yourself.

Making a slipknot step-by-step

1. Loop the yarn as shown in the picture below.

Making a slipknot - by La Visch Designs

2. Next, arrange the yarn tail in such a way, that you can pull it through the first loop, like this:

Making a slipknot - by La Visch Designs

3. Insert your knitting needle as shown, underneath the arranged bit of yarn tail.

Making a slipknot - by La Visch Designs

4. Now hold both the yarn tail and the yarn going back to the ball of yarn and pull them both to tighten the slipknot around the needle.

Making a slipknot - by La Visch Designs

5. And there you have it: a lovely slipknot around your needle! You’re now ready to start casting on the remaining stitches needed for your project. You can for example use the knitted-on cast-on for this.

Making a slipknot - by La Visch Designs

Of course, it can be hard to visualize the motions needed to realize the above. For that very reason, I’ve also made a short video in which I show you how I make slipknots around my knitting needle. It doesn’t contain a spoken commentary, it’s really only to show you the motions!

tutorial – making a slipknot Read More »
tutorial: garter tab CO for top-down crescents

Garter tab CO for top-down crescents - a tutorial by La Visch Designs

Many top-down shawl patterns start with a garter tab cast-on because it creates a lovely seamless start of any shawl. Most people will be familiar with this cast-on for traditional top-down triangle shawls. A tutorial on working such a garter tab cast-on can be found here. But what to do when starting a top-down crescent type shawl?

This type of shawl usually has a different increase rate when compared with traditional triangles. With the latter, the stitch count is increased by 4 on all right-side rows. With a top-down crescent though, increases are worked on both right side and wrong side rows: the stitch count is increased by 4 stitches on right-side rows and by 2 on wrong-side rows. When the wrong-side row increases are yarn overs, you get a rather decorative eyelet edge to your shawl. This makes it, however, harder to make your garter tab blend in invisibly. And this is where this tutorial on knitting garter tab CO for top-down crescents comes in!

As with all garter tabs, they can be a bit fiddly to work, especially when working with very skinny yarn. However, don’t let that deter you from knitting patterns that use this cast on: with the below step-by-step instructions and tips you are sure to master this technique.

In this example I used the following garter tab instructions, to get a 7 stitch start including 2 edge stitches on each side:

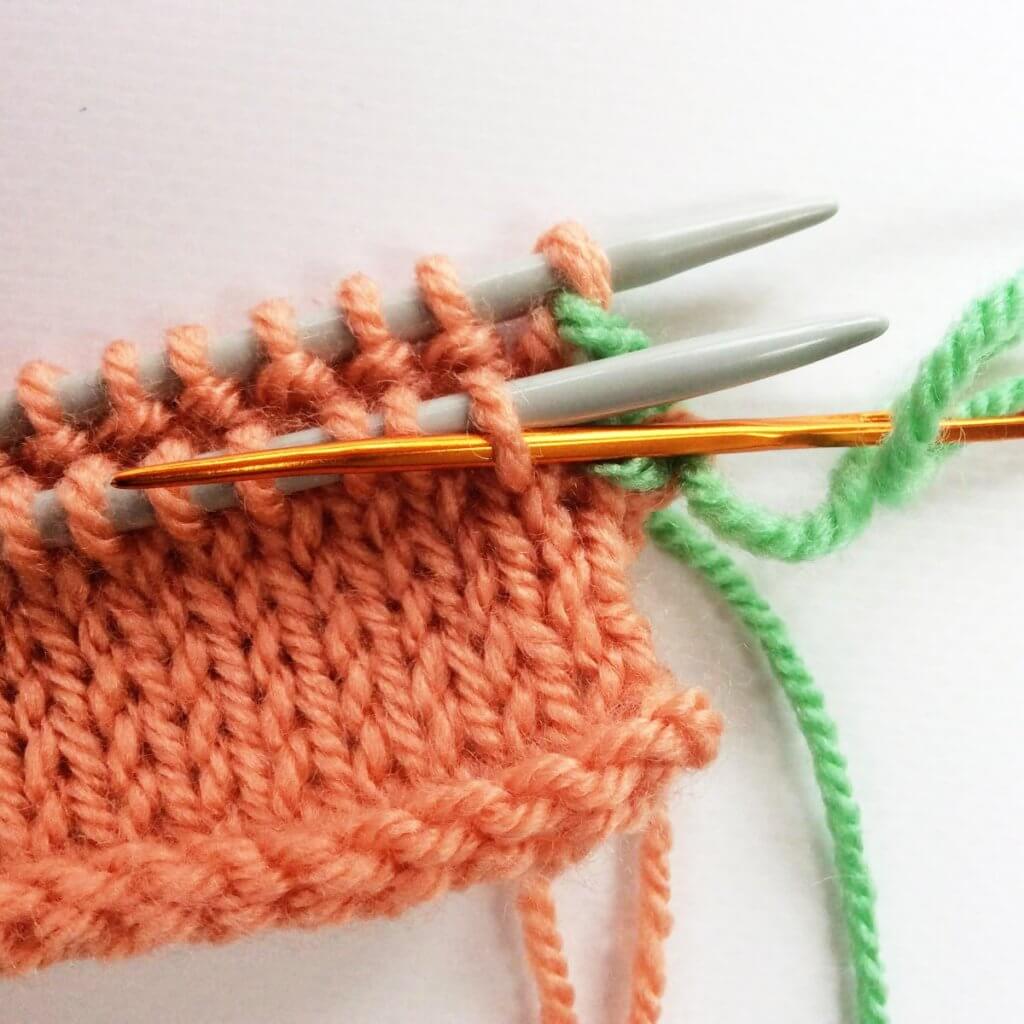
CO 2 sts and knit 6 rows. Turn work 90 degrees clockwise, yo, then pick up 1 st from the second (middle) garter stitch ridge along the long edge and twist this st 360 degrees counterclockwise, then purl it, yo. Pick up and knit 2 sts along the cast on edge. (7 sts).

Materials

Besides yarn and knitting needles I’m also using 3 removable stitch markers, one preferably in a different color or size.

Garter tab CO for top-down crescents - a tutorial by La Visch Designs

The garter tab CO for top-down crescents step by step

1. Cast-on two stitches using your preferred cast-on method. In this example, I’m using the knitted on cast-on. Place markers in each of every cast-on stitch, this will make it easier to pick them up later on. I attached them to the back legs of the stitches to keep the markers out of the way.

Garter tab CO for top-down crescents - a tutorial by La Visch Designs

2. Work 6 rows in garter stitch (knit every row). This will give you 3 ridges.

Garter tab CO for top-down crescents - a tutorial by La Visch Designs

3. Then turn your work – still on the right-hand needle – 90 degrees clockwise and yo.

Garter tab CO for top-down crescents - a tutorial by La Visch Designs

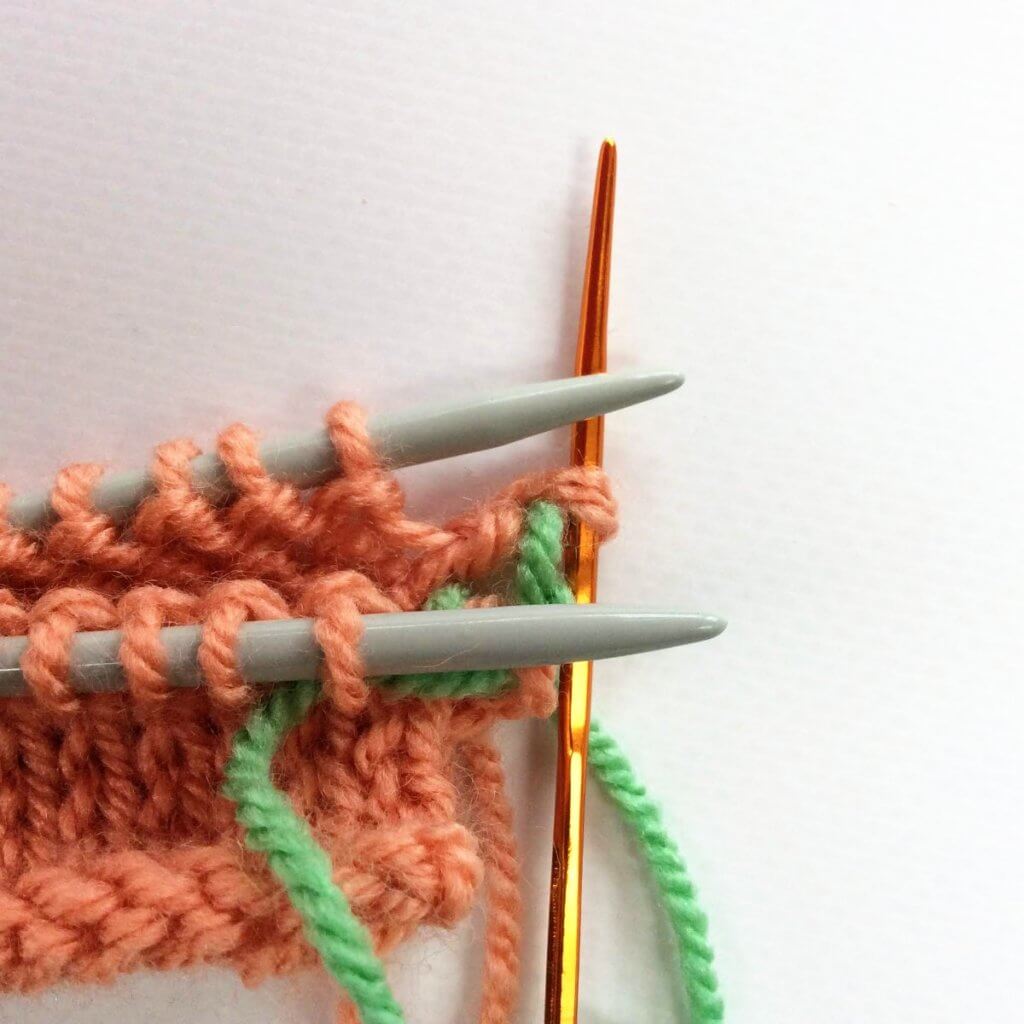
4. Next, insert the remaining stitch marker in the purl bump from the middle of the 3  garter ridges along the edge.

Garter tab CO for top-down crescents - a tutorial by La Visch Designs

5. Use the stitch marker to twist the stitch it is inserted in 360 degrees counterclockwise (2 twists).

Garter tab CO for top-down crescents - a tutorial by La Visch Designs

6. Next, insert the left-hand needle in the twisted stitch ….

Garter tab CO for top-down crescents - a tutorial by La Visch Designs

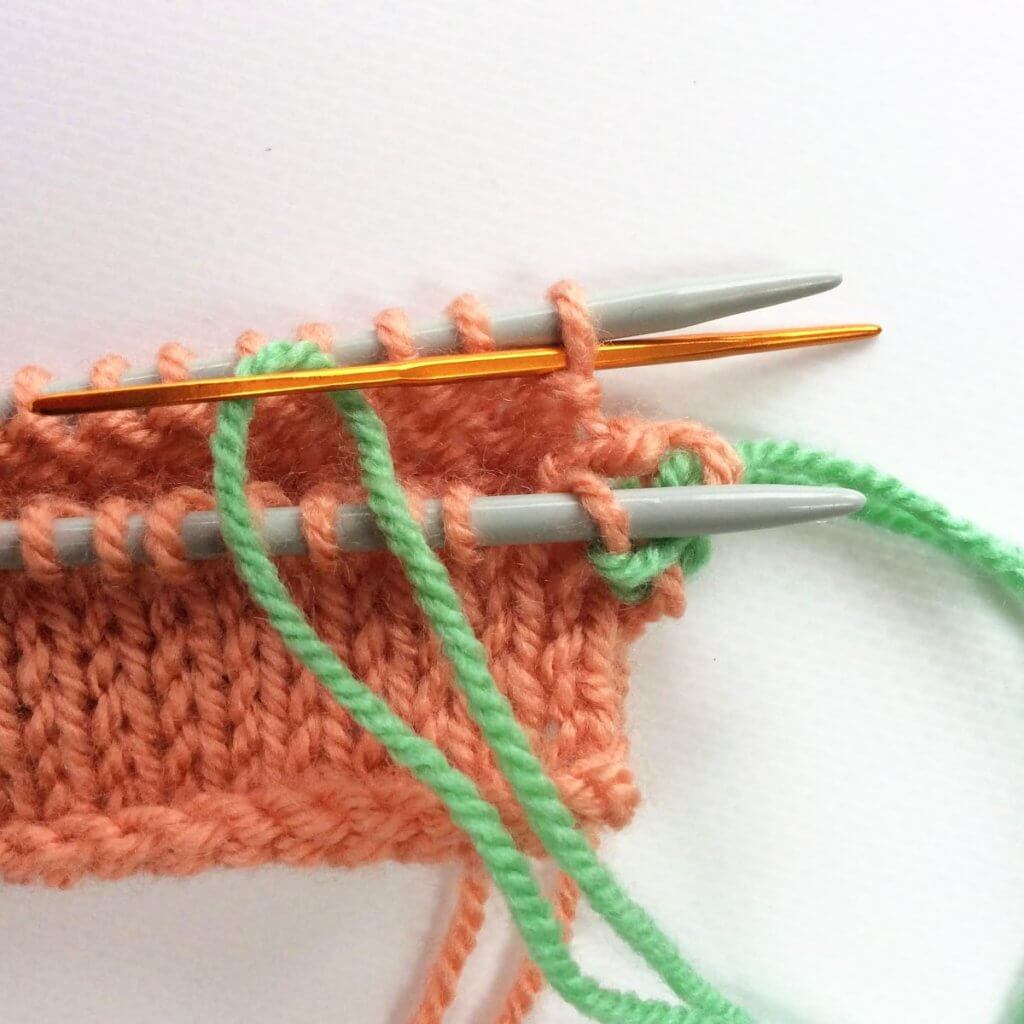
7. …. and purl this stitch. The reason I’m purling this stitch here is that it makes sure that after casting on I can continue straight away with a right side row for stockinette. If you want reverse stockinette or garter stitch, this stitch should be knit instead of purled. It looks like this after this step:

Garter tab CO for top-down crescents - a tutorial by La Visch Designs

8. Next, yo again.

Garter tab CO for top-down crescents - a tutorial by La Visch Designs

9. Turn your work 90 degrees clockwise again and pick up and knit the first marked stitch along the cast-on edge. These stitches can be a tad hard to see, but because we marked them in step 1 this really isn’t an issue.

Garter tab CO for top-down crescents - a tutorial by La Visch Designs

10. Now pick up and knit the second marked stitch along the cast-on edge.

Garter tab CO for top-down crescents - a tutorial by La Visch Designs

11. There you have it: a garter tab CO for top-down crescents! There are now 7 stitches: 2 stitches on either end which will become the garter edge stitches, and 3 stitches in the middle which will become the body of your shawl. You are now ready to start the rest of your pattern!

Garter tab CO for top-down crescents - a tutorial by La Visch Designs

In the little swatch shown below, I’ve knitted some more rows in the following format:

Row 1 (RS): K2, (k1, yo, k1) in next st, k to 3 sts before end, (k1, yo, k1) in next st, k2.
Row 2 (WS): K2, yo, p to 2 sts before end, yo, k2.

Do you see how well this garter tab cast-on blends in? I can’t see where the cast-on ends and the rest of the shawl begins! And that’s how I like it.

Garter tab CO for top-down crescents - a tutorial by La Visch Designs

tutorial: garter tab CO for top-down crescents Read More »
tutorial: making a magic ball

Making a magic ball - by La Visch Designs

If you’re a bit like me, you’ll have loads of odds and ends of the various projects. They are of course quite ornamental when displayed in nice glass jars or vases. But how many jars of ornamental balls of yarn does one need? I mostly work in fingering weight yarn which means I’ve got a lot of ends that would combine well, ranging from a mere 2 g up to quarter skeins. Of course, the latter could be used in small projects like Fish for Amiga, but again, how many small softies does one need?

So, I thought, why not make a magic ball?!

What is a magic ball?

You may wonder what a magic ball exactly is. Well, I’ll tell you! It is a ball of yarn that is made by attaching pieces of yarn of similar weight to each other. Thus making a bigger ball out of all of the smaller yarn remains. This way a scrappy project like a blanket, cowl, scarf or shawl is made easier because there are no ends left to weave in. That’s already taken care of by combining the yarns in the magic ball!

I myself am also very much looking forward to working with my magic ball. All those memories of projects past attached to the yarns within… Below you can find what I did to make my magic ball.

How to make a magic ball step by step

1. To start, collect your bits and bobs of yarn. Make sure they’re all in the similar weight range and ideally, also of similar materials. Combining an all acrylic yarn with otherwise wool yarns will have an impact on the resulting piece if it requires blocking. And do also consider differences in drape and washing care.

In my case, they’re all fingering weight yarns with a high content of wool. Some have up to 25% of nylon, others contain a bit of silk. In general behavior, all these yarns are however quite similar.

Making a magic ball - by La Visch Designs

2. To connect the pieces of yarn with each other, there are of course various options among which the Russian join and the braided join. In this case, because the yarns all have multiple plies, I’m using the braided join. The Russian join requires a bit more attention and tools to work, but would have been my choice for connecting single ply yarns with each other.

Making a magic ball - by La Visch Designs

3. Do leave the yarn tails on! Cutting them off prematurely can contribute to the join coming undone. Just leave them be and cut any yarn ends after you’ve knitted up your magic ball and blocked the finished piece. In the below picture you can see a bit how I’m faring midway in making my magic ball.

Making a magic ball - by La Visch Designs

4. And here it is all done! Almost 100 g of yarn where there were only useless bits before. Now to think of a nice new design to use it in…

Making a magic ball - by La Visch Designs

tutorial: making a magic ball Read More »
tutorial: chainless starting double crochet (csdc)

Chainless starting double crochet (csdc) - a tutorial by La Visch Designs

Usually, when beginning a new row or round in a crochet project, we start with a chain 2 or chain 3 to replace the first double crochet (dc) stitch. However, a chain of stitches is much skinnier than regular double crochet, which makes it quite visible in the resulting piece. Also, it can be hard to tension the chain just so that it exactly matches the height of the dc stitches. This can make the edge of the piece (when worked flat) less neat than desired. Fortunately, there is a solution for this: the chainless starting double crochet stitch or csdc for short.

Chainless starting double crochet (csdc) - a tutorial by La Visch Designs

This is the perfect way to make a starting stitch that more closely resembles both the height and thickness of a regular dc stitch. Please note, though, that this method is best suited for continuing in the same color yarn. When changing the yarn color, using a standing double crochet stitch instead is advised. For this, I will also make a tutorial soon!

In this post, I will show you how to work the chainless starting double crochet stitch when worked flat. Notes on how to do this when working in the round can be found below the step-by-step instructions. Please note that American crochet terminology is used.

How to work a chainless starting double crochet stitch step by step

1. To start the csdc stitch, pull up the loop on your hook approx. to the height of a regular double crochet stitch.

Chainless starting double crochet (csdc) - a tutorial by La Visch Designs

2. Hold the elongated loop in place on your hook with your finger….

Chainless starting double crochet (csdc) - a tutorial by La Visch Designs

3. … and twist the hook counterclockwise down towards you, wrapping the lengthened loop around your hook. You now have the original loop around your hook as well as an extra double strand.

Chainless starting double crochet (csdc) - a tutorial by La Visch Designs

4. Now we will continue making a double crochet as we would normally do. First, yarn over…

Chainless starting double crochet (csdc) - a tutorial by La Visch Designs

5. …. and pull it through the double strand on your hook. Treat it as the first 2 loops on the hook as you would while working a regular double crochet stitch.

Chainless starting double crochet (csdc) - a tutorial by La Visch Designs

6. Again yarn over…

Chainless starting double crochet (csdc) - a tutorial by La Visch Designs

7. …. And pull it through the remaining 2 loops on the hook to complete the stitch.

Chainless starting double crochet (csdc) - a tutorial by La Visch Designs

And that’s it! Now you’re ready to continue your pattern in the other stitches of the row or round.

Chainless starting double crochet (csdc) - a tutorial by La Visch Designs

Working a chainless starting double crochet stitch in the round

Using a csdc stitch when working in the round is basically the same as when working flat. The main difference is, of course that in projects worked in the round, the last stitch has to be joined with the first one of the round by using a slip stitch (sl st).

This makes the process as follows:
1. Slip stitch in the top of the first stitch of the round.
2. Work the chainless starting double crochet stitch as described above.
3. Work the rest of the round.
4. Join in the round by working a slip stitch into the top of the csdc as you would with a regular dc stitch.

Other chainless starting stitches?

Not all projects are worked in double crochet, of course. Fortunately, it’s really easy to also use this technique to replace the starting chains for taller stitches like the treble crochet stitch, double treble crochet stitch, etc. The main thing to keep in mind is that you need
1. To pull up a loop in step 1 as described above to match the height of the intended stitch.
2. Adjust the number of wraps (step 3 as described in the csdc step-by-step instructions above) to match the number of “loops on the hook” with those from the intended stitch. Each wrap hereby represents 2 loops.

This technique lends itself less well for stitches shorter than the double crochet. But then, for those is the starting chain also less of a problem in looks.

Patreon logo

Thanks to my Patreon supporters for bringing you this freebie! Creating quality patterns and tutorials is a lot of work and resource-intensive. However, I find it important to give you free content like this tutorial. Thanks to the generous support of my Patreon supporters, I can make it happen. Thank you, patrons! Click here to join, or click here to read more about La Visch Designs on Patreon.

tutorial: chainless starting double crochet (csdc) Read More »