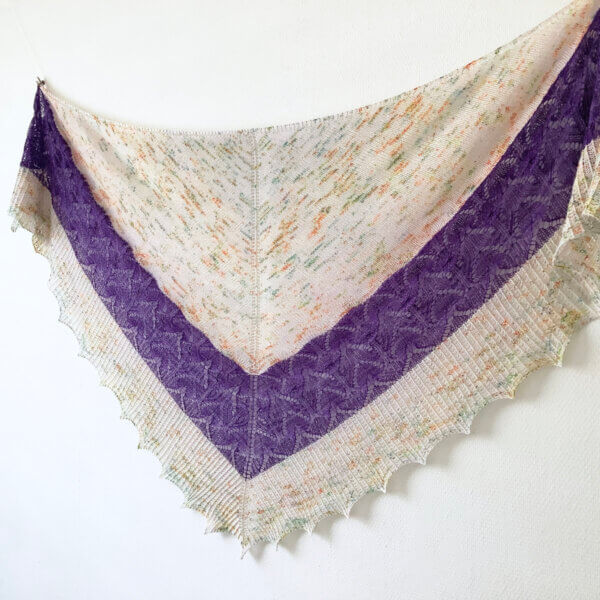
lace

electric violet

Electric Violet - A knit shawl in pale pink yarn with multicolored speckles, a lace border in deep purple, followed by an edging in twisted rib. It's shown on a mannequin against a white background.

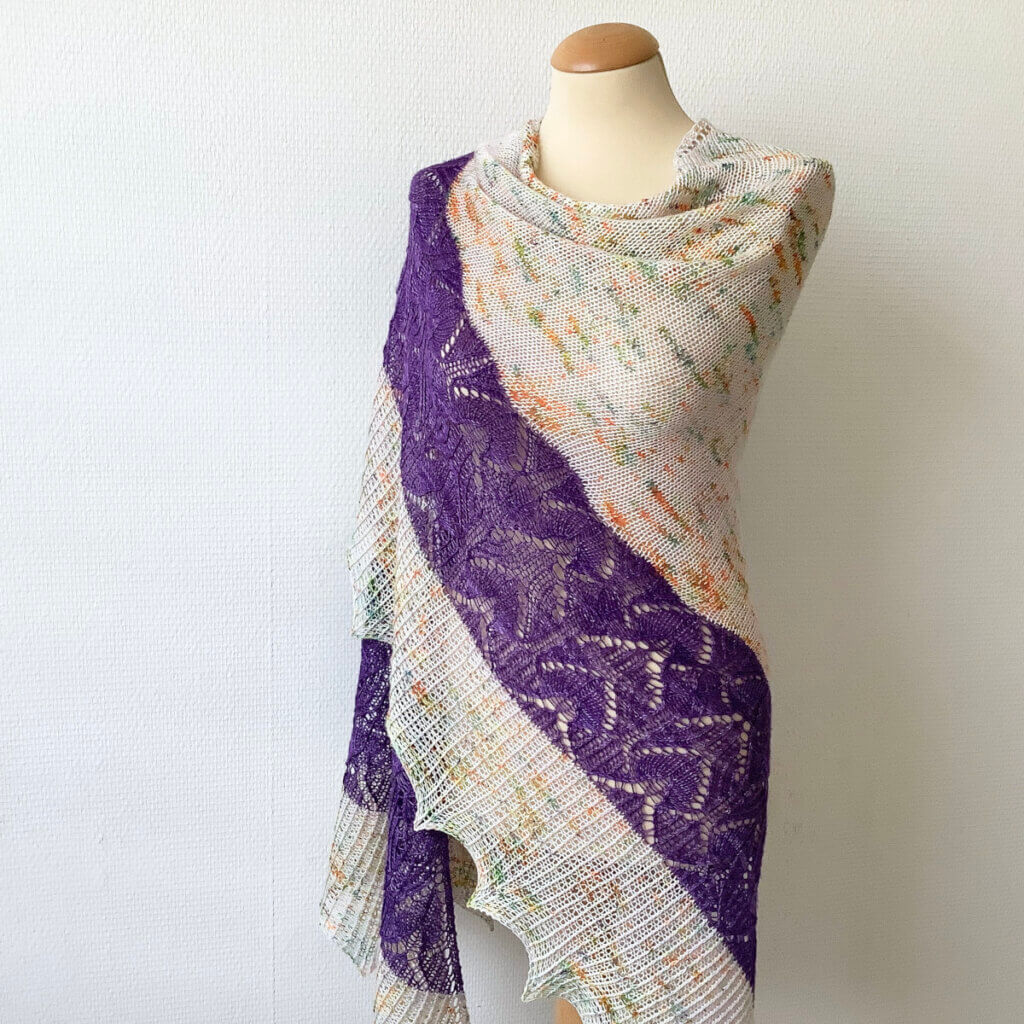
The Electric Violet shawl, was inspired by the gorgeous hand-dyed yarn from RMR Yarn Co. it’s knit with. It combines a relaxing-to-knit stockinette body, with a delightful lace section, followed by a twisted rib edging. The shawl as shown in size L, uses 300 g of fingering weight yarn. A smaller 2 skein shawl (size S in this pattern) is made by omitting the twisted rib section.

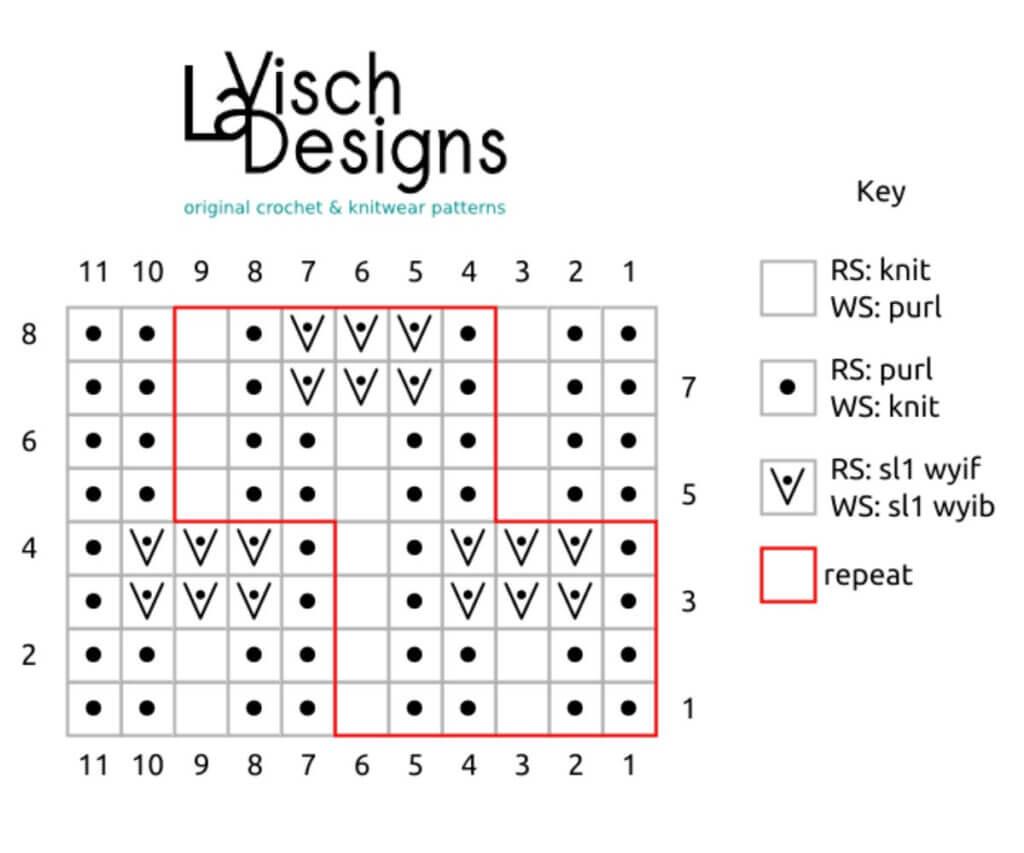
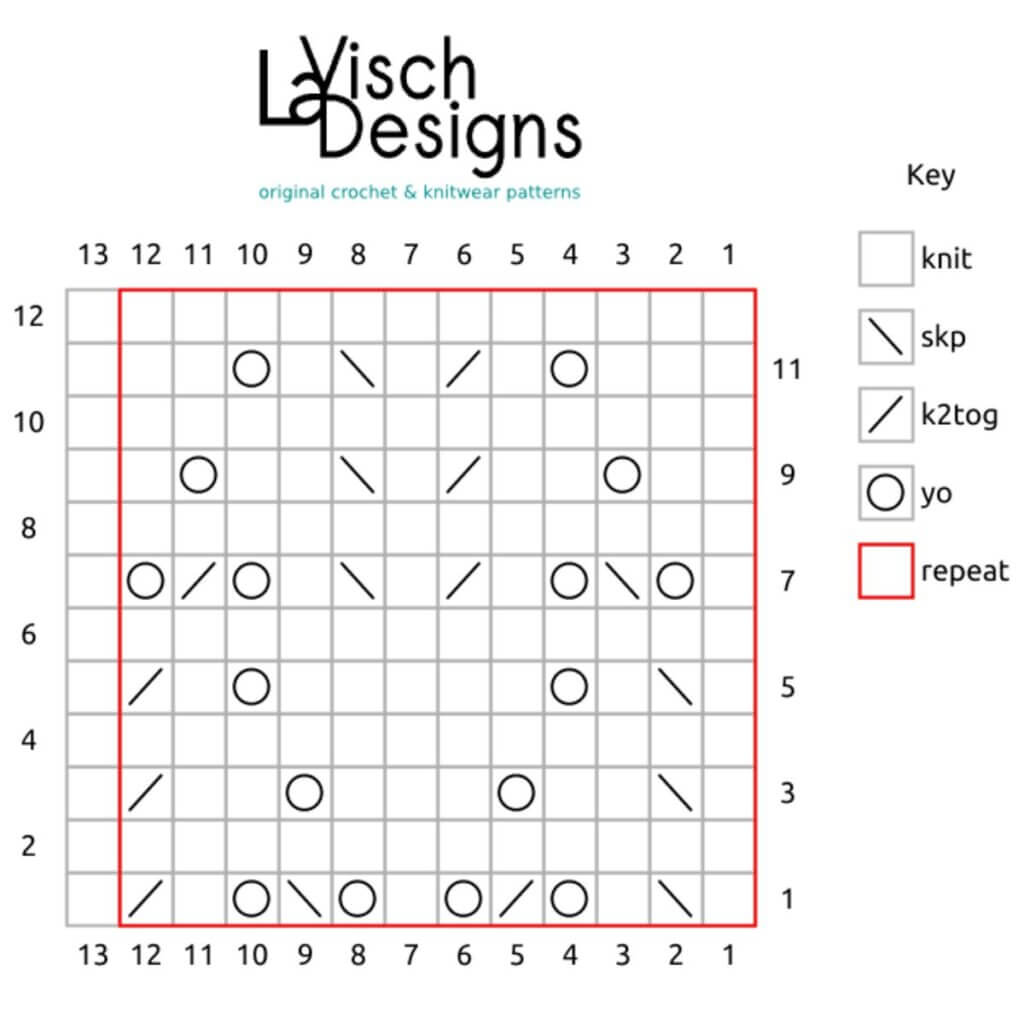
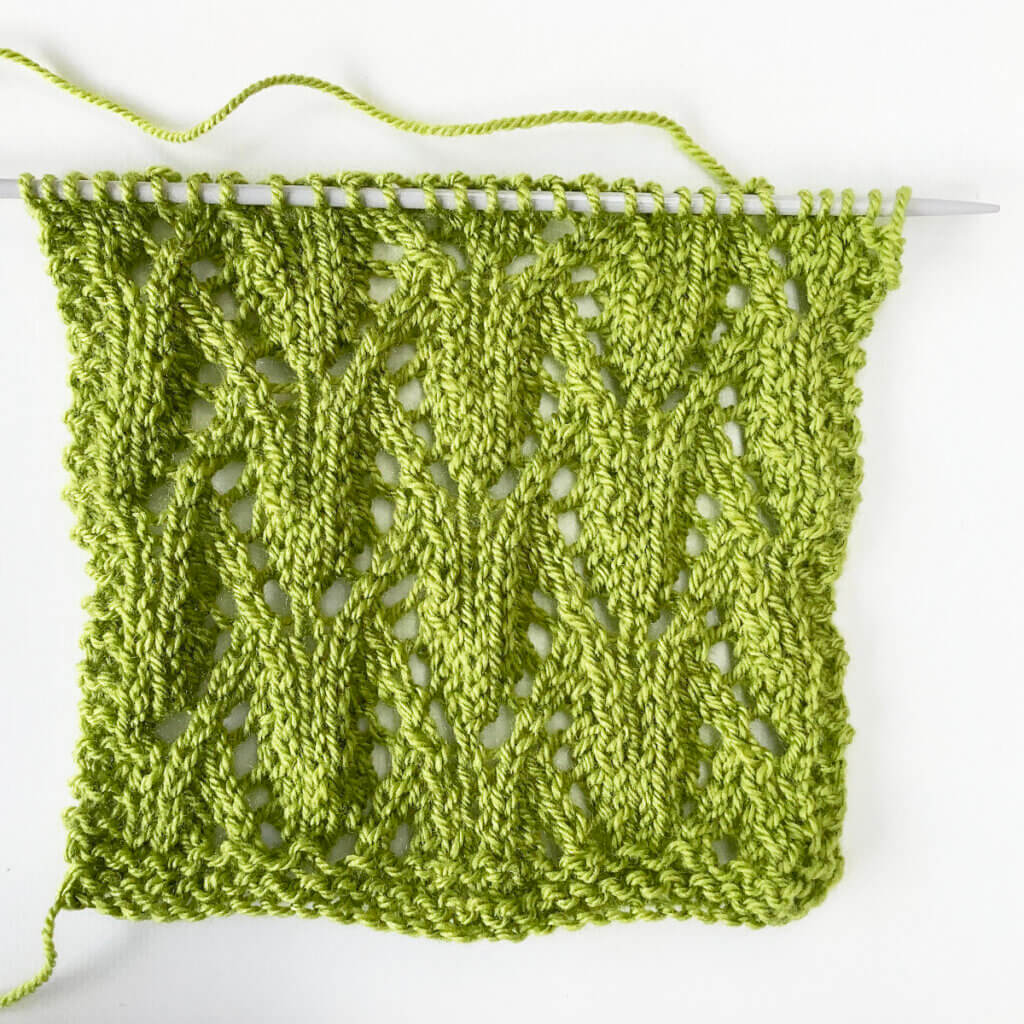
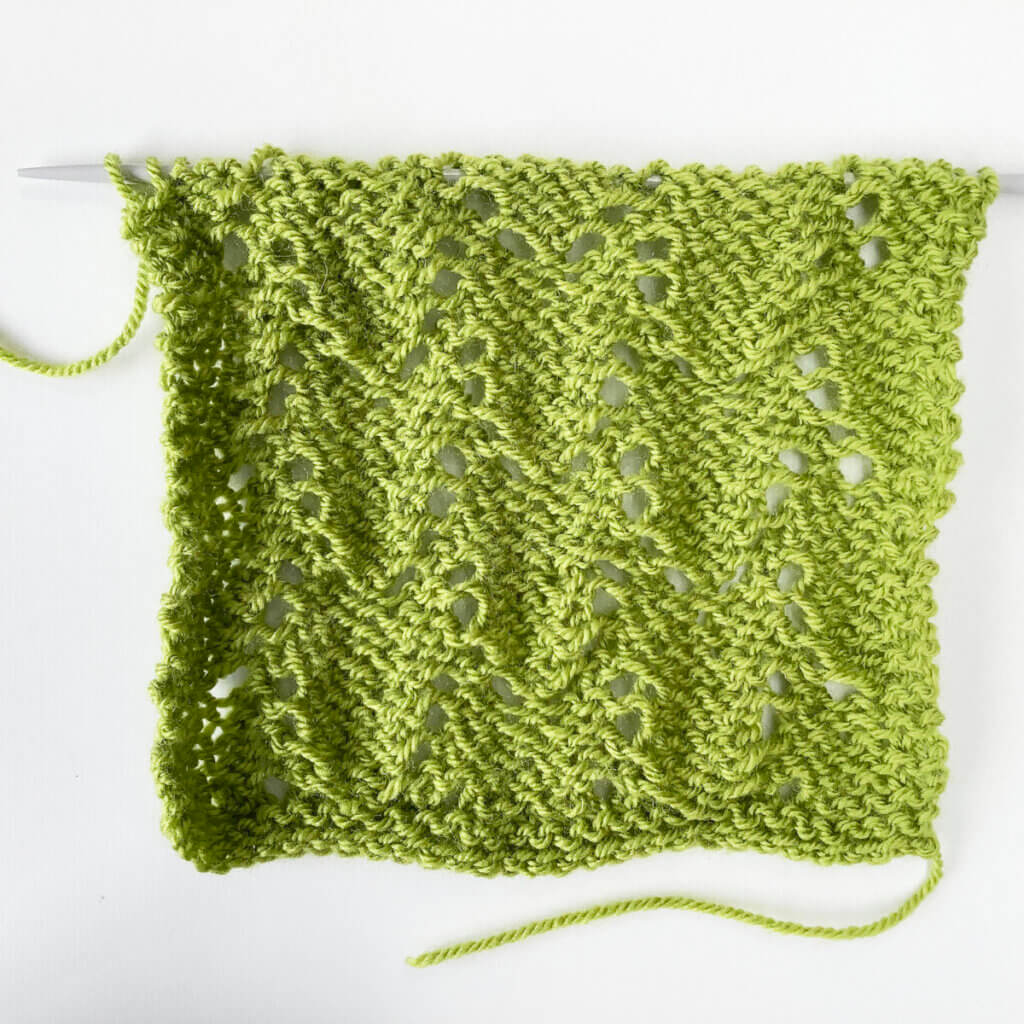
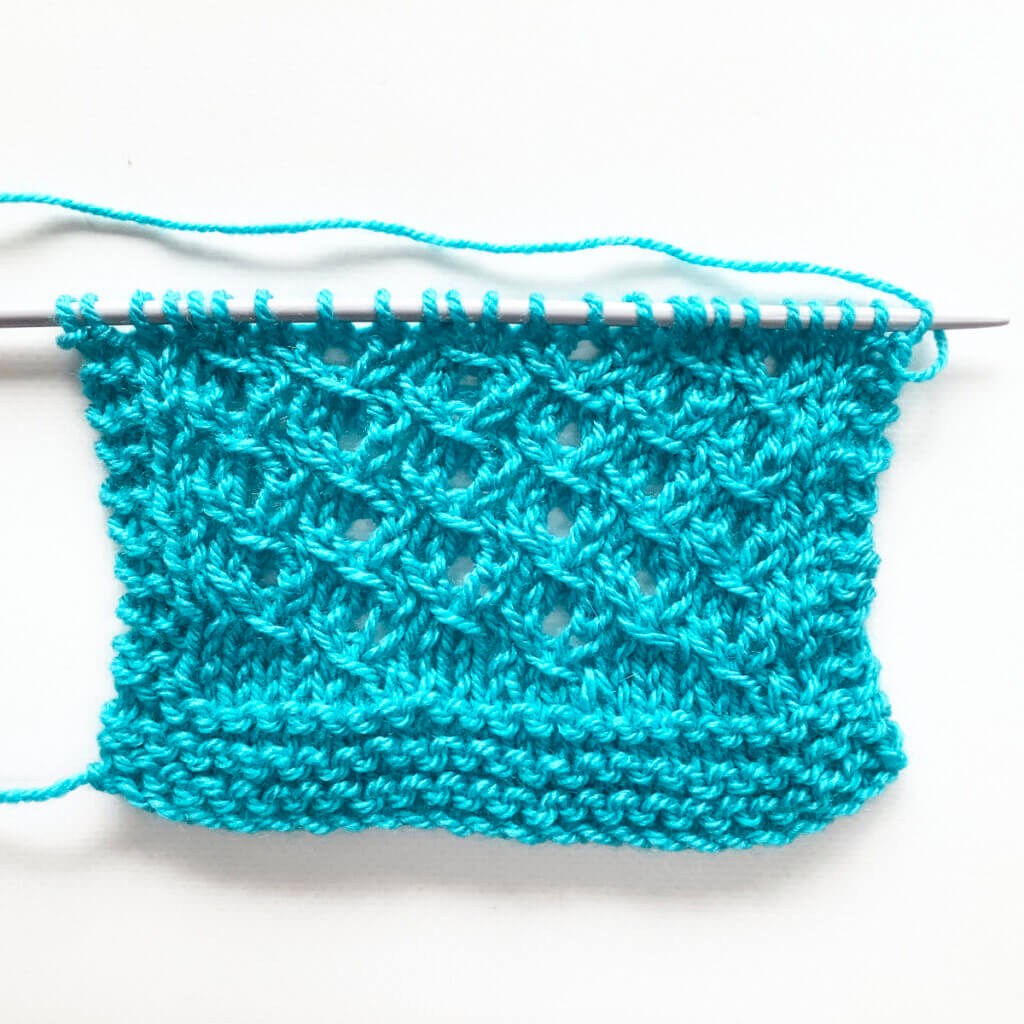
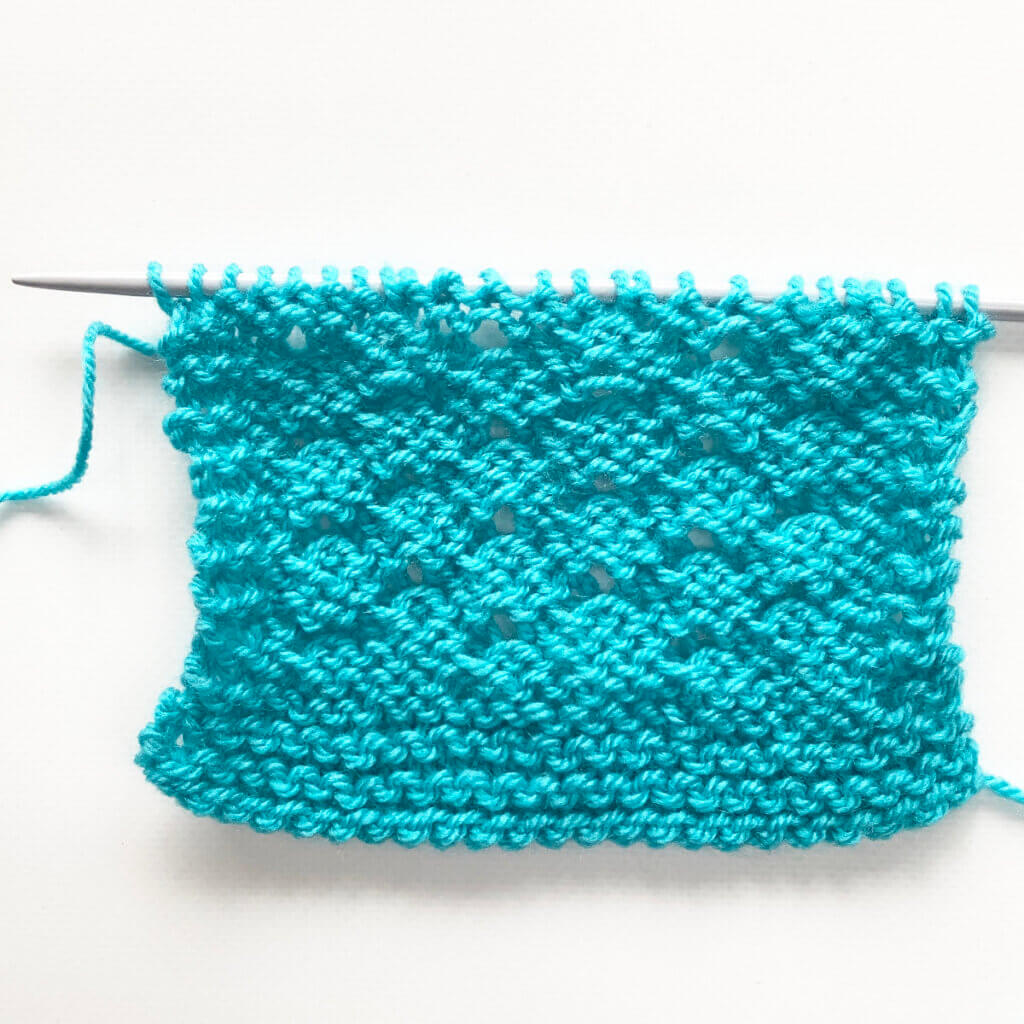
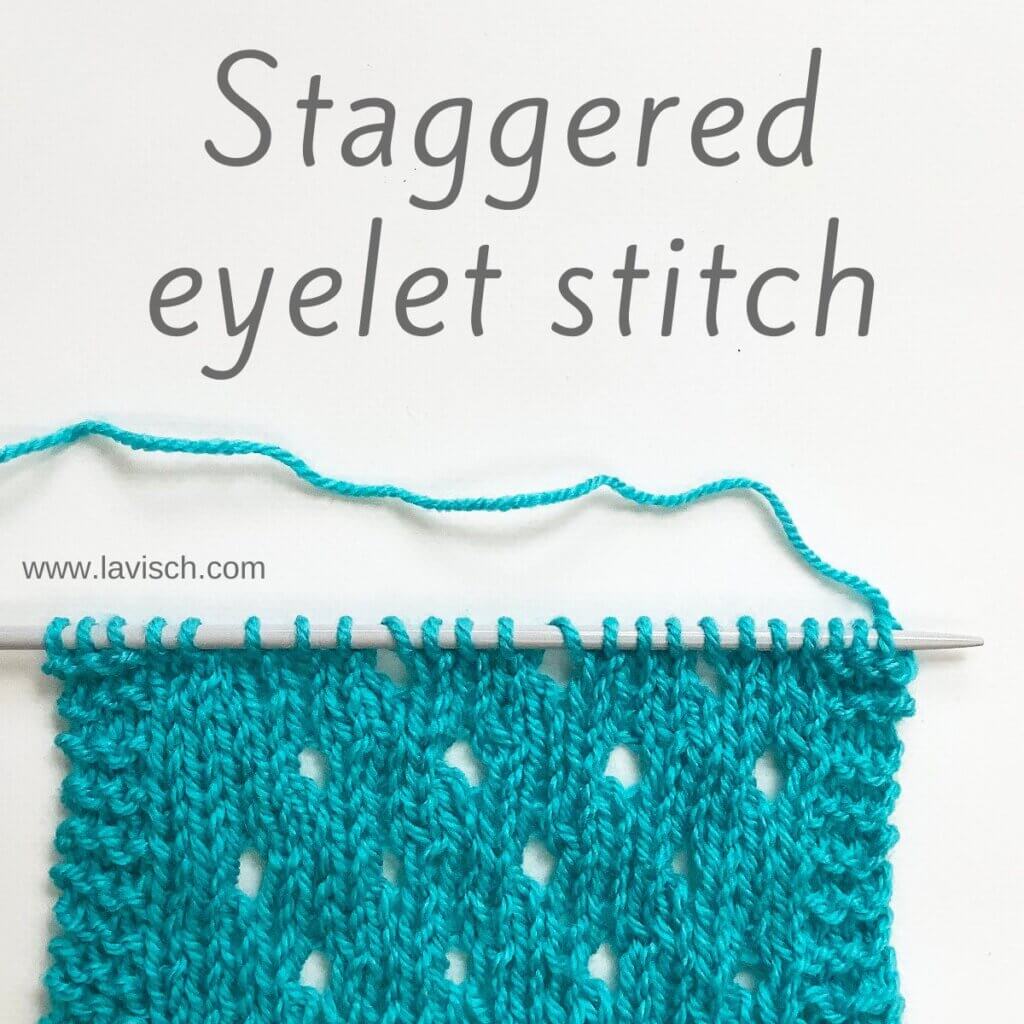
This shawl is knit from the top-down in one piece, starting at the neck edge with a garter stitch tab. The instructions for the lace are both charted and written out.


Pay what you want: (minimum €6.95)

€

Add to cart


Difficulty level

This shawl is worked from the top down, starting with a garter stitch tab. The patterning in the edging is worked on both right side and wrong side rows.

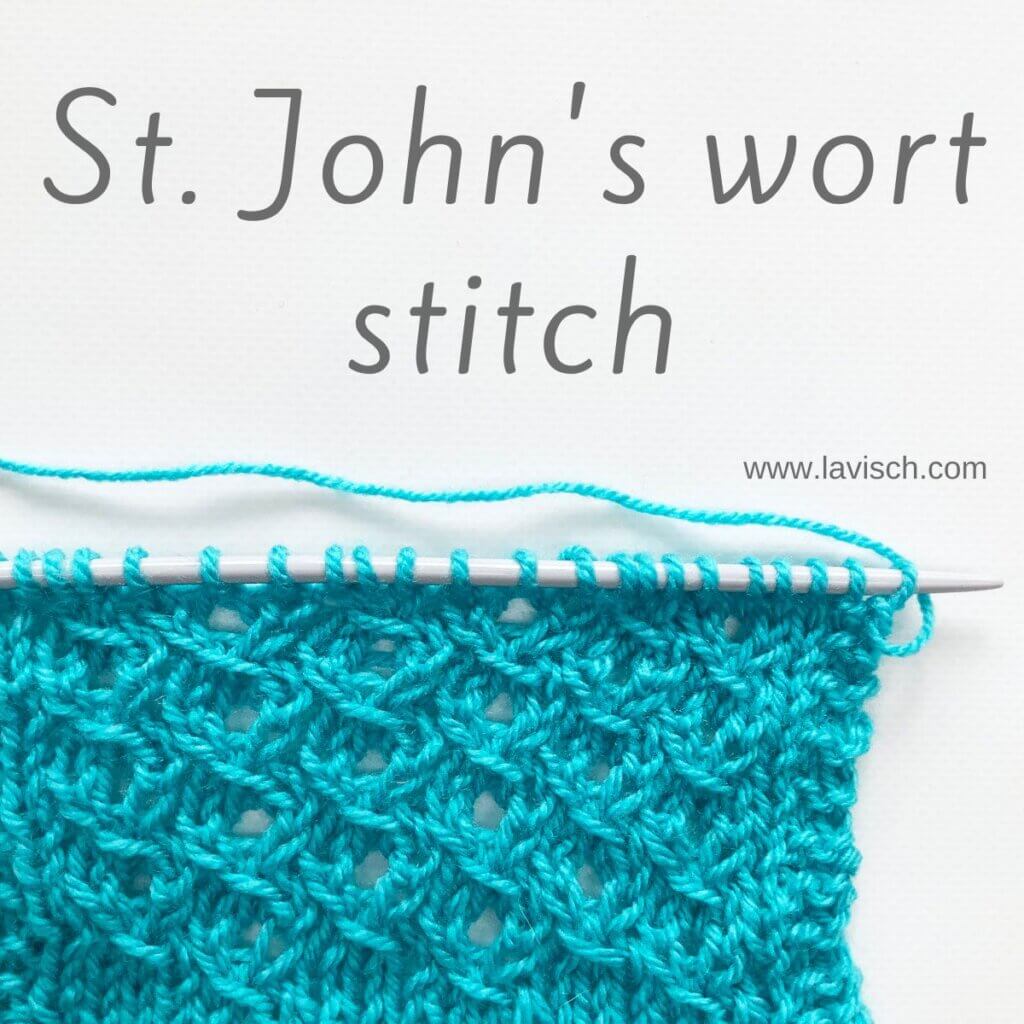
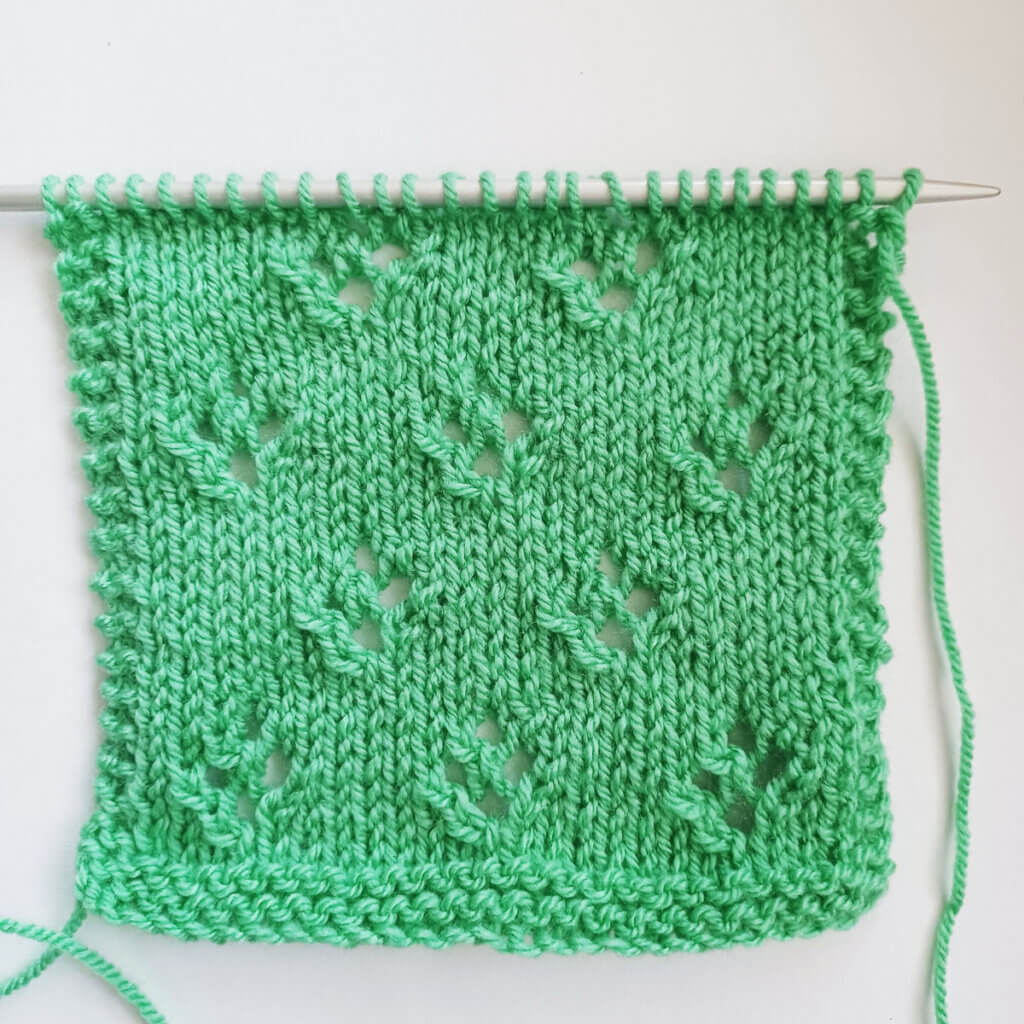
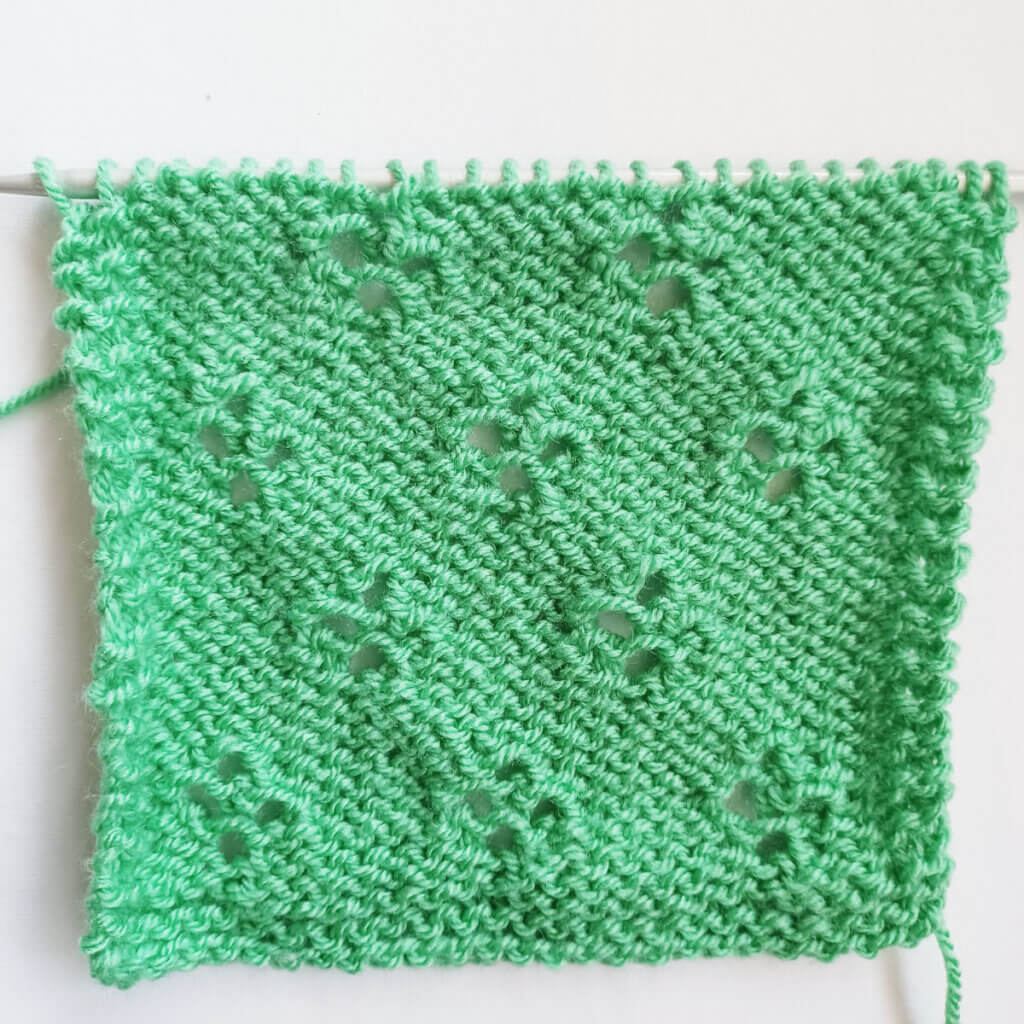
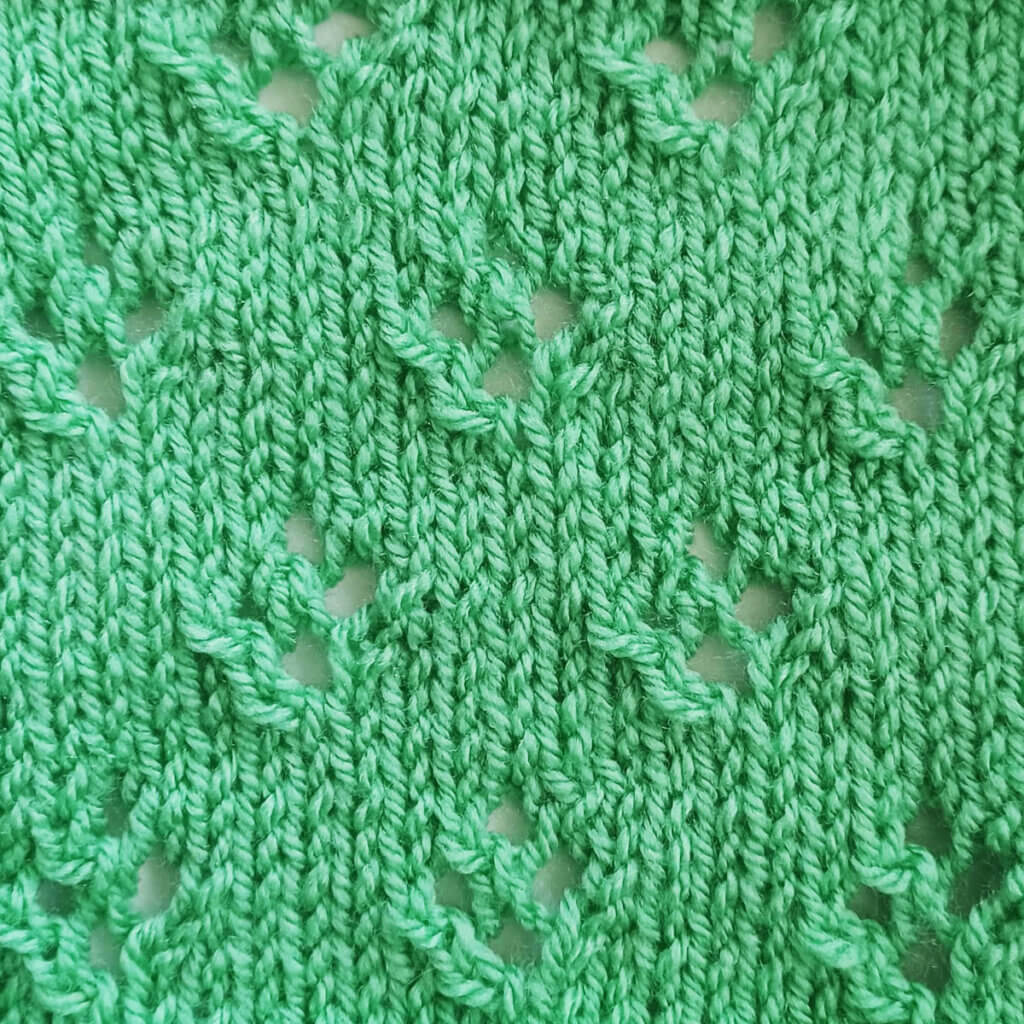
Stitches used include knit, purl, k tbl, p tbl, skp, k2tog, k2tog tbl, p2tog, p2tog tbl, yo and a wrapped stitch. This pattern is therefor suitable for the intermediate to advanced knitter.

Sizes and finished measurements

Size S (L): Wingspan of 196 (235) cm (77 ¼ (92 ½) inches) and a depth of 89 (106) cm (35 (41 ¾) inches), measured after blocking. The shawl pictured is a size L.

The size of the Electric Violet shawl can be changed by using lighter or heavier yarn and/or working fewer (or more) repeats of the various sections of the shawl. This will, of course, change the amount of yarn needed. 

Pattern details

  • Gauge: Approx. 14 sts / 25 rows = 10 cm (4 inches) over stockinette stitch, measured after blocking. Gauge is however not critical for this design but should give you a fabric that you like with the yarn used.
  • Pattern languages included: English.
  • Digital PDF has 7 pages (letter size)

Yarn

RMR Yarn Co. Micaela (75% SW extra fine merino, 25% Mulberry silk; 400 m (437 yds) / 100 g) in the following colors and quantities:
C1: 400 (800) m (437 (874) yds) / 100 (200) g) in Para Harumi
C2: 400 (400) m (437 (437) yds) / 100 (100) g) in Jalea De Uva

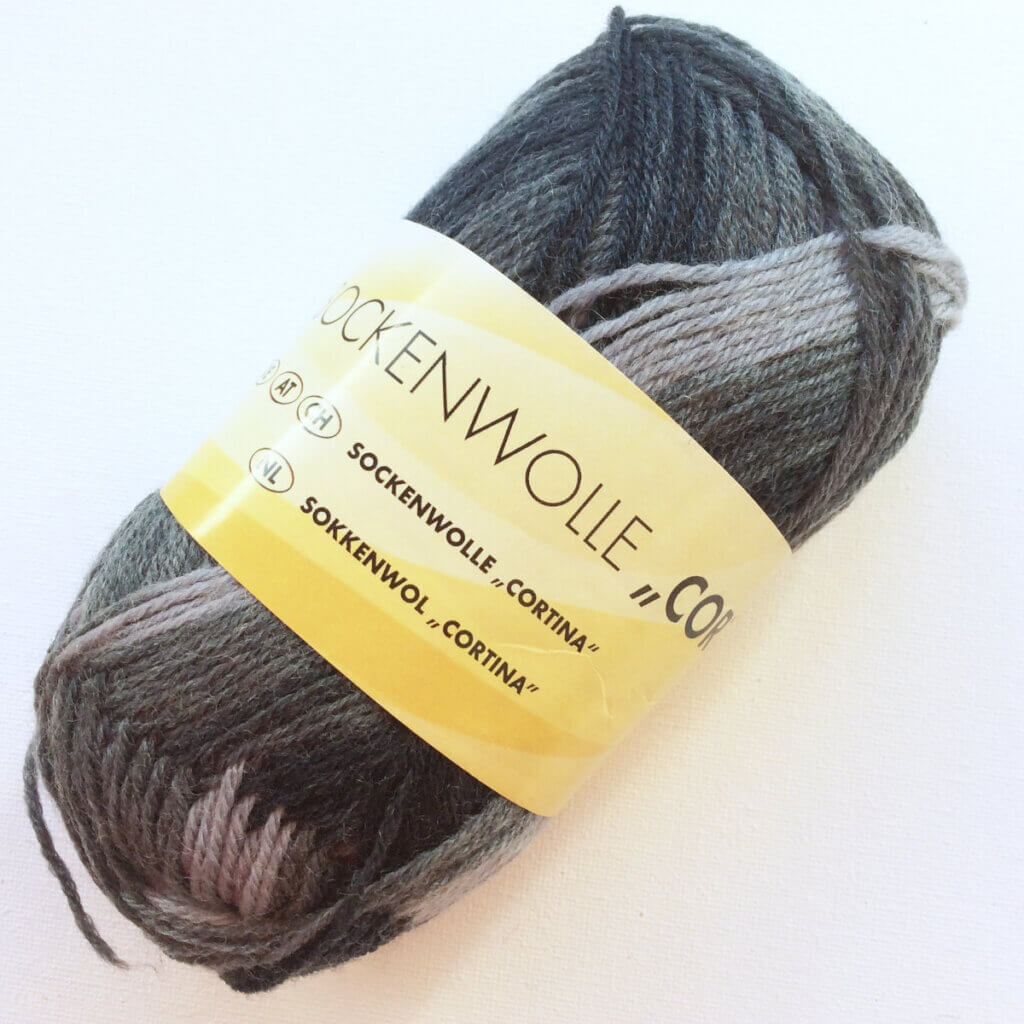
Substitute a fingering weight yarn in a speckled color for C1, and a solid or tonal colorway for C2 for a similar result.

Materials

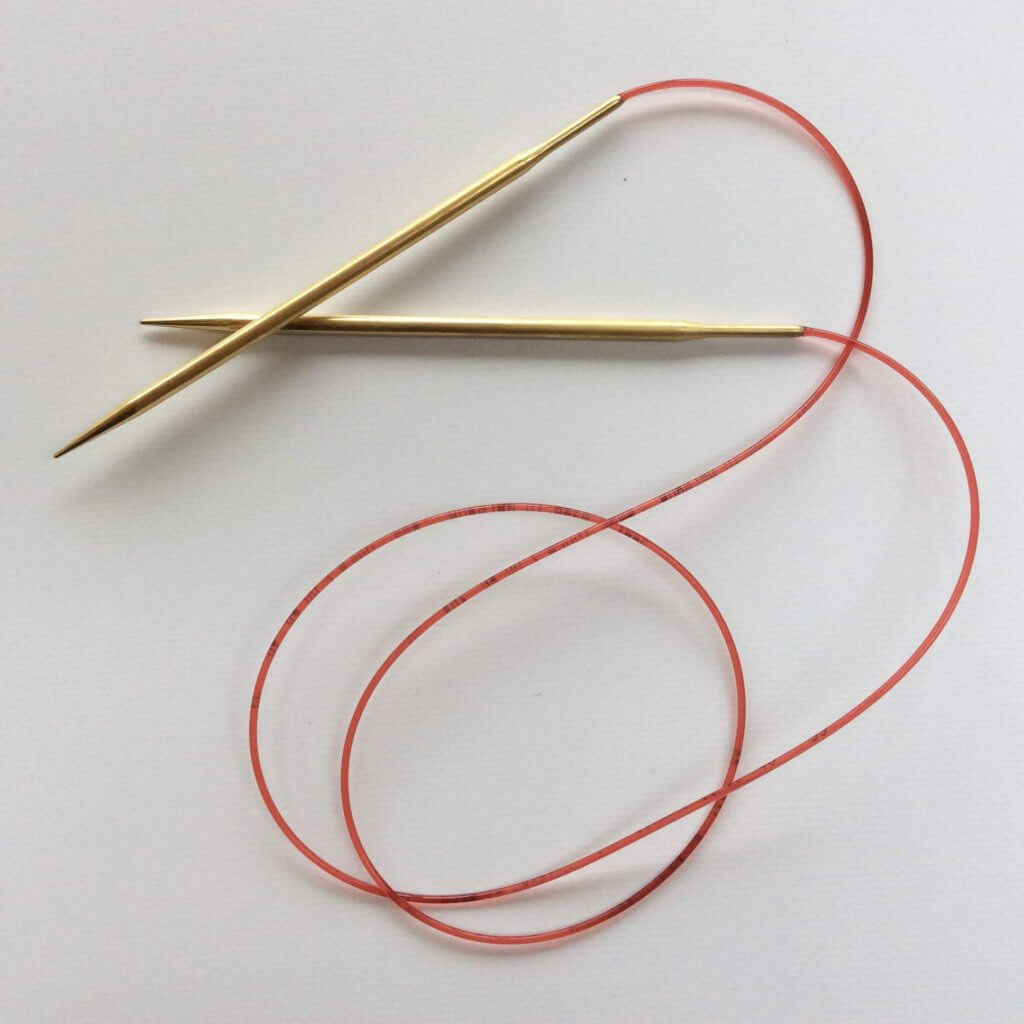
  • Size 3.5 mm (US 4) / 80 cm (32 inches) circular needles were used for the sample shawl. Use needles appropriate for the yarn chosen.
  • 4 stitch markers to indicate the center stitch and the edge stitches
  • Cable needle
  • Stitch markers to indicate repeats of the lace patterning (optional)
  • Yarn needle

electric violet Read More »

stitch pattern – slip stitch basket weave

Slip stitch basket weave  by La Visch Designs

The slip stitch basket weave stitch pattern is a variation of 2 x 1 rib. It has strategically placed slip stitches, creating the horizontal threads that give this stitch pattern its lovely texture. Please keep in mind, that the above swatch is worked in an unblocked worsted weight acrylic. When this stitch pattern is knit in a yarn that blocks out nicely, say a wool or cotton yarn, it may look a tad different from how it looks like here.

This stitch pattern is worked as a multiple of 6 stitches + 5, and in an eight-row repeat. Please note that I’ve added 2 edge stitches in garter stitch on both sides of the swatch.

Materials used

Yarn: Paintbox Yarns Simply DK, a good value, good quality 100% acrylic yarn, in the color 128 Lime Green.

Knitting needles: This is a pair of straights that I picked up at the second-hand store when I started knitting, brand unknown.

Stitches used

  • k – knit
  • p – purl
  • sl1 wyif – slip 1 stitch purlwise with yarn in front.
  • sl1 wyib – slip 1 stitch purlwise with yarn in back.
  • st(s) – stitch(es)

Slip stitch basket weave instructions

Row 1 (RS): *P2, k1*; rep ** to 2 sts before end, p2.
Row 2 (WS): K2, *p1, k2*; rep *-* to end.
Row 3: *P1, sl1 wyif 3 times, p1, k1*; rep *-* to 5 sts before end, p1, sl1 wyif 3 times, p1.
Row 4: K1, sl1 wyib 3 times, k1, *p1, k1, sl1 wyib 3 times, k1*; rep *-* to end.
Row 5: *P2, k1*; rep *-* to 2 sts before end, p2.
Row 6: K2, *p1, k2*; rep *-* to 3 sts before end, p1, k2.
Row 7: P2, k1, *p1, sl1 wyif 3 times, p1, k1*; rep *-* to 2 sts before end, p2.
Row 8: K2, *p1, k1, sl1 wyib 3 times, k1*; rep *-* to 3 sts before end, p1, k2.

Repeat rows 1-8 for pattern until desired length.

Slip stitch basket weave chart

In the below pictures, you see the patterning first from the right, and then also from the wrong side of the fabric:

Slip stitch basket weave from the RS
Slip stitch basket weave from the WS

The below picture gives an impression on how this stitch pattern looks when used allover in a project.

Slip stitch basket weave allover
Patreon logo

Thanks to my Patreon supporters for bringing you this freebie! Creating quality patterns and tutorials is a lot of work and resource-intensive. However, I find it important to give you free content like this tutorial. Thanks to the generous support of my Patreon supporters, I can make it happen. Thank you, patrons! Click here to join, or click here to read more about La Visch Designs on Patreon.

stitch pattern – slip stitch basket weave Read More »

stitch pattern – poollehekiri half leaves stitch

Poollehekiri (half leaves) stitch

The poollehekiri lace stitch pattern is Estonian in origin. Poollehekiri translates to “half leaves”. And that is literally how it’s constructed! If you take a look at the chart below, you can see that once the first row of leaves has been worked half, a new set of leaves is worked, offset to the first row. This way, interlocking chevrons are formed by the yarn overs. Please keep in mind, though, that the above swatch is worked in a worsted weight acrylic. When this stitch pattern is knit in a yarn that blocks out nicely, say a wool or cotton yarn, it opens up a lot more than it looks like here.

This stitch pattern is worked as a multiple of 12 stitches + 1, and in a twelve-row repeat. Please note that I’ve added 2 edge stitches in garter stitch on both sides of the swatch.

Materials used

Yarn: Paintbox Yarns Simply DK, a good value, good quality 100% acrylic yarn, in the color 128 Lime Green.

Knitting needles: This is a pair of straights that I picked up at the second-hand store when I started knitting, brand unknown.

Stitches used

Poollehekiri half leaves stitch instructions

Row 1 (right side): *K1, skp, k1, yo, k2tog, yo, k1, yo, skp, yo, k1, k2tog*; rep ** to 1 st before end, k1.
Row 2 and all following wrong side rows: Purl.
Row 3: *K1, skp, k2, yo, k3, yo, k2, k2tog*; rep ** to 1 st before end, k1.
Row 5: *K1, skp, k1, yo, k5, yo, k1, k2tog*; rep *-* to 1 st before end, k1.
Row 7: *K1, yo, skp, yo, k1, k2tog, k1, skp, k1, yo, k2tog, yo*; rep *-* to 1 st before end, k1.
Row 9: *K2, yo, k2, k2tog, k1, skp, k2, yo, k1*; rep ** to 1 st before end, k1.
Row 11: *K3, yo, k1, k2tog, k1, skp, k1, yo, k2*; rep ** to 1 st before end, k1.

Repeat rows 1-12 for pattern until desired length.

Poollehekiri (half leaves) chart

In the below pictures, you see the patterning first from the right, and then also from the wrong side of the fabric:

Poollehekiri (half leaves) stitch from the RS
Poollehekiri (half leaves) stitch from the WS
Patreon logo

Thanks to my Patreon supporters for bringing you this freebie! Creating quality patterns and tutorials is a lot of work and resource-intensive. However, I find it important to give you free content like this tutorial. Thanks to the generous support of my Patreon supporters, I can make it happen. Thank you, patrons! Click here to join, or click here to read more about La Visch Designs on Patreon.

stitch pattern – poollehekiri half leaves stitch Read More »

stitch pattern – linen stitch

Linen stitch by La Visch Designs

Back in 2011 I decided to cast on a stole using the linen stitch. It’s named like that, because it looks similar to a woven linen fabric. The stitch uses simple slipped stitches to achieve that effect. This also means that the fabric it creates is rather dense and may turn out very tight during knitting. To counter that effect, go up needles sizes from what you would usually use for that weight of yarn. In the project pictured, I used 4.5 mm (US 7) size needles, there is nothing loose about this fabric!

The patterning can, of course, be worked in a single color. But because of the slip stitches, very lovely effects can be achieved by using 2 or more colors. The general advice for changing yarn colors, with the linen stitch, is to change colors at the beginning of every odd-numbered row. In the project pictured, I’m working 3 rows of each color in the following sequence: gray, red, variegated black & gray’s, red. As a sidenote, in this project I cut the yarn with every row for instant fringe at the sides of my stole.

The stitch pattern requires any odd number of stitches, and is worked over 2 rows, when not taking color sequences into account.

Materials used

Yarn: Zettl Sockenwolle Cortina, a light fingering sock yarn (75% Wool, 25% Nylon) per 209 m (229 yds) / 50 g. Pictured here in a gray variegated colorway, also red and solid gray were used in the project shown.

Needles: Addi Lace Circular Needles. In this project, I used the 4.5 mm (US 7) size.

Stitches used

  • k – knit
  • p – purl
  • RS / WS – right side / wrong side
  • rep – repeat
  • sl – slip the indicated stitch purl-wise to the right-hand needle
  • st(s) – stitch(es)
  • wyib – with the yarn held in the back of your project
  • wyif – with the yarn held in the front of your project

Linen stitch

Row 1 (RS): * K1, sl 1 wyif; rep from * to 1 st before end, k1.
Row 2 (WS): Sl 1 wyib, * p1, sl 1 wyib; rep from * to end.

Repeat rows 1-2 for pattern until desired length.

In the below pictures, you see the patterning first from the right, and then also from the wrong side of the fabric:

Linen stitch as seen from the RS
The stitch as seen from the RS.
Linen stitch as seen from the WS
The stitch as seen from the WS.
Patreon logo

Thanks to my Patreon supporters for bringing you this freebie! Creating quality patterns and tutorials is a lot of work and resource-intensive. However, I find it important to give you free content like this tutorial. Thanks to the generous support of my Patreon supporters, I can make it happen. Thank you, patrons! Click here to join, or click here to read more about La Visch Designs on Patreon.

stitch pattern – linen stitch Read More »

stitch pattern – St. John’s wort stitch

St. John's wort stitch by La Visch Designs

The St John’s wort stitch is a traditional lace knitting stitch. It combines a 3 to 2 decrease on the right side of the fabric, with a strategically placed yarn over increase on the following wrong side of the fabric. Because of this, you’ll see that the stitch count decreases on the right side rows, and increases again on the wrong side rows. As far as lace patterning goes, this one is pretty intuitive to knit: The yarn over always has to be worked between the 2 wrapped stitches of the 3 to 2 decrease. This makes it pretty easy to read the knitting, and see which stitch needs to go where.

The stitch pattern requires a multiple of 6 + 2 stitches, and is worked over 4 rows. Please note that I’ve added 2 edge stitches in garter stitch on both sides of the swatch. These are not included in the stitch pattern description.

Materials used

Yarn: Paintbox Yarns Simply DK, a good value, good quality 100% acrylic yarn, in the color Marine Blue.

Needles: This is a pair of straights that I picked up at the second-hand store when I started knitting, brand unknown.

Stitches used

  • k – knit
  • p – purl
  • psso – pass the slipped stitch over
  • RS / WS – right side / wrong side
  • rep – repeat
  • sl – slip the indicated stitch knit-wise to the right-hand needle
  • st(s) – stitch(es)
  • yo – yarn over

St. John’s Wort stitch

Row 1 (RS): K1, * (sl 1, k2, psso), k3; rep from * to 1 st before end, k1.
Row 2 (WS): P1, * p4, yo, p1; rep from * to 1 st before end, p1.
Row 3: K1, * k3, (sl 1, k2, psso); rep from * to 1 st before end, k1.
Row 4: P1, * p1, yo, p4; rep from * to 1 st before end, p1.

Repeat rows 1-4 for pattern until desired length.

In the below pictures, you see the patterning first from the right, and then also from the wrong side of the fabric:

St. John's Wort stitch from the RS
The stitch as seen from the RS.
St. John's Wort stitch from the WS
The stitch as seen from the WS.
Patreon logo

Thanks to my Patreon supporters for bringing you this freebie! Creating quality patterns and tutorials is a lot of work and resource-intensive. However, I find it important to give you free content like this tutorial. Thanks to the generous support of my Patreon supporters, I can make it happen. Thank you, patrons! Click here to join, or click here to read more about La Visch Designs on Patreon.

stitch pattern – St. John’s wort stitch Read More »

stitch pattern – staggered eyelet stitch

Staggered eyelet stitch - by La Visch Designs

The staggered eyelet stitch consists of alternating eyelets on a stockinette background. It’s a quite simple stitch pattern, with a gorgeous effect when used all-over in a design. Especially if you don’t want to take away too much attention from the yarn. This stitch pattern is worked as a multiple of 4 stitches plus 2 stitches, and in an eight-row repeat. Please note that I’ve added 3 edge stitches in garter stitch on both sides of the swatch. These are not included in the stitch pattern description.

Materials used

Yarn: Paintbox Yarns Simply DK, a good value, good quality 100% acrylic yarn, in the color Marine Blue.

Needles: This is a pair of straights that I picked up at the second-hand store when I started knitting, brand unknown.

Stitches used

  • k – knit
  • k2tog – knit 2 stitches together
  • p – purl
  • RS / WS – right side / wrong side
  • rep – repeat
  • st(s) – stitch(es)
  • yo – yarn over

Staggered eyelet stitch

Row 1 (RS): Knit.
Row 2 and all following WS rows: Purl.
Row 3: K1, yo, k2tog, *k2, yo, k2tog; rep from * to 3 sts before end, k3.
Row 5: Knit.
Row 7: K3, *yo, k2tog, k2; rep from * to 3 sts before end, yo, k2tog, k1.

Repeat rows 1-8 for pattern until desired length.

In the below pictures, you see the patterning first from the right, and then also from the wrong side of the fabric:

The staggered eyelet stitch from the RS
The stitch as seen from the RS.
The staggered eyelet stitch from the WS
The stitch as seen from the WS.
Patreon logo

Thanks to my Patreon supporters for bringing you this freebie! Creating quality patterns and tutorials is a lot of work and resource-intensive. However, I find it important to give you free content like this tutorial. Thanks to the generous support of my Patreon supporters, I can make it happen. Thank you, patrons! Click here to join, or click here to read more about La Visch Designs on Patreon.

stitch pattern – staggered eyelet stitch Read More »

stitch pattern – berry stitch

Berry stitch

The Berry stitch consists of patterning that creates little alternating clusters. They are pretty reminiscent of berries, hence the name. However, you can also encounter similar patterning as raspberry stitch, trinity stitch, cluster stitch, or bramble stitch. As with all types of bobbles, this stitch pattern creates the little clusters by a combination of increasing and decreasing. In this particular example, I used needles that were somewhat large for the weight of the yarn, this made the effect more lacy than would otherwise be the case.

This stitch pattern is worked as a multiple of 4 stitches, and in a four-row repeat. However, if you want it to fill a whole panel symmetrically, it’s a multiple of 4 stitches + the first 3 stitches of the next four-stitch repeat. Please note that I’ve added 2 edge stitches in garter stitch on both sides of the swatch. These are not included in the stitch pattern description.

Materials used

Yarn: Paintbox Yarns Simply DK, a good value, good quality 100% acrylic yarn, in the color Marine Blue.

Needles: This is a pair of straights that I picked up at the second-hand store when I started knitting, brand unknown.

Stitches used

  • k – knit
  • k3tog – knit 3 stitches together
  • p – purl
  • RS / WS – right side / wrong side
  • rep – repeat
  • st(s) – stitch(es)

Berry stitch

Row 1 (RS): *K3tog, (p1, k1, p1) into the same st; rep from * to end.
Row 2 (WS): Knit.
Row 3: *(P1, k1, p1) into the same st, k3tog; rep from * to end.
Row 4: Knit.

Repeat rows 1-4 for pattern until desired length.

In the below pictures, you see the patterning first from the right, and then also from the wrong side of the fabric:

Berry stitch from the RS
The stitch as seen from the RS.
Berry stitch from the WS
The stitch as seen from the WS.
Patreon logo

Thanks to my Patreon supporters for bringing you this freebie! Creating quality patterns and tutorials is a lot of work and resource-intensive. However, I find it important to give you free content like this tutorial. Thanks to the generous support of my Patreon supporters, I can make it happen. Thank you, patrons! Click here to join, or click here to read more about La Visch Designs on Patreon.

stitch pattern – berry stitch Read More »

stitch pattern – tiny bobble stitch

Tiny bobble stitch

This tiny bobble stitch is a nicely textured stitch pattern, suitable for allover application. In my swatch, I’ve shown how it looks both in a single color all-over, and with the bobble part of the pattern in a contrasting color. I rather like the effect of both. I think the one with the contrast color would also work very well as a single accent near the hem and wrists of garments, for example. How would you use this lovely textured stitch pattern?

The tiny bobble stitch pattern is worked as a multiple of 2 + 1 stitches, and in a six-row repeat. In other words: any odd number of stitches will work. Please note that I’ve added 2 edge stitches in garter stitch on both sides of the swatch. These are not included in the stitch pattern description.

Materials used

Yarn: Paintbox Yarns Simply DK, a good value, good quality 100% acrylic yarn, in the colors Vintage Pink and Lime.

Needles: This is a pair of straights that I picked up at the second-hand store when I started knitting, brand unknown.

Stitches used

  • k – knit
  • k3tog tbl – knit 3 stitches together through the back loop
  • p – purl
  • RS / WS – right side / wrong side
  • yo – yarn over
  • rep – repeat
  • sl1 wyib – slip 1 stitch purl-wise with the yarn held in the back
  • st(s) – stitch(es)

Tiny bobble stitch

Row 1 (RS): Knit.
Row 2 (WS): Purl.
Rows 3-4: Rep rows 1-2.
Row 5: K1, *sl1 wyib, (k1, yo, k1) into the next st; rep from * to last 2 sts, sl1 wyib, k1.
Row 6: P1, *sl1 wyib, k3tog tbl; rep from * to last 2 sts, sl 1wyib, p1.

Repeat rows 1-6 for pattern until desired length.

Please note that for the first part of the example, I’ve worked all 6 rows of the patterning in the same color twice. In the last repeat, though, rows 5 and 6 were worked in the green contrast color.

In the below pictures, you see the patterning first from the right, and then also from the wrong side of the fabric:

Tiny bobble stitch - view from the front
The stitch as seen from the RS.
Tiny bobble stitch - view from the back
The stitch as seen from the WS.
Patreon logo

Thanks to my Patreon supporters for bringing you this freebie! Creating quality patterns and tutorials is a lot of work and resource-intensive. However, I find it important to give you free content like this tutorial. Thanks to the generous support of my Patreon supporters, I can make it happen. Thank you, patrons! Click here to join, or click here to read more about La Visch Designs on Patreon.

stitch pattern – tiny bobble stitch Read More »

stitch pattern – alternating bobble stitch

Alternating bobble stitch

The bobble stitch is a nicely textured stitch pattern, suitable for allover application. Bobbles are a great way to make your knitting 3-dimensional instead of just flat. For that very reason, they are also often used in conjunction with lace patterning or with cables. The bobble pattern, described here, was used in my Moerbei shawl. The thing with bobbles is that there are so many ways to make them, there really is no right or wrong way. They can be made in 3, 4, 5 or even more stitches to make them less or more fat. To do so, stitches have to be increased and later decreased. There are, of course, many ways to do either things. Here, I will be showing a 5-stitch bobble.

As with most bobbles, it may be necessary to push the bulk of the bobble to the right side of the fabric to show it at its best. During knitting, it may be end up somewhere in between, or even pushed to the wrong side. Easily fixed, though!

This stitch pattern is worked as a multiple of 8 stitches, and in a twelve-row repeat. Please note that I’ve added 2 edge stitches in garter stitch on both sides of the swatch. These are not included in the stitch pattern description.

Materials used

Yarn: Paintbox Yarns Simply DK, a good value, good quality 100% acrylic yarn, in the color Spearmint green.

Needles: This is a pair of straights that I picked up at the second-hand store when I started knitting, brand unknown.

Stitches used

  • k – knit
  • k2tog – knit 2 stitches together
  • mb – make bobble: Work [k1, yo, k1, yo, k1] into the same st, turn, p5, turn, slip 3 stitches together as if to knit, k2tog, pass 3 slipped sts over; bobble made
  • p – purl
  • RS / WS – right side / wrong side
  • yo – yarn over
  • rep – repeat
  • st(s) – stitch(es)

Alternating bobble stitch

Row 1 (RS): Knit.
Row 2 and all following WS rows: Purl.
Rows 3-4: Rep rows 1-2.
Row 5: *K2, mb, k5; rep from * to end.
Rows 7-10: Rep rows 1-4.
Row 11: *K6, mb, k1; rep from * to end.
Row 12: Purl.

Repeat rows 1-12 for pattern until desired length.

In the below pictures, you see the patterning first from the right, and then also from the wrong side of the fabric:

Alternating bobble stitch from the RS
The stitch as seen from the RS.
Alternating bobble stitch from the WS
The stitch as seen from the WS.

To get an impression of how this stitch looks as an all-over pattern:

Alternating bobble stitch - all-over
Patreon logo

Thanks to my Patreon supporters for bringing you this freebie! Creating quality patterns and tutorials is a lot of work and resource-intensive. However, I find it important to give you free content like this tutorial. Thanks to the generous support of my Patreon supporters, I can make it happen. Thank you, patrons! Click here to join, or click here to read more about La Visch Designs on Patreon.

stitch pattern – alternating bobble stitch Read More »

stitch pattern – quatrefoil stitch

Quatrefoil stitch

The quatrefoil stitch is a stitch pattern in the category of eyelet stitches. It’s made by working a group of 4 yarn overs, each flanked by a single decrease. Each group of 4 eyelets is alternated, making this a lovely pattern to use allover in a project.

This stitch pattern is worked as a multiple of 8 stitches, and in a sixteen-row repeat. Please note that I’ve added 2 edge stitches in garter stitch on both sides of the swatch.

Materials used

Yarn: Paintbox Yarns Simply DK, a good value, good quality 100% acrylic yarn, in the color Spearmint green.

Needles: This is a pair of straights that I picked up at the second-hand store when I started knitting, brand unknown.

Stitches used

  • k – knit
  • k2tog – knit 2 stitches together
  • p – purl
  • RS / WS – right side / wrong side
  • yo – yarn over
  • rep – repeat
  • skp – slip 1 stitch, knit 1 stitch, pass the slipped stitch over
  • st(s) – stitch(es)

Quatrefoil stitch

Row 1 (RS): Knit. (15 sts)
Row 2 and all following WS rows: Purl.
Row 3: K2, *k1, yo, skp, k5; rep from * to 5 sts before end, k1, yo, skp, k2.
Row 5: K1, k2tog, *yo, k1, yo, skp, k3, k2tog; rep from * to 4 sts before end, yo, k1, yo, skp, k1.
Row 7: K2, *k1, yo, k2tog, k5; rep from * to 5 sts before end, k1, yo, k2tog, k2.
Row 9: Knit.
Row 11: K2, *k5, yo, skp, k1; rep from * to 5 sts before end, k5.
Row 13: K2, *k3, k2tog, yo, k1, yo, skp; rep from * to 5 sts before end, k5.
Row 15: K2, *k5, yo, k2tog, k1; rep from * to 5 sts before end, k5.
Row 16: Purl.

Repeat rows 1-16 for pattern until desired length.

Quatrefoil stitch chart

In the below pictures, you see the patterning first from the right, and then also from the wrong side of the fabric:

Quatrefoil stitch as seen from the RS
The stitch as seen from the RS.
Quatrefoil stitch as seen from the WS
The stitch as seen from the WS.

To get an impression of how this stitch looks as an all-over pattern:

Quatrefoil stitch as seen from the RS - all over
Patreon logo

Thanks to my Patreon supporters for bringing you this freebie! Creating quality patterns and tutorials is a lot of work and resource-intensive. However, I find it important to give you free content like this tutorial. Thanks to the generous support of my Patreon supporters, I can make it happen. Thank you, patrons! Click here to join, or click here to read more about La Visch Designs on Patreon.

stitch pattern – quatrefoil stitch Read More »