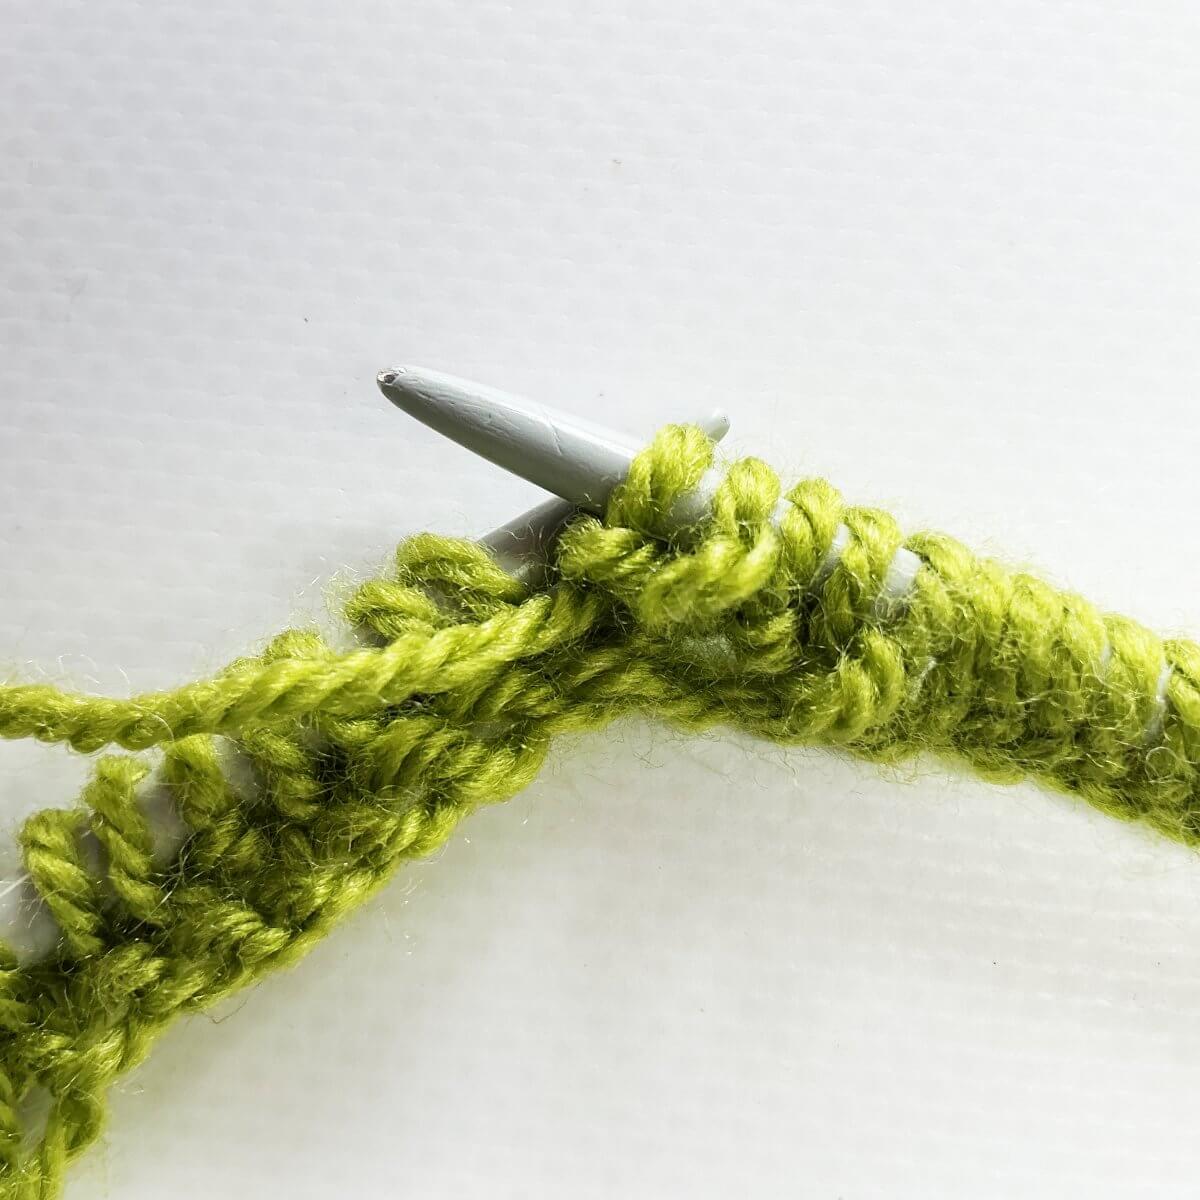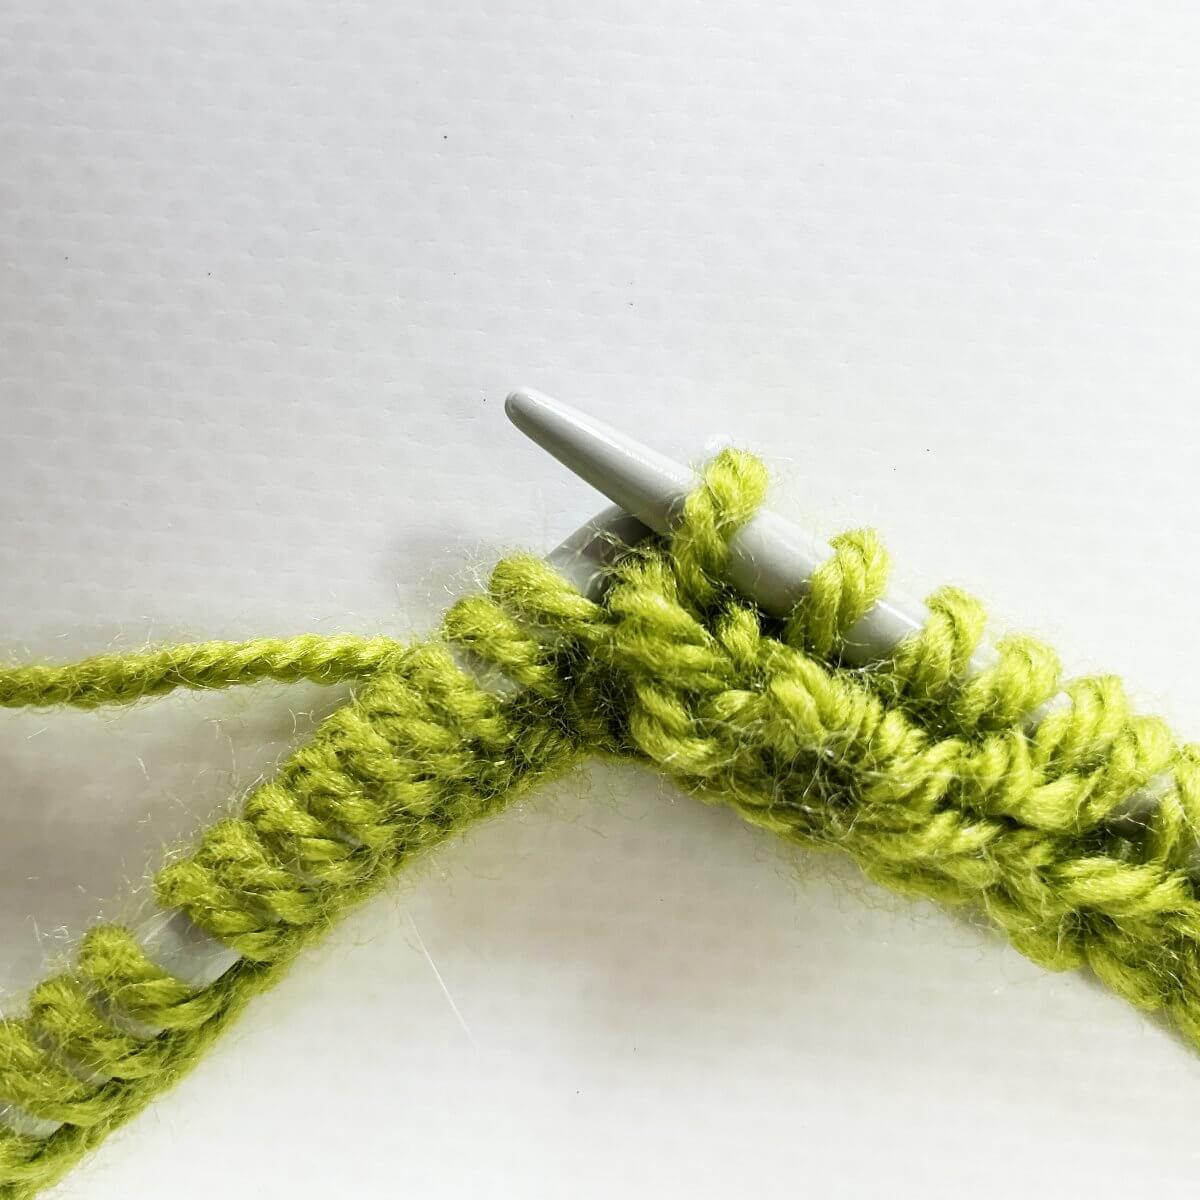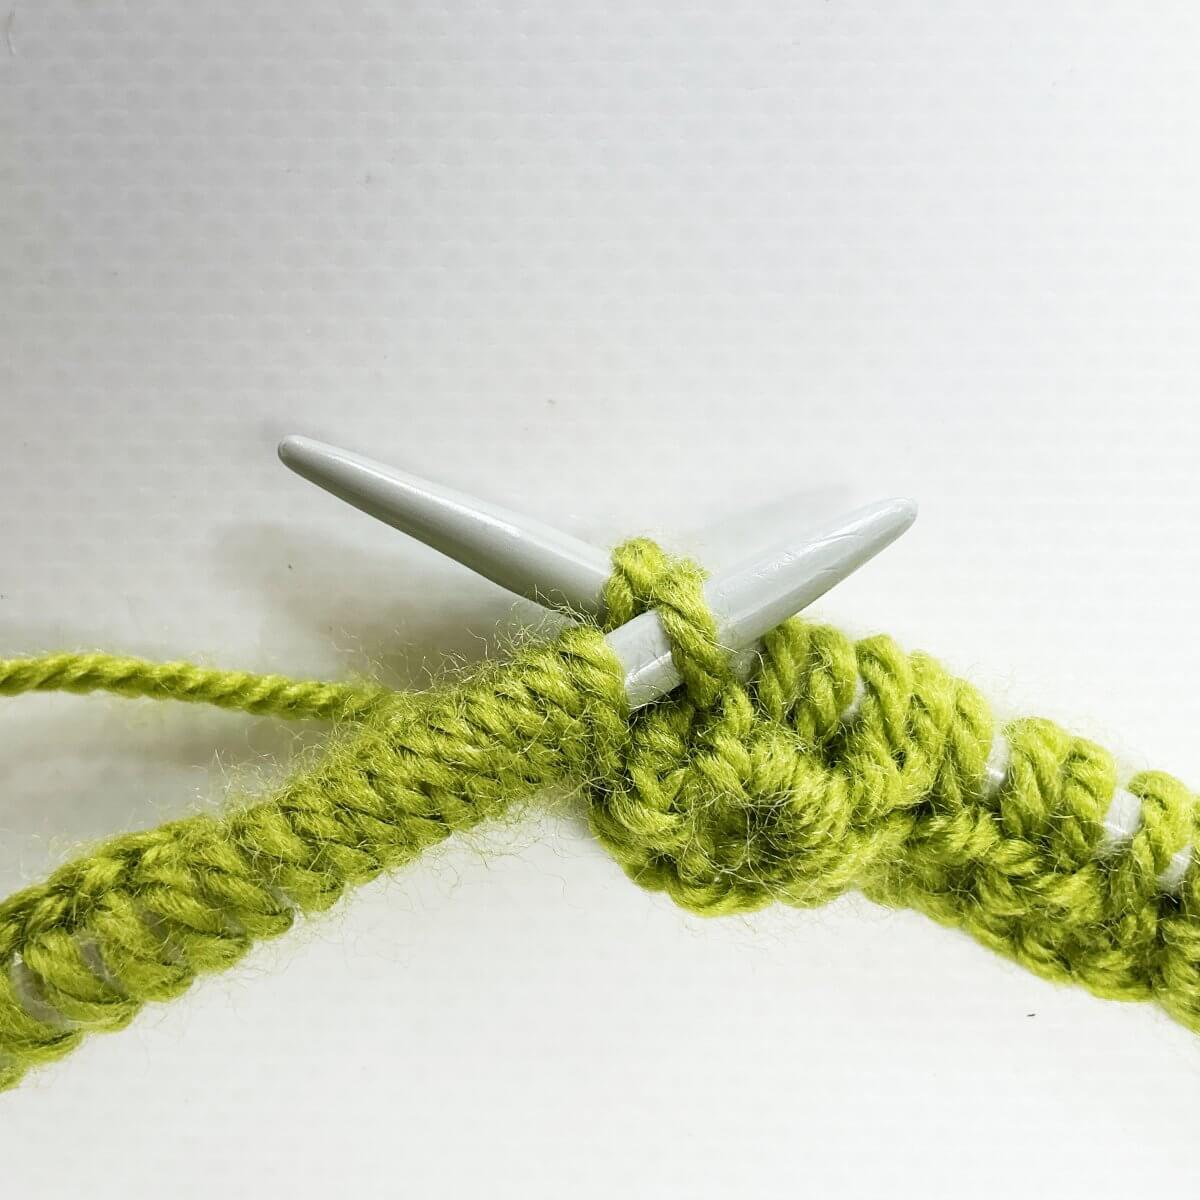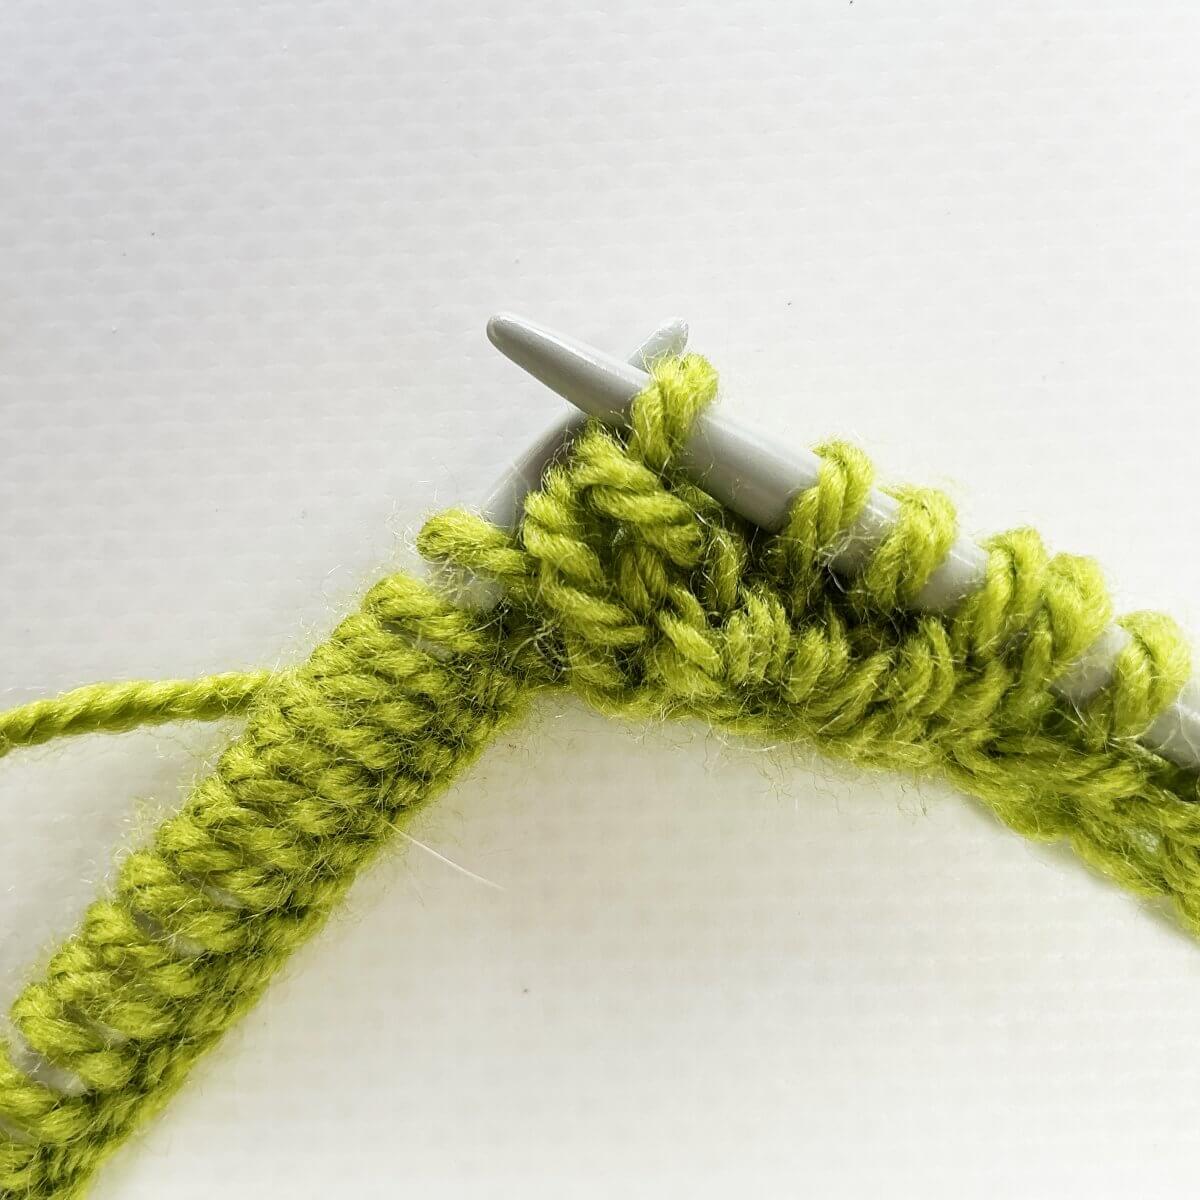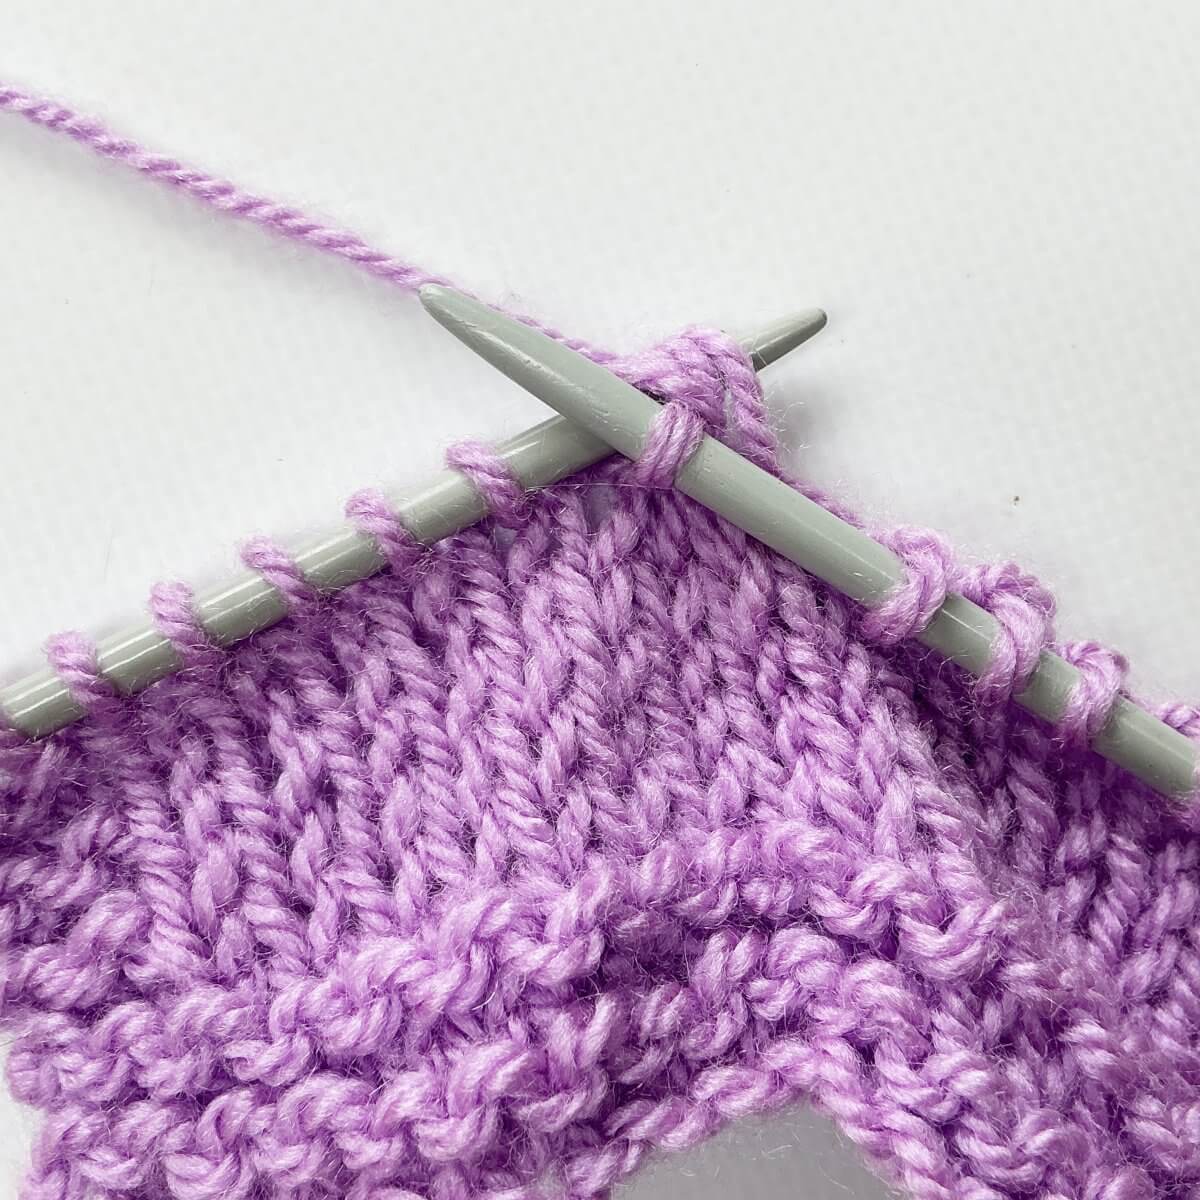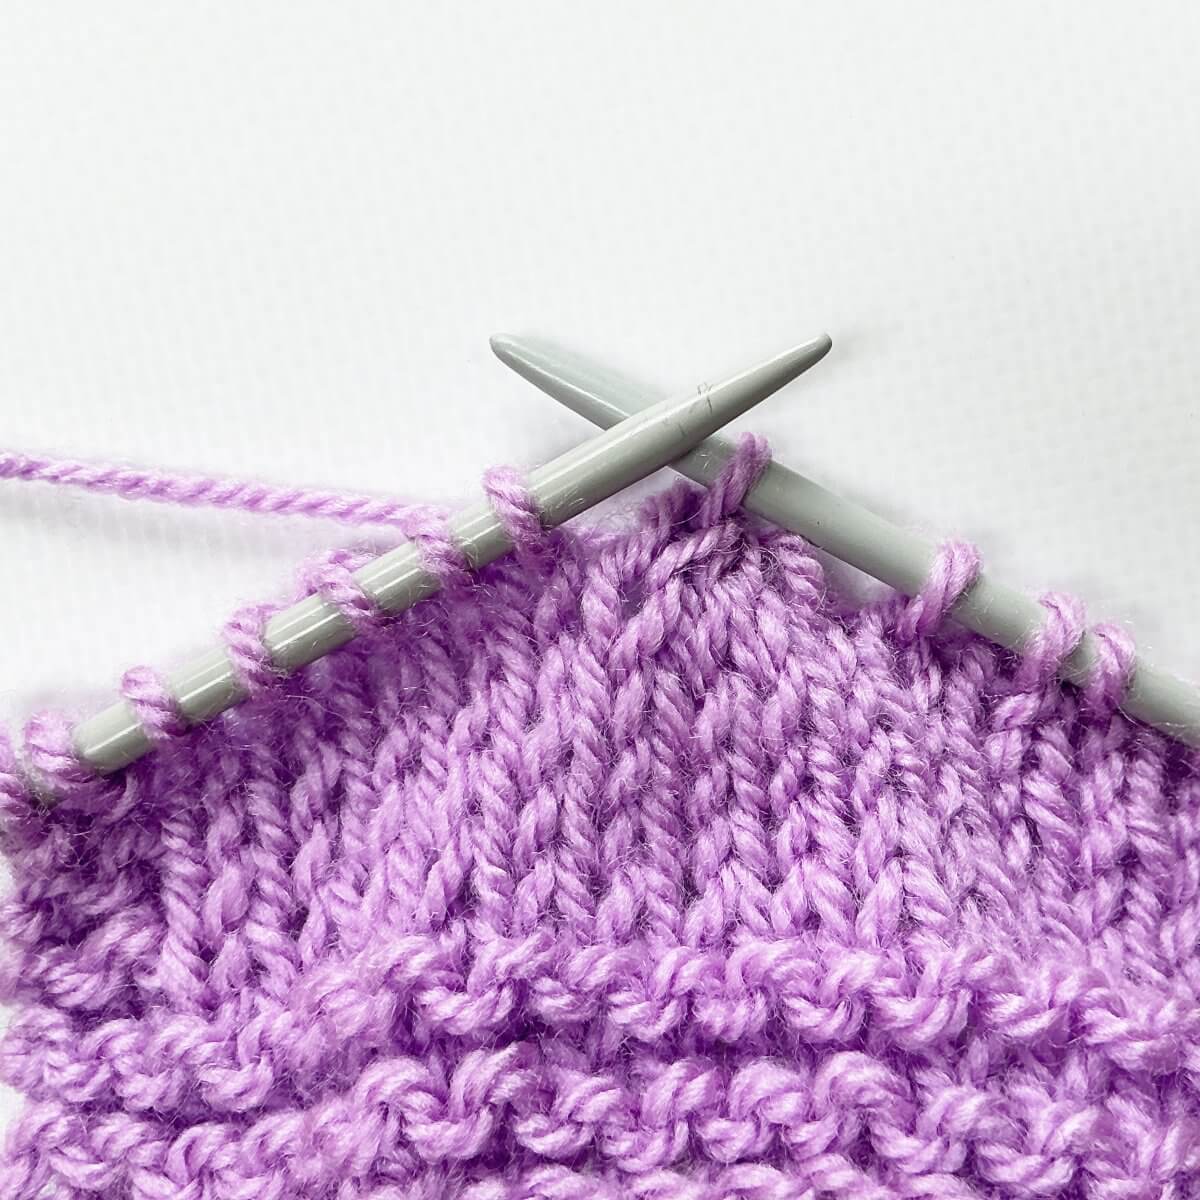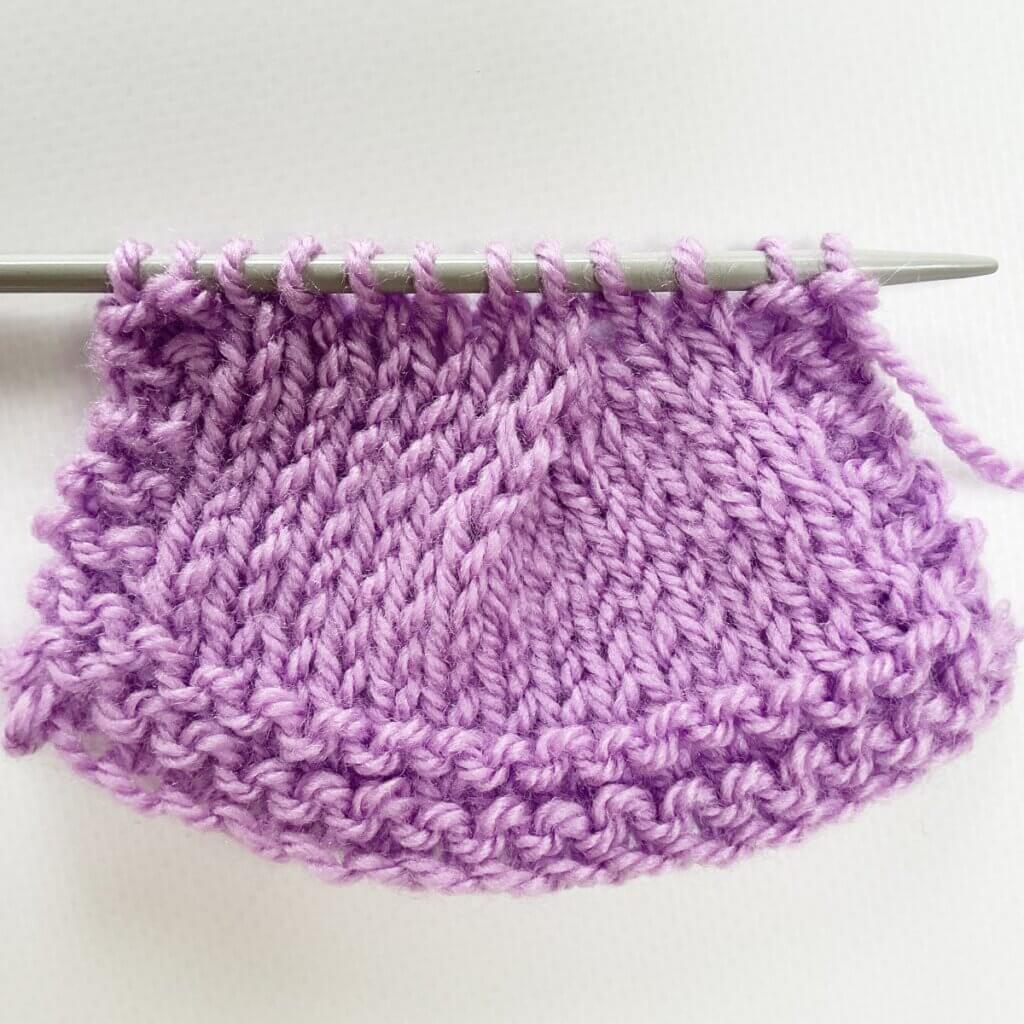
knitting tutorial

tutorial – jog-less garter stitch in the round: lifted strand & p2tog method
Jog-less garter stitch in the round: lifted strand & p2tog method - a tutorial by La Visch Designs

Garter stitch is wonderfully squishy and reversible, but when worked in the round it comes with a small challenge. Because circular knitting is actually worked as a continuous spiral, the beginning and end of each round don’t meet at exactly the same height. This creates a visible “jog” where the knit and purl rounds join. Depending on your yarn and project, this jog may hardly be noticeable, or it may stand out quite clearly. Smooth yarns, solid colors and simple stitch patterns often make it more obvious.

There are several ways to try and make the transition to a new round as jog-less as possible. The lifted strand and p2tog method described in this tutorial, I found on the website of Susanna Winter (Talvi Knits). With this method, a strand of yarn between two stitches is lifted and worked together with the final stitch of the purl round. This creates a much smoother transition between rounds without changing your stitch count. Let’s take a look at how it’s done!

Materials used
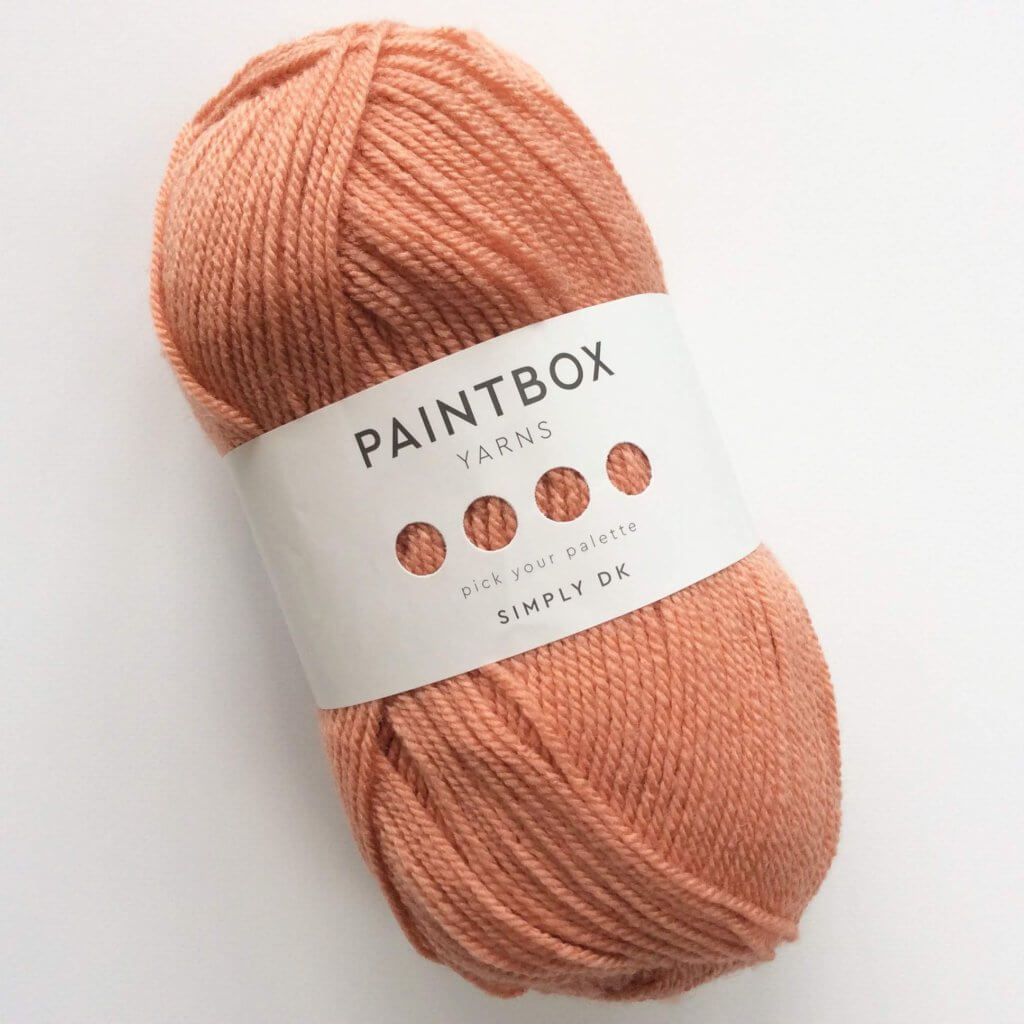
Yarn: Paintbox Yarns Simply DK, a good value, good quality 100% acrylic yarn, here in the color Vintage Pink.

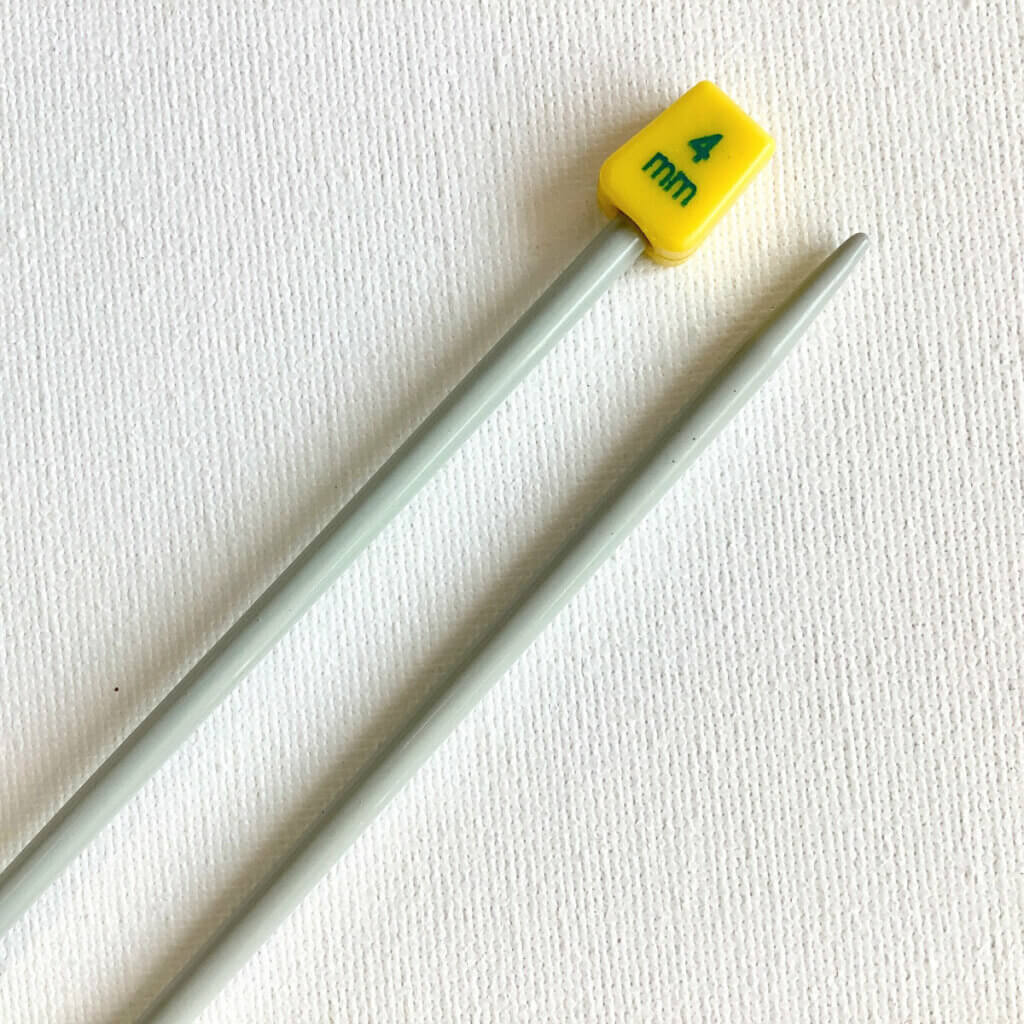
Knitting needles: I knit the swatch with tiny circular needles, but transferred it to this is a pair of straights for some of the pictures. I picked these up at the second-hand store when I started knitting, brand unknown.

A note before we start

Before we begin, garter stitch in the round is worked as follows:

Round 1: Knit all stitches.
Round 2: Purl all stitches.

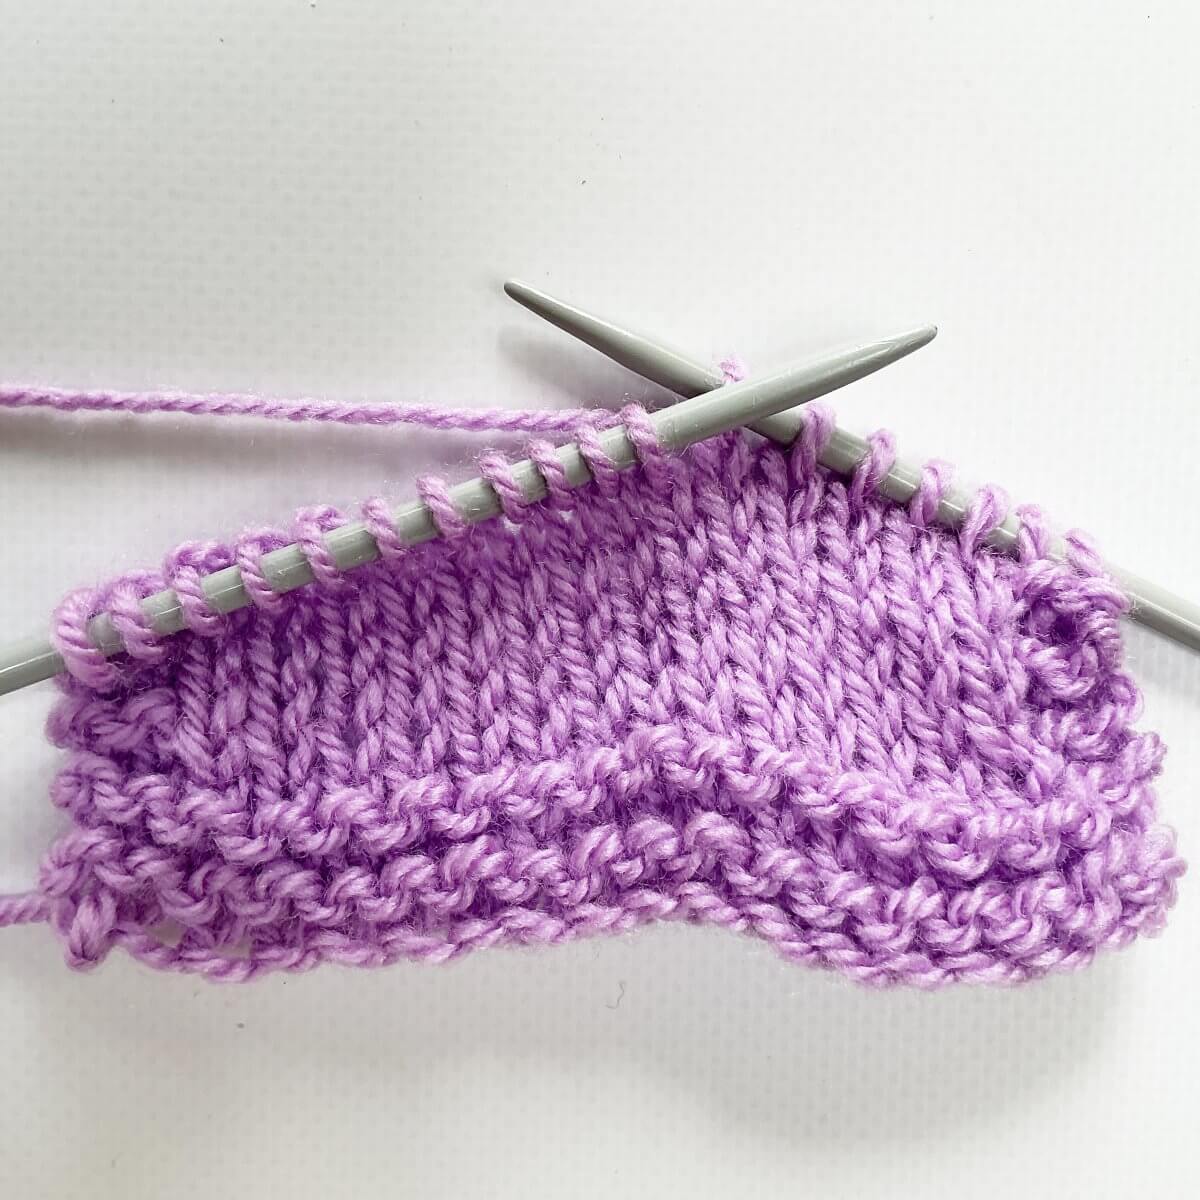
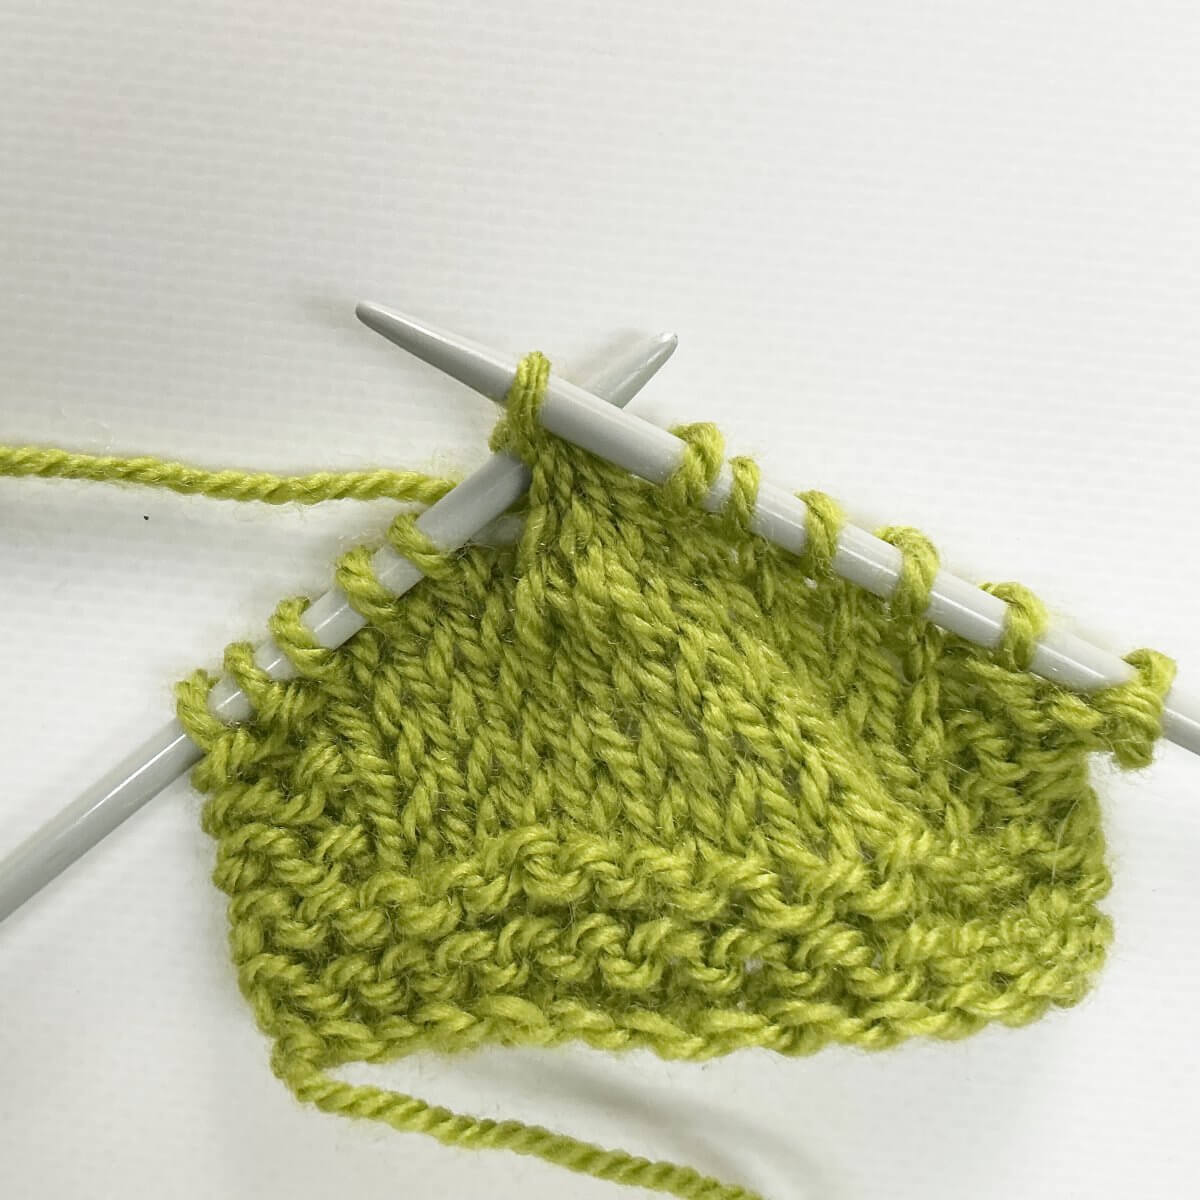
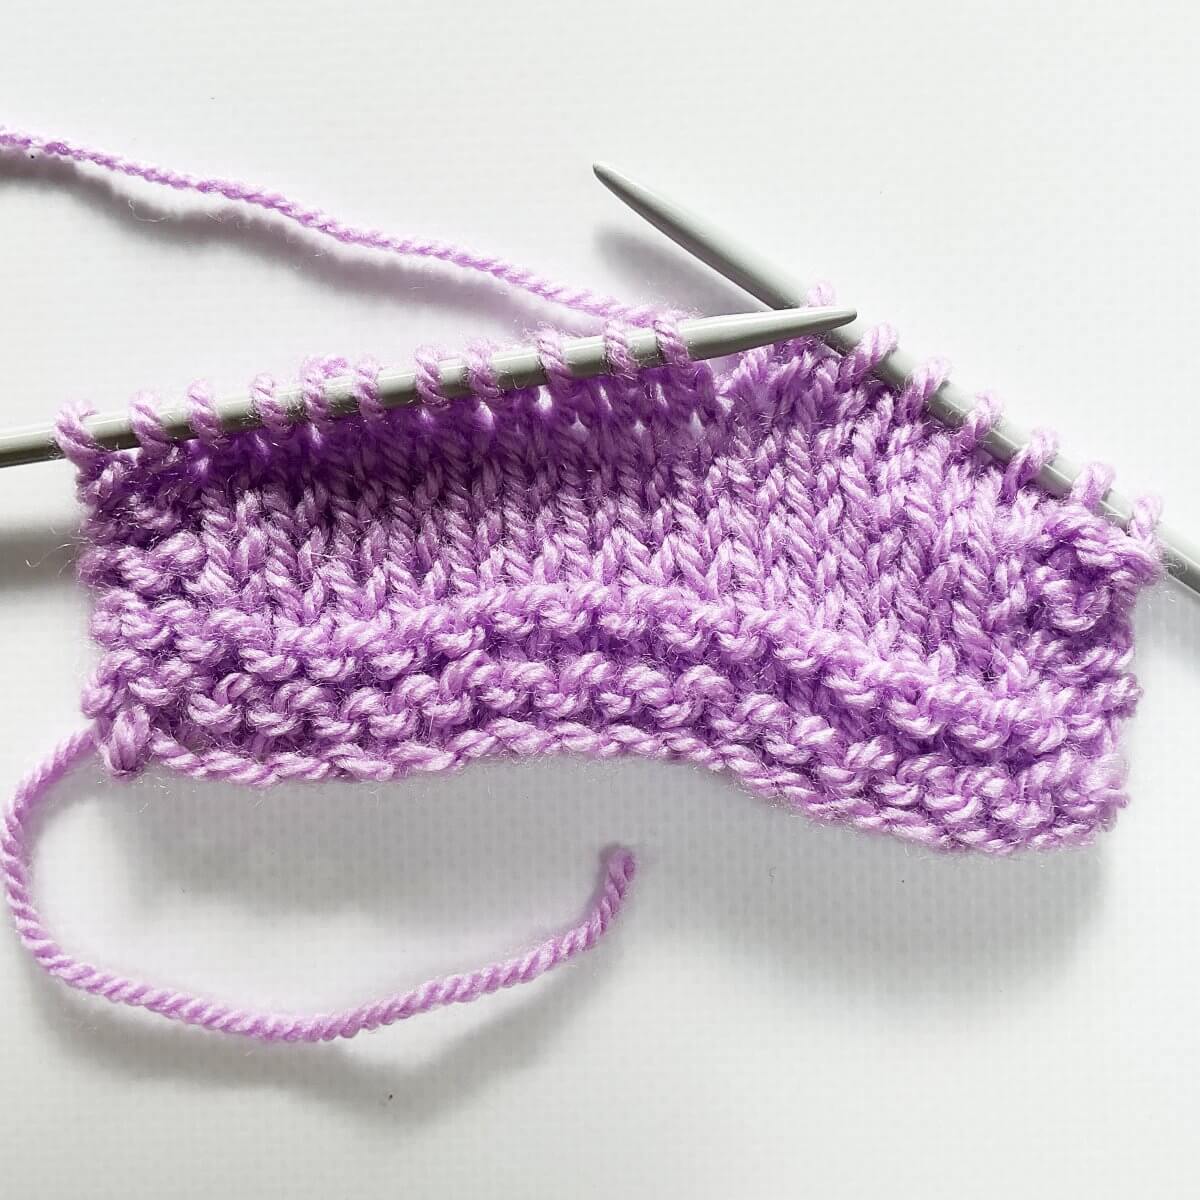
In the swatch you see below, I’ve worked 10 rounds in garter stitch without doing anything to smooth the transition. Do you see how the garter stitches ridges on the left and right of the marker do not line up?
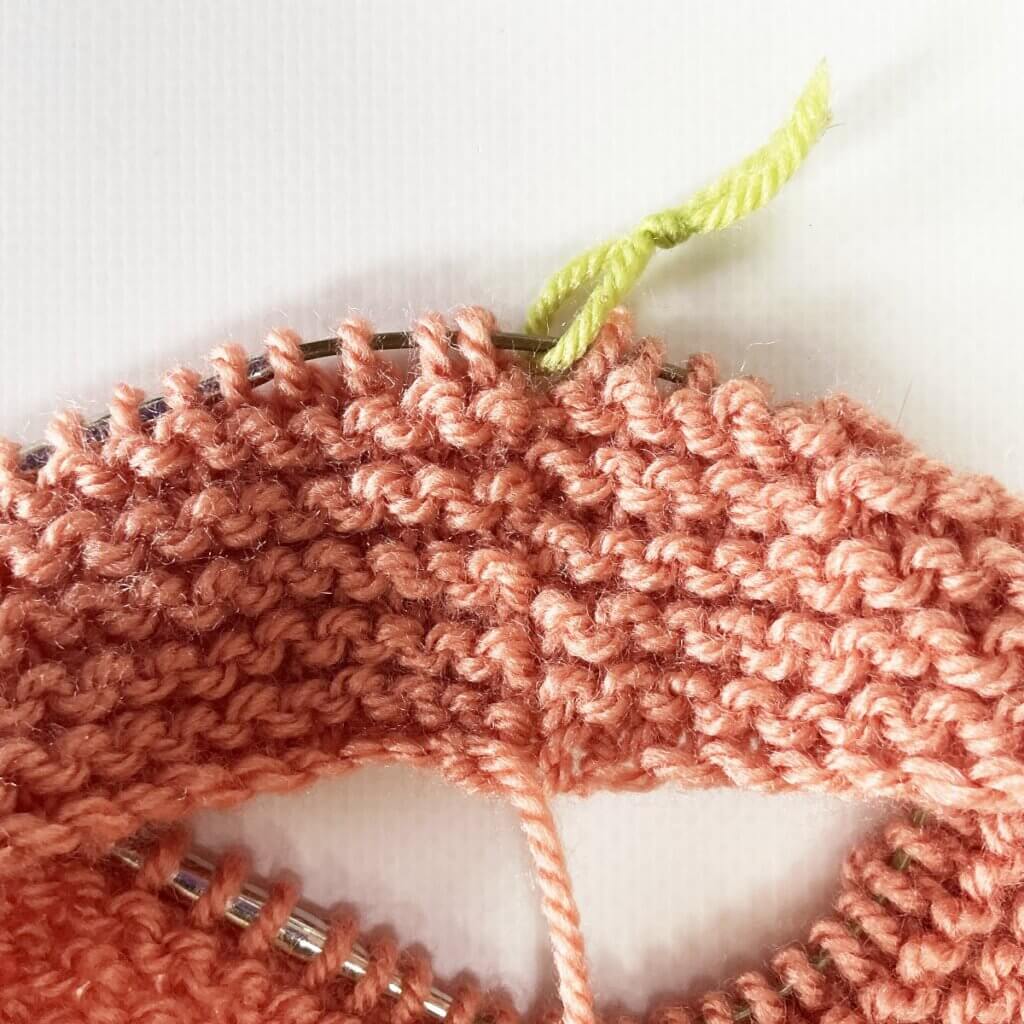
Garter stitch in the round without any smoothing

Knitting jog-less garter stitch in the round: lifted strand & p2tog method step by step

The modification on making the transition jog-less with the lifted strand and p2tog method is only worked at the very end of every purl round.

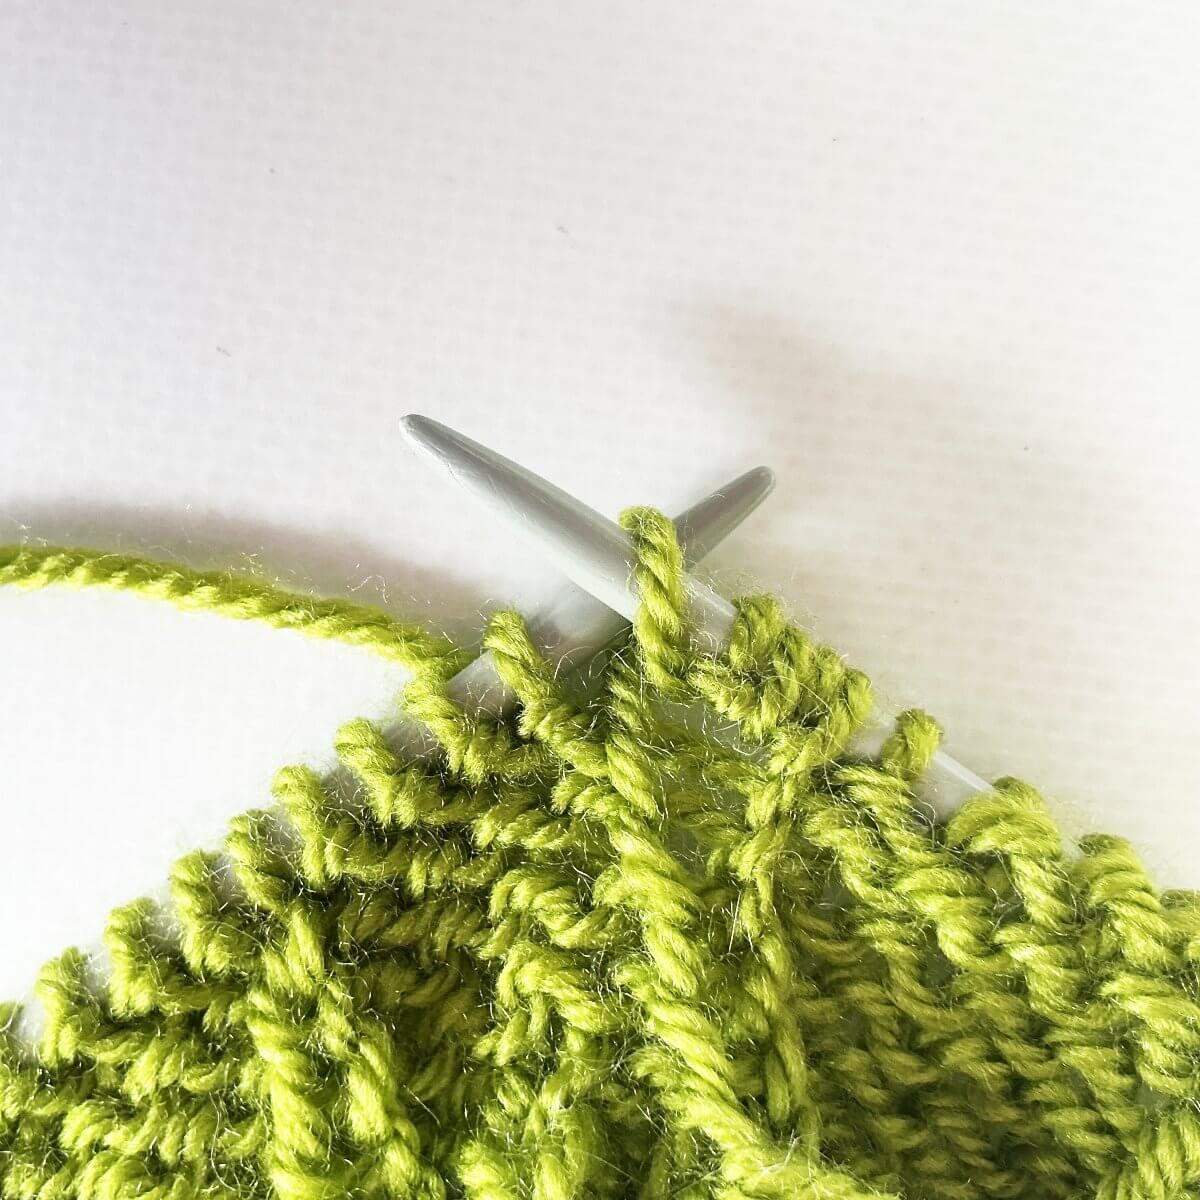
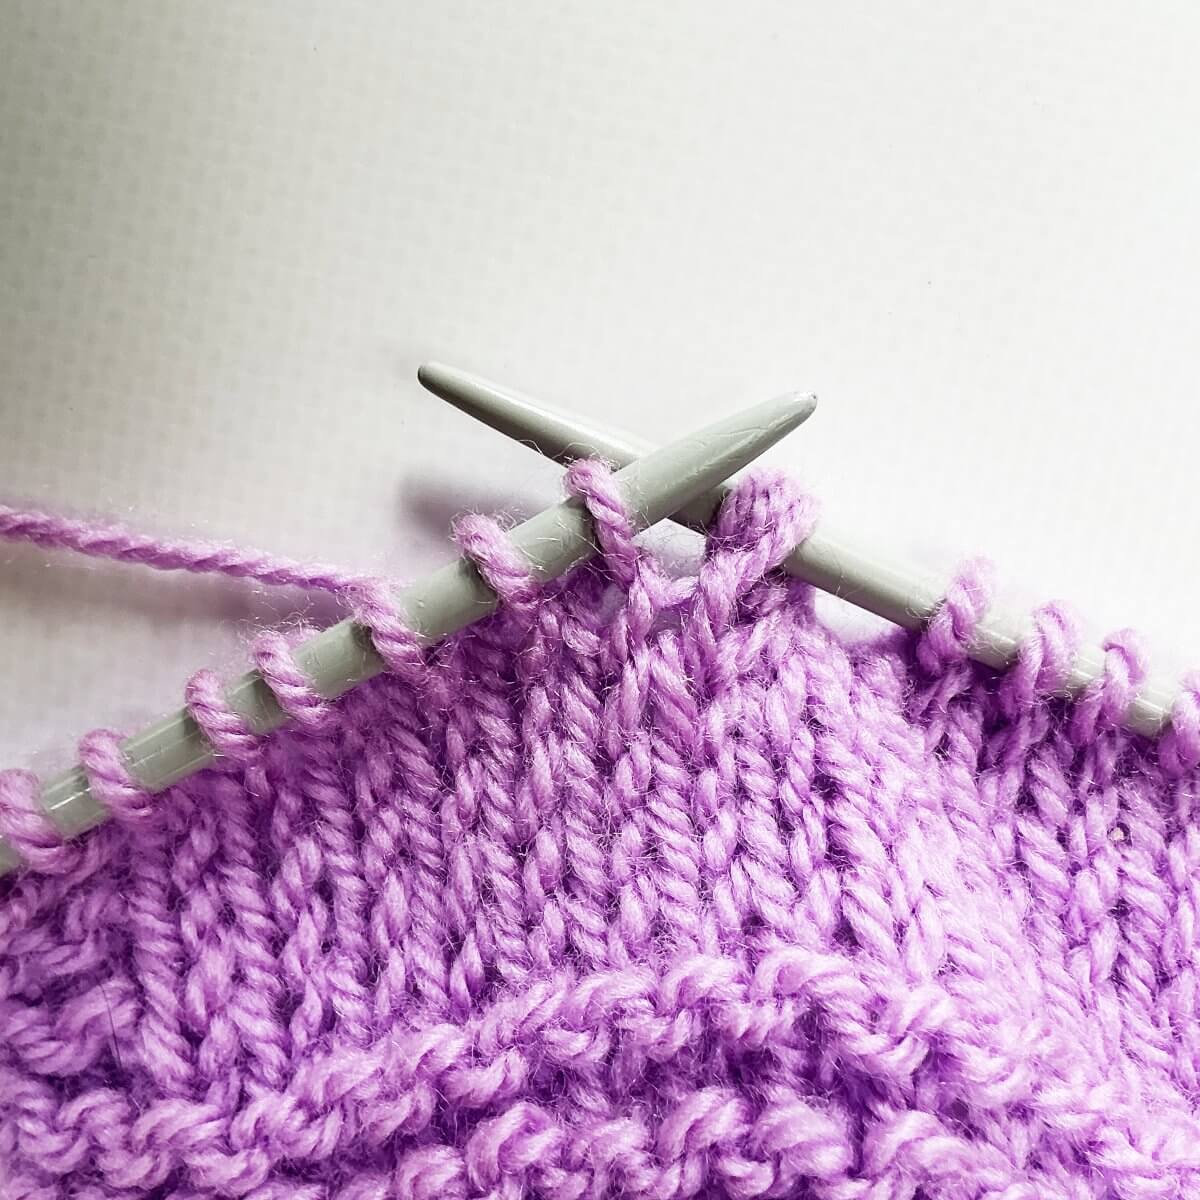
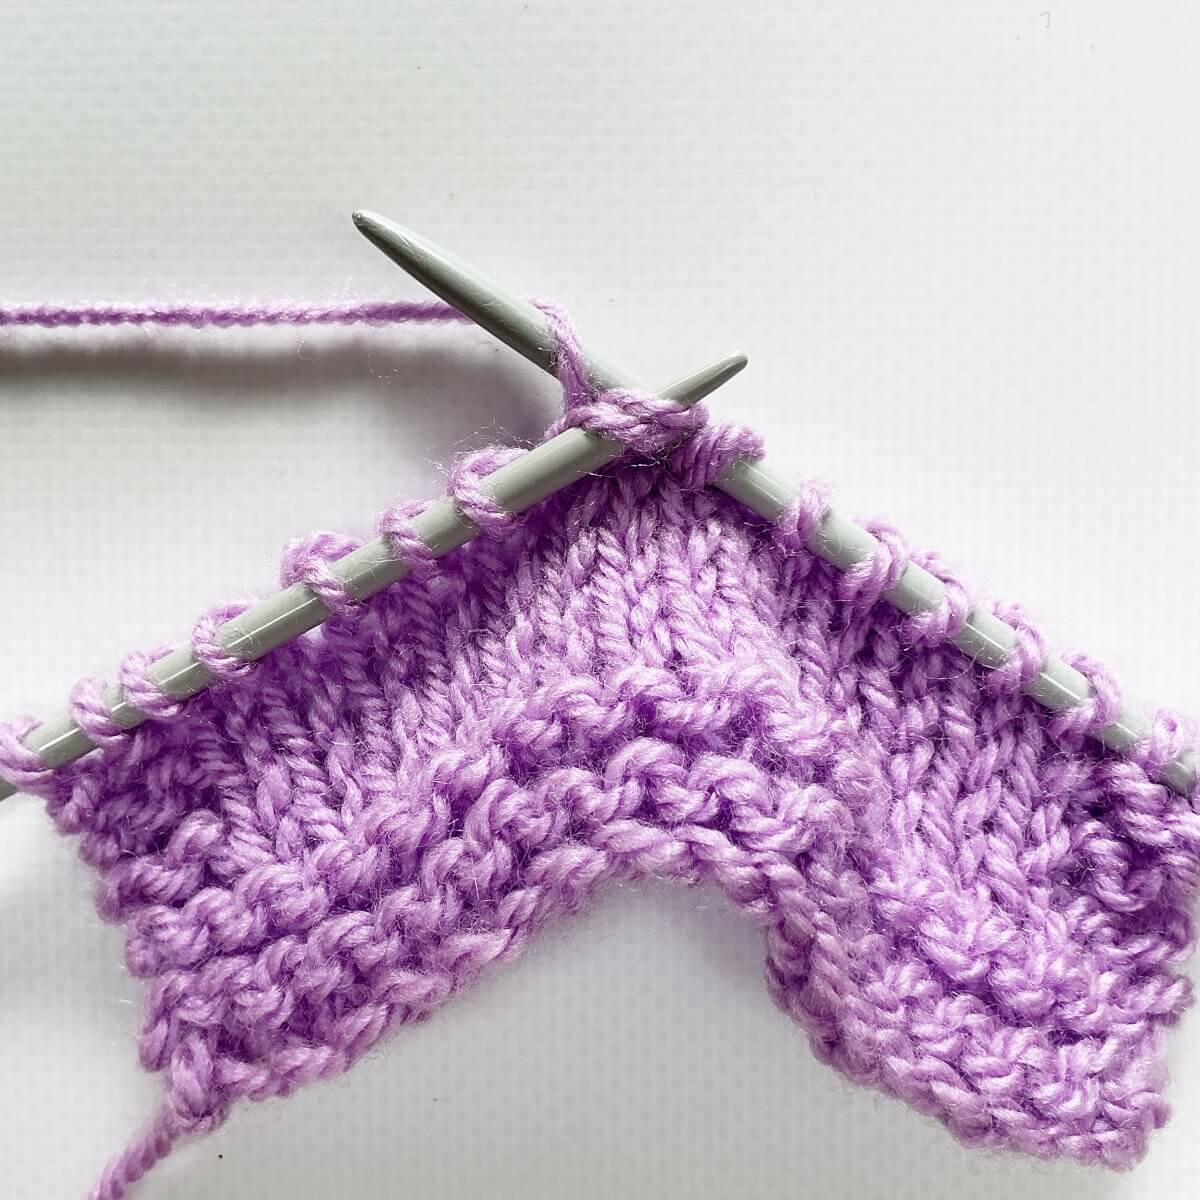
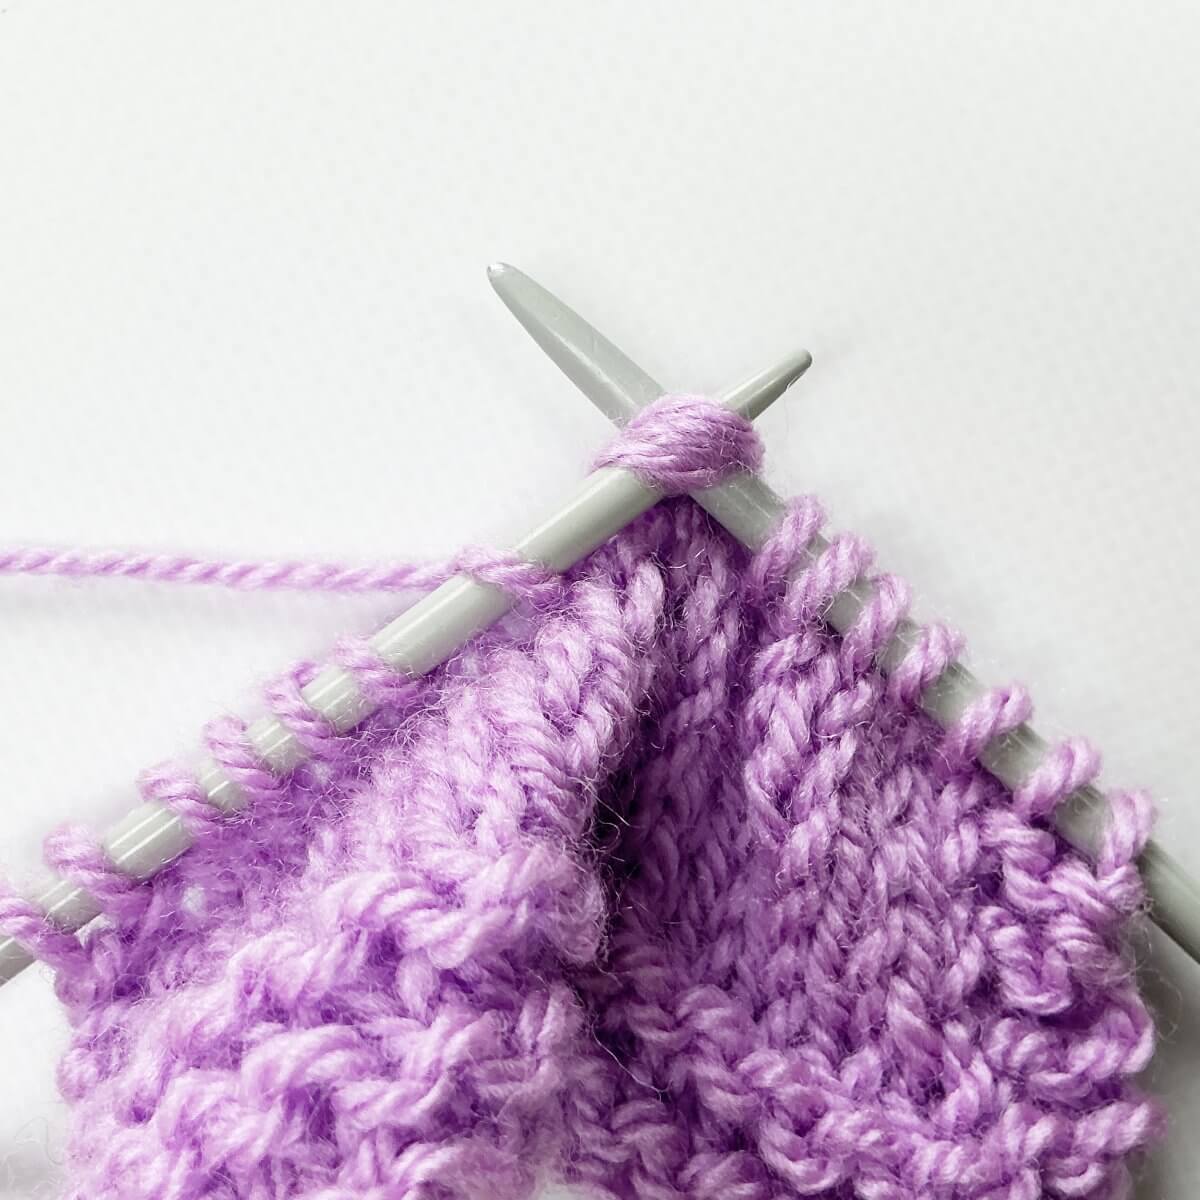
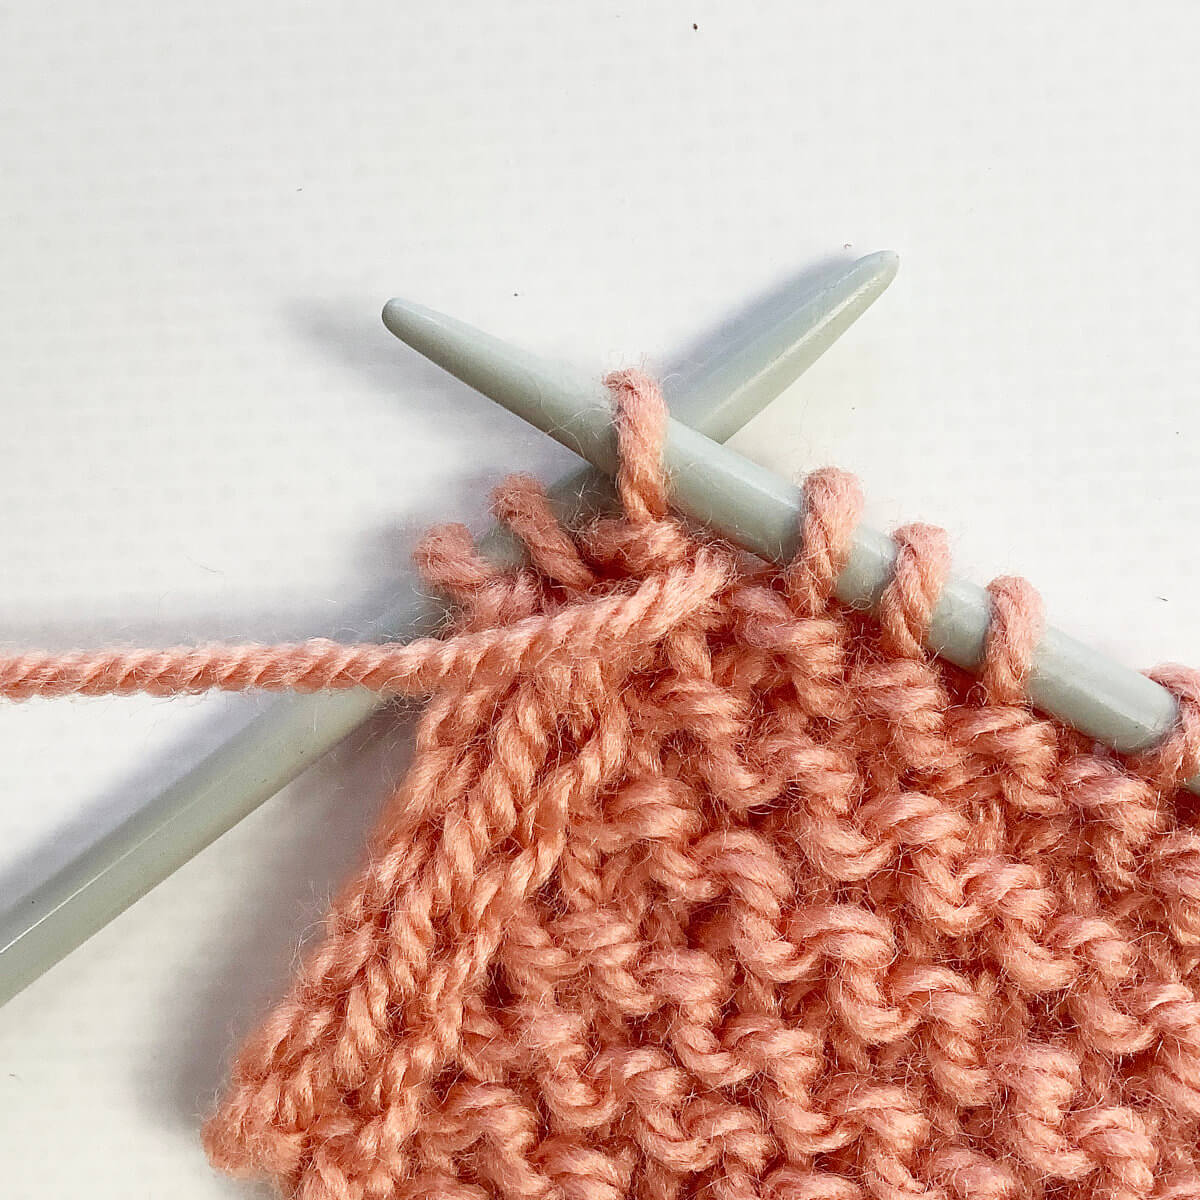
  1. Knit a round, then purl across the entire round until only one stitch remains before the beginning-of-round marker.
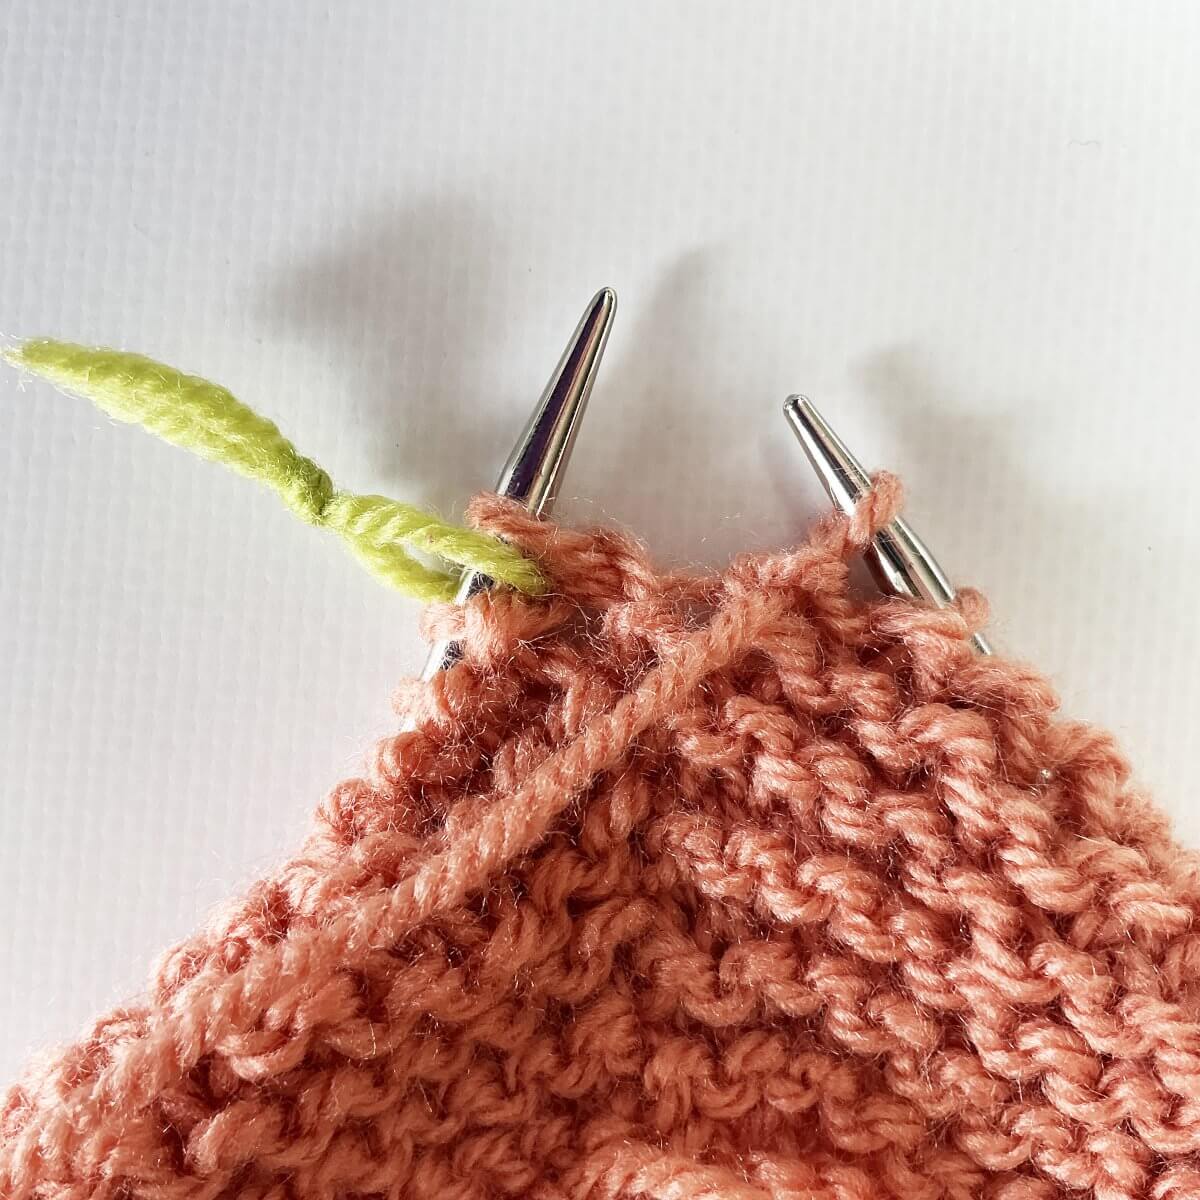
    Step 1 of working jog-less garter stitch in the round with the lifted strand & p2tog method

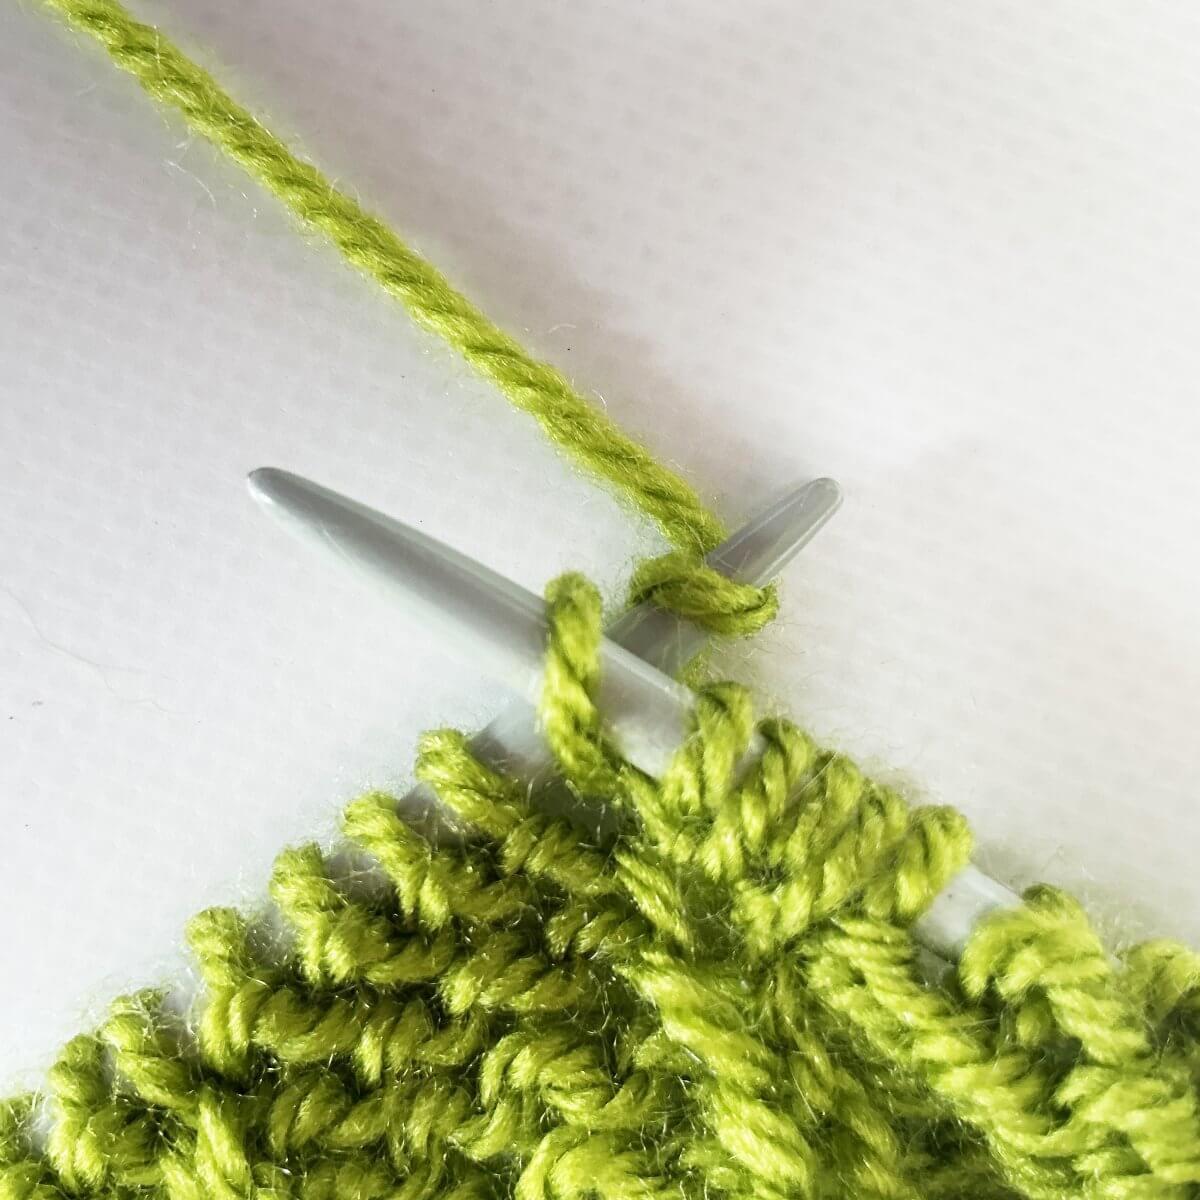
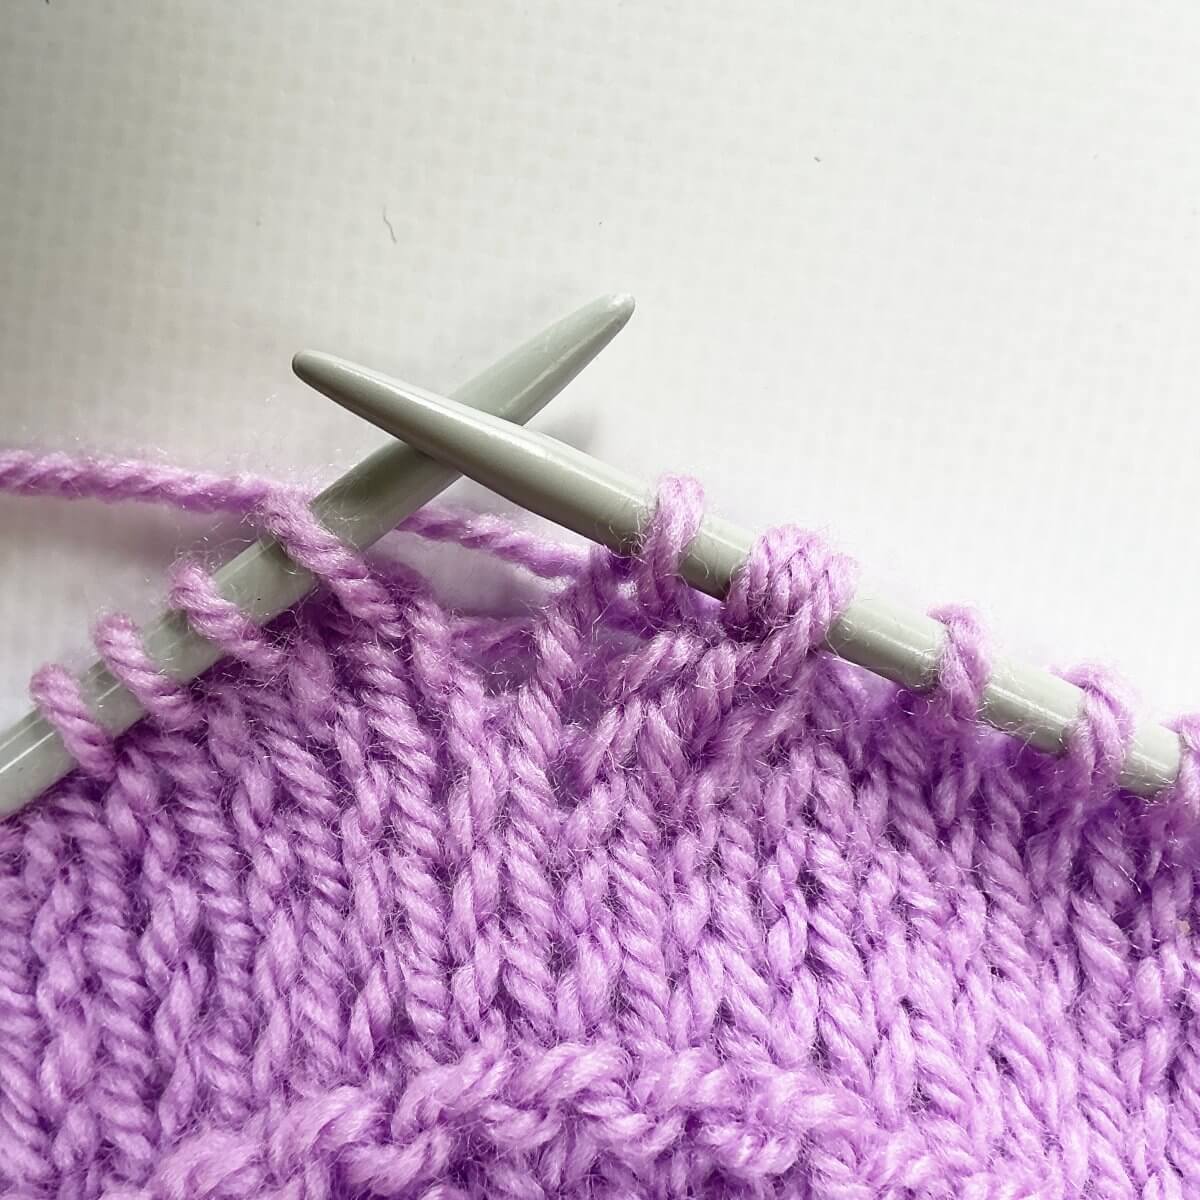
  2. Move the working yarn to the back of the work….
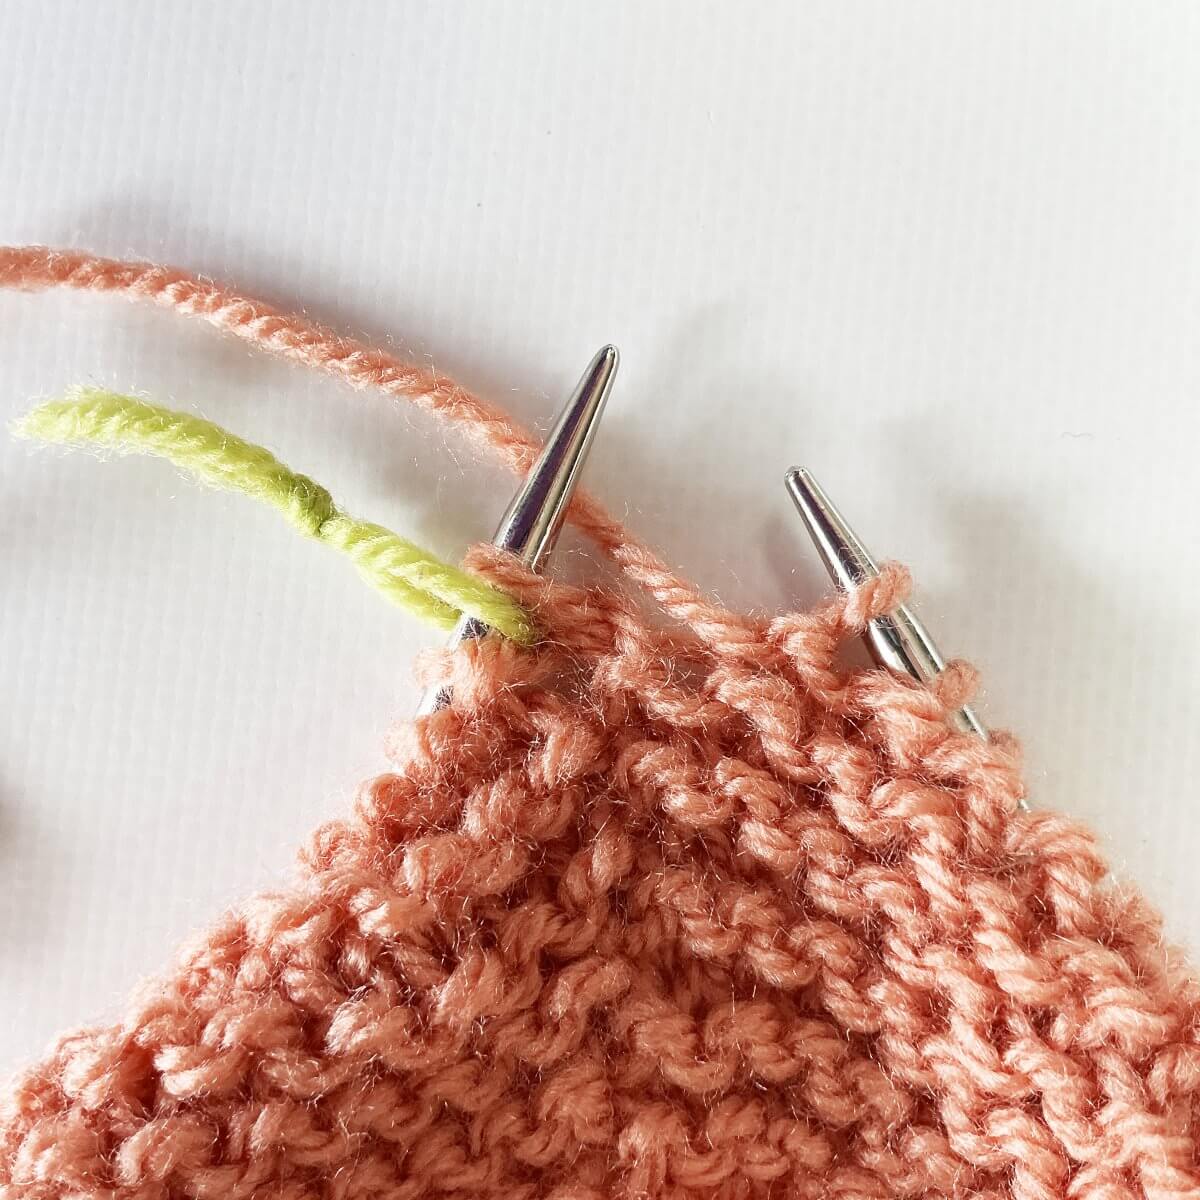
    Step 2

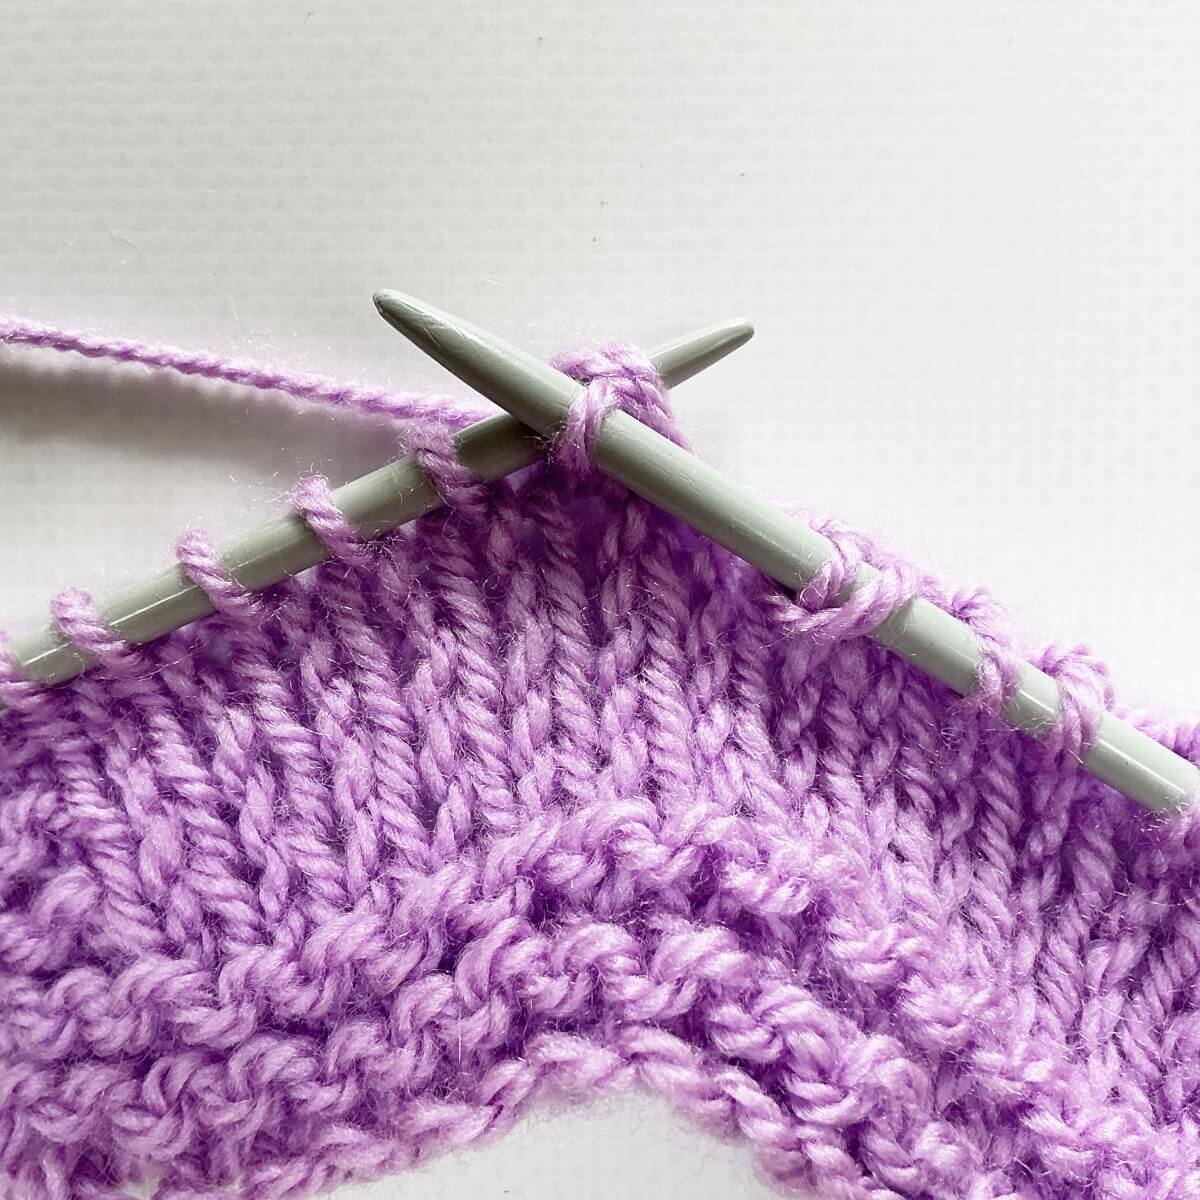
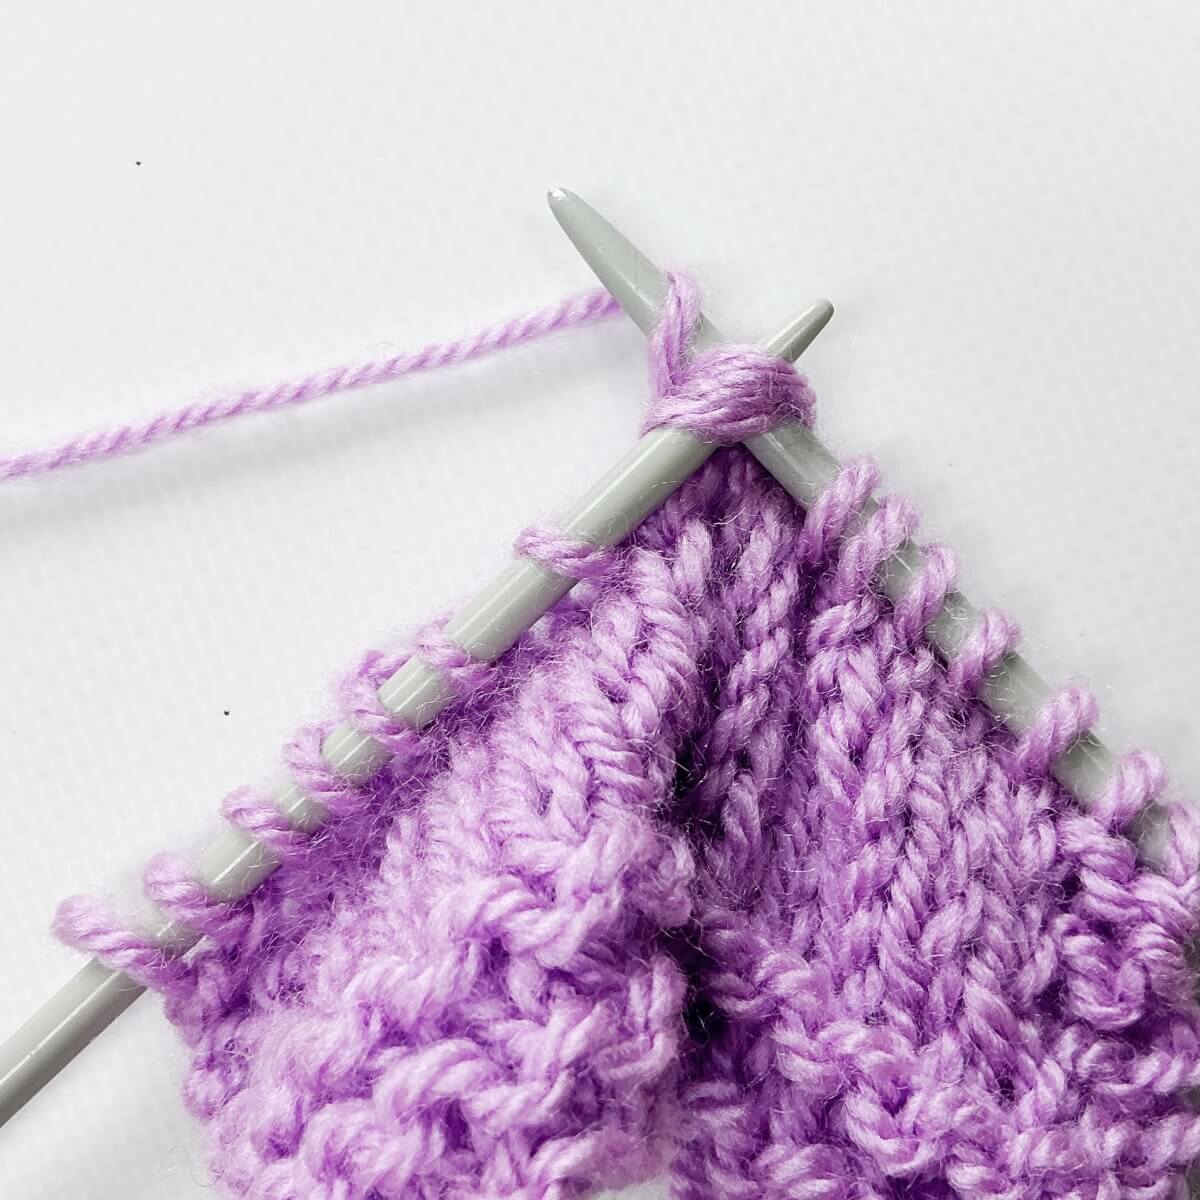
  3. …. then slip the final stitch purl-wise to the right-hand needle with the working yarn held at the back of the work.

    Do not move the beginning-of-round marker yet!Step 3 of working jog-less garter stitch in the round with the lifted strand & p2tog method

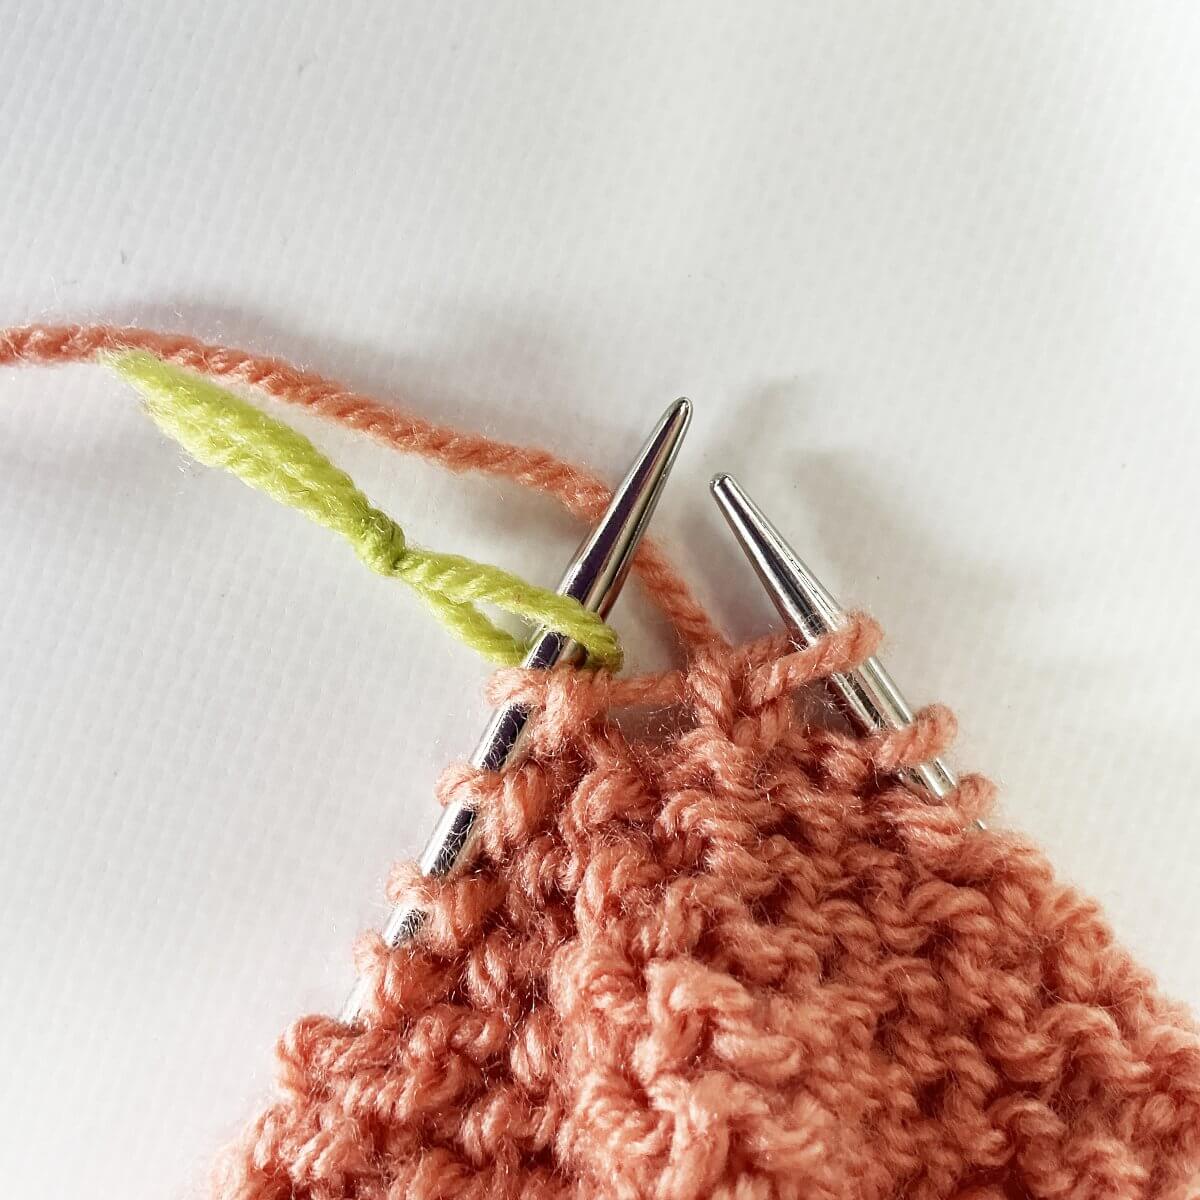
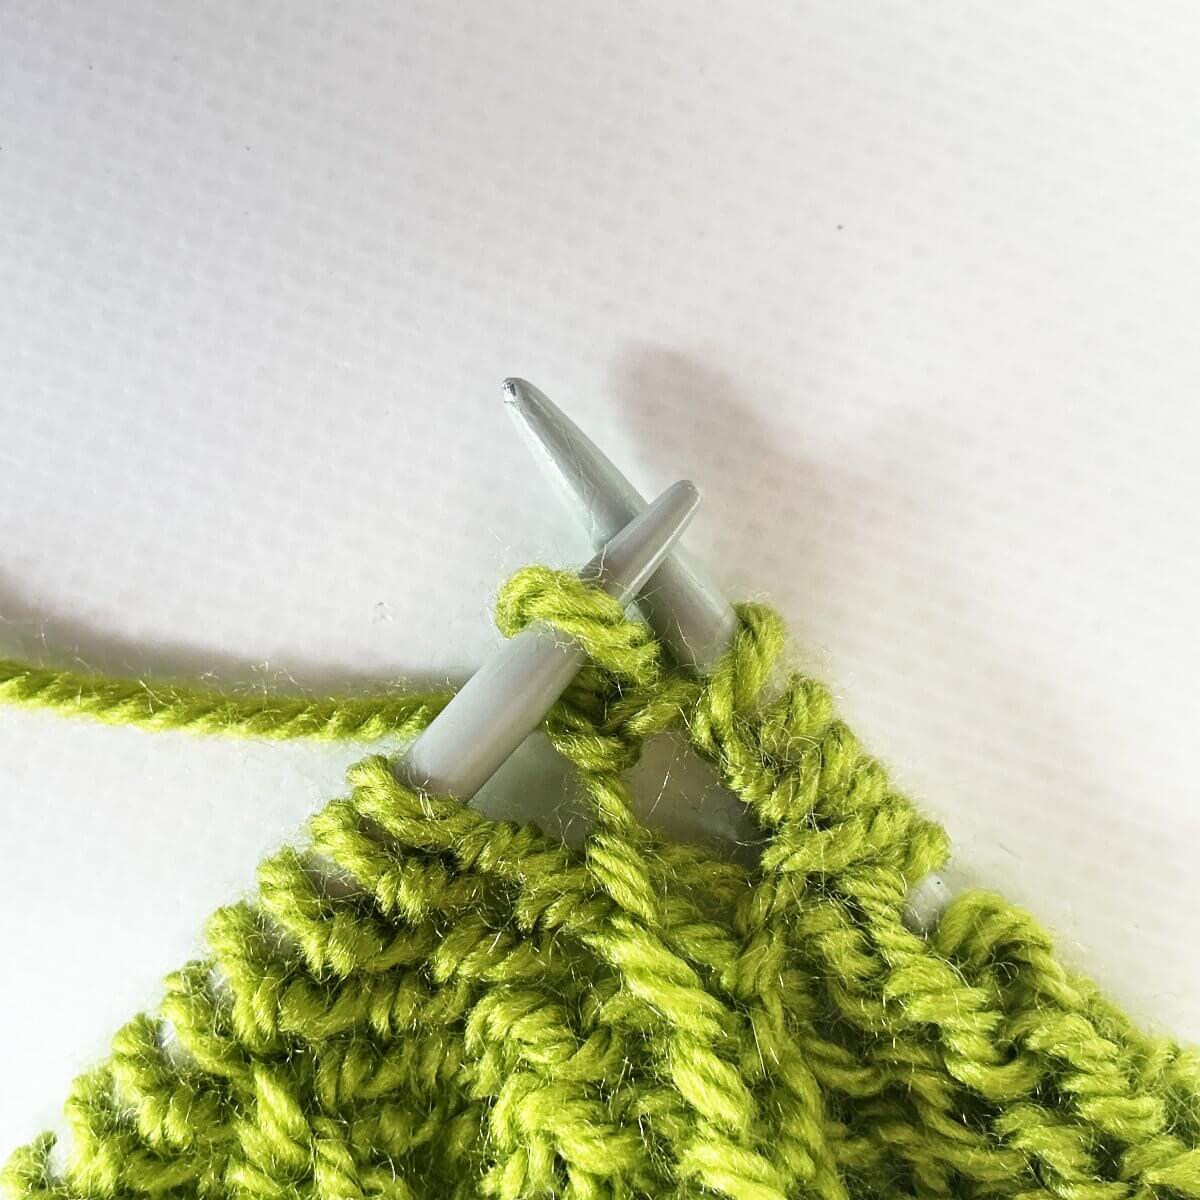
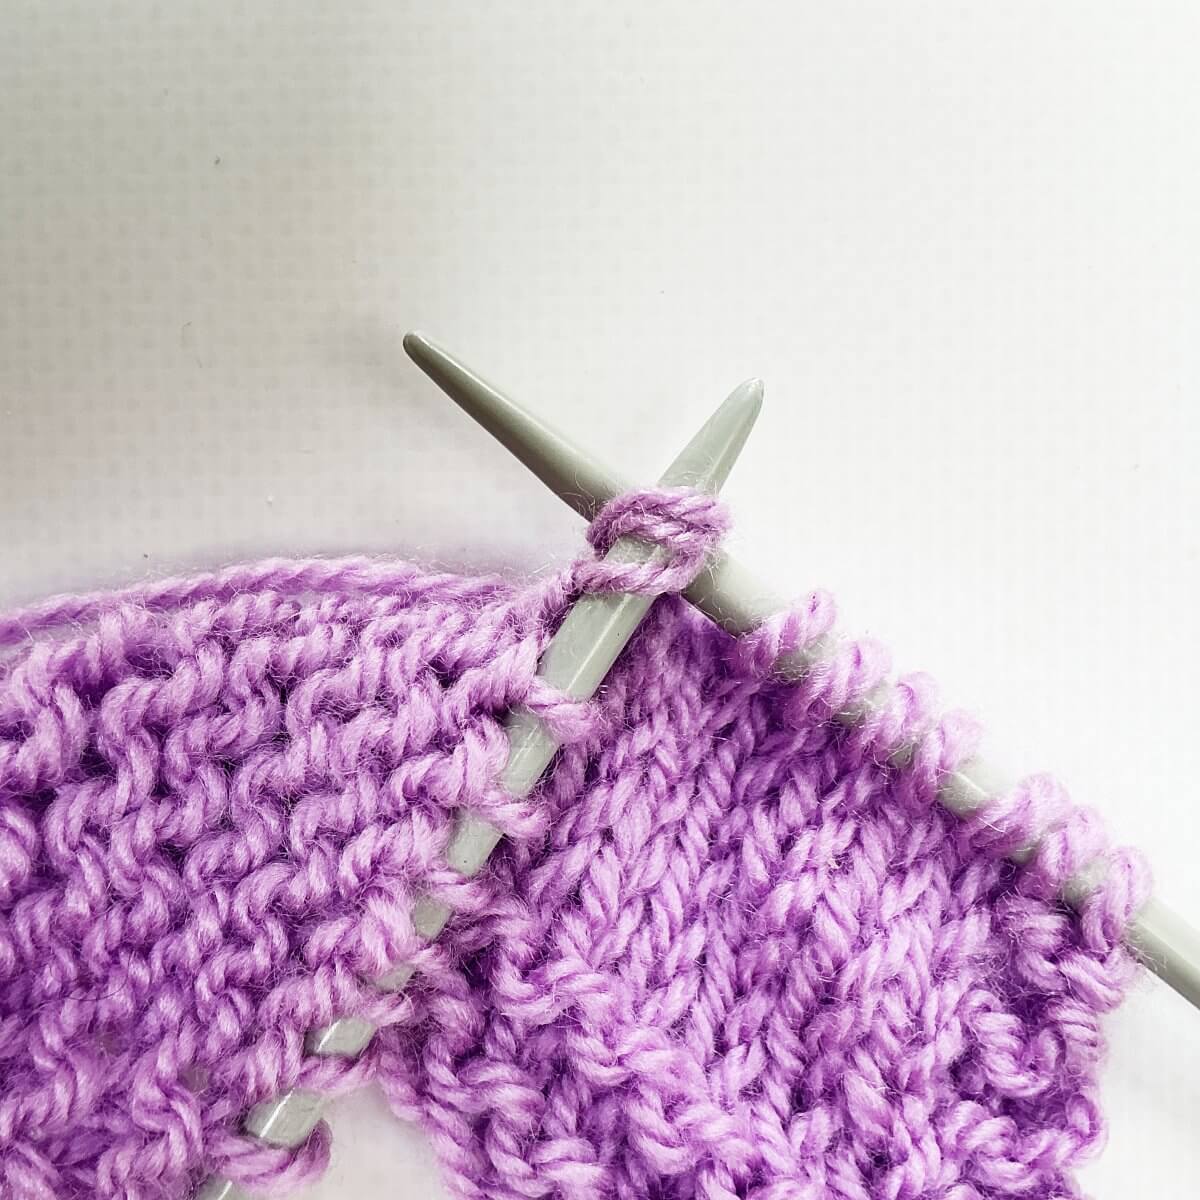
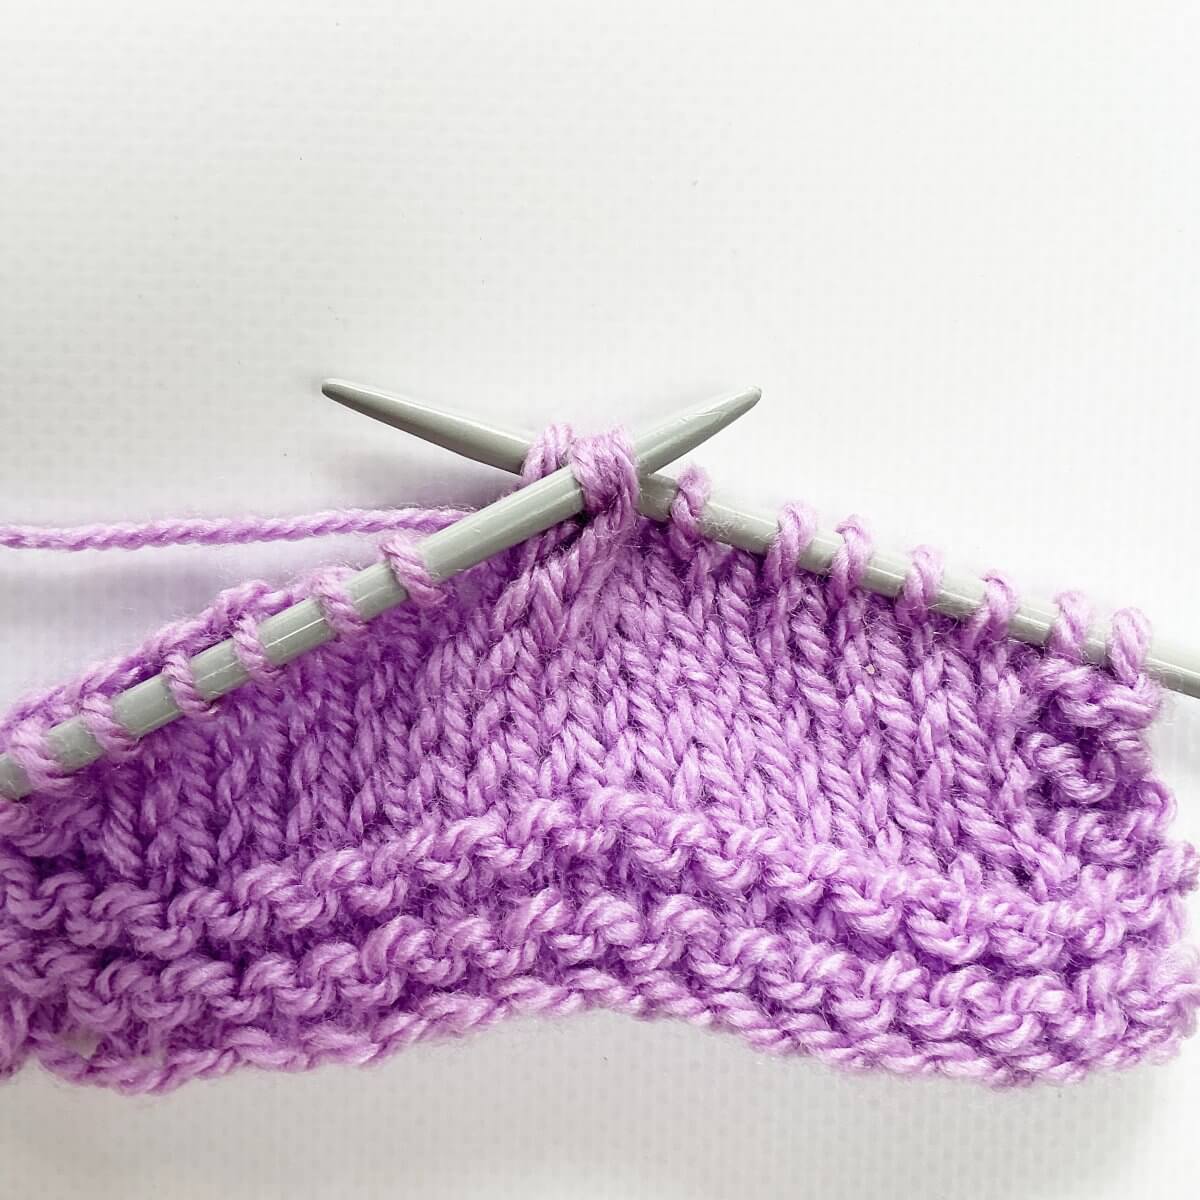
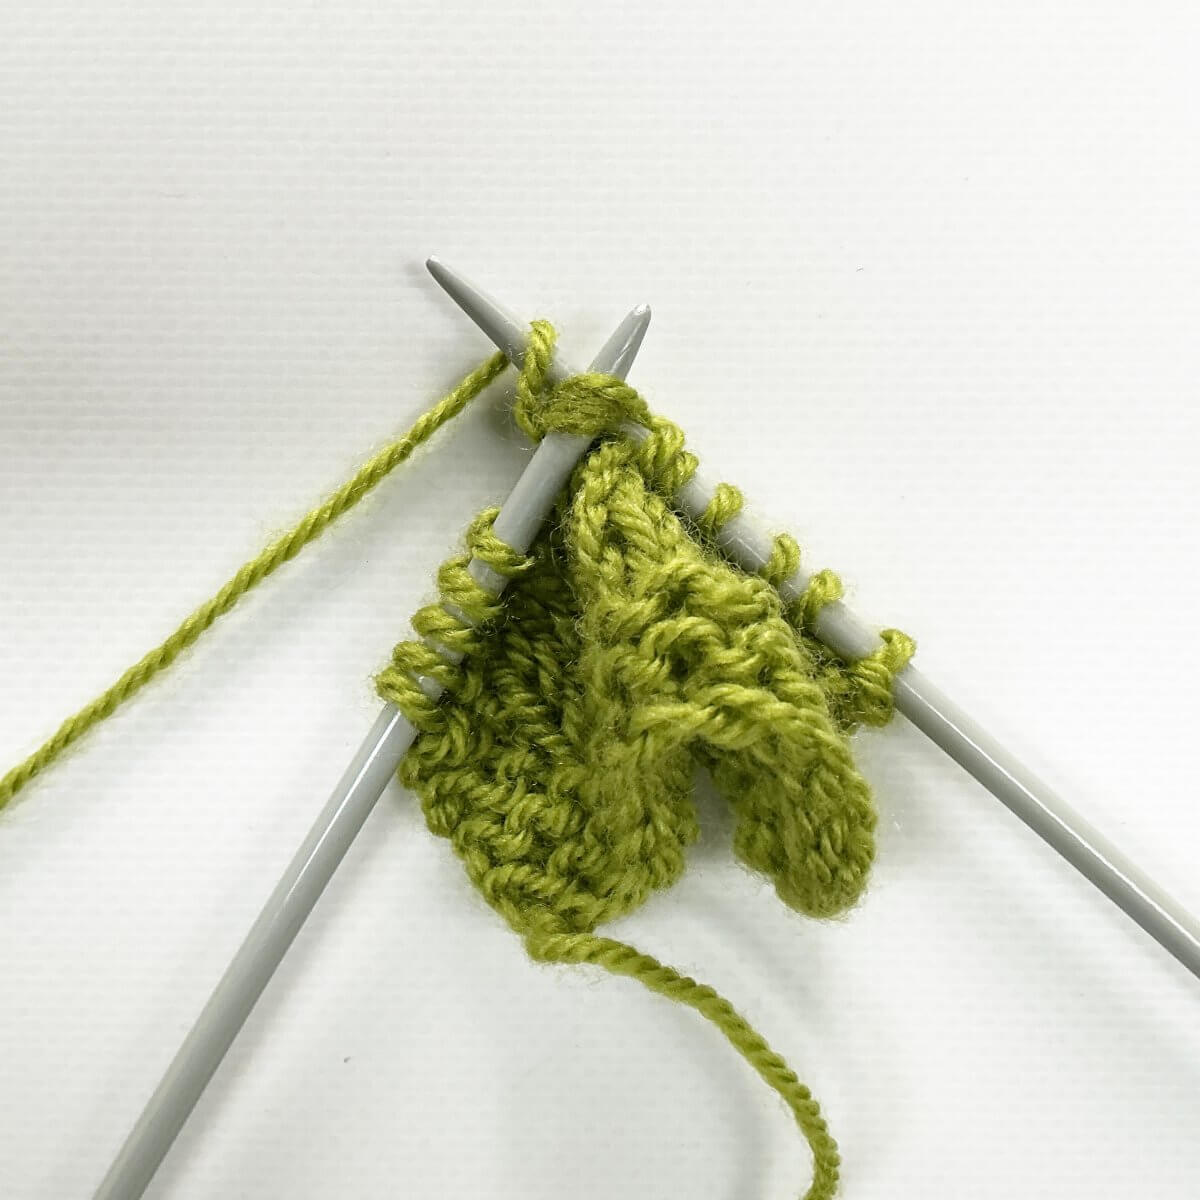
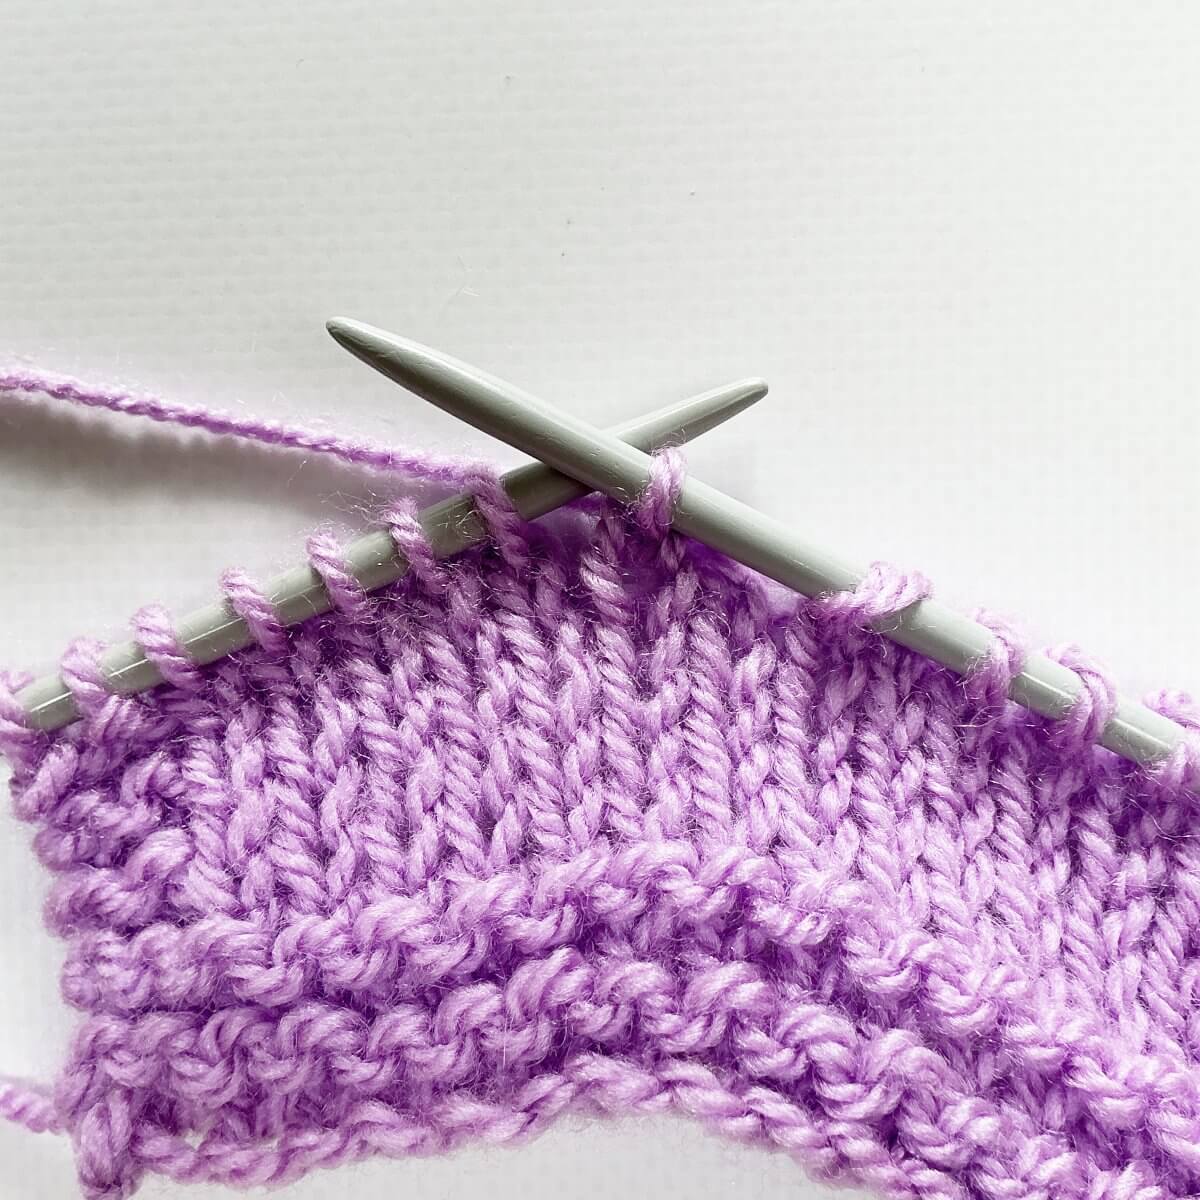
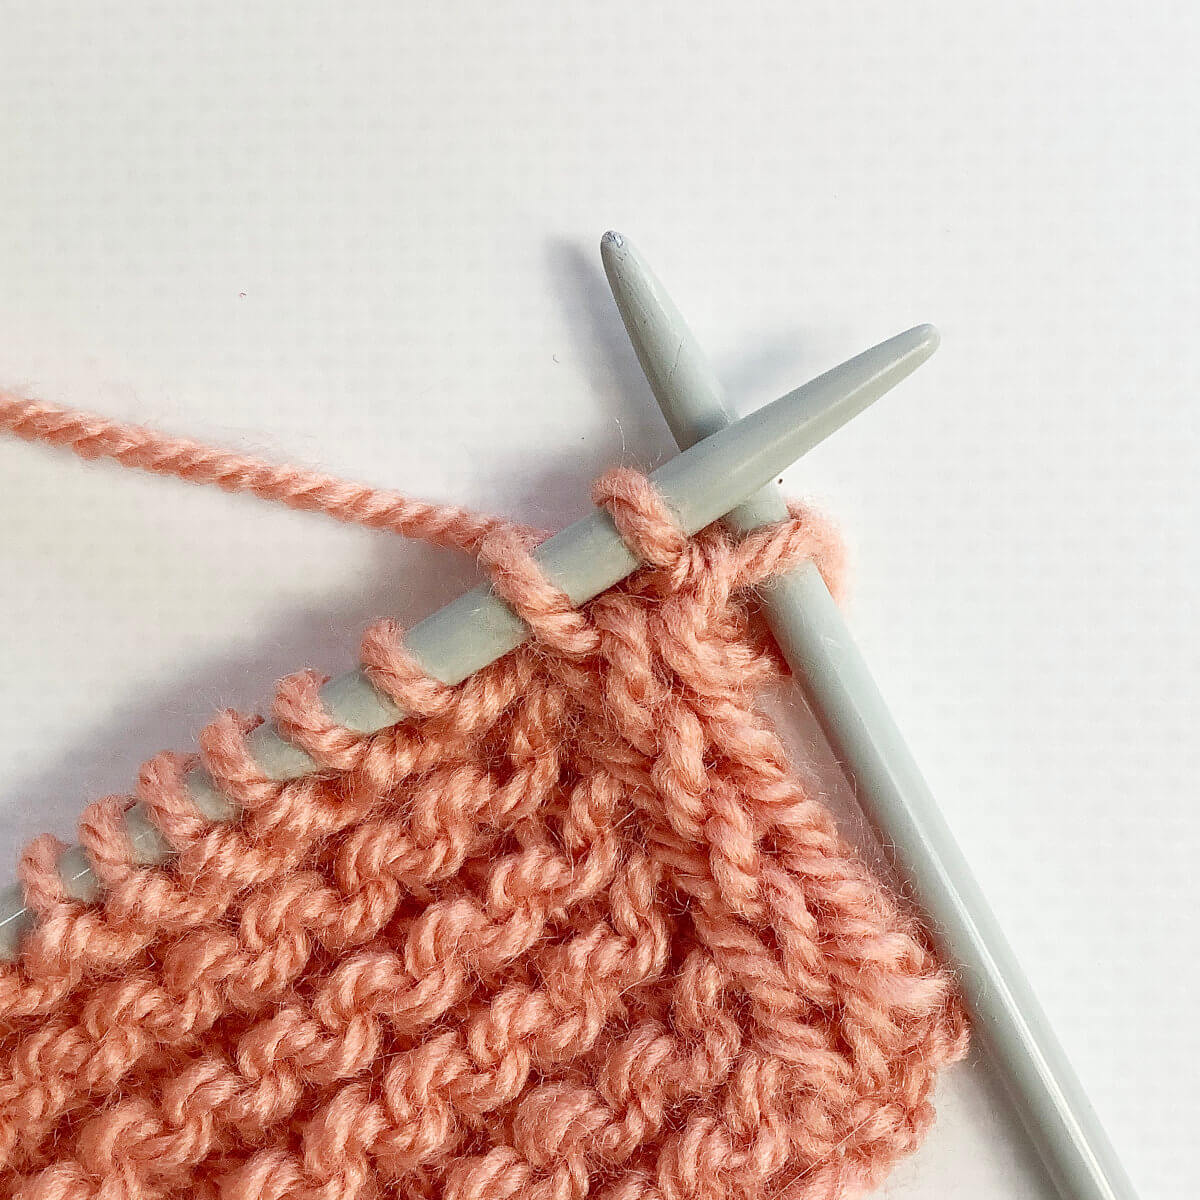
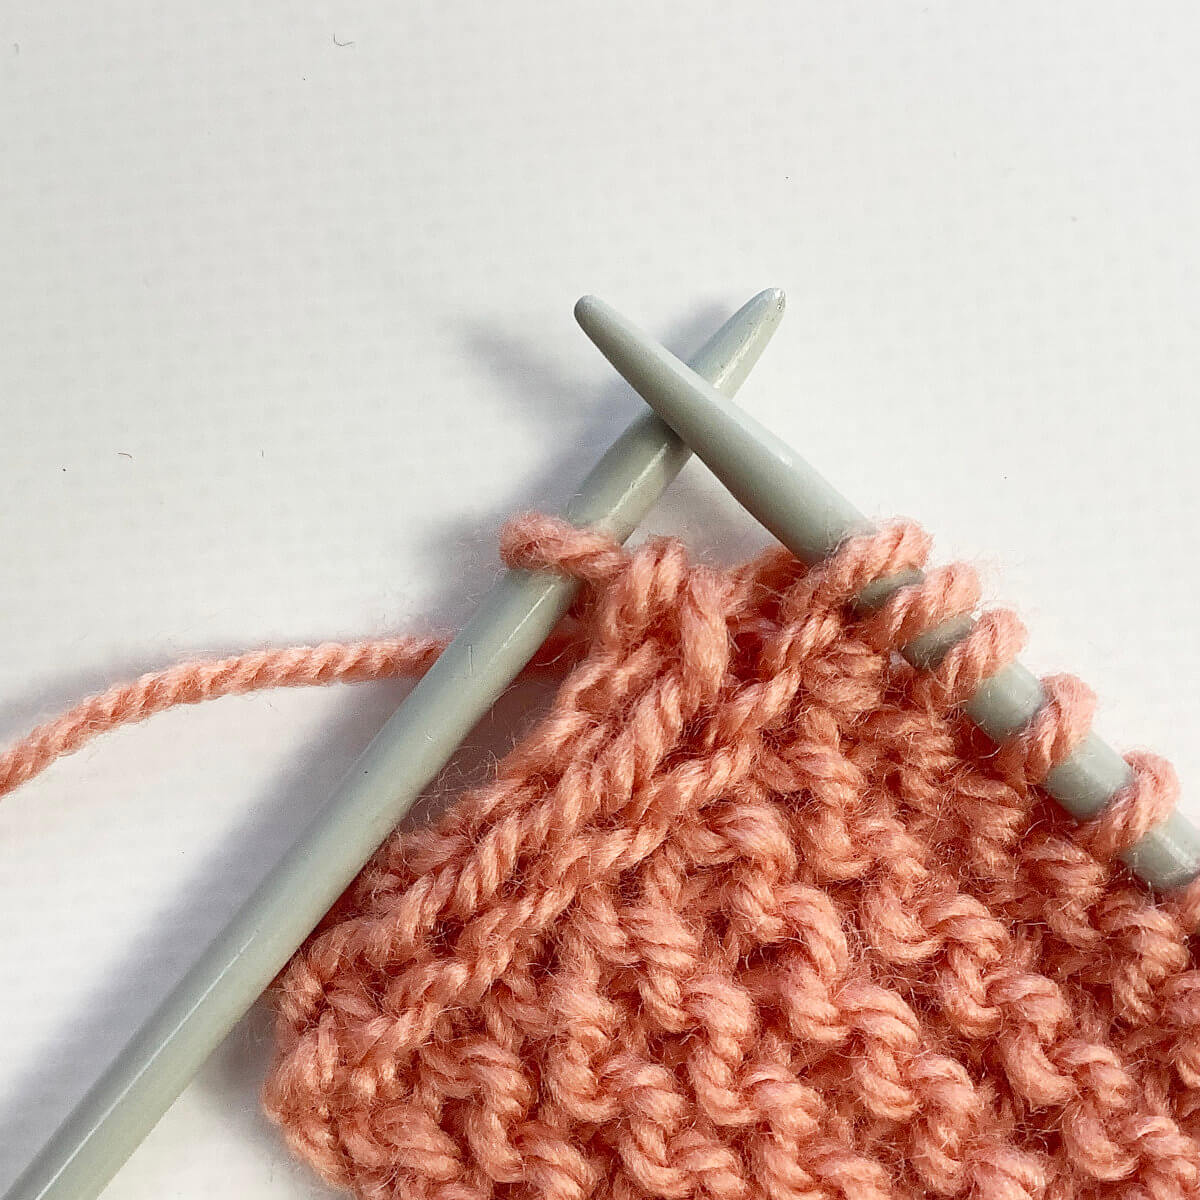
  4. Locate the horizontal strand running between the slipped stitch and the first stitch of the next round. Insert the right-hand needle from front to back underneath this strand, in the same direction used when working a right-leaning lifted increase (M1R). Lift the strand onto the left-hand needle.
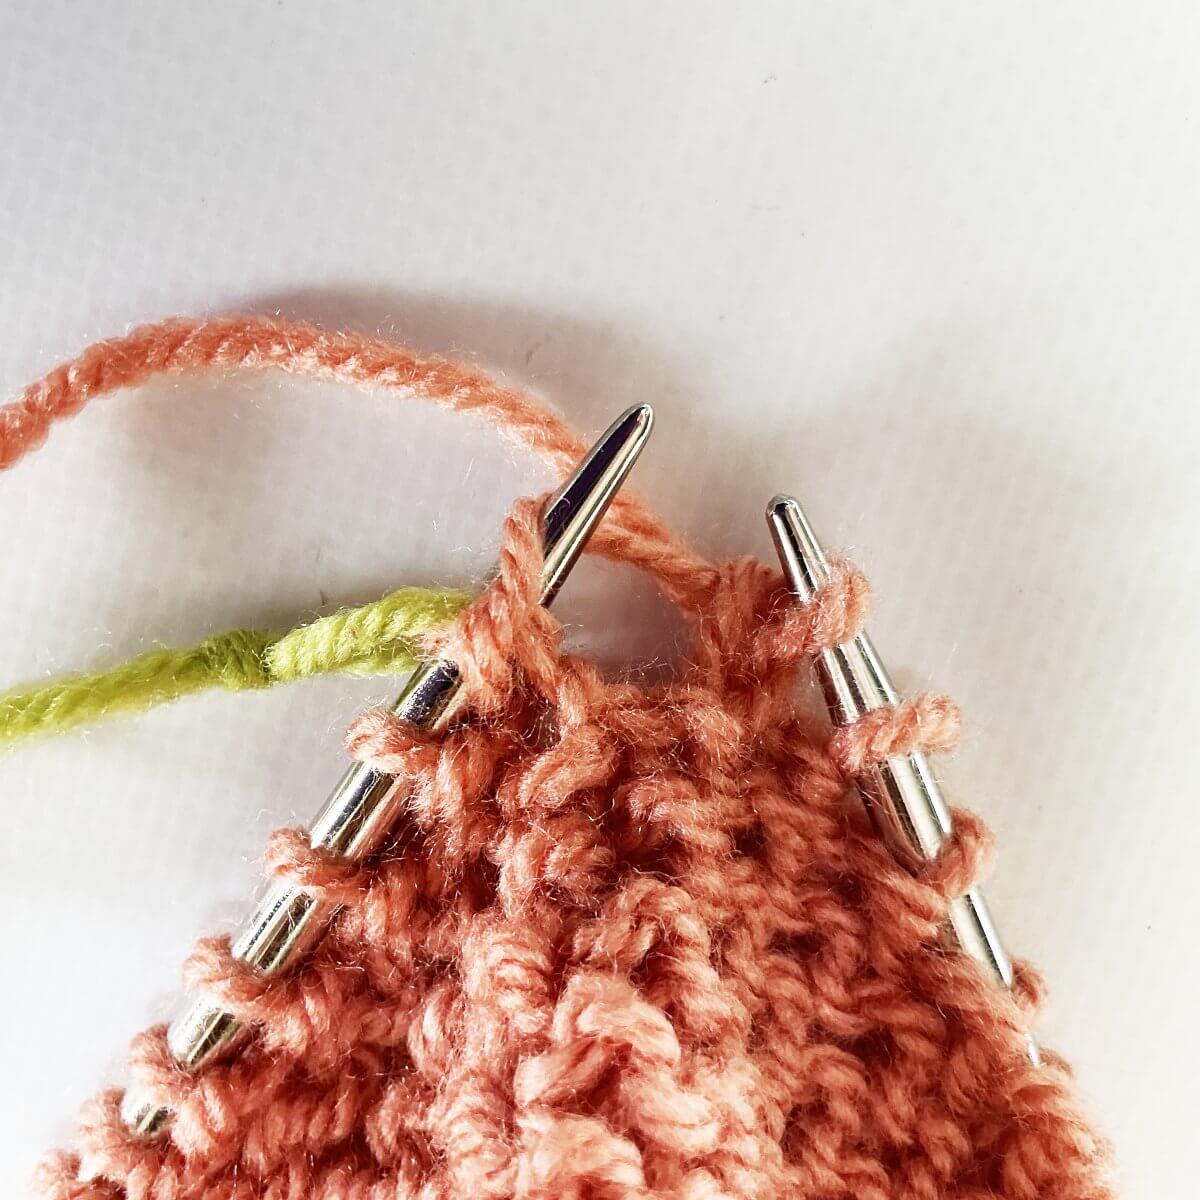
    Step 4

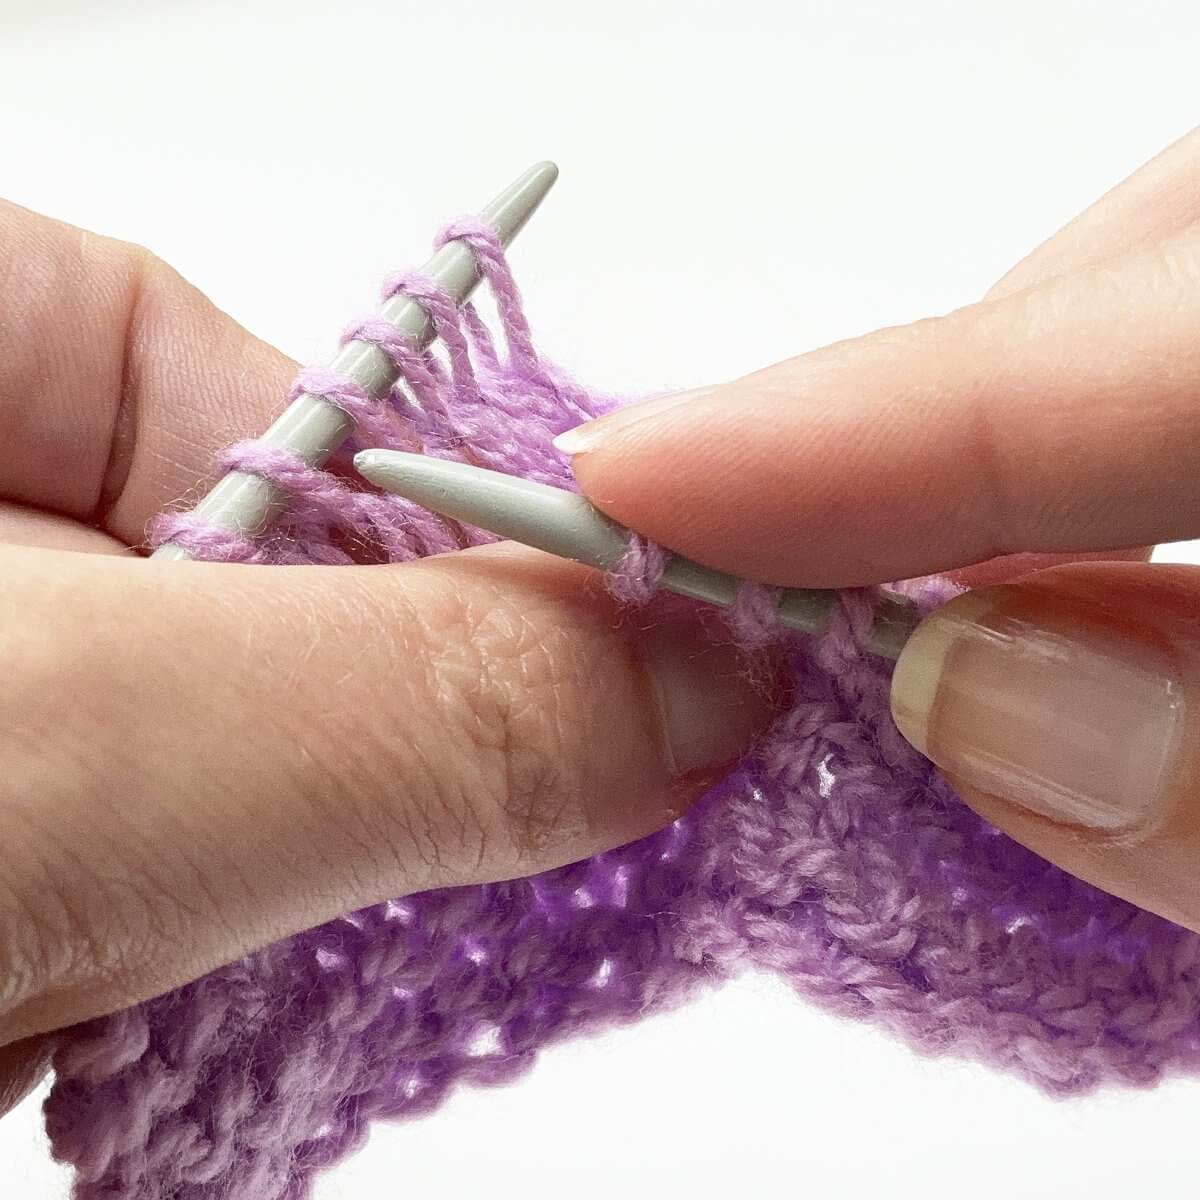
  5. Slip the last stitch back onto the left-hand needle.

    You should now have the lifted strand, and the slipped stitch next to each other on the left-hand needle. Step 5 of working jog-less garter stitch in the round with the lifted strand & p2tog method
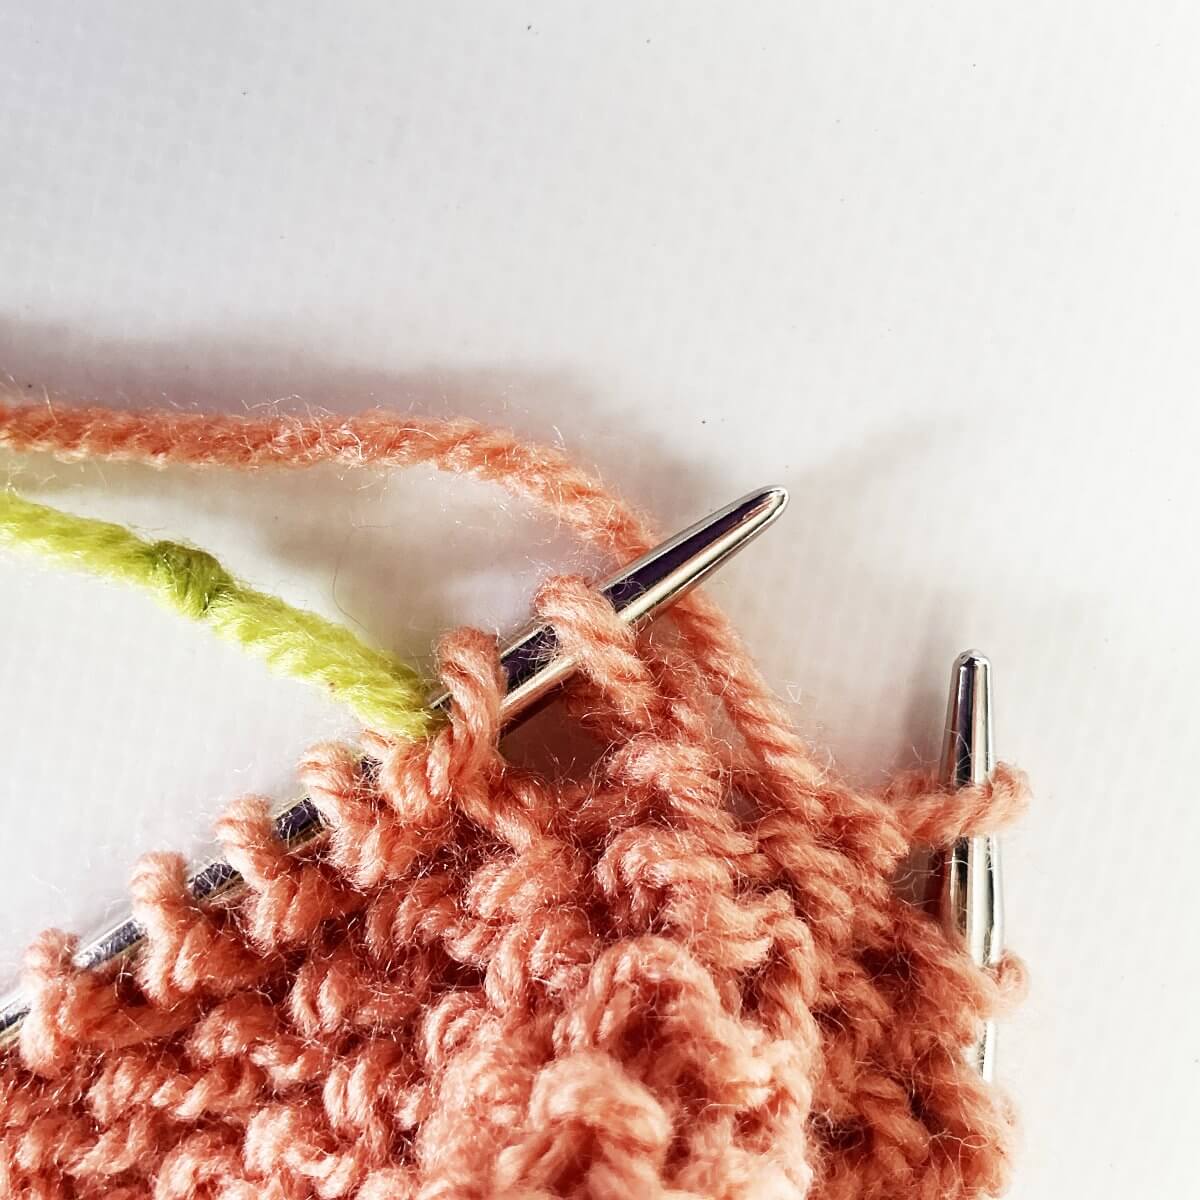
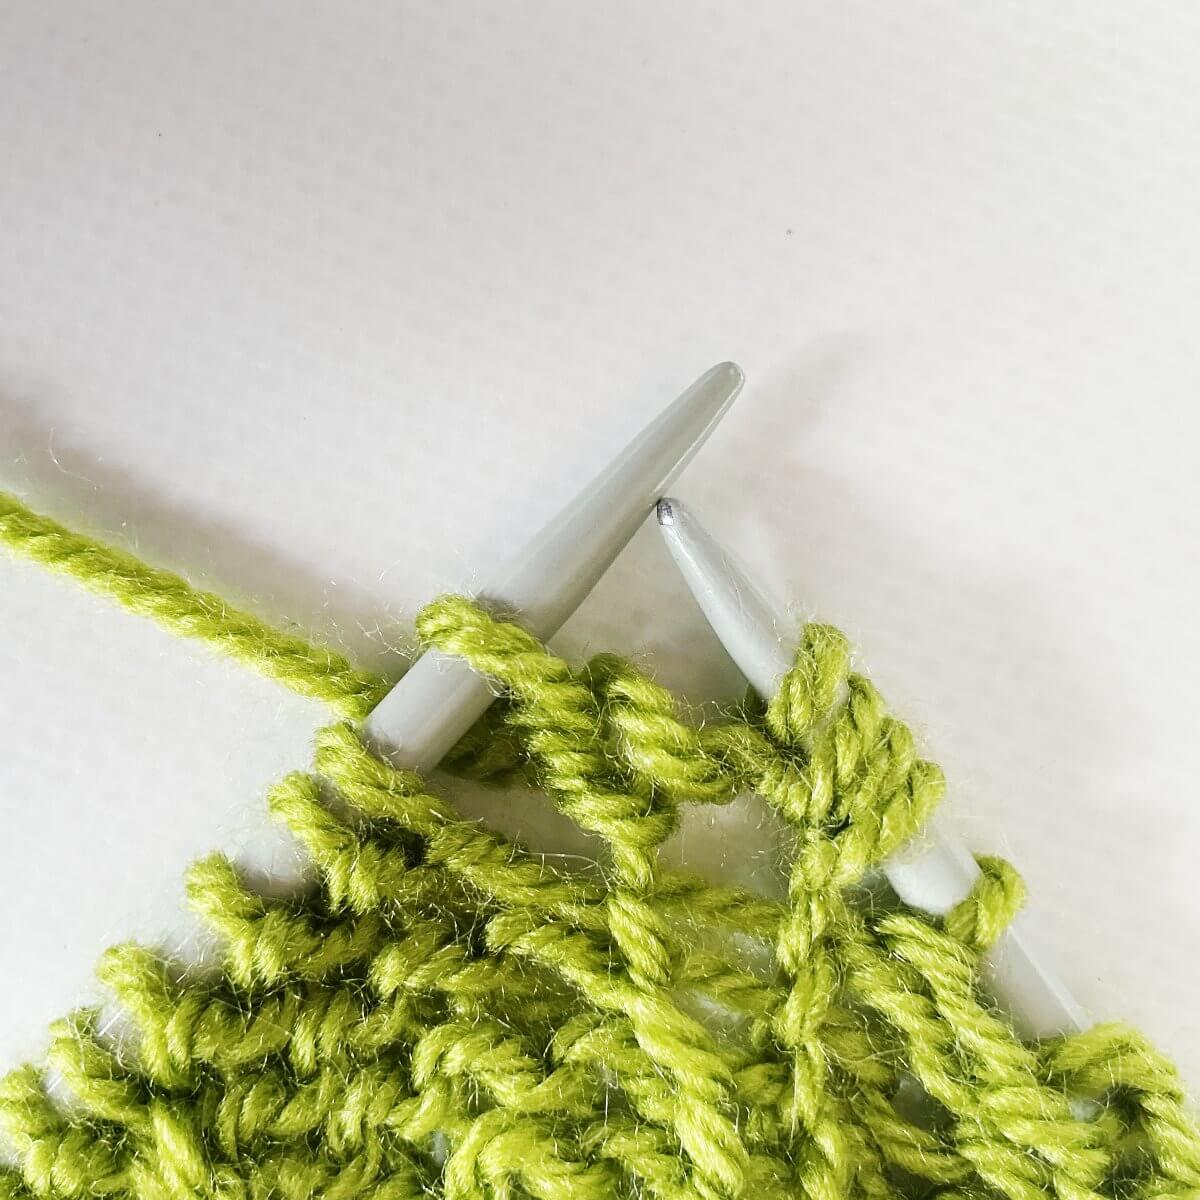
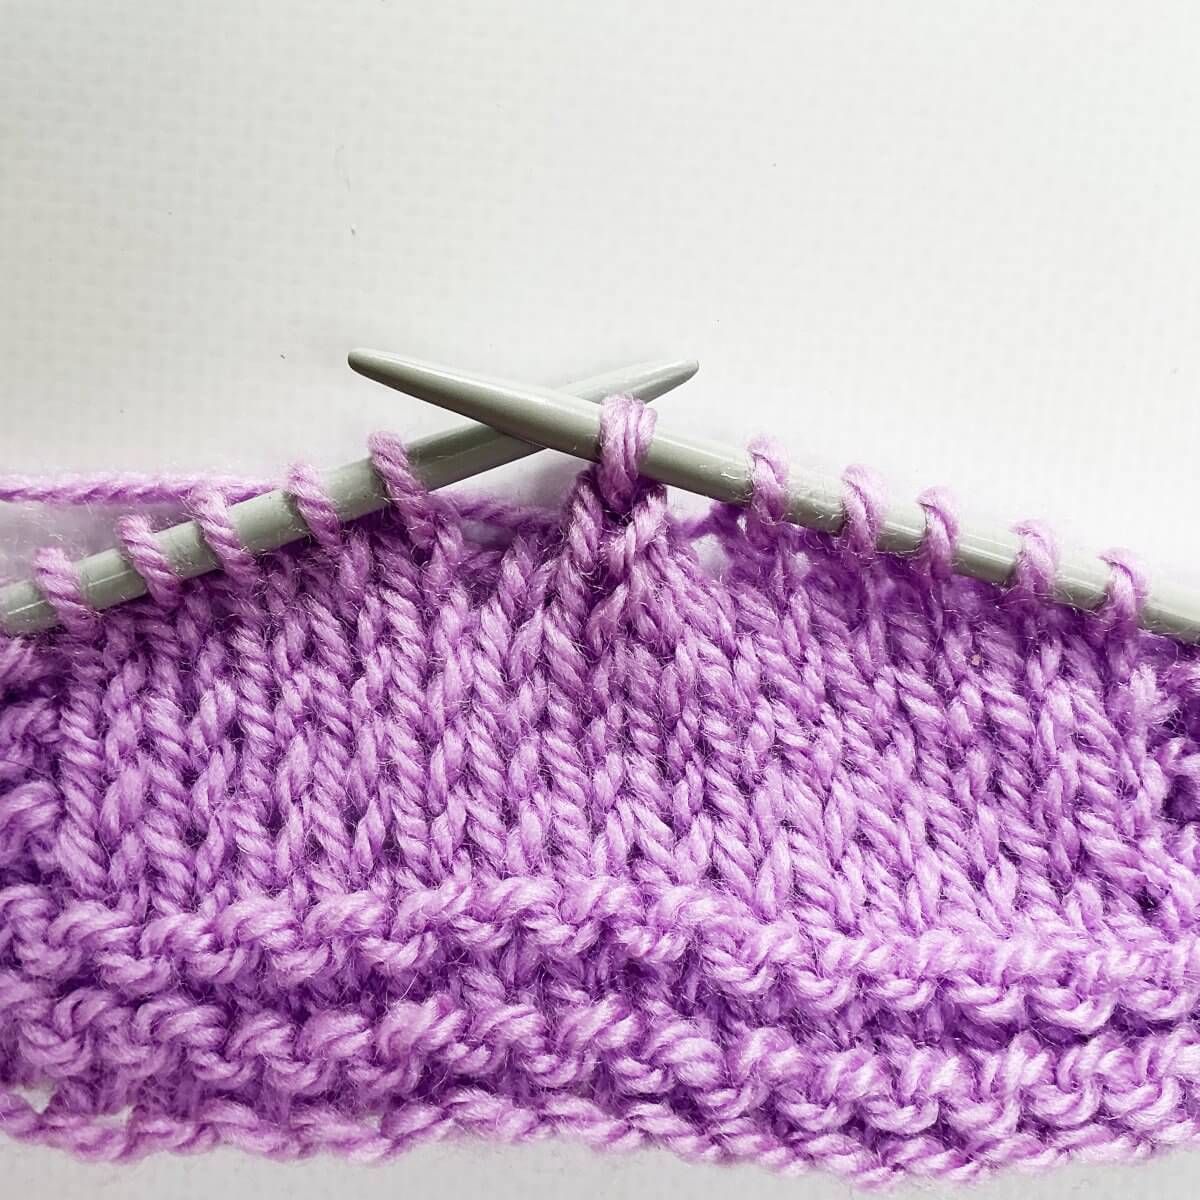
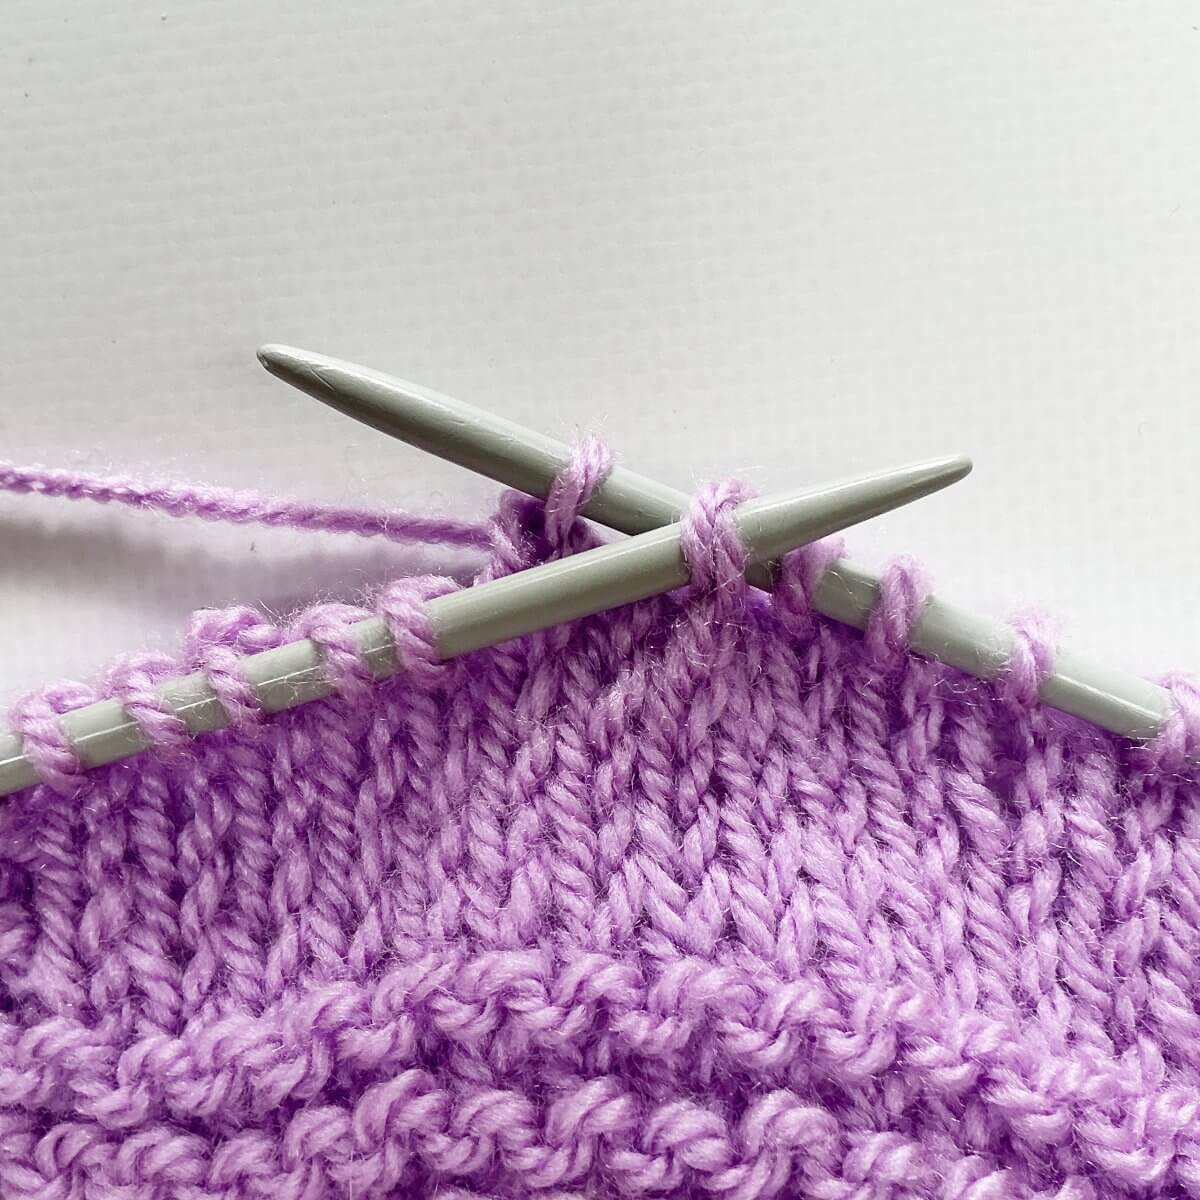
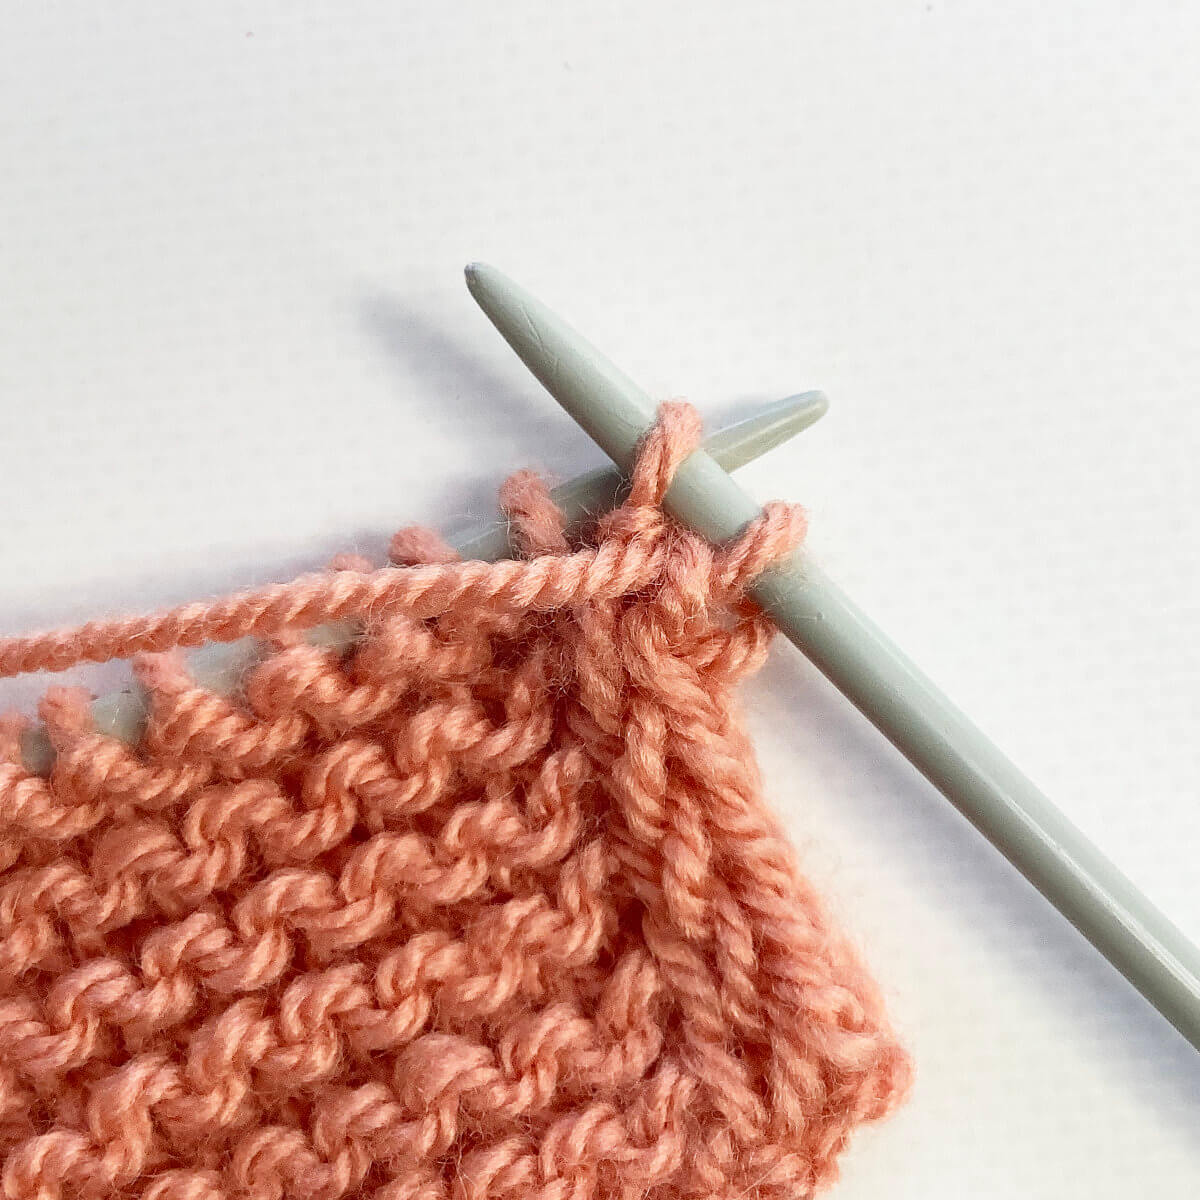
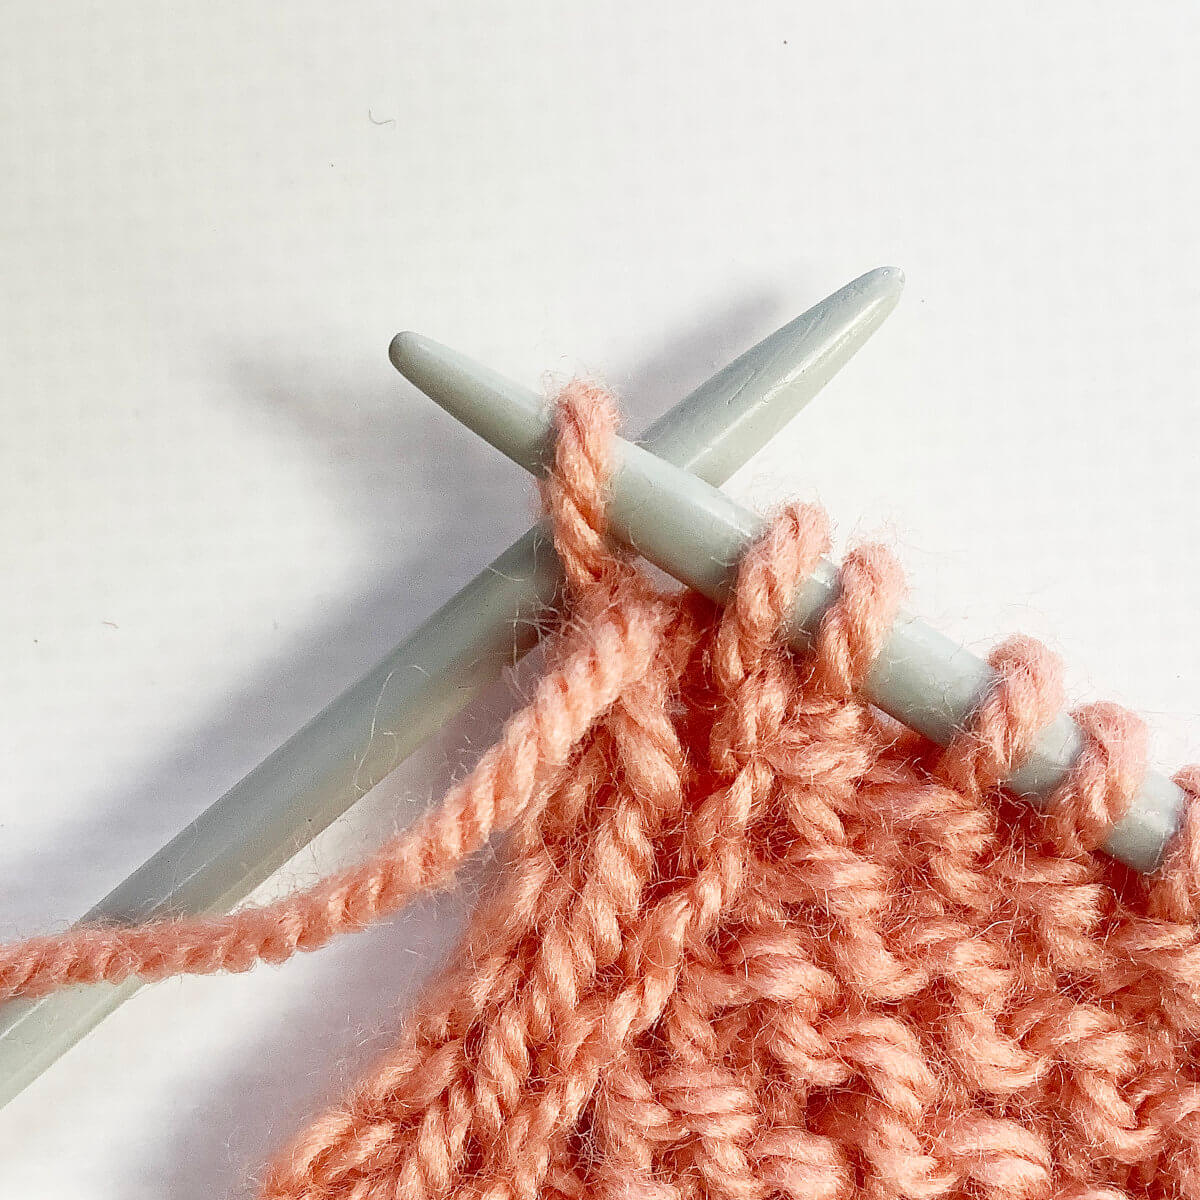
  6. Move the working yarn back to the front of the work again, and purl the lifted strand together with the slipped stitch (p2tog). Pulling the yarn just a little firmer than usual helps keep the join tidy without creating puckering.
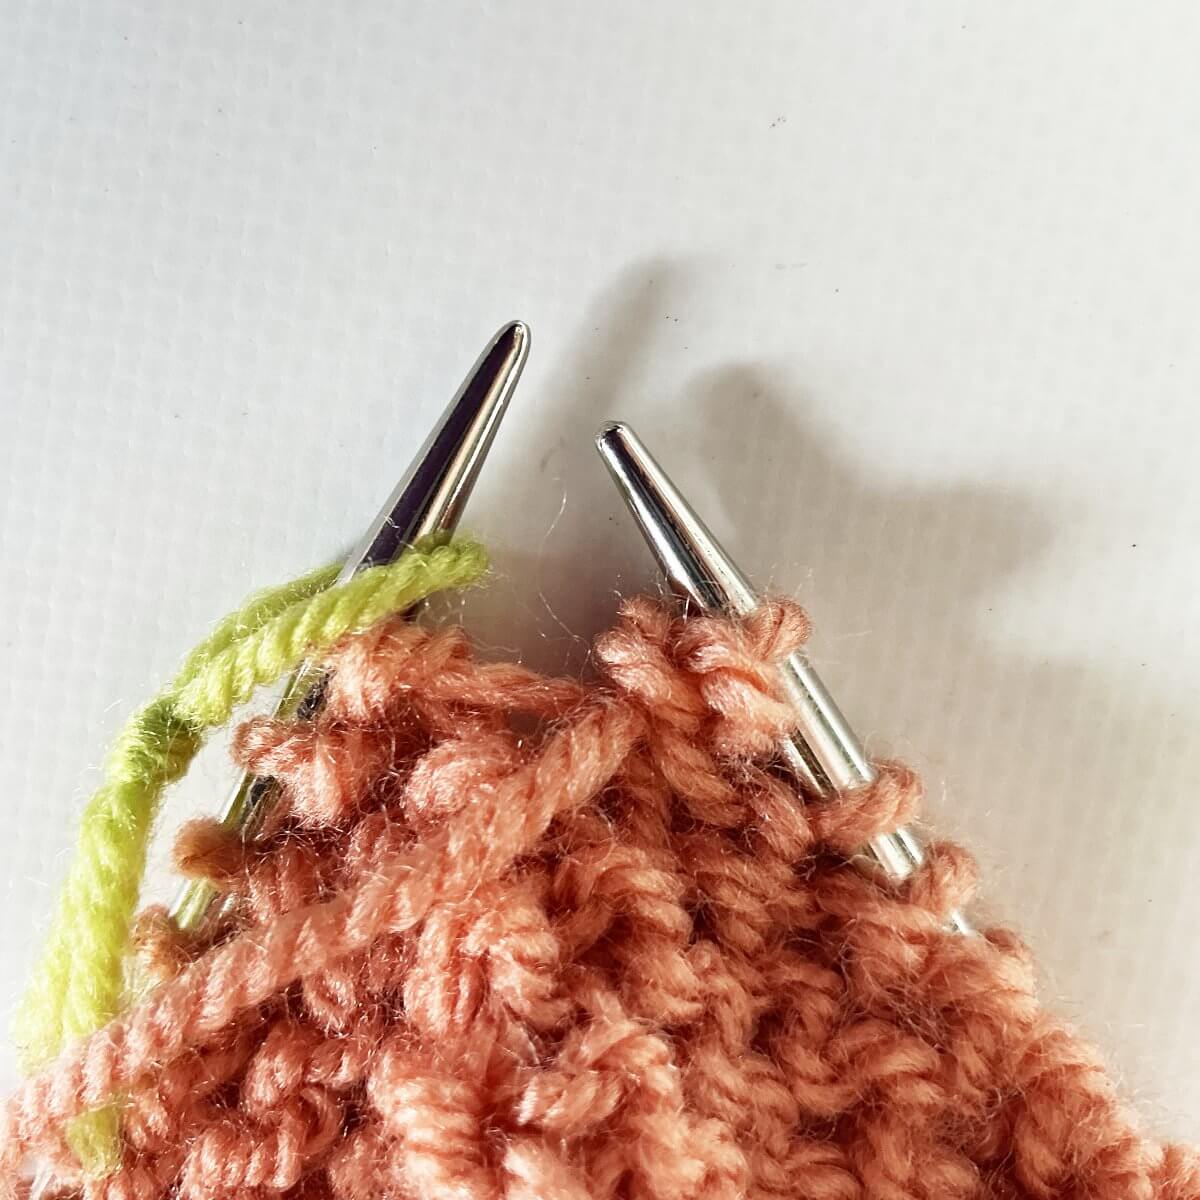
    Step 6

  7. Work steps 1-6 for every 2 rounds that you work in garter stitch.

The result

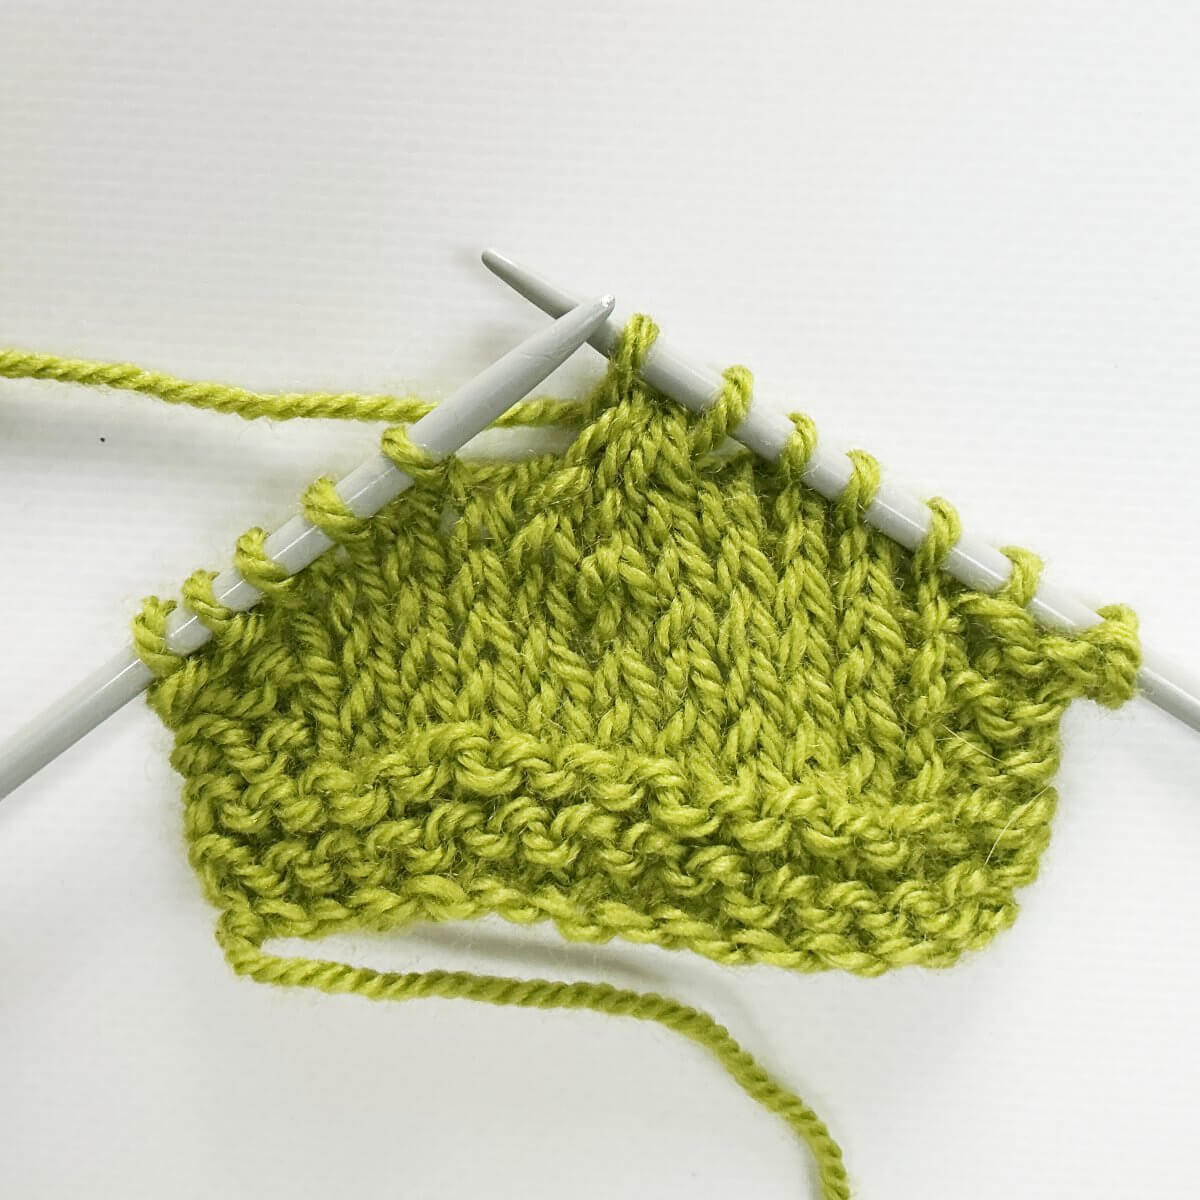
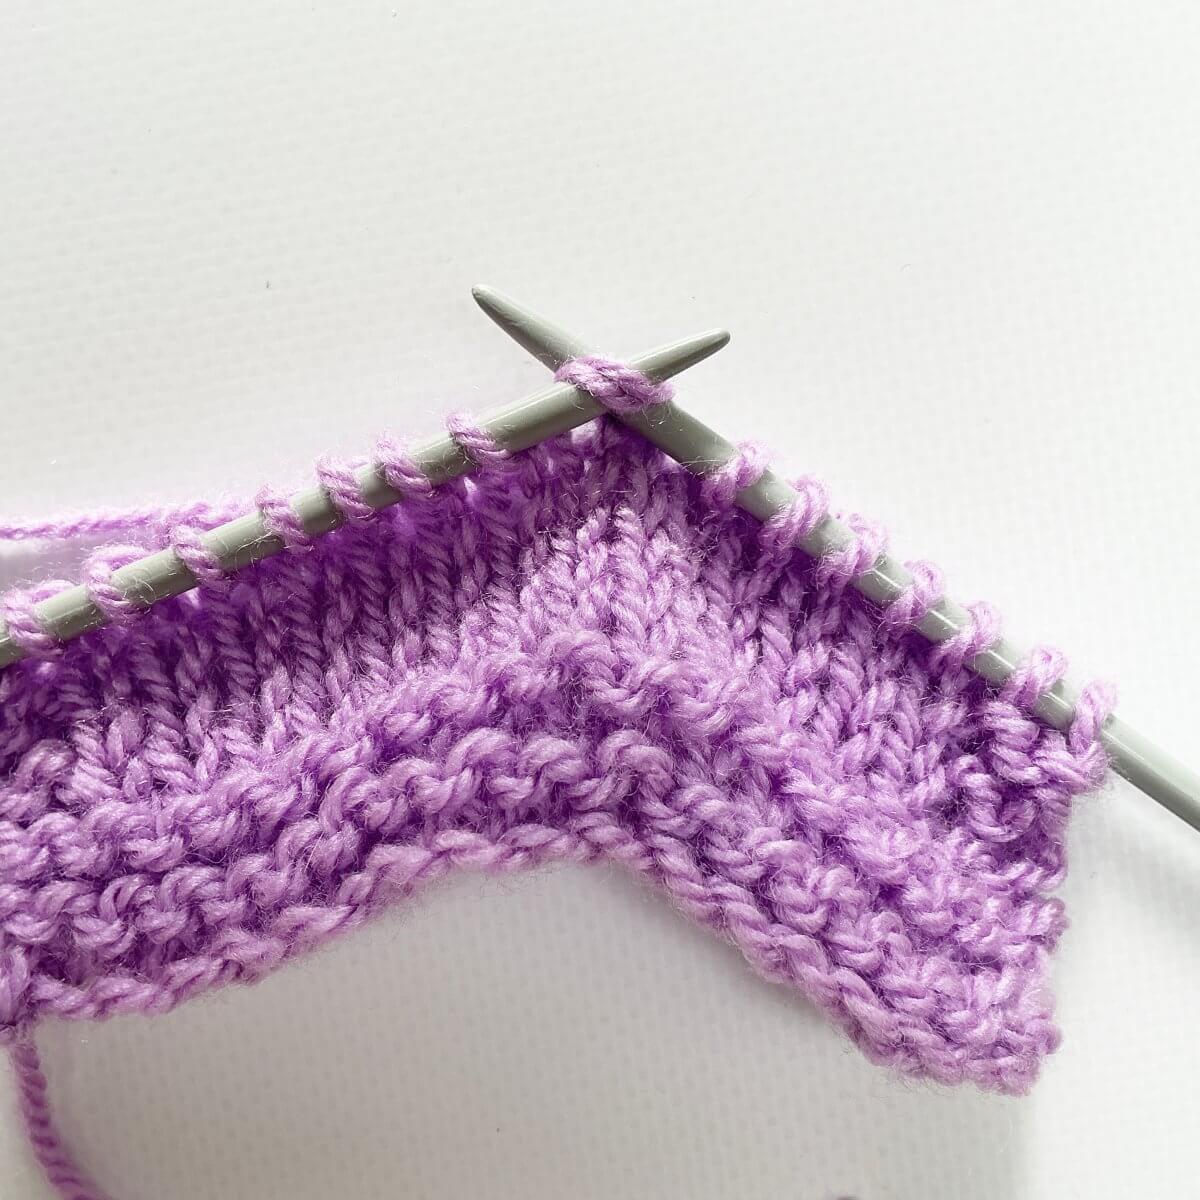
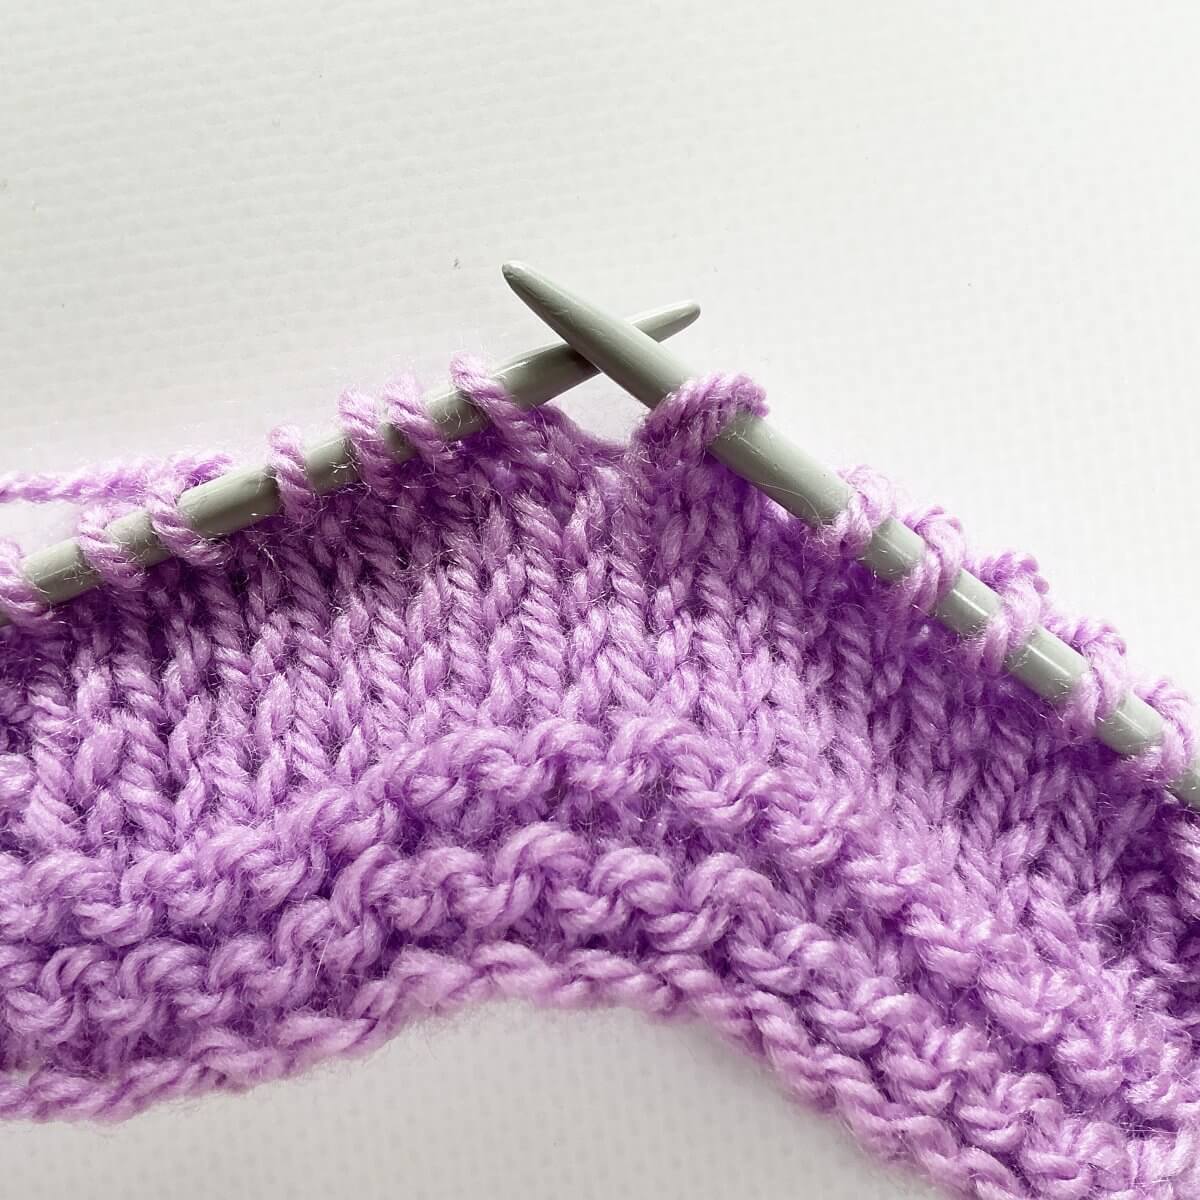
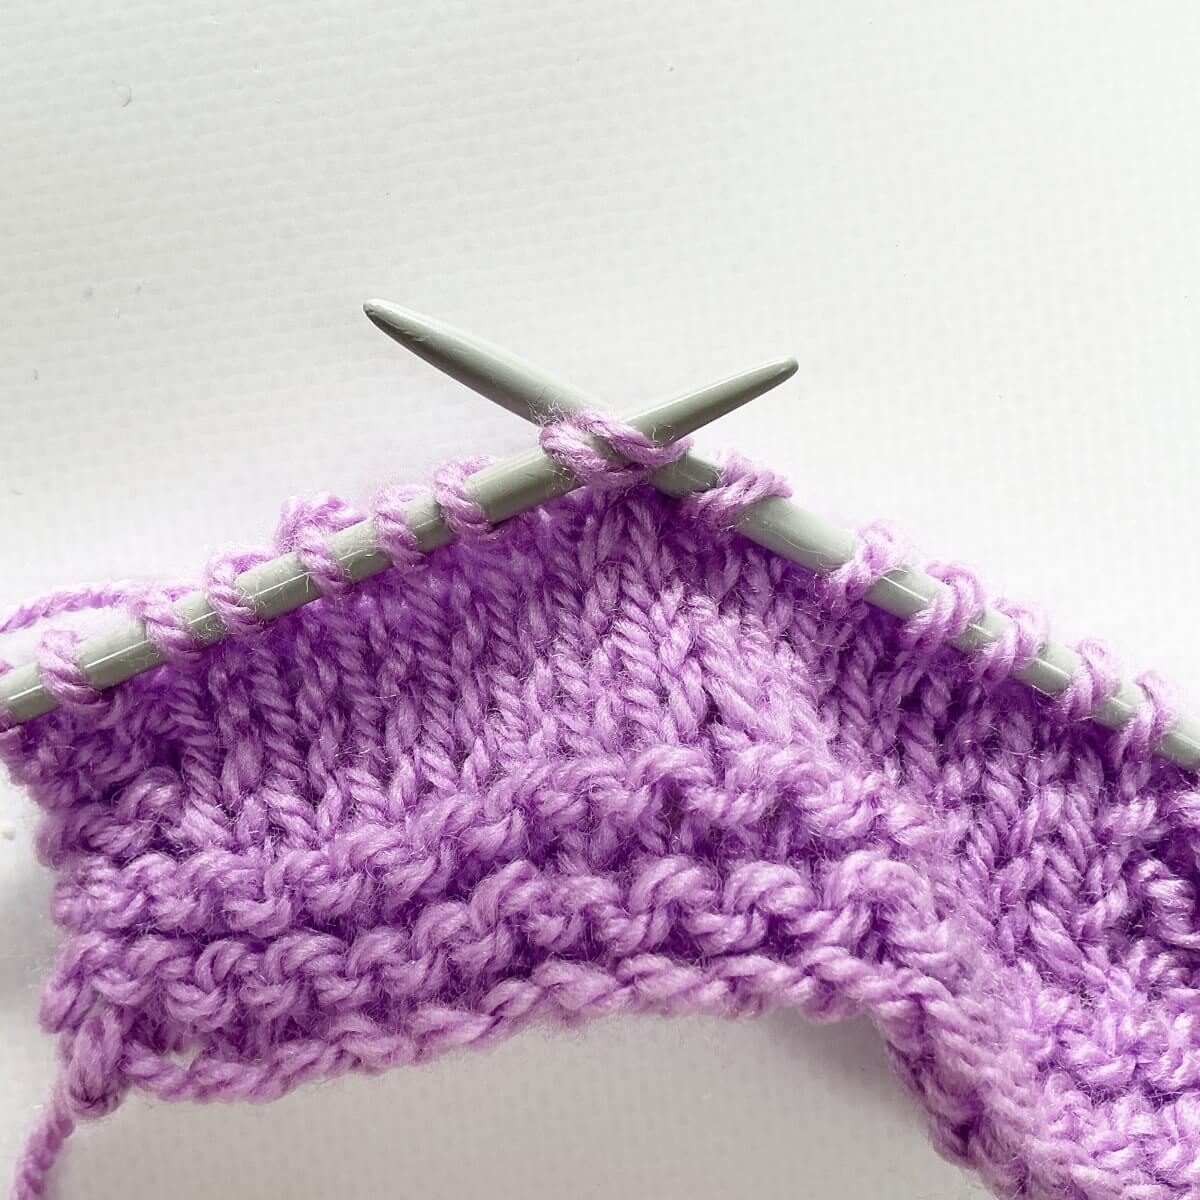
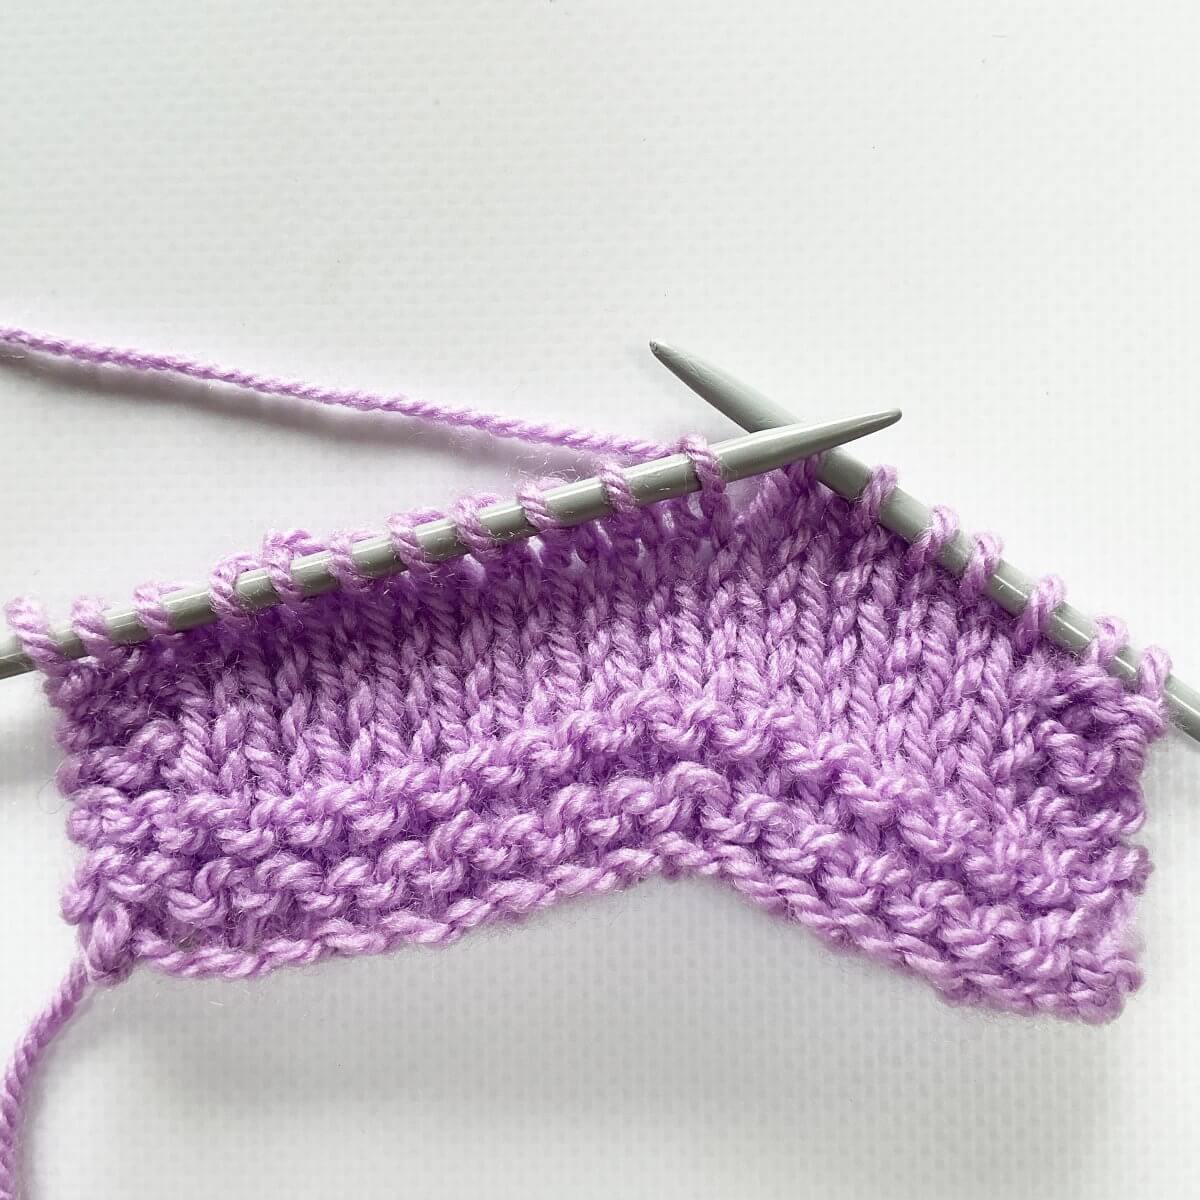
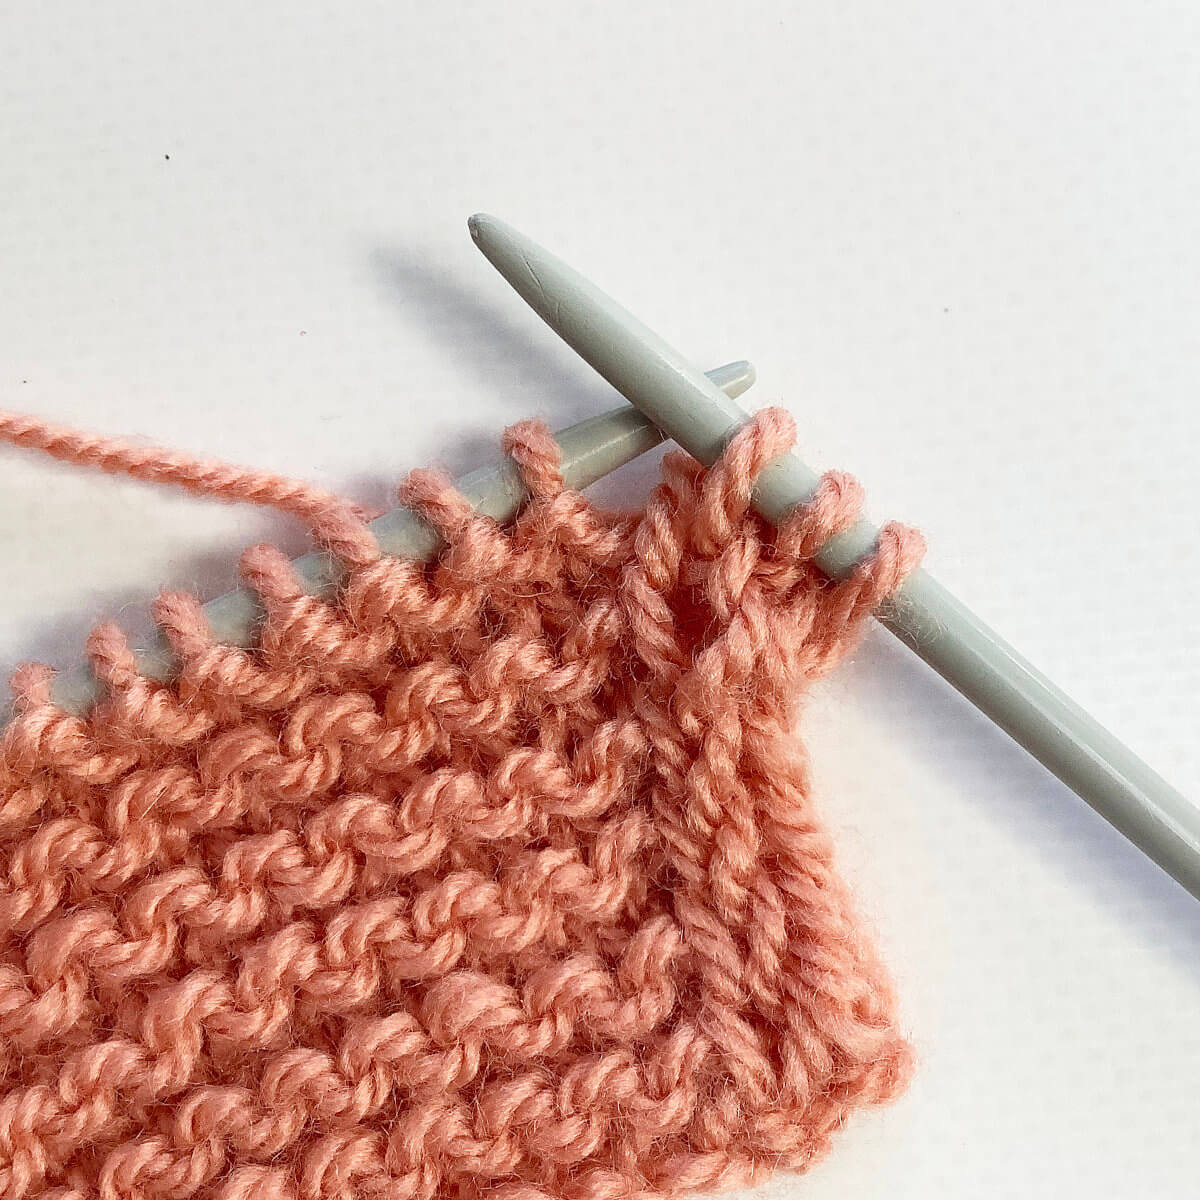
After several garter ridges have been worked, the beginning of the round blends much more smoothly into the surrounding fabric. Instead of a sharp step between rounds, the transition becomes gently angled and far less noticeable. Like many jog-less techniques, this method is a visual improvement rather than a completely invisible join. Below, you can see a comparison between doing nothing to smooth the transition (the bottom 5 ridges) and using the lifted strand & p2tog method (the upper 5 ridges).
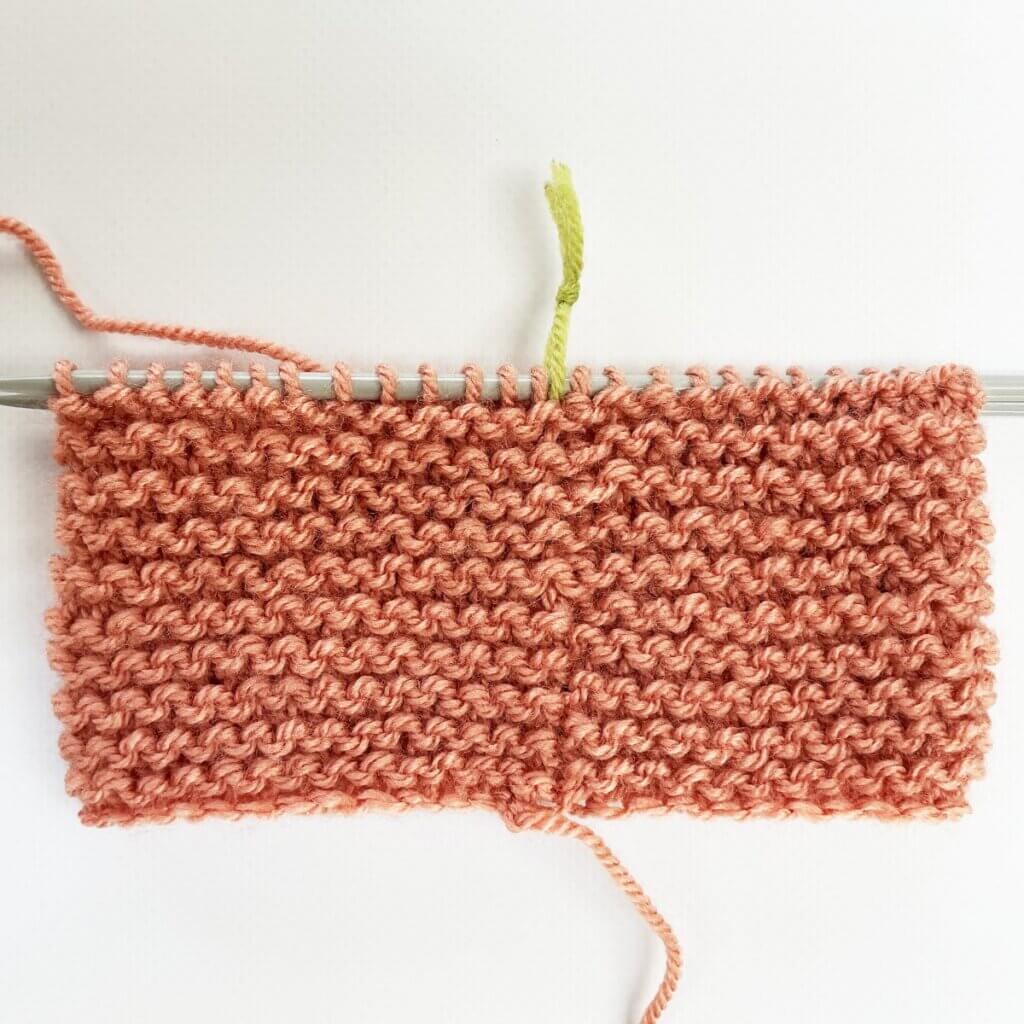

The result of working jog-less garter stitch in the round with the lifted strand & p2tog method
Patreon logo

Thanks to my Patreon supporters for bringing you this freebie! Creating quality patterns and tutorials is a lot of work and resource-intensive. However, I find it important to give you free content like this tutorial. Thanks to the generous support of my Patreon supporters, I can make it happen. Thank you, patrons! Click here to join, or click here to read more about La Visch Designs on Patreon.

tutorial – jog-less garter stitch in the round: lifted strand & p2tog method Read More »
tutorial – knitting backwards

Knitting backwards - a tutorial by La Visch Designs

Knitting backwards, also known as reverse knitting or mirror knitting, is a useful technique that allows you to work stitches from left to right without turning your work. Instead of reaching the end of a row, turning the fabric, and working back across in the usual direction, you simply continue knitting in the opposite direction. This technique can be particularly useful when working short rows, entrelac, bobbles, or other stitch patterns that require frequent turning. Many knitters also use it to avoid purling, especially when working stockinette fabric. By alternating regular knitting with backwards knitting, it is possible to stay on the same side of the fabric throughout the project.

While knitting backwards may feel awkward at first, it becomes much easier with practice. The key is to remember that you are essentially performing the same actions as a knit stitch, but in reverse. Ok, lets get started!

Materials used

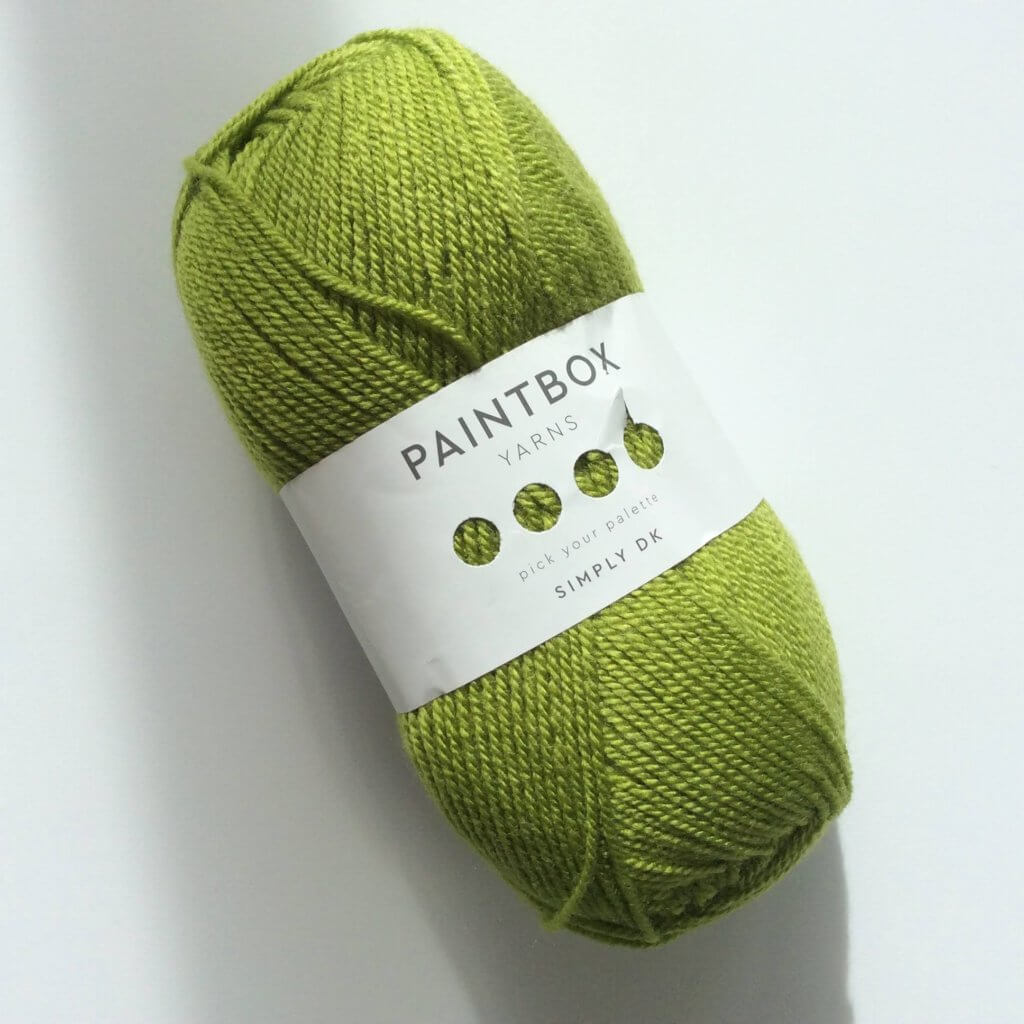
Yarn: Paintbox Yarns Simply DK, a good value, good quality 100% acrylic yarn, here in the color Lime.

Knitting needles: This is a pair of straights that I picked up at the second-hand store when I started knitting, brand unknown.

Knitting backwards step by step

In this tutorial, I’m showing you how to work this technique in working a bobble. So much less hassle to knit backwards instead of turning your work for every bobble!

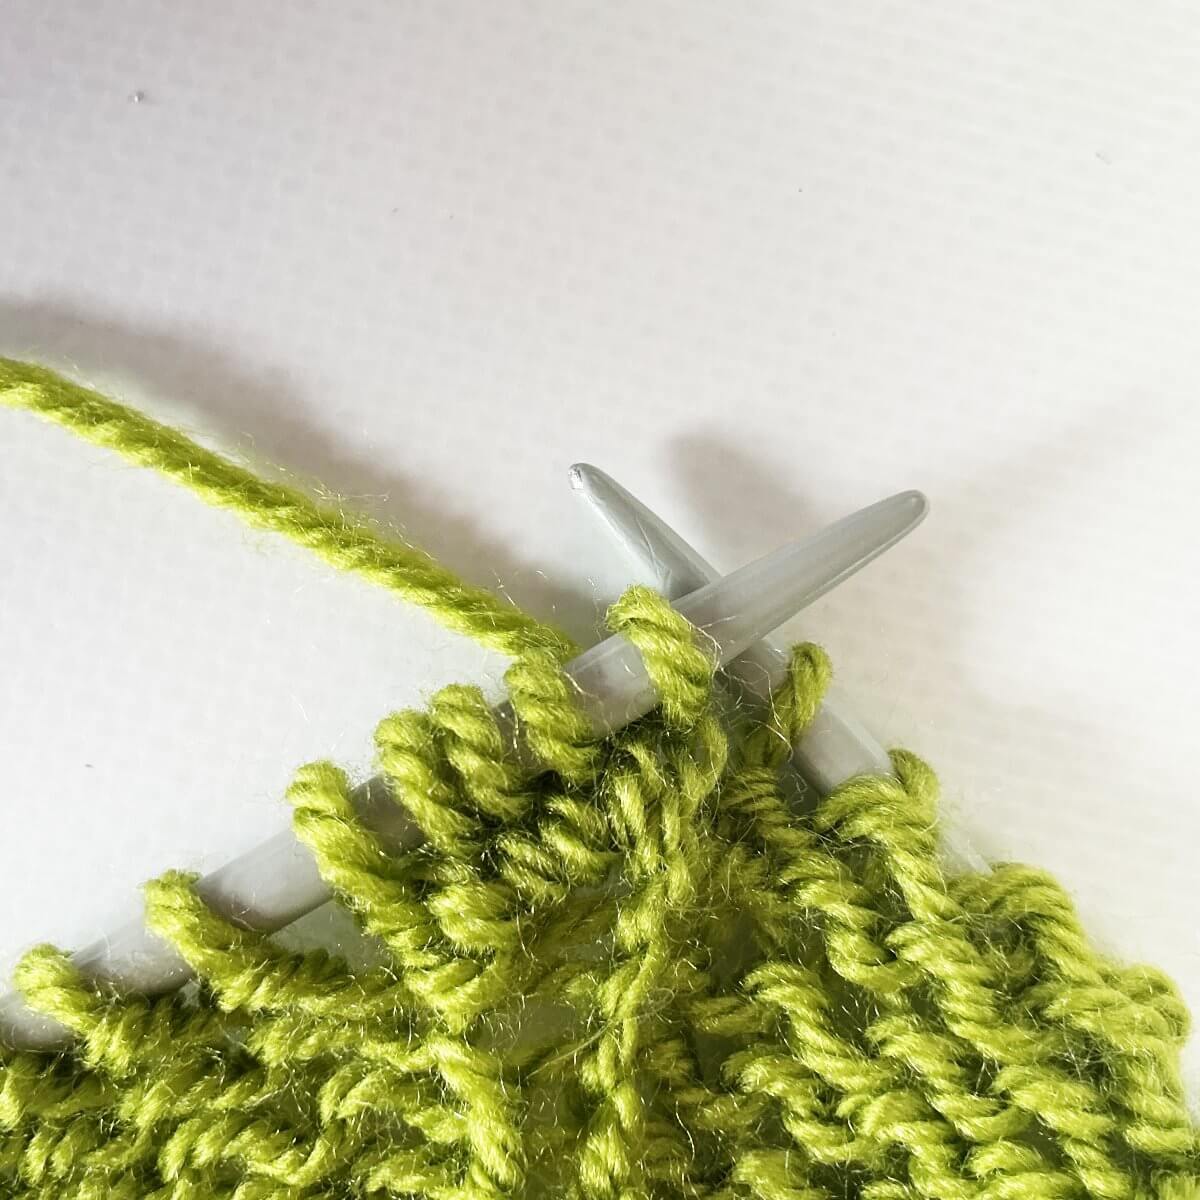
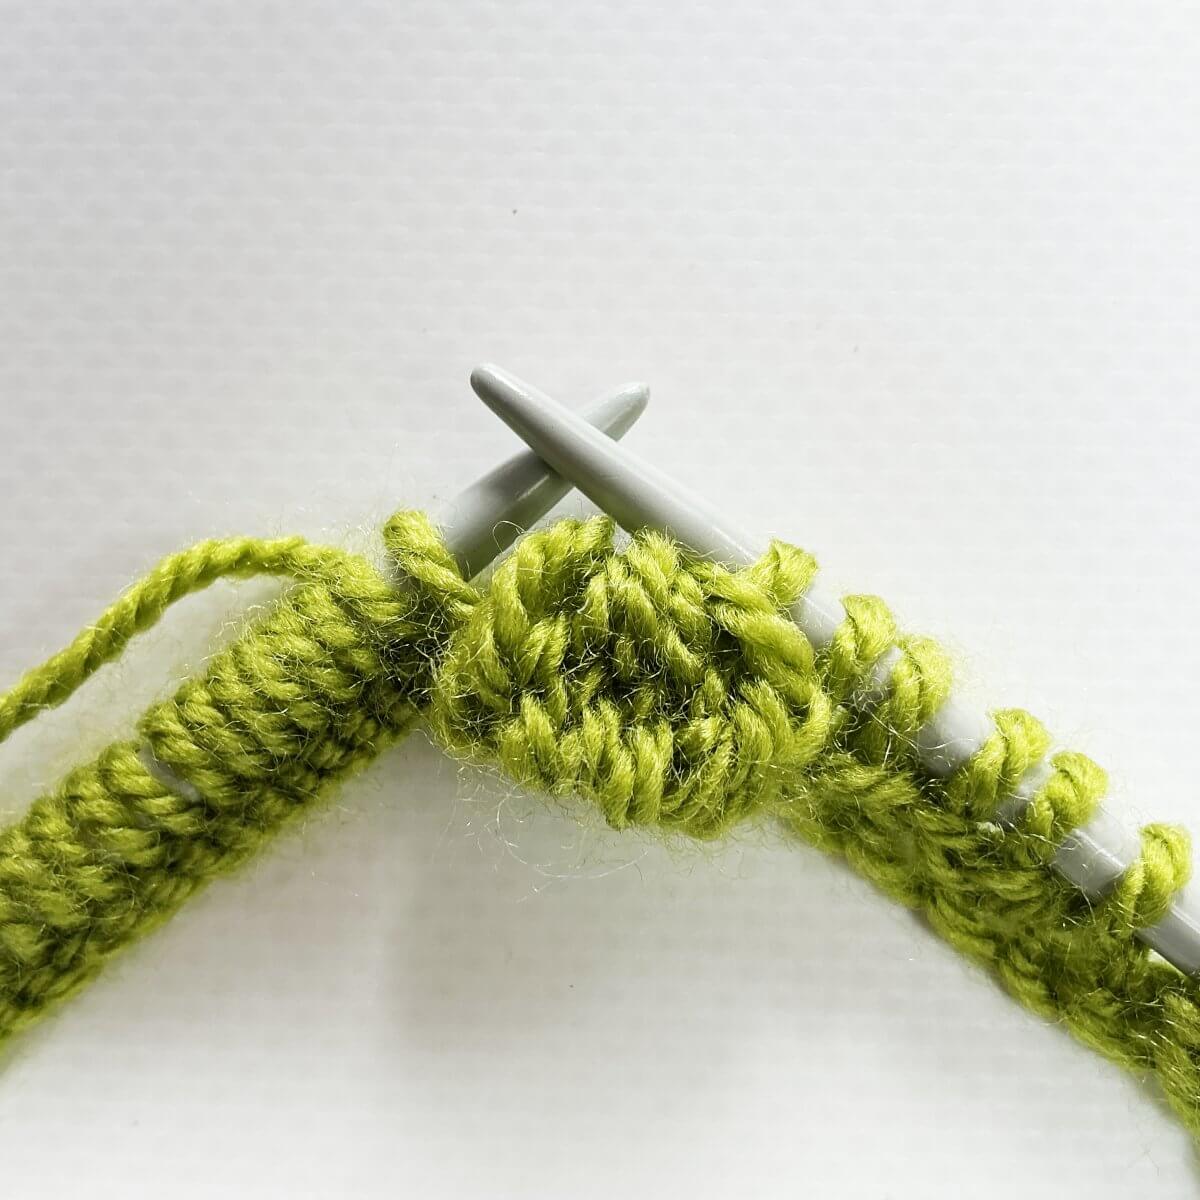
  1. Hold your knitting as you normally would. The stitches to be worked are the 5 near the point on the right-hand needle, and the working yarn is positioned at the back of the work.

    Unlike regular knitting, you will now create new stitches on the left-hand needle while working from left to right across the row.Step 1 of knitting backwards

  2. Insert the tip of the left-hand needle into the back leg of the first stitch on the right-hand needle. Enter the stitch from left to right.

    This feels unusual at first because the left needle becomes the active working needle.Step 2

  3. Using your right hand, wrap the working yarn from the back and over, then around the tip of the left-hand needle.

    Don’t wrap the yarn too tight, this can make the next row difficult to work. Also, you can wrap the working yarn the other way around around the needle. However, this will result in a twisted stitch. To untwist it in the next row, work it through the back loop.Step 3 of knitting backwards

  4. Using the tip of the right-hand needle, lift the old stitch over the yarn you wrapped around the needle, and drop it from the needle.

    Take care not to pull the working yarn too tightly, to prevent tension issues.Step 4

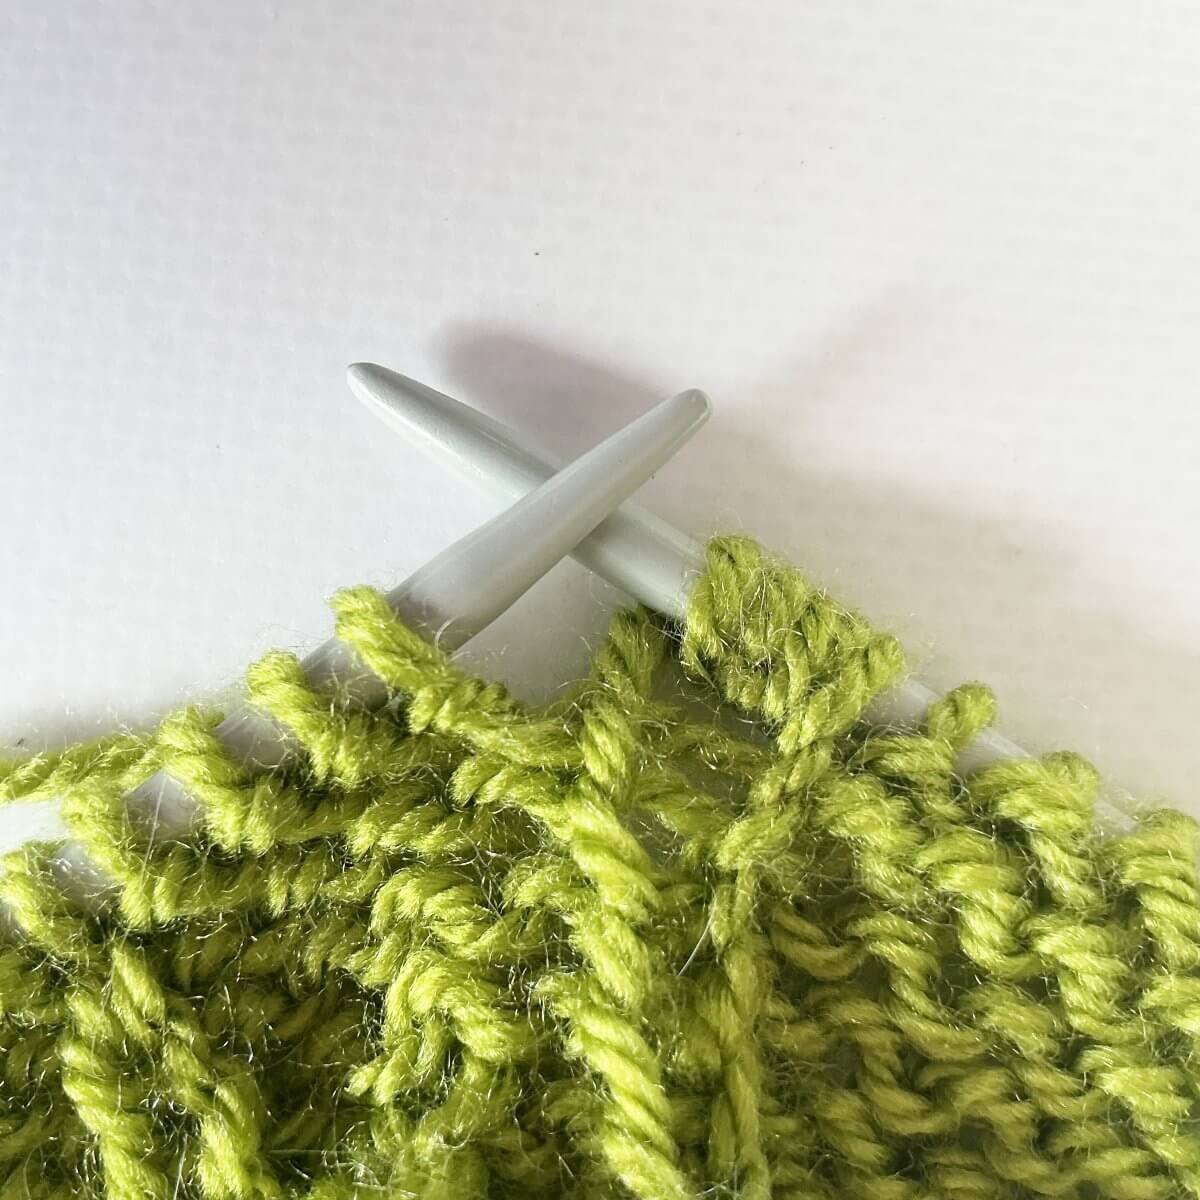
  5. Now pull the right-hand needle out of the stitch that is nearest to its tip.

    The new loop remains on the left-hand needle while the old stitch has been released from the right-hand needle. Step 5 of knitting backwards

  6. Repeat Steps 2 through 5 for each stitch, in this case for the 5 stitches that make up the bobble.

    After a few repeats, the movement becomes more fluid. Focus on maintaining even tension rather than speed.The result of knitting backwards

Tips for success

Knitting backwards is one of those techniques that can seem awkward initially but becomes surprisingly intuitive once mastered. It is not intended to replace regular knitting, but it can be a valuable addition to your knitting toolbox. Whenever a pattern requires constant turning or small sections worked back and forth, knitting backwards can save time and help maintain a smooth workflow. To make sure you get the most out of this technique:

  • Practice first on a small swatch before using the technique in a project.
  • Keep the stitches relaxed to avoid tight gauge, many knitters find their backwards knitting tension is tighter than their regular knitting at first.
  • Work slowly until the hand movements become familiar.
  • If your stitches appear twisted on the next row, check that the yarn is being wrapped over the needle towards you, then around to the back again.
Patreon logo

Thanks to my Patreon supporters for bringing you this freebie! Creating quality patterns and tutorials is a lot of work and resource-intensive. However, I find it important to give you free content like this tutorial. Thanks to the generous support of my Patreon supporters, I can make it happen. Thank you, patrons! Click here to join, or click here to read more about La Visch Designs on Patreon.

tutorial – knitting backwards Read More »

tutorial – knitting a bobble

Knitting a bobble - a tutorial by La Visch Designs

Bobbles are a lovely way to add texture to a knitting project. I’ve used them myself to add interest to an otherwise rather plain stockinette shawl body in my Moerbei shawl. They’re also rather popular as an extra design element on cabled sweaters. In the basis a bobble is nothing more than a single stitch that is increased to a collection of stitches (usually 3, 5, or 7 stitches), worked back and forth and then decreased back again to a single stitch. There are, however, many ways to go about this.

In this tutorial I will show you a 5-stitch version of a bobble. Read on for more details!

Materials used

Yarn: Paintbox Yarns Simply DK, a good value, good quality 100% acrylic yarn, here in the color Lime.

Knitting needles: This is a pair of straights that I picked up at the second-hand store when I started knitting, brand unknown.

Knitting a bobble step by step

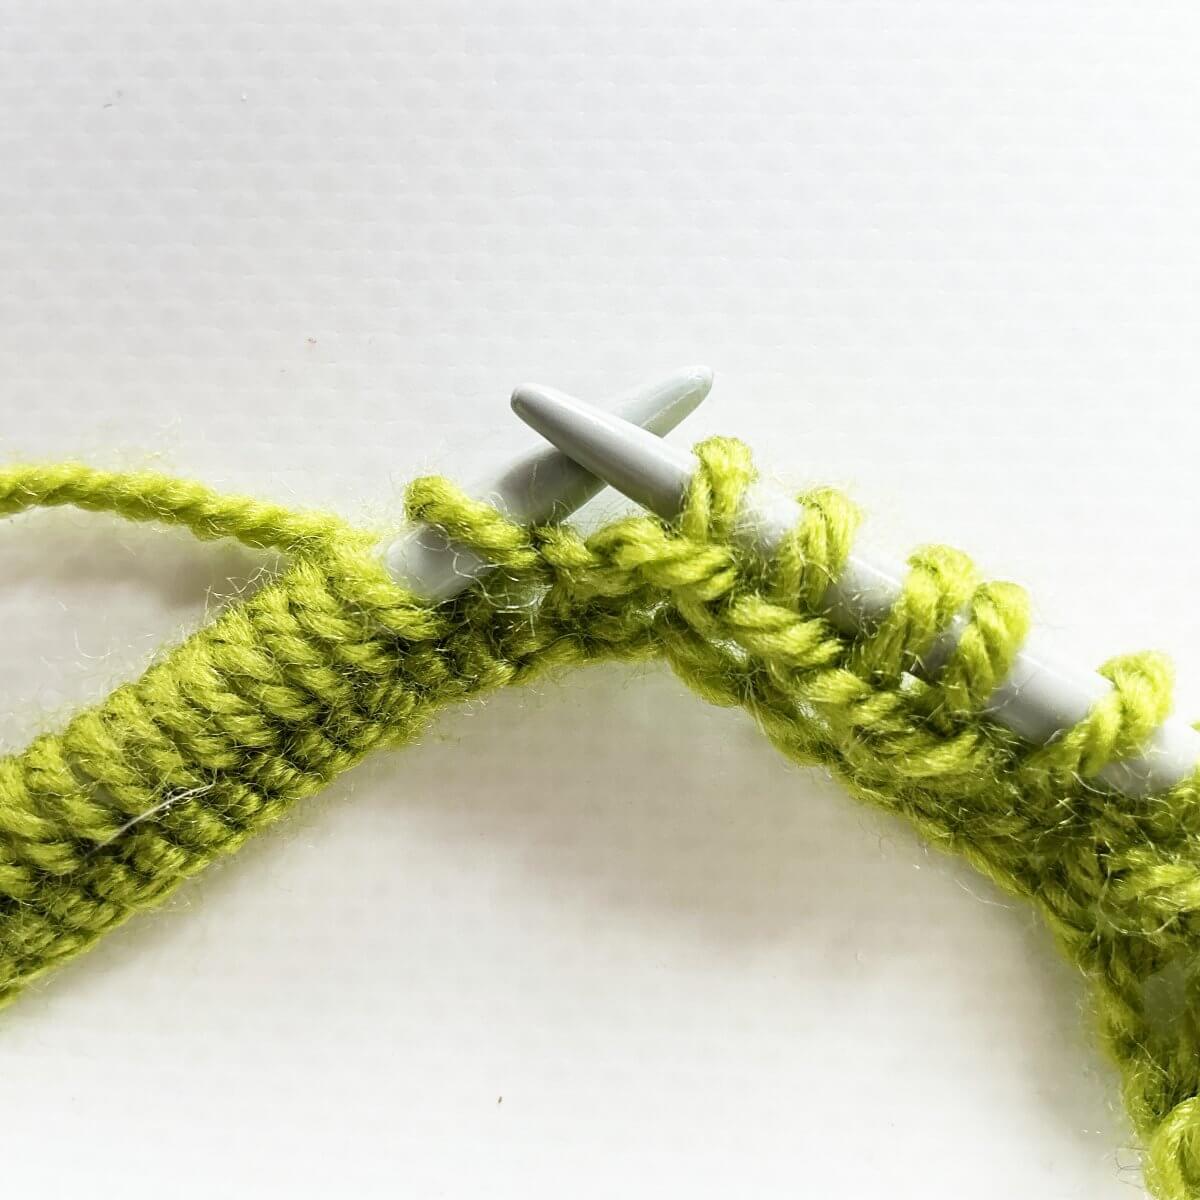
  1. First, work in your piece of knitting to the point where you want to make the bobble.

    Step 1 of knitting a bobble

  2. Next, insert the right-hand needle into the center of the next stitch on the needle, and work a [k1, yo, k1, yo, k1] increase into that stitch.

    Step 2

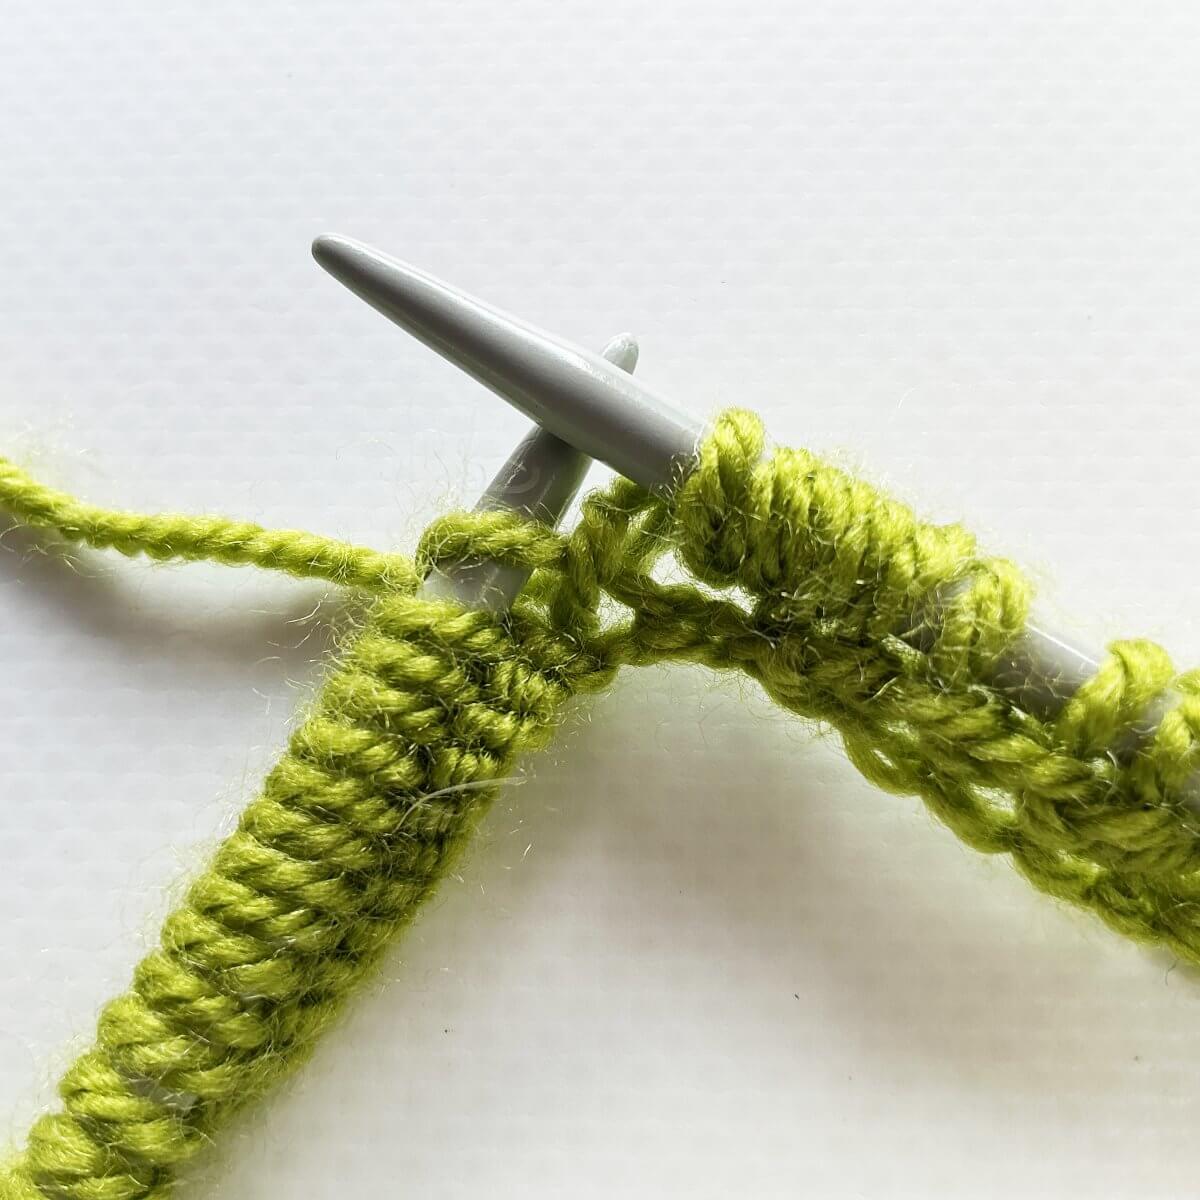
  3. Turn you work, and purl the 5 stitches you increased to.

    Step 3 of knitting a bobble

  4. Again turn you work, and knit the 5 stitches you increased to.

    Step 4

  5. Now, pass the second stitch from the tip of the right-hand needle over the first one (the last stitch knitted).

    Step 5 of knitting a bobble

  6. Repeat step 5 another 3 times, until you only have 1 stitch left.

    Step 6

  7. The result: a lovely 5-stitch bobble!

    The result of knitting a bobble

Patreon logo

Thanks to my Patreon supporters for bringing you this freebie! Creating quality patterns and tutorials is a lot of work and resource-intensive. However, I find it important to give you free content like this tutorial. Thanks to the generous support of my Patreon supporters, I can make it happen. Thank you, patrons! Click here to join, or click here to read more about La Visch Designs on Patreon.

tutorial – knitting a bobble Read More »
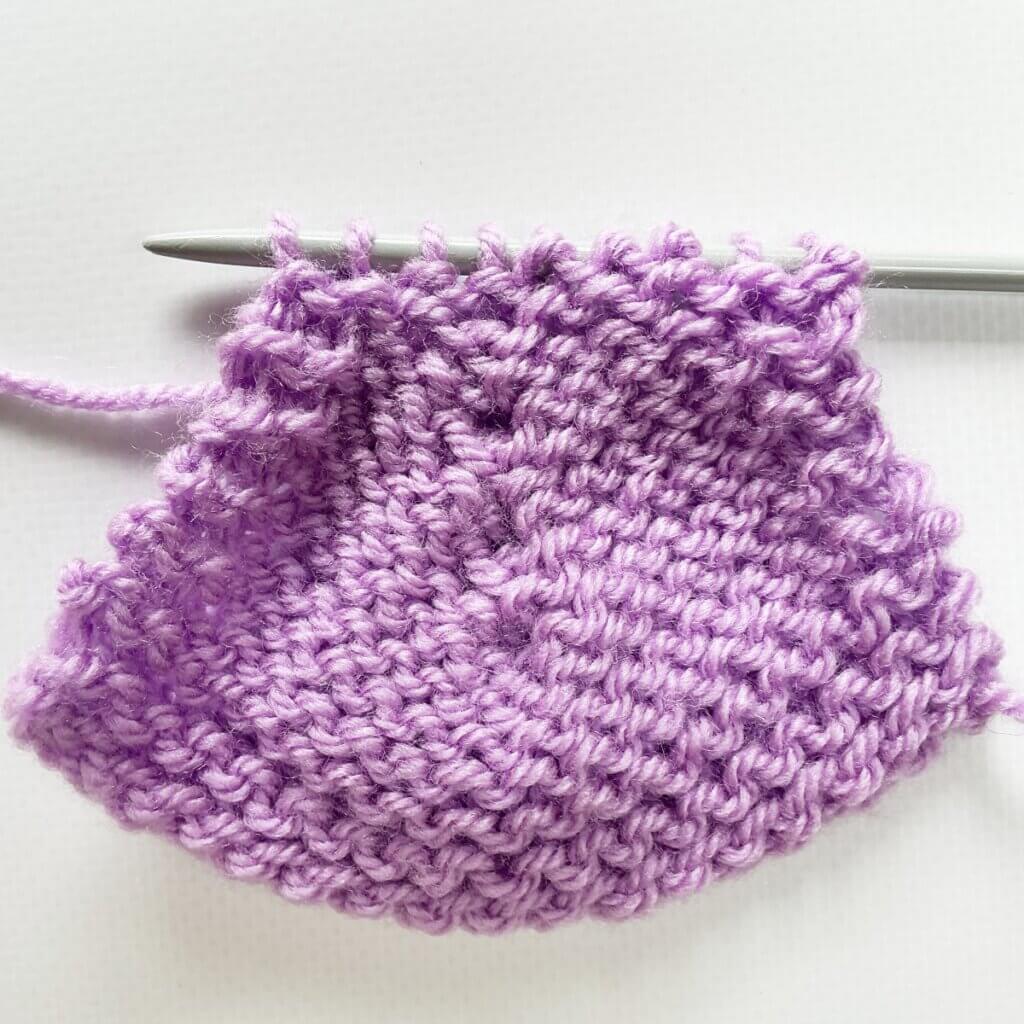
stitch pattern – twisted rib

Twisted rib - a stitch pattern by La Visch Designs

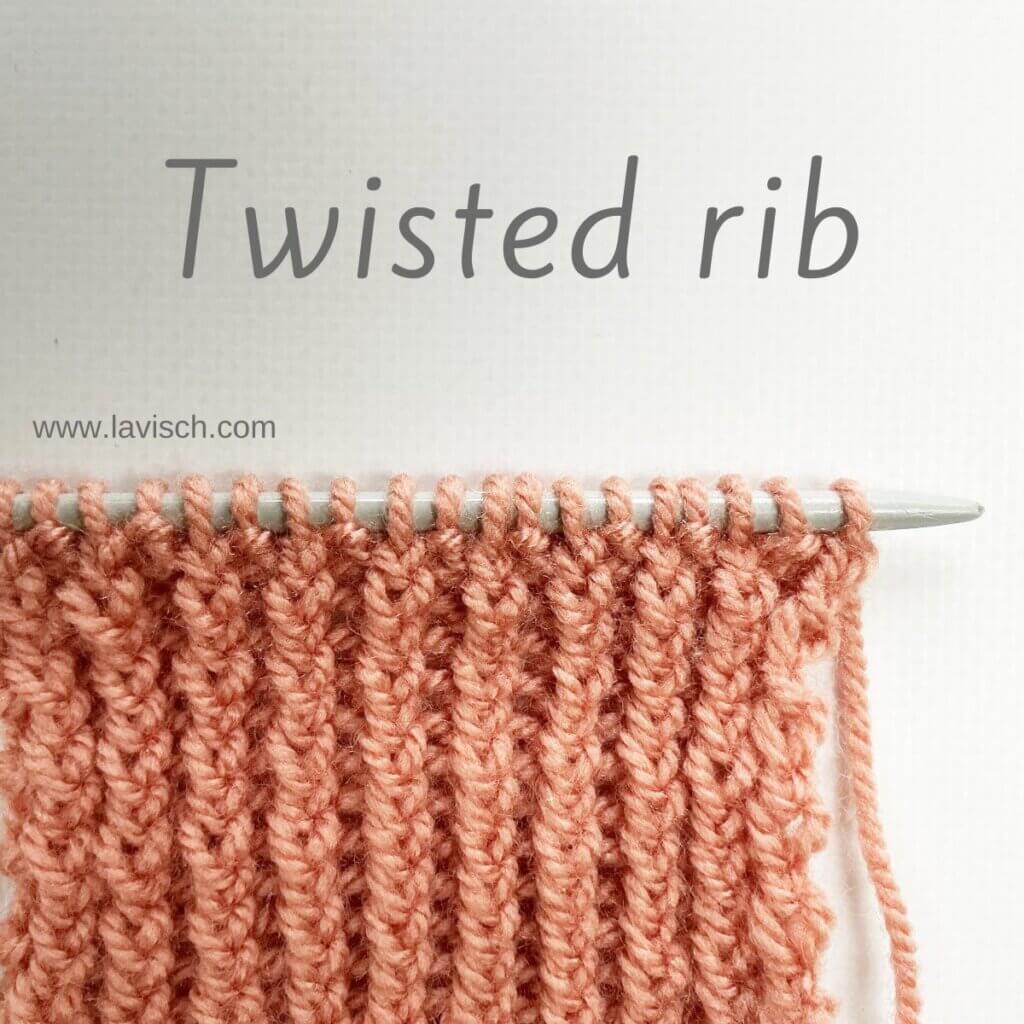
Twisted rib is a ribbing technique that creates a crisp texture by intentionally twisting the knit stitches as you work them. It’s commonly used for cuffs, hems, and necklines where you want strong definition and elasticity without the relaxed look of standard rib. In regular ribbing (like k1, p1), you work the knit stitches through the front loop, allowing the stitch to sit open and relaxed. In twisted rib, however, you work them through the back loop (tbl). This small change crosses the legs of the stitch. This tightens it and makes the column of stitches stand out more sharply. The trade-off is that twisted rib is less elastic and slightly slower to knit than regular rib.

Personally, I use twisted rib quite a lot in garments, because I really like the way it looks.

Materials used

Yarn: Paintbox Yarns Simply DK, a good value, good quality 100% acrylic yarn, here in the color 155 Vintage Pink.

Needles: This is a pair of straights that I picked up at the second-hand store when I started knitting, brand unknown.

Stitches used

k – knit
p – purl
RS / WS – right side / wrong side
tbl – through the back loop

1×1 twisted rib instructions

Row 1 (RS): *K1 tbl, p1; rep from * to end.
Row 2: (WS): *K1, p1 tbl; rep from * to end.

Work these 2 rows for the pattern. When working in the round, you can just repeat row 1 for every round.

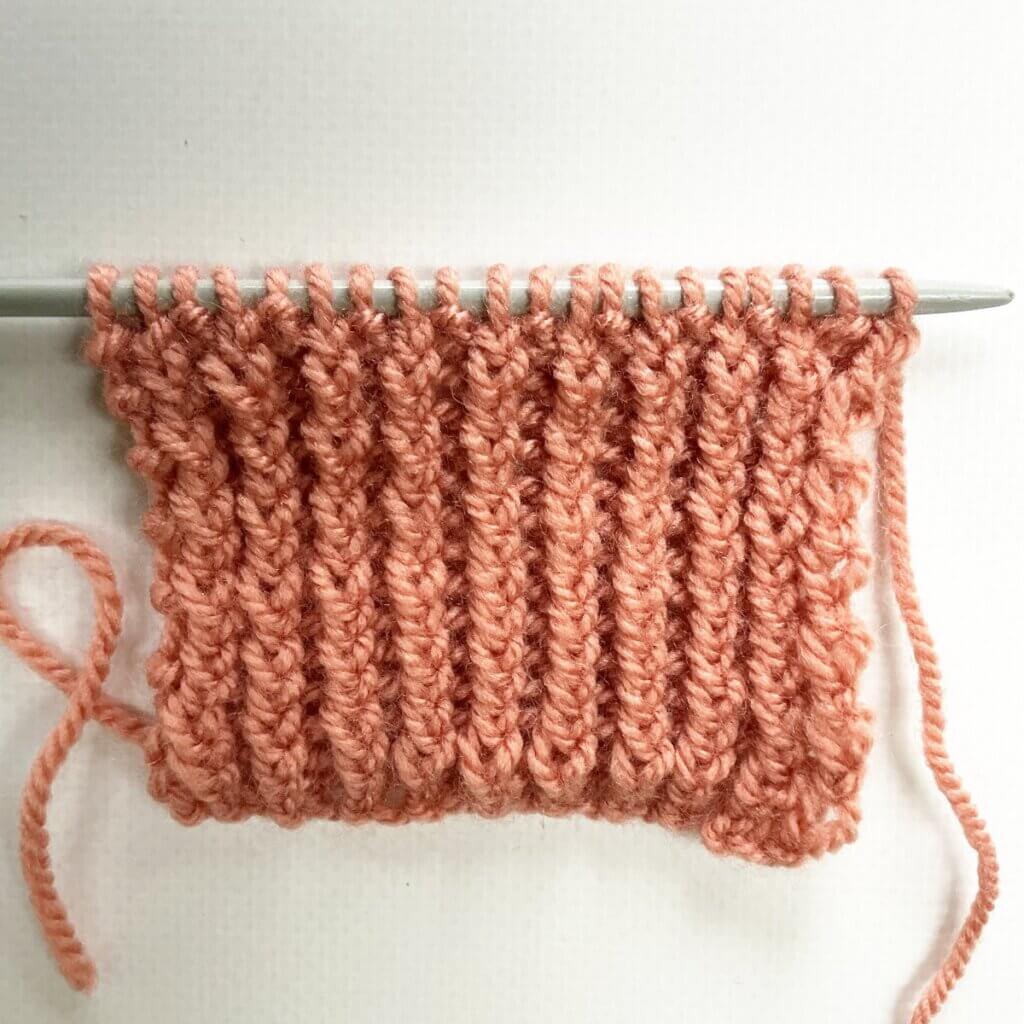
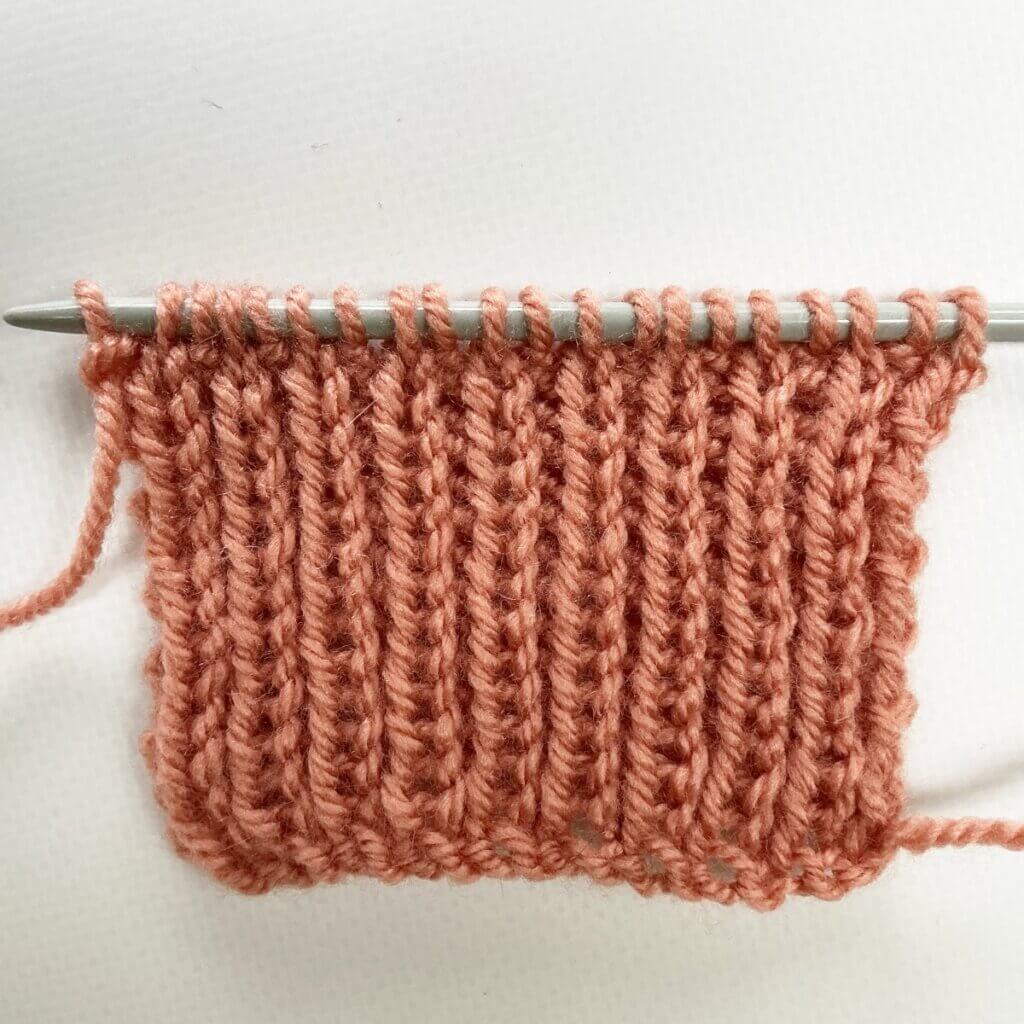
Below, you can see how this stitch pattern looks: First as seen from the right side, and then from the wrong side of the fabric.

Twisted rib as seen from the RS
Twisted rib as seen from the WS

Patreon logo

Thanks to my Patreon supporters for bringing you this freebie! Creating quality patterns and tutorials is a lot of work and resource-intensive. However, I find it important to give you free content like this tutorial. Thanks to the generous support of my Patreon supporters, I can make it happen. Thank you, patrons! Click here to join, or click here to read more about La Visch Designs on Patreon.

stitch pattern – twisted rib Read More »
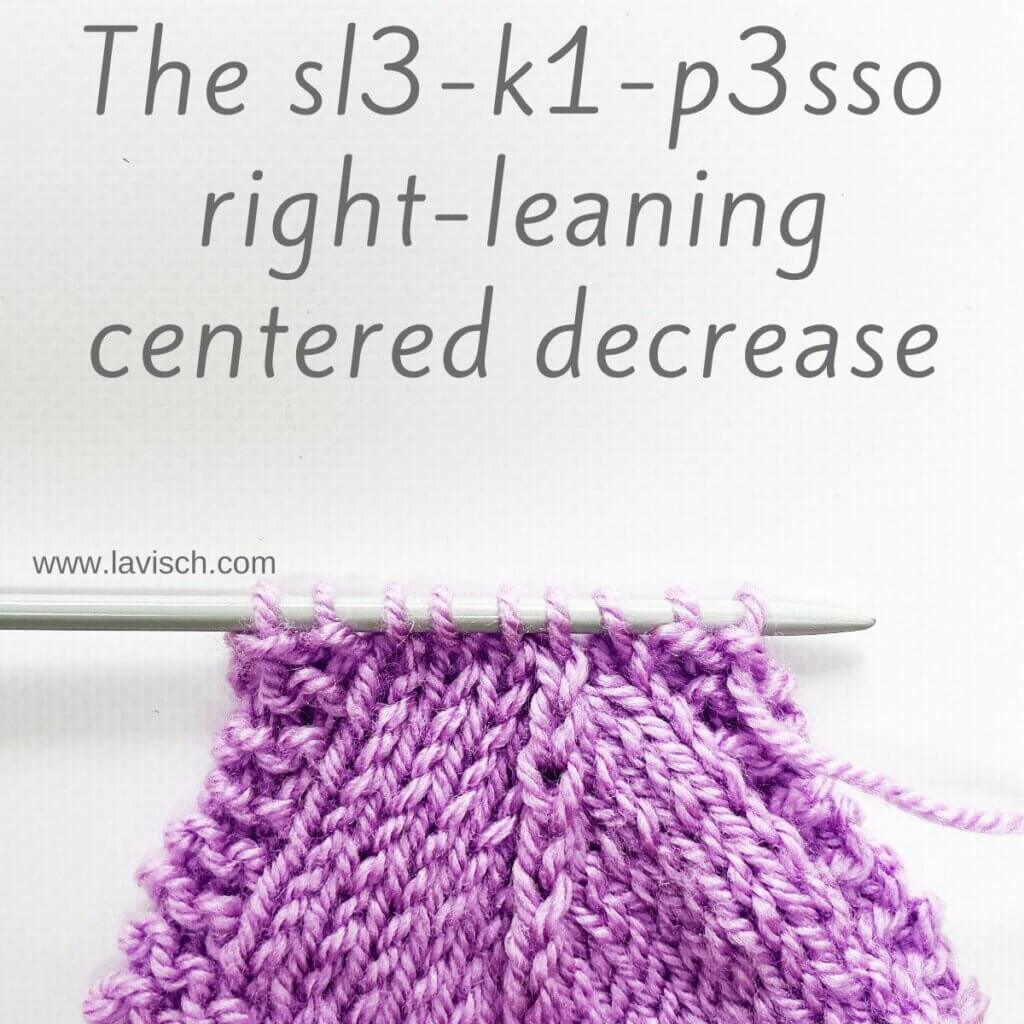
tutorial – the sl3-k1-p3sso right-leaning centered decrease

The sl3-k1-p3sso right-leaning centered decrease - a tutorial by La Visch Designs

Recently, I shared with you how to work the slightly left-leaning sl2-k2tog-p2sso decrease. Of course, there is also a centered triple decrease that’s slightly right-leaning: The sl3-k1-p3sso decrease! This abbreviation is short for slip 3, knit 1, pass 3 slipped stitches over. The result is a tidy, symmetrical-looking line that subtly favors one side. In this tutorial, we’ll walk step-by-step through how to work the sl3-k1-p3sso decrease. Let’s pick up our needles and see how to work this decrease!

Materials

Yarn: Paintbox Yarns Simply DK, a good value, good quality 100% acrylic yarn, here in the color Tea Rose.

Knitting needles: This is a pair of straights that I picked up at the second-hand store when I started knitting, brand unknown.

Working a sl3-k1-p3sso step by step

  1. First, work your way across the row until you’ve reached the point where you want to make the decrease. In this case, I want to work the triple decrease 5 stitches in after the garter stitch edge.

    Step 1 of working the sl3-k1-p3sso decrease

  2. Next, insert the tip of the right-hand needle into the first 3 stitches at the same time as if to knit.

    Step 2

  3. Pass these stitches to the right-hand needle.

    This step changes the orientation of the stitches, influencing how they appear when the decrease has been finished.Step 3 of working the sl3-k1-p3sso decrease

  4. Now knit the next stitch.

    Step 4

  5. To finish the triple decrease, we will be passing the initially slipped stitches over the knit stitch. First, insert the left-hand needle into those 3 stitches….

    Step 5 of working the sl3-k1-p3sso decrease

  6. …. then pass them over the other stitch.

    The result of working the sl3-k1-p3sso decrease

The result

The below pictures show how it looks after 2 more decrease rows have been worked. First from the right side, then from the wrong side of the fabric. Please note that in order to have any subsequent decreases line up correctly, any new decrease has to be started 2 stitches before the stitch on top of the resulting one from the previous decrease. And that’s all there is to it!

Multiple sl3-k1-p3sso decreases as seen from the RS
Multiple sl3-k1-p3sso decreases as seen from the WS
Patreon logo

Thanks to my Patreon supporters for bringing you this freebie! Creating quality patterns and tutorials is a lot of work and resource-intensive. However, I find it important to give you free content like this tutorial. Thanks to the generous support of my Patreon supporters, I can make it happen. Thank you, patrons! Click here to join, or click here to read more about La Visch Designs on Patreon.

tutorial – the sl3-k1-p3sso right-leaning centered decrease Read More »
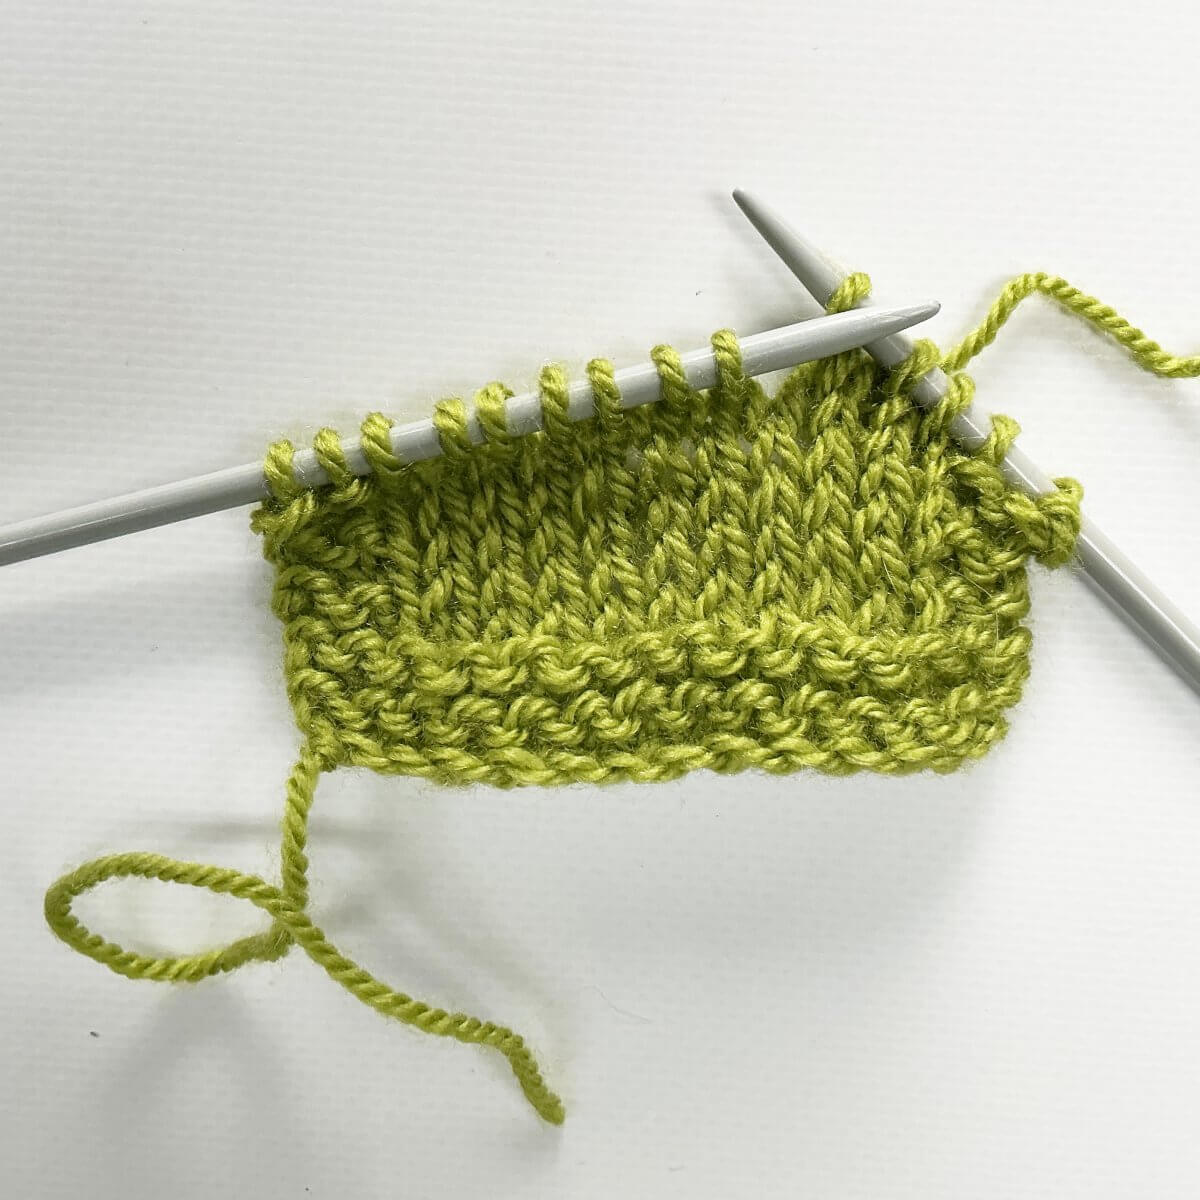
tutorial – the k4tog bf decrease

The k4tog bf decrease - a tutorial by La Visch Designs

As part of this stitch pattern that I encountered, there was also this “k4tog bf” decrease. The abbreviation stands for “knit 4 stitches together back front”. It’s a new to me way to reduce the number of stitches from 4 to 2 stitches. Of course, you could also just combine a k2tog and your choice of a left-leaning decrease, take for example the skp decrease. However, the k4tog bf decrease looks quite different, so it really has its place. And that stitch pattern I encountered it in? I will post it soon!

Below you can find how to work this decrease, so get your materials and follow along!

Materials

Yarn: Paintbox Yarns Simply DK, a good value, good quality 100% acrylic yarn, here in the color Lime.

Knitting needles: This is a pair of straights that I picked up at the second-hand store when I started knitting, brand unknown.

Working a k4tog bf step by step

  1. First, work your way across the row until you’ve reached the point where you want to make the decrease. In this case, I want to work the decrease over the 4 stitches in the middle of the swatch.

    Step 1 of working the k4tog bf decrease

  2. Next, insert the tip of the right-hand needle into the first 4 stitches at the same time as if to knit through the back loop. This is easier when using very sharp needles. I also find it helps to pull the fabric below the 4 stitches down a bit, to open up the loops that are on the needle.

    Step 2

  3. Wrap the yarn around the needle…

    Step 3 of working the k4tog bf decrease

  4. …and pull it through the stitches you inserted the right-hand needle in.

    Step 4

  5. Next, we’re going to work the “front” part of the decrease. Insert the tip of the right-hand needle into the first 4 stitches at the same time as if to knit. Again, this is easier when using very sharp needles or pulling the fabric down a bit, to open up the loops that are on the needle.

    Step 5 of working the k4tog bf decrease

  6. Wrap the yarn around the needle…

    Step 6

  7. …and pull it through the stitches you inserted the right-hand needle in.

    Step 7 of working the k4tog bf decrease

  8. To finish the k4tog bf decrease, slip the original stitches off the left-hand needle.

    Step 8

The below picture shows how it looks after 2 more decrease rows have been worked over the center 4 stitches in the swatch. Below it, you can find another picture showing the wrong side of the swatch.

The result of working the k4tog bf decrease - from the RS
The result of working the k4tog bf decrease – from the RS
The result of working the k4tog bf decrease - from the WS
The result of working the k4tog bf decrease – from the WS
Patreon logo

Thanks to my Patreon supporters for bringing you this freebie! Creating quality patterns and tutorials is a lot of work and resource-intensive. However, I find it important to give you free content like this tutorial. Thanks to the generous support of my Patreon supporters, I can make it happen. Thank you, patrons! Click here to join, or click here to read more about La Visch Designs on Patreon.

tutorial – the k4tog bf decrease Read More »
tutorial – the sl2-k2tog-p2sso left-leaning centered decrease

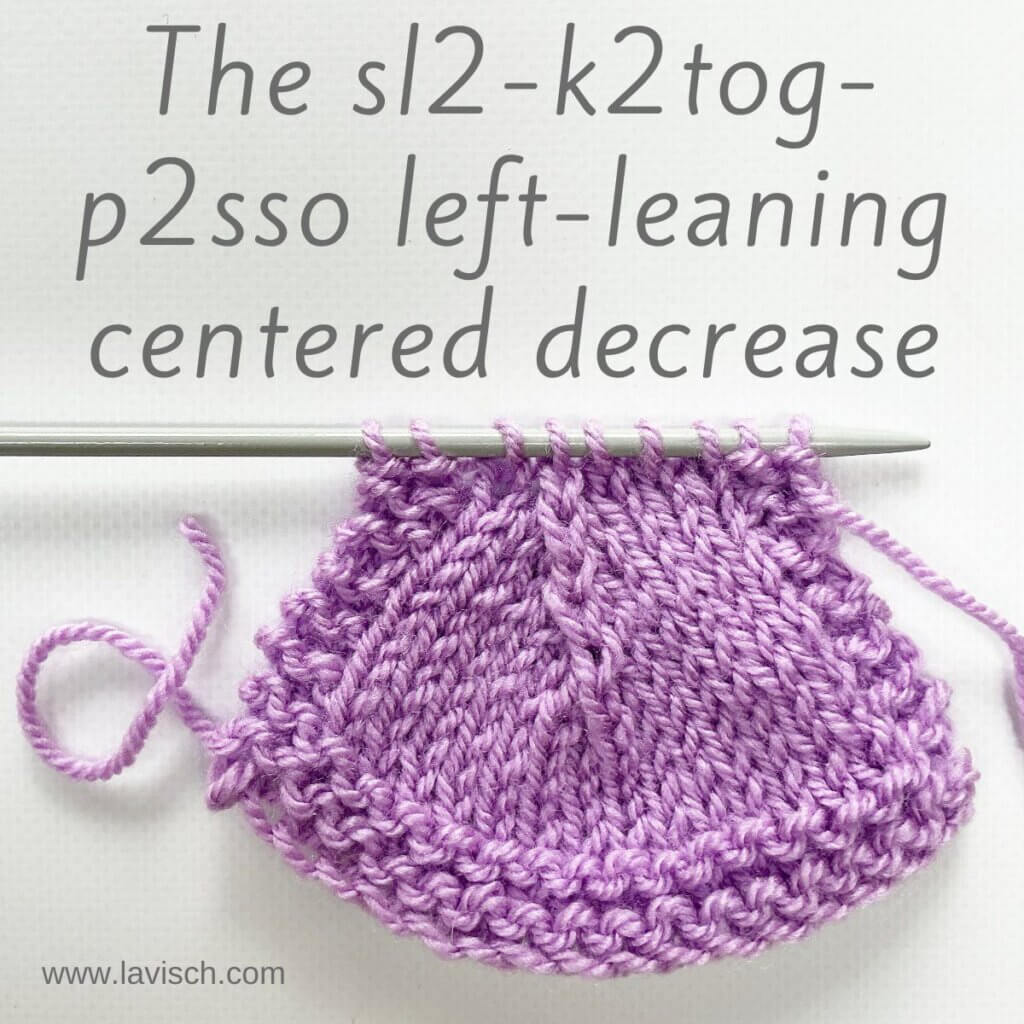
The sl2-k2tog-p2sso left-leaning centered decrease - a tutorial by La Visch Designs

In knitting, as in life, many paths can lead to the same beautiful result. When it comes to shaping your fabric with decreases, there are often several ways to achieve a similar visual effect, each with its own subtle character. The sl2-k2tog-p2sso decrease (short for slip 2, knit 2 together, pass 2 slipped stitches over) is one of those methods that produces what’s called a centered triple decrease. Despite the “centered” label, this particular decrease leans just a touch to the left. The result is a tidy, symmetrical-looking line that subtly favors one side.

In this tutorial, we’ll walk step-by-step through how to work the sl2-k2tog-p2sso decrease. And if you find yourself preferring a version that leans ever so slightly to the right; don’t worry! A companion tutorial for that variation will be coming soon. Ready? Let’s pick up our needles and see how this decrease works its magic.

Materials

Yarn: Paintbox Yarns Simply DK, a good value, good quality 100% acrylic yarn, here in the color Tea Rose.

Knitting needles: This is a pair of straights that I picked up at the second-hand store when I started knitting, brand unknown.

Working a sl2-k2tog-p2sso step by step

  1. First, work your way across the row until you’ve reached the point where you want to make the decrease. In this case, I want to work the triple decrease 7 stitches in after the garter stitch edge.

    Step 1 of working a sl2-k2tog-p2sso decrease

  2. Next, insert the tip of the right-hand needle into the first 2 stitches at the same time as if to knit.

    Step 2

  3. Pass these stitches to the right-hand needle.

    This step changes the orientation of the stitches, influencing how they appear when the decrease has been finished.Step 3 of working a sl2-k2tog-p2sso decrease

  4. Over the next 2 stitches, we will be working a k2tog decrease. To do so, we first insert the right-hand needle into the 2 stitches as if to knit.

    Step 4

  5. Wrap the yarn around the needle…

    Step 5 of working a sl2-k2tog-p2sso decrease

  6. …and pull it through the stitches.

    Step 6

  7. To finish the k2tog decrease, slip the original stitches off the left-hand needle.

    Step 7 of working a sl2-k2tog-p2sso decrease

  8. To finish the triple decrease, we will be passing the initially slipped stitches over the stitch that was left after working the k2tog. First, insert the left-hand needle into those 2 stitches….

    Step 8

  9. …. then pass them over the other stitch.

    The result of working a sl2-k2tog-p2sso decrease

The result

The below pictures show how it looks after 2 more decrease rows have been worked. First from the right side, then from the wrong side of the fabric. Please note that in order to have any subsequent decreases line up correctly, any new decrease has to be started 1 stitch before the stitch on top of the resulting one from the previous decrease. And that’s all there is to it!

The sl2-k2tog-p2sso left-leaning centered decrease from the RS
The sl2-k2tog-p2sso left-leaning centered decrease from the WS
Patreon logo

Thanks to my Patreon supporters for bringing you this freebie! Creating quality patterns and tutorials is a lot of work and resource-intensive. However, I find it important to give you free content like this tutorial. Thanks to the generous support of my Patreon supporters, I can make it happen. Thank you, patrons! Click here to join, or click here to read more about La Visch Designs on Patreon.

tutorial – the sl2-k2tog-p2sso left-leaning centered decrease Read More »
tutorial – the k4tog right-leaning triple decrease

The k4tog right-leaning decrease - a tutorial by La Visch Designs

On this website, I’ve already posted a lot of tutorials about different types of decreases. Well, I encountered a stitch pattern that uses various triple decreases. In other words: Decreases in which 4 stitches are reduced to a single remaining stitch. In this tutorial, I will show you the “k4tog” right-leaning triple decrease. The abbreviation stands for “knit 4 stitches together”. It’s a common way to reduce the number of stitches in your project and make it narrower. Together with its matching left-leaning decreases, it can be found in lace patterning.

Below you can find how to work this decrease, so get your materials and follow along!

Materials

Yarn: Paintbox Yarns Simply DK, a good value, good quality 100% acrylic yarn, here in the color Tea Rose.

Knitting needles: This is a pair of straights that I picked up at the second-hand store when I started knitting, brand unknown.

Working a k4tog step by step

  1. First, work your way across the row until you’ve reached the point where you want to make the decrease. In this case, I want to work the triple decrease 5 stitches in after the garter stitch edge.

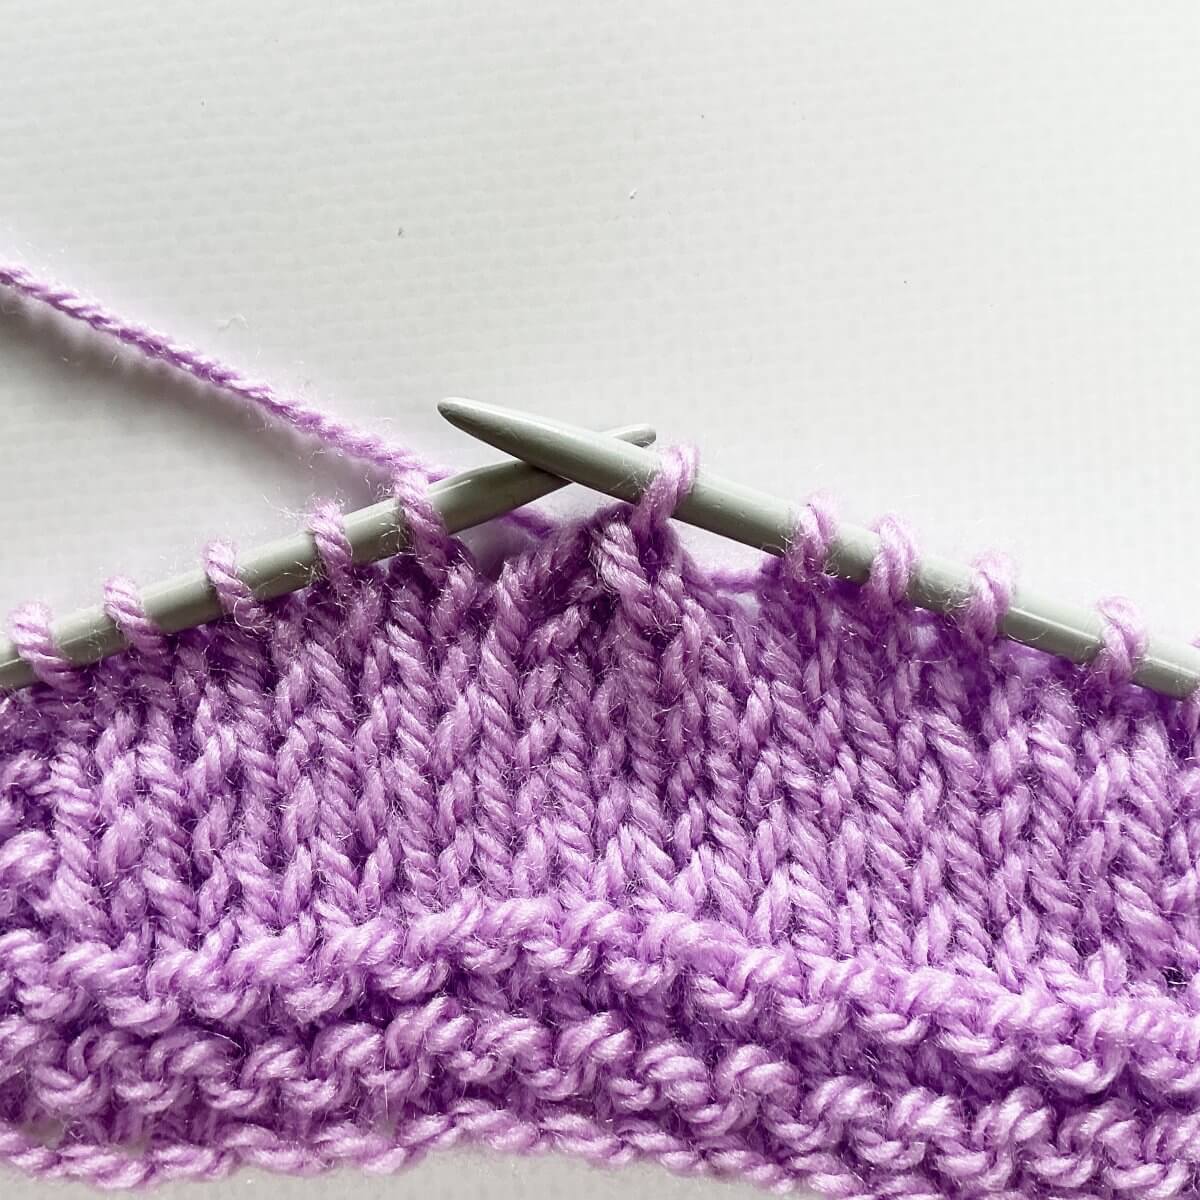
    The k4tog right-leaning decrease - step 1

  2. Next, insert the tip of the right-hand needle into the first 4 stitches at the same time as if to knit. This is easier when using very sharp needles. I also find it helps to pull the fabric below the 4 stitches down a bit, as pictured here, to open up the loops that are on the needle.

    Step 2

  3. In this step, I’ve inserted the right-hand needle into the 4 stitches.

    The k4tog right-leaning decrease - step 3

  4. Wrap the yarn around the needle…

    Step 4

  5. …and pull it through the stitches you inserted the right-hand needle in.

    The k4tog right-leaning decrease - step 5

  6. To finish the k4tog decrease, slip the original stitches off the left-hand needle.

    The k4tog right-leaning decrease - step 6

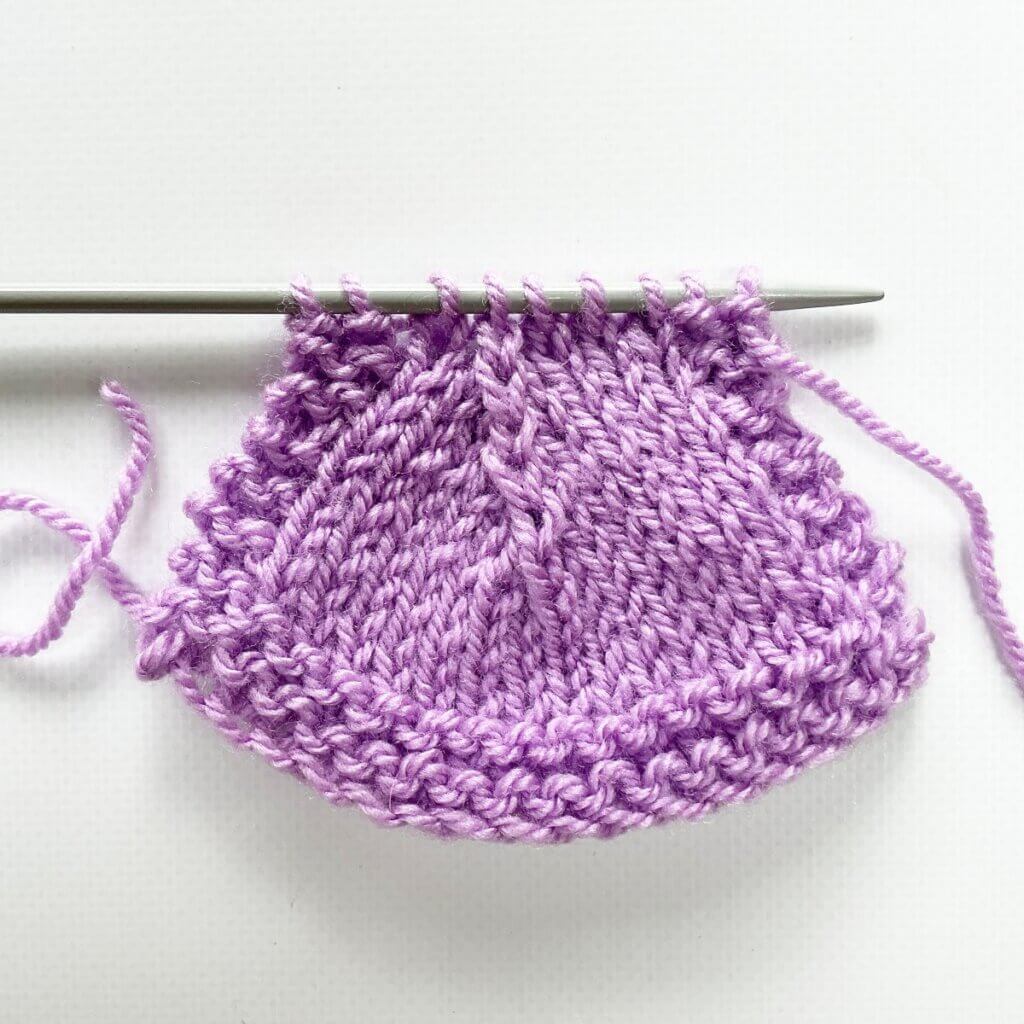
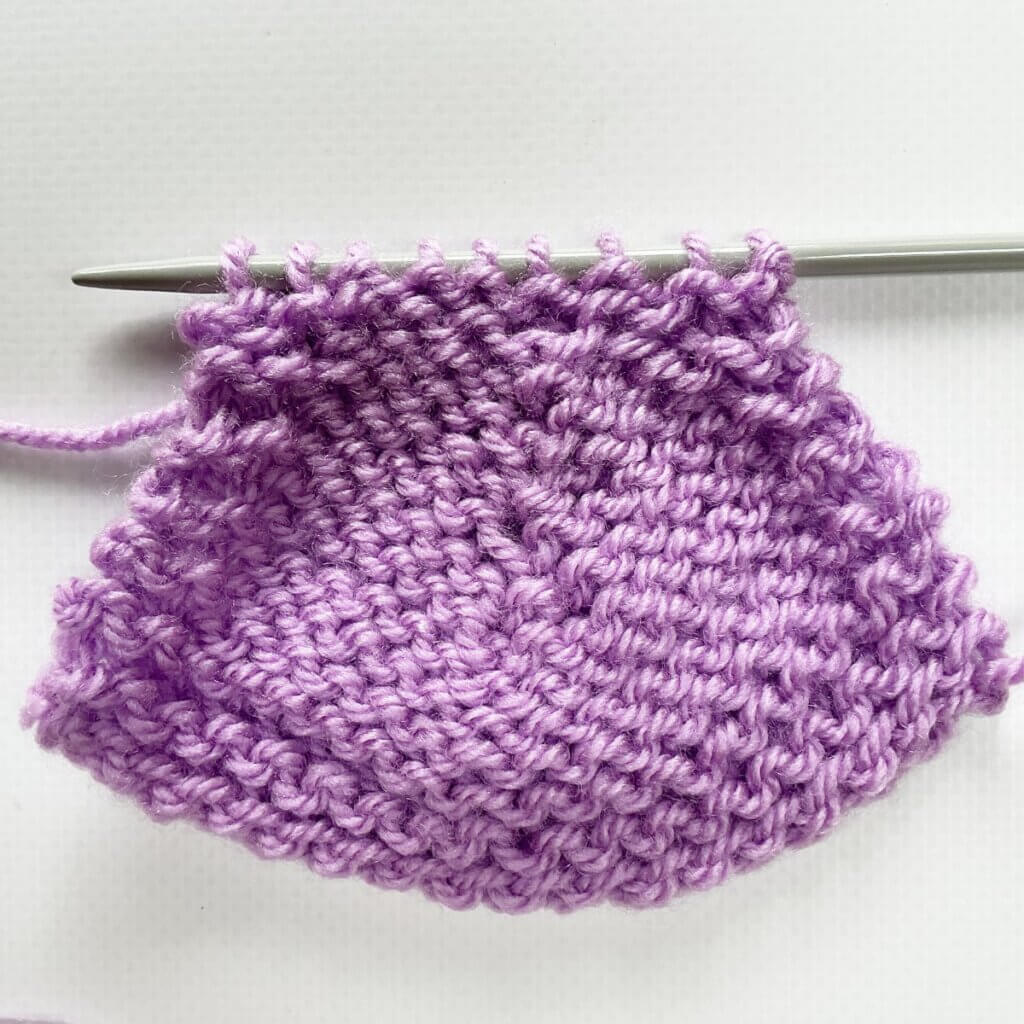
The below picture shows how it looks after 1 more decrease row has been worked. The second decrease was started 2 stitches in from the garter stitch edge. As you can see, another one wasn’t possible without dipping into the edge stitches if I wanted to stay in the decrease line you see forming. And that’s all there is to it!

The k4tog right-leaning decrease - the result
Patreon logo

Thanks to my Patreon supporters for bringing you this freebie! Creating quality patterns and tutorials is a lot of work and resource-intensive. However, I find it important to give you free content like this tutorial. Thanks to the generous support of my Patreon supporters, I can make it happen. Thank you, patrons! Click here to join, or click here to read more about La Visch Designs on Patreon.

tutorial – the k4tog right-leaning triple decrease Read More »
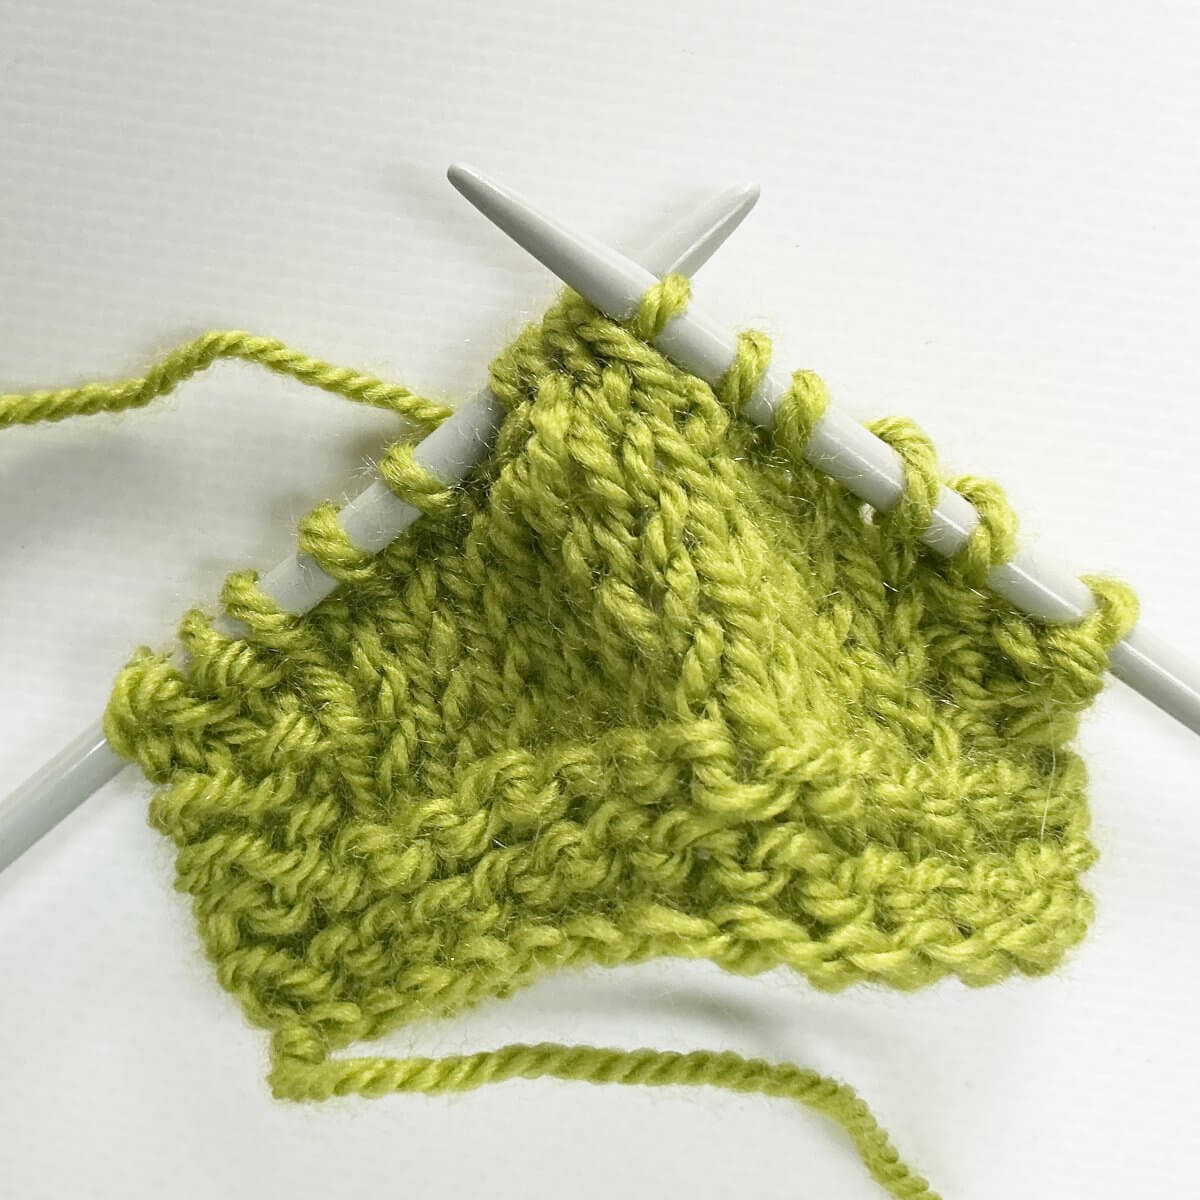
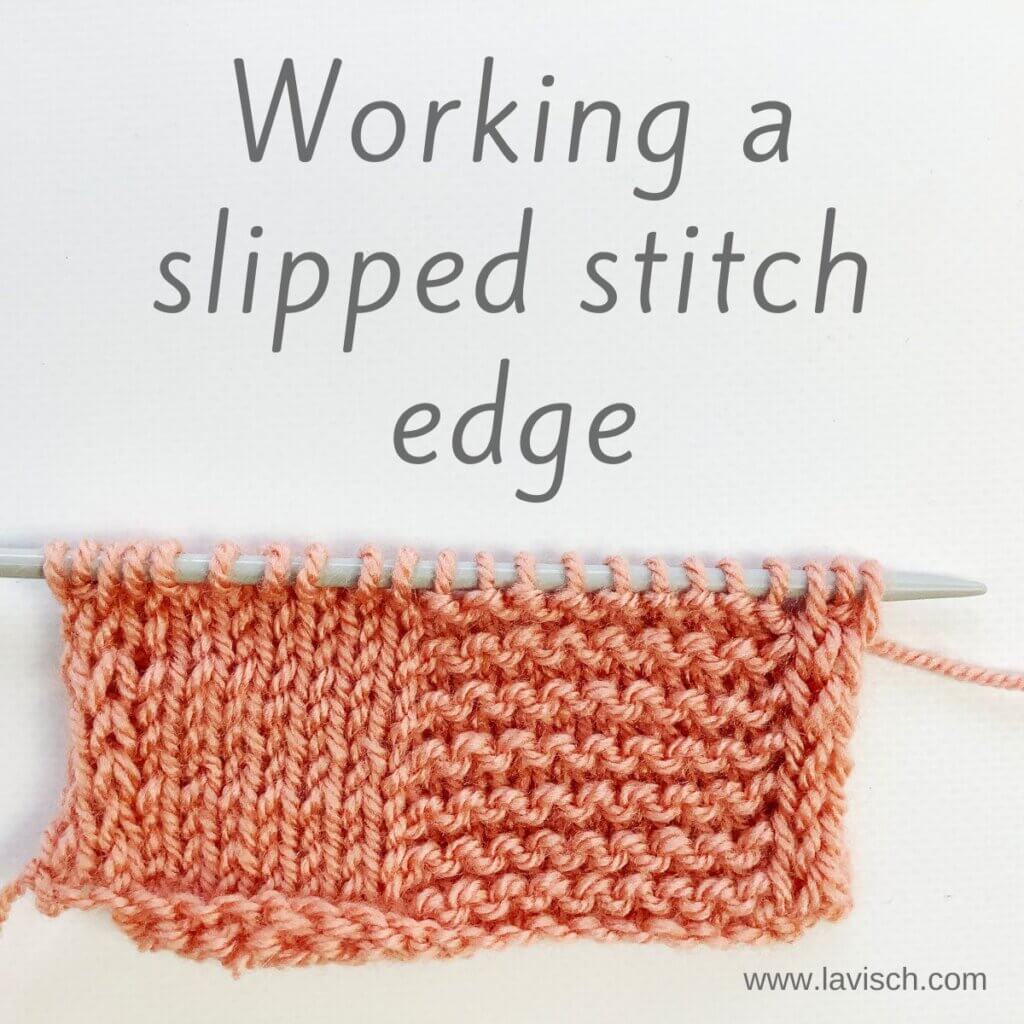
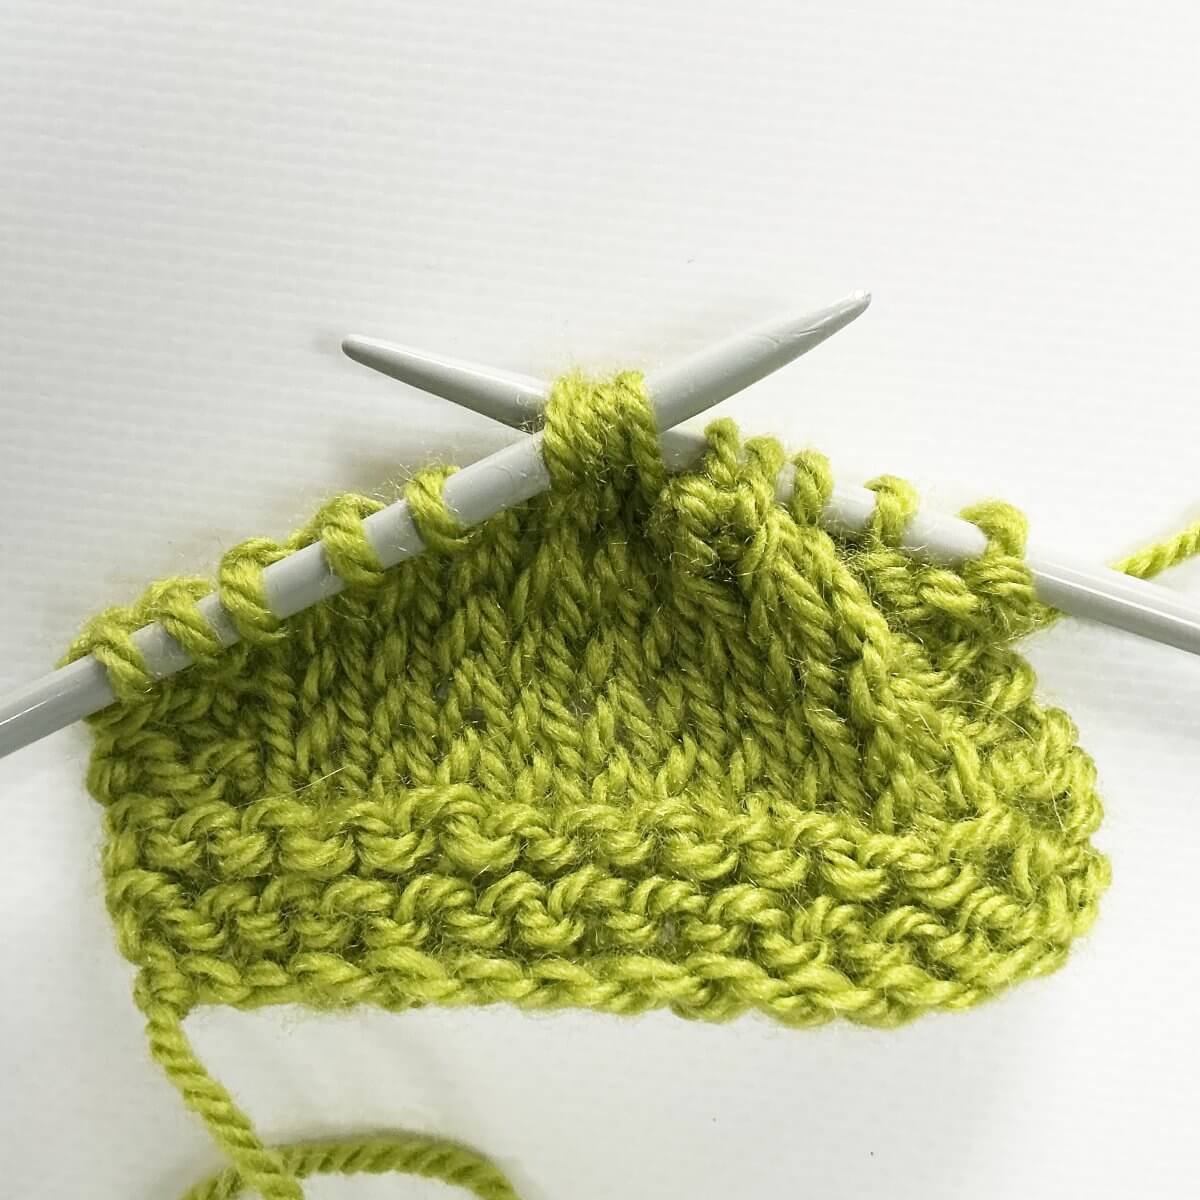
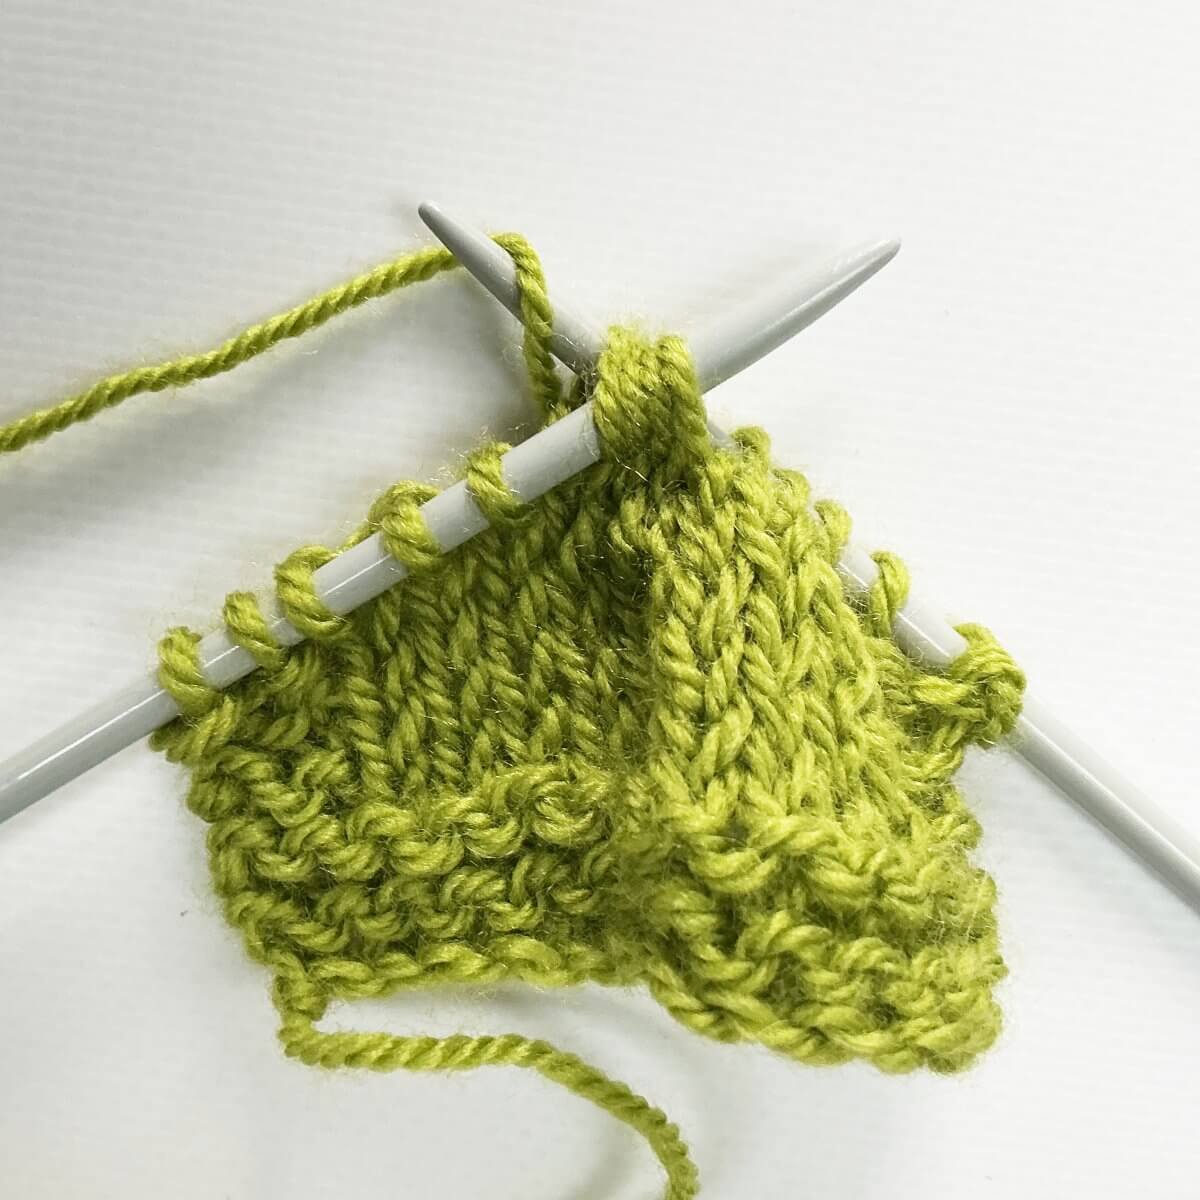
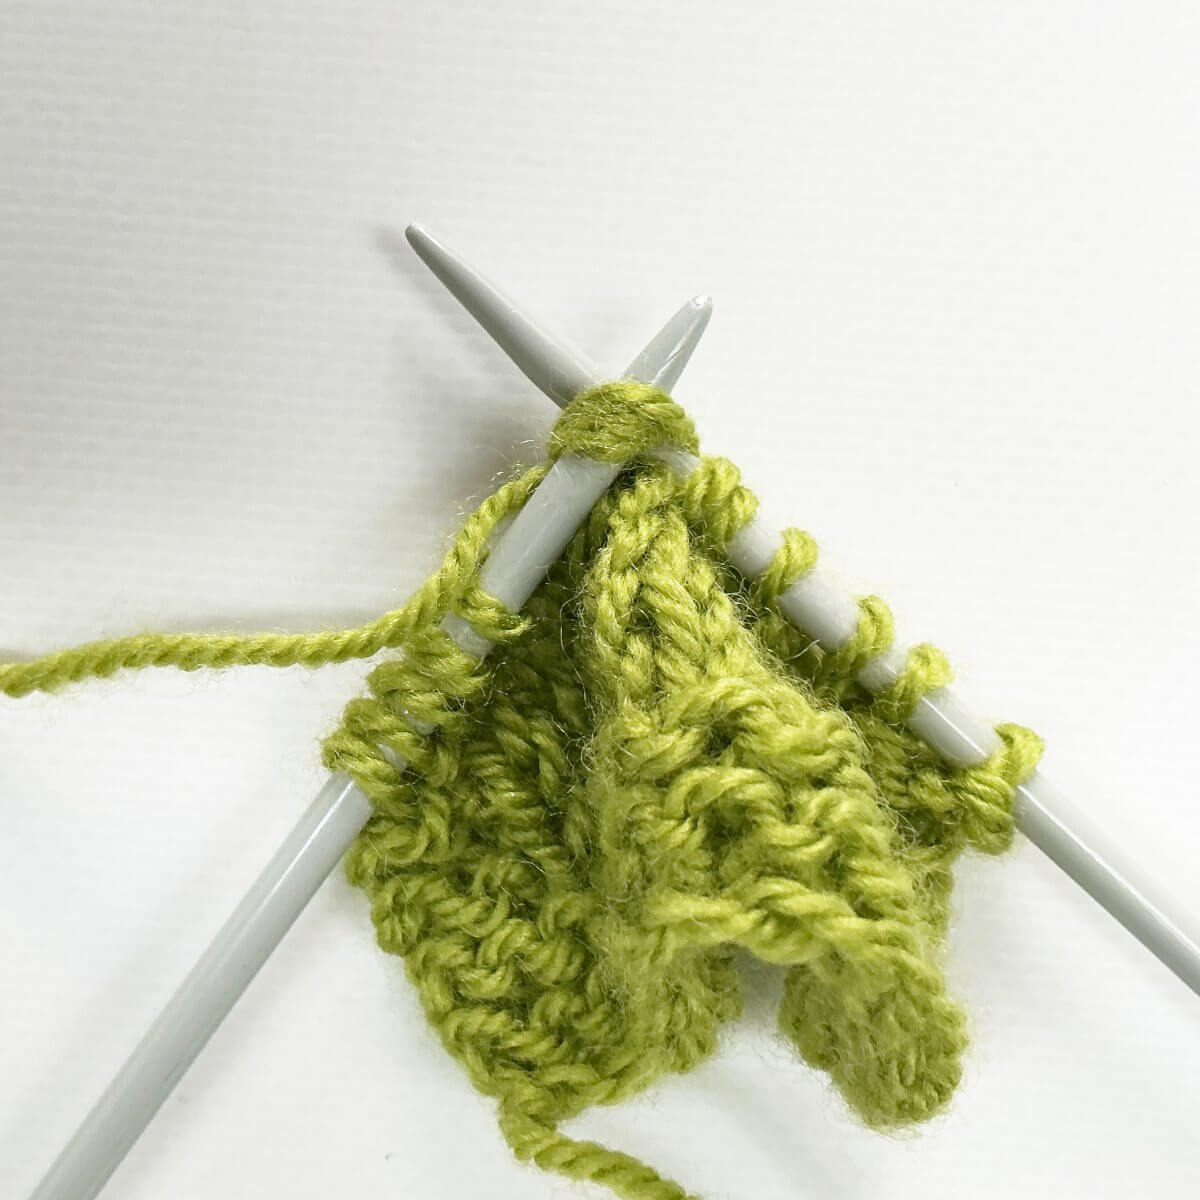
tutorial – working a slipped stitch edge

Working a slipped stitch edge

In some of my patterns, I use a slipped stitch edge as a finishing on the edges. Take for example the edges on the Sweet as Pi cardigan, or the upper edge of the sideways knit Morello Cerise shawl. What I like about this kind of edge, is that it looks like i-cord finishing. Only at the side edges of your fabric, instead of the top or bottom edges that you would get with an i-cord cast-on, or i-cord bind-off.

The slipped stitch edge is sometimes abbreviated as “SSE”. It is worked over the first 3 or last 3 stitches of a row. Or on both, of course. I find it helps to place an extra stitch marker 3 stitches in from the edge on each side of your work. That way there is always a clear demarcation of the stitches to work the SSE over.

Materials

Yarn: Paintbox Yarns Simply DK, a good value, good quality 100% acrylic yarn, here in the color Vintage Pink.

Needles: This is a pair of straights that I picked up at the second-hand store when I started knitting, brand unknown.

Working a slipped stitch edge step by step

In a pattern you may see the following instruction for the slipped stitch edge or SSE:
RS: K1, sl1 purl-wise wyif, k1.
WS: Sl1 purl-wise wyif, k1, sl1 purl-wise wyif.

In other words: when slipping the stitches, you always keep the yarn in front of your work, and you never slip a stitch that you’ve slipped in the previous row. Ok, let’s take a look at how to do this.

  1. On the RS: Knit the first stitch


    Step 1 of working a slipped stitch edge on the RS

  2. Move the yarn to the front of the work, insert your right-hand knitting needle purl-wise into the stitch and slip it to that needle.

    Step 2 of working a slipped stitch edge on the RS

  3. Knit the third stitch.

    Now you can continue with the row according to your pattern. Step 3 of working a slipped stitch edge on the RS

  4. WS: Move the yarn to the front of the work, insert your right-hand knitting needle purl-wise into the stitch and slip it to that needle.

    Step 1 of working a slipped stitch edge on the WS

  5. Knit the next stitch.

    Step 2 of working a slipped stitch edge on the WS

  6. Again, move the yarn to the front of the work, insert your right-hand knitting needle purl-wise into the stitch and slip it to that needle.

    Now you can continue with the row according to your pattern. Step 3 of working a slipped stitch edge on the WS

The result

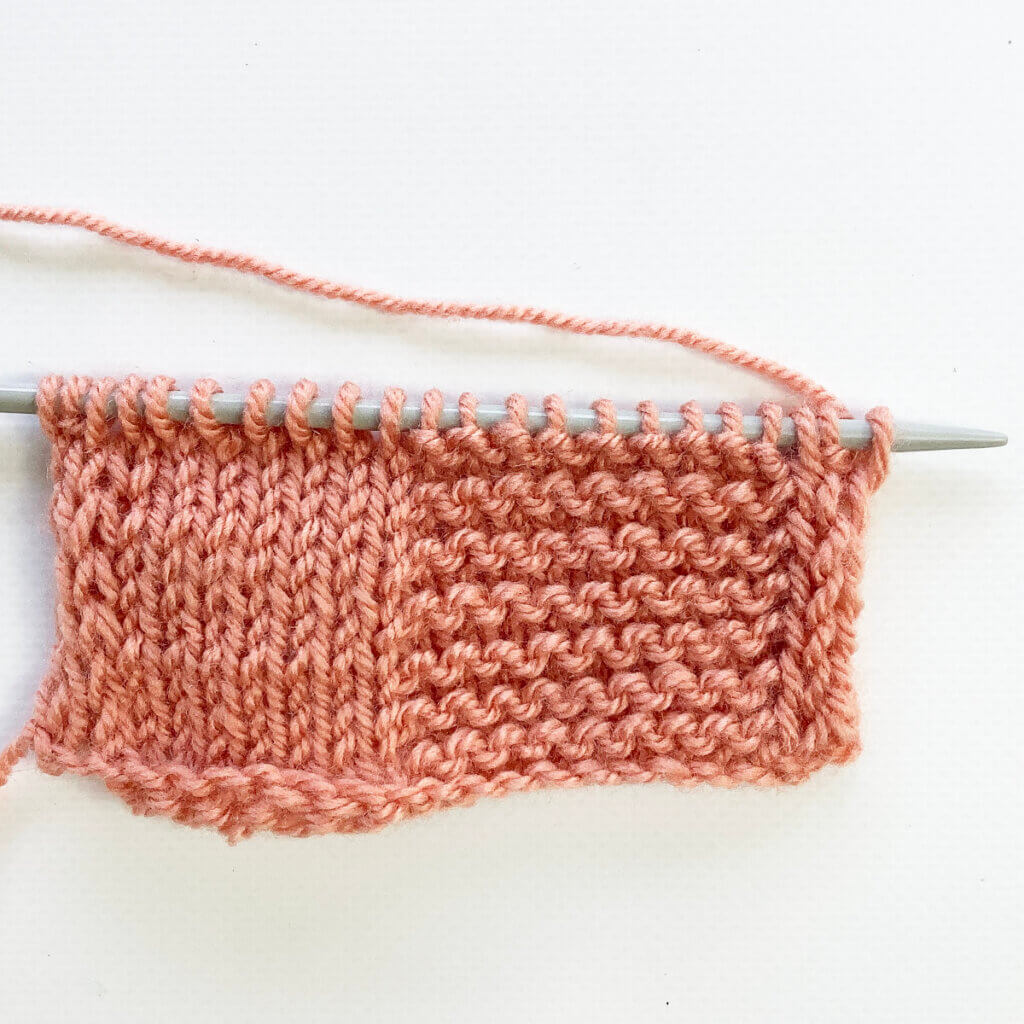
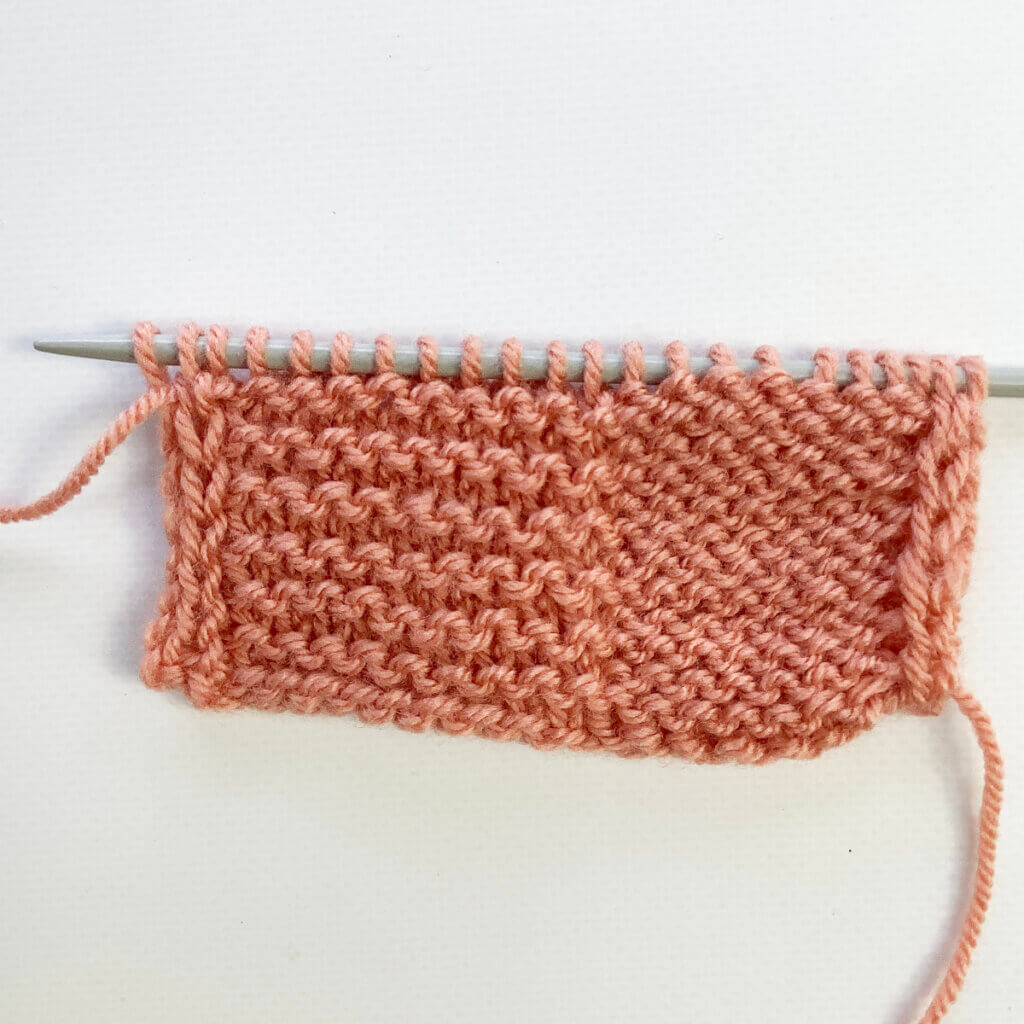
In the little swatch I made for this tutorial, I did half in garter stitch, and half in stockinette. This way, you can see what the effect is on both the right and wrong sides of the fabric. It really looks like an i-cord! What’s also pretty obvious in the below pictures, is that the row gauge of garter stitch is much more condensed than with the stockinette. This is something that you may want to take into account in your project. Because the SSE contains slipped stitches, it will give a tighter edge than other edge treatments. This may cause pulling.

The result of working a slipped stitch edge on the RS
The result of working a slipped stitch edge on the WS
Patreon logo

Thanks to my Patreon supporters for bringing you this freebie! Creating quality patterns and tutorials is a lot of work and resource-intensive. However, I find it important to give you free content like this tutorial. Thanks to the generous support of my Patreon supporters, I can make it happen. Thank you, patrons! Click here to join, or click here to read more about La Visch Designs on Patreon.

tutorial – working a slipped stitch edge Read More »
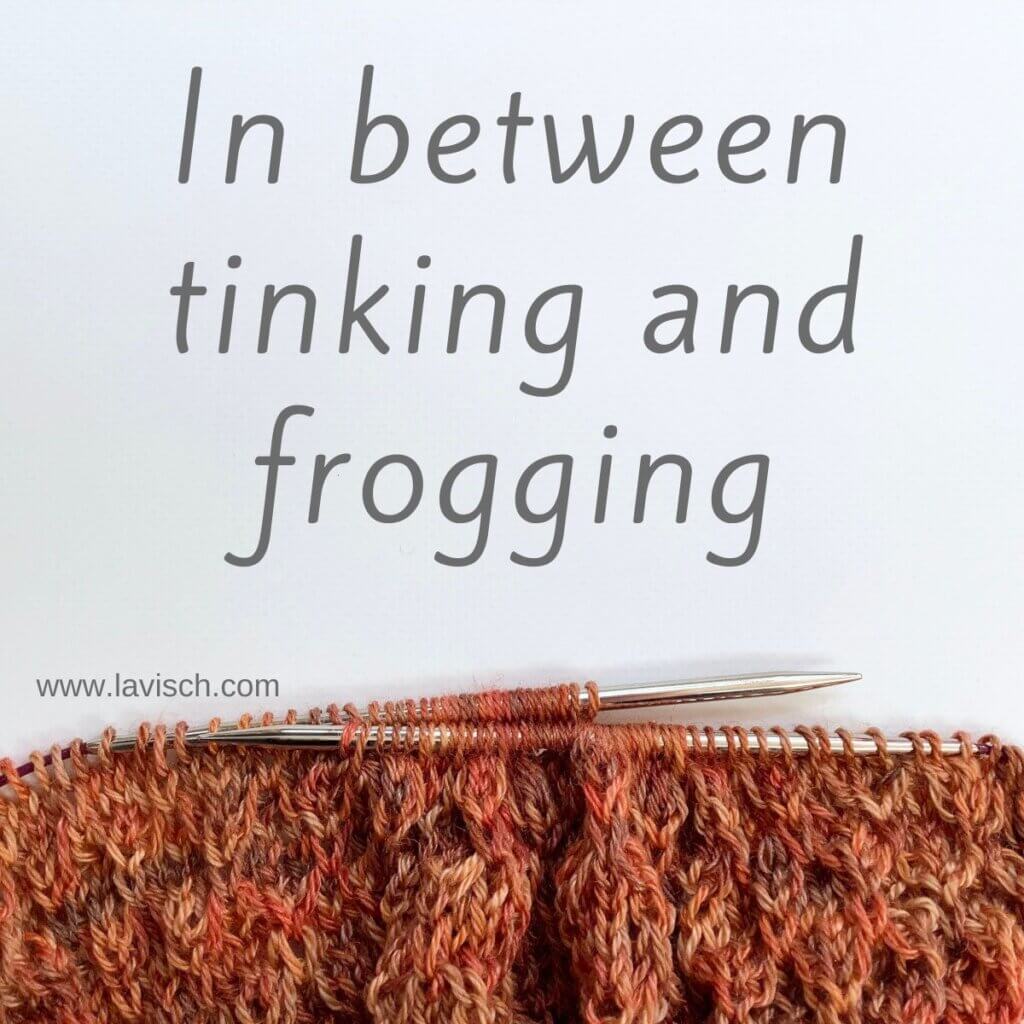
tutorial – in between tinking and frogging

In between tinking and frogging - a tutorial by La Visch Designs

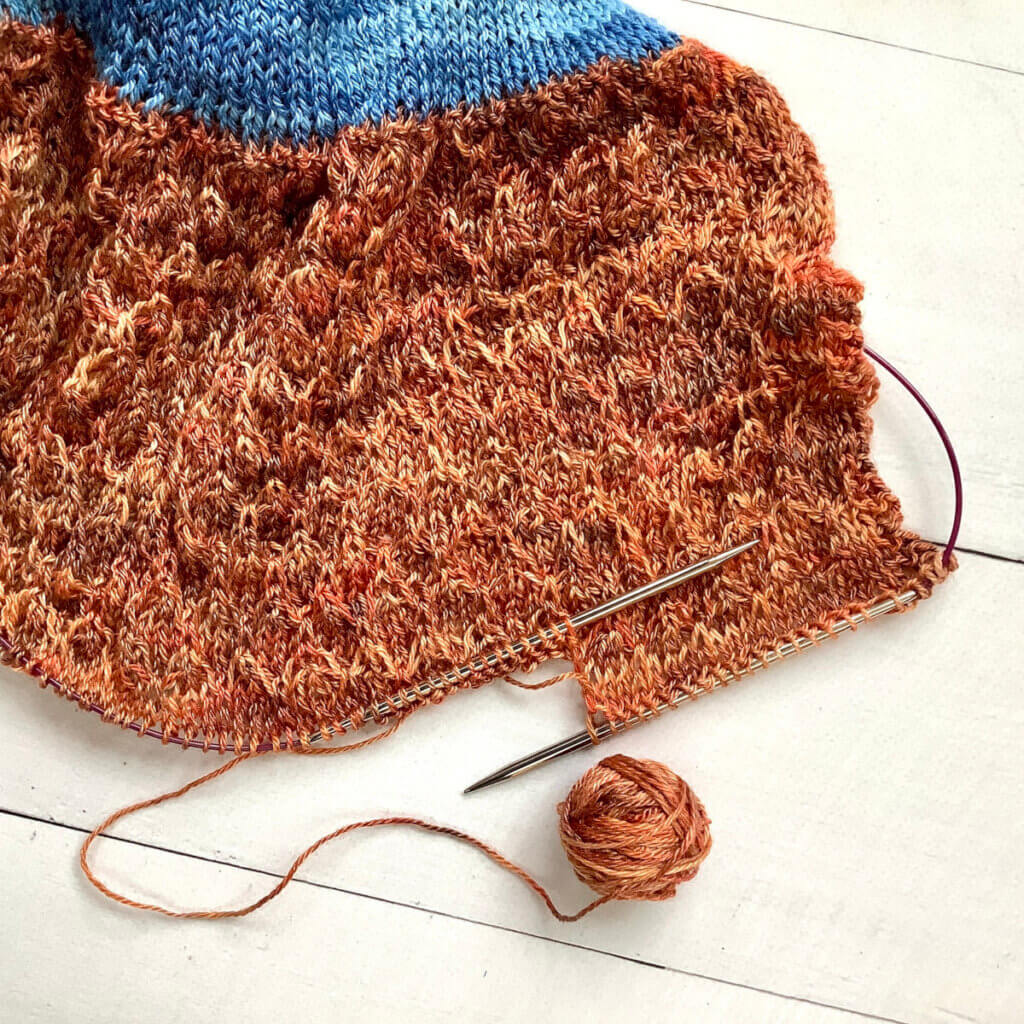
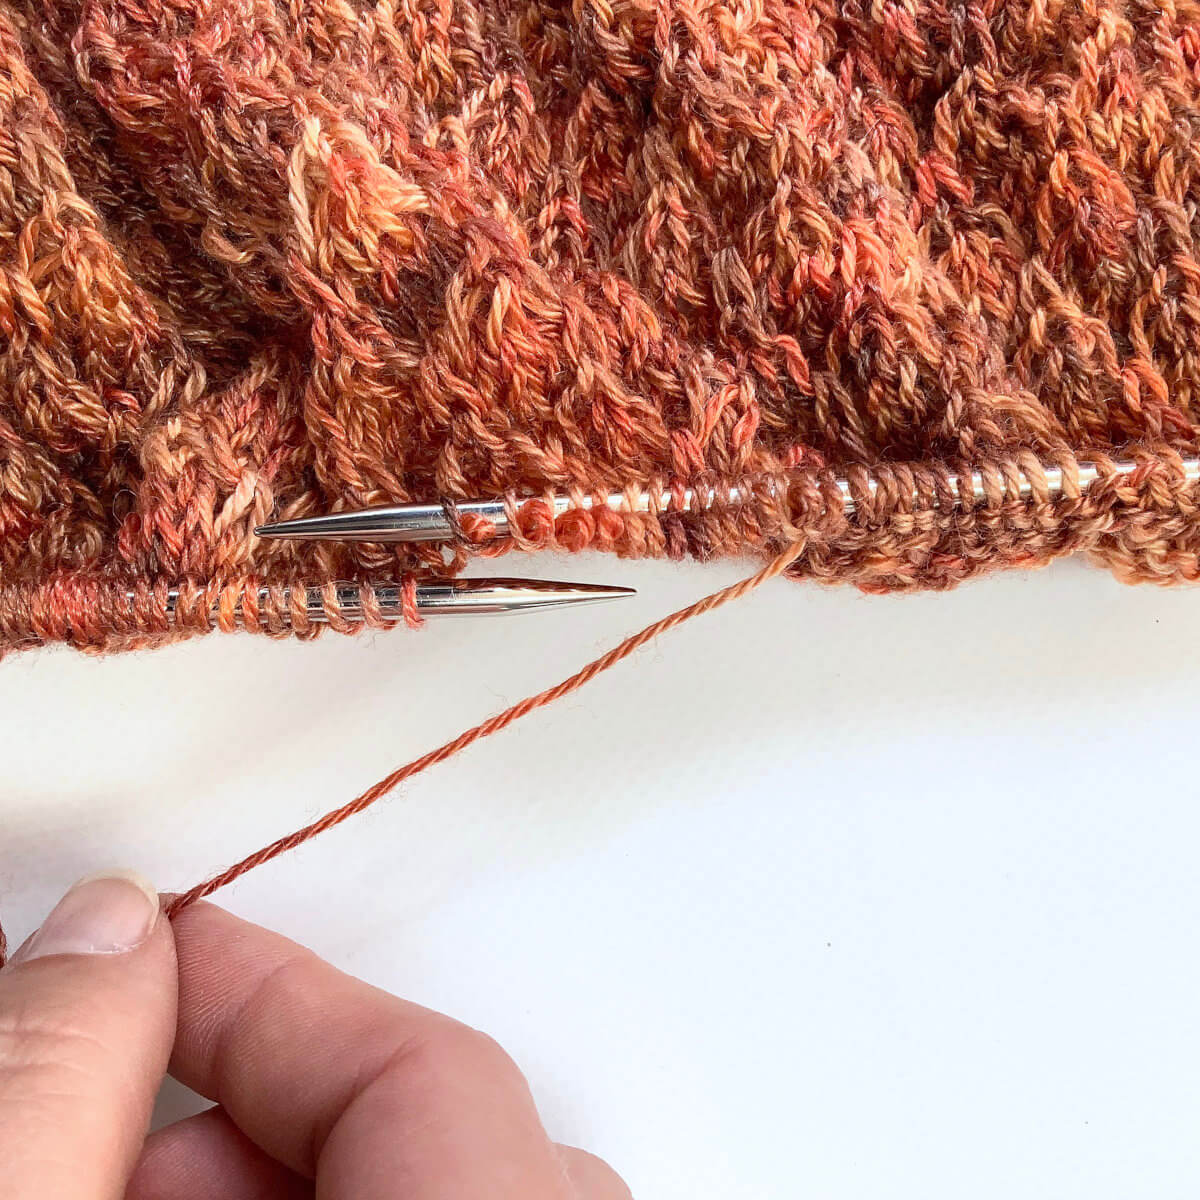
In a shawl project, I encountered a hiccup that I had to fix. When finishing the diamond patterning after a full repeat, and then working a garter stitch ridge to mirror the beginning of this section, this is what I noticed:

Do you see those plain rows of stockinette just above the needle and garter stitch ridge on the right? This did not mirror the start of the section at all… So, I undid some rows to start the garter stitch ridge earlier. With a rather “sticky” yarn, I would just remove the knitting needle, rip it out and place the stitches back on the needle at the right point. However, the yarn used in this project contains 50% tencel, making it rather slippery. I certainly didn’t want to drop any stitches in this patterning. But tinking (knitting spelled and done backwards) back 3 rows wasn’t a good option as well, with over 350 sts on the needle.

The solution: a technique that is something in between tinking and frogging! Below, I’ll show you how I went about it step by step.

Materials

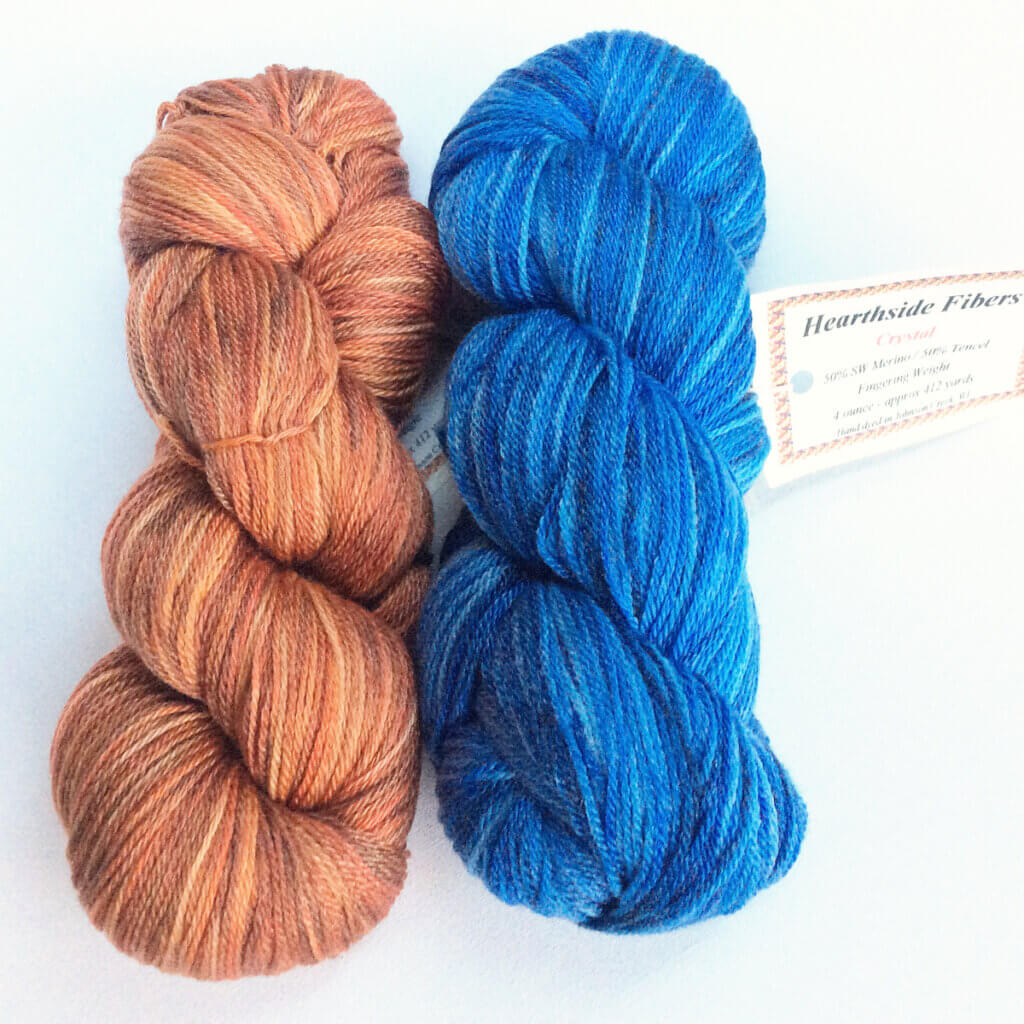
Yarn: Hearthside Fibers Crystal in the colors “Vermont”, and “Lake”.

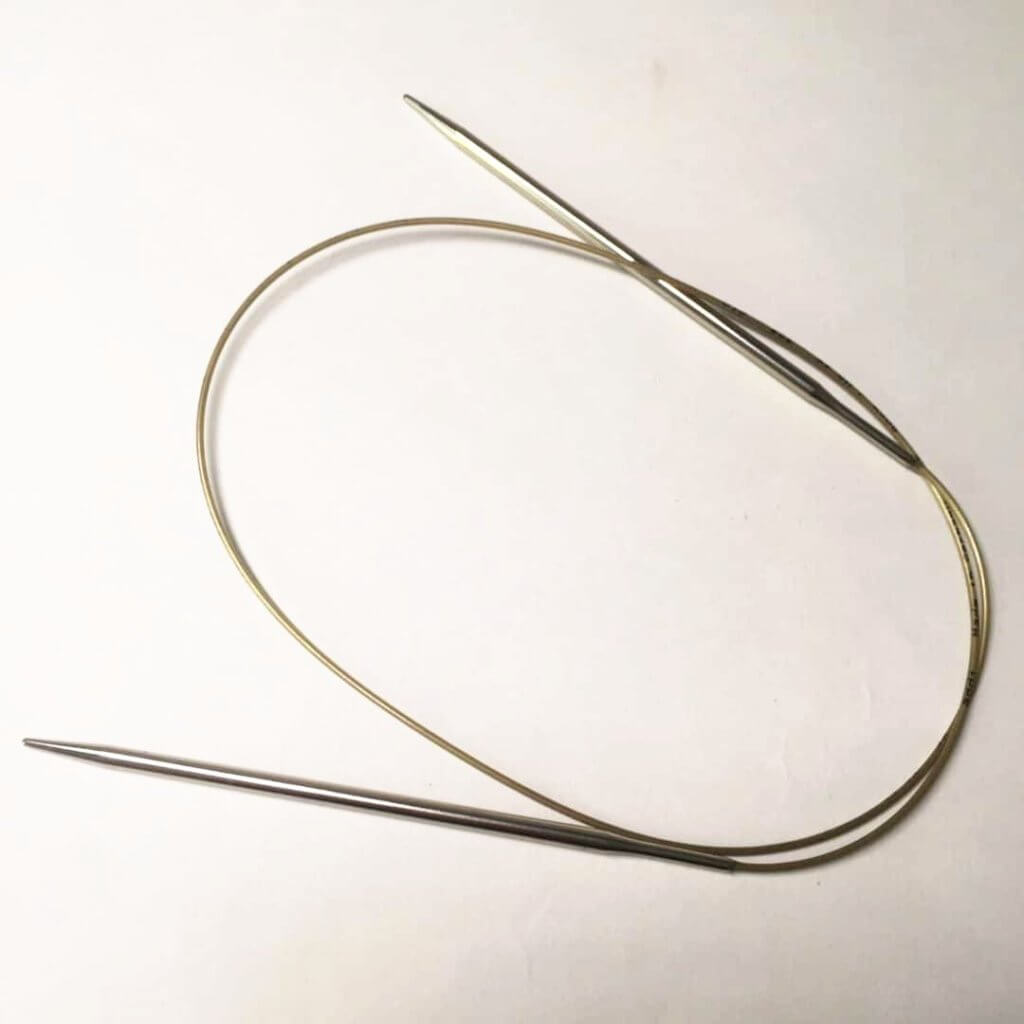
Needles: A pair of Addi circular needles in the size 4 mm (US 6)

In between tinking and frogging step by step

  1. I positioned my project in such a way, that I had a good view of the row I wanted to put back on the needle from the right side of the fabric.

    In this case, that meant holding the work as shown.Step 1

  2. Do you see the little “V” just above the knitting needle, positioned in between the loops on that needle? Insert the needle into the left leg of the first “V”

    You could, of course, insert the needle under the other leg, but that would mean that the loops are placed on the needle with a twisted orientation. Not a big issue, but it would mean working a first row of the project through the back loops to get them oriented correctly again.
    I do hope I haven’t mixed up my stitch legs here, though…Step 2 of in between tinking and frogging

  3. Repeat step 2 until you have a decent number of stitches on your needle.

    When working with circulars, that’s about 15 to 20 stitches for me.Step 3

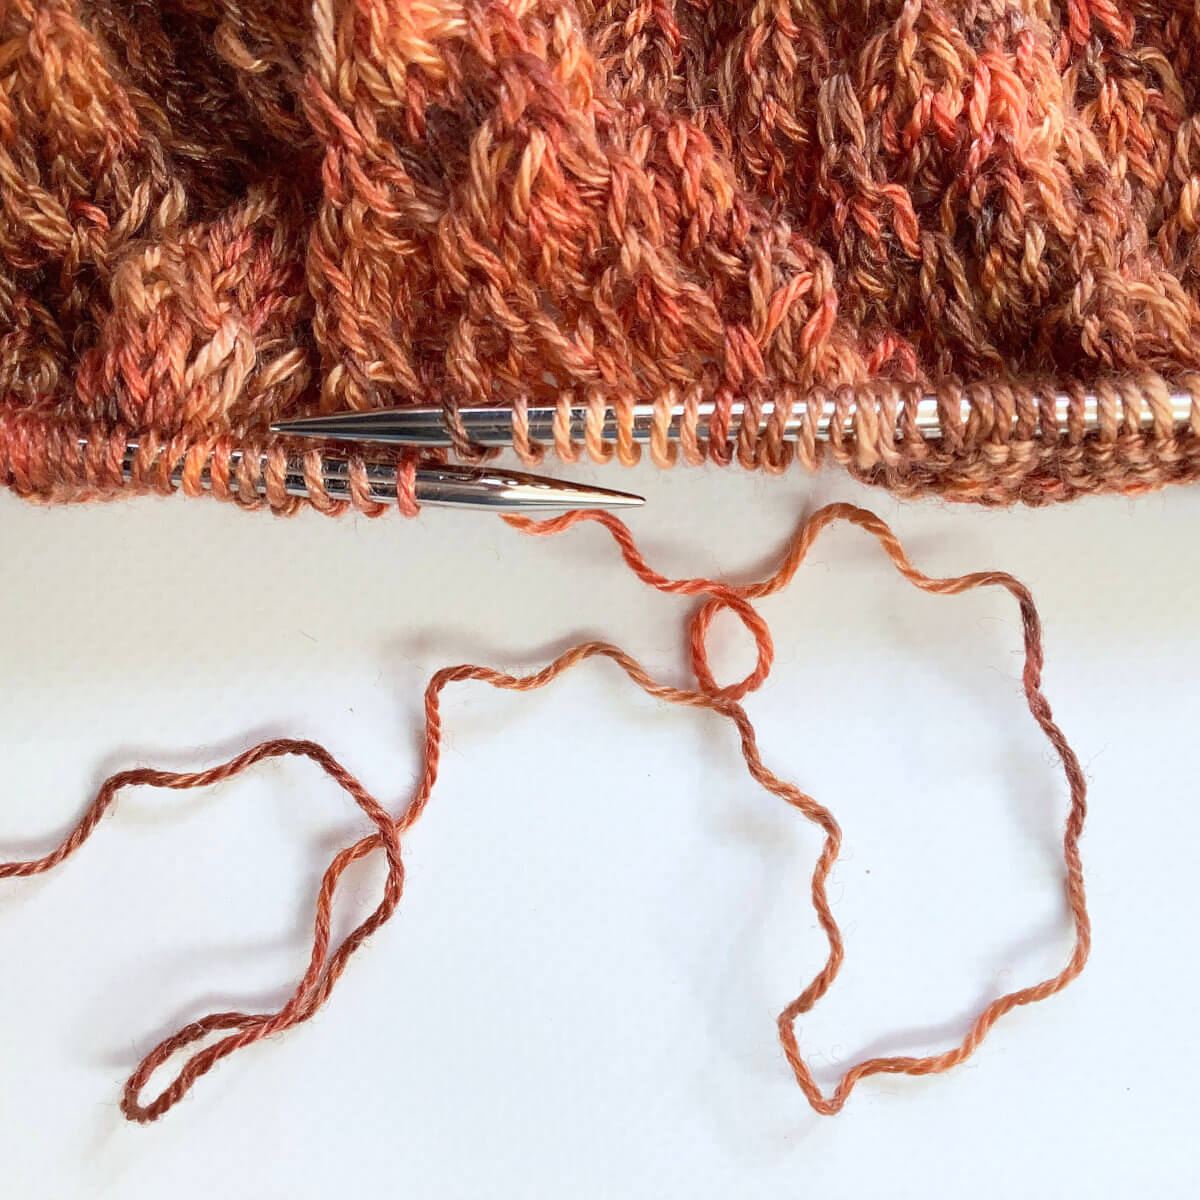
  4. Next, slide the knitting needle that holds all non-tinked back stitches out of the stitches below which you’ve just picked up stitches with the other needle.

    Step 4

  5. Now gently pull out the working yarn out of these stitches.

    Make sure to watch out for any missed stitches, now it’s easy to fix it without any runners in your fabric. This will be less so when you’ve already moved on to a new section of stitches.Step 5 of in between tinking and f rogging

  6. And there you have it: a whole set of stitches safely on the needle, without either tinking or frogging.

    Step 6

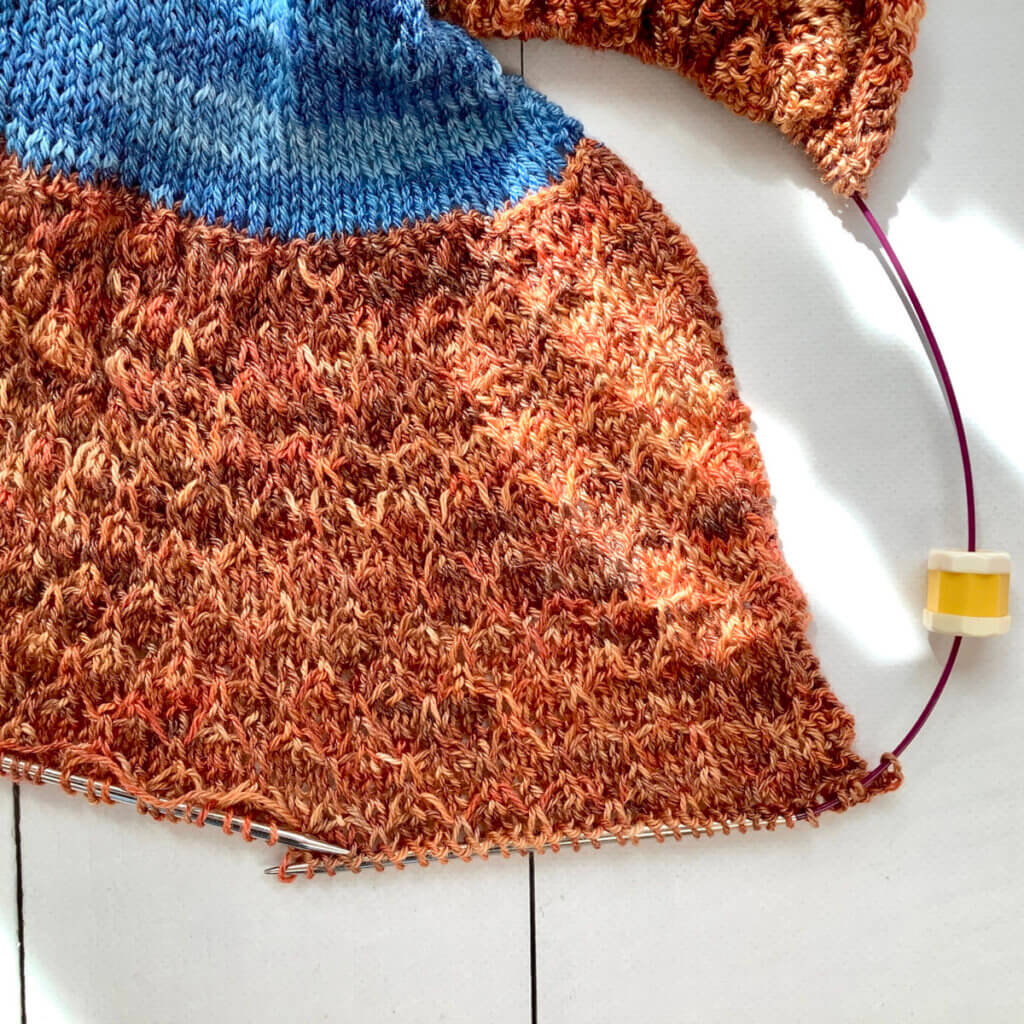
This way really is between tinking and frogging; a lovely compromise! And my project? I got the offending rows out and did the garter stitch ridge earlier. This is how I intended it to look!

Result in my project
Patreon logo

Thanks to my Patreon supporters for bringing you this freebie! Creating quality patterns and tutorials is a lot of work and resource-intensive. However, I find it important to give you free content like this tutorial. Thanks to the generous support of my Patreon supporters, I can make it happen. Thank you, patrons! Click here to join, or click here to read more about La Visch Designs on Patreon.

tutorial – in between tinking and frogging Read More »