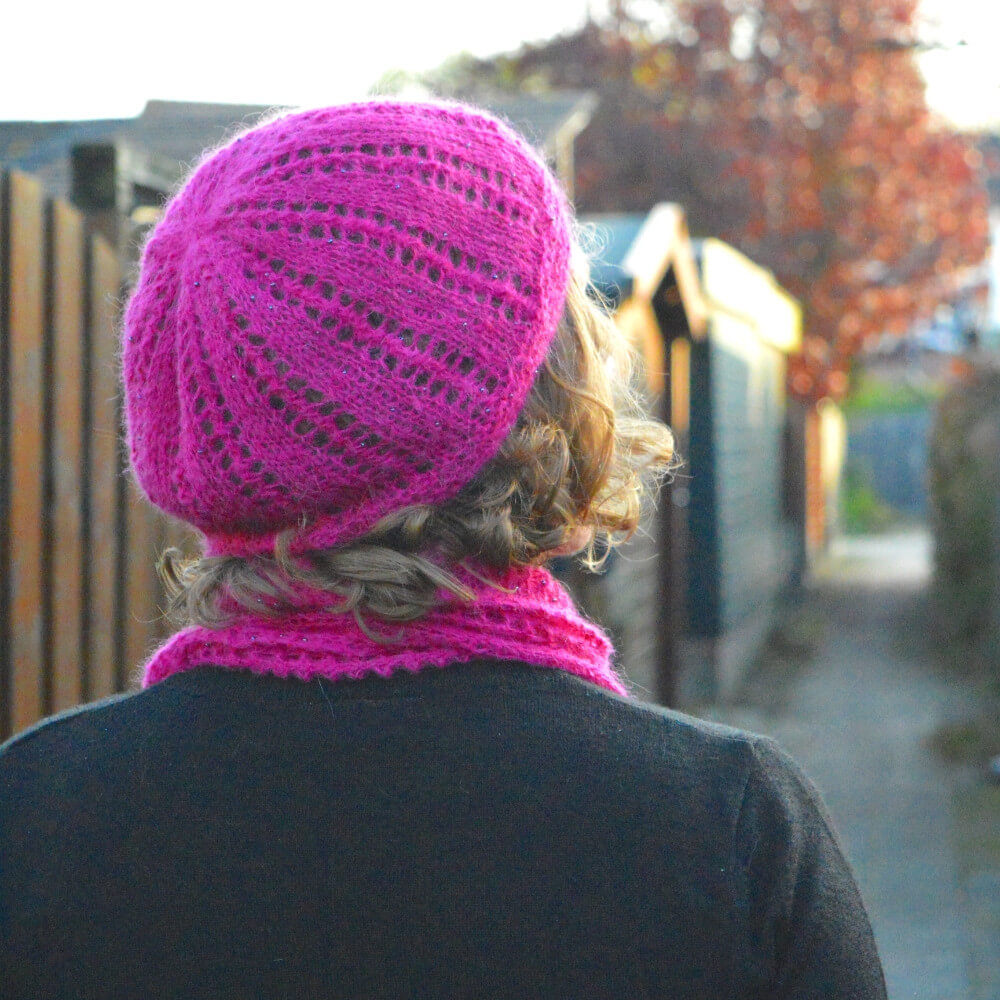
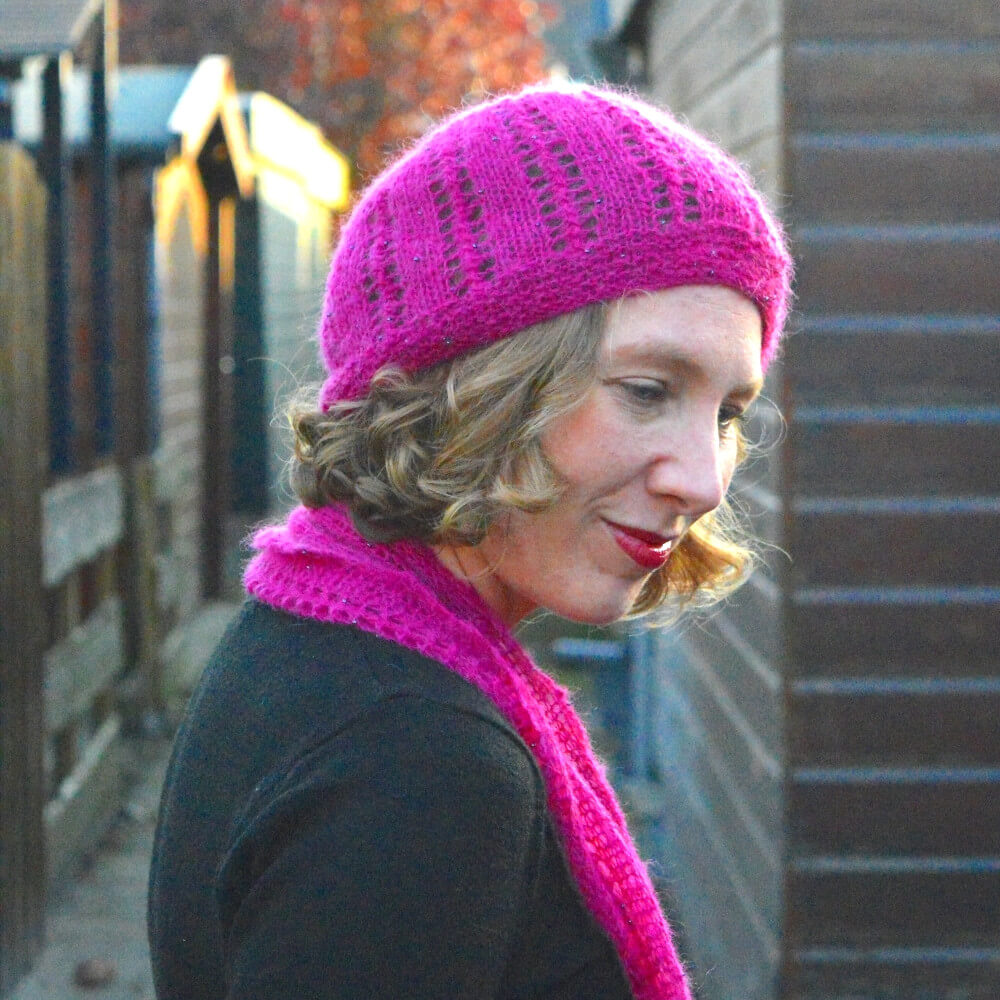
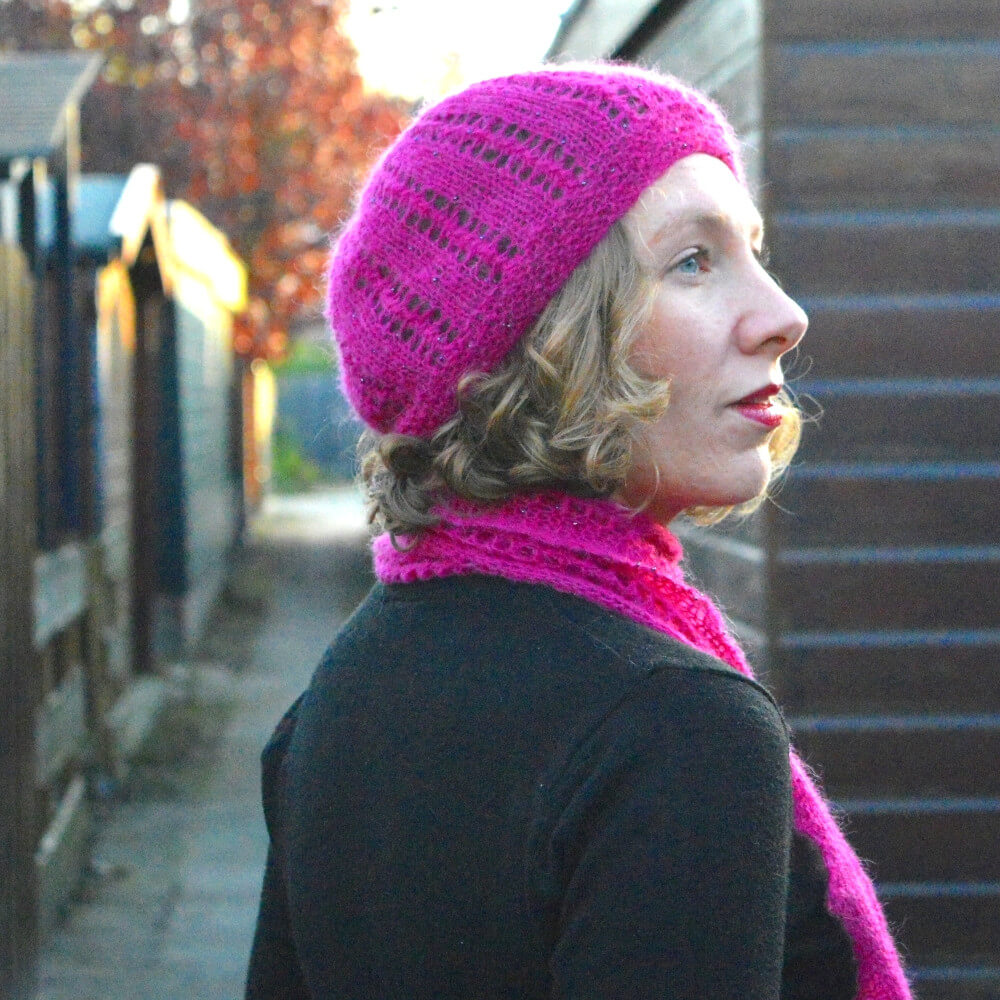
The Zoel Hat is a very soft and delicate hat knit using lace weight mohair yarn. It is a great pattern to get familiar with using this type of yarn. Because of the simple two-row lace, this pattern not only lets the yarn shine but also makes for a wonderful portable project.
Pair it with the Zoel Scarf to warm up a cold day in autumn or winter.
Pay what you want: (minimum €4.90)
€
Skills required
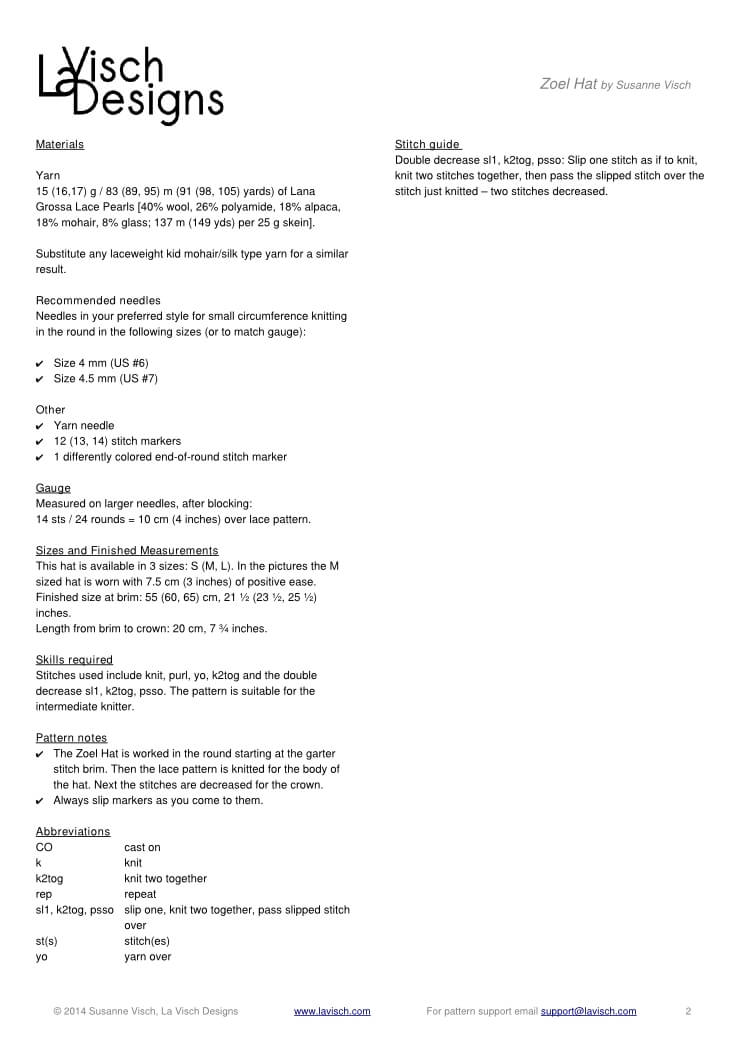
This hat is knit in the round. Stitches used include knit, purl, yo, k2tog and the double decrease sl1-k2tog-psso. The pattern is suitable for the intermediate knitter.
Sizes and Finished Measurements
The Zoel hat is available in 3 sizes: S (M, L). In the pictures, the M sized hat is worn with 7.5 cm (3 inches) of positive ease. Finished size at brim: 55 (60, 65) cm, 21 1⁄2 (23 1⁄2, 25 1⁄2) inches. Length from brim to crown: 20 cm, 7 3⁄4 inches.
Pattern details
Bottom-up
Written for gauge of approx. 14 sts / 24 rounds = 10 cm (4 inches) over lace pattern
Pattern languages included: English and Dutch (Dit patroon omvat zowel een Nederlandse als een Engelse versie)
Digital PDF has 2 pages (A4 size)
Materials
15 (16,17) g / 83 (89, 95) m (91 (98, 105) yards) of Lana Grossa Lace Pearls [40% wool, 26% polyamide, 18% alpaca, 18% mohair, 8% glass; 137 m (149 yds) per 25 g skein]. Substitute any lace weight kid mohair/silk type yarn for a similar result.
Needles in your preferred style for small circumference knitting in the round in the following sizes (or to match gauge): Size 4 mm (US #6) and size 4.5 mm (US #7)
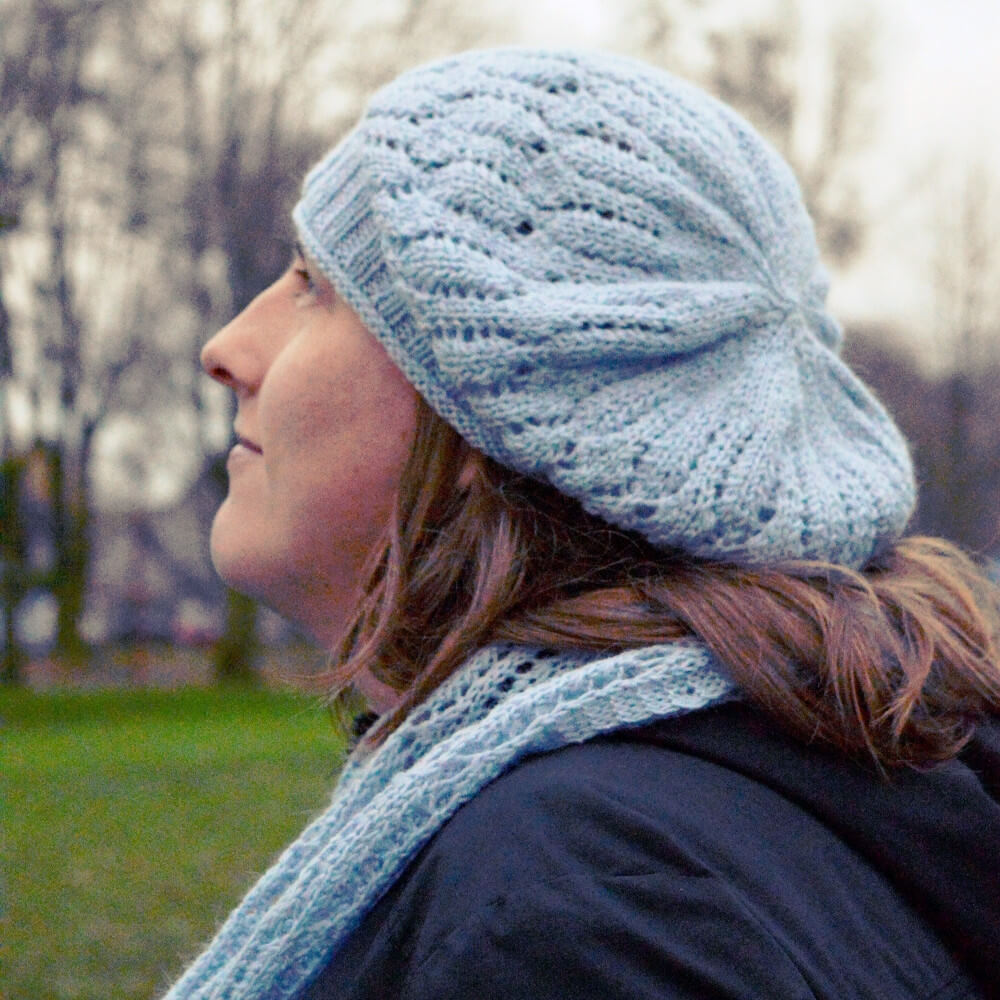
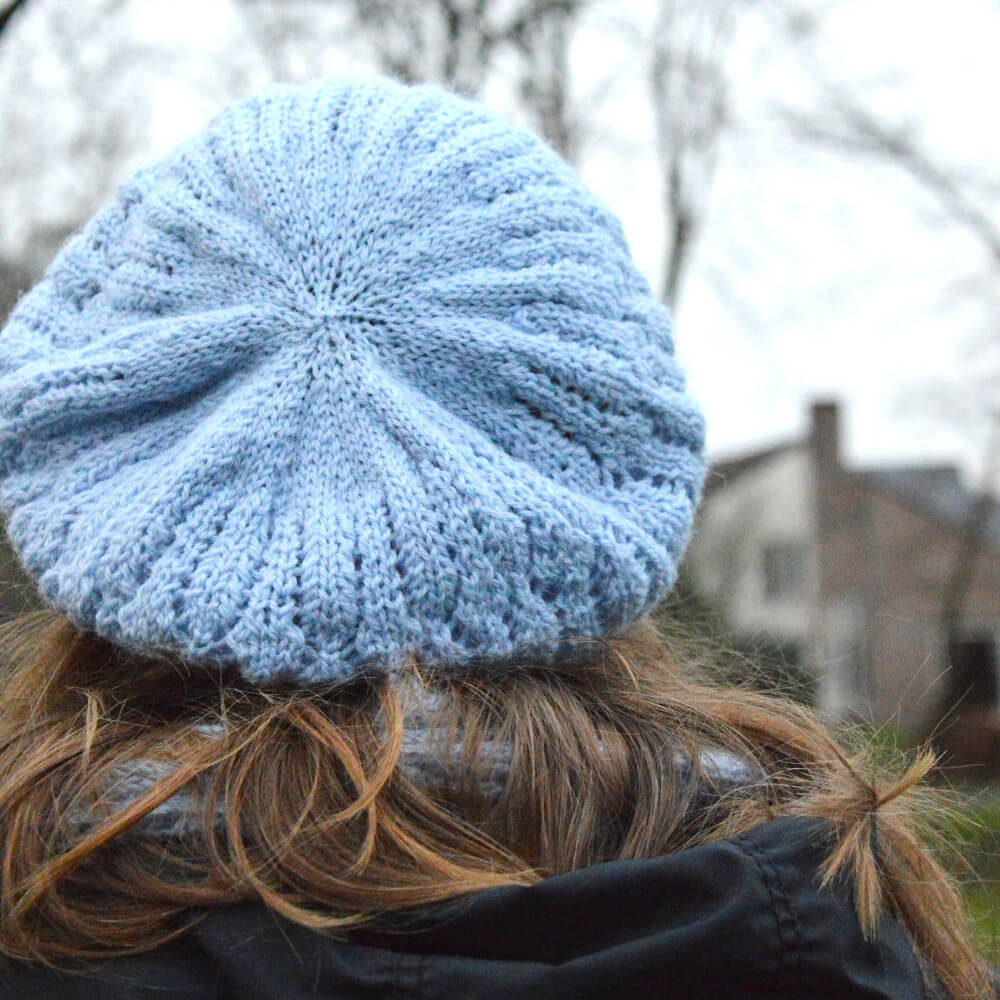
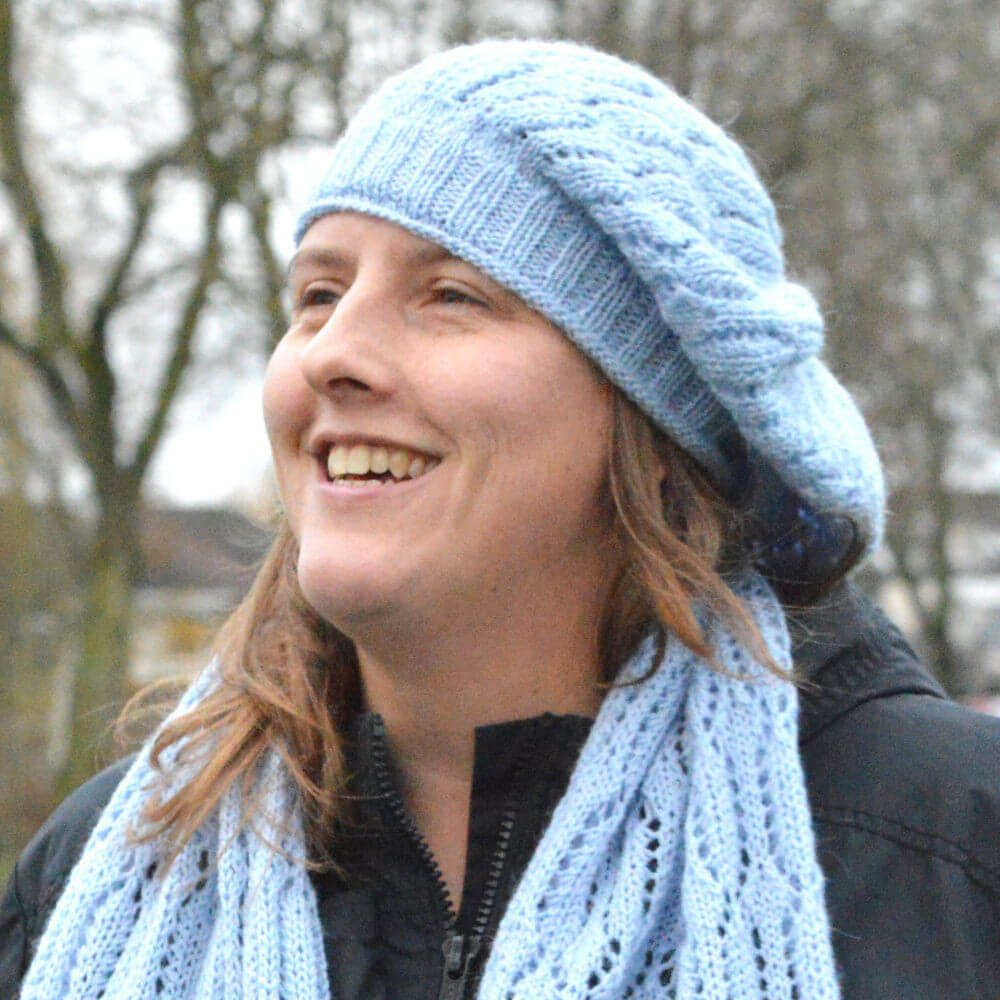
The IJskristal Slouchy Hat is a shapely tam which combines a simple and elegant lace repeat pattern with a wonderful amount of slouch.
Worked in the round from the bottom up, this pattern is available in two sizes. With both written and charted directions for the lace, this hat knits up like a dream. Pair it with the IJskristal Convertible Cowl/Scarf for a lovely coordinating set.
Pay what you want: (minimum €4.90)
€
Skills required
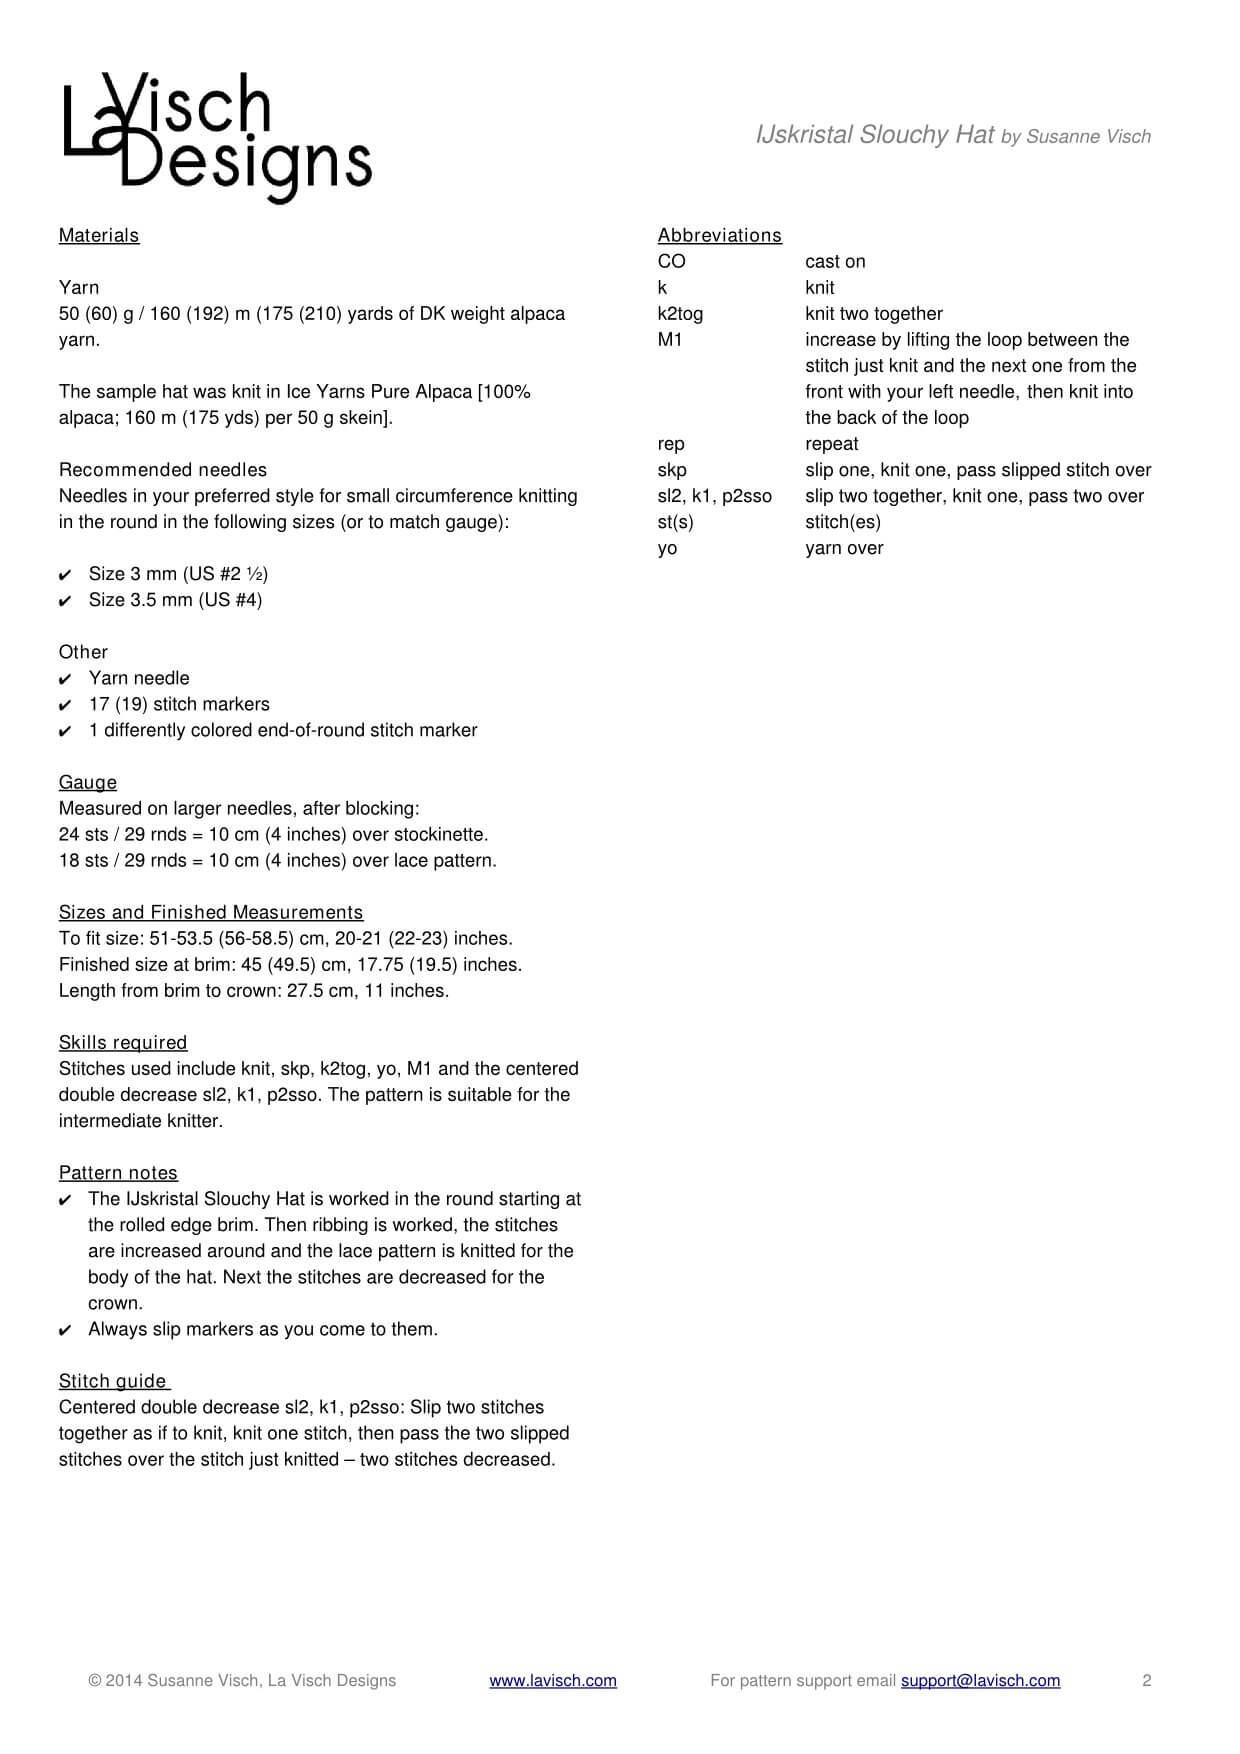
The IJskristal Slouchy Hat is worked in the round starting at the rolled edge brim. Stitches used include knit, skp, k2tog, yo, M1 and the centered double decrease sl2-k1-p2sso. The pattern is suitable for the intermediate knitter.
Sizes and Finished Measurements
To fit size: 51-53.5 (56-58.5) cm, 20-21 (22-23) inches. Finished size at brim: 45 (49.5) cm, 17.75 (19.5) inches. Length from brim to crown: 27.5 cm, 11 inches.
Pattern details
Bottom-up
Written for gauge of approx. 24 sts / 29 rounds = 10 cm (4 inches) over stockinette
Pattern languages included: English and Dutch (Dit patroon omvat zowel een Nederlandse als een Engelse versie)
Digital PDF has 3 pages (A4 size)
Materials
50 (60) g / 160 (192) m (175 (210) yards of DK weight alpaca yarn. The sample hat features Ice Yarns Pure Alpaca (100% Alpaca; 160 m (175 yds) / 50 g). Substitute for an alpaca yarn of comparable weight for a similar result.
Needles in your preferred style for small circumference knitting in the round in the following sizes (or to match gauge): Size 3 mm (US #2 ½) and size 3.5 mm (US #4)
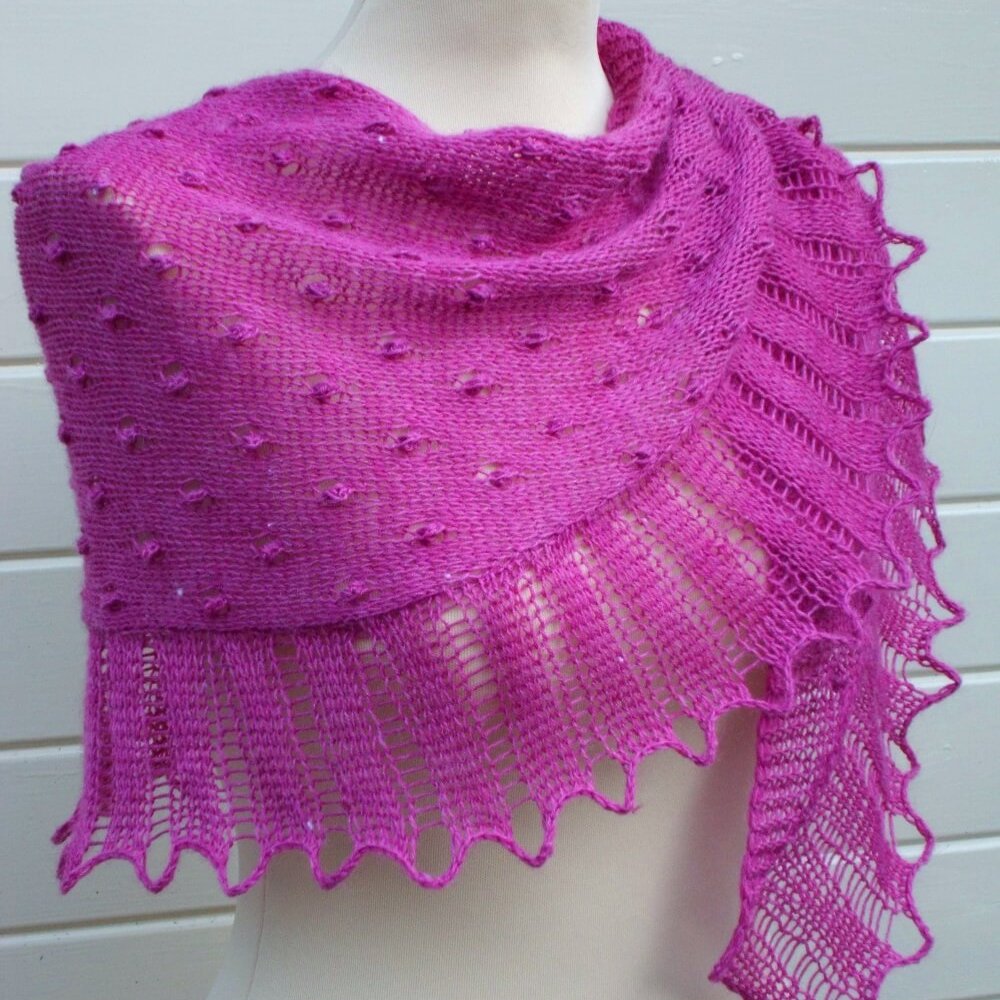
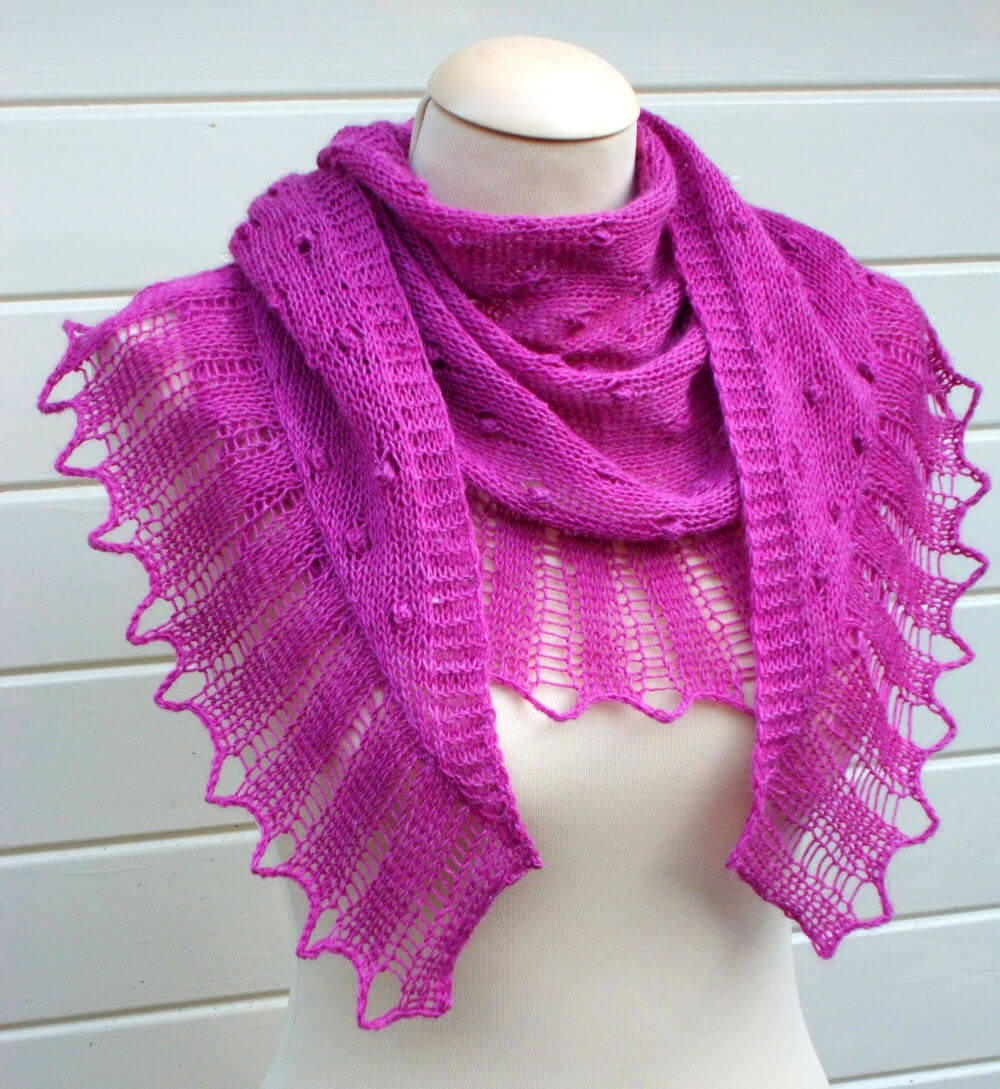
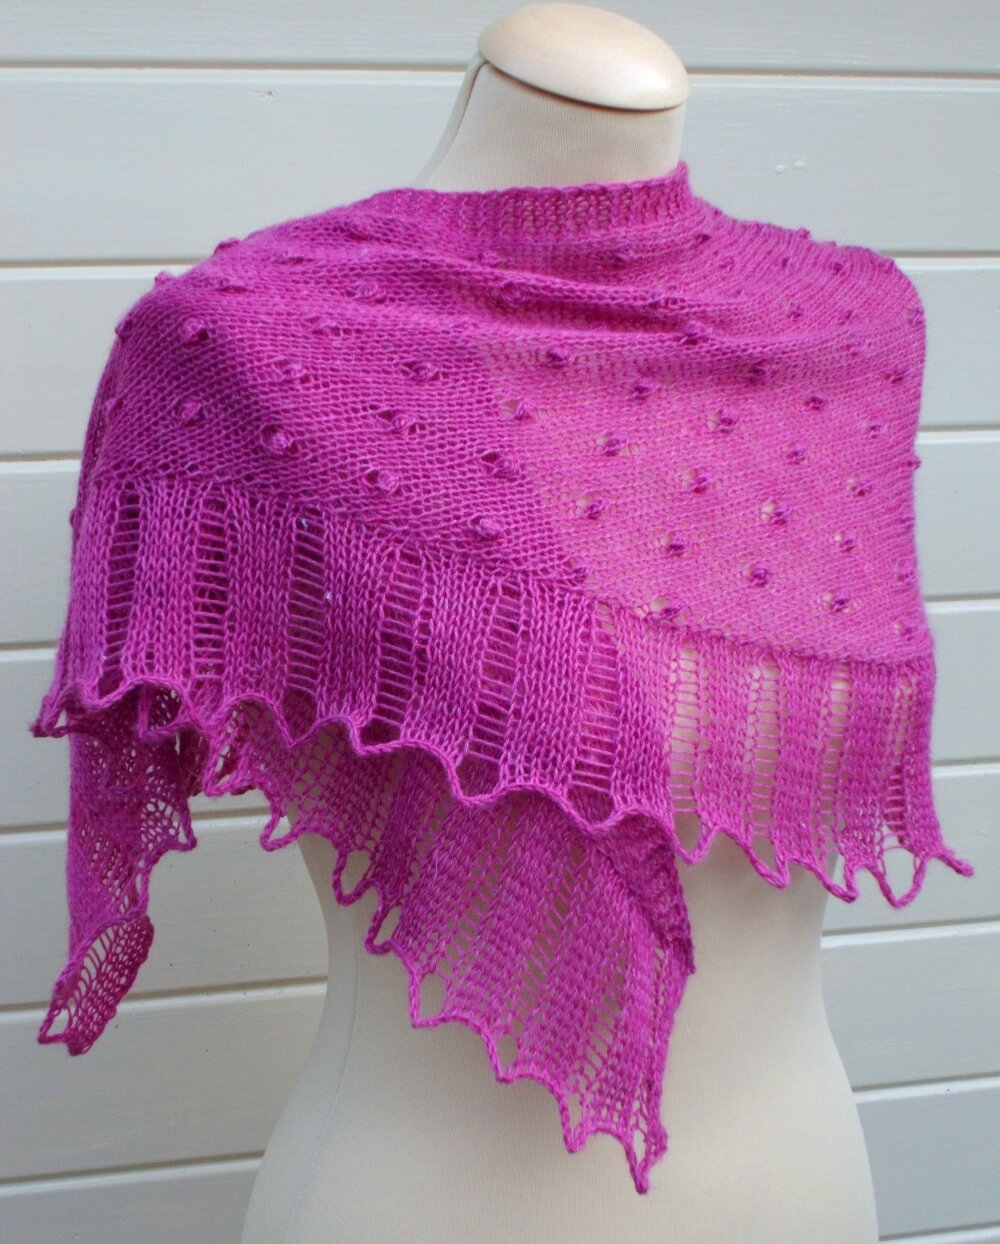
Inspired by the lovely texture and color of almost-ripe moerbei or mulberry fruit, the Moerbei shawl is juicy and sweet and exactly what you need.
Knitted sideways from tip to tip with only 100 g or 420 m (460 yds) of fingering weight yarn, it’s the perfect project for that special skein of yarn. This shawl features both an appealing textured body achieved by working bobbles, as well as a delicate looking and easy to work border. Once the body of the shawl is complete, stitches are picked up for the border and dropped to create the ruffle effect.
Pay what you want: (minimum €6.50)
€
Skills required
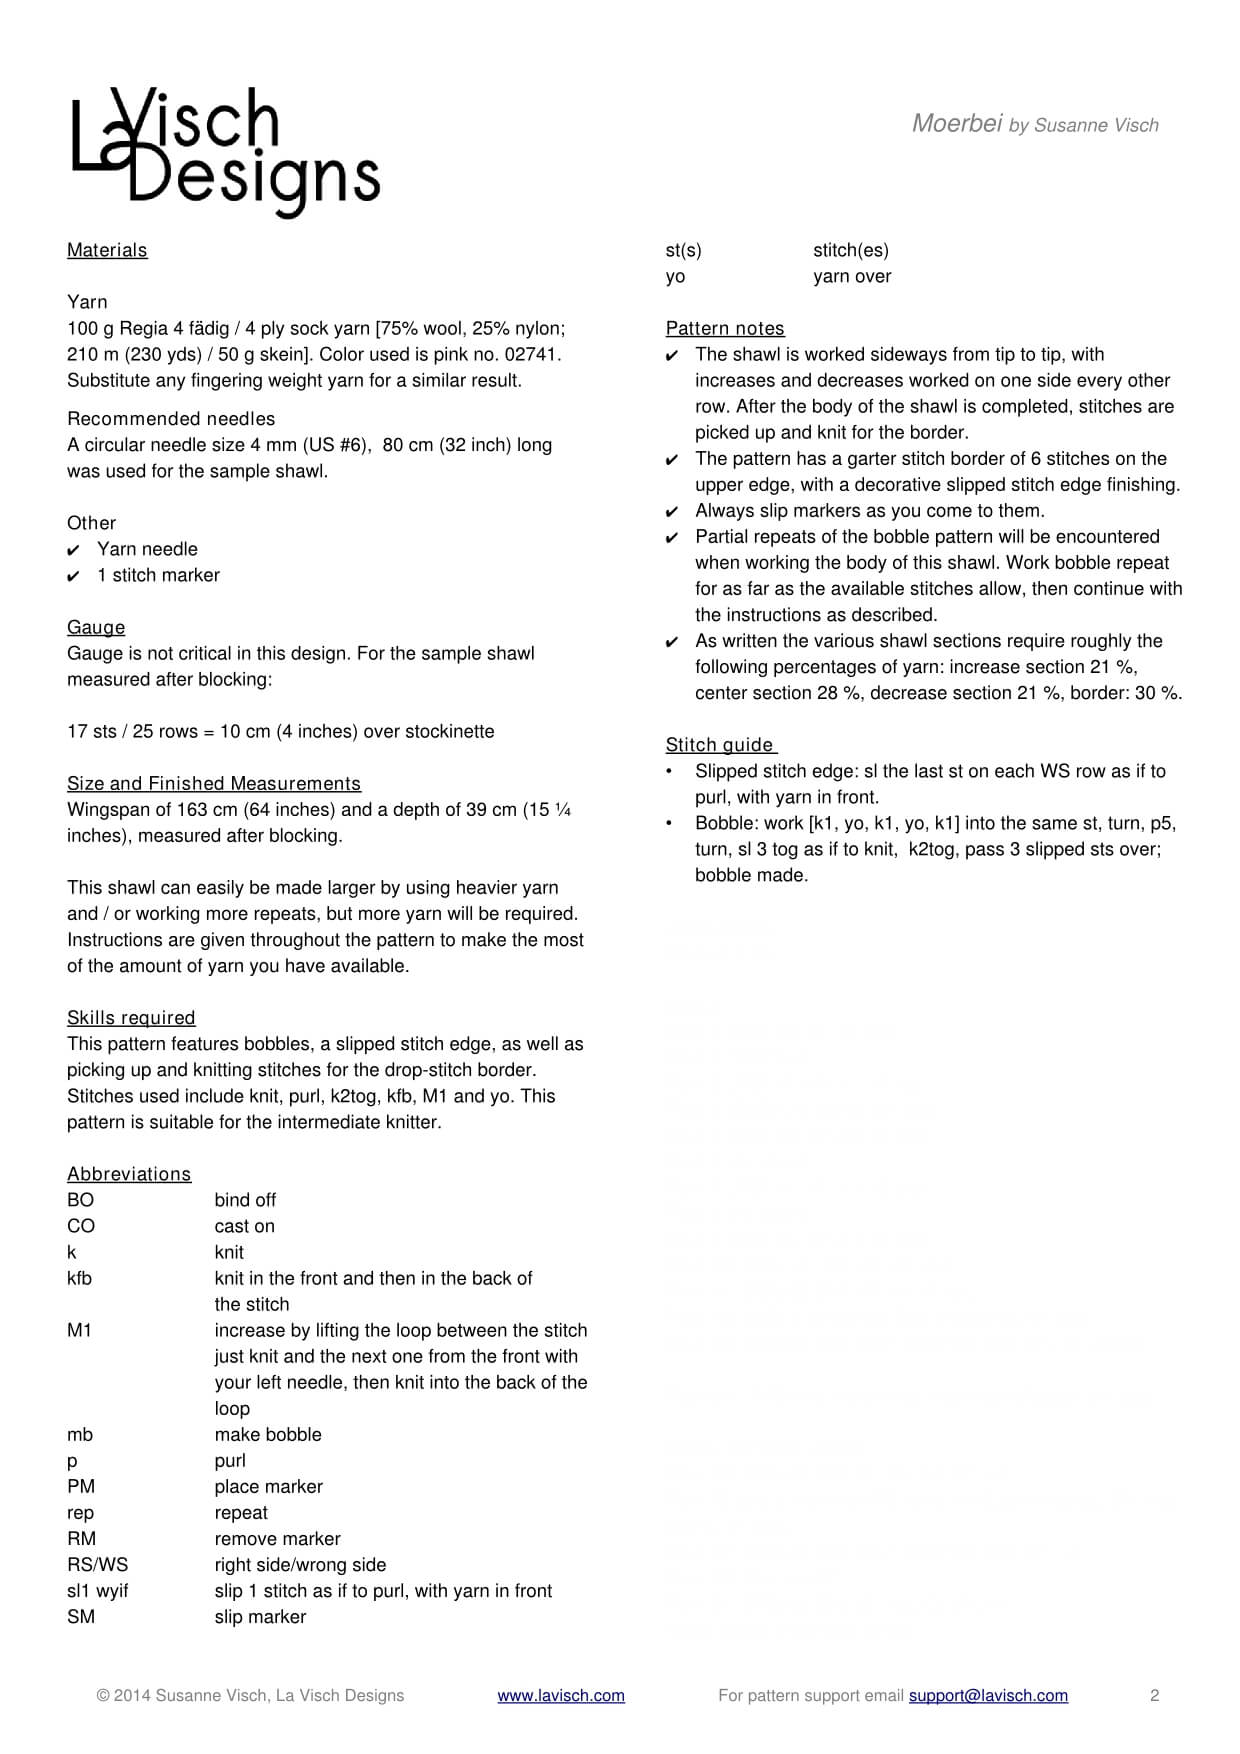
This pattern features bobbles, a slipped stitch edge, as well as picking up and knitting stitches for the drop-stitch border. Stitches used include knit, purl, k2tog, kfb, M1 and yo. This pattern is suitable for the intermediate knitter.
Pattern details
Top-down
One size – easily adjustable
Written for gauge of approx. 17 sts / 25 rows = 10 cm (4 inches) over stockinette
Pattern languages included: English and Dutch (Dit patroon omvat zowel een Nederlandse als een Engelse versie)
Digital PDF has 3 pages (A4 size)
Materials for Moerbei
420 m (460 yds) / 100 g fingering weight yarn
A circular needle size 4 mm (US #6), 80 cm (32 inches) long.
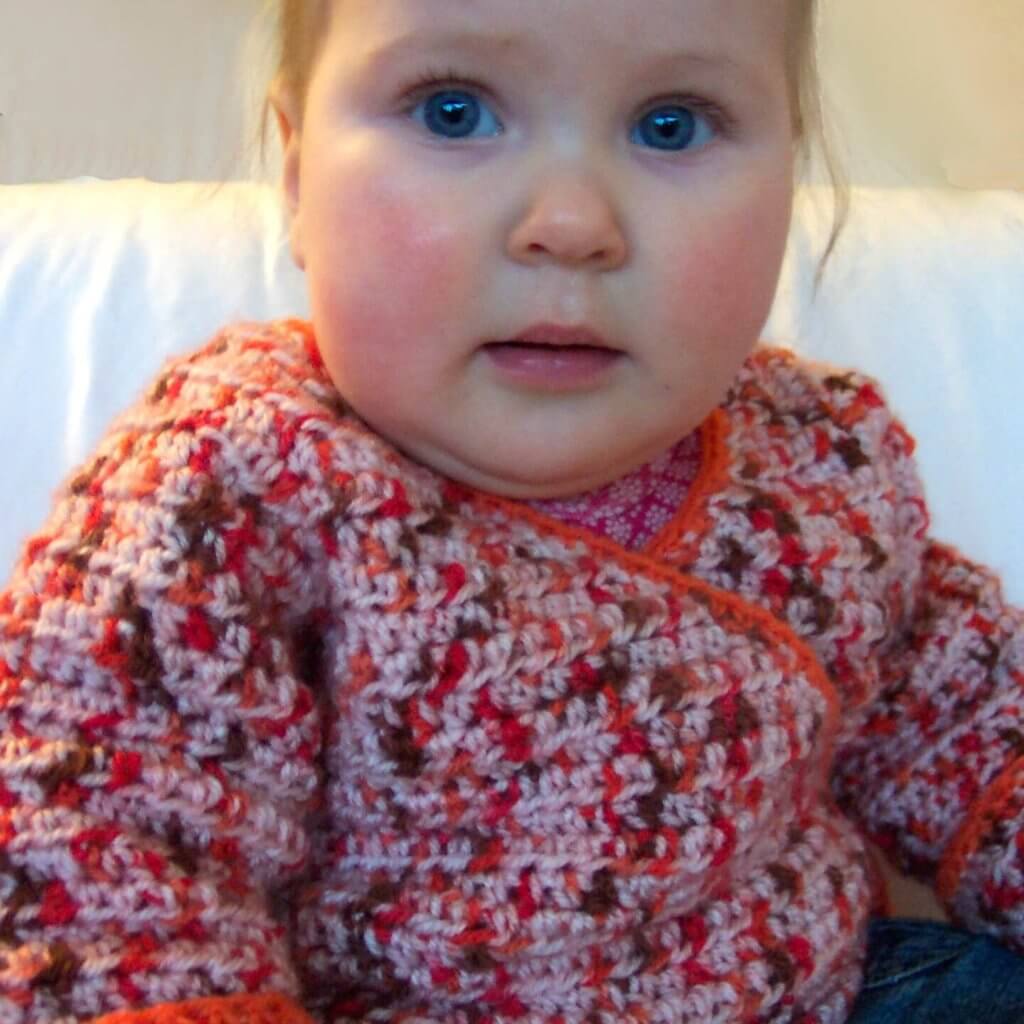
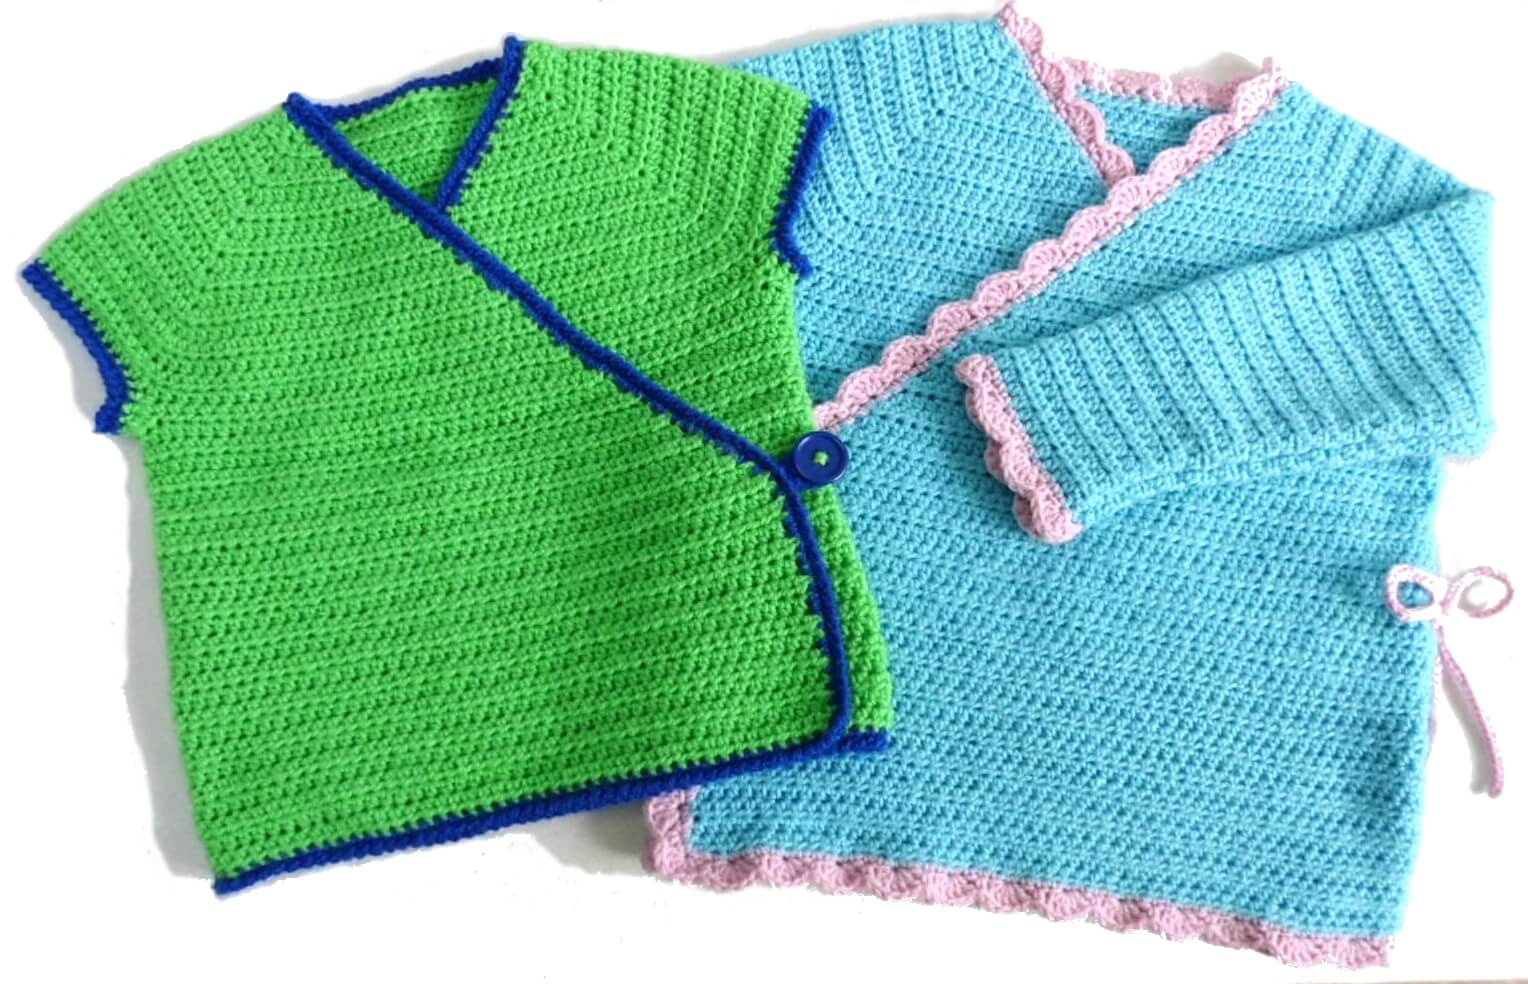
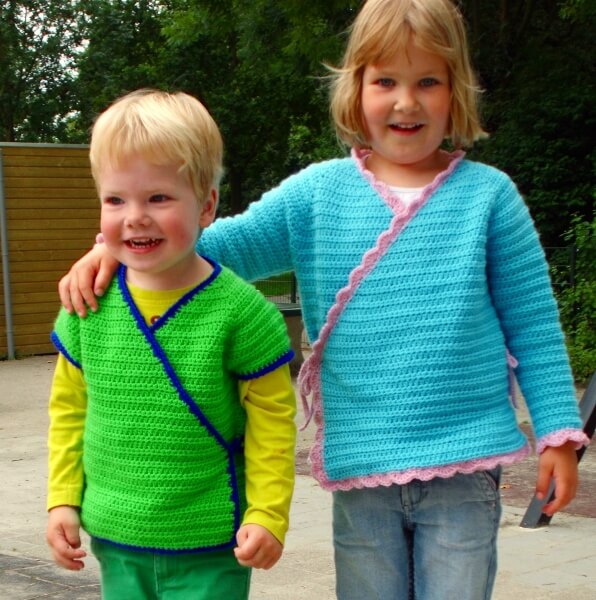
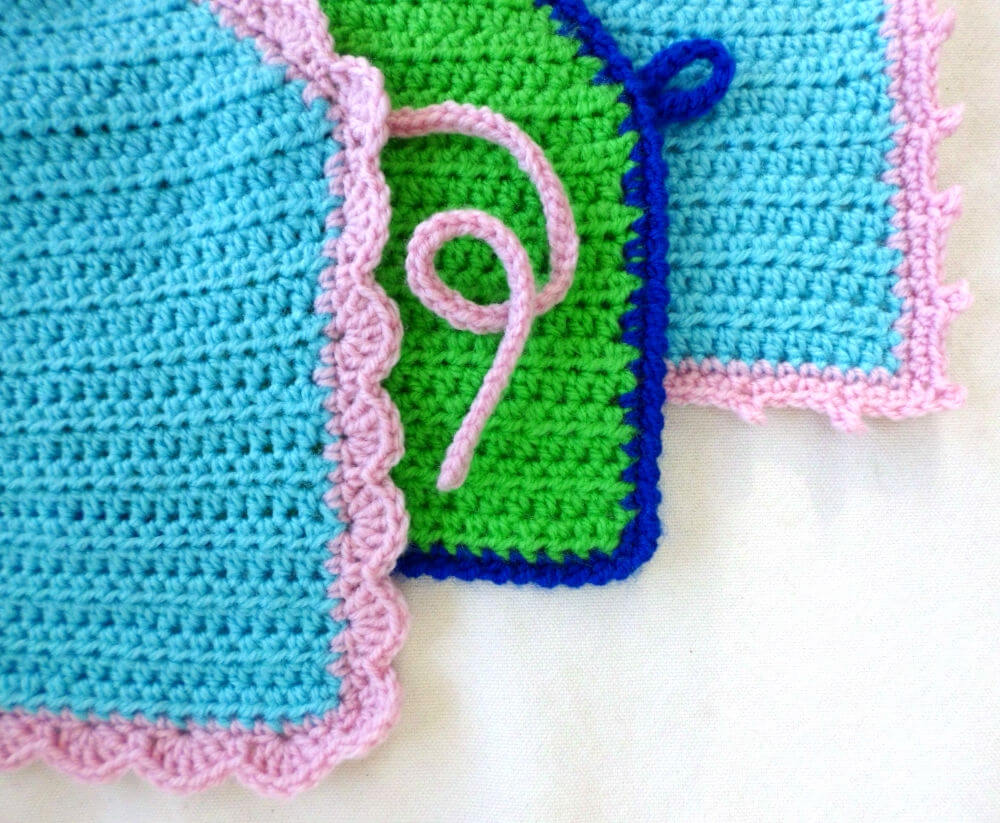
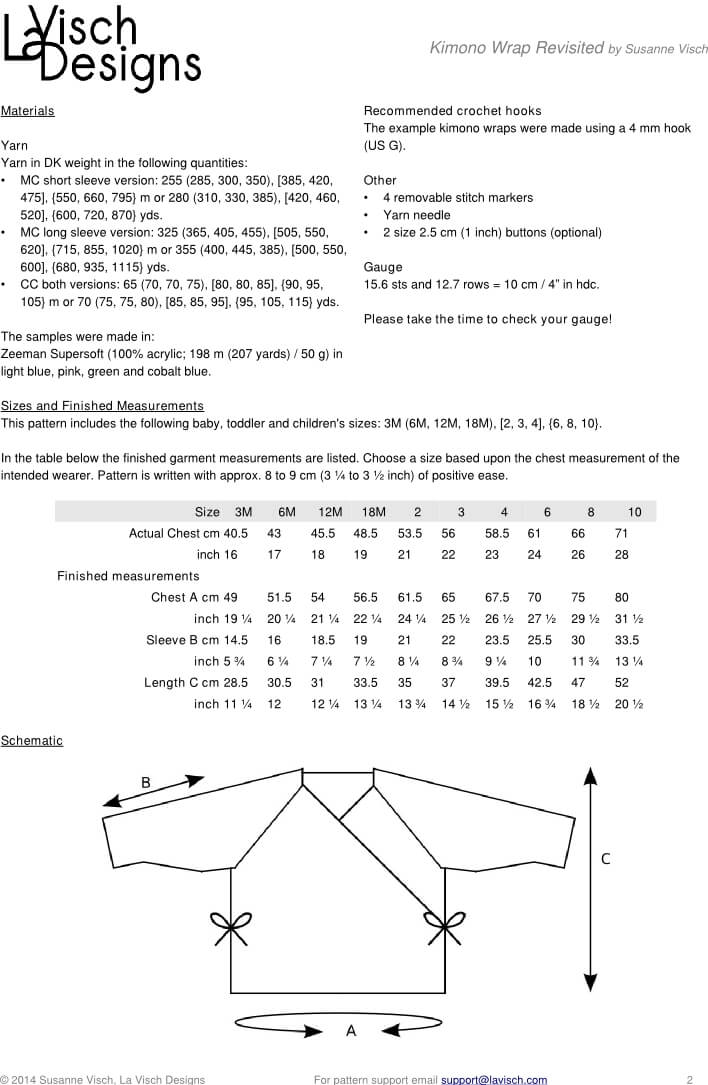
Kimono Wrap Revisited: a highly customizable crochet wrap pattern with sizes ranging from 3 months to 10 years and multiple options for finishing and closures. Make it in a camouflage variegated yarn or make a very girly version in pink with a picot or shell edging. Anything is possible!
This kimono wrap is worked back and forth from the top down in one piece, with either single crochet, reverse single crochet, picot or shell neck and hem finishing. You can add cute ties, or loops and buttons, to fasten. You can make it sleeveless, or with long sleeves.
This pattern is written in American English crochet terminology.
Pay what you want: (minimum €7.10)
€
Sizing
Kimono Wrap Revisited includes the following baby, toddler and children’s sizes: 3M (6M, 12M, 18M), 2, 3, 4, {6, 8, 10}. The pattern includes approx. 8 to 9 cm (3 ¼ to 3 ½ inches) of positive ease.
Difficulty
Techniques used consist of half double crochet foundation row, hdc, hdc increases and hdc decreases. Because of this the pattern is suitable for the advanced beginner.
Pattern details
Top-down
Gauge: 15.6 stitches and 12.7 rows = 4 inches in hdc
Pattern languages included: English and Dutch (Dit patroon omvat zowel een Nederlandse als een Engelse versie)
Digital PDF has 4 pages (A4 size)
Yarn
Yarn in DK weight in the following quantities:
MC short sleeve version: 255 (285, 300, 350), 385, 420, 475, {550, 660, 795} m or 280 (310, 330, 385), 420, 460, 520, {600, 720, 870} yds.
MC long sleeve version: 325 (365, 405, 455), 505, 550, 620, {715, 855, 1020} m or 355 (400, 445, 385), 500, 550, 600, {680, 935, 1115} yds.
CC both versions: 65 (70, 70, 75), 80, 80, 85, {90, 95, 105} m or 70 (75, 75, 80), 85, 85, 95, {95, 105, 115} yds.
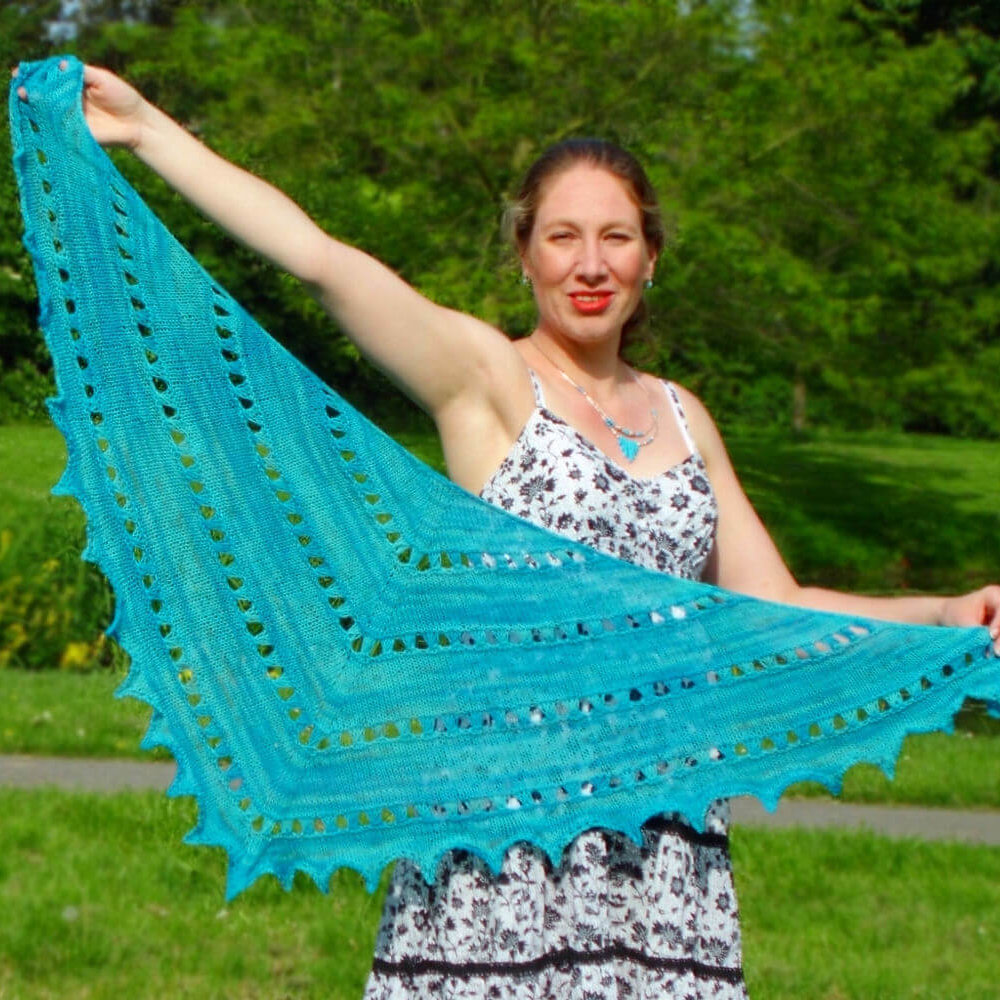
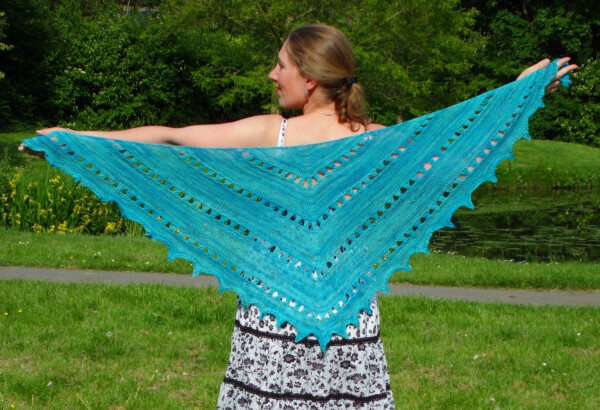
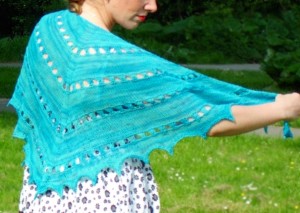
Sometimes when I think of summer, I get this picture of a turquoise sea, rolling gently over a white sandy beach. Imagine the heat of the sun and the cool breeze carrying the scent of salt. This image of summer bliss is what inspired me to design the Zomer Zilt shawl, which is just right to throw on when the sun goes down and the air becomes a tad chilly. Knitted from the top down, with only 100 g of fingering weight yarn, it’s the perfect summer project.
This design features broomstick lace, so called because it is similar to lace created with a broomstick and crochet hook. It is worked over two rows: on the first row, the yarn is wrapped twice around the needle between each knit stitch. On the next row, the wraps are dropped to create elongated stitches, which are worked in groups of four.
Pay what you want: (minimum €6.50)
€
Skills required
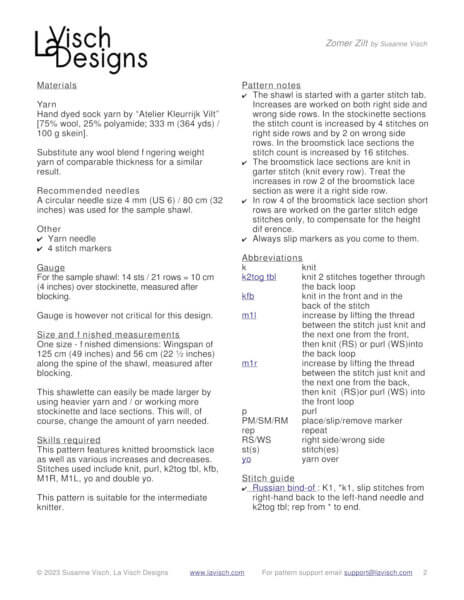
Zomer Zilt features knitted broomstick lace as well as various increases and decreases. Stitches used include knit, purl, k2tog tbl, kfb, M1R, M1L, yo and double yo. This pattern is suitable for the intermediate knitter.
Pattern details
Top-down
No sewing
One size – easily adjustable
Pattern languages included: English, German and Dutch (Dit patroon omvat zowel een Nederlandse, Duitse als een Engelse versie)
Digital PDF has 4 pages (letter size) for the English version (updated pattern format per August 2023), and 3 pages (A4 size) for the other versions.
Materials
100 g fingering (sock) weight yarn. Yarn used in sample: Hand dyed sock yarn by “Atelier Kleurrijk Vilt” [75% wool, 25% polyamide; 333 m (364 yds) / 100 g skein]. Substitute any fingering weight yarn for a similar result.
Circular needle size 4 mm (US 6), 80 cm (32 inches)
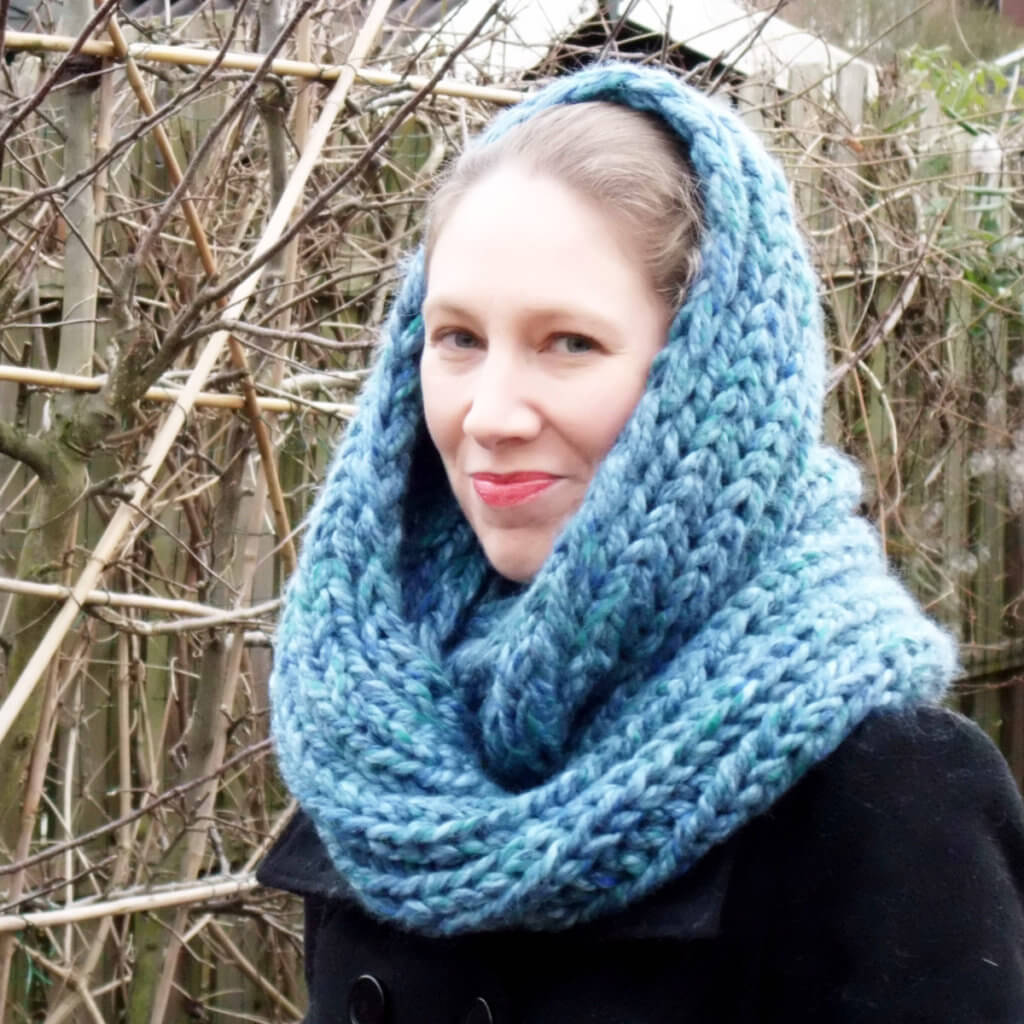
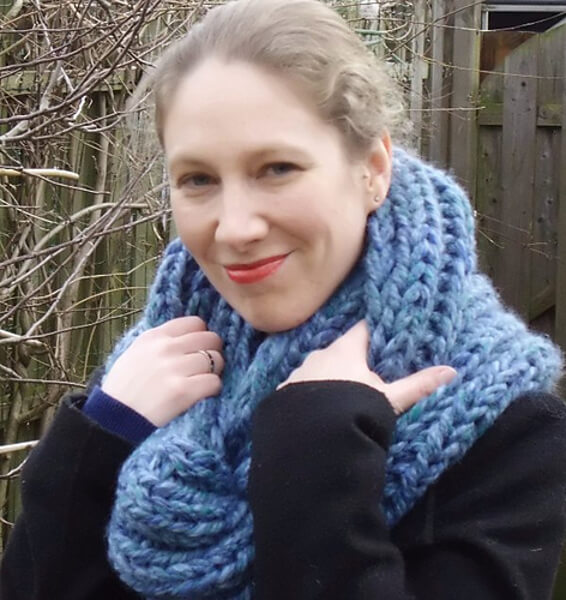
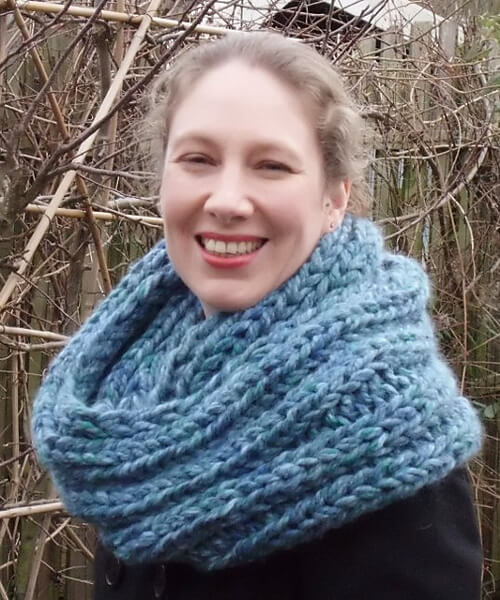
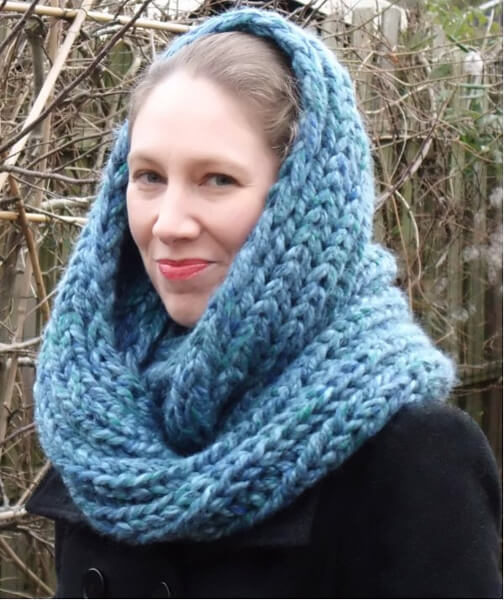
Sometimes you just want to get warm and make a statement. With the Frost Giant Cowl, you can achieve both. The cowl is worked flat and has two finishing options, choose the one you feel most comfortable with. The finishing options consist of either plain seaming or a three-needle-bind-off.
Materials
Yarn The sample cowl was knit using 270 m (297 yards) / 450 g Wibra Myrna [80% acrylic, 20% wool; 60 m (66 yds) per 100 g skein] held double. Substitute any (extra) bulky weight yarn for a similar result. Using a thinner yarn will result in a less humongous cowl.
Recommended needles Needles in your preferred style in the following sizes (or to match gauge):
Size 14 mm (US #18)
1 extra needle in size 14 mm (US #18) or slightly smaller (only needed with the three-needle bind-off finishing option)
Adjust needle size appropriately when using a less bulky yarn for a smaller cowl.
Other
Yarn needle
Waste yarn (optional) – only needed with the three-needle bind- off finishing option, worsted or aran weight yarn held double or triple can be used
Gauge
Gauge is not critical in this design. For the sample cowl: 5.5 sts / 8 rows = 10 cm (4 inches) measured over 2×2 rib.
Sizes and Finished Measurements
27 cm (11 inch) wide (unstretched), 70 cm (27 ½ inch) long.
Skills required
The plain seaming finishing option in this pattern is suitable for the beginning knitter. The three-needle bind-off finishing option requires a provisional cast on. Because this is a more advanced knitting technique, this version is suitable for the intermediate knitter. Stitches used include knit, purl and slipping stitches.
Abbreviations
BO – bind off CO – cast on k – knit p – purl rep – repeat sl – slip st(s) – stitch(es) wyib – with yarn in back
Pattern notes
Yarn is held double throughout.
Always slip the first stitch of the row purl-wise with the yarn held to the back.
When you run out of yarn, a new skein will be attached by knitting a few stitches with both the new and old yarn held double. The ends can be woven in later.
Instructions
Seamed finishing option: CO 18 sts with the yarn held double. Row 1: Sl1wyib, k2, [p2, k2] 3 times, p3.
Three-needle bind-off finishing option: CO 18 sts with waste yarn held double or triple. Row 1: Knit. Switch to working yarn held double. Row 2: K3, [p2, k2] 3 times, p3.
Both finishing options: Next: Sl1wyib, k2, [p2, k2] 3 times, p3. Rep this row until length of piece is 148 cm (58 inches) or desired length.
Bind-off Seamed finishing option: BO using your BO of choice, for example, the knit bind-off.
Next: Hold the ends of the piece together and use the yarn needle to sew both ends together and form a loop. Be careful not to twist the loop before seaming the ends together.
Three-needle bind-off finishing option: Transfer the stitches from the waste yarn to the extra needle, be careful not to twist the loop when holding the beginning and end of the piece together.
Step 1: Hold both needles holding sts next to each other. Step 2: With the third needle, knit each st through both the first st on the needle closest to you as well as through the first st on the back needle at the same time. Wrap as for a knit st and complete the stitch as usual. Step 3: Rep step 2 one time. Step 4: There are now 2 sts on your right hand needle. Lift the first st worked over the second st worked, using the tip of your left hand needle. Step 5: Rep steps 3-4 until all sts are BO.
Tip: Use a crochet hook to weave yarn ends in, when the yarn is to thick to use regular yarn needles. Just grab the yarn with the hook, pull it through the fabric and repeat.
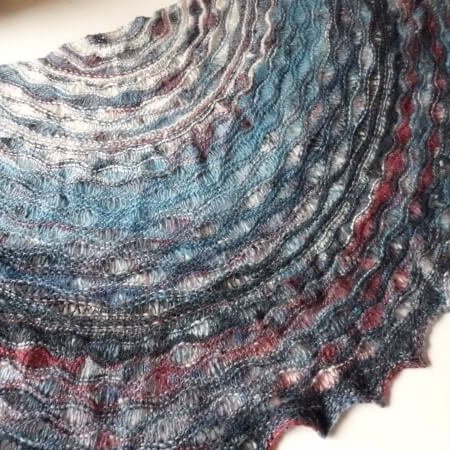
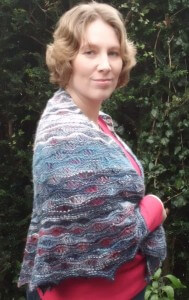
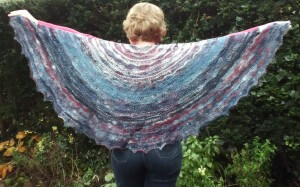
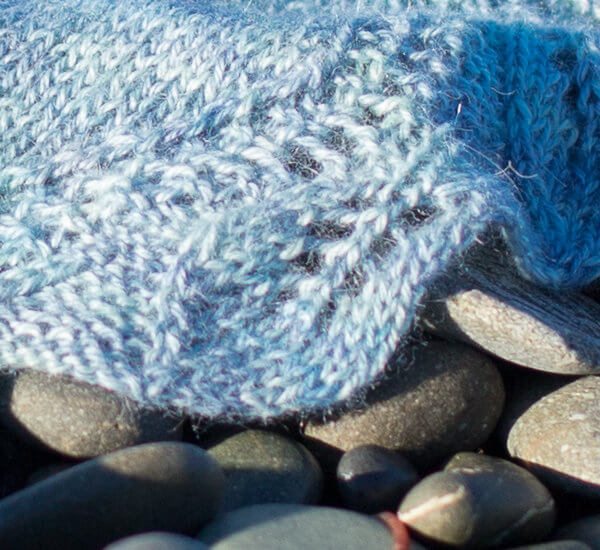
Stormy Seas is a half circle shawl, featuring Sea Foam lace. It shows off variegated and self striping yarns with long to medium lengths of color wonderfully. Combined with the all-over garter stitch, it gives an airy, textured, reversible fabric. While my version is in a hand spun yarn, it can, of course, also be knit with a commercial yarn. Make the shawl as small or large as you like, just knit until your yarn runs out!
The instructions for the lace are, of course, both charted and fully written out.
Pay what you want: (minimum €6.50)
€
Difficulty level
This pattern features the Sea Foam stitch, which requires multiple yarn overs, that are dropped on the following row. This takes some getting used to, but is quite easy to execute. Stitches used include knit, kfb, k2tog tbl, yo and multiple yo’s. This pattern is suitable for the beginning to intermediate lace knitter
The Sea Foam lace pattern is both charted and written out
One size (wingspan of 148 cm (58 inches) measured from tip to tip)– easily adjustable
Pattern languages included: English and Dutch (Dit patroon omvat zowel een Nederlandse als een Engelse versie)
Digital PDF has 4 pages (letter size)
Materials
420 – 630 m (460 – 690 yds) of fingering or sport weight yarn. The sample shawl features a hand spun yarn.
Size 4.5 mm (US 7) / 100 cm (40 inches) circular needles were used for the sample shawl. Use needles appropriate for the yarn chosen.
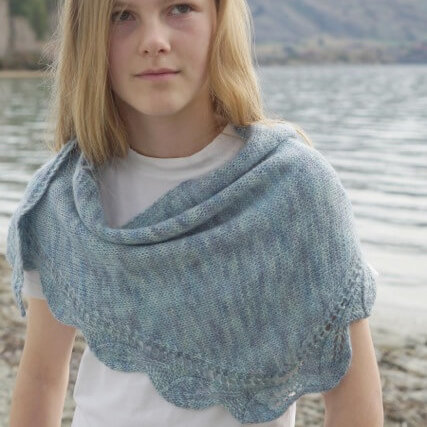
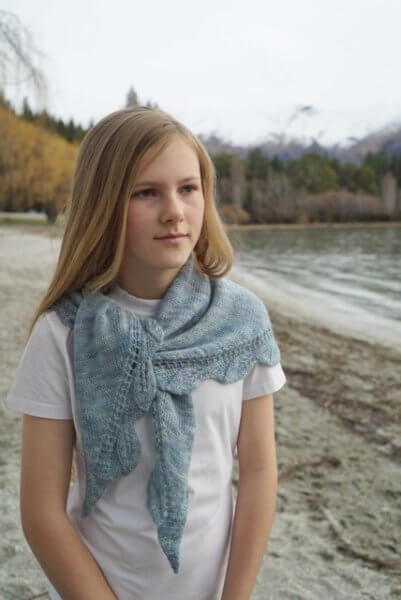
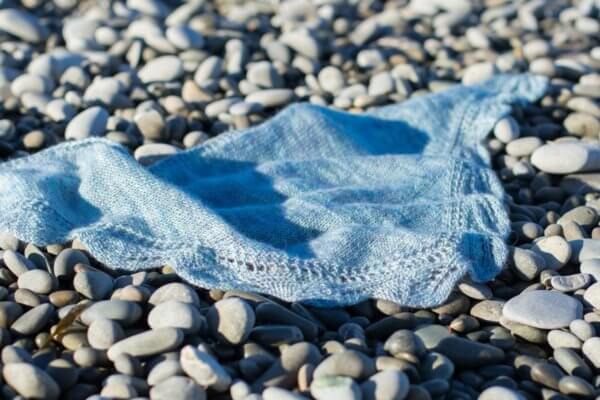
The Autumn Leaves Shawl features a simple stockinette body knit sideways in a shallow triangle shape. The leafy border is knitted on at the same time. Made in a loose gauge, Autumn Leaves is an airy layering piece, just enough for when there’s a chill in the air.
This design works great with that special skein of fingering weight yarn. The Autumn Leaves Shawl can, however, be made in any size, using any weight of yarn. Just knit until you have reached half of your yarn or half the size you want the shawl or shawlette to be. Since the body is in plain stockinette this pattern is also very suited to use with hand dyed yarns. Instructions for the lace border are both written and charted.
Materials
Yarn 360 m (393 yds) / 100 g Knitcola Alpaca Hand-dyed Yarn [100 % alpaca] in light blue. Substitute any fingering weight yarn in a solid or semi-solid color for a similar result.
Recommended needles Size 4.5 mm (US 7), 80 cm (32 inches) circular needles were used for the sample shawl.
Other
Yarn needle
2 stitch markers
Gauge
Gauge is not critical in this design. For the sample shawl measured after blocking: 14 sts / 22 rows = 10 cm (4 inches) over stockinette.
Size and finished measurements
Finished dimensions of the sample shawl: 140 cm (55 inches) along the upper edge and a depth of 32 cm (12 ½ inches), measured after blocking. The sample shawl has a total of 16 leaves.
This shawl can easily be made larger by using heavier yarn and/or working more repeats. This will, of course, increase the amount of yarn needed.
Skills required
This pattern features lace knitted on both right and wrong side rows. Stitches used include knit, purl, k2tog, p2tog, kfb, m1, skp, yo, and sl2-k-p2sso. Therefore, this pattern is suitable for the intermediate or lace knitter.
Abbreviations
BO – bind off CO – cast on k – knit k2tog – knit two together kfb – knit in the front and in the back of the stitch m1 – increase by lifting the loop between the stitch just knit and the next one from the front with your left needle, then knit into the back of the loop p – purl p2tog – purl two together PM – place marker rep – repeat RM – remove marker RS/WS – right side/wrong side skp – slip, knit, pass the slipped stitch over the knitted stitch sl2-k1-p2sso – slip two together, knit one, pass two stitches over (2 stitches decreased) sl1 wyif – slip 1 stitch as if to purl, with yarn in front SM – slip marker st(s) – stitch(es) yo – yarn over
Pattern notes
Work the Autumn Leaves shawl sideways from tip to tip, with increases and then decreases worked on one side every other row. The lace border is worked simultaneously.
The pattern has a garter stitch border of 4 stitches on the upper edge, with a decorative slipped stitch edge finishing.
Always slip markers as you come to them.
Instead of the skp decrease ssk can be used if desired.
Stitch guide
Slipped stitch edge: Slip the last stitch on each WS row as if to purl, with yarn in front.
Wrap and Turn (w&t): Bring your yarn to the front between the needles, slip the next stitch purl-wise, bring your yarn between the needles to the back again, slip the stitch back to the left needle, and turn work.
Rows 13-22: Rep row 11-12 five more times (13 sts).
Body – increase section
Both the written out and charted instructions for the leafy border can be found at the bottom of this page. Please note, stitch counts given here are only applicable to the body stitches.
Row 1 (RS): K4, SM, k1, m1, PM, work row 1 of Leafy border. (6 sts – 1 st increased in body) Row 2 (WS): Work row 2 of Leafy border, SM, p to marker, SM, k3, sl1 wyif. Row 3: K4, SM, k to 1 st before marker, M1, K1, SM, work row 3 of Leafy border. (7 sts – 1 st increased in body) Row 4: Work row 4 of Leafy border, SM, p to marker, SM, k3, sl1 wyif. Row 5: K4, SM, k to 1 st before marker, M1, K1, SM, work row 5 of Leafy border. (8 sts – 1 st increased in body) Row 6: Work row 6 of Leafy border, SM, p to marker, SM, k3, sl1 wyif.
Continue in this manner until all 18 rows of the border pattern have been worked. (14 sts in body)
Next: Repeat last 18 rows until 8 leaves or almost half of the yarn has been used. (77 sts in body)
Next: Rep rows 1-16 once again. (85 sts in body)
Tip: Weigh your project in between pattern repeats to get an idea the amount of yarn needed for each repeat. This way, a better estimate can be made whether another repeat is possible with your available amount of yarn.
Easing the border around the center point
Row 17: K4, SM, k to 1 st before marker, m1, K1, SM, work row 17 of Leafy border. (78 sts – 1 st increased in body) Row 18: Work row 18 of Leafy border, RM, w&t. Row 19: PM, work row 1 of Leafy border. Row 20: Work row 2 of Leafy border, SM, pick up and purl wrap together with corresponding st, p to marker, SM, k3, sl1 wyif.
Body – decrease section
Row 1 (RS): K4, SM, k to 2 sts before marker, k2tog, SM, work row 3 of Leafy border. (77 sts – 1 st decreased in body) Row 2 (WS): Work row 4 of Leafy border, SM, p to marker, SM, k3, sl1 wyif. Row 3: K4, SM, k to 2 sts before marker, k2tog, SM, work row 5 of Leafy border. (76 sts – 1 st decreased in body) Row 4: Work row 6 of Leafy border, SM, p to marker, SM, k3, sl1 wyif.
Continue in this manner until the same number of leaves as on the increase section have been completed (14 sts).
Next row (RS): K4, SM, k1, k2tog, k to end, removing marker. (13 sts – 1 st decreased in body) Next row (WS): P to marker, SM, k3, sl1 wyif. Rep these last 2 rows 9 more times, removing marker after final rep (4 sts).
Next row: K1, k2tog, k1. (3 sts) Next row: K2, sl1 wyif. Next row: K1, k2tog. (2 sts) Next row: K1, sl1 wyif. Next row: K2tog and fasten off.
Finishing
Finally, weave in ends and block your Autumn Leaves Shawl to shape.
Thanks to my Patreon supporters for bringing you this freebie! Creating quality patterns and tutorials is a lot of work and resource-intensive. However, I find it important to give you free content like this tutorial. Thanks to the generous support of my Patreon supporters, I can make it happen. Thank you, patrons! Click here to join, or click here to read more about La Visch Designs on Patreon.
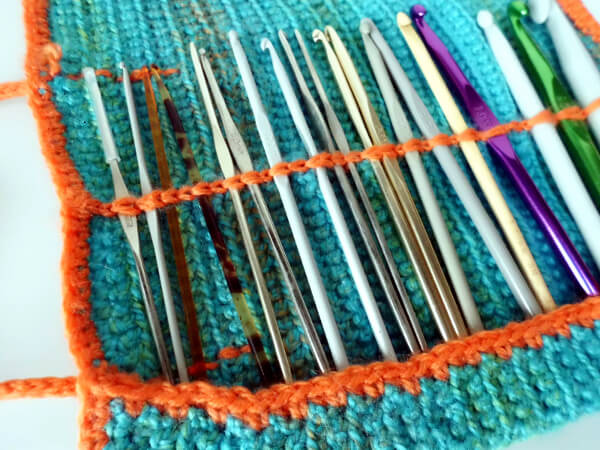
When I learned to crochet I soon found the need to store my rapidly increasing stash of crochet hooks. But where? Make it myself of course! Since I have hooks from very thin to very thick I wanted to have one in which I can easily adjust the size of the pockets. The pattern for this Roll it Up & Go crochet hook case is written more as a template instead of exact instructions.
This pattern is written in American English crochet terminology.
Difficulty
Techniques used consist of ch, sc and slst. Because of this, the pattern is suitable for the beginner.
Materials
Less than 1 skein of yarn of choice
Even less in yarn of the same weight in a contrasting color
Crochet hook size 3.5 mm (US # E)
Crochet hook size 4 mm (US # G).
Finished Size
Any size you want it to be!
Gauge
Depends on the size desired and yarn used.
Notes
The main body of this hook case consists of a rectangle shape worked in Sc in the front loops only to get a more thin and flexible fabric.
Instructions for the roll it up & go crochet hook case
The body of the hook case
Ch a length equal to the length of the longest hook you want to keep in the case + 10 cm (4 inch) for the pockets. Let’s call that amount of chains “A”. In my case A was equal to 51 sts. Make sure your A is an uneven number. Ch 1, turn.
Row 1: Sc in second ch from hook and in each ch across. Ch 1, turn. Work the sc in the single bump on the back of the chain for a finishing that will look the same on both ends of the rectangle.
Row 2: Sc (in front loops only!) in each sc for (A minus 3) / 2 sts, 1 sc in both loops of st, ch 1, skip 1 sc, 1 sc in both loops of st, sc in front loops only in each sc across, ch 1, turn
Repeat row 2 until you have twice the number of crochet hooks you want to keep in the case + 12. It is however always wise to make it bigger than you think you’ll possibly be needing. Fasten off.
Create the pocket
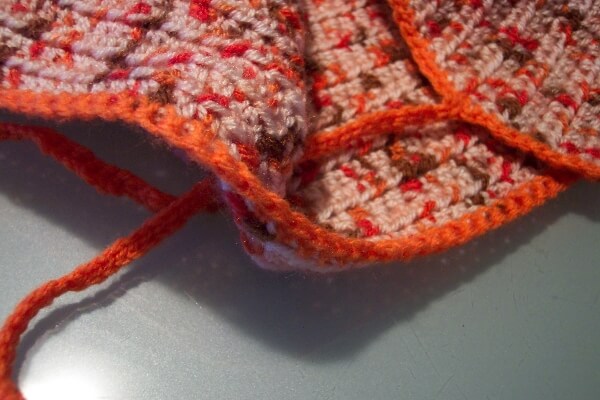
First, sc along one of the sides of the rectangle (perpendicular to the rows) with a contrasting color. I used orange. Then fasten off.
Next, fold up the side you just worked on perpendicular to the rows. Doing this will make a pocket, make sure the pocket is approx. 5 cm (2 inch). Fasten onto the crease with a slip stitch. Sc up the side of the pocket, making sure to crochet through both the upper and lower row. When you reach the end of the pocket, continue to sc up the side of the case, along the upper edge and down the other side. Then crochet both rows together again. Fasten off.
Holding the hooks in place
In the middle of the rectangle, the [ 1 sc in both loops of stitch, ch 1, skip 1 sc, 1 c in both loops of stitch] part created a line with “holes” in the fabric. These holes will be used to slip stitch the “holding” part of the hook case onto the rectangle. Up to 5 mm hooks, I use 1 st loop to hold the hook down. For bigger hooks skip 1 or even 2 holes and adjust the tension of your yarn to make a slip stitch loop big enough to accommodate the bigger hook. By using a contrasting color you can at any time in the future rework this part to fit more (or less) smaller or bigger hooks.
Hold your yarn at the back of your work (the outside of your crochet hook case). Push your hook into the work from the front to the back at the edge of the rectangle where column with the holes begins. Hook the yarn from behind your work and bring the new loop to the front. Be sure to hold on to the loose end of yarn!
Then, again push your hook through the fabric to the back, hook the yarn and bring it to the front of your work. This time bring your newly formed loop through the old one. Be careful not to pull the yarn too much or the fabric will pucker. When you reach the other side of the rectangle, fasten off.
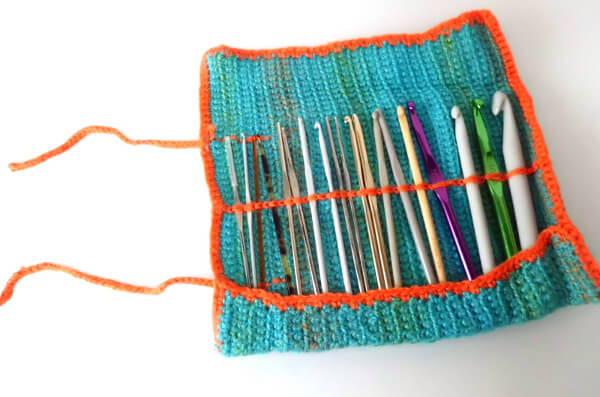
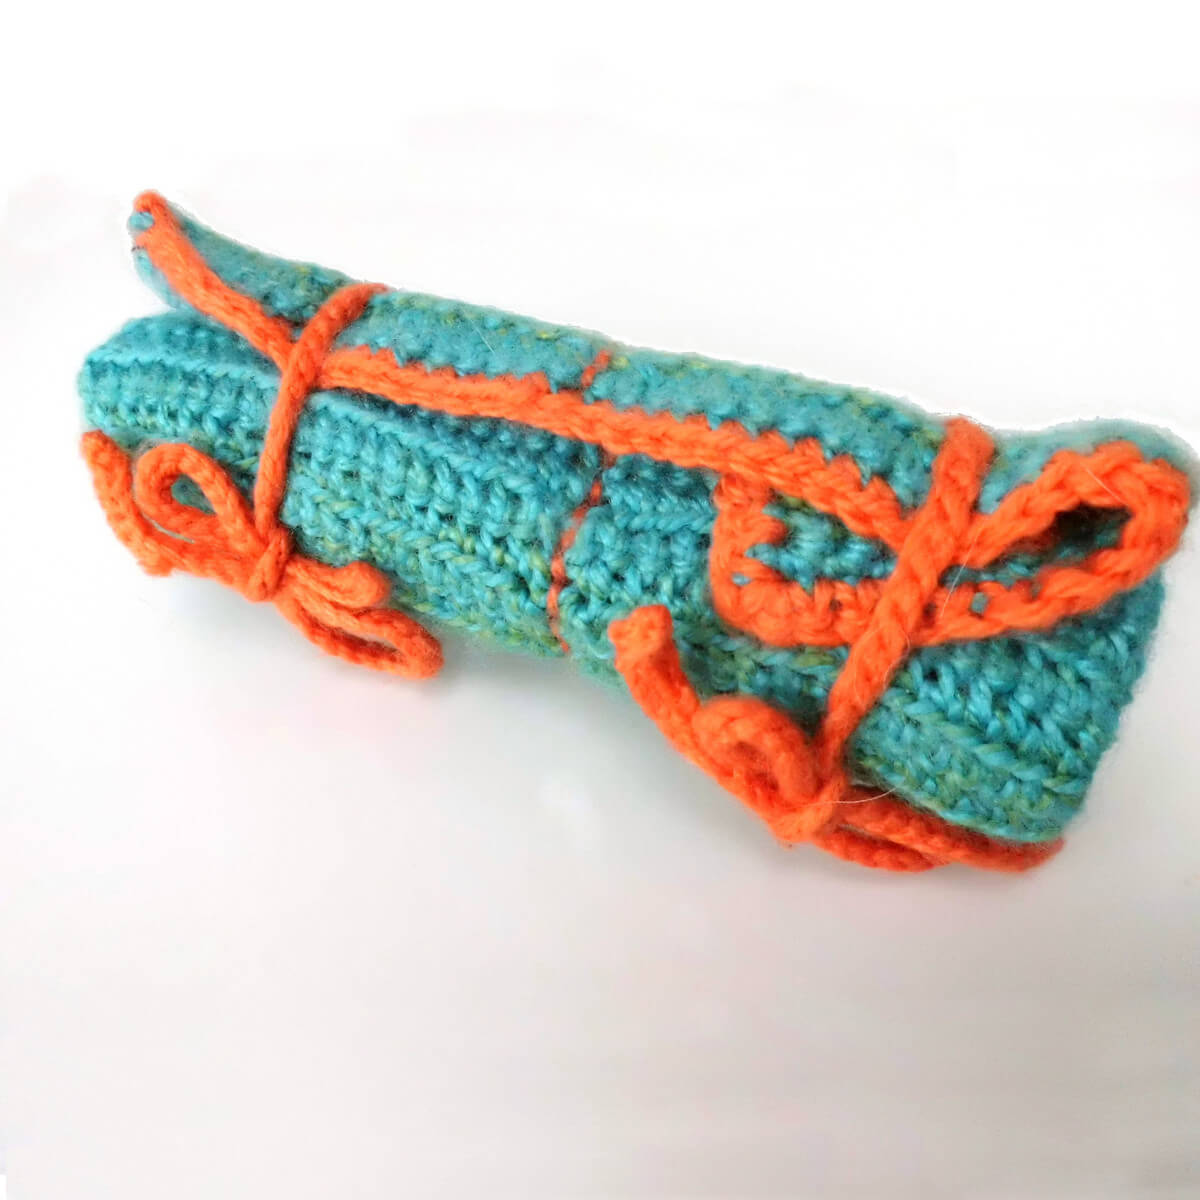
Closure
In my Roll it Up & Go crochet hook case I used ties to keep it closed. Of course feel free to use buttons or something else instead.
With the larger hook make a chain big enough to wrap around your hook case when rolled up plus extra to tie into a bow. Also, add about 20 extra chains, the chain will end up shorter than it initially is. A total of 40 to 50 cm (16 to 17 inches) will probably be enough.
Next, switch to the smaller hook and slipstitch in the second chain from the hook and till the end. Fasten off. Repeat for second tie.
Finishing
Sew the ties to the outside of the Roll it Up & Go crochet hook case as pictured. Weave in ends and fill your hook case up with crochet hooks.