tutorial – knitting the m1bl increase
Knitting the m1bl increase - by La Visch Designs

As you know, there are many options to work increases in knitting. Take for example the various m1 increases. A disadvantage of the regular m1 increase is, however, that it’s worked into the horizontal strand between two stitches in the row below. This causes the knitting to become tighter when they’re stacked over multiples rows. Especially when working in stripes or garter stitch, this can cause the lines to become distorted.

And that is where the m1bl increase comes in. The m1bl increase is also known as “Make 1 with Backward Loop” or the “Backward loop increase”. And when worked correctly it’s almost invisible! This is due to the fact that it doesn’t use yarn from the row below, but is given its own amount to be formed. Also, the m1bl increase can be used to either increase mid-row or cast-on stitches at the end of the row. The m1bl is basically the same as the thumb method of casting on, also known as the “single cast-on”, “e-wrap cast-on” or the “backward loop cast-on”.

Directional increase

The m1bl increase is a directional increase. This means there is both a left-leaning and a right-leaning version, which mirror each other when used together. This can be very useful in projects where paired increased are needed and it may be visually pleasing to be symmetrical. Think for example of both sides of a top-down triangle shawls spine, or bust shaping in a garment.

Sometimes there is no indication of a direction given in the pattern, usually denoted by plain “m1bl”. If that is the case, you can choose which version you like best, or easiest to make. Often I don’t bother using both versions of the m1bl increase. I mean, it’s so invisible on its own!

In my patterns you can find the following description for the m1bl increase:
Make 1 with a backward loop (m1bl): With your thumb, make a backward loop with the working yarn over the right-hand needle and pull to tighten.

Below you can find how this increase is worked.

Knitting the left-leaning m1bl increase step by step

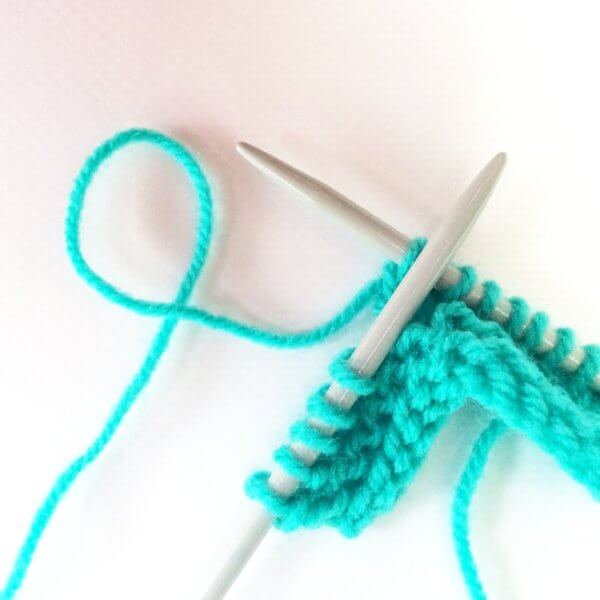
1. Take your working yarn and loop it as shown in the picture below, with the yarn going to the project in front.
Knitting the m1bl increase - by La Visch Designs

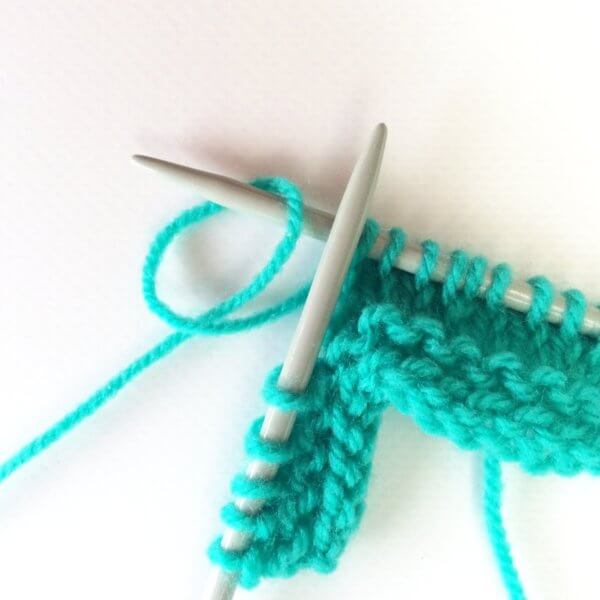
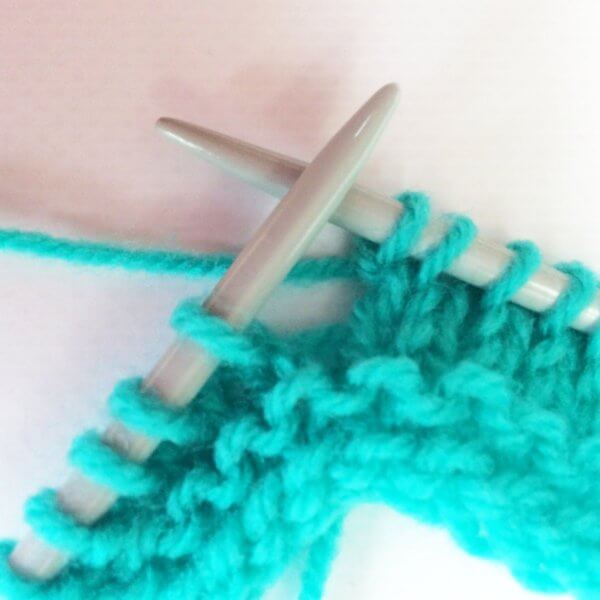
2. Next, insert the tip of the right needle from back to front through the loop.
Knitting the m1bl increase - by La Visch Designs

3. Pull the yarn snugly around the needle.
Knitting the m1bl increase - by La Visch Designs

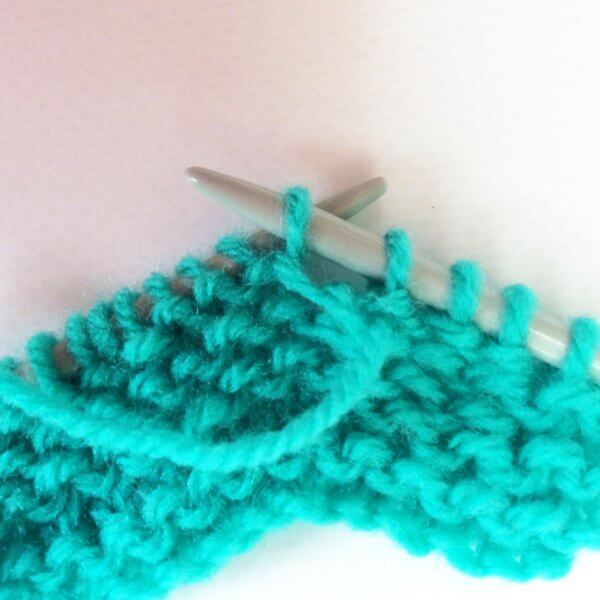
4. On next row when you come to the loop added, purl (as shown here for stockinette) or knit (for garter stitch) as usual.
Knitting the m1bl increase - by La Visch Designs

Knitting the right-leaning m1bl increase step by step

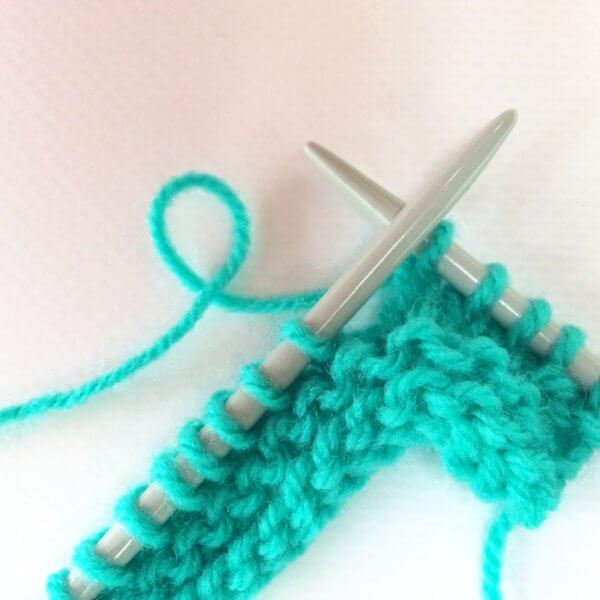
1. Take your working yarn and loop it as shown in the picture below, with the yarn going to the project in the back.
Knitting the m1bl increase - by La Visch Designs

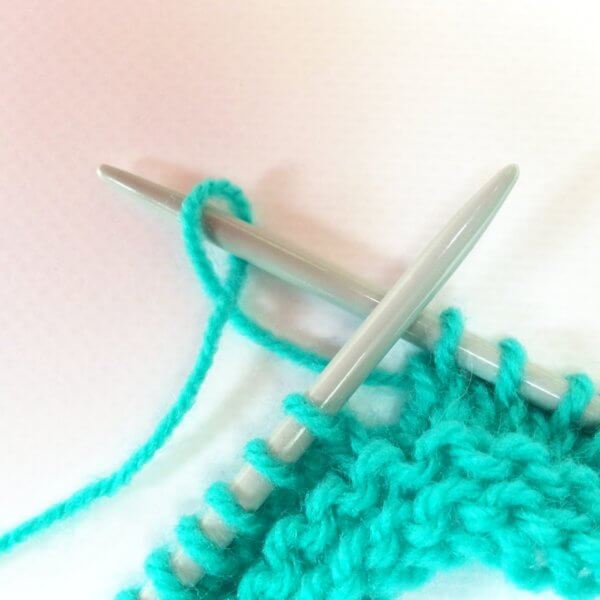
2. Next, insert the tip of the right needle from front to back through the loop.
Knitting the m1bl increase - by La Visch Designs

3. Pull the yarn snugly around the needle.
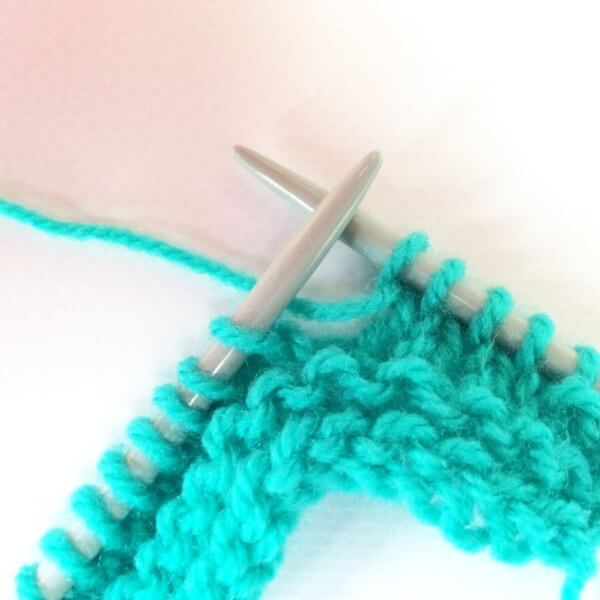
Knitting the m1bl increase - by La Visch Designs

4. On next row when you come to the loop added, purl (as shown here for stockinette) or knit (for garter stitch) as usual.
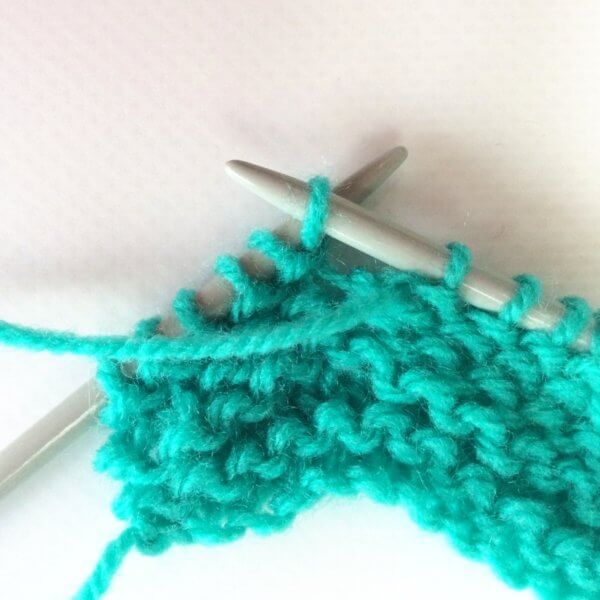
Knitting the m1bl increase - by La Visch Designs

The results

And this is how knitting both right- and left-leaning versions of the m1bl increase are worked! The result in stockinette is shown below, with the right-leaning version on the right of the swatch and the left-leaning one on the left. In this small swatch, there are three increase rows worked every other row, at a distance of 3 stitches from the garter stitch edge.
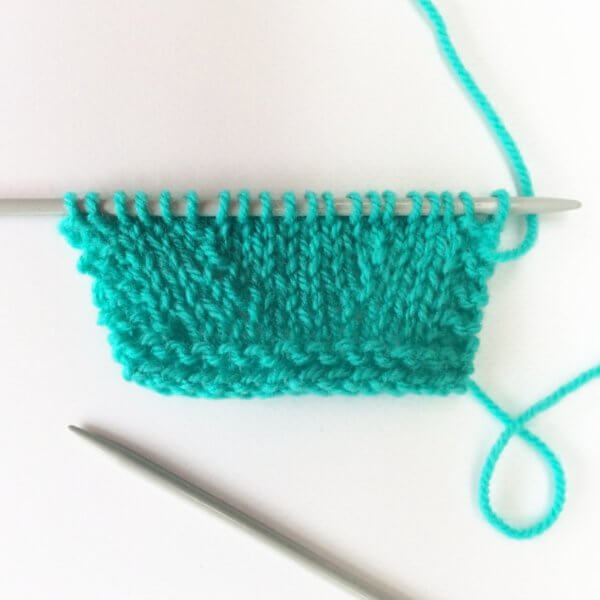
Knitting the m1bl increase - by La Visch Designs

As you can see in the below picture, the increases are fairly invisible in reverse stockinette. The same holds true in garter stitch!
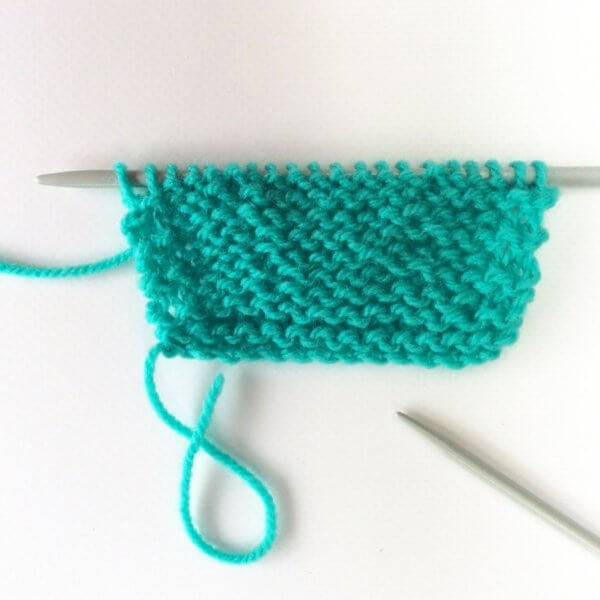
Knitting the m1bl increase - by La Visch Designs

tutorial – knitting the m1bl increase Read More »

tutorial – making a slipknot

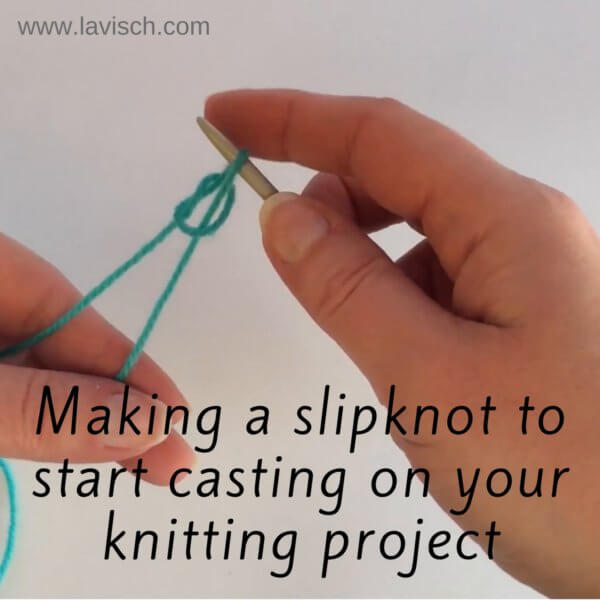
making a slipknot - by La Visch Designs

I know, it seems so basic: making a slipknot to start casting on your knitting project. But that’s only because once you know how to do it, it’s easy! And yes, I know it’s possible to start casting on without a slipknot, and that it’s sometimes to be preferred because it doesn’t give that extra knot on your cast-on edge. But that’s not the point here.

Most of the times I still start my knitting projects with a slipknot, even though I know how to do it without. I guess I just like that sturdy start of my cast-on edge! In this post, I’m going to show you how to do make a slipknot around a knitting needle yourself.

Making a slipknot step-by-step

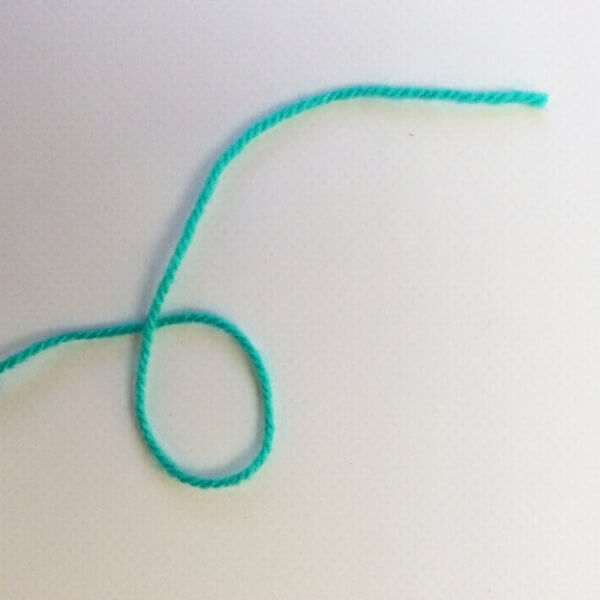
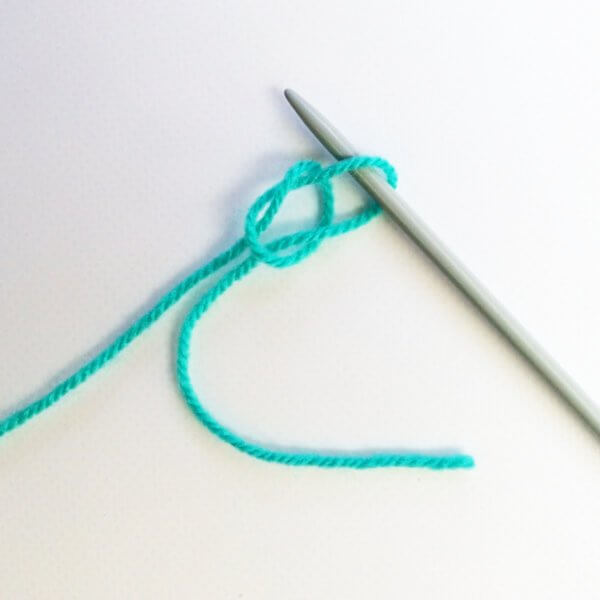
1. Loop the yarn as shown in the picture below.

Making a slipknot - by La Visch Designs

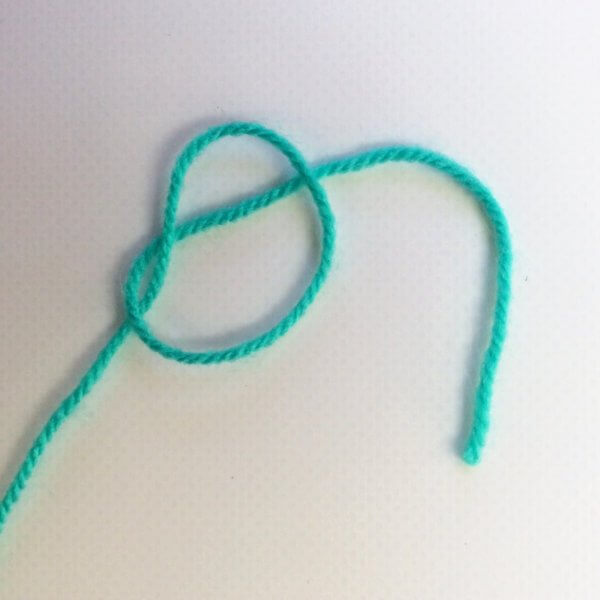
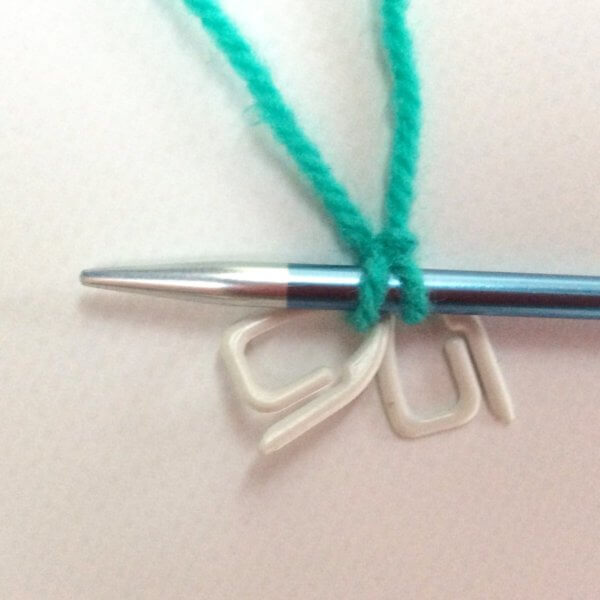
2. Next, arrange the yarn tail in such a way, that you can pull it through the first loop, like this:

Making a slipknot - by La Visch Designs

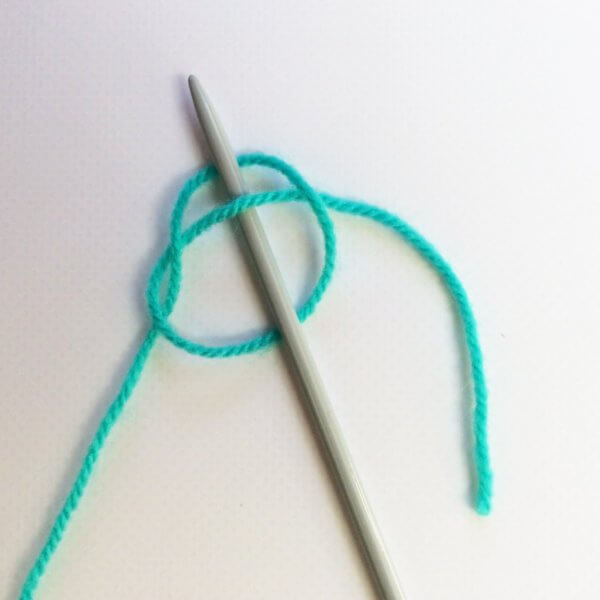
3. Insert your knitting needle as shown, underneath the arranged bit of yarn tail.

Making a slipknot - by La Visch Designs

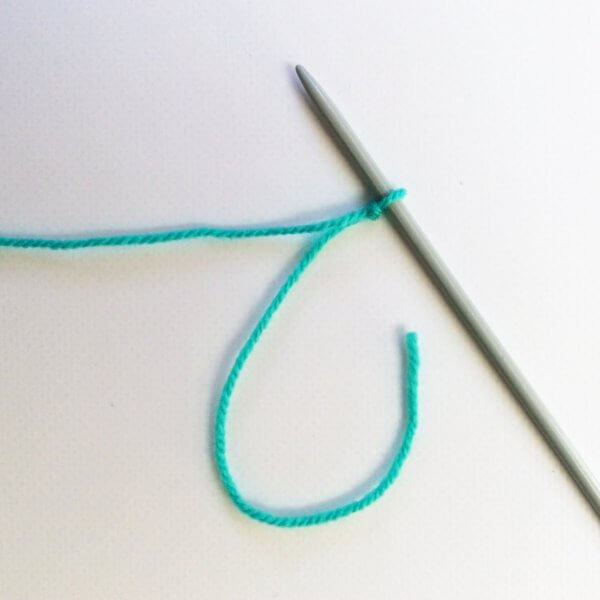
4. Now hold both the yarn tail and the yarn going back to the ball of yarn and pull them both to tighten the slipknot around the needle.

Making a slipknot - by La Visch Designs

5. And there you have it: a lovely slipknot around your needle! You’re now ready to start casting on the remaining stitches needed for your project. You can for example use the knitted-on cast-on for this.

Making a slipknot - by La Visch Designs

Of course, it can be hard to visualize the motions needed to realize the above. For that very reason, I’ve also made a short video in which I show you how I make slipknots around my knitting needle. It doesn’t contain a spoken commentary, it’s really only to show you the motions!

tutorial – making a slipknot Read More »
art deco

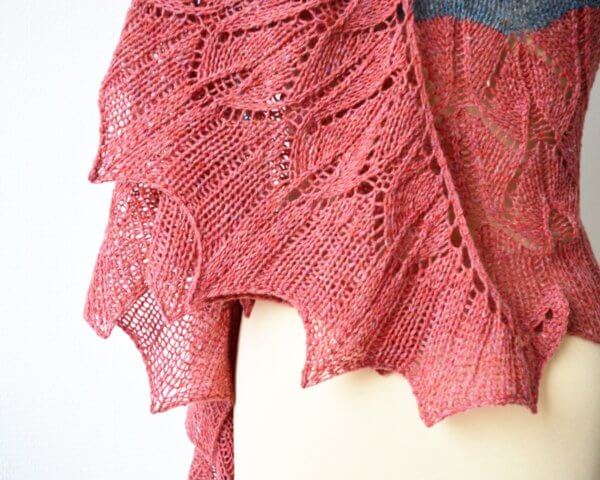
Art Deco shawl

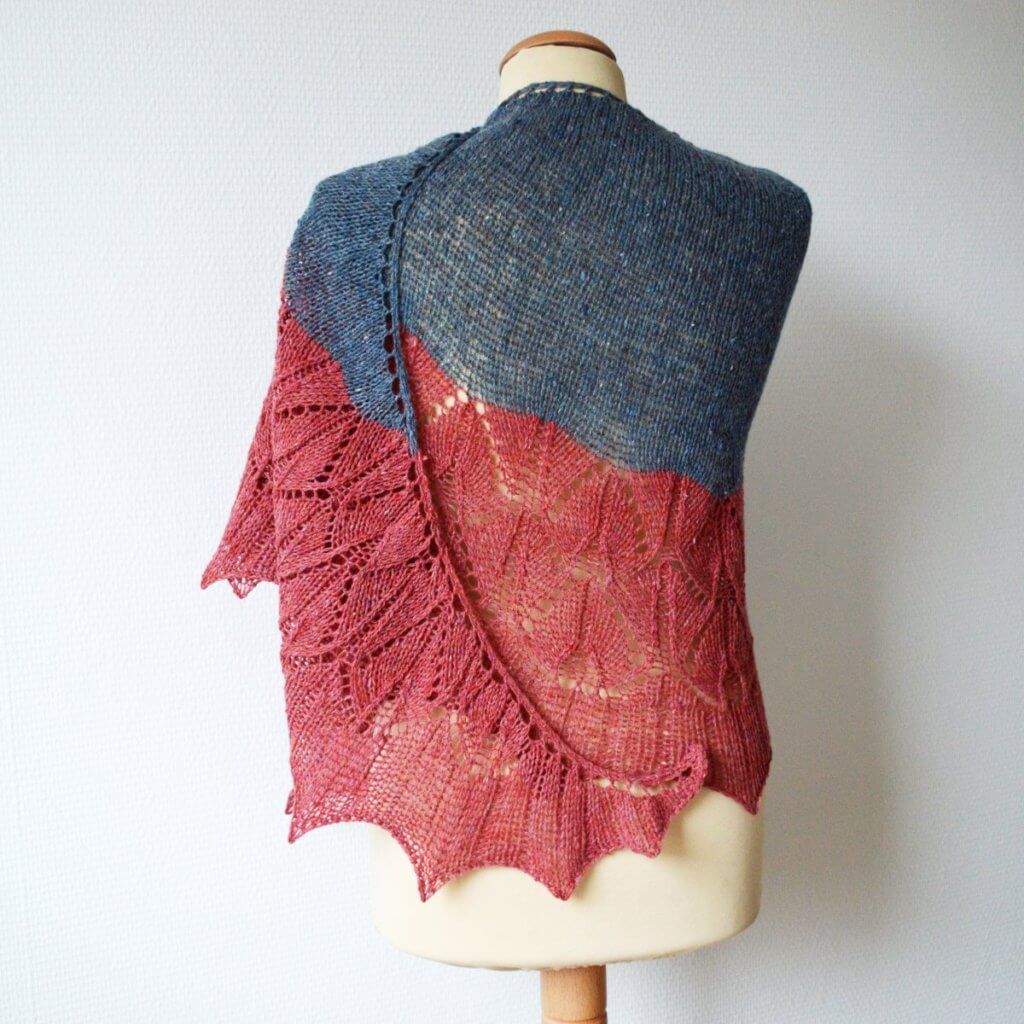
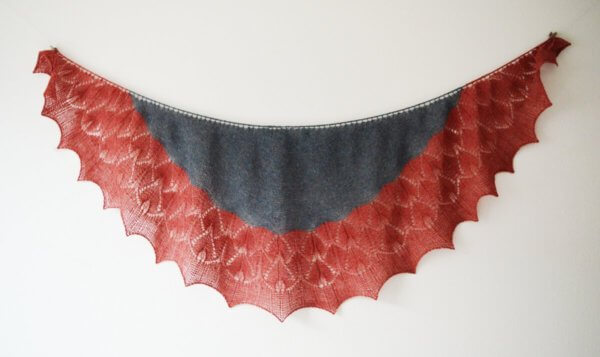
Art Deco is a crescent-shaped shawl worked from the top-down. The stylized flowers as commonly used in France, in the early days of Art Deco, inspired the flowers in the border of this design.

The shawl starts with a garter stitch tab. The body contains special shaping, which helps to avoid the “bump” in the upper edge of the shawl, so often present in crescent shawl designs. The lace in the border is knit on both right side and wrong side rows. The instructions for the border of the shawl are provided both fully charted and written out.


Pay what you want: (minimum €6.50)

Add to cart


Difficulty level

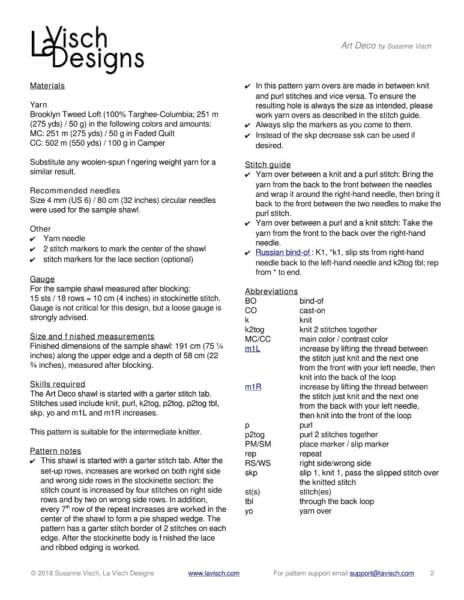
The Art Deco shawl starts with a garter stitch tab. Stitches used include knit, purl, k2tog, p2tog, p2tog tbl, skp, yo and m1L and m1R increases. This pattern is suitable for the intermediate knitter.

Sizes and finished measurements

One size: Finished dimensions of the sample shawl: 191 cm (75 ¼ inches) along the upper edge and a depth of 58 cm (22 ¾ inches), measured after blocking.

Pattern details

  • Gauge: Approx. 15 sts / 18 rows = 10 cm (4 inches) over stockinette, measured after blocking. While gauge is not critical in this design, a loose gauge gives the best result.
  • Pattern languages included: English and Dutch (Dit patroon omvat zowel een Nederlandse als een Engelse versie)
  • Digital PDF has 6 pages (letter size)

Materials

  • Yarn: Brooklyn Tweed Loft (100% Targhee-Columbia; 251 m (275 yds) / 50 g) in the following colors and amounts:
    MC: 251 m (275 yds) / 50 g in Faded Quilt
    CC: 502 m (550 yds) / 100 g in Camper
  • Size 4 mm (US 6) / 80 cm (32 inches) circular needles
  • Yarn needle
  • 2 stitch markers to indicate the center stitches
  • Stitch markers for the lace section (optional)

art deco Read More »
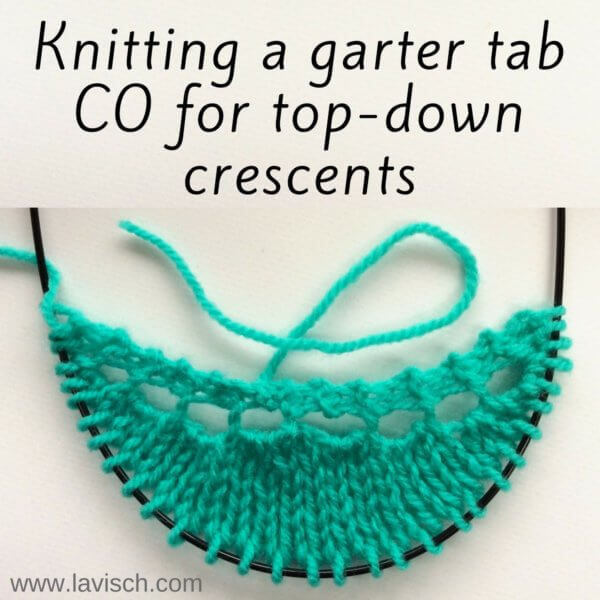
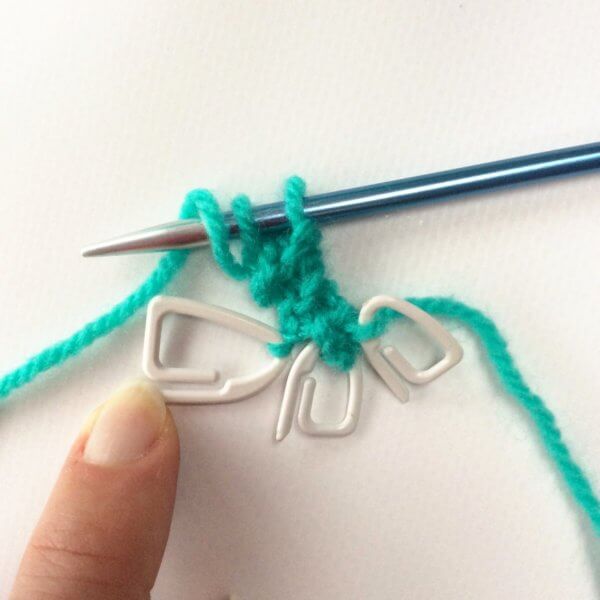
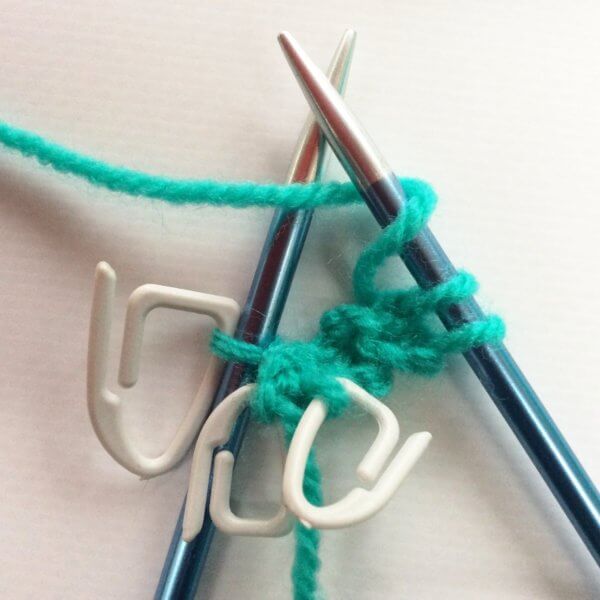
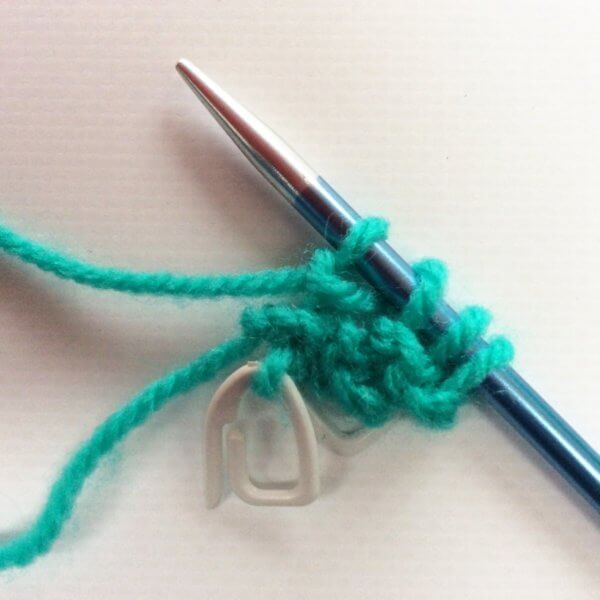
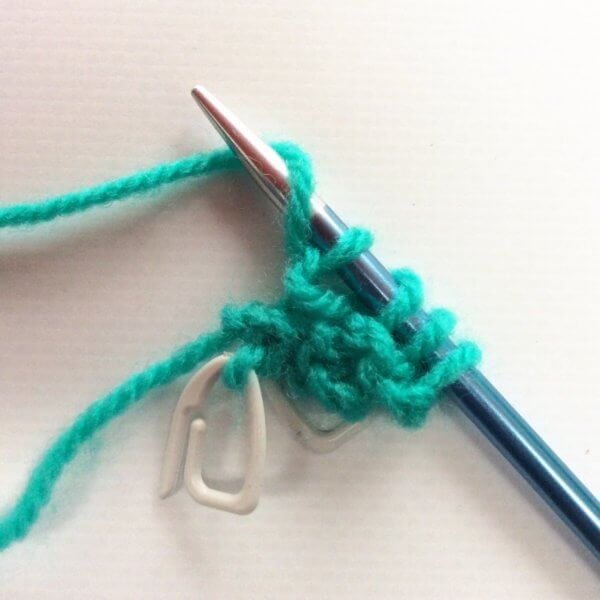
tutorial: garter tab CO for top-down crescents

Garter tab CO for top-down crescents - a tutorial by La Visch Designs

Many top-down shawl patterns start with a garter tab cast-on because it creates a lovely seamless start of any shawl. Most people will be familiar with this cast-on for traditional top-down triangle shawls. A tutorial on working such a garter tab cast-on can be found here. But what to do when starting a top-down crescent type shawl?

This type of shawl usually has a different increase rate when compared with traditional triangles. With the latter, the stitch count is increased by 4 on all right-side rows. With a top-down crescent though, increases are worked on both right side and wrong side rows: the stitch count is increased by 4 stitches on right-side rows and by 2 on wrong-side rows. When the wrong-side row increases are yarn overs, you get a rather decorative eyelet edge to your shawl. This makes it, however, harder to make your garter tab blend in invisibly. And this is where this tutorial on knitting garter tab CO for top-down crescents comes in!

As with all garter tabs, they can be a bit fiddly to work, especially when working with very skinny yarn. However, don’t let that deter you from knitting patterns that use this cast on: with the below step-by-step instructions and tips you are sure to master this technique.

In this example I used the following garter tab instructions, to get a 7 stitch start including 2 edge stitches on each side:

CO 2 sts and knit 6 rows. Turn work 90 degrees clockwise, yo, then pick up 1 st from the second (middle) garter stitch ridge along the long edge and twist this st 360 degrees counterclockwise, then purl it, yo. Pick up and knit 2 sts along the cast on edge. (7 sts).

Materials

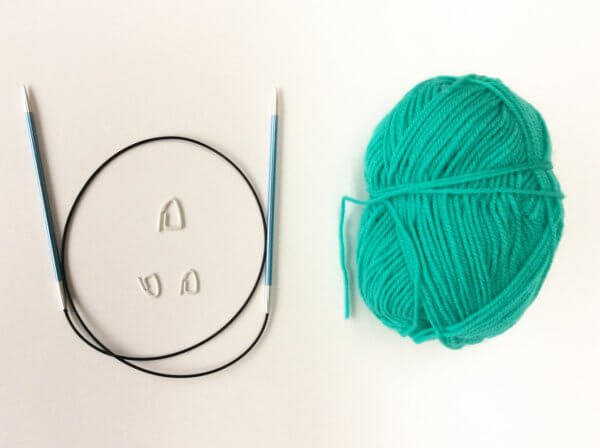
Besides yarn and knitting needles I’m also using 3 removable stitch markers, one preferably in a different color or size.

Garter tab CO for top-down crescents - a tutorial by La Visch Designs

The garter tab CO for top-down crescents step by step

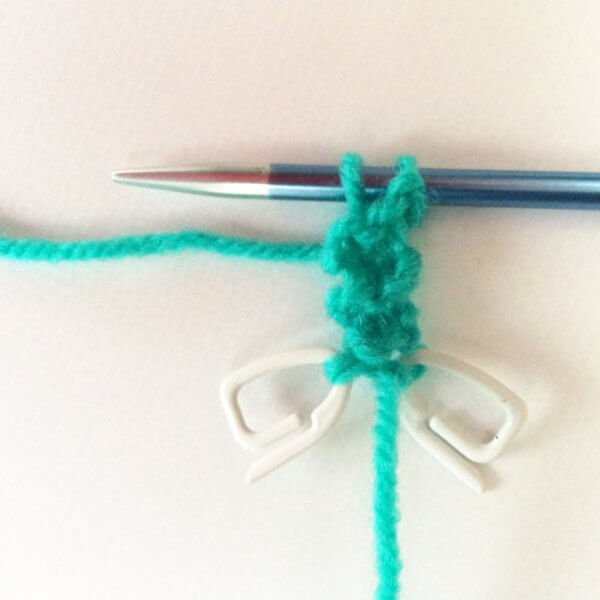
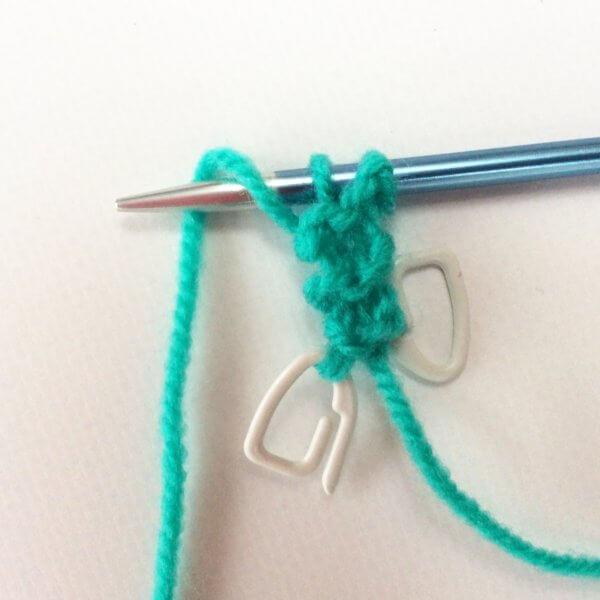
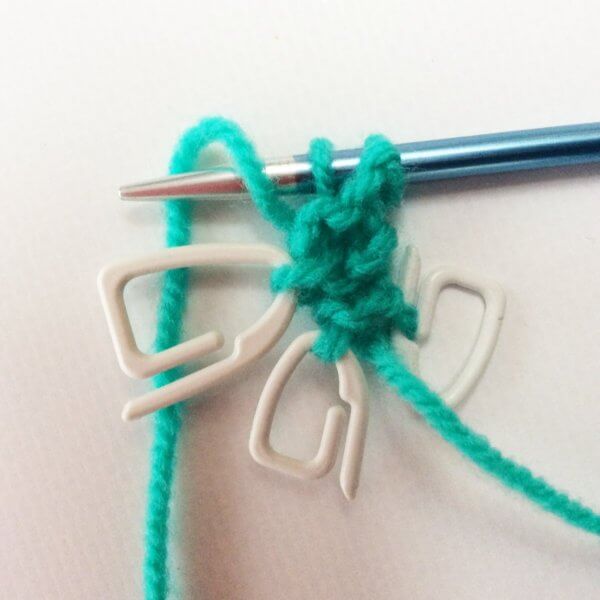
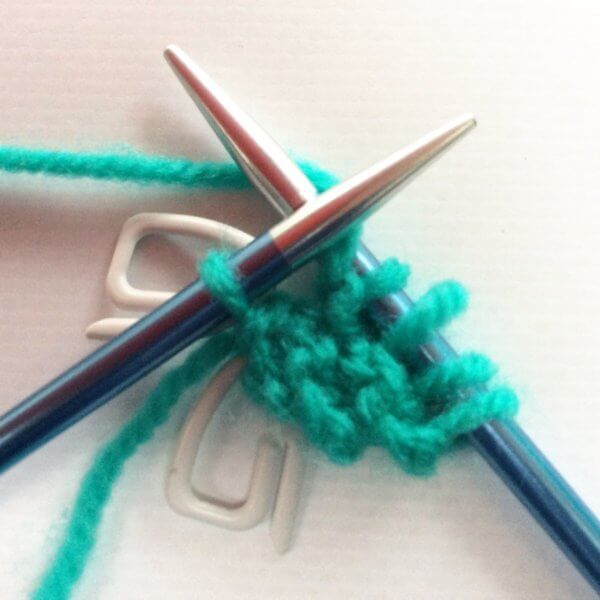
1. Cast-on two stitches using your preferred cast-on method. In this example, I’m using the knitted on cast-on. Place markers in each of every cast-on stitch, this will make it easier to pick them up later on. I attached them to the back legs of the stitches to keep the markers out of the way.

Garter tab CO for top-down crescents - a tutorial by La Visch Designs

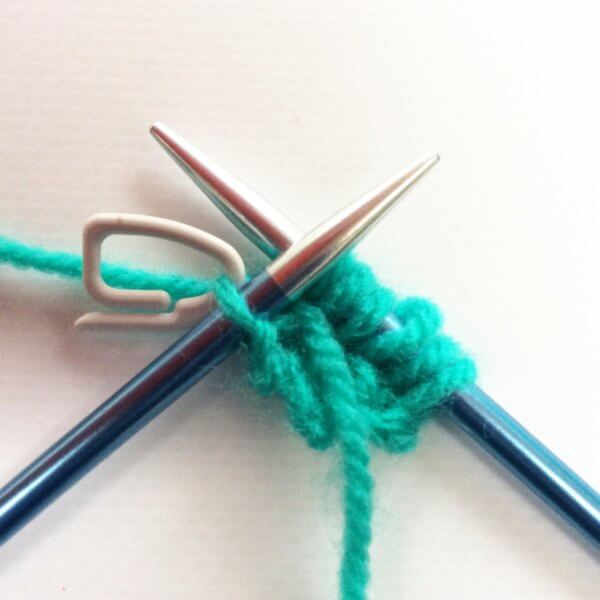
2. Work 6 rows in garter stitch (knit every row). This will give you 3 ridges.

Garter tab CO for top-down crescents - a tutorial by La Visch Designs

3. Then turn your work – still on the right-hand needle – 90 degrees clockwise and yo.

Garter tab CO for top-down crescents - a tutorial by La Visch Designs

4. Next, insert the remaining stitch marker in the purl bump from the middle of the 3  garter ridges along the edge.

Garter tab CO for top-down crescents - a tutorial by La Visch Designs

5. Use the stitch marker to twist the stitch it is inserted in 360 degrees counterclockwise (2 twists).

Garter tab CO for top-down crescents - a tutorial by La Visch Designs

6. Next, insert the left-hand needle in the twisted stitch ….

Garter tab CO for top-down crescents - a tutorial by La Visch Designs

7. …. and purl this stitch. The reason I’m purling this stitch here is that it makes sure that after casting on I can continue straight away with a right side row for stockinette. If you want reverse stockinette or garter stitch, this stitch should be knit instead of purled. It looks like this after this step:

Garter tab CO for top-down crescents - a tutorial by La Visch Designs

8. Next, yo again.

Garter tab CO for top-down crescents - a tutorial by La Visch Designs

9. Turn your work 90 degrees clockwise again and pick up and knit the first marked stitch along the cast-on edge. These stitches can be a tad hard to see, but because we marked them in step 1 this really isn’t an issue.

Garter tab CO for top-down crescents - a tutorial by La Visch Designs

10. Now pick up and knit the second marked stitch along the cast-on edge.

Garter tab CO for top-down crescents - a tutorial by La Visch Designs

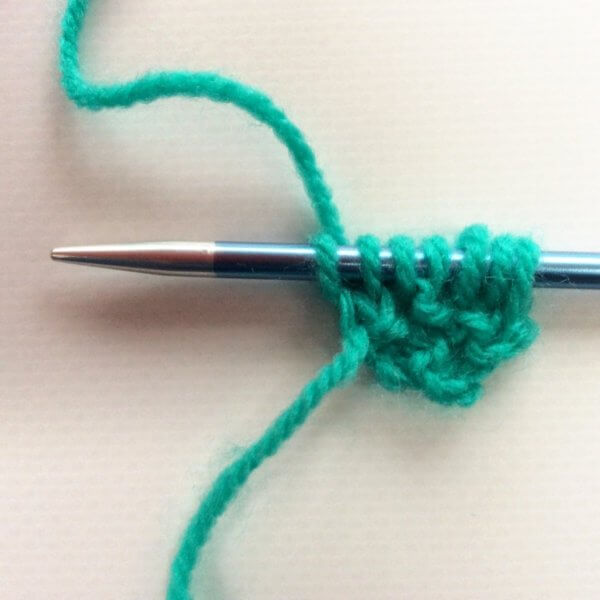
11. There you have it: a garter tab CO for top-down crescents! There are now 7 stitches: 2 stitches on either end which will become the garter edge stitches, and 3 stitches in the middle which will become the body of your shawl. You are now ready to start the rest of your pattern!

Garter tab CO for top-down crescents - a tutorial by La Visch Designs

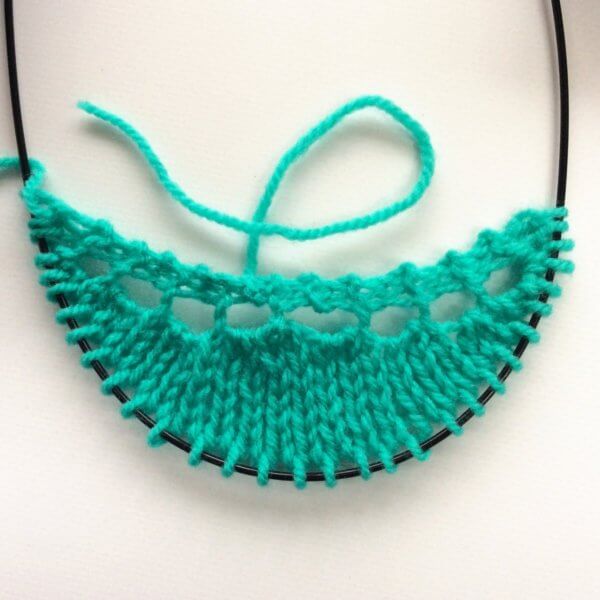
In the little swatch shown below, I’ve knitted some more rows in the following format:

Row 1 (RS): K2, (k1, yo, k1) in next st, k to 3 sts before end, (k1, yo, k1) in next st, k2.
Row 2 (WS): K2, yo, p to 2 sts before end, yo, k2.

Do you see how well this garter tab cast-on blends in? I can’t see where the cast-on ends and the rest of the shawl begins! And that’s how I like it.

Garter tab CO for top-down crescents - a tutorial by La Visch Designs

tutorial: garter tab CO for top-down crescents Read More »
chocolate raspberry waffles

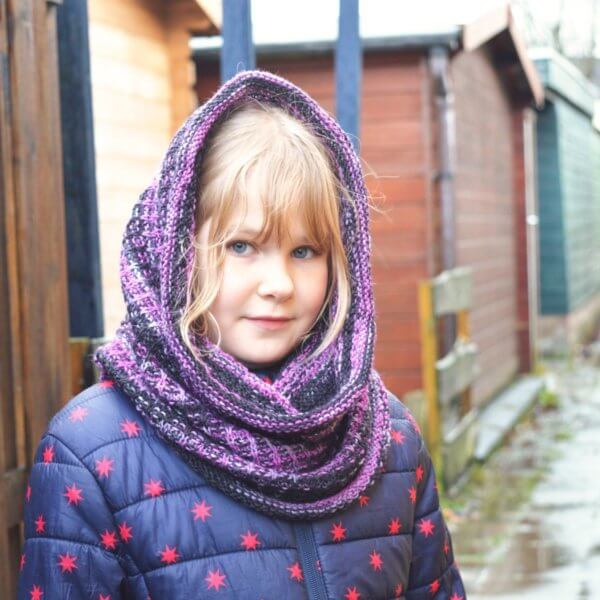
Chocolate Raspberry Waffles cowl

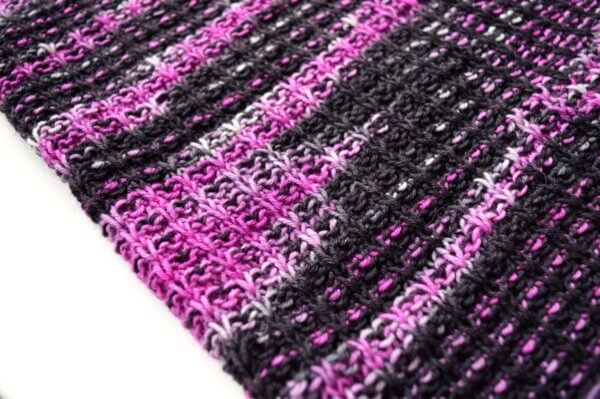
The Chocolate Raspberry Waffles cowl is just the pattern for those times that you want a mindless knit. Using slip-stitch patterning, it’s designed to break up the color pooling and flashing often seen with hand-dyed yarns.

This cowl is worked in the round. The pattern is suitable for the advanced beginner.


Pay what you want: (minimum €5.50)

Add to cart


Difficulty level

This cowl is worked in the round. Stitches used include knit, purl and slip stitches. This pattern is suitable for the advanced beginner.

Sizes and finished measurements

One size – finished dimensions: Height of 42 cm (16 ½ inches) and 66 cm (26 inches) circumference, measured after blocking.

Pattern details

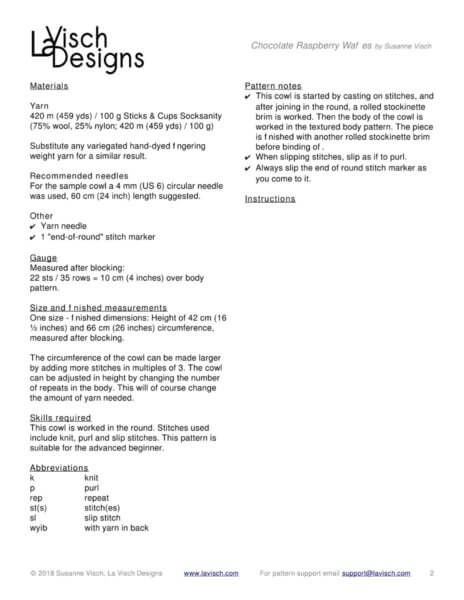
  • Chocolate Raspberry Waffles is written for a gauge of approx. 22 sts / 35 rows = 10 cm (4 inches) over body pattern, measured after blocking. Gauge is however not critical in this design.
  • Pattern languages included: English and Dutch (Dit patroon omvat zowel een Nederlandse als een Engelse versie)
  • Digital PDF has 2 pages (letter size)

Materials

  • Yarn: 420 m (459 yds) / 100 g Sticks & Cups Socksanity (75% wool, 25% nylon; 420 m (459 yds) / 100 g). Substitute any variegated hand-dyed fingering weight yarn for a similar result.
  • Size 4 mm (US 6) / 60 cm (24 inches) circular needles
  • Yarn needle
  • 1 “end-of-round” stitch marker

chocolate raspberry waffles Read More »
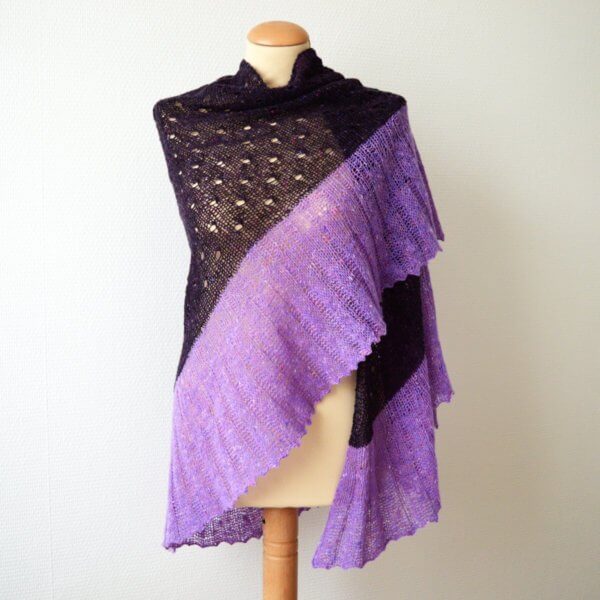
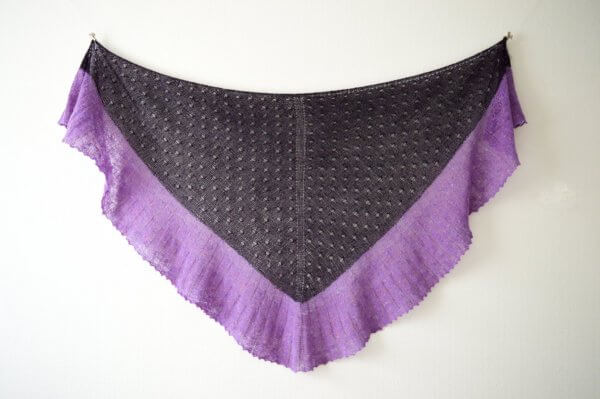
arugula

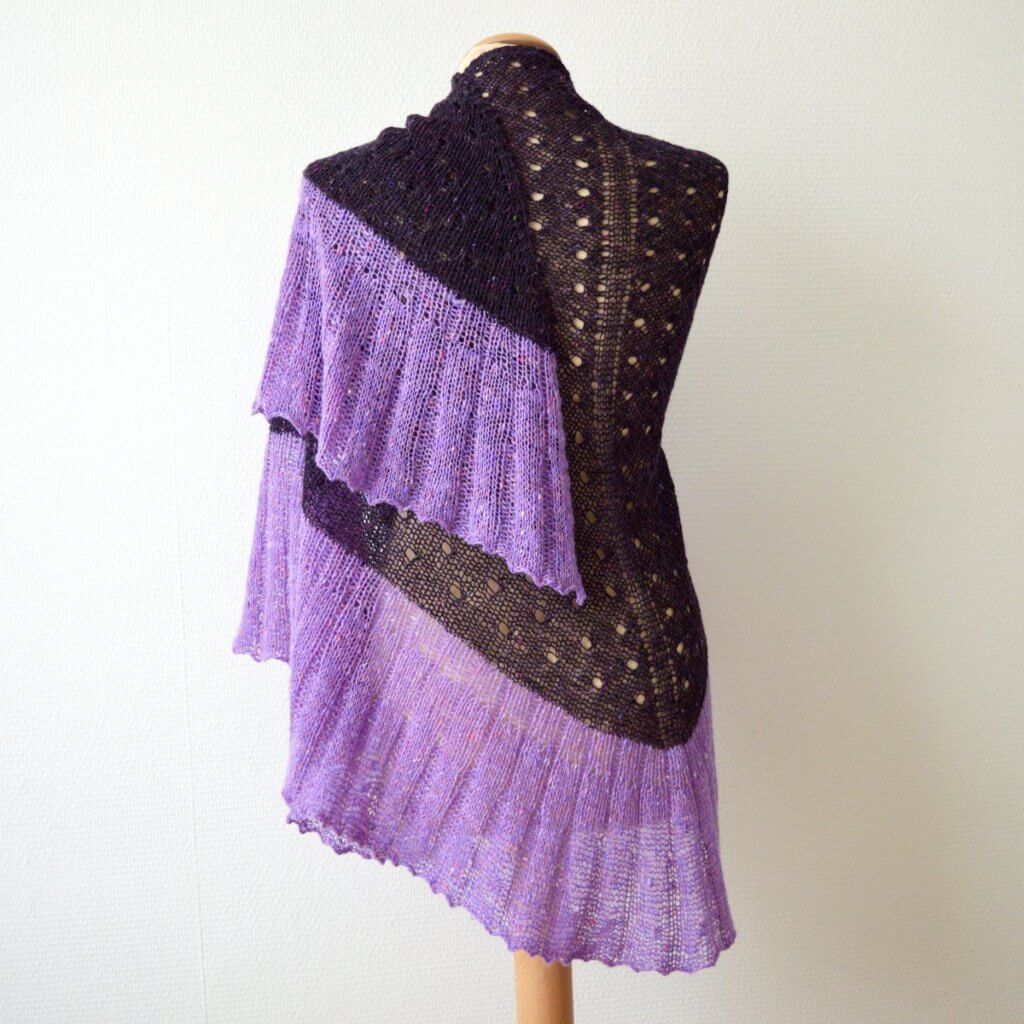
Arugula shawl

Arugula is a shawl in 2 sizes, designed to use the lovely rustic tweedy yarn pictured in the sample. In this design, it is paired with a flouncy ribbed ruffle in a contrasting solid color. A relatively mindless knitting project that gives a wonderful end result.

This shawl is knitted from the top-down in one piece, starting at the neck edge with a garter tab. The instructions for the body of the shawl are provided charted and written out. The ruffled edging is written only.


Pay what you want: (minimum €6.50)

Add to cart


Difficulty level

This shawl is started with a garter stitch tab. Stitches used include knit, purl, yo and m1bl. This pattern is suitable for the beginning knitter to intermediate knitter.

Sizes and finished measurements

Size S (L) finished dimensions: Wingspan of 146 (200) cm (57 ½ (78 ¾) inches) and a depth of 68 (90) cm (26 ¾ (35 ½) inches), measured after blocking. The shawl shown is in size L.

Pattern details

  • Arugula is written for a gauge of approx. 12.7 sts / 26 rows = 10 cm (4 inches) over body pattern, measured after blocking. Gauge is however not critical in this design.
  • Pattern languages included: English and Dutch (Dit patroon omvat zowel een Nederlandse als een Engelse versie)
  • Digital PDF has 4 pages (letter size)

Materials

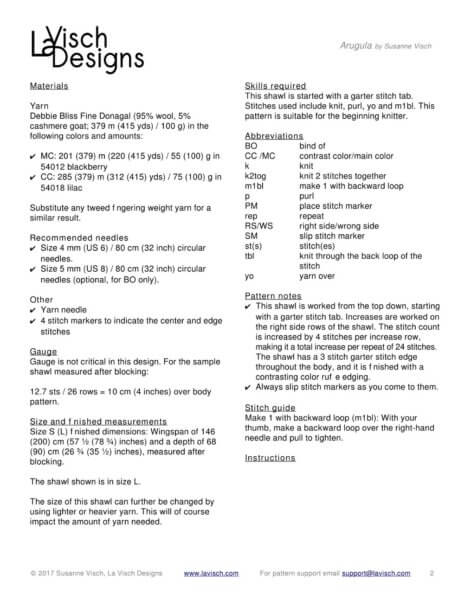
  • Yarn: Debbie Bliss Fine Donagal (95% wool, 5% cashmere goat; 379 m (415 yds) / 100 g) in the following colors and amounts:
    MC: 201 (379) m (220 (415 yds) / 55 (100) g in 54012 blackberry
    CC: 285 (379) m (312 (415) yds) / 75 (100) g in 54018 lilac
    Substitute any tweed fingering weight yarn for a similar result.
  • Size 4 mm (US 6) / 80 cm (32 inches) circular needles
  • Size 5 mm (US 8) / 80 cm (32 inches) circular needles (optional, for BO only).
  • Yarn needle
  • 4 stitch markers to indicate the center and edge stitches

arugula Read More »
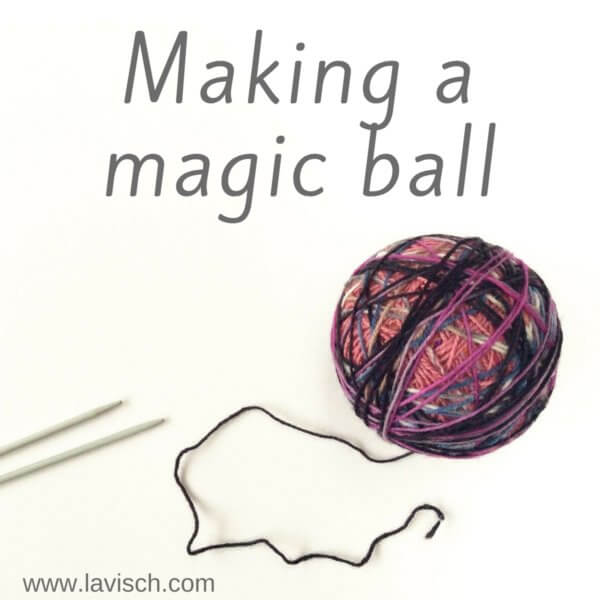
tutorial: making a magic ball

Making a magic ball - by La Visch Designs

If you’re a bit like me, you’ll have loads of odds and ends of the various projects. They are of course quite ornamental when displayed in nice glass jars or vases. But how many jars of ornamental balls of yarn does one need? I mostly work in fingering weight yarn which means I’ve got a lot of ends that would combine well, ranging from a mere 2 g up to quarter skeins. Of course, the latter could be used in small projects like Fish for Amiga, but again, how many small softies does one need?

So, I thought, why not make a magic ball?!

What is a magic ball?

You may wonder what a magic ball exactly is. Well, I’ll tell you! It is a ball of yarn that is made by attaching pieces of yarn of similar weight to each other. Thus making a bigger ball out of all of the smaller yarn remains. This way a scrappy project like a blanket, cowl, scarf or shawl is made easier because there are no ends left to weave in. That’s already taken care of by combining the yarns in the magic ball!

I myself am also very much looking forward to working with my magic ball. All those memories of projects past attached to the yarns within… Below you can find what I did to make my magic ball.

How to make a magic ball step by step

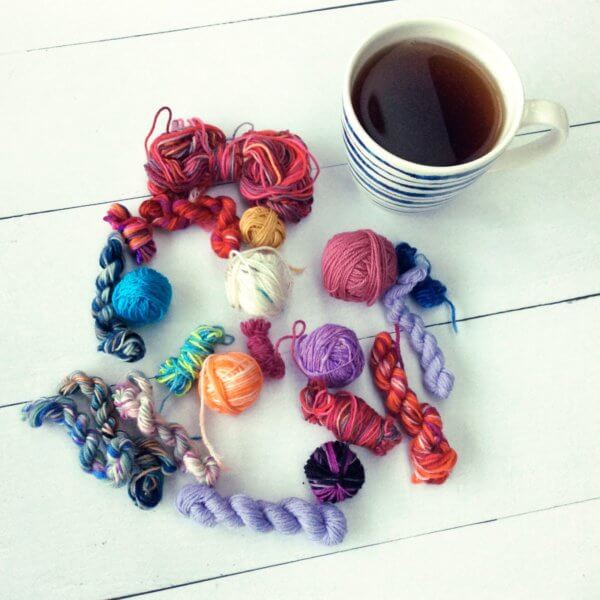
1. To start, collect your bits and bobs of yarn. Make sure they’re all in the similar weight range and ideally, also of similar materials. Combining an all acrylic yarn with otherwise wool yarns will have an impact on the resulting piece if it requires blocking. And do also consider differences in drape and washing care.

In my case, they’re all fingering weight yarns with a high content of wool. Some have up to 25% of nylon, others contain a bit of silk. In general behavior, all these yarns are however quite similar.

Making a magic ball - by La Visch Designs

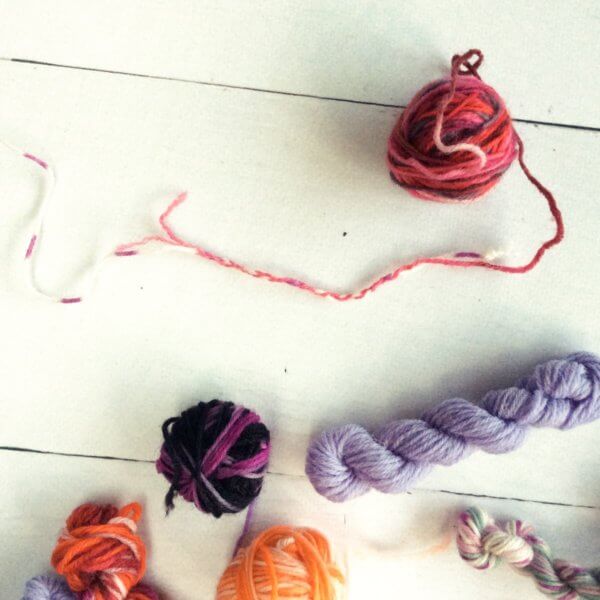
2. To connect the pieces of yarn with each other, there are of course various options among which the Russian join and the braided join. In this case, because the yarns all have multiple plies, I’m using the braided join. The Russian join requires a bit more attention and tools to work, but would have been my choice for connecting single ply yarns with each other.

Making a magic ball - by La Visch Designs

3. Do leave the yarn tails on! Cutting them off prematurely can contribute to the join coming undone. Just leave them be and cut any yarn ends after you’ve knitted up your magic ball and blocked the finished piece. In the below picture you can see a bit how I’m faring midway in making my magic ball.

Making a magic ball - by La Visch Designs

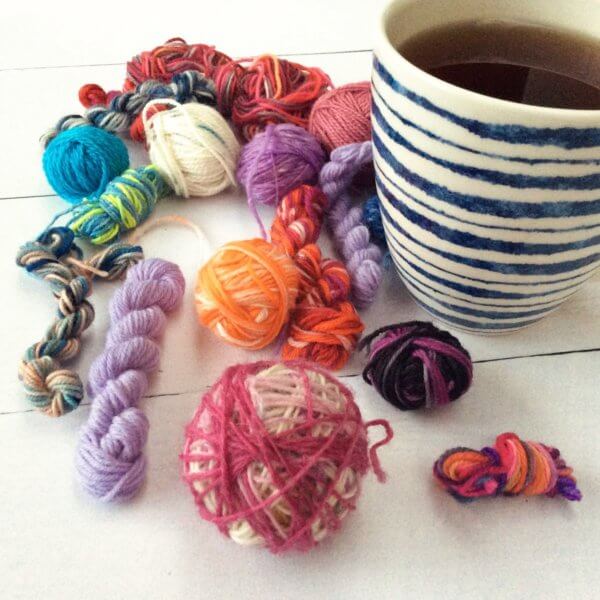
4. And here it is all done! Almost 100 g of yarn where there were only useless bits before. Now to think of a nice new design to use it in…

Making a magic ball - by La Visch Designs

tutorial: making a magic ball Read More »
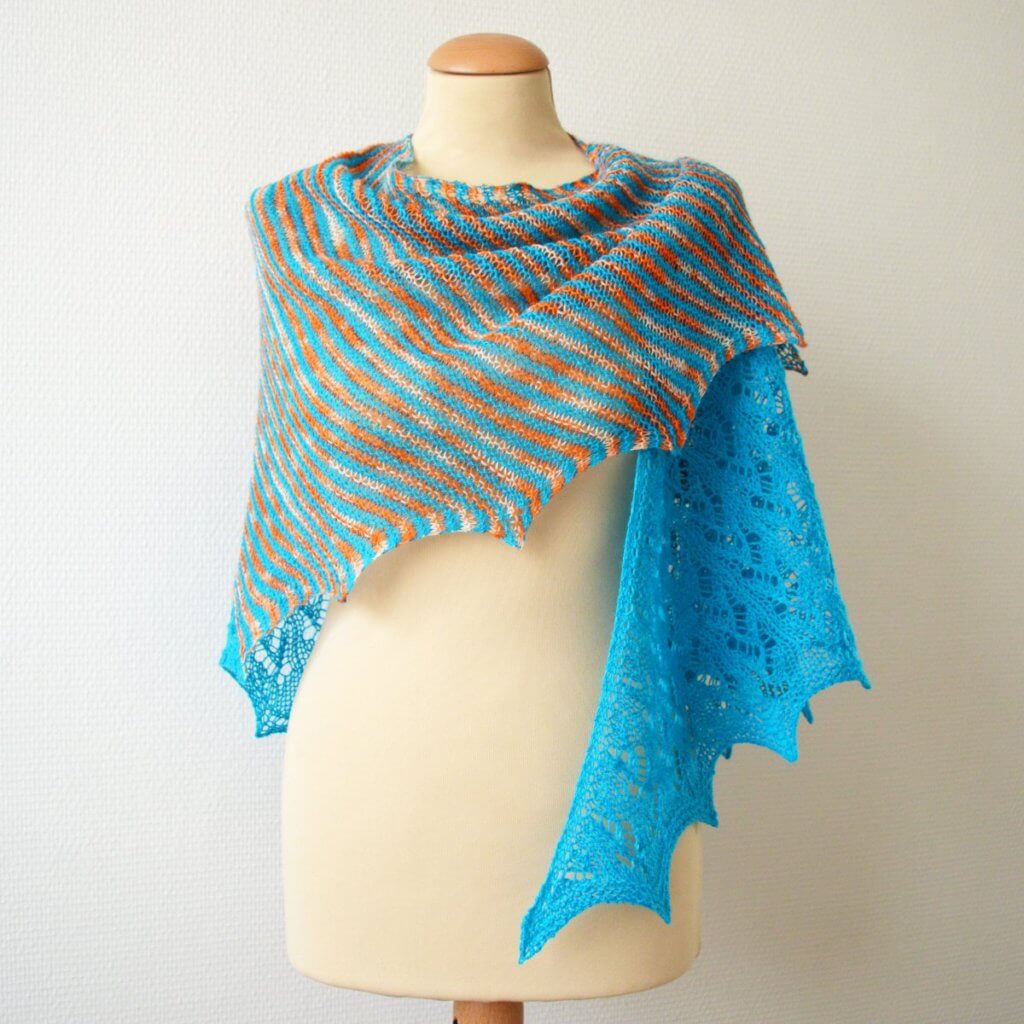
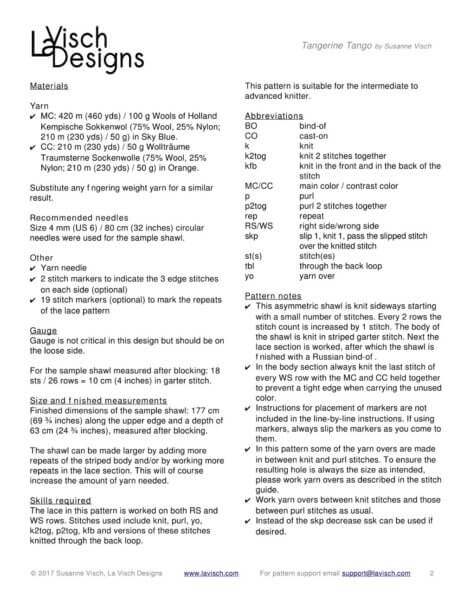
tangerine tango

Tangerine Tango shawl

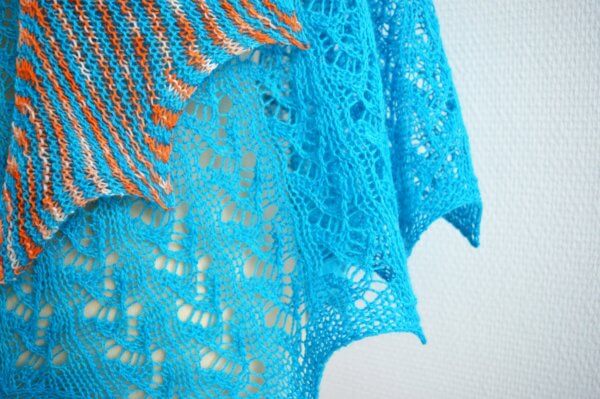
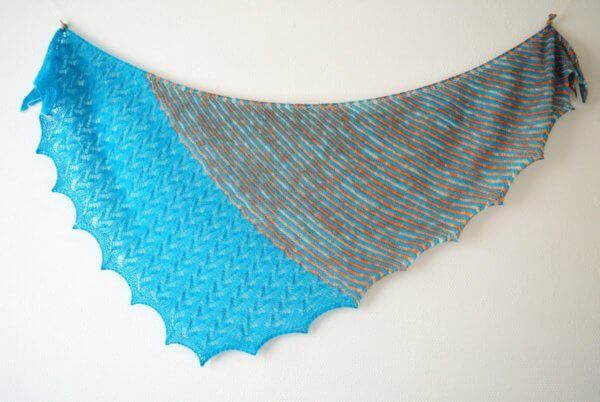
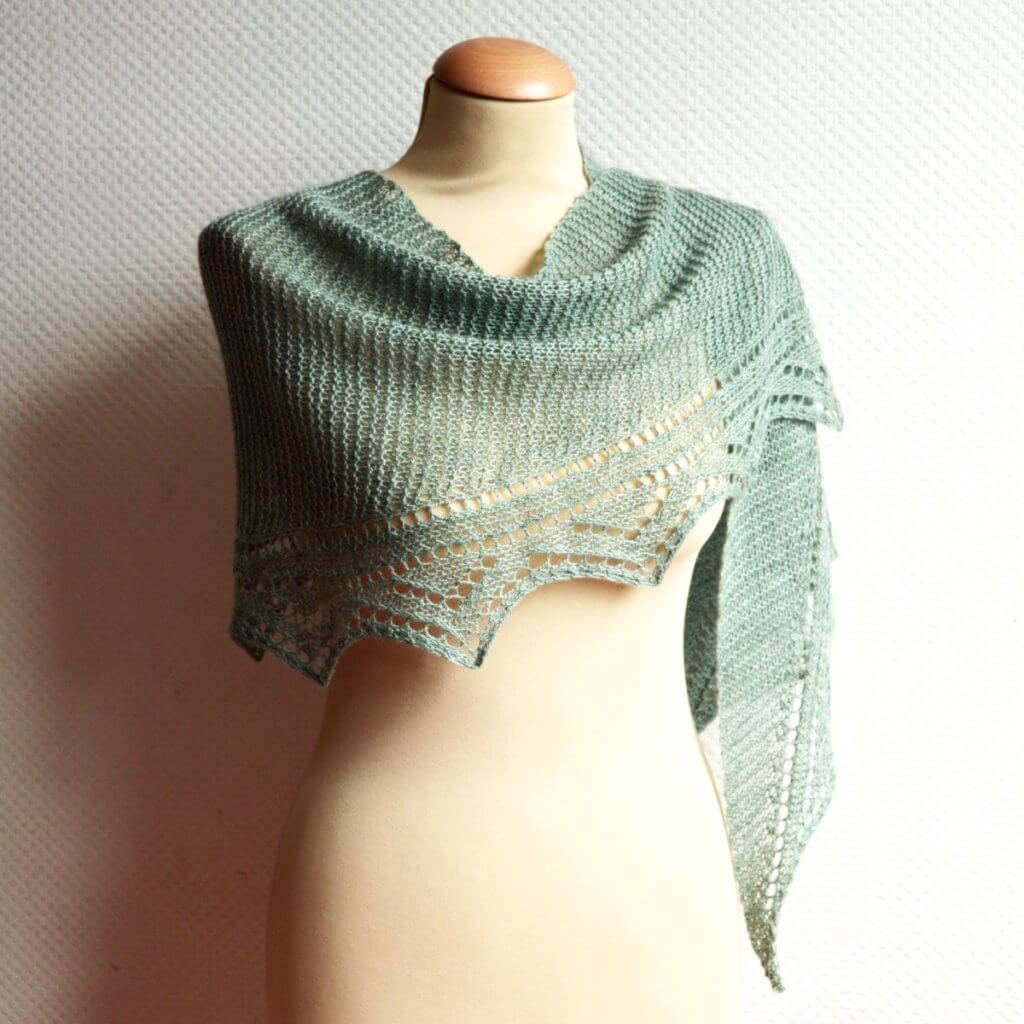
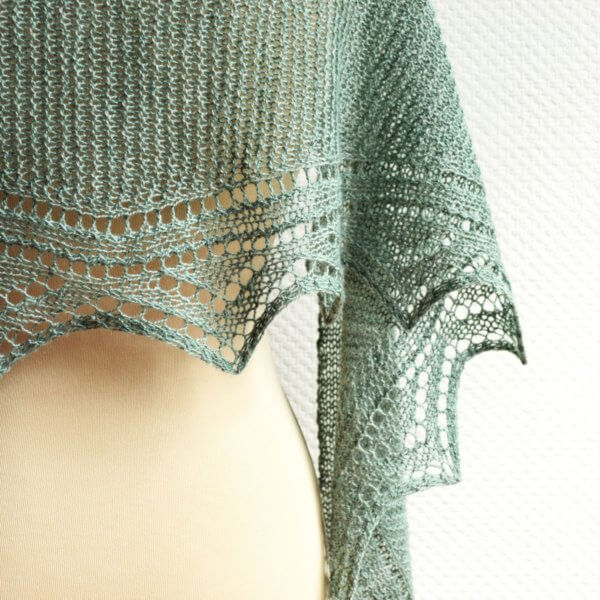
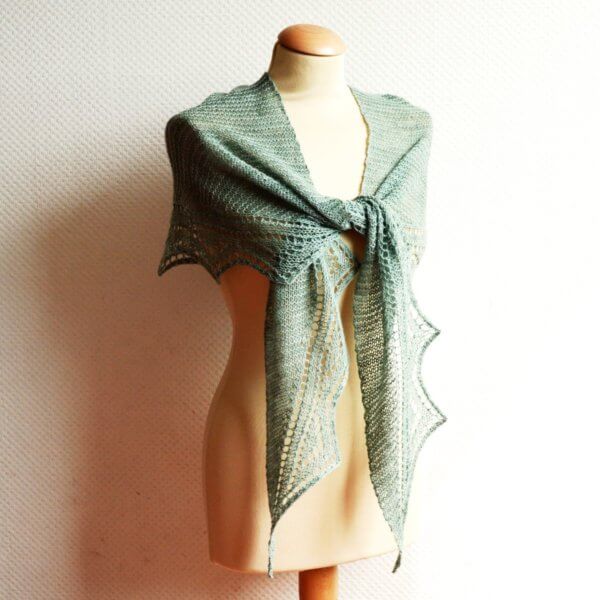
Tangerine Tango is a stylish triangular shawl knit sideways on the bias. The combination of striped garter stitch and lace makes it a perfect choice for those colors of fingering weight yarn that combine so well. With its generous size of 177 cm (69 ¾ inches) along the upper edge and a depth of 63 cm (24 ¾ inches), it is perfect to wear as an elegant scarf.

This pattern contains both fully written out as well as charted instructions for the lace section. The lace in the border is worked on both right side and wrong side rows. The shawl can be made larger by adding more repeats of the striped garter stitch section and/or by working more repeats of the lace section.


Pay what you want: (minimum €6.50)

Add to cart


Difficulty level

The lace in this pattern is worked on both RS and WS rows. Stitches used include knit, purl, yo, k2tog, p2tog, kfb and versions of these stitches knitted through the back loop. This pattern is suitable for the intermediate to advanced knitter.

Sizes and finished measurements

Finished dimensions of the sample shawl: 177 cm (69 ¾ inches) along the upper edge and a depth of 63 cm (24 ¾ inches), measured after blocking.

Pattern details

  • Tangerine Tango is written for a gauge of approx. 18 sts / 26 rows = 10 cm (4 inches) over garter stitch, measured after blocking. Gauge is however not critical in this design.
  • Pattern languages included: English and Dutch (Dit patroon omvat zowel een Nederlandse als een Engelse versie)
  • Digital PDF has 4 pages (letter size)

Materials

  • Yarn: MC: 420 m (460 yds) / 100 g Wools of Holland Kempische Sokkenwol (75% Wool, 25% Nylon; 210 m (230 yds) / 50 g) in Sky Blue.
    CC: 210 m (230 yds) / 50 g Wollträume Traumsterne Sockenwolle (75% Wool, 25% Nylon; 210 m (230 yds) / 50 g) in Orange.
    Substitute any fingering weight yarn for a similar result.
  • Size 4 mm (US 6) / 80 cm (32 inches) circular needles
  • Yarn needle
  • 2 stitch markers to indicate the 3 edge stitches on each side (optional)
  • 19 stitch markers (optional) to mark the repeats of the lace pattern

tangerine tango Read More »
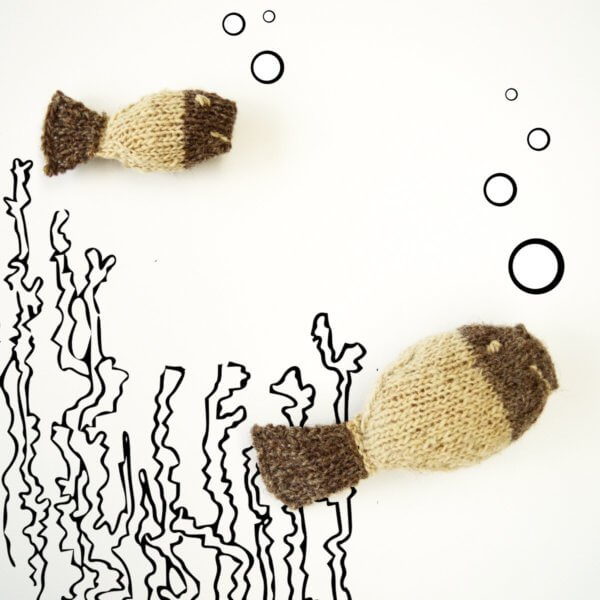
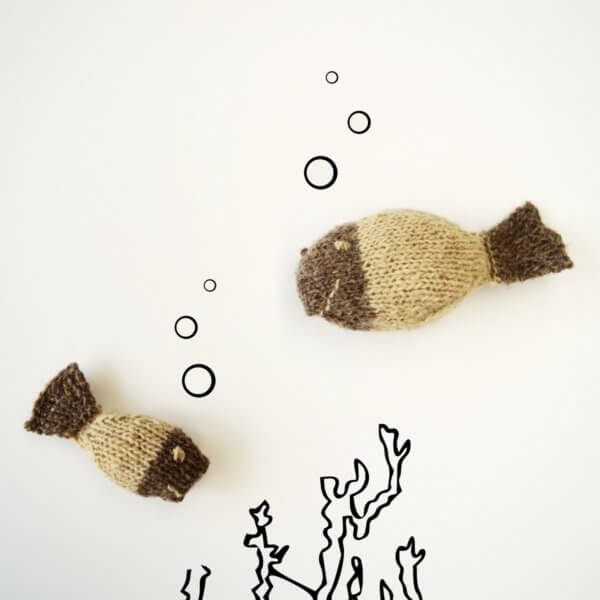
fish for Amiga

Fish for Amiga - a knitting pattern by La Visch Designs

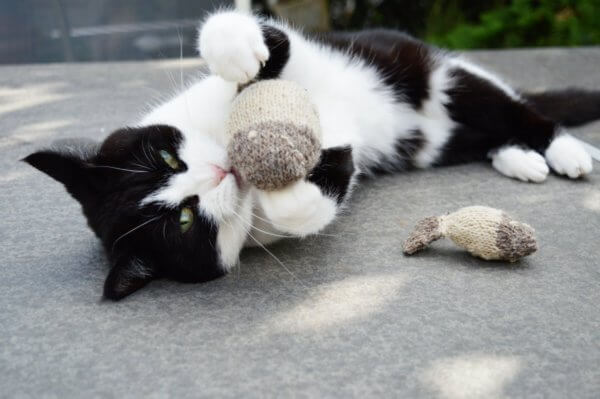
My cat Amiga is crazy about Moeke Yarns Elena. And by crazy I mean the drooling and acting weird kind of crazy. I think it must be the slight sheepiness this yarn has. So, I thought I would make her day by creating something just for her made from this lovely yarn. The result: Fish for Amiga!

These small fish for Amiga are knit in the round. After closing the body, knit the tail flat back and forth. A photo tutorial on how to close the body of the fish is included in the pattern. Since only small amounts of yarn are used, this pattern is perfect for stash busting little odds and ends.


Pay what you want: (minimum €3.00)

Add to cart


Difficulty level

Techniques used include Judy’s Magic Cast On and knitting in the round. Stitches used include knit, purl, skp, k2tog and m1. This pattern is suitable for the intermediate knitter.

Sizes and finished measurements

Size S (L): Height of 3.5 (6.5) cm (1 ½ (2 ½ ) inches) and a length of 9 (14) cm (3 ½ (5 ½ ) inches).

Pattern details

  • The gauge should be such that your stitches are tight enough not to show the stuffing. For the sample fish: 11 sts / 15 rows = 5 cm (2 inches) over stockinette.
  • Pattern languages included: English and Dutch (Dit patroon omvat zowel een Nederlandse als een Engelse versie)
  • Digital PDF has 4 pages (letter size)

Materials

  • Approx. 13 (33) m (15 (36) yds) / 4 (10) g of Moeke Yarns Elena Single (100% wool; 330 m (361 yds) / 100 g) in the sample Fish for Amiga. Substitute a sport to DK weight yarn for a similar result.
  • Needles in your preferred style for small circumference knitting in the round. For the sample fish: Size 3 mm (US 2 ½) needles.
  • 1 extra needle in the same size as your main needles.
  • 4 stitch markers
  • 1 differently colored “end of round” marker
  • Fiberfill
  • Yarn needle

fish for Amiga Read More »
duizendknoop

Duizendknoop shawl

Duizendknoop: A shallow, triangle scarf, knit sideways. This design features a simple garter stitch body. The triangle edging, so reminiscent of the leaves of the Duizendknoop (Persicaria perfoliata), is knitted on at the same time. Worked at a loose gauge, Duizendknoop is a lovely and airy layering piece.

While written for a single skein of fingering weight yarn, this pattern can easily be adjusted for different amounts and weights of yarn. Instructions for the lace border are both written and charted.


Pay what you want: (minimum €6.50)

Add to cart


Difficulty level

This pattern features a garter stitch body with a lace edging worked simultaneously. Stitches used include knit, purl, k2tog, skp, kfb, m1 and yo. This pattern is suitable for the intermediate knitter.

Sizes and finished measurements

Finished dimensions of the sample shawl: 195 cm (76 ¾ inches) along the upper edge and a depth of 39 cm (15 ¼ inches), measured after blocking. Make the shawl larger by working more sections of the body pattern.

Pattern details

  • Duizendknoop is written for a gauge of approx. 18 sts / 22 rows = 10 cm (4 inches) over garter stitch, measured after blocking. Gauge is however not critical in this design.
  • Pattern languages included: English and Dutch (Dit patroon omvat zowel een Nederlandse als een Engelse versie)
  • Digital PDF has 5 pages (letter size)

Materials

  • 1 skein of Sock Marl by Dutch Wool Diva (50% Wool, 50% alpaca 400 m (437 yds) / 100 g) in “Kelp”. Substitute any fingering weight yarn in a semi-solid color for a similar result.
  • Size 4 mm (US 6) / 80 cm (32 inches) circular needles
  • Yarn needle
  • 1 stitch marker

duizendknoop Read More »