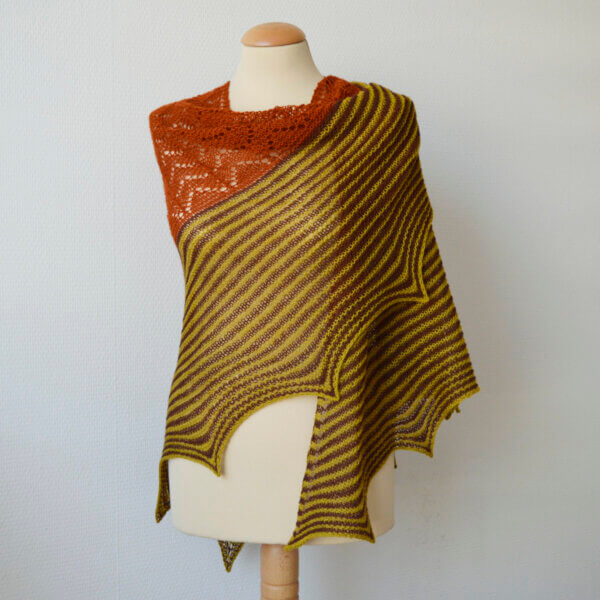
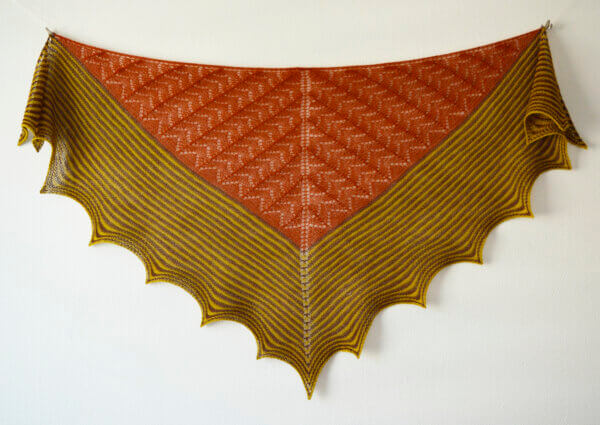
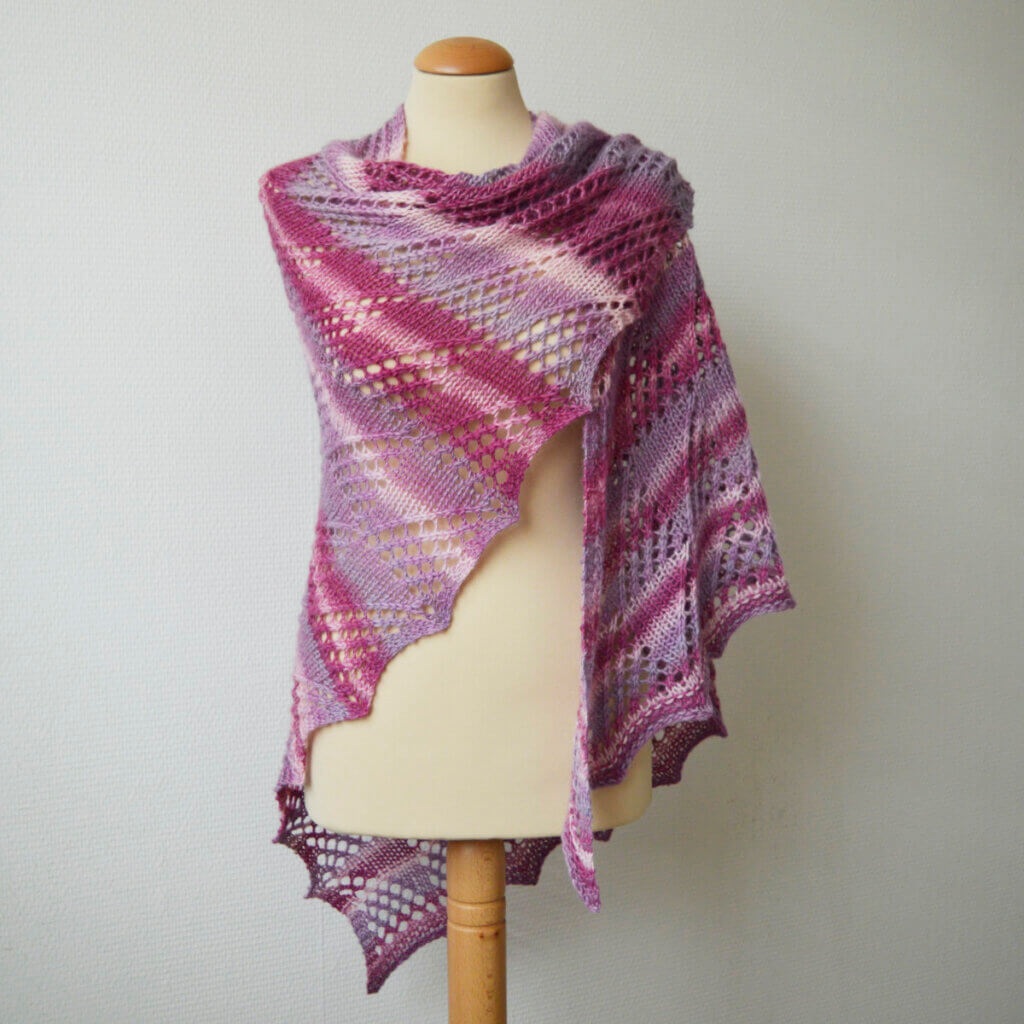
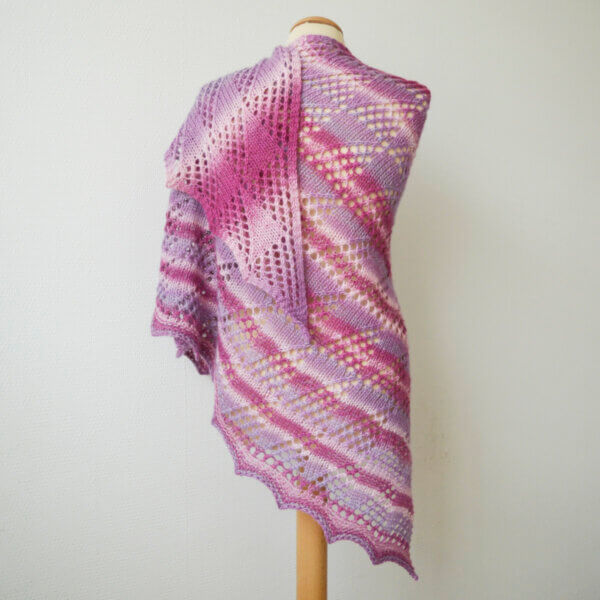
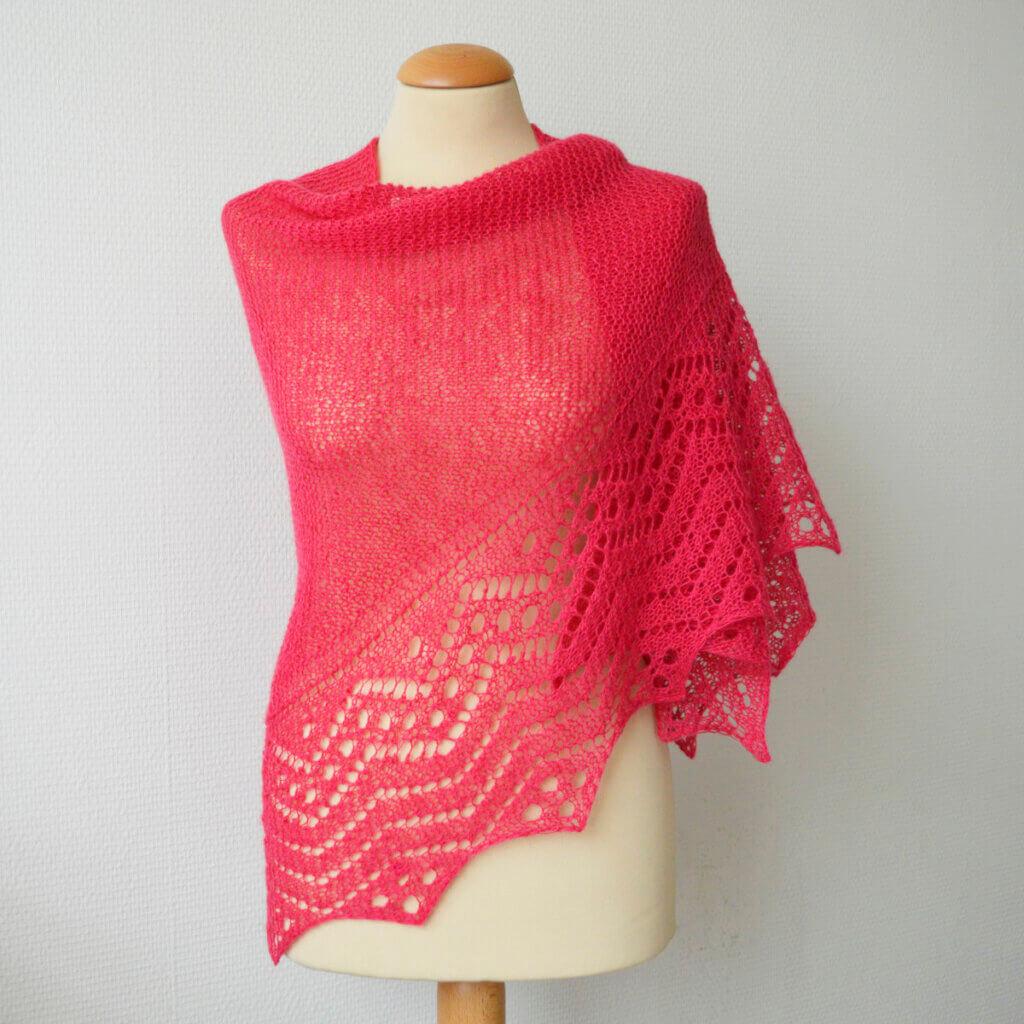
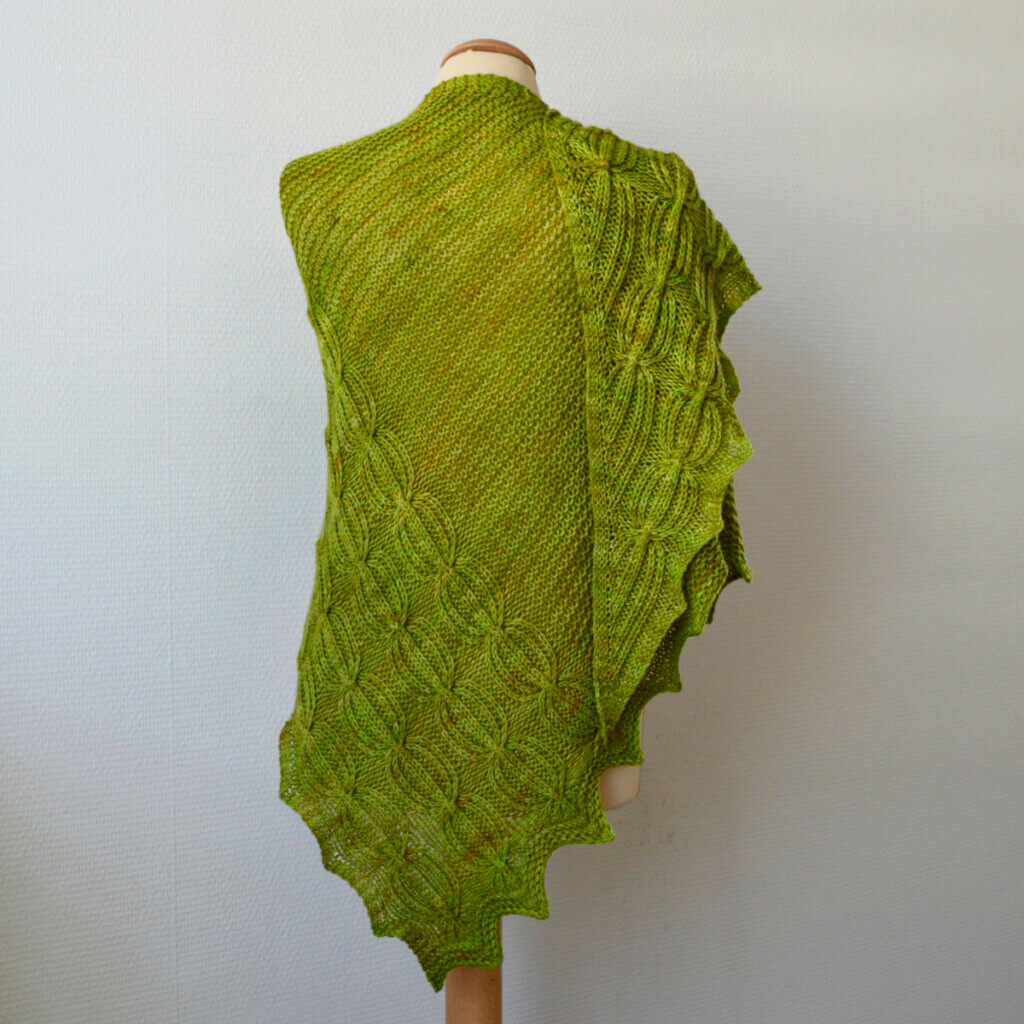
hazelnoot
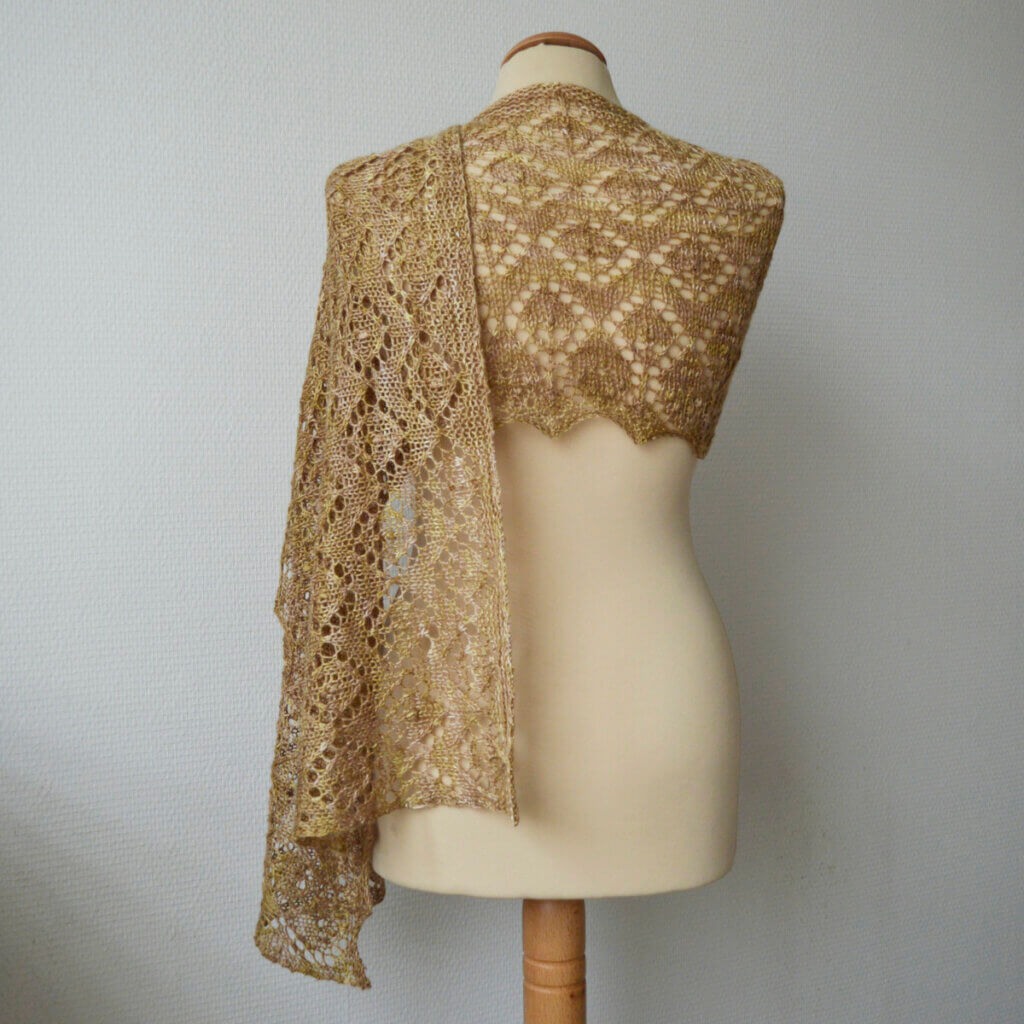
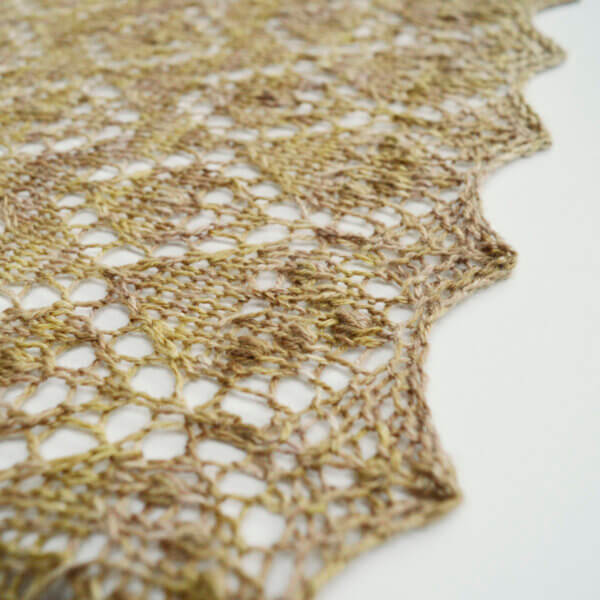
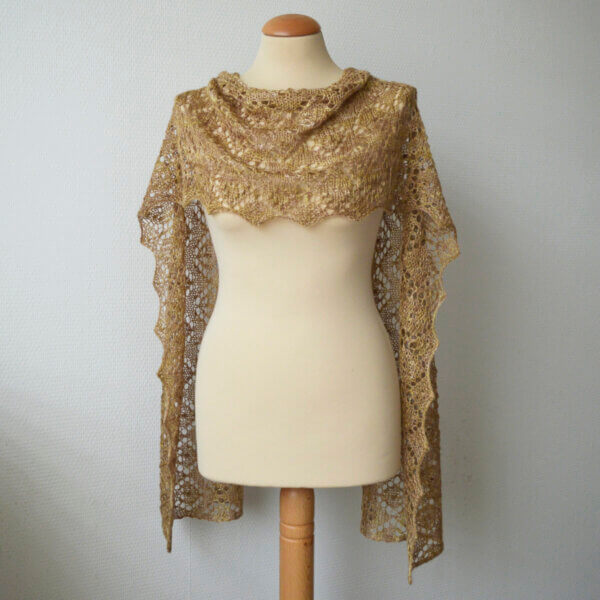
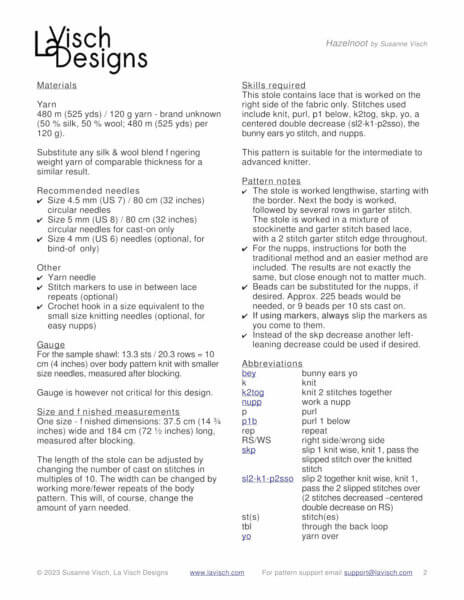
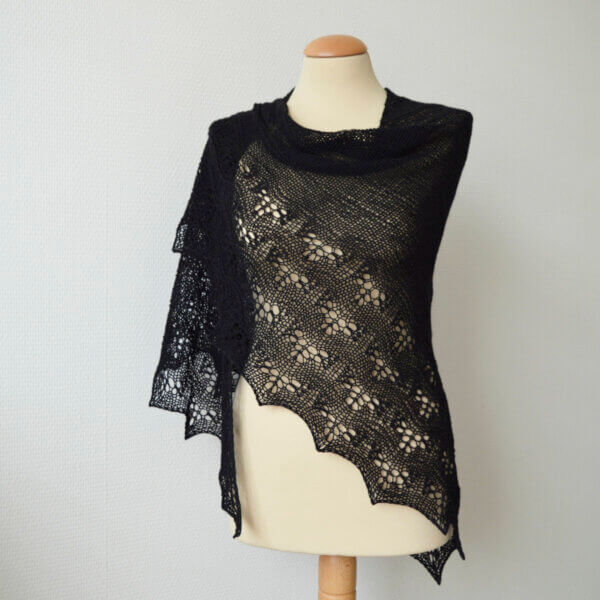
The luscious wool and silk yarn used in the Hazelnoot stole is the result of some deep stash diving. As such, the label is lost, so the brand is unknown. However, it’s much too pretty not to use! It inspired me to create a delicate lace design, based on traditional Estonian stitch patterns. These, of course, include nupps. Instructions for both traditional and easy nupps are included.
The instructions for the stole are provided both fully charted and written out.
Pay what you want: (minimum €6.95)

Difficulty level
The Hazelnoot stole contains lace that is worked on the right side of the fabric only. Stitches used include knit, purl, p1 below, k2tog, skp, yo, a centered double decrease (sl2-k1-p2sso), the bunny ears yo stitch, and nupps.
This pattern is therefor suitable for the intermediate to advanced knitter.
Sizes and finished measurements
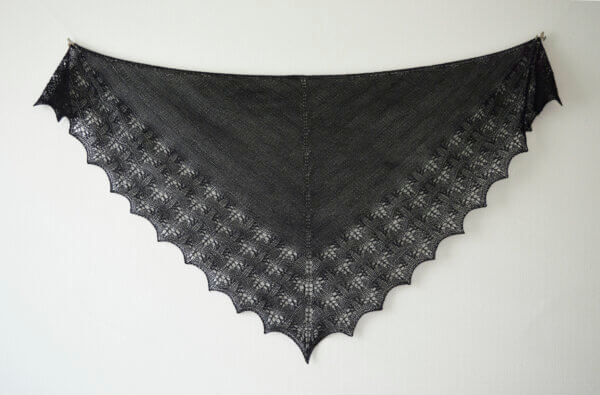
One size – finished dimensions: 37.5 cm (14 ¾ inches) wide and 184 cm (72 ½ inches) long, measured after blocking.
Adjust the length of the stole by changing the number of cast on stitches in multiples of 10. Adjust the width by working more/fewer repeats of the body pattern. This will, of course, change the amount of yarn needed.
Pattern details
- Gauge: Approx. 13.3 sts / 20.3 rows = 10 cm (4 inches) over body pattern, knit with medium size needles, measured after blocking. Gauge is not critical in this design, but should give you a fabric that you like with the yarn used.
- Pattern languages included: English.
- Digital PDF has 6 pages (letter size)
Materials
- Yarn: 480 m (525 yds) / 120 g yarn – brand unknown (50 % silk, 50 % wool; 480 m (525 yds) per 120 g). Substitute any silk & wool blend fingering weight yarn of comparable thickness for a similar result.
- Size 4.5 mm (US 7) / 80 cm (32 inches) circular needles.
- Size 5 mm (US 8) / 80 cm (32 inches) circular needles for cast-on only.
- Size 4 mm (US 6) needles (optional, for bind-off only).
- Yarn needle.
- Stitch markers to use in between lace repeats (optional).
- Crochet hook in a size equivalent to the small size knitting needles (optional, for easy nupps).
- Substitute beads for the nupps, if desired. Approx. 225 beads would be needed, or 9 beads per 10 sts cast on.